
Guide to Configure and Use Magic Keyboard on Windows
Published
5 min read
How to Setup and Use Magic Keyboard on Windows 11/10
The Apple Magic Keyboard is known for its sleek design, comfortable typing experience, and excellent battery life. While it’s predominantly designed for macOS devices, it can also be successfully utilized with Windows 11 and Windows 10. In this article, we’ll provide a detailed guide on how to set up and use the Magic Keyboard on Windows systems, covering everything from the initial pairing process to optimizing its functionality.
Understanding the Magic Keyboard
Before we dive into the setup process, let’s take a moment to understand what the Magic Keyboard is and its features:
-
Design: The Magic Keyboard comes with an elegant, minimalist design which makes it an attractive addition to any workstation. Its low-profile keys offer a refined and responsive typing experience.
-
Battery Life: With a rechargeable battery, the Magic Keyboard boasts an impressive lifespan. A single charge can last for about a month or more, depending on usage.
-
Bluetooth Connectivity: The keyboard connects via Bluetooth, allowing for a wireless and clutter-free workspace.
-
Functionality: While the Magic Keyboard comes with macOS-specific features, it can be configured to work effectively with Windows systems as well.
Required Materials
- Apple Magic Keyboard
- Windows 10 or Windows 11 device
- Active Bluetooth capabilities on your PC
- USB-C charging cable (for initial charging)
Step-by-Step Setup Process
Step 1: Charging Your Magic Keyboard
Before setting up your Magic Keyboard, ensure that it’s fully charged. Use the included USB-C charging cable to connect it to your computer or any USB wall charger. A fully charged keyboard will ensure a seamless setup and connection process.
Step 2: Enable Bluetooth on Your Windows PC
The next step is to ensure that Bluetooth is enabled on your Windows device:
-
Windows 10:
- Click on the Start Menu and select Settings (the gear icon).
- Navigate to Devices and click on Bluetooth & other devices.
- Toggle the Bluetooth switch to On.
-
Windows 11:
- Click on the Start Menu and go to Settings.
- Select Devices from the left sidebar.
- Click on Bluetooth & devices and toggle the Bluetooth switch to On.
Step 3: Pairing Your Magic Keyboard
Now that Bluetooth is enabled, you can proceed to pair your Magic Keyboard with your Windows device:
-
Put the Magic Keyboard in Pairing Mode:
- Turn on your Magic Keyboard by pressing the power button located on the back.
- Once turned on, it should enter pairing mode automatically. If not, press and hold the power button until the LED indicator blinks, signaling it’s in pairing mode.
-
Pairing on Windows:
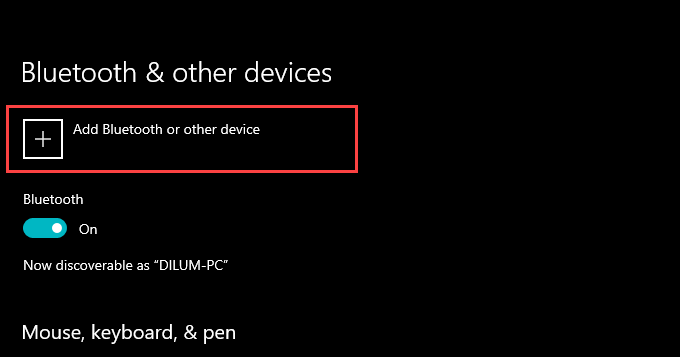
- In the Bluetooth settings on your Windows device, click on Add Bluetooth or other device.
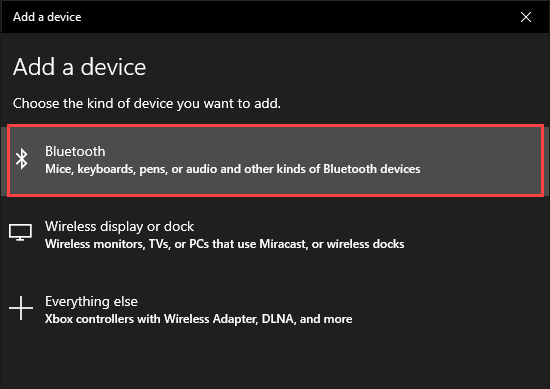
- Choose Bluetooth from the options presented.
- Wait for your Magic Keyboard to appear on the list of available devices. It will typically display as «Magic Keyboard» followed by some digits.
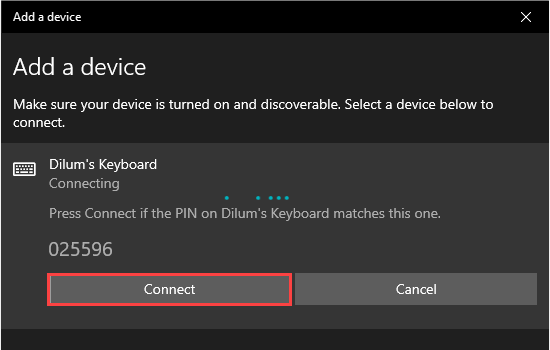
- Select it and click on the Connect button.
- You may be prompted to confirm a pairing code. If so, make sure it matches the code shown on your keyboard, then press Enter on the keyboard.
Step 4: Adjusting Keyboard Settings
Once your Magic Keyboard is paired, you may want to adjust the keyboard settings to make it more suitable for your needs:
-
Keyboard Layout:
- Windows may default to the US keyboard layout. If you’re using a different layout, you can change this by going to Settings > Time & Language > Language & Region. Select your preferred language and click on Options to customize the keyboard layout.
-
Function Keys:
- By default, function keys (F1-F12) on the Magic Keyboard will control system functions such as volume and brightness. If you’d like them to function as standard function keys, you can do this by adjusting settings within specific applications, or using software solutions if required.
Step 5: Installing Additional Software
While the Magic Keyboard generally works well with Windows, you might find it beneficial to install additional software:
-
Microsoft Keyboard Layout Creator: This program allows you to create custom keyboard layouts. This can be particularly useful for remapping keys or adjusting functionality.
-
3rd Party Utilities: Software like AutoHotkey can be useful for advanced users looking to create custom key bindings or shortcuts, aside from the keyboard’s default behavior.
Step 6: Using the Magic Keyboard Efficiently
Once you have set up your Magic Keyboard, it’s time to explore how to use it effectively:
-
Special MacOS Keys:
- Some keys on the Magic Keyboard are macOS-specific (like Command, Option). On Windows, these may not function as you expect. Generally, the Command key corresponds to the Windows key, while the Option key serves as the Alt key.
-
Keyboard Shortcuts:
- Familiarize yourself with Windows keyboard shortcuts. For instance, Use
Windows + Dto show or hide the desktop,Alt + Tabto switch between applications, etc. This can greatly enhance your productivity.
- Familiarize yourself with Windows keyboard shortcuts. For instance, Use
-
Function Key Behavior:
- Remember that if you want to utilize the F1-F12 keys as standard function keys, you must press the
Fnkey as well unless you’ve toggled the setting in an application.
- Remember that if you want to utilize the F1-F12 keys as standard function keys, you must press the
Step 7: Troubleshooting Common Issues
While the setup is generally straightforward, you may encounter occasional issues. Here are some common troubleshooting tips:
-
Keyboard Not Connecting:
- Ensure Bluetooth is enabled and your keyboard is turned on. If it still doesn’t connect, try restarting both your keyboard and your Windows device.
-
Keys Not Responding:
- If certain keys stop responding, it may be due to low battery. Charge your keyboard. If issues persist, try unpairing and reconnecting the keyboard.
-
Lag or Delay:
- If you experience lag, ensure that other Bluetooth devices are not causing interference. Stand close to your PC and remove any obstacles.
-
Windows Updates:
- Sometimes keyboard issues can stem from pending Windows updates. Make sure your system is updated by going to Settings > Update & Security.
Final Thoughts
Using an Apple Magic Keyboard on Windows 10 or 11 can greatly enhance your typing experience, blending the aesthetics of Apple design with the functionality of Windows. This 5000-word guide has provided an in-depth look at the setup and usage of this keyboard, empowering you to take full advantage of its capabilities while navigating the Windows operating system.
Whether for work, gaming, or casual use, integrating the Magic Keyboard into your Windows environment can improve productivity and comfort. Enjoy the sleek feel and reliable performance the Magic Keyboard brings to your computing experience!
-
Home
-
News
- How to Use an Apple Magic Keyboard on Windows?
By Stella | Follow |
Last Updated
Can I use a Mac keyboard on a PC? Of course, yes and it is quite easy. MiniTool Software writes this post to help you connect an Apple Magic Keyboard on Windows and introduce how to use a Magic keyboard with Windows.
Can I Use a Mac Keyboard on a Windows PC?
If you have an Apple Magic keyboard at hand but your computer is running Windows, do you know how to use the keyboard on Windows? Or perhaps, you install Windows 10/11 on your Mac using Boot Camp, and you need to use your Mac Keyboard with Windows.
Well then, the first question you want to should be: does a Mac keyboard work with a PC? Or can I use a Mac keyboard on a PC?
A Magic keyboard is completely compatible with Windows. You don’t even need to make changes. However, some Windows keys are not on a Mac keyboard. You can use the Mac equivalents of Windows keys or the on-screen keyboard to make up for this defect.
In the following part, we will show you how to use an Apple keyboard on Windows.
How to Use a Magic Keyboard on Windows?
Move 1: Connect Your Apple Keyboard to Your Windows Computer
If you install Windows on a Mac computer, the keyboard connection should be created. You can use the keyboard immediately.
If it is the first time to use a Magic keyboard on a Windows computer, you need to first connect it to your device. If it is a wireless keyboard, you can follow these steps to do the job:
Step 1: Insert batteries into the keyboard and press the switch button to turn it on. So, it can be discovered by your Windows computer.
Step 2: Turn on Bluetooth on your Windows computer.
- On Windows 10, you need to go to Start > Settings > Devices > Bluetooth & other devices to switch the button to ON for Bluetooth.
- On Windows 11, you need to go to Start > Settings > Bluetooth & devices to turn Bluetooth on.
Step 3: Add the wireless Mac keyboard.
- On Windows 10, you need to click Add Bluetooth or other devices > Bluetooth and select the target keyboard to establish the connection.
- On Windows 11, you need to click Add device > Bluetooth and select the target keyboard to establish the connection.
After these steps, your Apple Magic keyboard will be connected to Windows. You can use the keyboard as a Windows keyboard.
Move 2: How to Use a Magic Keyboard on Mac?
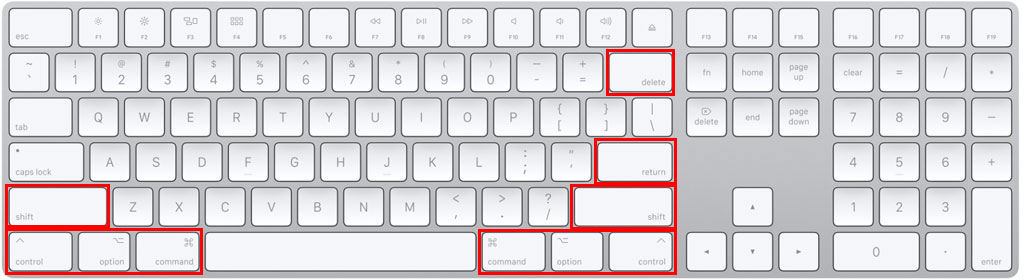
Most keys on an Apple keyboard work the same way as the keys on a Windows keyboard. However, you will say that some Windows keys cannot be found on the Mac keyboard. Don’t worry. There are Mac equivalents of Windows keys:
- The Windows key is the Command key on a Mac keyboard.
- The Alt key is the Option key on a Mac keyboard.
- The Backspace key is the Delete key on a Mac keyboard.
- The Enter key is the Return key on a Mac keyboard.

Image souce: Apple
Besides, if you can’t find the following keys on an Apple keyboard, you can use the Windows on-screen keyboard:
- Pause/Break
- Insert
- Forward Delete
- Home
- End
- Page Up
- Page Down
- Number Lock
- Scroll Lock
Bottom Line
Want to use a Magic keyboard on Windows but don’t know how? This post is helpful for you. After connecting the Apple keyboard to Windows, you can just use it as a Windows keyboard, but only you need to know the Mac equivalents of Windows keys. Also, the Windows on-screen keyboard can help you.
When you delete some files by mistake, you can use a professional data recovery software like MiniTool Power Data Recovery to get them back.
MiniTool Power Data Recovery TrialClick to Download100%Clean & Safe
If you have other issues that need to be solved, you can let us know in the comments. You can also share your suggestions here.
About The Author
Position: Columnist
Stella has been working in MiniTool Software as an English Editor for more than 8 years. Her articles mainly cover the fields of data recovery including storage media data recovery, phone data recovery, and photo recovery, videos download, partition management, and video & audio format conversions.
Apple Magic Keyboard has the most responsive keys which require the least quantity of energy to push and experience extremely secure. It has a very simple design but it looks really beautiful and unique. But using Magic Keyboard in Windows 10 is difficult when don’t know the process. This article will give the easiest 2 ways to learn how to pair and use Apple Magic Keyboard in Windows 10. You can follow any of the process that works for you the best.
- Part 1: How to Connect an Apple Magic Keyboard to Windows 10 Using Bluetooth
- Part 2. How to Custom an Apple Magic Keyboard on Windows 10 Using Microsoft Keyboard Layout Creator
Part 1. How to Connect an Apple Magic Keyboard to Windows 10 Using Bluetooth
It’s really easy to connect an Apple Magic Keyboard to Windows 10 using Bluetooth. All you need to do is turn on the Bluetooth and then pair the keyboard with your PC. Here is how to do it:
1. First, click on the «Start» button (Which is the Windows icon in the bottom left of the desktop) and then click «Settings.»
2. Now go to the «Devices» option. It may say «Bluetooth, printers, mouse» underneath it.
3. Now click the «Bluetooth» option where in the middle of the screen it will say «Manage Bluetooth devices.» You need to make sure your Bluetooth option is turned on here.
4. Now you will see something like, «Your PC is searching for and can be discovered by Bluetooth devices.» Under that text, you’ll see a list of Bluetooth devices available for pairing. Click the option that says «Magic Keyboard» or «Apple Wireless Keyboard,» and click on the grey button that says «Pair.»
5. A popup window with a passcode will appear. This is when the setup for the two types of Apple wireless keyboards differs. If you have the older Wireless Keyboard, simply type the code on the screen and hit the Enter/Return key on your Apple keyboard. If you have a newer version, you will see that Windows 10 is assuming your Keyboard as a device with a screen, as a result it will ask you to match a code that it will show you in that moment. Don’t worry, just click on «Yes» and your keyboard will be connected.
Part 2. How to Custom an Apple Magic Keyboard on Windows 10 Using Microsoft Keyboard Layout Creator
You can customize Apple Magic Keyboard on Windows 10 by using Microsoft keyboard layout creator. Just by following an easy process, Microsoft keyboard layout creator will be a very useful thing in this process. Here is how to do it:
1. Download Microsoft Keyboard Layout Creator from here and install it on your Windows 10 PC. Once installed, open the program and you will be presented with a blank keyboard.
2. Click on File > Load Existing Keyboard.
3. Select your current keyboard. Most of you will need to select US or United Kingdom Extended. Select it and then click OK.
4. Now the keyboard layout you see will be the keyboard layout as currently mapped. To change how a key is mapped, click on the key to be changed and type the character you want that key to type at the popup window. Once finished click OK.
5. After you have remapped all the keys you wish to change. Click on the ‘…’ button on the bottom right to select where you want to save your new layout then click Project > Build DLL and Setup Package to create the new layout.
6. Once the build completes go to where you have saved your new layout and run the Setup file to install it on your PC. Click your way through the prompts and you are ready to use your Apple Keyboard on your Windows PC.
Summary
Apple’s Magic Keyboard is not easy to use for Windows users but after reading this article, all your confusions will be solved. Magic keyboards connect to any PC with Bluetooth and basically work but some standard PC keys are missing or some keys are swapped. So you can try the Microsoft keyboard layout creator for key mapping and missing keys. This article is really helpful for those who want to use this simple but stylish keyboard in their Windows 10 PC. It will make the whole process of using Magic Keyboard in Windows 10 easier than ever! There a special recommendation for you is to reset passwords of Windows 10/11 with the help of PassFab 4WinKey.
Apple’s Magic Keyboard is a remarkably sleek-looking device with scissor-switch keys that allow for an incredible typing experience. The best thing is that you can also use it with other devices.
Since the Magic Keyboard uses Bluetooth for connectivity, you should have no trouble pairing it with a PC or Mac running Windows via Boot Camp. However, slight differences in the Magic Keyboard can pose a challenge.

So below, you’ll figure out what you must do to set up and use the Magic Keyboard correctly on Windows. You’ll also learn how to install the latest drivers for the device should you run into any issues.
You can pair your Apple Magic Keyboard with Windows similar to any other Bluetooth device. However, if you just installed Windows over Boot Camp and had the keyboard connected to macOS, it should be automatically paired with Windows. If not, the steps below should help you connect it with Windows on any PC or Mac.
1. Turn your Magic Keyboard on, and then off. You should find the power switch on the top-right edge of the device.
2. Open the Start menu and select Settings > Devices > Bluetooth & other devices.
3. Turn on the switch next to Bluetooth and select Add Bluetooth or other device.
4. Select Bluetooth.
5. Select your Magic Keyboard. If Windows displays a six-digit PIN and asks you to confirm if you see it on the Magic Keyboard (which is impossible since it has no display), simply select Connect.
6. Select Done.
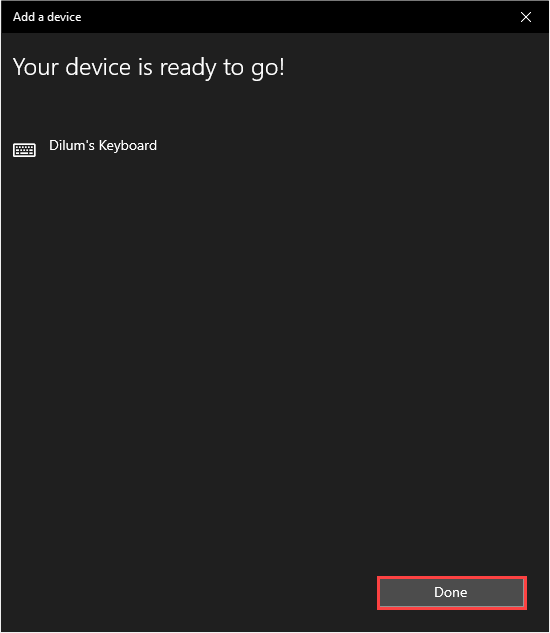
You’ve now finished pairing your Magic Keyboard, so you should be able to start using it with Windows immediately.
Replacement Magic Keyboard Keys on Windows
Apple designs the Magic Keyboard for macOS, so you’ll notice several differences (specifically with the modifier keys) compared to a typical PC keyboard. Thankfully, most keys work as substitutes, so here’s a list of the most important:
Alt —> Option
AltGR —> Option + Control
Windows —> Command
Backspace —> Delete
Enter —> Return
If you use an Apple Magic Keyboard without a numeric keypad, you’ll find various keys (such as Home, Page Up/Down, and End) completely missing. The same applies to all Magic Keyboard models since they don’t include the Print Screen and Applications keys.
In that case, you’ll have to rely on the On-Screen Keyboard that comes built into Windows to perform the relevant actions. You can invoke it whenever you want using the Windows + Ctrl + O keyboard shortcut (or on the Magic Keyboard by pressing Command + Ctrl + O).
Install Magic Keyboard Drivers on Windows
The Magic Keyboard should work without issues as soon as you finish pairing it with
Windows. But if you run into connectivity or other problems while using the Magic Keyboard, you must install the relevant drivers for the device.
Use Brigadier
Apple does not release the latest official Magic Keyboard drivers for use on Windows PCs, so you must use a Python script called Brigadier to download them as part of Boot Camp Support Software.
1. Download the Brigadier.exe file from Github and copy it to your desktop.
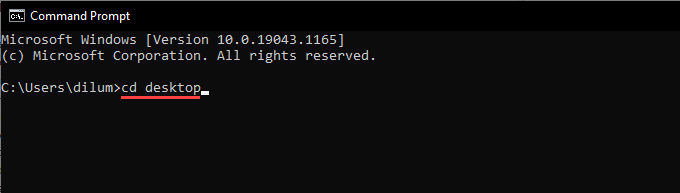
2. Search for and open the Command Prompt. Then, type cd desktop and press Enter.
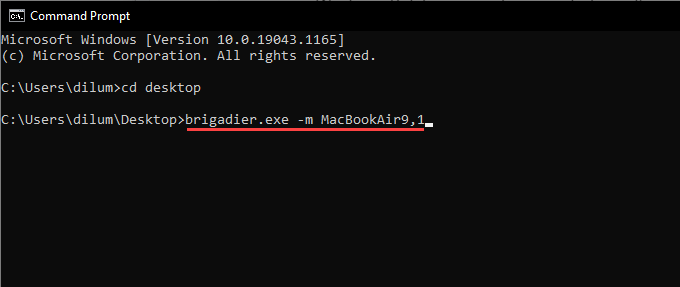
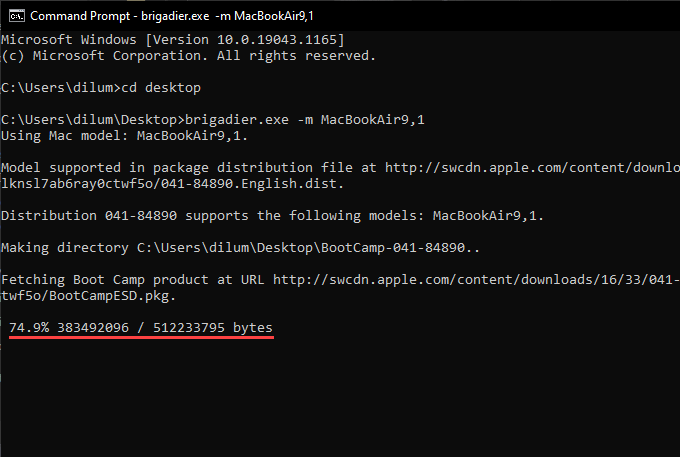
3. Next, type brigadier.exe -m MacBookAir9,1 and press Enter.
4. Wait until Brigadier finishes downloading the Boot Camp Support Software. Then, exit the Command Prompt console.
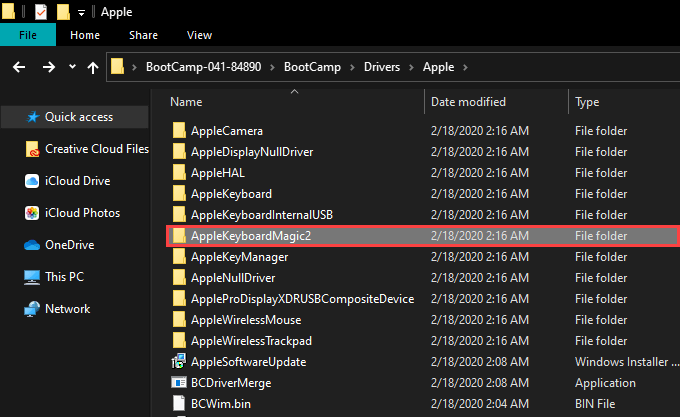
5. Open the BootCamp folder on your desktop. Then, navigate through the subfolders labeled BootCamp > Drivers > Apple > AppleKeyboardMagic2.
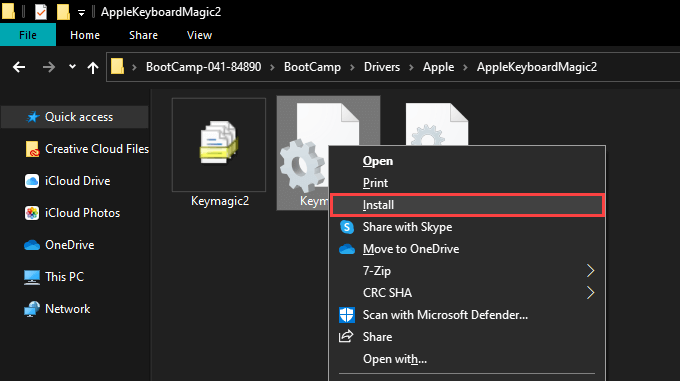
6. Right-click the Keymagic2.inf file and select Install.
Use Apple Software Update
If you use Windows via Boot Camp on a Mac, you can install Magic Keyboard-related updates directly via the Apple Software Update applet.
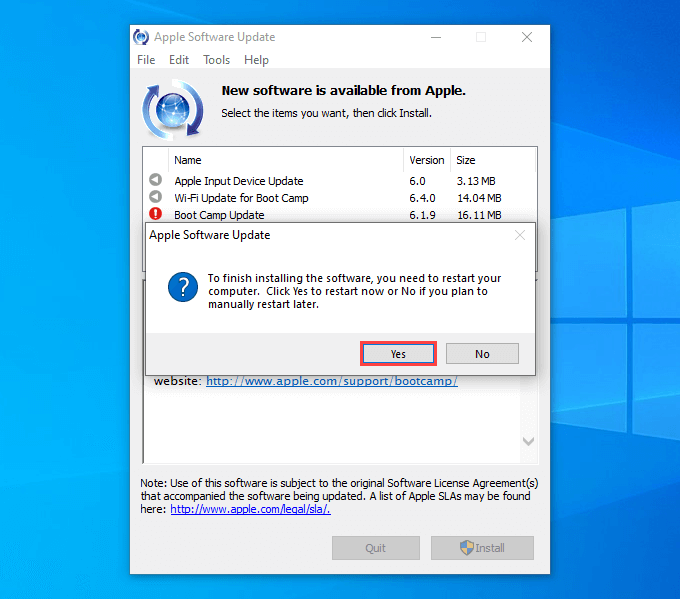
1. Open the Start menu and select Apple Software Update from the list of programs.
2. Check the box next to Apple Input Device Update. For your Boot Camp installation to work optimally, you must also select any other updates. Then, select Install Items.

3. Complete Yes to restart Windows and complete installing the selected items.
Try Magic Keyboard Utilities
If you need superior functionality while using your Magic Keyboard with Windows, it’s worth looking into third-party support software called Magic Keyboard Utilities.
Not only does Magic Keyboard Utilities install the drivers required to get your Apple Magic Keyboard running smoothly on Windows, but it can also change modifier keys, help you switch between different keyboard layouts, map useful actions to the function keys, and so on. It even lets you keep tabs on the keyboard’s battery life.
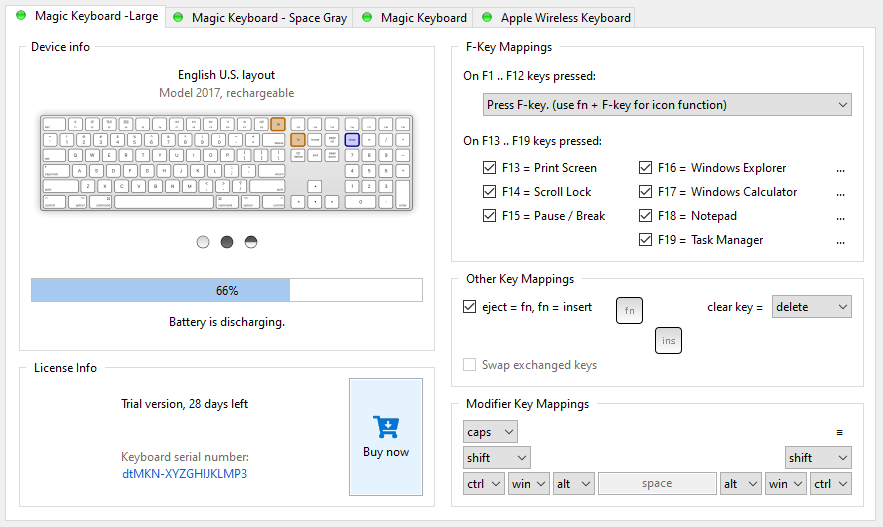
Magic Keyboard Utilities costs $14.90 a year, but you can thoroughly test out the application for 28 days with a free trial. It’s a steep price to pay, but if you plan on using your Magic Keyboard with your PC for the long haul, it should help improve the experience a lot.
Absolute Magic on Windows
The slight differences in the keyboard layout coupled with various missing keys might make the Magic Keyboard a tad challenging to deal with on the PC. However, use it for some time, and you should find it more manageable. Now that you’ve finished setting up your Apple Magic Keyboard, here’s what you must do to set up your Magic Mouse on Windows.
Related Posts
- How To Fix Magic Keyboard Caps Lock Not Working
- How to Fix Function Keys Not Working on Apple Magic Wireless Keyboard
- How to Use Your iPhone as a USB Drive on Mac and PC
- Apple’s Big Week: Design Debates, AI Ambitions, and Regulatory Roadblocks
- How to Connect Xbox Controllers to Your Mac