
Все способы:
- Предупреждение об ограничениях
- Шаг 1: Включение Bluetooth
- Шаг 2: Подключение наушников
- Шаг 3: Управление подключением
- Решение возможных проблем
- Вопросы и ответы: 0
Предупреждение об ограничениях
Прежде чем перейти к реализации процедуры подключения AirPods к компьютеру или ноутбуку с ОС Windows 11, важно отметить следующее:
- Вызов Siri по очевидным причинам будет недоступен, а управление касаниями/нажатиями – не работать в принципе либо работать строго так, как это ранее было настроено на Apple-девайсе.
- Воспроизведение звука не будет начинаться и/или останавливаться автоматически при помещении/извлечении наушников в/из ушей и/или зарядный кейс. Подключение/отключение будет осуществляться в момент открытия/закрытия футляра соответственно.
- Гарнитура в целом может и наверняка будет работать нестабильно (особенно на устройствах со старой версией Bluetooth). Это проявляется в прерываниях и рывках во время воспроизведения, разрывах соединения, менее качественном звучании и т. д.
- Для корректной работы АирПодс с ОС Виндовс требуется, чтобы в компьютере или ноутбуке был установлен Блютуз версии 4 и выше. Узнать версию модуля беспроводной связи можно следующим образом:
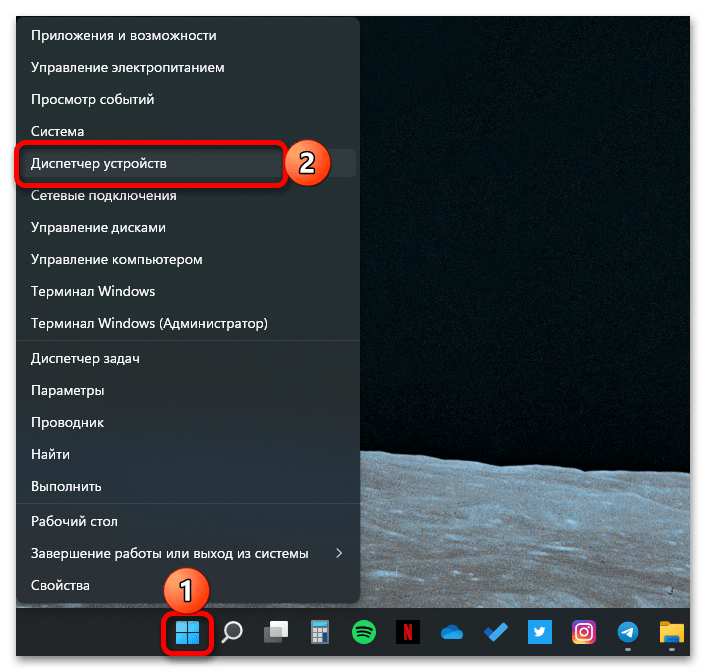
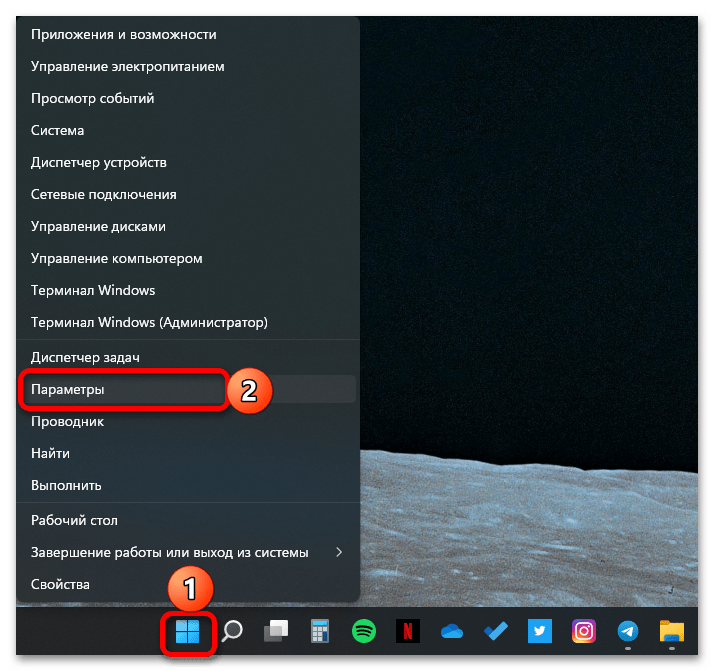
- Откройте «Диспетчер устройств». Проще всего это сделать через контекстное меню кнопки «Пуск», вызываемое нажатием по ней правой кнопкой мышки (ПКМ).
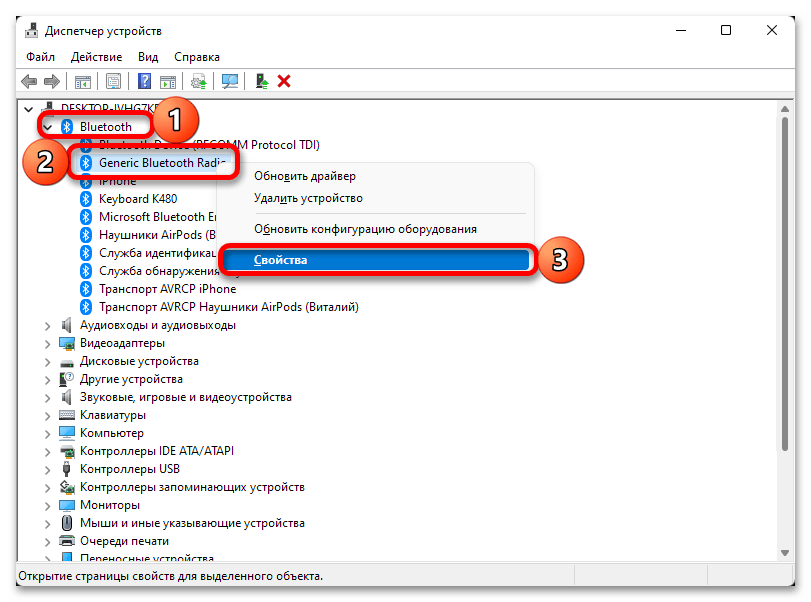
- Разверните список Bluetooth, найдите в нем наименование своего беспроводного адаптера, кликните по нему ПКМ и выберите пункт «Свойства».
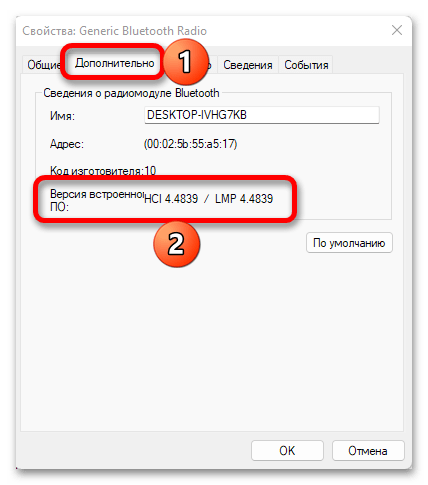
- Перейдите во вкладку «Дополнительно» и ознакомьтесь со сведениями в строке «Версия встроенного ПО». Указанное рядом с параметром «LMP» значение необходимо сопоставить со следующими для Bluetooth:

Версия встроенного ПО Версия Bluetooth LMP 0.x Bluetooth 1.0b LMP 1.x Bluetooth 1.1 LMP 2.x Bluetooth 1.2 LMP 3.x Bluetooth 2.0 LMP 4.x Bluetooth 2.1 LMP 5.x Bluetooth 3.0 LMP 6.x Bluetooth 4.0 LMP 7.x Bluetooth 4.1 LMP 8.x Bluetooth 4.2 LMP 9.x Bluetooth 5.0


В нашем случае, как можно понять по скриншоту выше, используется адаптер LMP 4.4839, что соответствует версии Bluetooth 2.1. AirPods удалось подключить и они работают, но их использование на таком устройстве крайне сложно назвать комфортным.
Шаг 1: Включение Bluetooth
Очевидно, что для подключения любых беспроводных наушников, не только AirPods, к компьютеру или ноутбуку, прежде всего необходимо активировать Bluetooth на последнем. В Windows 11 это можно сделать через «Центр уведомлений» или «Параметры», о чем мы ранее писали в отдельной статье.
Подробнее: Как включить блютуз на компьютере с Виндовс 11
Шаг 2: Подключение наушников
После того как модуль беспроводной связи будет активирован, можно смело переходить к сопряжению наушников и ПК. Делается это по следующему алгоритму:
- Откройте «Параметры» операционной системы. Это можно сделать через меню «Пуск», контекстное меню, вызываемое нажатием правой кнопки мышки (ПКМ) на данном элементе, и с помощью клавиш «Win+I».
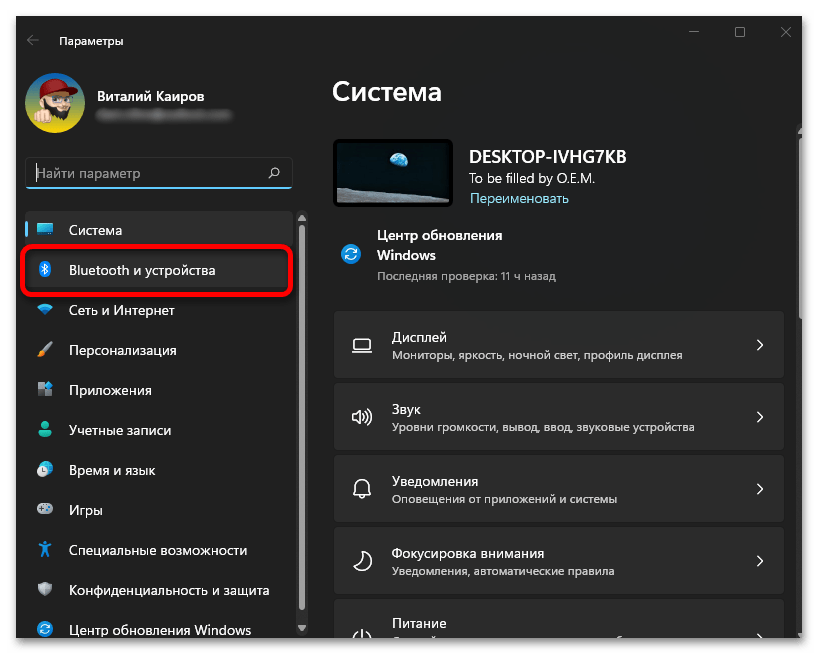
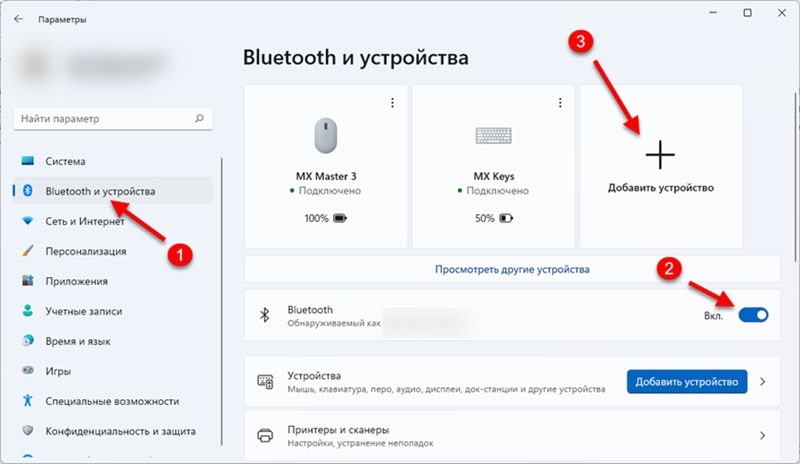
- Перейдите к разделу «Bluetooth и устройства».
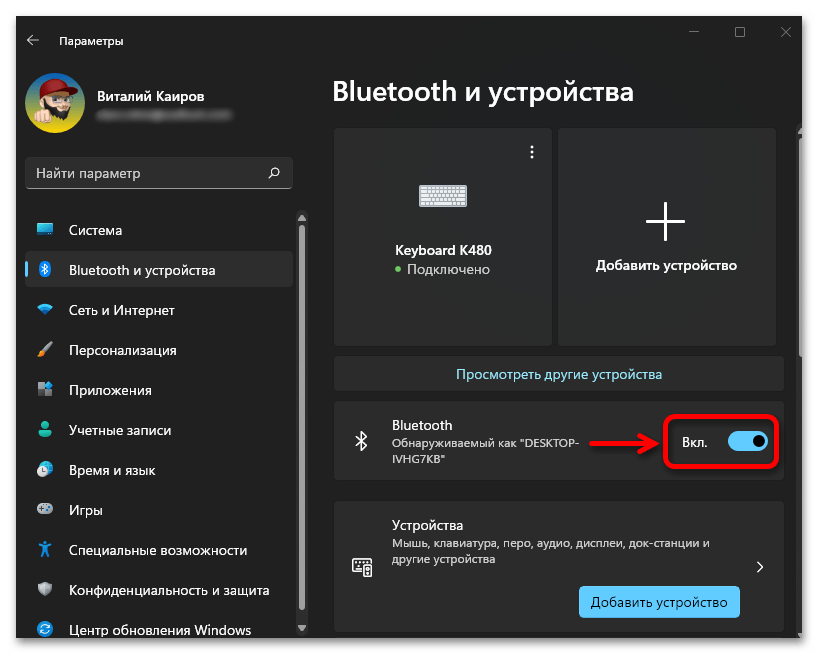
- Убедитесь, что опция «Bluetooth» находится в активированном состоянии.
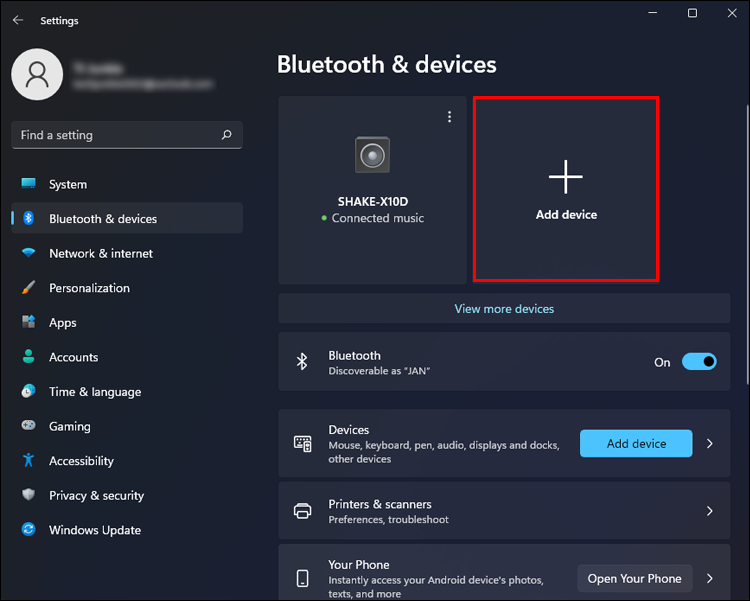
- Нажмите на плитку или кнопку с подписью «Добавить устройство».
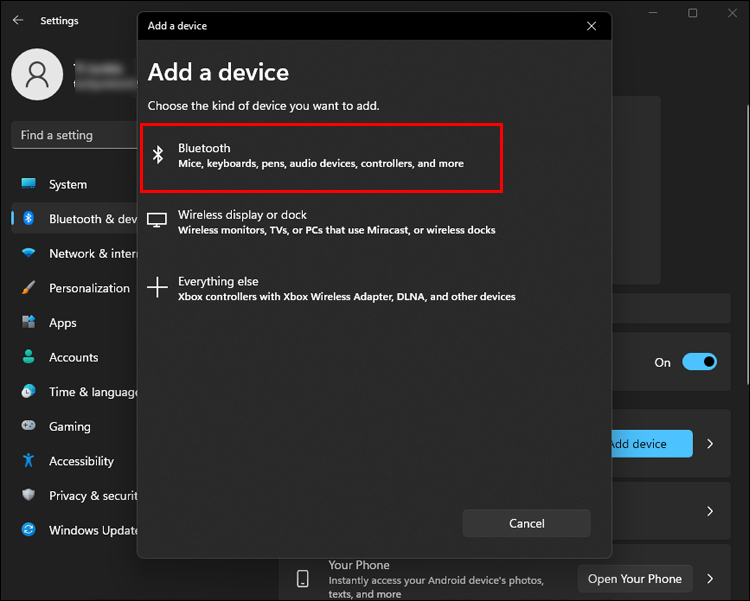
- В появившемся списке выберите первый вариант – «Bluetooth».
- Откройте зарядный кейс беспроводной гарнитуры (извлекать из него наушники на данном этапе не обязательно).

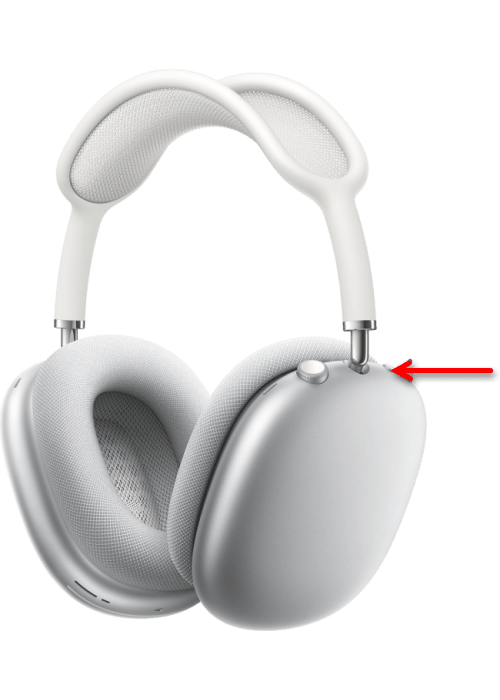
Зажмите и удерживайте расположенную на корпусе кнопку соединения до тех пор, пока зарядный индикатор в или на корпусе (зависит от модели) не начнет мигать белым, как это показано на изображении ниже.

Примечание: На модели AirPods Max для активации режима сопряжения необходимо удерживать кнопку управления шумом.

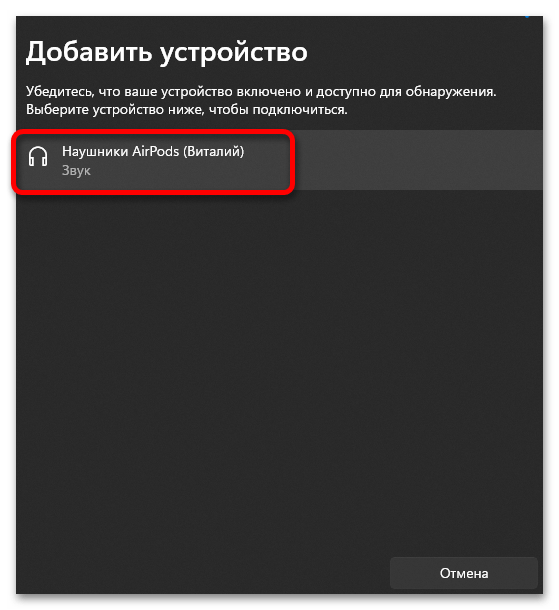
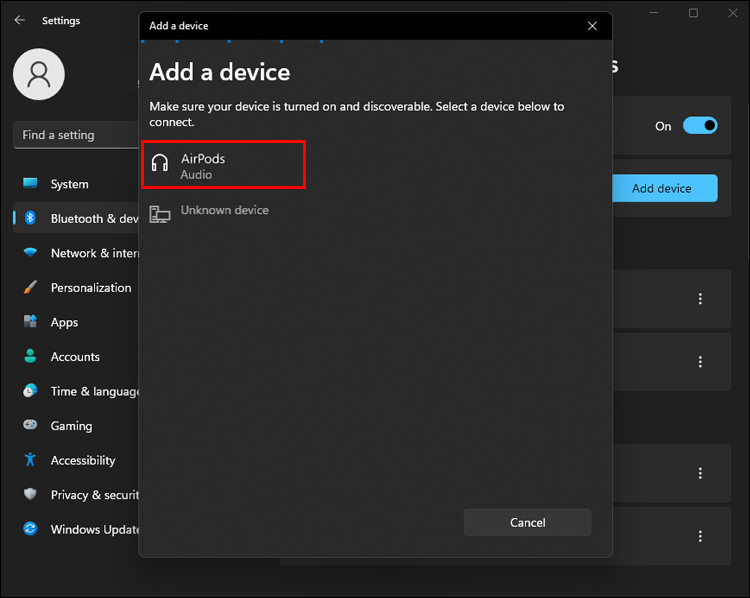
- Ожидайте, пока система найдет наушники,

после чего кликните по их наименованию для продолжения.

Спустя несколько секунд AirPods будут подключены к компьютеру.
Закройте окно сопряжения, нажав на кнопку «Готово».


Шаг 3: Управление подключением
После того как беспроводные наушники будут подключены, вы сможете пользоваться их базовыми возможностями, такими как прослушивание аудио и общение.
- Управлять подключением можно в уже упомянутом выше разделе «Bluetooth и устройства» системных «Параметров».

Здесь же по необходимости можно отключать
и подключать аксессуар,

а также удалить его из списка доступных к использованию.
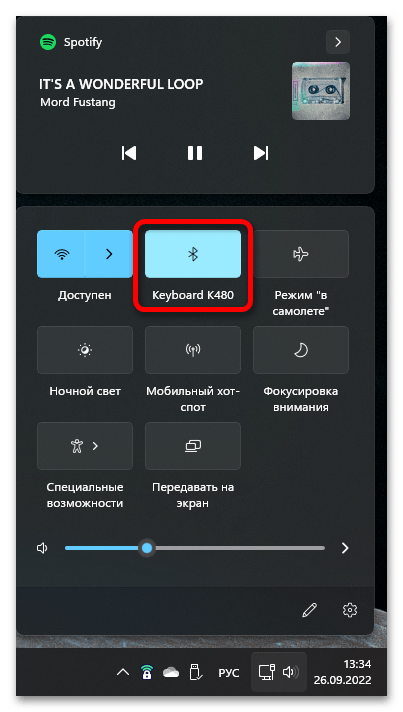
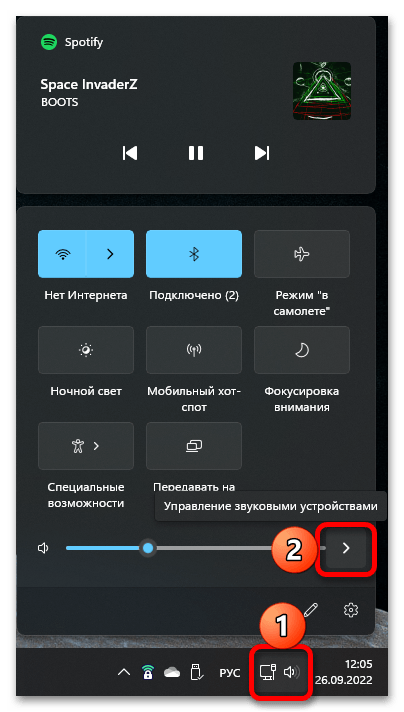
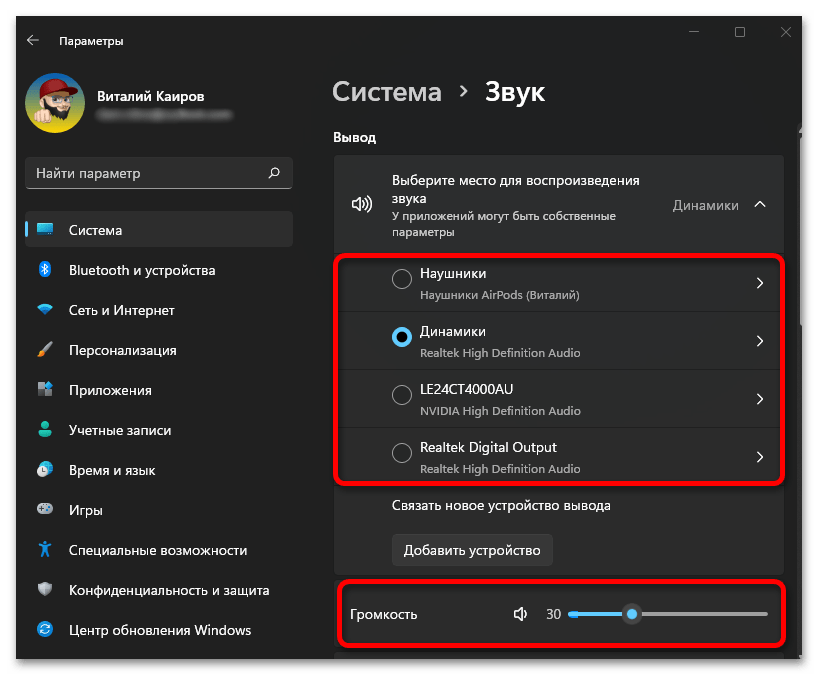
- Для управления громкостью следует воспользоваться доступной в «Центре уведомления шкалой», а если нажать по расположенному справа от нее указателю,

можно быстро переключаться между всеми подключенными к ПК или ноутбуку звуковыми устройствами.
- Аналогичная возможность, как и более тонкая настройка, доступна в разделе «Дополнительные параметры громкости».

Если открыть в них подраздел с AirPods, можно назначить наушники средством воспроизведения звука и/или общения по умолчанию, предоставить дополнительные разрешения, отрегулировать общий уровень громкости и баланс для левого и правого канала, а также по желанию активировать/деактивировать опцию улучшения звука.


Решение возможных проблем
Ввиду того, что АирПодс в первую очередь предназначены для использования в связке с другой техникой Эппл, на ПК и ноутбуках с Виндовс, даже относительно современных, с их подключением и использованием вполне могут возникать проблемы, помимо всех тех ограничений, которые мы обозначили в начале статьи. Узнать о причинах их возникновения и устранить поможет отдельная статья на нашем сайте, ссылка на которую дана ниже.
Подробнее: Устранение проблем с подключением AirPods
Наша группа в TelegramПолезные советы и помощь
54760
Если вы хотите подключить беспроводные наушники AirPods к Windows 11 и не знаете как это сделать, или что-то не получается, то вы зашли по адресу. В этой статье я подробно покажу процесс подключения, настройки и использования наушников от Apple на ноутбуках и ПК с установленной Windows 11. У нас на сайте уже есть такая инструкция, посмотреть ее можно по этой ссылке, но она написана на примере предыдущих версий Windows (десятки и семерки).
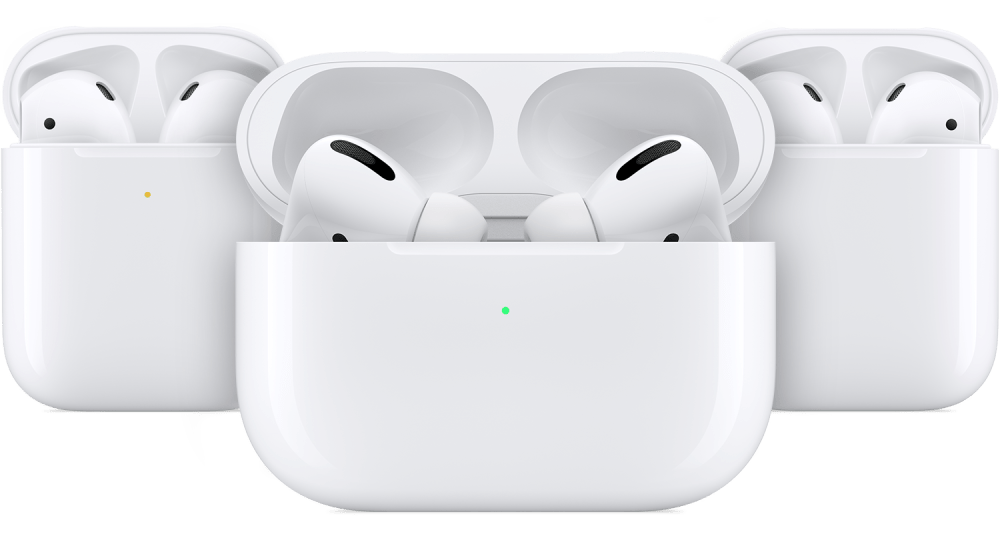
Все версии и поколения наушников AirPods, в том числе AirPods Pro и Max отлично работают в Windows 11. Конечно, они не так сильно интегрированы в систему, как в случае с устройствами от Apple. В Windows 11 они никак не отличаются от любых других Bluetooth наушников, которые мы уже подключали в этой статье: как подключить Bluetooth наушники в Windows 11. Чтобы была возможность подключить наушники, на вашем ПК или ноутбуке должен быть Bluetooth. Должны быть установлены драйверы. В последней версии Windows с этим проблем как правило нет. При условии, что у вас не очень старый ноутбук или адаптер.
Пошаговая инструкция по подключению AirPods к Windows 11
- Нажимаем правой кнопкой мыши на меню Пуск и переходим в Параметры.

- Слева переходим на вкладку «Bluetooth и устройства». Включаем Bluetooth, если он выключен. После чего нажимаем на «Добавить устройство».

- Берем наши AirPods. Их нужно перевести в режим подключения, чтобы компьютер смог их обнаружить. Для этого открываем кейс с наушниками и примерно на 10 секунд зажимаем кнопку на кейсе. Индикатор должен мигать белым цветом. В зависимости от версии AirPods, индикатор может быть как снаружи кейса, так и внутри. На AirPods Max нужно зажать и удерживать кнопку управления шумом. Для активации режима сопряжения на AirPods 4 нужно сделать двойной тап на сенсорную кнопку (она под индикатором). Индикатор так же начнет мигать белым цветом.

- Нажимаем на пункт «Bluetooth», после чего начнется поиск устройств. Напомню, что индикатор на кейсе наушников AirPods должен мигать белым цветом.

- Когда в списке появляться ваши наушник AirPods – нажмите на них.
Сразу начнется процесс подключения.
- Через несколько секунд AirPods будут подключены.
Надпись «Подключенный голос, музыка» означает, что наушник могут использоваться как в стерео режиме (для прослушивания музыки), так и работать как гарнитура. То есть Windows 11 будет использовать микрофон в AirPods. Нажмите на кнопку «Готово».


Дальше просто достаньте наушники из кейса, вставьте их в уши и они автоматически подключаться к вашему ноутбуку или ПК. Если убрать их обратно в кейс, они автоматически отключаться от компьютера.
Не удается подключить. Если Windows 11 не находит AirPods, или не получается вывести на них звук после подключения, тогда вам пригодится эта статья: почему AirPods не подключаются к ноутбуку или компьютеру.
Настройка и управление
Дополнительно настраивать ничего не нужно. Но покажу вам несколько моментов, которые, возможно, вам пригодятся.
Подключенные наушник будут отображаться в разделе «Bluetooth и устройства» – «Устройства».

Там их можно либо принудительно «Отключить» (это то же самое, если бы вы просто спрятали наушник в зарядной футляр), или «Подключить» (если они не подключились автоматически). Или же «Удалить устройство» (эта функция полностью удаляет наушник из системы, чтобы вновь их использовать, придется подключать заново, как это показано в инструкции выше).
Если есть проблемы с выводом звука в Windows 11 через AirPods (когда наушник подключены, а звука нет), то проверьте, правильно ли выбран источник для вывода звука. Самый простой способ это сделать – нажать на иконку звука в трее, а затем на стрелку возле регулировки звука.

Выберите наушники из списка устройств.
Уровень заряда и функциональные кнопки
При подключении AirPods к устройствам от Apple можно посмотреть заряд каждого наушника и кейса, настроить функциональные клавиши отдельно на правом и левом наушнике, автообнаружение уха. В Windows 11 все это не работает. Даже уровень заряда не отображается. Я так понимаю, что система просто не умеет определять заряд TWS наушников, так как заряд обычных наушников отображается. Так же нет возможности настроить действие на нажатие функциональной кнопки на правом и левом наушнике. В моем случае, после подключения AirPods 2 функциональные кнопки на каждом наушнике выполняли функцию «Следующий трек».
Залез в Microsoft Store и нашел там несколько утилит, которые немного расширяют функционал наушников AirPods. Правда, все они платные. Возможно, в интернете можно найти и бесплатные подобные утилиты. Если знаете такие – поделитесь в комментариях. Как я понял (по оценкам), самая нормальная – MagicPods (не реклама!). Установил пробную версию. Из основных фишек:
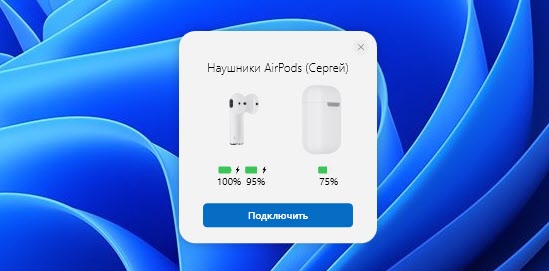
- Всплывающее окно с анимацией и отображением заряда каждого наушника и кейса сразу после открытия кейса с наушниками. Для этого даже не нужно подключать наушник через параметры в Windows.

- Отображение уровня заряда в самом приложении и на иконке в трее.

- Настройка действия, когда один наушник вне уха.


Обратите внимание, что в этом приложении нет возможности настроить функциональные кнопки (следующий/предыдущий трек, старт/пауза) на каждом наушнике. Видимо эту функцию в Windows нельзя реализовать даже с помощью сторонней программы.
Я это приложение покупать не буду. Я не часто использую свои AirPods с ноутбуком. Но возможно кому-то информация об этом приложении пригодится.
Connecting AirPods Max to Windows 11 might sound tricky because they’re Apple products, but it’s simple. You just need to use Bluetooth to pair them to your Windows 11 device. Follow these steps and you’ll be jamming out in no time!
If you’ve got AirPods Max and a Windows 11 device, you’re in luck. Even though they’re from different tech worlds, they can still work together. Let’s get started on connecting them.
Step 1: Turn on Bluetooth on your Windows 11 Device.
First, you need to make sure Bluetooth is enabled on your computer.
Go to the Start menu, click on «Settings,» then «Bluetooth & devices.» Toggle the Bluetooth switch to «On.» Your PC is now ready to find Bluetooth devices.
Step 2: Put your AirPods Max in Pairing Mode.
Next, make sure your AirPods Max are discoverable to your Windows 11 device.
Press and hold the noise control button on the AirPods Max until the light starts flashing white. This means they’re in pairing mode and ready to connect.
Step 3: Connect AirPods Max to Windows 11.
Now, get your Windows 11 device to see your AirPods Max.
In the «Bluetooth & devices» settings, click on «Add device.» Select «Bluetooth» and wait a few seconds. When «AirPods Max» appears, click on it to connect.
What Happens Next
After completing these steps, your AirPods Max should be connected to your Windows 11 device. You’ll hear a confirmation sound, and your computer might show a notification. Now, you’re free to listen to music, watch videos, or even join calls with high-quality audio.
Tips for Connecting AirPods Max to Windows 11
- Stay Close: Make sure you’re within a reasonable distance between your AirPods Max and your computer.
- Charge Up: Ensure your AirPods Max battery is charged to avoid connection issues.
- Update Drivers: Keep your Bluetooth drivers up to date for the best performance.
- Reconnect If Needed: If you have issues, try turning Bluetooth off and on again on your Windows 11 device.
- Use the Case: Putting AirPods Max back in their case and then taking them out can sometimes reset the connection.
Frequently Asked Questions
Why aren’t my AirPods Max connecting to my Windows 11 device?
Check if Bluetooth is turned on and the AirPods Max are in pairing mode. If that doesn’t work, try restarting your computer.
Can I use the AirPods Max microphone with Windows 11?
Yes, once connected, you can use the built-in microphone for calls or voice commands.
Will my AirPods Max automatically reconnect to my Windows 11 device?
Yes, after the first connection, they should automatically reconnect when both Bluetooth and the AirPods Max are on.
Why is the sound lagging on my AirPods Max?
Make sure you’re within range and there are no obstacles causing interference. Also, keep your Bluetooth driver updated.
Can I connect my AirPods Max to multiple devices?
Yes, but they can only be actively connected to one device at a time. You’ll need to switch between devices manually.
Summary
- Turn on Bluetooth on your Windows 11 Device.
- Put your AirPods Max in Pairing Mode.
- Connect AirPods Max to Windows 11.
Conclusion
Connecting AirPods Max to Windows 11 is easier than you might think. Even though Apple designed these headphones for their ecosystem, Bluetooth makes them flexible. If you follow the steps above, you should have no trouble getting them paired. Whether it’s for work or fun, having your AirPods Max connected to your Windows 11 device can make a big difference in your audio experience.
Remember, good Bluetooth etiquette ensures a smooth connection. Keep your drivers updated, stay within range, and keep your AirPods Max charged. If you run into any hiccups, don’t hesitate to cycle the Bluetooth settings or restart your devices.
For more detailed guides on making the most out of your tech, keep exploring and never hesitate to ask for help. Happy connecting!
Matt Jacobs has been working as an IT consultant for small businesses since receiving his Master’s degree in 2003. While he still does some consulting work, his primary focus now is on creating technology support content for SupportYourTech.com.
His work can be found on many websites and focuses on topics such as Microsoft Office, Apple devices, Android devices, Photoshop, and more.
AirPods are a premium pair of well-designed earbuds. They offer high-quality sound, work seamlessly with your devices, and look trendy in your ears. AirPods are compatible with Windows 11 and are configured and used similarly to Apple devices.
Read on to learn about setting up your Windows 11 computer for your AirPods and what to try if it doesn’t work as expected.
Before you can start using your AirPods with your PC, you’ll need to pair them. Your AirPods can be paired with several devices simultaneously but will only work with one device at a time. Follow these steps to pair your AirPods with your Windows 11 PC:
- Open “Settings.”

- Choose “Bluetooth & devices.”

- Ensure the slider switch is “On.”
- Click on “+ Add device.”
- Place your AirPods in their case, and leave the case open.

- Long-press the button on your AirPods case.

- Once the light on the case flashes white, release the button.
- Click “Bluetooth” on your PC.
- Your computer will search for discoverable devices. Select your AirPods when it appears in the list.

- Wait for your computer and AirPods to pair up, then click “Done.”


Your AirPods are now ready to use.
How to Re-establish a Connection
If you’ve paired your AirPods with an Apple device, it will ask whether you want to connect whenever it senses the device. However, using AirPods with Windows 11 is slightly trickier. After connecting to your PC for the first time, you’ll need to re-establish the connection if you’ve been using your AirPods with another device. Here’s how:
- Remove your AirPods from their case and place them close to your computer.
- Click on the speaker icon on the taskbar.
- Increase the volume by clicking on the “>” icon to the right of the sound control.
- In the list of devices, select “Headphones (AirPods).”
Once you’ve chosen your AirPods from the menu, they are connected and ready to use.
How to Troubleshoot If Your AirPods Are Not Working
Next, we have some fixes to try that should help to solve the following:
- No connection between your AirPods and PC.
- The connection keeps disconnecting.
- No sound.
- The microphone doesn’t work.
Try Reconnecting the AirPods
In this scenario, reconnecting your AirPods includes uninstalling and then re-installing them. Follow these steps:
- Use hotkey “Windows + S” to open the “Search” menu.

- Type “Device Manager” into the text field, then click on the top result.

- Expand the “Bluetooth” option to see your connected devices.

- Find all the devices that begin with “AirPods,” right-click them, and then choose ” Uninstall device” from the context menu.”

- Click “Uninstall” in the pop-up to confirm.
- Open your AirPods case and long-press the button on the back until the white light appears.
- Restart your PC.

- Once it has restarted, use hotkey “Windows + I” to open “Settings.”
- Select the “Bluetooth & devices” tab on the left.
- Click on “Add device,” then “Bluetooth.”
- When your AirPods appear, click on them to connect.


Now you’ll need to set your AirPods as a default device. Here’s how that is done:
- Use hotkey “Windows + S” to open the “Search” menu.

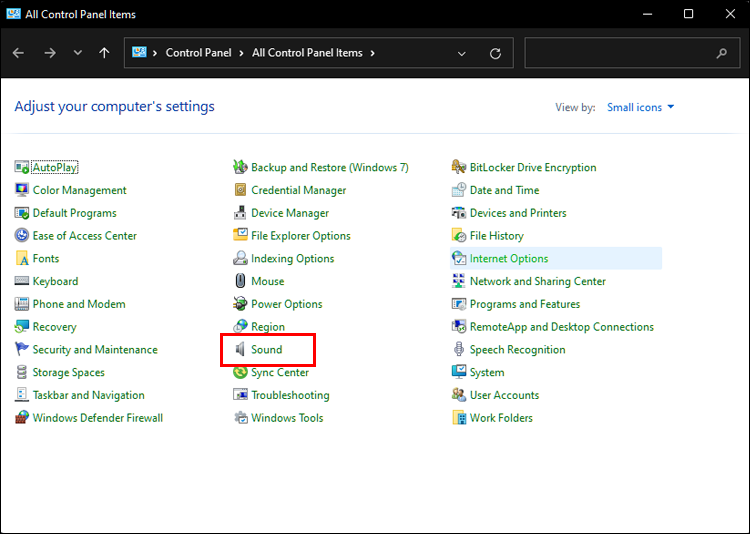
- Type “Control Panel,” then click on the control panel result.

- Select “Hardware and Sound,” then “Sound.”

- Beneath the “Playback” tab, choose “AirPods” (listed as headphones), then click on “Set Default.”
- Click on “OK” to save the change and exit the window.

Use Bluetooth Troubleshooter
If your AirPods have connected successfully, but you can’t hear anything, the cause could be down to a misconfigured playback device selection. Here we’ll run the “Bluetooth Troubleshooter” and update the Bluetooth drivers to see if that helps. Follow these steps:
- Use hotkey “Windows + I” to open “Settings.”

- In “System,” select “Troubleshoot.”

- Choose “Other troubleshooters.”
- Find the “Bluetooth” troubleshooter, then hit “Run.”
- Follow the instructions and make the changes, if any, to fix the issue.


To update the Bluetooth drivers:
- Open “Search.”

- Enter “Device Manager” and click on the relevant result.

- Double click on “Network adapters.”

- Right-click on the “Bluetooth Device,” then from the context menu, choose “Update driver.”

- In the “Update Drivers” window, select “Search automatically for drivers.”
- Windows will now scan for the best driver to install for the Bluetooth adapter.


Drivers are vital for any device to function effectively, and it’s imperative to have the latest version installed at all times.
The method listed above only scans for the best driver versions available. If you haven’t downloaded a driver previously, the driver is likely out of date. In this case, find the latest version in “Windows Update” or visit the manufacturer’s website to download and install the setup.
Update Windows 11
Older versions of Windows 11 are likely to cause problems for your AirPods, as each update includes bug fixes and performance enhancements. So to keep it updated:
- Use hotkey “Windows + I” to open “Settings.”
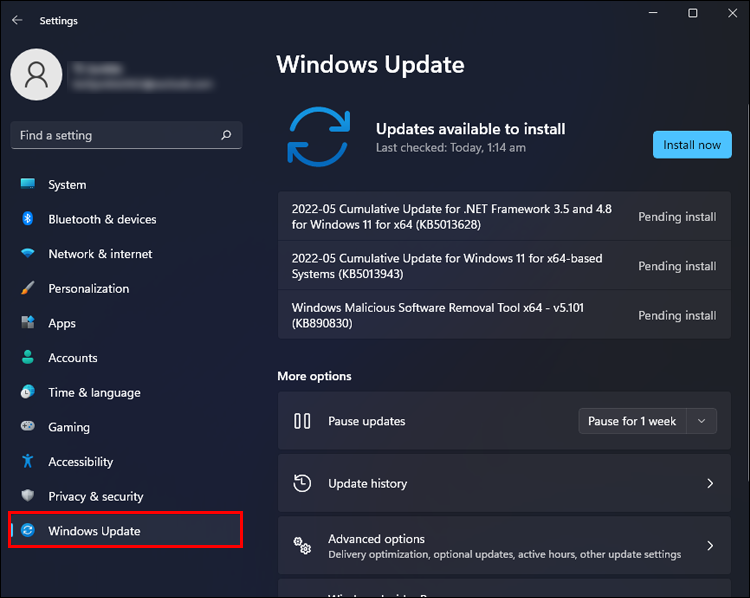
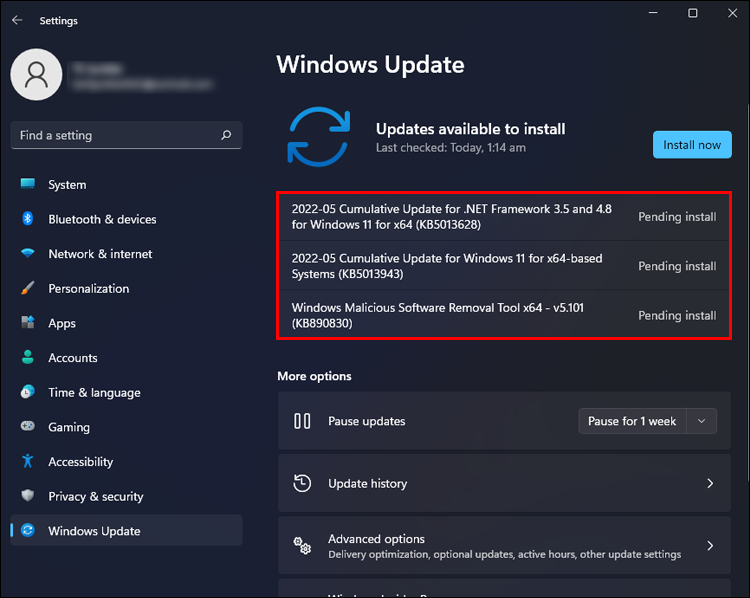
- Choose “Windows Update” from the tabs on the left.
- Click “Check for updates” to scan for new OS versions on the right.
- If a new version is available, it will be listed with a “Download & install” button. Click on it.
Ensure Bluetooth Support Is Running
The Bluetooth service should be running for Bluetooth devices to operate correctly:
- Use hotkey “Windows + R” to open “Run.”
- To open the “Services” app, type “services.msc” and click “OK” or “Enter.”

- Find and double-click the “Bluetooth Support Service.”

- From the “Startup type” pull-down menu, choose “Automatic.”
- Beneath “Service status,” click on “Start.”
- To save the changes and close the “Properties” window, click on “OK.”


Disable the Wireless iAP Service
This service facilitates the use of voice commands using AirPods. However, it can also affect functionality. So if nothing else has worked so far, disabling this service should get your AirPods working. Here’s how to disable the wireless iAP service:
- Use hotkey “Windows + S” to open “Search.”
- Enter “Control Panel,” then click on the relevant result.

- Choose “Hardware and Sound.”
- Click on “Devices and Printers.”

- Beneath “Devices,” right-click the AirPods.
- From the context menu, choose “Properties.”
- Go to the “Services” tab.
- Uncheck the “Wireless iAP” box, then click “OK” to save changes.


How to Resolve AirPods Microphone Problems
If your microphone still doesn’t work with calls after trying the above fixes, we have a few more options:
Keep Using the Microphone
Many users had reported that when they continued to use the microphone, it started to work after a while, so try out the following:
- Tap your AirPods to activate the microphone.
- Begin to talk and keep talking, and your AirPods should pick up your voice after a few seconds.
Check the Active Microphone Settings
If only one of the AirPods works, try this:
- Open “Settings.”
- Click the “Bluetooth” option, then on your AirPods info icon.
- Select the “Microphone” and enable the “Automatically Switch AirPods” option.
These steps should enable your AirPods to use the best microphone for both AirPods to work.
Check Your Firmware
Some users have claimed that firmware version “3A283” has been problematic for AirPods, and the problem was resolved by updating the firmware. With your AirPods connected to your computer, in their open case, try the following:
- Check your firmware to ensure it’s not: “3A283.”
- If your firmware is not up-to-date, try installing the latest version.
If the problem continues, try reaching out to Apple support.
Your AirPods Are Ready to Use
Once a connection has been established between your AirPods and Windows 11 computer, they should work seamlessly. Most connection problems are typically caused by outdated drivers, the latest version of Windows 11 not installed, or a conflicting service such as the wireless iAP. Running the “Bluetooth Troubleshooter” is generally an excellent place to start for finding and solving issues. In addition to ensuring that your computer is up-to-date.
Did you run into issues connecting your AirPods to a Windows 11 PC? How did you resolve it? Let us know in the comments section below.
Can’t figure out how to connect AirPods to a Windows laptop? We’ll show you the way with an easy-to-follow, step-by-step guide.
This post also describes how to remove AirPods from a Bluetooth list and provides troubleshooting should you run into unforeseen issues.
Contents
- Connecting your AirPods to a Windows laptop from HP
- How to connect AirPods to a Windows laptop PC
- How to connect and disconnect your AirPods to an HP Windows laptop
- How to remove your AirPods from Bluetooth on your HP Windows laptop
- Troubleshooting an HP laptop Bluetooth connection with AirPods
- Handy Bluetooth shortcuts for Windows
- Connecting your AirPods to an HP laptop
Connecting your AirPods to a Windows laptop from HP
Since the first-gen AirPods hit store shelves in December 2016, these sleek wireless earbuds have become one of the most sought-after Apple accessories. Their runaway success inspired other tech companies to follow suit. Big-name brands like Sony, Bose, Panasonic, and Sennheiser now offer competing Bluetooth buds.
Although AirPods provide optimal functionality on Apple computers, the earbuds will work on any Bluetooth-enabled device. That means you can connect your AirPods to virtually any Windows laptop from HP.
The Bluetooth pairing process is straightforward and need only be done once. After you’ve synced the two devices, you can rapidly connect-disconnect them anytime you like.
How to connect AirPods to a Windows laptop PC
Follow these steps to connect your AirPods to an HP Windows laptop PC.
1. Put the AirPods into their charging case
Close the case and wait a few seconds. Ideally, the AirPods should have at least 20% battery before you pair them to your laptop.
2. Open the AirPods case
Open the case and leave the AirPods inside while you follow the rest of these steps.
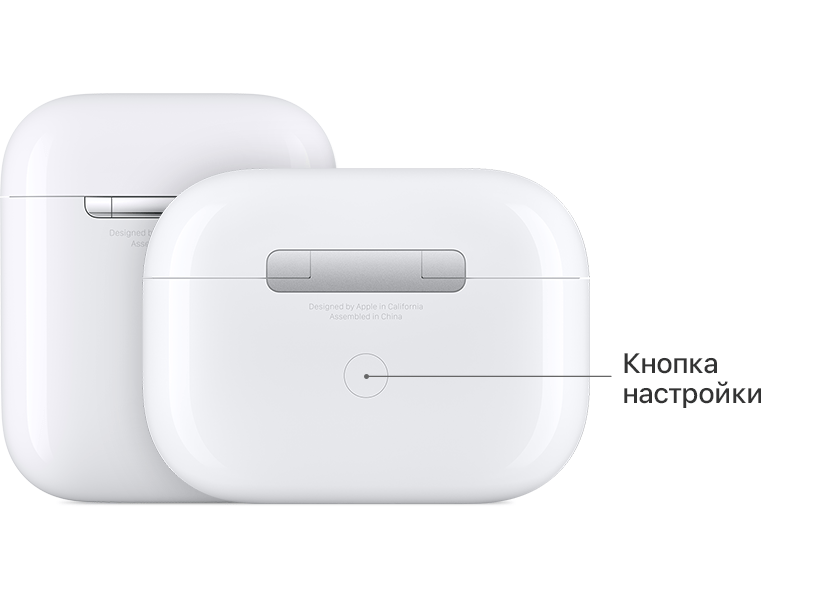
3. Press and hold the Setup button
The Setup button is the small, circular button on the backside of the case. Hold it down until you see the LED lights flashing on the inside (older AirPods) or front (AirPods Pro).
The Setup button puts the AirPods into pairing mode, an essential step for pairing any Bluetooth device.
4. Open the Start Menu
Click the Windows logo on your HP laptop to open the Start Menu on your laptop. With Windows 10, you’ll find it in the bottom left corner. Windows 11 users will see it in the bottom taskbar.
5. Go to Settings
Find the gear-shaped icon and click it to open Settings.
6. Open Bluetooth & devices
Windows 11 users should click Bluetooth & devices on the left-hand column. If you’re on Windows 10, click Devices on the Settings icon menu, then click Bluetooth & devices on the left column.
7. Add a new Bluetooth device
On Windows 10, click Add Bluetooth to other devices next to the grey plus icon. Windows 11 users must click the blue Add Device button within the Devices row.
8. Choose Bluetooth
A pop-up screen will give you the options of Bluetooth, Wireless display or dock, and Everything else.
Choose Bluetooth.
9. Select your AirPods
After a few seconds, a list of available Bluetooth devices will load on the Add a device window. Click the icon for your AirPods.
10. Click Done
A window will pop up, declaring, “Your device is ready to go.” Click Done.
11. Start listening to groovy tunes from your HP laptop
Or watch YouTube videos or whatever it is you were planning to do. Got other devices you need to connect to your HP laptop via Bluetooth? Just follow the same steps. This guide isn’t exclusive to AirPods — the same steps apply to all compatible Bluetooth devices on HP laptops.
How to connect and disconnect your AirPods to an HP Windows laptop
The earbuds should automatically connect when you pair your AirPods to your HP laptop.
If you want to play audio through your phone (or another device), you’ll need to disconnect the AirPods from your laptop first. And to start listening through your PC again, you’ll need to reconnect the AirPods.
But don’t worry. The disconnect-reconnect process is fast and easy — you’ve already done most of the legwork.
1. Open the Bluetooth menu on your laptop
Follow the steps outlined above.
In case you’ve forgotten, click the Start Menu and click Settings. Next, click the Bluetooth & devices icon on the left-hand column (Windows 11) or click Devices, then Bluetooth & other devices (Windows 10).
2. Click Connect or Disconnect
Find your AirPods from the list of Bluetooth devices and click the Connect or Disconnect button.
How to remove your AirPods from Bluetooth on your HP Windows laptop
You may decide to remove your AirPods from your HP laptop’s Bluetooth menu. The removal process is fast and straightforward.
1. Open the Start Menu
Click the Windows logo in the bottom left corner (Windows 10) or bottom taskbar (Windows 11) to open the Start Menu.
2. Open Settings
Look for the gear icon and click it to open Settings.
3. Open Bluetooth & devices
On Windows 10, click Devices, and then click Bluetooth & other devices. Windows 11 users need only click Bluetooth & devices in the left-hand column.
4. Remove your AirPods
On Windows 10, find your AirPods under the Audio tab and click Remove device.
On Windows 11, find your AirPods from the list of Bluetooth-connected devices at the top of the page. Click the three vertical dots, and then click Remove device.
If you want to reconnect your AirPods, follow the steps we provided in the How to connect AirPods to a Windows laptop section of this post.
Troubleshooting an HP laptop Bluetooth connection with AirPods
Still having trouble connecting your AirPods to your laptop? No need to dig up your HP warranty just yet. There’s a good chance you can fix the issue yourself.
The most common cause of a failed connection is a flat battery. Put your AirPods in their case and charge them up for a few hours before trying again.
AirPods sometimes have trouble syncing, especially when connected to multiple devices. The best way to rectify the issue is to perform a reset.
To reset AirPods and AirPods Pro:
- Put the AirPods into their case and close the lid.
- Wait 30 seconds and open the lid again.
- Follow the steps in this post to remove your AirPods from the Bluetooth list and pair them again. Note: this is different to the connect-reconnect process.
To reset AirPods Max:
- Press and hold the Digital Crown and Noise Control buttons, which you’ll find at the top of one of the ear coverings.
- Continue holding these two buttons until an amber LED light flashes at the bottom of the same ear covering.
- Alternatively, to return your AirPods Max to factory settings, press and hold the Digital Crown and Noise Control buttons for about 15 seconds until you see a white LED light.
If your AirPods work perfectly with any device except your HP laptop, there’s a good chance your PC is the culprit. Double-check that your Bluetooth is turned on. Failing that, Windows troubleshooter might help:
- Click the Windows icon to open the Start Menu (bottom left corner for Windows 10 or bottom taskbar for Windows 11).
- Click Updates & Security (Windows 10) or System (Windows 11).
- Click Troubleshoot
- Click Other troubleshooters
- Click Bluetooth
With any luck, the troubleshooter will analyse and rectify the issue.
Handy Bluetooth shortcuts for Windows
Try the following shortcuts to save time when pairing or connecting a Bluetooth device in Windows.
On Windows 11:
- Click Show hidden icons in the bottom right tray
- Click Bluetooth Devices
- Click Settings

On Windows 10 and 11:
- Press Windows + A to open the action centre
- Click the Bluetooth icon to toggle Bluetooth on or off
- Alternatively, right-click the Bluetooth icon and click Settings
Connecting your AirPods to an HP laptop
Pairing your AirPods to a Windows laptop from HP is a fast, hassle-free procedure. And following the steps in this guide makes the process a whole lot easier.
Once you’re all paired up, you can rapidly connect and disconnect your device through the Bluetooth menu – pro tip: try using the action centre to cut down on clicks.
About the Author: Harry Stewart is a freelance content writer covering everything from travel to tech.