
Рассмотрим особенности очистки «подвисшей» очереди печати в системах Windows. Рассмотренная методика позволяет удалить из очереди документы, которые по какой-то причине не печатаются и мешают отправке на печать других файлов и документов.
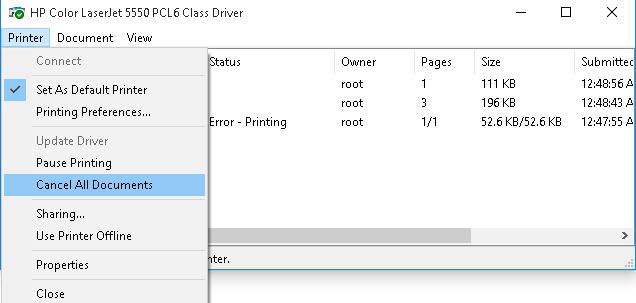
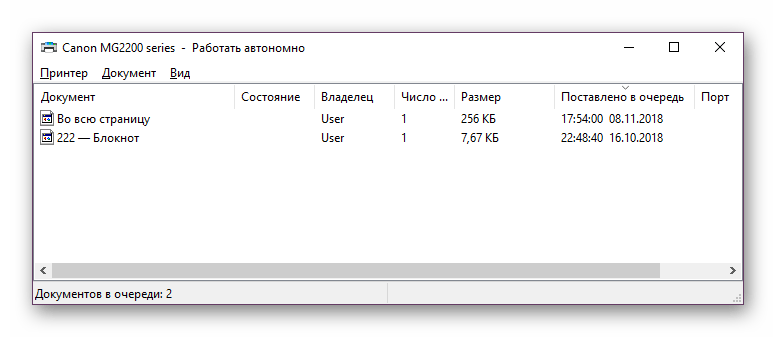
«Мягкий» способ очистки текущей очереди печати принтера выполняется из окна Панели управления (Control Panel ->Devices and Printers). В списке принтеров нужно найти проблемный принтер, щелкнуть по нему ПКМ и выбрать в меню пункт See what’s printing.

В открывшемся окне управления очередью печати принтера в меню выбираем пункт Printer-> Cancel All Documents . Все документы, в том числе зависшие, должны удалиться из очереди печати принтера.
В том случае, если какие-то документы не удаляются из очереди печати, значит они в данный момент заблокированы системой или драйвером самого принтера. Они пропадут из очереди печати после перезагрузки. Если перезагрузка выполнить проблематично, можно принудительной удалить все задания из очереди службы печати Windows.
Важно. Приведенная ниже методика очистки очереди печати удаляет ВСЕ имеющиеся задания печати на ВСЕХ принтерах системы. Это нужно иметь в виду, особенно при очистке зависшей очереди печати на выделенном принт-сервере на базе Windows.
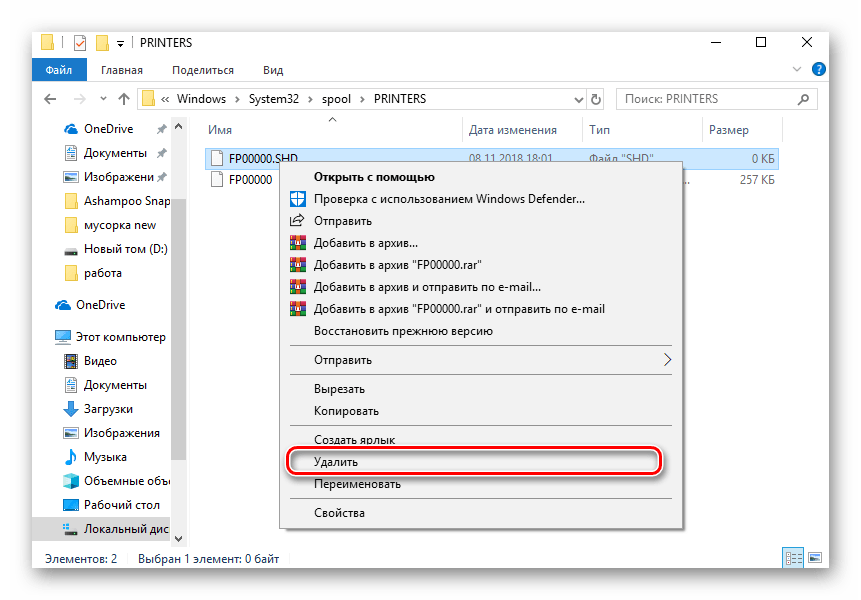
Напомним, что при отправке документа на печать на принтер, служба печати Windows (Print Spooler) формирует задание печати и создает два файла: один с расширением .SHD (содержит настройки задания печати), второй — .SPL (хранит собственно данные, которые нужно распечатать). Таким образом, задания печати будут доступны службе печати, даже после закрытия программы, инициировавшей печать. Данные файлы хранятся в каталоге спулера (по умолчанию, «%systemroot%\System32\spool\PRINTERS”). После успешной печати, эти файлы автоматически удаляются из этого каталога, и, соответственно, из очереди печати.
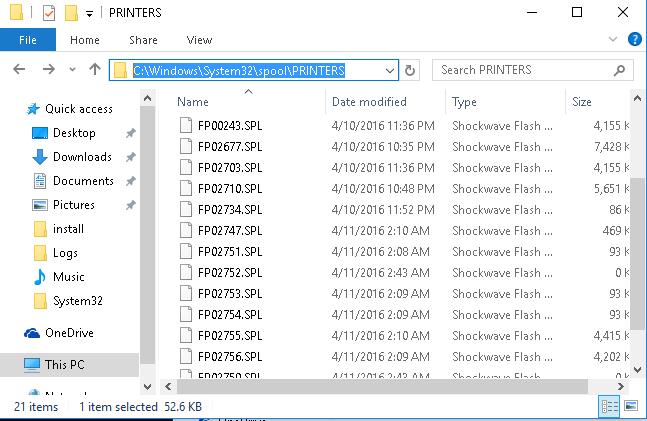
Нам нужно вручную очистить содержимое этой папки, тем самым мы удалим все задания в памяти Print Spooler.
Откройте командную строку с правами администратора и последовательно выполните команды:
net stop spooler
del %systemroot%\system32\spool\printers\*.shd /F /S /Q
del %systemroot%\system32\spool\printers\*.spl /F /S /Q
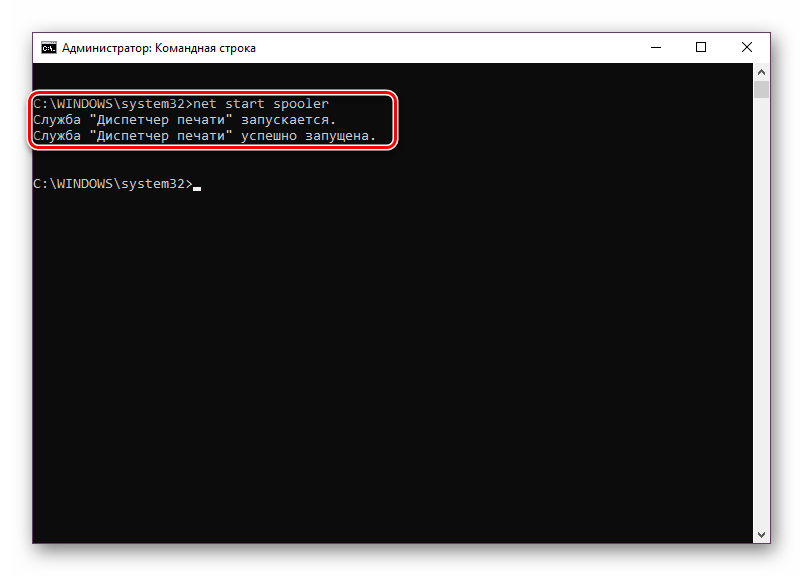
net start spooler

Этот набор команд последовательно останавливает службу печати Windows, рекурсивно удаляет все файлы с расширениями *.shd и *.spl из каталога %systemroot%\system32\spool\printers и запускает остановленную службу.
Архив с готовым bat файлом можно скать по ссылке reset_spooler.zip (запускать от имени администратора)
Примечание. В том случае, если скрипт не работает, проверьте, что в свойствах принт-сервера (Панель управления -> Devices and Printers -> кнопка Print Server Properties в верхнем меню -> вкладка Advanced -> в поле Spool folder location указан каталог C:\windows\system32\spool\Printers. В 99% случаев это должно быть так. Если путь к каталогу спулера отличается, нужно будет поправить путь к нему в скрипте.

Рассмотренные выше методики помогут очистить очередь печати в любой версии Windows, будь то Windows 7, 8 или Windows 10.
Все способы:
- Очищаем очередь печати в Windows 10
- Способ 1: Свойства принтера
- Способ 2: Ручная очистка очереди печати
- Вопросы и ответы: 2
Сейчас у многих пользователей имеется дома принтер. С его помощью можно без каких-либо трудностей распечатать необходимые цветные или черно-белые документы. Запуск и настройка этого процесса обычно осуществляется через операционную систему. Встроенный инструмент выстраивает очередь, которая регулирует поступление файлов в печать. Иногда происходят сбои либо случайная отправка документов, поэтому возникает надобность очистить эту очередь. Выполняется такая задача двумя методами.
Очищаем очередь печати в Windows 10
В рамках данной статьи будет рассмотрено два метода очистки очереди печати. Первый является универсальным и позволяет удалить все документы или только выбранный. Второй же полезен тогда, когда произошел системный сбой и файлы не удаляются, соответственно, и подключенное оборудование не может начать нормально функционировать. Давайте разберемся с этими вариантами более детально.
Способ 1: Свойства принтера
Взаимодействие с печатающим устройством в операционной системе Windows 10 происходит с помощью стандартного приложения «Устройства и принтеры». В него встроено множество полезных утилит и инструментов. Один из них и отвечает за формирование и работу с очередью элементов. Удалить их оттуда не составит труда:
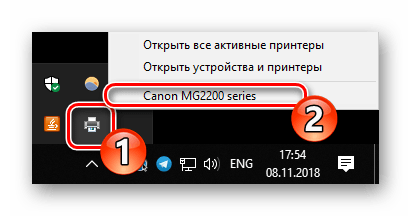
- Найдите значок принтера на панели задач, кликните на нем правой кнопкой мыши и выберите в списке используемое устройство.
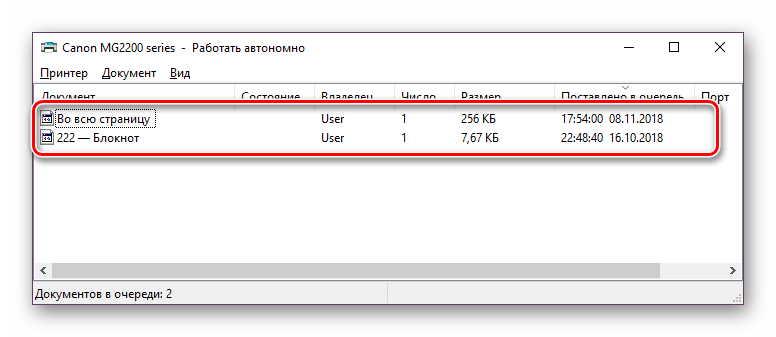
- Откроется окно параметров. Здесь вы сразу увидите перечень всех документов. Если требуется удалить только один, нажмите на нем ПКМ и выберите «Отменить».
- В случае когда файлов много и по отдельности очищать их не совсем удобно, разверните вкладку «Принтер» и активируйте команду «Очистить очередь печати».
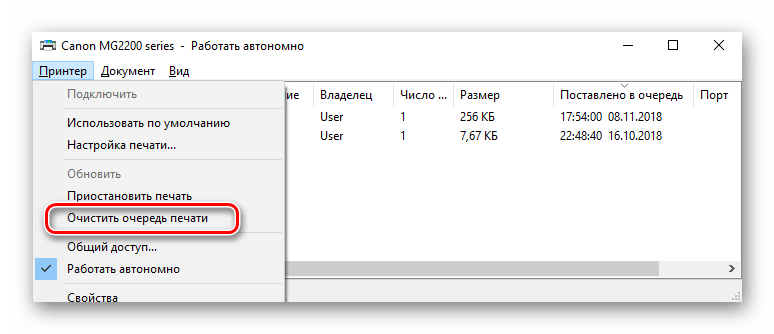
К сожалению, не всегда упомянутый выше значок отображается на панели задач. В этой ситуации открыть меню управления периферией и очистить очередь через нее можно так:
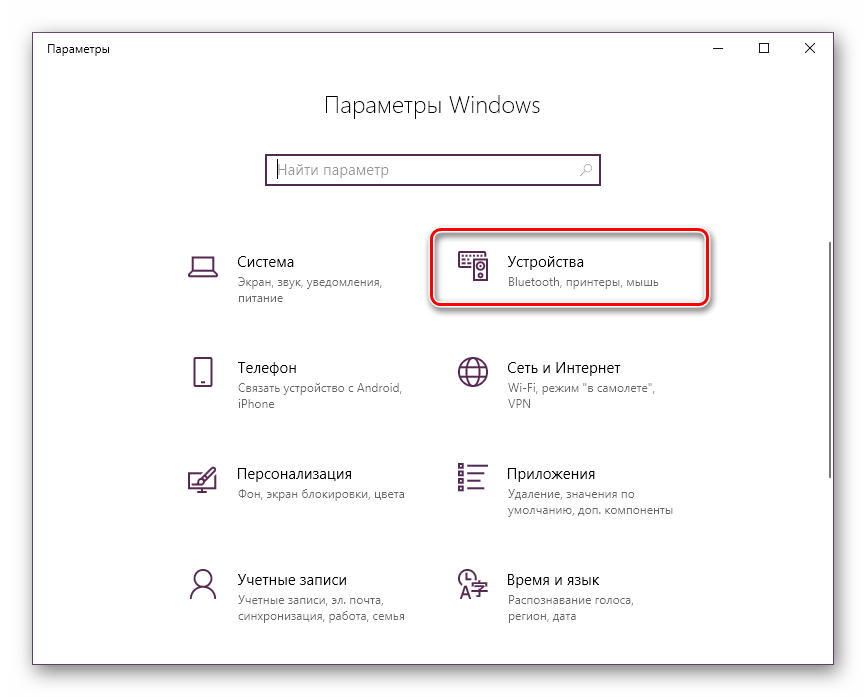
- Перейдите в «Пуск» и откройте «Параметры», нажав на кнопку в виде шестеренки.
- Отобразится перечень параметров Windows. Здесь вас интересует раздел «Устройства».
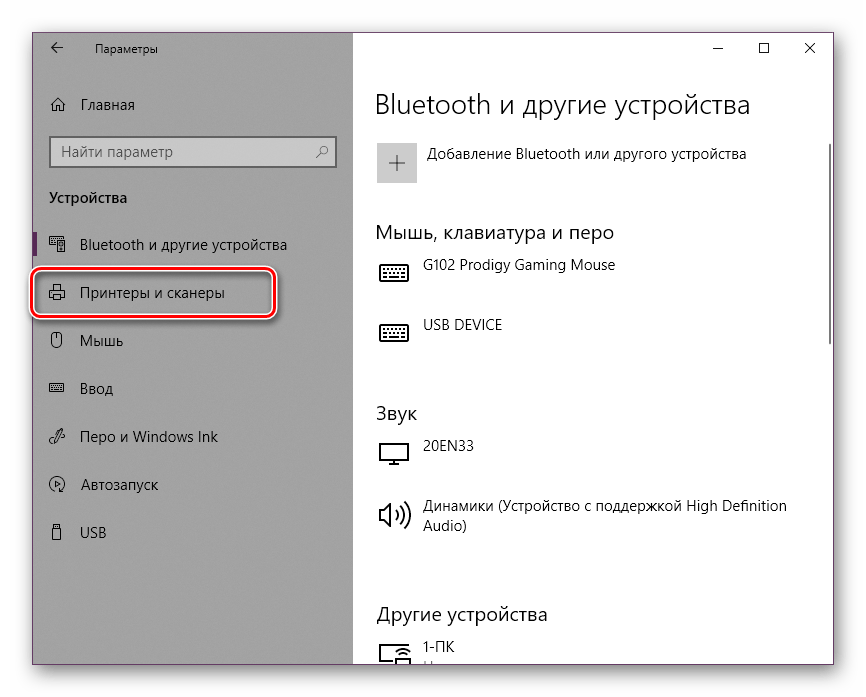
- На панели слева перейдите в категорию «Принтеры и сканеры».
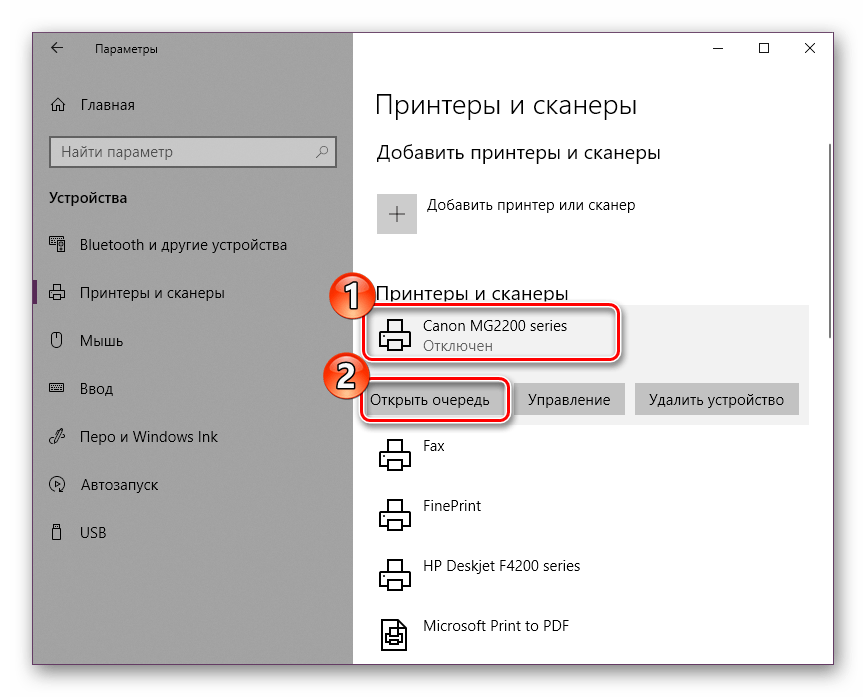
- В меню найдите оборудование, для которого и необходимо очистить очередь. Кликните на его названии ЛКМ и выберите «Открыть очередь».
- Теперь вы попадаете в окно с параметрами. Работа в нем происходит точно так же, как это было показано в предыдущей инструкции.
Читайте также: Добавление принтера в Windows
Как видите, первый способ достаточно прост в исполнении и не требует много времени, очищение происходит буквально за несколько действий. Однако иногда случается так, что записи просто не удаляются. Тогда рекомендуем обратить внимание на следующее руководство.
Способ 2: Ручная очистка очереди печати
За корректную работу принтера отвечает служба «Диспетчер печати». Благодаря ей создается очередь, документы отправляются в распечатку, а также происходят дополнительные операции. Различные системные либо программные сбои в самом устройстве провоцируют зависание всего алгоритма, из-за чего временные файлы никуда не деваются и только мешают дальнейшему функционированию оборудования. При возникновении подобных проблем вам нужно вручную заняться их удалением, а сделать это можно следующим образом:
- Откройте «Пуск» в строке поиска напечатайте «Командная строка», кликните на появившемся результате правой кнопкой мыши и запустите приложение от имени администратора.
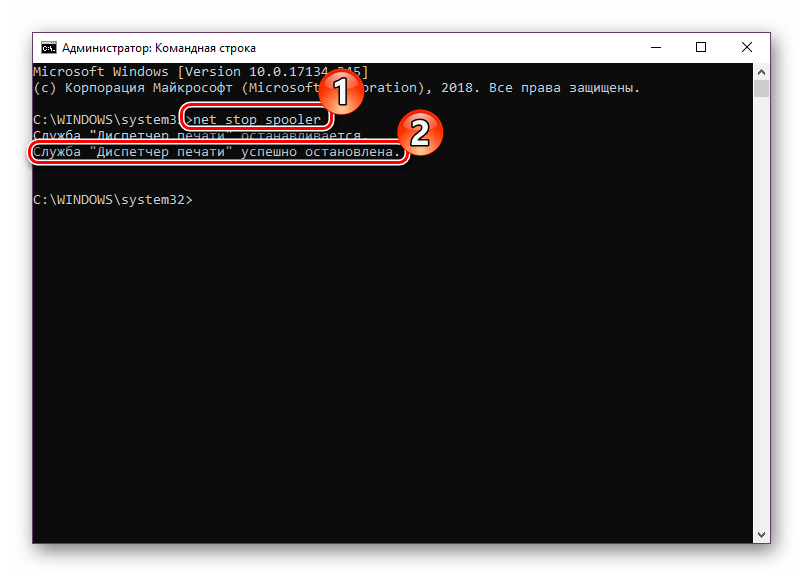
- В первую очередь останавливаем саму службу «Диспетчер печати». За это отвечает команда
net stop spooler. Введите ее и нажмите на клавишу Enter. - После успешной остановки вам пригодится команда
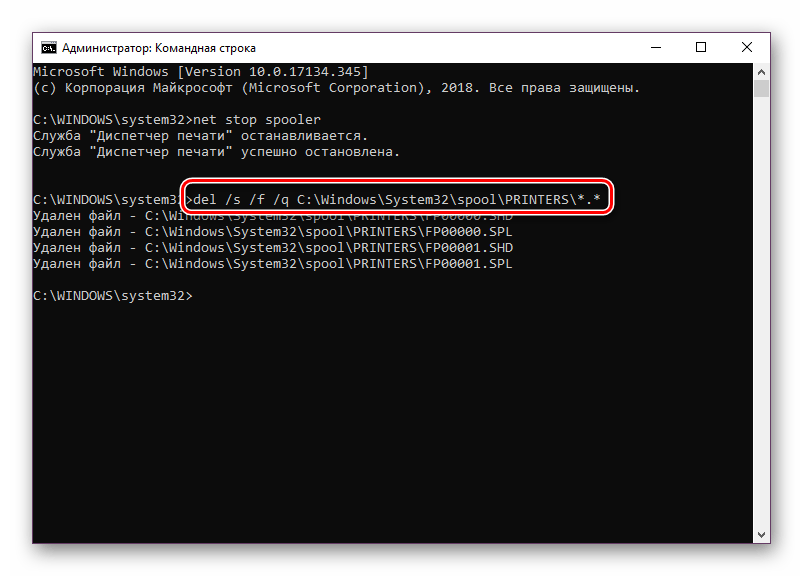
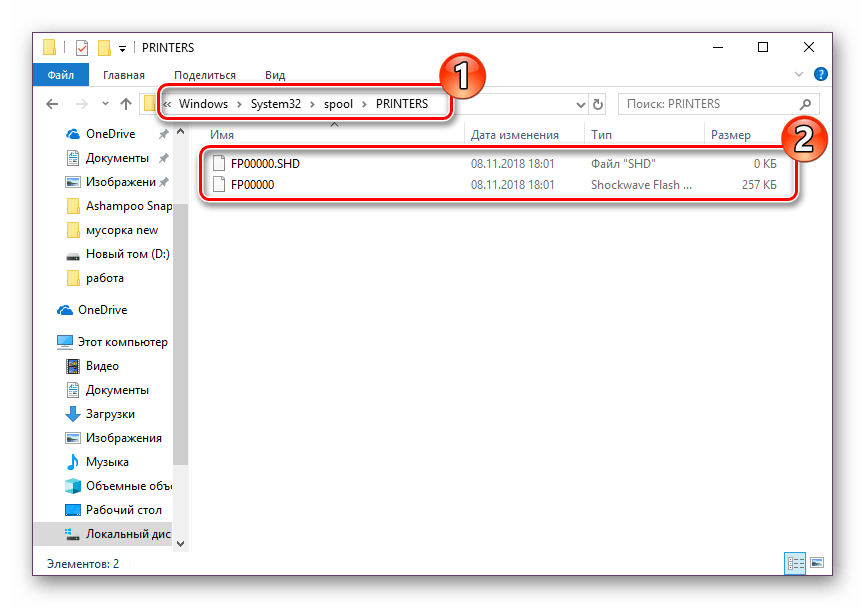
del /s /f /q C:\Windows\System32\spool\PRINTERS\*.*— она отвечает за удаление всех временных файлов. - По завершении процесса деинсталляции требуется вручную проверить папку хранения этих данных. Не закрывайте «Командную строку», откройте Проводник и найдите все временные элементы по пути
C:\Windows\System32\spool\PRINTERS - Выделите все их, кликните правой кнопкой мыши и выберите пункт «Удалить».
- После этого вернитесь в «Командную строку» и запустите службу печати командой
net start spooler

Такая процедура позволяет очистить очередь печати даже в тех случаях, когда элементы, находящиеся в ней, зависли. Переподключите устройство и заново приступайте к работе с документами.
Читайте также:
Как распечатать документ с компьютера на принтере
Как распечатать страницу из интернета на принтере
Печать книги на принтере
Печать фото 3×4 на принтере
С необходимостью очистки очереди печати сталкивается практически каждый обладатель принтеров или многофункциональных устройств. Как вы могли заметить, выполнить эту задачу не составит труда даже неопытному юзеру, а второй альтернативный метод поможет справиться с зависанием элементов буквально за несколько действий.
Читайте также:
Правильная калибровка принтера
Подключение и настройка принтера для локальной сети
Наша группа в TelegramПолезные советы и помощь
Download Article
Stop printer spooler errors from interrupting your work
Download Article
- On Windows (Settings)
- On Windows (CMD)
- On a Mac
- Troubleshooting
- Expert Interview
|
|
|
|
If your printer’s not working and your print jobs keep getting stuck, you may need to clear the print spooler. Before you clear the print spooler, make sure your work is saved and that there aren’t any other issues affecting your print jobs. Then, you can go into your computer settings and clear the printer spooler so all your failed print jobs are deleted. Once they’re deleted, you should be able to print your documents again without any problems. This guide will walk you through clearing the printer spooler on Windows 10 and 11, as well as on your Mac.
Quick Steps
- Open services.msc.
- Right-click Print Spooler and select Stop.
- In File Explorer, go to C:\Windows\System32\spool\printers.
- Delete all the files in the folder.
- In services.msc, right-click Print Spooler, and select Start.
-

To do this, click the Start menu (or press the Windows key on your keyboard), type services.msc, and then press Enter.
- According to computer repair specialist Blain Gunter, the print spooler is the intermediary between the printer and the computer. This service handles all print jobs sent to the printer.
-
Scroll through the list of services until you find the one labeled “Print spooler.” The services should be in alphabetical order.
Advertisement
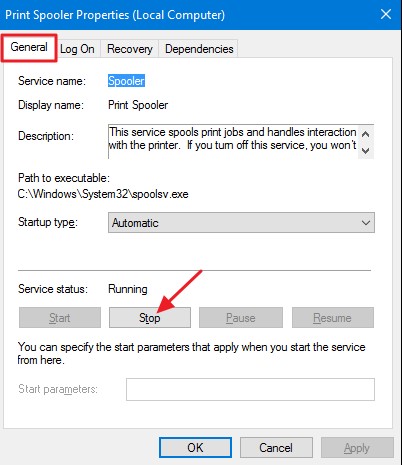
-
Before you can clear the print spooler, you must stop the service so the files aren’t in use. You will see this under «Print Spooler» in the upper-left corner of the list of services.
- Alternatively, you can right-click the Print Spooler and select Stop.
-
A fast way to do this is to press the Windows key + E at the same time. You can also right-click the Start menu and select File Explorer.
-
This is usually the C: drive. To get there, click This PC on the left panel, then double-click the C: drive on the right panel.
-
This opens a list of more folders.
-
Even more folders will appear.
-
You’ll probably need to scroll down to find it.
-
Now, instead of seeing folders, you will see files with weird names consisting of letters and numbers. This is your print spool.
-
Use your mouse to select all the files in the folder, then press the Delete key on your keyboard. You may be prompted to confirm.
-
Now that the spooler is cleared, you will need to restart the service so you can start printing again. Here’s how:
- Press the Windows key on your keyboard.
- Type services.msc and press Enter.
- Right-click Print spooler and select Start.


Advertisement
-
To do this:
- Press the Windows key and type cmd.
- Right-click «Command Prompt» and select Run as administrator.
-
To do this from the command prompt, just type net stop spooler and press Enter.
-
Type or paste this command at the prompt, and then press Enter to clear the print spooler:
- del %systemroot%\System32\spool\printers\* /Q
- After you press Enter, the spooler will be cleared.
-
Now, just restart the service by typing net start spooler and pressing Enter. The print spooler is clear, and you should now be able to print.


Advertisement
-
You can easily clear the entire print spool queue on your Mac using a simple terminal command.
- To open a Terminal, click the Launchpad icon on your Dock (the multicolored squares), type terminal, then click Terminal.[1]
- To open a Terminal, click the Launchpad icon on your Dock (the multicolored squares), type terminal, then click Terminal.[1]
-
This command will remove all jobs in the printer spool.[2]
-
If you still have printing problems, you can usually fix them by re-adding the printer to your Mac desktop or MacBook. Here’s how:
- Click the Apple menu and select System Settings.
- Click Printers & Scanners in the left sidebar.
- Hold down Control as you click the printer in the right panel.
- Select Remove printer > Remove.[3]
- To add the printer back, click Add Printer, Scanner, or Fax, select your printer, and follow the on-screen instructions.[4]


Advertisement
-
Look at your printer. If all the lights are off, it may not have power, which could be why your print jobs aren’t going through. Check to see if the printer cord is plugged in. If it’s not, plug it in and try printing again to see if the problem is resolved.
-
Look on the printer for any flashing lights or error messages. A paper jam or low ink may be why your printer isn’t working. Take care of any error messages before you clear the printer spooler. Once the error messages are gone, try printing something to see if the problem is resolved.
-
If it’s been a long time since you’ve updated your computer or printer drivers, installing the latest updates can often fix printing and other problems. Printer drivers are usually installed automatically when you update Windows, but you can also update drivers manually.
-
If you’re having trouble printing on a Windows PC, you can usually fix the issue using one of Windows’ troubleshooters. Here’s how:
- Windows 10
- Press the Windows key on your keyboard, type troubleshooting and select Troubleshooting Settings.
- Click Use a printer.
- Click Advanced
- Click Run as administrator. You may be prompted to enter your administrator password.
- Click Next and follow the troubleshooter screens.[5]
- Windows 11
- Click the Start menu and select Settings.
- Click System in the left panel.
- Click Troubleshoot in the right panel.
- Click Other troubleshooters.
- Click Run next to «Printer» and follow the troubleshooter screens.
- Windows 10


Advertisement
Ask a Question
200 characters left
Include your email address to get a message when this question is answered.
Submit
Advertisement
Thanks for submitting a tip for review!
About This Article
Thanks to all authors for creating a page that has been read 82,969 times.
Is this article up to date?
How to clear print spooler in Windows 10 is our next guide. Clearing and restarting the print spooler it comes handy when you are trying to fix print jobs in queue. You as a user sometimes can set a few bunch of documents to print and this can stuck print job by holding up the entire process. At this point you can’t delete or cancel the stuck print job from the queue.
There are different reasons why you can’t print, such as connection problems or hardware issues with the printer. Usually it is an issue with the Windows 10 print spooler. This is a service that spools print jobs and handles the interactions with the printer. Sometimes it will stop working, even after restarting your computer device and printer. In Windows, the print files are not directly sent to the printer. They arrive first in the spooler, which is a windows service responsible for all print jobs. The spooler is useful as it enables you to change the order of pending print jobs or delete them. When there’s a problem, the files just remain in the print queue. And once the first document cannot be printed, neither will al l the other documents behind it.
In order to clear print spooler there are a couple of different ways and we are going to cover them.
Method 1 – How to clear print spooler in Windows 10 Manually
- Press Windows key + R to open up a Run dialog box.
- Type ‘services ‘ inside the text box and press Ctrl + Shift + Enter to open up an elevated CMD prompt.
- Click the Services app.
- Scroll down to Print Spooler.
- Right click Print Spooler and select Stop.
- Navigate to C:\Windows\System32\spool\PRINTERS and delete all files in the folder.
- In the Services window, restart the Print Spooler service by clicking Start in the left pane when Print Spooler is highlighted.
How to clear print spooler in Windows 10
Method 2 – How to clear print spooler using a Command Prompt
- Press Windows key + R to open up a Run dialog box.
- Type ‘cmd‘ inside the text box and press Ctrl + Shift + Enter to open up an elevated CMD prompt.
- Once you have opened CMD prompt as an administrator with elevated privilege type the following command and press Enter:
net stop spooler
del /Q /F /S "%systemroot%\System32\Spool\Printers\*.*"
net start spooler
After you run the command successfully, you should be able to send a print job to the printer, and this time the printer should work.
Method 3 – How to clear print spooler using a Batch File
If clear print spooler is a task that you are forced to do it frequently then the best recommended is to create by yourself a .bat script which will be configured to run at every system startup. The idea behind the script is to search clear print spooler automatically
Step 1: Create the batch script
- Press Windows key + R to open up a Run dialog box.
- Type ‘notepad.exe’ inside the text box
- Press Ctrl + Shift + Enter to open up an elevated Notepad
- Inside the opened Notepad window, paste the following code:
net stop spooler
del /Q /F /S "%windir%\System32\spool\PRINTERS\*.*"
net start spooler
- Click on File(from the ribbon at the top) and click on Save As…
- Name the script something recognizable
- Place it in a location that’s easily accessible and ensure that you change the extension to .bat before clicking on
Step 2: Configure the batch script to run at every system startup.
In order to do this we have already publish two article explaining in details every step. You can easily find them on the following links: Create Windows Task Scheduler and schedule to run bat file and How to create scheduled task with windows task scheduler. Make sure to configure the Task Schedule to begin At Startup. And ensure that the checkbox associated with Enabled (at the bottom) is checked.
Conclusions
Dear followers of Get IT Solutions, in our step-by-step tutorial, we have provided all the possible solutions on how to clear print spooler. We hope you will find this method helpful. Have you managed to solve it? Please let us know in the comments below.
You can use your printer with many devices but the ease that you get while using it with your Windows 10 computer is unmatched. Though you may not be familiar with all the controls of your printer using your Windows 10 PC and it can be a bit problematic if your printer ever runs into an issue and you do not know how to fix it. One such common problem that many users face with their printers is an unresponsive spooler or printing queue. Are you unable to stop your printer from making copies? Or do you need to clear the tasks that you have given to your printer? Whatever it is, we will help you with this guide on how to clear the printer spooler or clear the print queue on Windows 10.
How to Clear Print Spooler on Windows 10 PC
Follow these steps to remove the print queue on your Windows 10 system:
- From the Start Menu, search ‘Services’ and open the first search result.
- Scroll down and look for ‘Print Spooler’.
- Right-click on it and select ‘Stop’.
- On your computer, go to this location – ‘C:\Windows\system32\spool\PRINTERS’.
(You must have administrator permissions for it). - Delete all the files in this folder/location.
- Open the ‘Services’ window again as explained in the first step.
- Right-click ‘Print Spooler’.
- Select ‘Start’.
This way, you can clear the print queue and start it again on your Windows 10 PC.
So, these are the steps to clear the print queue on Windows 10. This process will come in handy if your printer misbehaves or if you’re unable to add/remove existing or new tasks to your printer. Once you are done with deleting tasks from the printing list on Windows 10, do check out our other guides that may help you with a few more things related to your printer and Windows 10 PC: How to Fix Error 740 While Adding Printer on Windows 10 and How to Check HP Printer Ink Levels on Windows 10.