
OneDrive cloud storage in Windows 11 makes it easy to securely access files—from Word documents and Excel spreadsheets to images—on any of your synced devices or online. Whether you use OneDrive for file backups or as your primary file management system, it’s important to know how to move, organize, and delete your OneDrive files. If you want to clear out all or part of your OneDrive or improve organization of what’s there, manage your cloud storage your way with these steps and tips.
Clear out OneDrive completely
If you don’t want any files in your OneDrive—perhaps you’re clearing out an old account or you want to start fresh on a new organizational system—follow these steps for a complete file clear-out:
- Open File Explorer in Windows 11 by selecting the folder icon in your taskbar, typing “File Explorer” in your search box, or selecting Windows logo key + E.
- Select the OneDrive cloud icon in the left-hand sidebar. You can now see all of the files in your OneDrive.
- If there are any folders or files you want to save, do so now. Select those folders and files.
- You have two choices: You can move the files and folders by highlighting and dragging them to another folder in the left-hand sidebar or you can copy and paste them.
- To copy, highlight the files and folders and select Ctrl + C or right-click on the highlighted files and select Show more options > Copy.
- To paste, open the folder where you want to place the copied files and folders. Within that folder, select Ctrl + V or right-click and select Show more options > Paste.
- Once you’ve preserved all the files and folders you want, highlight everything remaining in your OneDrive folder. Delete what’s left by selecting Ctrl + X or by right-clicking and selecting the trashcan icon.
Free up space in OneDrive
Do you need to free up some OneDrive space? Maybe you know there are way more files than you need, or you want to make room for other items. Here are a few strategies to free up space in OneDrive.
- Let go of large files. One of the fastest ways to free up OneDrive space is to remove large files you don’t need. Find these files by opening your OneDrive folder and sorting by size.
- Oust some old files. If you want to see which files you use least, sort your OneDrive folder by Date modified in ascending order. This is a quick way to find files you might not need.
- Dedupe outdated files. Sort your files by name to see if you have a whole stack of files with the same or similar names. You might be able to delete or consolidate older versions of those files to clear out extras you don’t really need.
Manage OneDrive folders like a boss
Let’s be honest: Folder management can be an art in and of itself. Here are a few quick strategies that can be used individually or all together to manage your OneDrive folders like a pro.
- Think about hierarchy. Plan out your folder organization so that primary folders are for top-level items. You might think about your materials in terms of the broadest possible categories: that could be home, work, and play, for instance. Then, within each of the top-level folders, consider the next broadest categories. Within home, you might have maintenance, wish list, and budgeting.
- Organize by project. Plan out your OneDrive with one folder for each major project. If you want to be able to sort by name to list projects in a specific order, you can number them, giving the priority projects the lowest numbers.
- Organize by points in a process. Whether it’s as simple as one folder for To Do and another for Done or as complex as one folder for each of the ten steps in a complicated process, organizing by process points can help you keep a process top of mind and encourage you to move through it to completion.
Whatever you choose to do with your documents, spreadsheets, and everything else in your digital filing system, OneDrive keeps your files secure, accessible, and easy to manage. For more tips, tricks, and insights to get the most out of Windows 11 and OneDrive, head to the Windows Learning Center.
Clearing your OneDrive cache in Windows 11 is a straightforward process that helps resolve syncing issues and frees up space. To do this, first, disconnect OneDrive from your PC, then navigate to the OneDrive folder and delete the “Cache” files. Finally, reconnect OneDrive to ensure everything is synced properly. This simple task is crucial for maintaining optimal performance and preventing glitches.
Clearing the OneDrive cache helps in resolving issues like sync errors or slow performance. Follow these steps to clear the cache efficiently.
Step 1: Disconnect OneDrive
First, right-click on the OneDrive cloud icon in the system tray and select “Settings.”
Disconnecting OneDrive ensures that no files are being synced while you’re clearing the cache. It’s a safe way to ensure no data loss occurs during the cache clearing process.
Step 2: Navigate to OneDrive Folder
Open File Explorer and go to the OneDrive folder location, typically found in “C:UsersOneDrive.”
The OneDrive folder is where all your synced files are stored. Accessing this location allows you to manage the cache files directly.
Step 3: Show Hidden Files
Click the “View” tab in File Explorer and check the “Hidden items” box.
OneDrive cache files are often hidden. By enabling hidden items, you can easily find and delete them.
Step 4: Delete Cache Files
Locate and delete the cache files named “Sync” or similar within the OneDrive folder.
Deleting these files clears out old or corrupted data that might be causing errors. Be careful not to delete important files unintentionally.
Step 5: Reconnect OneDrive
Go back to the OneDrive settings and sign in to reconnect your account.
Reconnecting OneDrive will start the syncing process anew, syncing your files correctly without the old cache issues.
After you complete these actions, OneDrive will initiate a fresh sync of your files. This will eliminate any potential problems caused by old or corrupted cache files. You should notice improved syncing speeds and fewer errors.
Tips for Clearing OneDrive Cache in Windows 11
- Regularly clear your OneDrive cache to prevent sync issues.
- Ensure all important files are backed up before deleting cache files.
- Use Disk Cleanup to free up space and enhance performance.
- Keep your Windows 11 updated to avoid compatibility issues.
- Consider using Microsoft’s OneDrive support if you encounter persistent problems.
Frequently Asked Questions
Why should I clear my OneDrive cache?
Clearing the cache helps resolve syncing errors and frees up storage space, improving overall performance.
Will clearing the cache delete my files?
No, clearing the cache only removes temporary files. Your actual OneDrive files remain intact.
How often should I clear the OneDrive cache?
Clear the cache whenever you encounter syncing problems or once every few months as preventative maintenance.
Can I automate the cache clearing process?
While there’s no built-in automation, you can create a script to automate the process if you’re tech-savvy.
What should I do if clearing the cache doesn’t fix my issue?
If problems persist, contact Microsoft Support for more advanced troubleshooting.
Summary
- Disconnect OneDrive.
- Navigate to OneDrive folder.
- Show hidden files.
- Delete cache files.
- Reconnect OneDrive.
Conclusion
Keeping your OneDrive cache clear in Windows 11 is like giving your computer a spring cleaning. By following these easy steps, you can maintain a smooth and efficient syncing experience. Whether you’re using OneDrive for personal use or managing files for work, ensuring the cache is regularly cleaned can prevent pesky sync errors and free up valuable storage space.
While clearing the cache is a helpful routine, it’s just one part of maintaining a healthy digital environment. Think of it as one of those essential chores that, when done regularly, keeps everything running smoothly. If you’re facing persistent issues even after clearing the cache, don’t hesitate to reach out for professional help or explore Microsoft’s support resources.
Remember, technology is here to make our lives easier, not more complicated. By taking simple steps like keeping your OneDrive cache in check, you’re actively participating in making your tech work for you. So, next time you’re facing sync troubles, you’ll know exactly where to start. Stay proactive, keep learning, and make the most of your digital tools!
Matthew Burleigh has been writing tech tutorials since 2008. His writing has appeared on dozens of different websites and been read over 50 million times.
After receiving his Bachelor’s and Master’s degrees in Computer Science he spent several years working in IT management for small businesses. However, he now works full time writing content online and creating websites.
His main writing topics include iPhones, Microsoft Office, Google Apps, Android, and Photoshop, but he has also written about many other tech topics as well.
Read his full bio here.
Quick Links
-
Clear OneDrive’s Recycle Bin
-
Delete Large and Unnecessary Files
-
Optimize Your OneDrive Sync Settings
-
Optimize Email Attachments
-
Move Files to External Storage or Another Cloud Service
-
Consider Upgrading Your Storage Plan
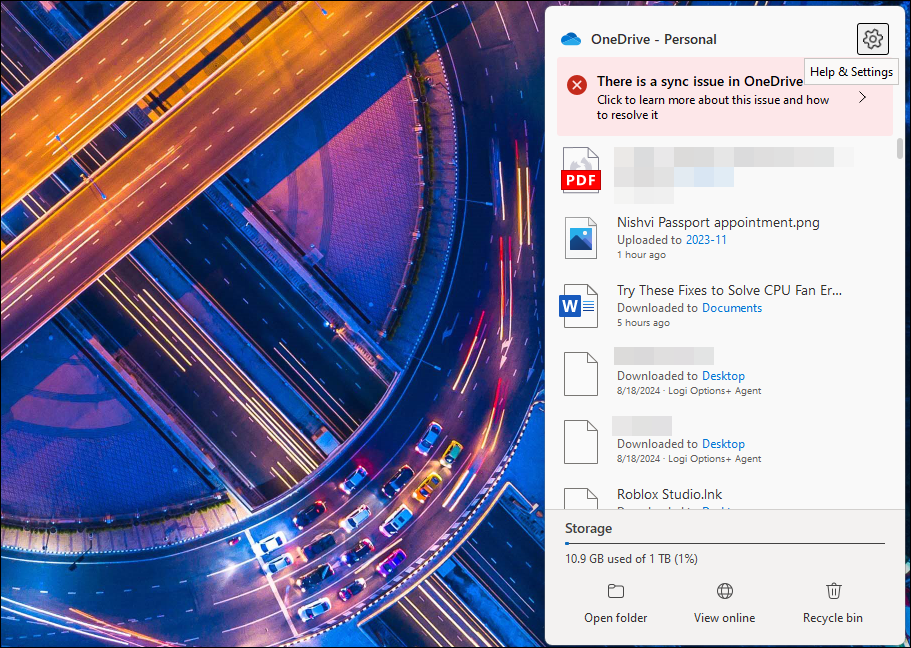
Once your OneDrive storage is full, your files will stop syncing, and Outlook might miss emails with attachments. To avoid that, you’ll need to quickly free up some OneDrive storage to make way for new files and emails. We’ll show you how.
1. Clear OneDrive’s Recycle Bin
When you delete a file from your OneDrive account, it sends it to the recycle bin. Since files in the recycle bin count toward your OneDrive storage, it’s essential to clean it up frequently. While OneDrive keeps the deleted files in the recycle bin for 30 days, you can manually delete them to free up some space immediately.
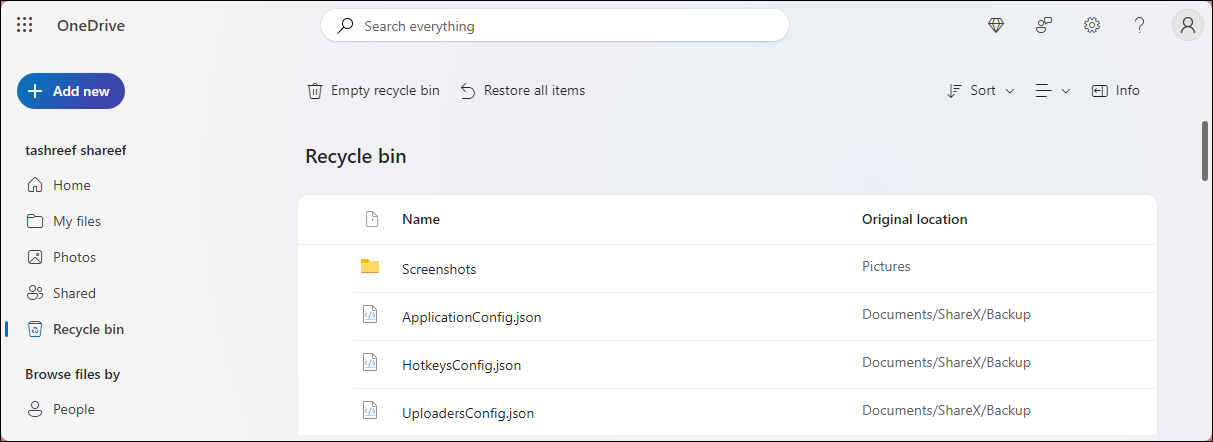
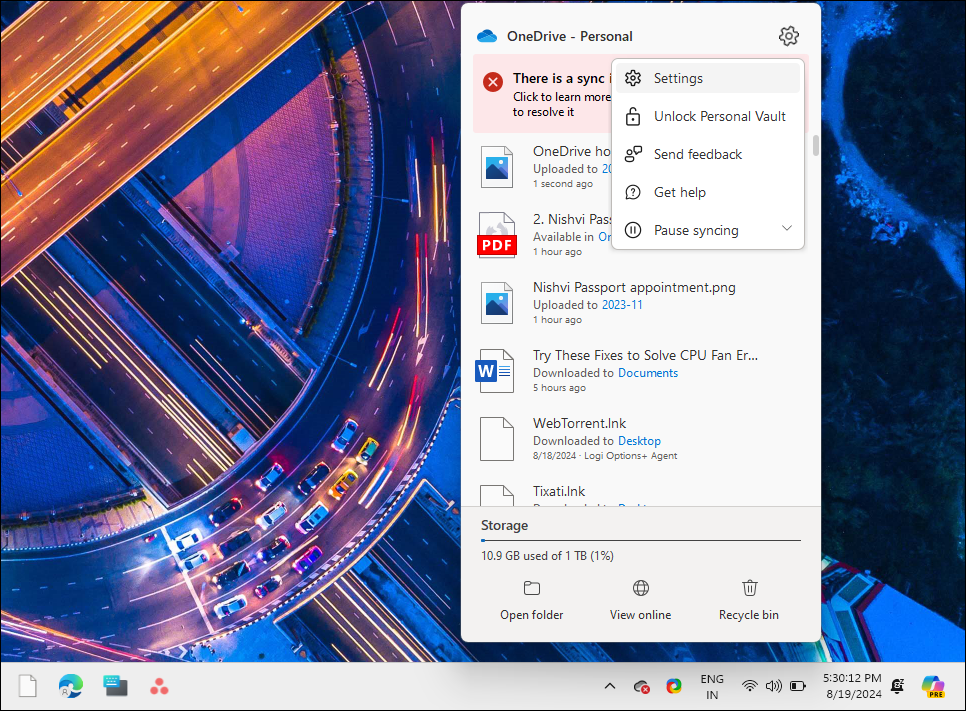
To empty the recycle bin, right-click the OneDrive icon in the Windows taskbar (bottom-right corner), then select Recycle bin. If you don’t have a desktop app, log into OneDrive web, then click the Recycle bin icon in the left navigation pane.
Scroll through the items in your recycle bin once to make sure you don’t delete anything important. To delete all the items, click the Empty recycle bin option below the search bar at the top. If not, you can select the individual items and then click Delete to remove them permanently.
You can also do this using the OneDrive app on your phone. In the Android version of the app, head to the Me tab from the bottom and tap Recycle Bin. Then, choose Delete ALL to empty the recycle bin. On iOS, tap the profile icon in the top-left corner, choose Recycle Bin, select all the files you want to delete, and then tap Delete.
2. Delete Large and Unnecessary Files
With the recycle bin emptied, let’s find out what’s taking up most space using the Manage storage option in OneDrive. To identify the space hogs, right-click the OneDrive icon in the taskbar and choose Settings. In the bottom-left corner, click Manage Storage. This will open your OneDrive account on the web.
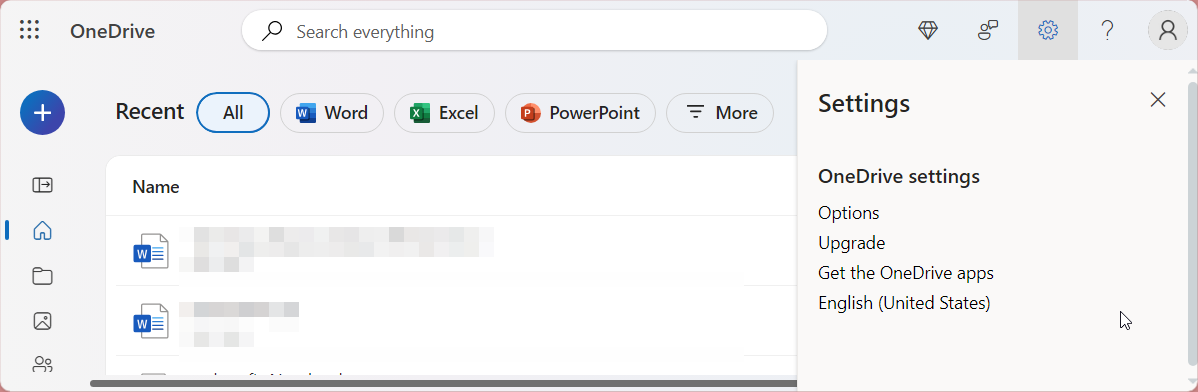
If you don’t have the desktop app, log into OneDrive web, click Settings (gear icon) in the top-right corner, and choose Options under OneDrive settings.
The Storage summary page shows how much of your OneDrive storage is used by files and Outlook attachments. Click the OneDrive link and wait for it to populate your screen with your files and folders.
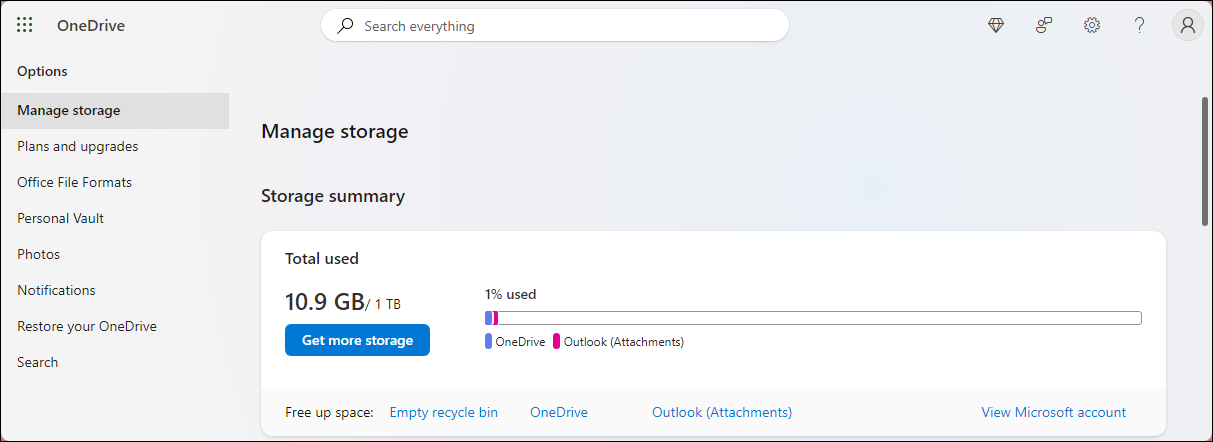
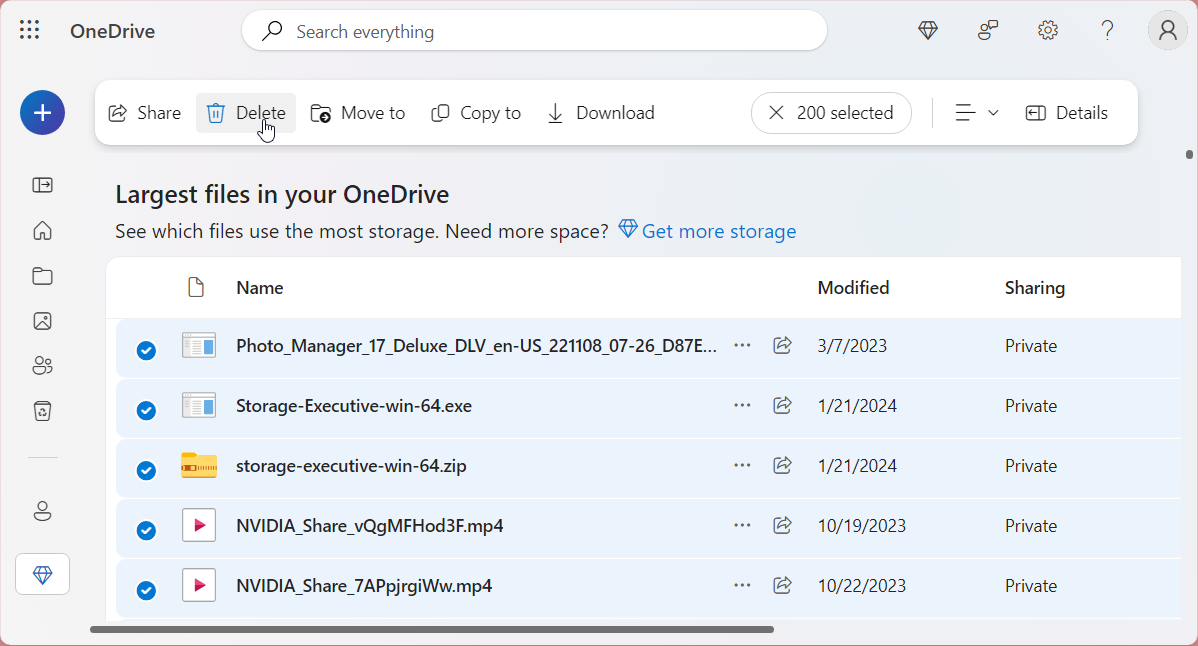
By default, OneDrive sorts the list by the largest files in your account. The idea is to find large but less important files you can delete or move elsewhere.
Back Up Files to Your Local Drive
Deleting a file from your OneDrive account on the web will also delete it from your OneDrive folder on your computer or smartphone, and vice versa. So, if you have a file or folder in OneDrive that you no longer want to store on the cloud but keep a copy on the computer, you’ll need to move it out of the OneDrive folder before deleting it.
To create a backup, double-click the OneDrive icon in the taskbar to open the OneDrive folder. Browse through the files and folders, select any file you want to back up, press Ctrl + C to copy it, and then move it to a different folder on your drive.
Now, in OneDrive web, select all the files you want to remove and click Delete in the top-left corner. Click Delete once again to confirm the action. After deleting the files, empty your recycle bin again to permanently delete them and reclaim the storage space. If you can’t delete some files, refer to our guide to fix problems with deleting files in OneDrive.
Remember that photos can also hog your OneDrive storage space. To clean up your photo library, open the Photos option in the left pane, select all the images you don’t want to keep, and hit Delete.
3. Optimize Your OneDrive Sync Settings
By default, OneDrive backs up the standard folders on your computer, including Documents, Desktop, and Pictures. By optimizing your OneDrive sync settings, you can ensure that only the important items are stored on the cloud. To enable selective sync, follow these steps:
-
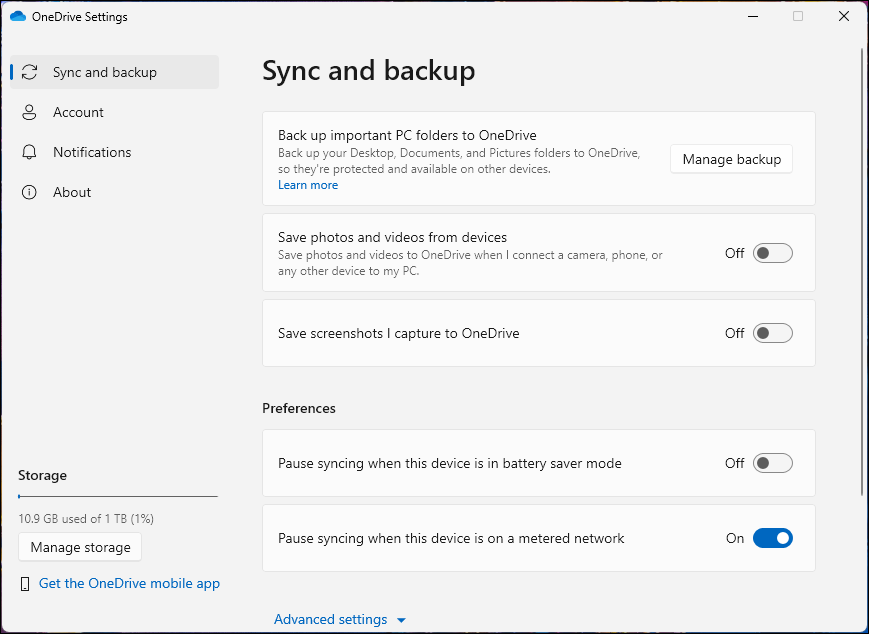
Right-click the OneDrive icon in the taskbar and choose Settings.

-
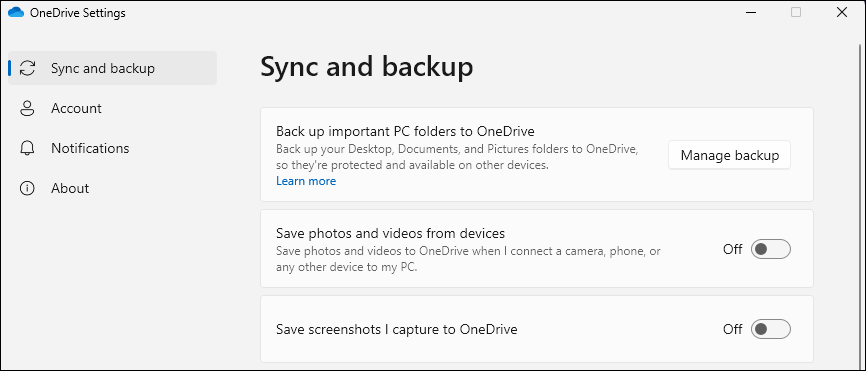
Head to the Sync and Backup tab and click Manage Backup on the right.

-
Toggle off all the switches for the folders you no longer wish to back up.

-
Click Stop backup when you get the Are you sure you want to stop folder backup? dialog. Then, click Close.

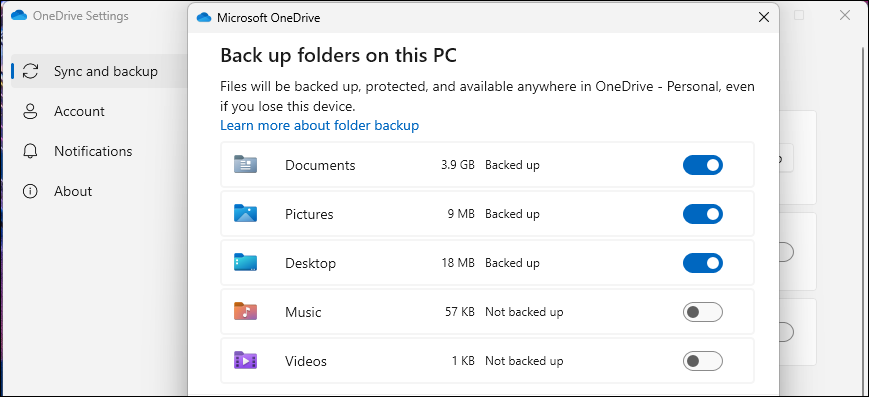

Avoid saving any non-critical and large files in the Documents folder for ease of access. OneDrive will sync all the files in these folders, eventually filling up your cloud storage space in no time. Disciplined file management is the key to efficiently managing limited cloud storage space.
4. Optimize Email Attachments
Outlook email attachments count toward OneDrive storage now instead of Outlook email storage. For a working professional, the email attachments can add up quickly, hogging the measly 5GB of free storage offered by OneDrive. Eventually, emails with attachments will stop coming as there’s no space to store them.
A solution to this is to delete large attachments from Outlook. Unfortunately, you can’t delete an attachment without deleting the email itself. So, save any critical information and attachments to your local drive or another cloud storage service before cleaning up your attachments.
To delete email attachments, open OneDrive on the web, click Settings in the upper-right corner, and choose Options. Under Manage storage, click the Outlook (Attachments) link.

This will open your Outlook account and show all the emails with attachments. Review and select the emails with attachments you deem safe to remove and click Delete.
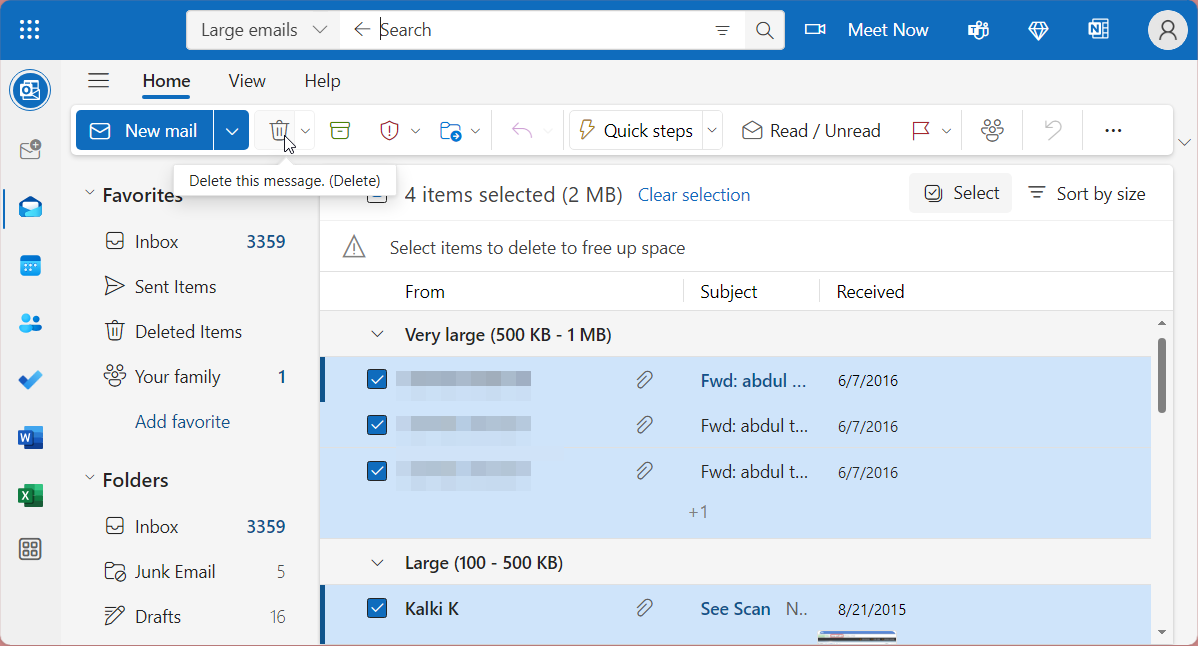
Now, open the Deleted Items tab in the left pane, choose all the items, and click Delete to empty the recycle bin.
5. Move Files to External Storage or Another Cloud Service
If your OneDrive storage is about to run out, you should back up your data to an external storage drive. External hard drives or USB flash drives are reliable ways to back up large amounts of data locally.
Another solution is to migrate your files to another cloud storage service, like Google Drive, which offers a generous 15GB of free storage. If you need more storage, you can subscribe to Google One, which starts at $1.99 per month for 100 GB of storage space along with other benefits.
6. Consider Upgrading Your Storage Plan
If you stick to OneDrive, consider upgrading your storage plan. Microsoft doesn’t offer any premium OneDrive plans but bundles extra storage with its Microsoft 365 plans.
For example, the basic Microsoft 365 plan offers 100GB of storage for $19.99 a year on top of other benefits like ad-free Outlook access, Office apps access on the web and mobile, OneDrive ransomware protection for files and photos, and access to Microsoft support.
If you need more storage, the Microsoft 365 Personal plan will set you back $6.99 per month for 1TB of storage and access to premium desktop apps, including Office, Clipchamp, Teams, Microsoft Defender, and more.
Hopefully, with the tips we recommended, you don’t have to upgrade your OneDrive storage. With the best storage management practices you can prevent your OneDrive storage from filling up quickly.
Nowadays, almost every website and application builds a cache. The cache is useful to reduce resource load time and increase efficiency. OneDrive is no exception. OneDrive app builds a cache to simplify the file syncing process and make it quick.
Cleaning OneDrive cache is important. However, with deduplication of OneDrive you can clear a lot of storage space and organize your One drive files. You can use the Sorcim’s Cloud Duplicate Finder web-app.
However, if your Internet connection drops constantly while your files are being synced online, it can cause the cache to become corrupted. When that occurs, the file sync may not work smoothly or OneDrive may behave unexpectedly. The solution is to clean up your cache.
Cleaning Up OneDrive Cache
Unfortunately, some OneDrive editions (such as desktop and iOS apps) do not have a direct option to clean up your cache. To clean the cache on your desktop app, you would need to reset the application or reinstall it. To clean the OneDrive cache on an iOS-based device, you would need to reinstall it. This will fix any underlying issues and you will need to sign in to your account again.
If you’re using the OneDrive app on an Android smartphone, it’s simple and straightforward. There is a direct way to clean up your cache without impacting the app configuration or reinstalling the app.
Will I Lose Any Data While Cleaning Cache, or Resetting/ Reinstalling OneDrive App?
Short & simple answer: No, you would not.
Cleaning up the OneDrive cache, resetting the OneDrive app or reinstalling OneDrive does not affect any data stored on your OneDrive cloud account. It only deletes the local files downloaded from the OneDrive server, along with the cache and other app configurations. Your files on the OneDrive cloud account will be accessible as before.
A] Reset OneDrive in Windows
OneDrive Sync App for Desktop
Method 1: Using Command Prompt
- Click on the Search box on the taskbar.
- Type Command Prompt in the search box and open it.
- In the Command Prompt window, type wsreset.exe
- Press Enter.
- Once the command executes, close the Command Prompt. It may take around 10 seconds.
Method 2: Using Command Prompt
- Open Command Prompt.
- Type the following command: %localappdata%\Microsoft\OneDrive\onedrive.exe /reset
- Press Enter.
Note: If the above command didn’t work, your app path may be different. Try one of the following alternate commands:
- C:\Program Files\Microsoft OneDrive\onedrive.exe /reset
- C:\Program Files (x86)\Microsoft OneDrive\onedrive.exe /reset
Method 3: Reinstall OneDrive
For Windows 11:
- Click the Start button and then select Settings.
- Click on the Apps tab, followed by Apps & Features.
- Scroll down and locate the Microsoft OneDrive application.
- Click on More > Uninstall.
- Re-install the OneDrive app.
For Windows 10:
- Click on the Start button.
- Right-click on the OneDrive app.
- Select the Uninstall option.
- Re-install the OneDrive app.
OneDrive Microsoft Store App
Microsoft Store is available for only Windows 10 and Windows 11 users. If you’re already using OneDrive from the Microsoft Store, there is a direct way to reset it.
- Click on the Start button.
- Type the following: apps:onedrive
- Click on App Settings > Reset.
B] Reset OneDrive Mac App
- Exit OneDrive.
- Click on the cloud icon on the top tray.
- Choose Settings > Quit OneDrive.
- Locate the OneDrive application from the Applications folder.
- Right-click on the OneDrive app and select Show package contents.
- Select Contents > Resources.
- Double-click on ResetOneDriveApp.command or ResetOneDriveAppStandalone.command
C] Clear OneDrive Android App Cache
- Open the main menu.
- Tap on Settings.
- Tap on Applications > Manage Applications.
- Scroll down and tap the OneDrive app.
- Tap on Force Stop.
- Tap on the Clear Cache button.
- Did that fix your OneDrive issue? If not, repeat the above steps and then tap on the Clear Data button.
D] Reset OneDrive iOS App
- Press and hold the OneDrive icon.
- Tap on the X symbol.
- When you’re prompted to confirm, tap the Delete App option.
- Press and hold the Sleep/ Wake and Home buttons together. Release them after 8-12 seconds.
- Now re-install the OneDrive app from the App Store.
OneDrive high CPU and memory usage is an annoying problem that is bothering lots of Windows users. In this post from MiniTool, we will tell you how to get rid of the OneDrive high CPU issue.
Microsoft OneDrive is one of the most commonly-used cloud backup services that excels at syncing and storing files. However, lots of OneDrive errors occur from time to time. For example, Microsoft something went wrong 1200, OneDrive download is slow, OneDrive backup tab missing, and so on.
Today, we are going to talk about another OneDrive issue – OneDrive high CPU and memory usage. Listed below are several feasible solutions to the OneDrive high memory usage Windows 11/10 issue.
How to Fix OneDrive High CPU and Memory Usage Windows 11/10
Solution 1. Restart OneDrive
When your program does not respond or appears in a situation similar to high CPU, you can use the End task feature in Task Manager to quit the problematic program. Follow the steps below to restart OneDrive.
Step 1. Right-click the Windows logo button to select Task Manager.
Step 2. Select OneDrive and click the End task button in the lower right corner. Or you can right-click OneDrive and select End task from the context menu.
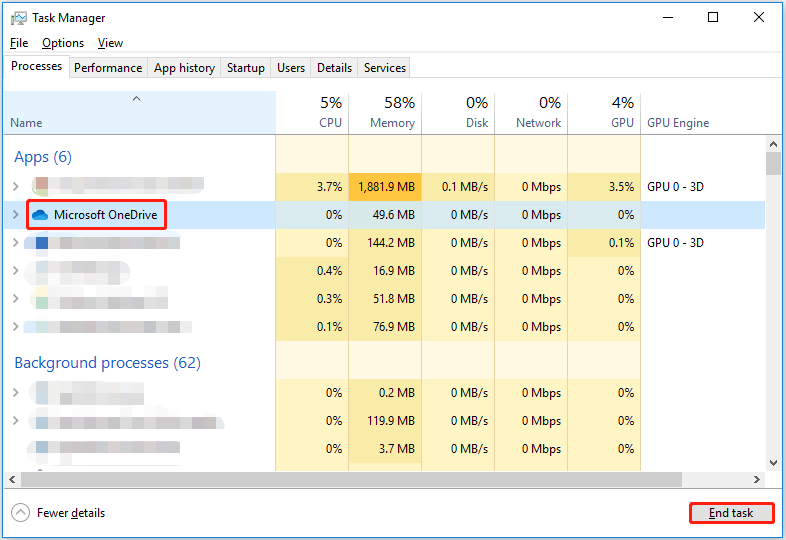
Step 3. Relaunch the OneDrive program and check if the OneDrive high CPU and memory usage issue has been fixed.
Solution 2. Delete OneDrive Setup Files
According to user experience, deleting OneDrive setup files is also an effective way to deal with the OneDrive high CPU and memory usage issue. Follow the guide below to accomplish this task.
Step 1. Press Windows + E key combinations to open File Explorer.
Step 2. Move on to the View tab and check Hidden items.
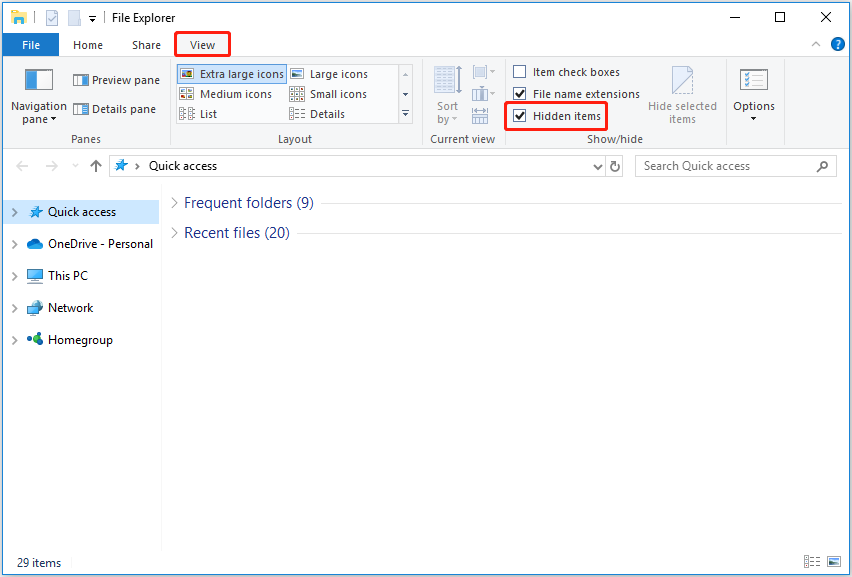
Step 3. In the address bar, navigate to the following path:
C:\Users\bj\AppData\Local\Microsoft\OneDrive\setup\logs
Step 4. Scroll down to find and delete these two files: UserTelemetryCache.otc.session and UserTelemetryCache.otc.
Step 5. Restart OneDrive, and now the OneDrive high CPU usage should be reduced.
Solution 3. Reset OneDrive
If the two methods listed above fail to work, you can choose to reset OneDrive. This will restore OneDrive to its original state.
For detailed steps to reset OneDrive, please refer to this article: How to Reset OneDrive on Windows 10/11.
Solution 4. Disable Telemetry
Microsoft collects data through the telemetry system to monitor your Windows settings and the programs you use, etc., which may cause OneDrive high CPU and memory usage. So, to fix the issue, you can disable the telemetry.
Note:
Note: Before making changes to the Windows registry, you are highly recommended to back up the registries or create a system restore point in the event of any accidents.
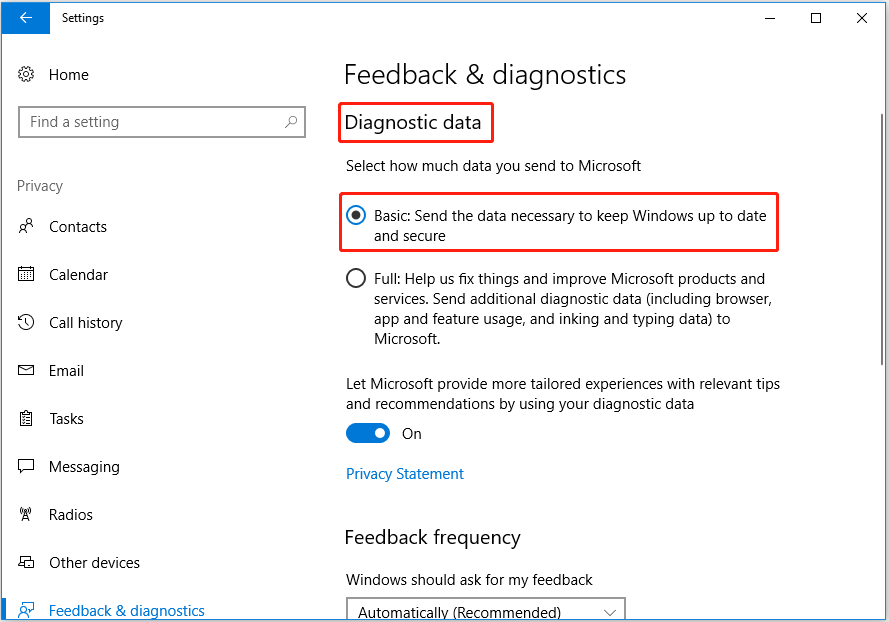
Step 1. Press Windows + I key combinations to open Settings.
Step 2. Click Privacy > Feedback & Diagnostics.
Step 3. Select the option of Basic under Diagnostic and usage data.
Step 3. Next, press Windows + R key combinations to open Run. In the run window, type regedit and press Enter.
Step 4. Choose Yes in the UAC window.
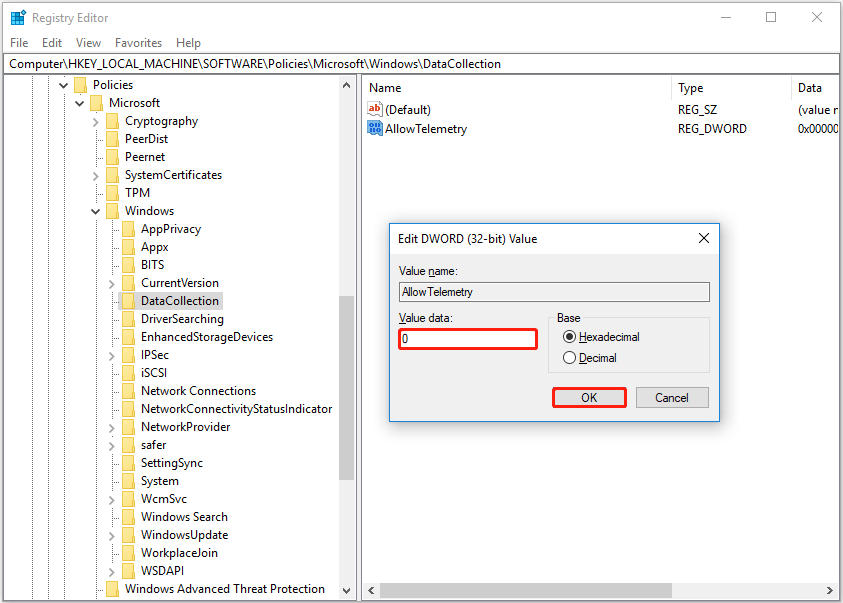
Step 5. Navigate to this path:
Computer\HKEY_LOCAL_MACHINE\SOFTWARE\Policies\Microsoft\Windows\DataCollection
Step 6. Right-click DataCollection to choose New > DWORD (32-bit) Value. Name the value to AllowTelemetry.
Step 7. Double-click AllowTelemetry and set its value data to 0. Finally, click OK to save your change.
Solution 5. Use a Data Backup Alternative
In addition to OneDrive, there are lots of data backup services, such as Google Drive, Dropbox, and so on. Also, professional third-party data backup software is popular, like MiniTool ShadowMaker.
MiniTool ShadowMaker is effective in data backup and file sync. It provides you with a trial edition that allows you to enjoy all its powerful features within 30 days for free.
MiniTool ShadowMaker TrialClick to Download100%Clean & Safe
Top Recommendation
Sometimes OneDrive deletes files automatically, to recover deleted files located on your local drive, you can use MiniTool Power Data Recovery. It excels at recovering data from various types of storage media, such as external hard drive data recovery, SSD data recovery, USB drive file restoration, HDD data recovery, and more.
MiniTool Power Data Recovery FreeClick to Download100%Clean & Safe
Bottom Line
To sum up, this article explains what should you do when OneDrive uses so much CPU in Windows 11/10. Follow the step-by-step guide to get rid of the issue.
If you have any questions about the topic of OneDrive high memory usage Windows 11/10, please feel free to tell us in the comment zone below.