Все способы:
- Проверка кешированной оперативной памяти
- Способ 1: Перезагрузка компьютера
- Способ 2: Отключение ненужных программ автозагрузки
- Способ 3: Завершение самых «прожорливых» процессов
- Способ 4: Редактирование реестра
- Способ 5: Создание ярлыка запуска выполнения ожидающих процессов
- Способ 6: Отключение визуальных эффектов
- Способ 7: Использование сторонних программ
- RAMMap
- ATM
- Вопросы и ответы: 0
Проверка кешированной оперативной памяти
Во время работы операционной системы Windows 11 кеш оперативной памяти практически всегда растет, а очищается в большинстве случаев только после перезагрузки. В него входят файлы и задачи как от сторонних программ, так и от стандартных процессов. Создание пула кеша позволяет значительно быстрее выполнять различные действия во время повторного обращения к ранее запущенным приложениям. Ознакомиться с тем, сколько сейчас оперативной памяти кешировано, можно через любую программу для мониторинга или «Диспетчер задач».
Читайте также: Как открыть «Диспетчер задач» в Windows 11
Что касается причин загруженности кеша, то здесь существует много факторов. Основной, конечно, это объем файла подкачки, время использования операционной системы и количество запущенных программ. Чем больше разных процессов было задействовано, тем больше файлов сохраняется в кеше оперативной памяти. Из-за этого методы очистки и разгрузки существуют разные, и обо всех них речь пойдет в следующих способах.
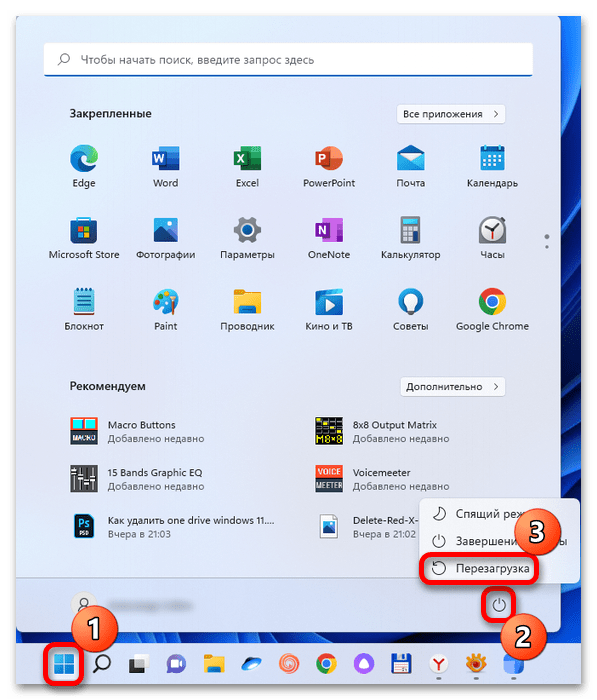
Способ 1: Перезагрузка компьютера
Самый простой и действенный метод решения поставленной задачи — банальная перезагрузка компьютера. Во время этого процесса сбрасываются все сохраненные ранее файлы кеша и происходит чистый запуск. Такой подход актуален в тех случаях, когда кеш оперативной памяти не заполняется очень быстро и вы можете работать с Windows 11 долго без появления различных задержек и тормозов. Просто по завершении своего пребывания за ПК отправьте его на перезагрузку или выключите (не переводите в режим сна), чтобы при следующем включении кеш ОЗУ уже был очищен.
Подробнее: Способы перезапуска ОС Windows 11
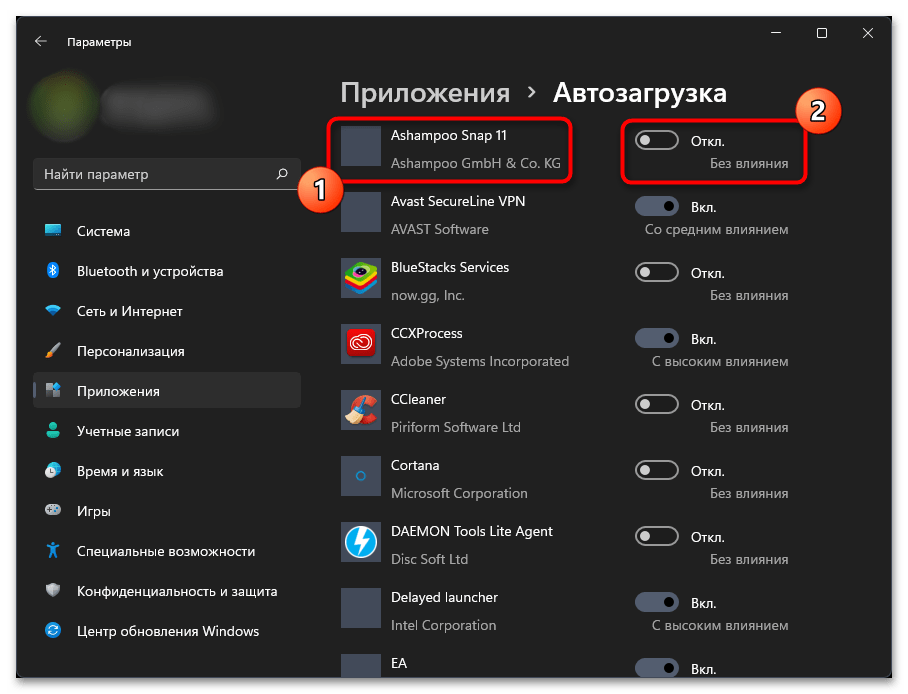
Способ 2: Отключение ненужных программ автозагрузки
На заполненность кеша оперативной памяти в Windows 11 очень влияют программы, добавленные в автозагрузку. Дело в том, что они включаются вместе с операционной системой и уже начинают работать фоном, занимая определенное пространство кешированной ОЗУ. Даже если вы перезагрузите ПК, то через небольшой промежуток времени в новом сеансе кеш снова забьется. Поэтому рекомендуем проверить список автозагрузки и отключить ненужные программы, чтобы не только освободить общий объем ОЗУ, но и уменьшить скорость наполнения кеша.
Подробнее: Отключение автозапуска программ в Windows 11
Способ 3: Завершение самых «прожорливых» процессов
Рекомендация по завершению задач в Windows 11, которые потребляют больше всего оперативной памяти, актуальна как для освобождения места, так и для очистки кеша. Скорее всего, как раз такие программы и создали во время своей активной работы значительный объем кешированной памяти, а после их полного завершения место должно освободиться. Выполнив эту операцию, программу можно снова запустить, а кеш будет набираться постепенно.
- Щелкните правой кнопкой мыши по «Пуску» и из появившегося контекстного меню выберите пункт «Диспетчер задач».
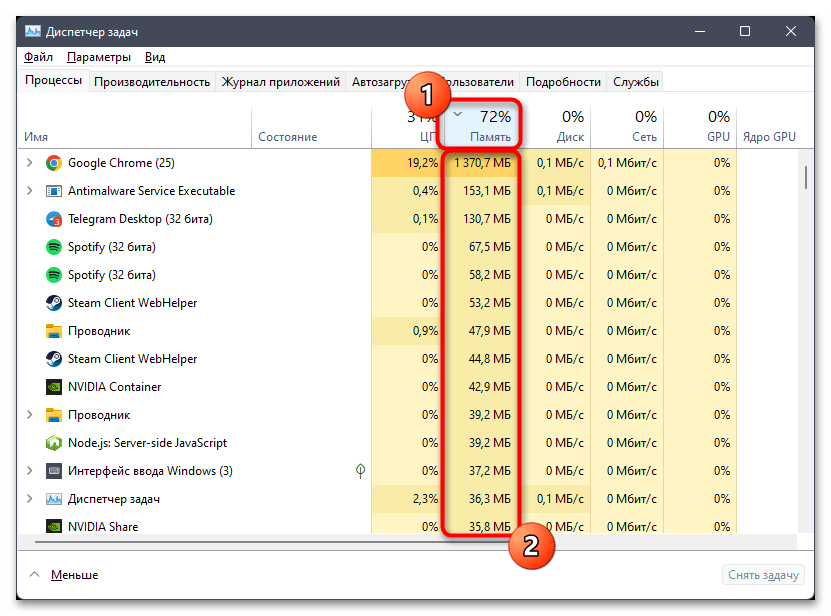
- На вкладке с процессами включите сортировку по потреблению оперативной памяти, нажав по соответствующему пункту. Найдите задачи, которые потребляют больше всего ресурса и которые можно сейчас отключить.
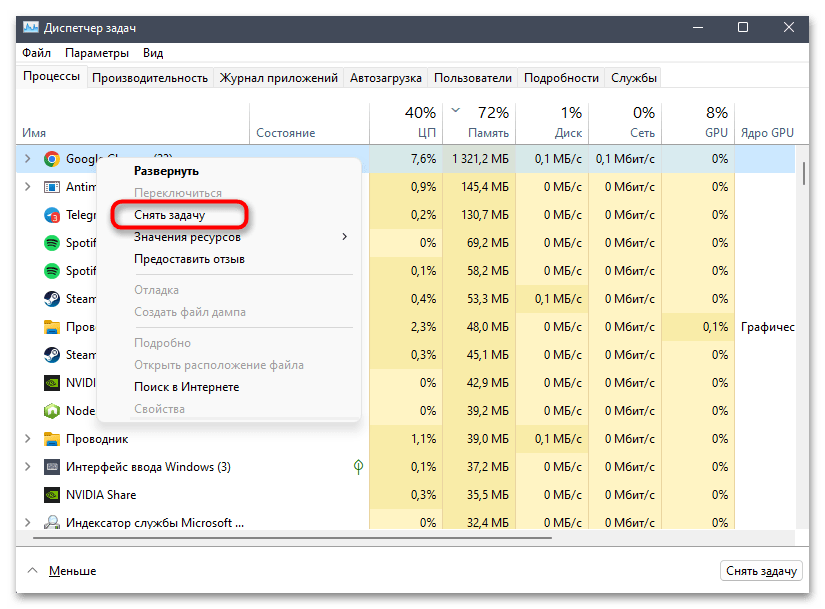
- Нажмите по такой задаче ПКМ и из контекстного меню выберите пункт «Снять задачу». Через 10-20 секунд ее можно повторно запустить и отслеживать, как будет заполняться объем кешированной оперативной памяти.
Способ 4: Редактирование реестра
Вариант с редактированием реестра подразумевает изменение всего одного параметра, который сделает так, чтобы файл подкачки очищался автоматически при выключении компьютера. Это позволит в следующем сеансе иметь на несколько десятков процентов меньше кешированной оперативной памяти, которая появляется сразу же после входа в систему. Соответственно, метод подходит только в том случае, если файл подкачки вообще включен в вашей операционной системе.
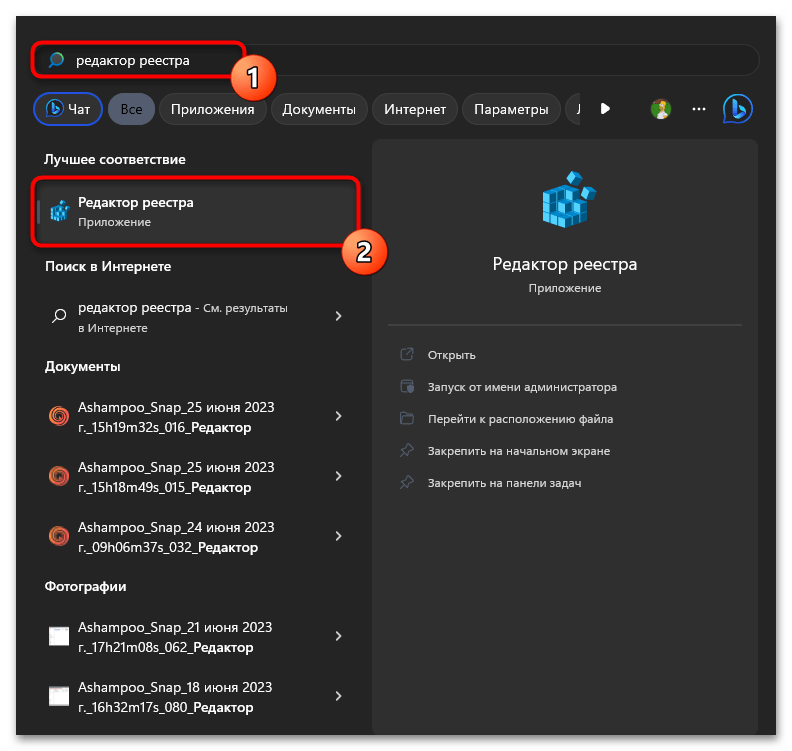
- Отыщите через «Пуск» «Редактор реестра» и запустите данное приложение.
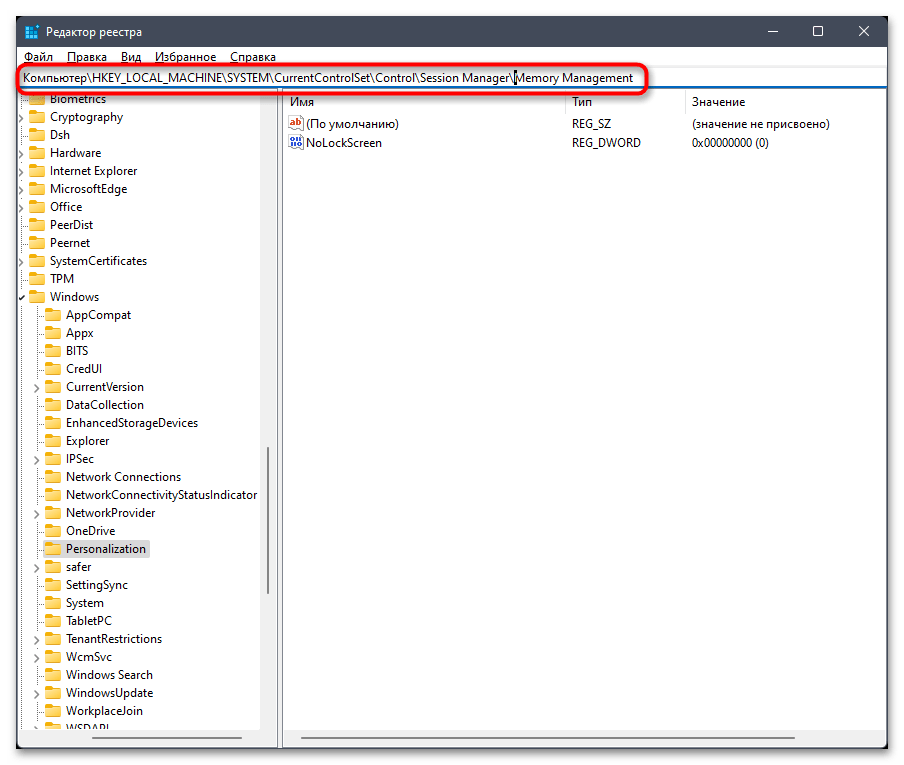
- В нем вставьте в адресную строку путь
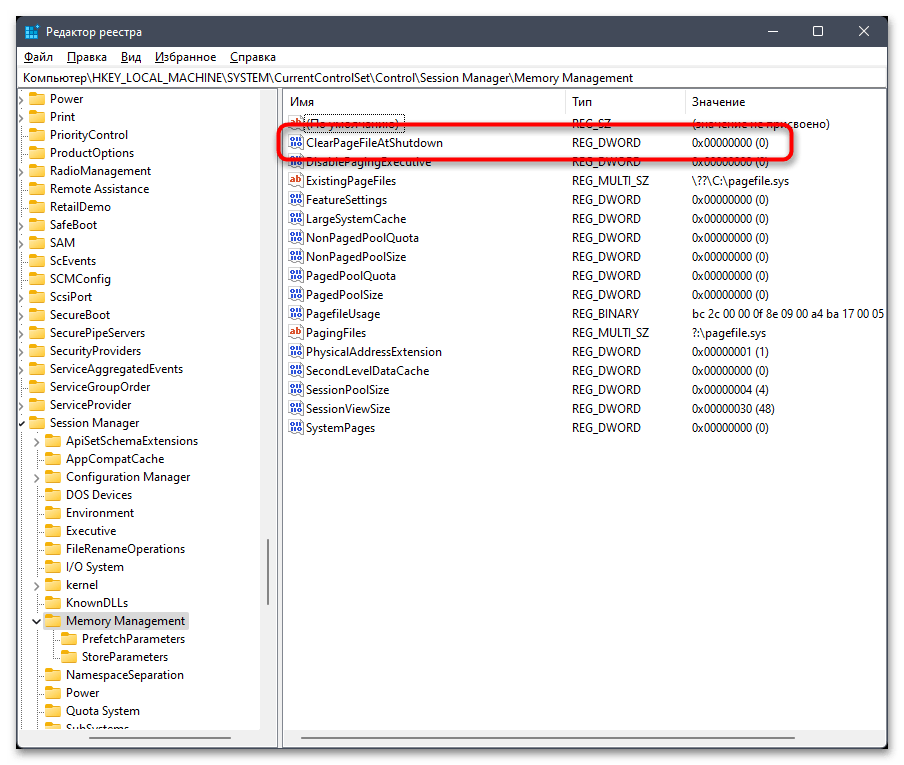
Компьютер\HKEY_LOCAL_MACHINE\SYSTEM\CurrentControlSet\Control\Session Manager\Memory Managementи перейдите по нему, нажав клавишу Enter. - Найдите параметр с названием «ClearPageFileAtShutdown» и дважды кликните по нему, чтобы открыть «Свойства».
- Установите значение как «1», чтобы активировать функцию очищения файла подкачки при выключении ПК. Сохраните изменения и отправьте ОС на перезагрузку, чтобы в следующем сеансе проверить, сколько кешированной ОЗУ будет сразу при запуске. Ее объем должен немного уменьшиться.
Способ 5: Создание ярлыка запуска выполнения ожидающих процессов
В интернете можно найти множество советов о том, что нужно открыть файлы «rundll32.exe» и «advapi32.dll», чтобы они очистили весь кеш оперативной памяти. На самом деле это действие позволяет только запустить выполнение ожидающих процессов, часть из которых как раз и заполнила кеш оперативной памяти до момента того, как задача будет завершена. При помощи этих файлов вы только инициируете запуск таких задач, после чего, возможно, объем кеша немного снизится, если в нем хранились какие-то записи, связанные с ожидающими процессами.
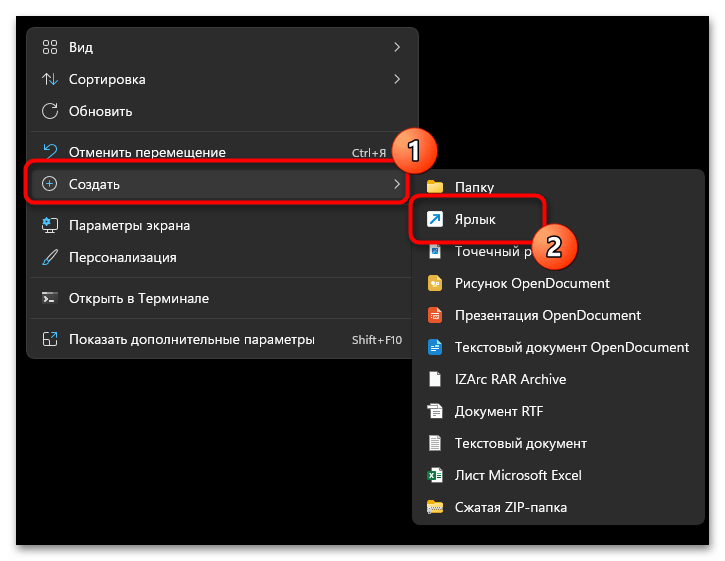
- Для удобства работы с командами лучше создать ярлык. Для этого щелкните ПКМ по пустому месту на рабочем столе, наведите курсор на «Создать» и выберите из списка соответствующий пункт.
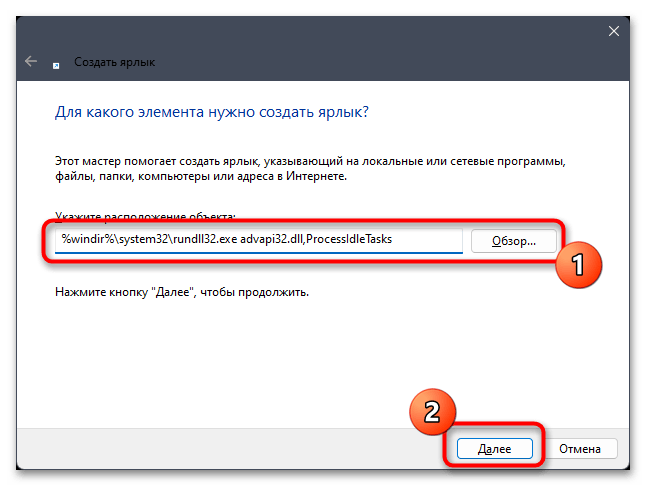
- Задайте для расположения объекта команду
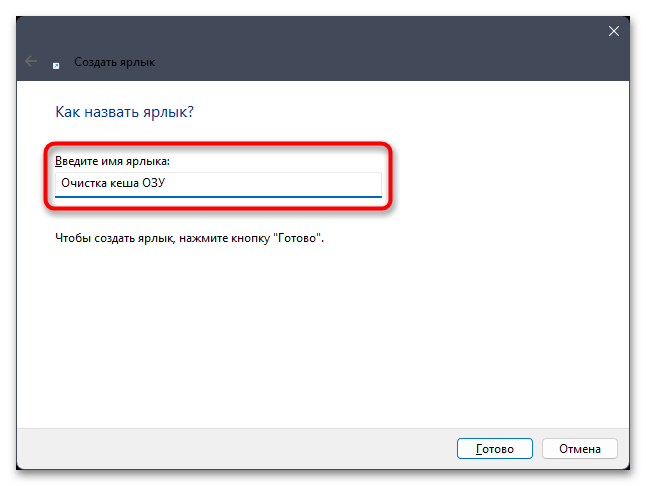
%windir%\system32\rundll32.exe advapi32.dll, ProcessIdleTasksи нажмите «Далее». - Имя для ярлыка установите любое, затем подтвердите его создание.
- Запустите его с рабочего стола и подождите 10 секунд, после чего переходите к проверке кеша оперативной памяти. Никаких графических меню или уведомлений при работе с ярлыком не появляется, все задачи выполняются фоном.
Способ 6: Отключение визуальных эффектов
Визуальные эффекты в Windows 11 тоже создают записи в кеше оперативной памяти, чтобы вы не видели никакой задержки при работе с графическим интерфейсом. Если вас не устраивает постоянный большой объем кешированного пространства, некоторые визуальные эффекты можно отключить, пожертвовав красотой оболочки операционной системы.
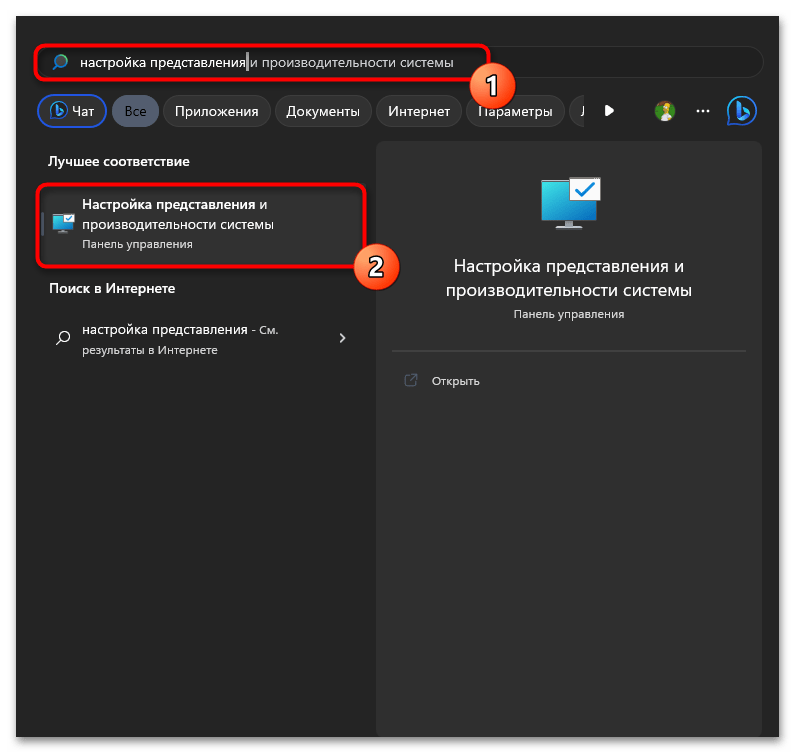
- Через поиск в «Пуске» отыщите элемент «Настройка представления и производительности системы», затем нажмите по нему ЛКМ для открытия соответствующего окна с параметрами.
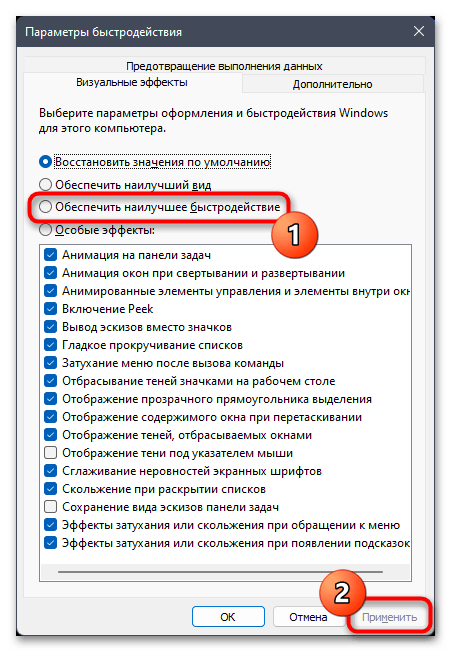
- Вы окажетесь на вкладке «Визуальные эффекты», где можно выбрать вариант «Обеспечить наилучшее быстродействие», чтобы большинство визуальных эффектов отключились автоматически.
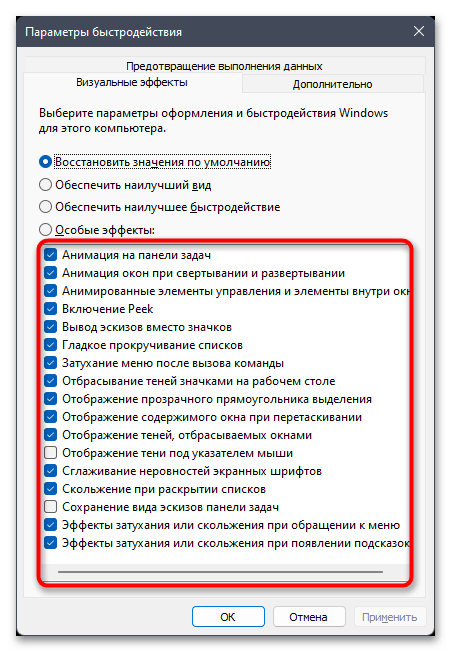
- Если вас интересует более тонкая настройка, просмотрите на весь список и снимите галочки с тех визуальных эффектов, которые вам кажутся бесполезными.
Способ 7: Использование сторонних программ
Если говорить о функциях полной очистки кешированной оперативной памяти без перезагрузки и выполнения множества действий вручную, то реализовать это можно исключительно при помощи сторонних программ. Далее будут рассмотрены два варианта, взаимодействие с которыми максимально простое и, грубо говоря, очистка происходит нажатием всего одной кнопки. Вы можете выбрать любую из предложенных бесплатных программ и повторить описанные действия, чтобы достичь желаемого результата.
RAMMap
RAMMap — официальная программа, распространяемая Microsoft, которая имеет необходимые функции для отслеживания потребляемой оперативной памяти и выполнения основных действий с ней. Есть и кнопки для очистки кешированной памяти, после чего вся она будет освобождена и начнет заполняться повторно при дальнейшей работе с ОС. Выполняется очистка при помощи RAMMap следующим образом:
Скачать RAMMap с официального сайта
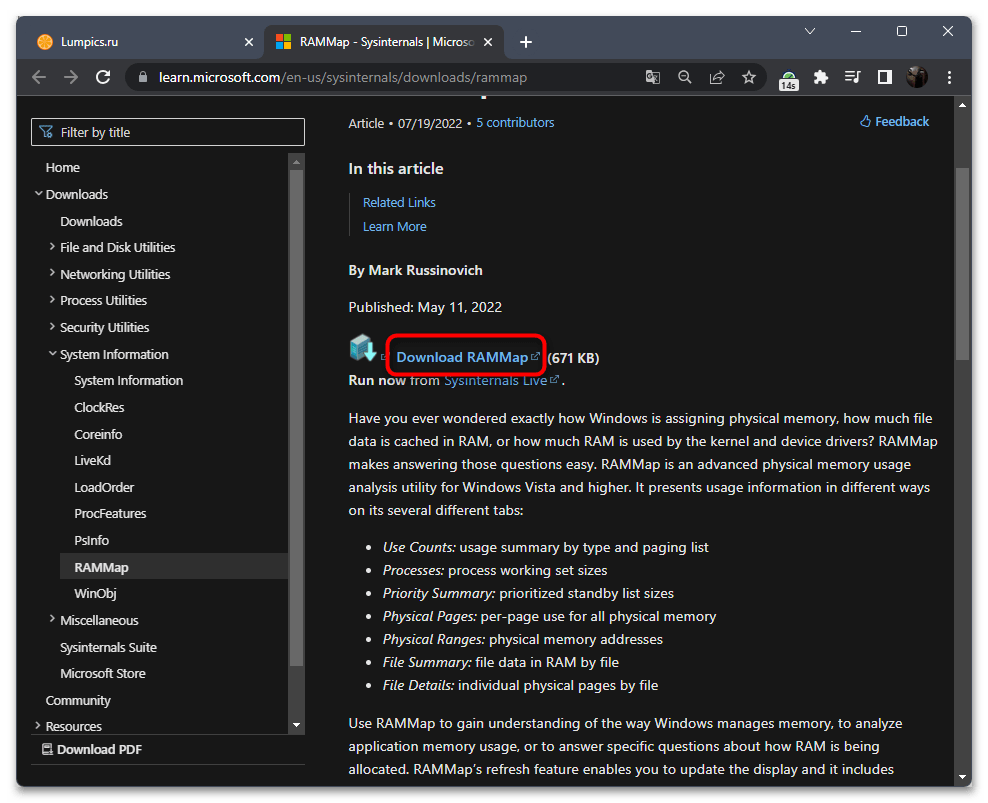
- Перейдите на страницу Microsoft с программой RAMMap и нажмите по ссылке для ее скачивания.
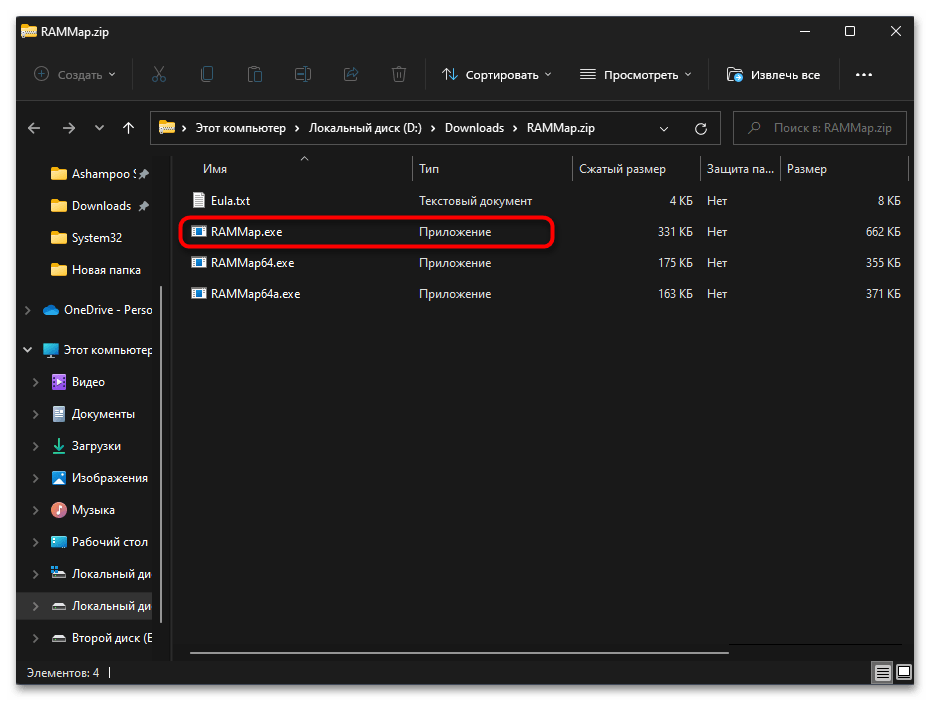
- Распакуйте полученный архив и запустите исполняемый файл с названием «RAMMap.exe».
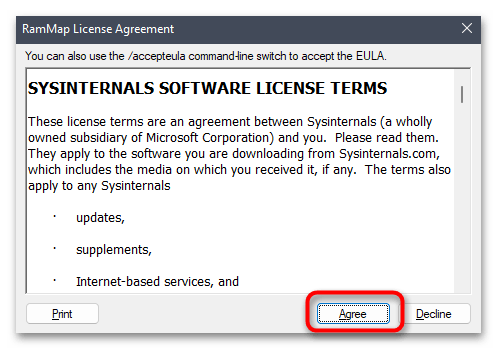
- При первом запуске подтвердите условия использования софта.
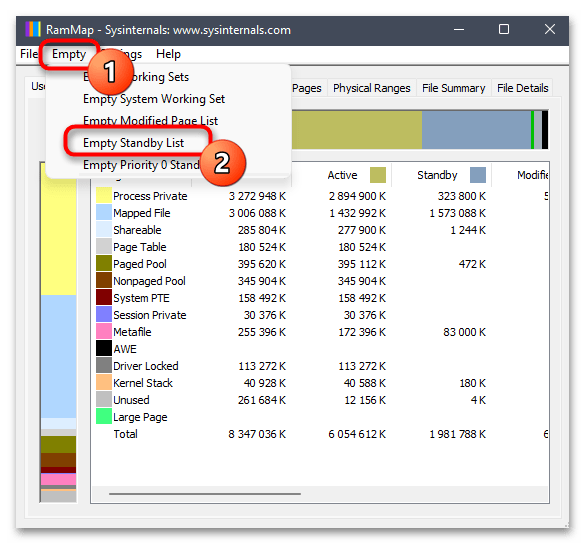
- В основном окне вызовите меню «Empty» и выберите пункт «Empty Standby List». Никаких уведомлений отображено не будет, поэтому можете сразу закрыть RAMMap и посмотреть, какой теперь объем кешированной памяти показывает «Диспетчер задач».
ATM
ATM — более профессиональное решение для мониторинга и диагностики оперативной памяти. В ней есть множество функций, о которых мы сейчас не будем говорить, поэтому не пугайтесь сложности интерфейса данного софта. Сейчас воспользуемся только одной кнопкой, которая запустит процесс очистки кешированной оперативной памяти, освобождая все возможное пространство.
Скачать ATM с официального сайта
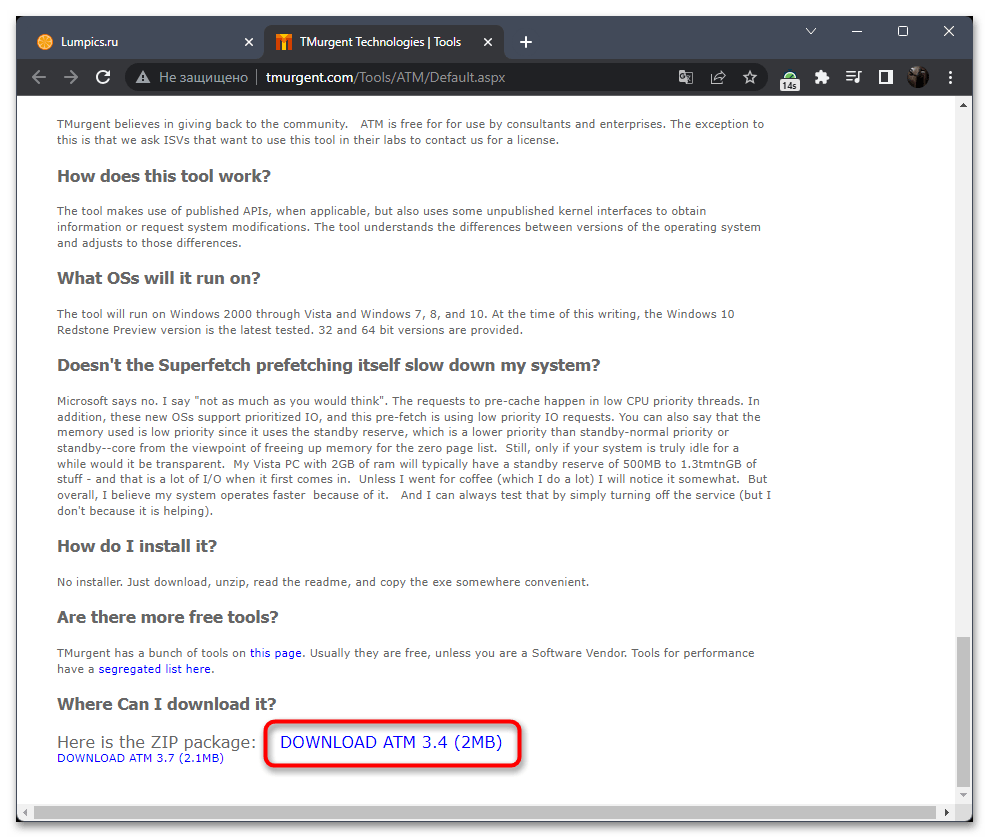
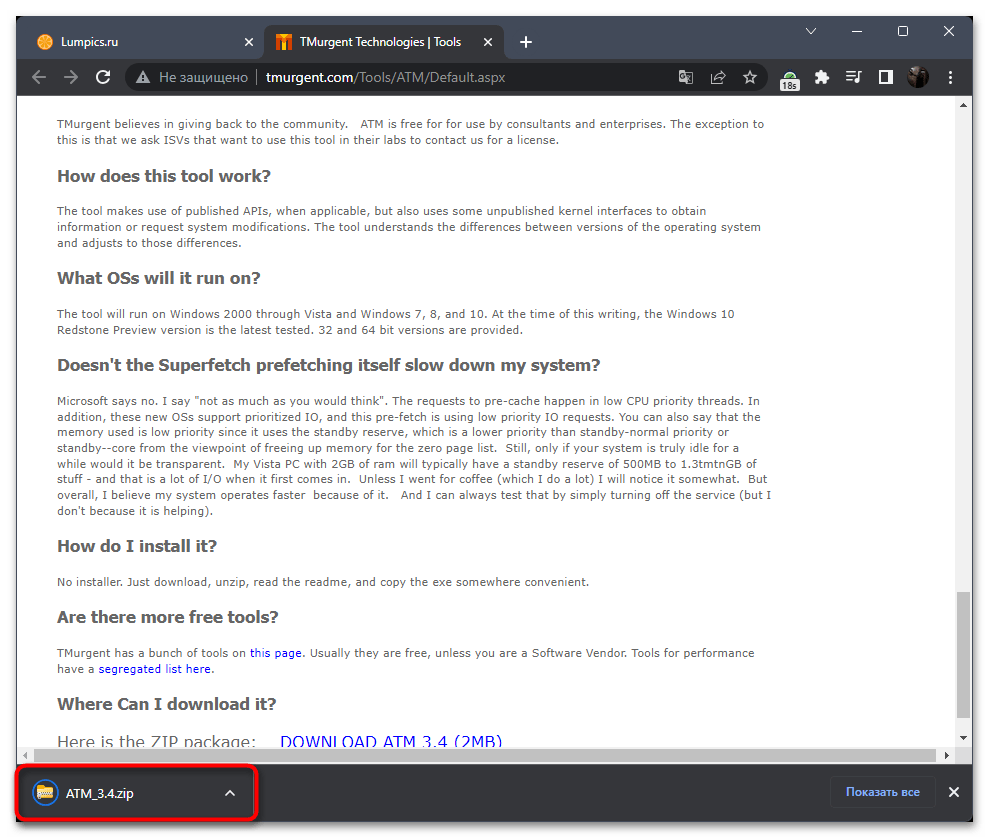
- На официальном сайте внизу страницы нажмите по ссылке «Download ATM».
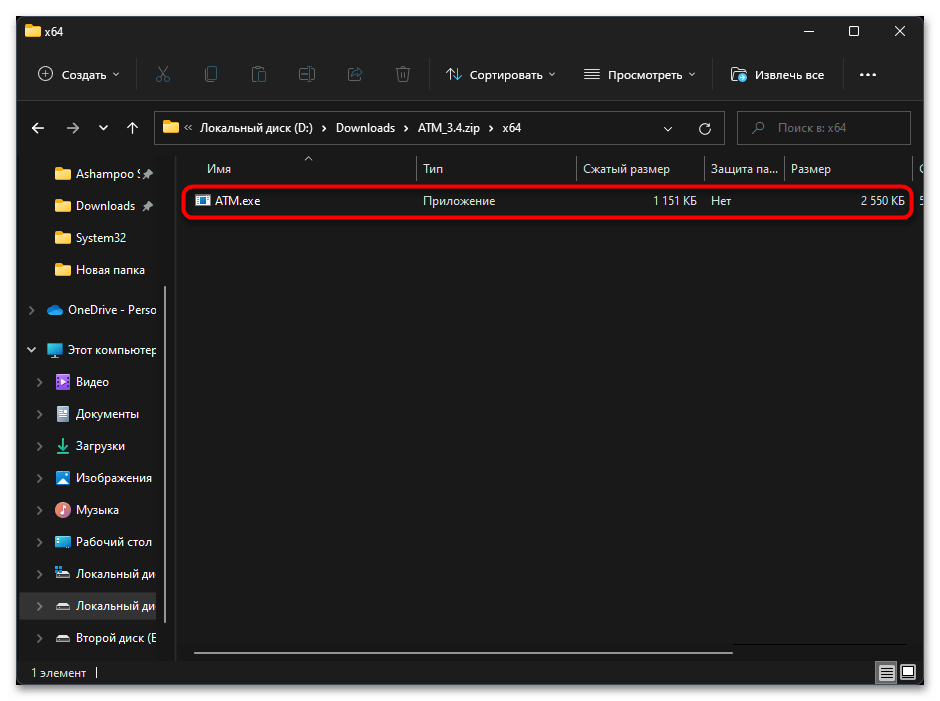
- Дождитесь загрузки архива и распакуйте его в любое удобное место на компьютере.
- Запустите находящийся в каталоге исполняемый файл. Он будет там только один.
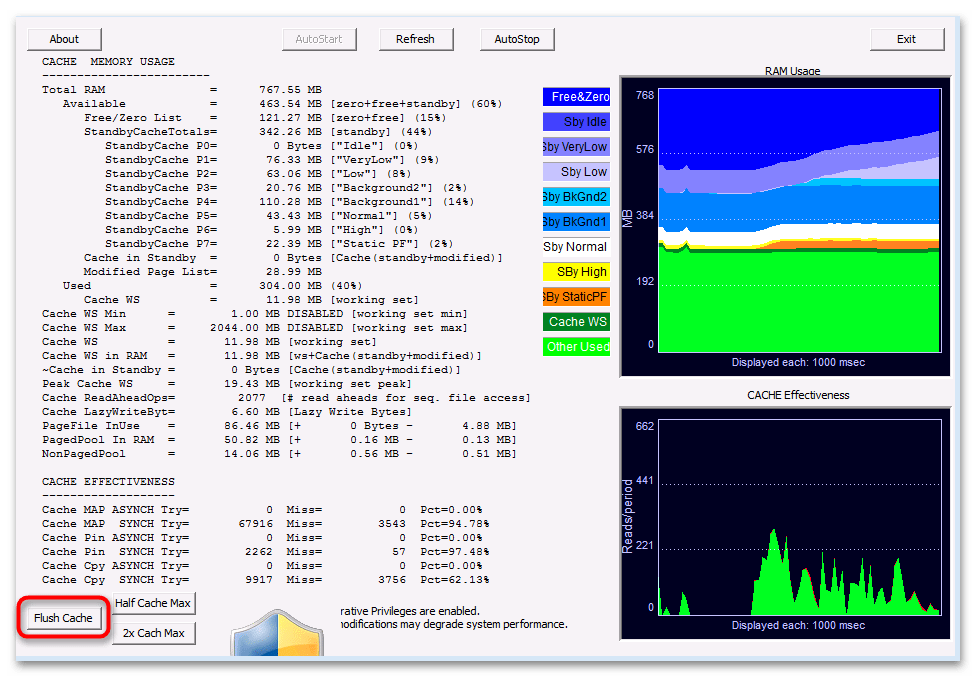
- В интерфейсе ATM нажмите кнопку «Flush Cache» и нажмите ее, подтверждая тем самым очистку кешированного пространства. На этом взаимодействие с софтом для выполнения поставленной задачи завершено.
Наша группа в TelegramПолезные советы и помощь
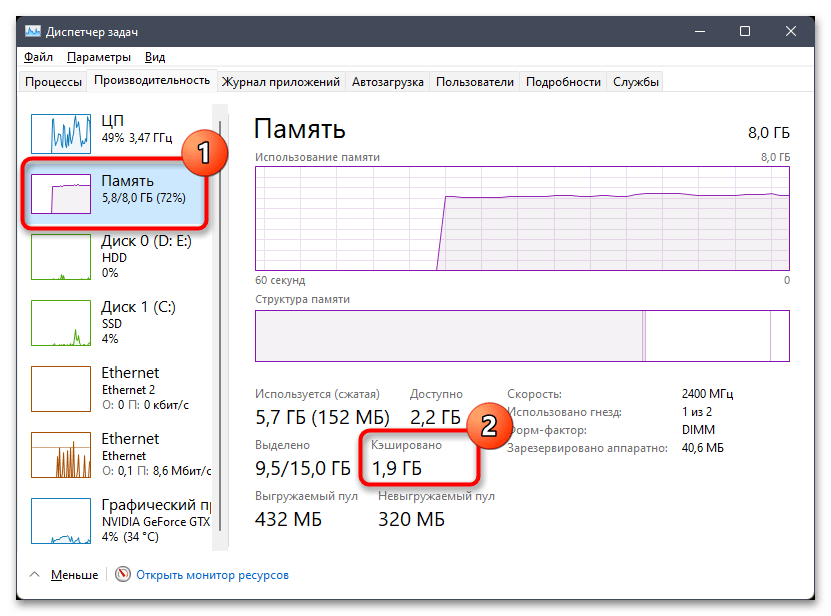
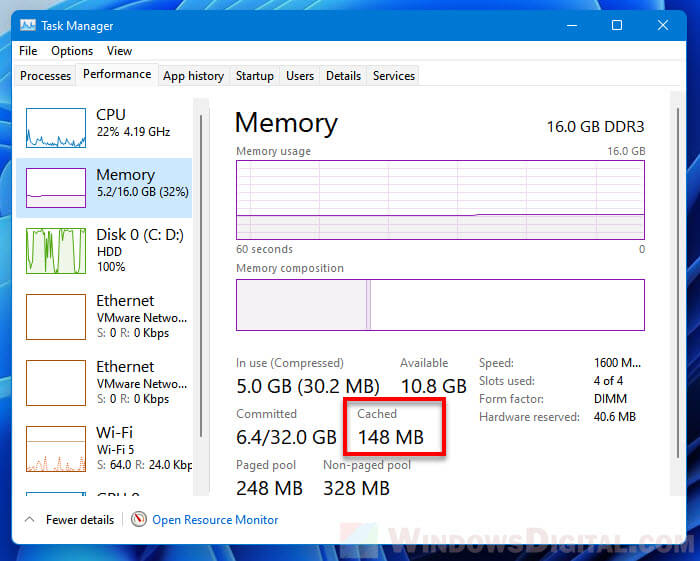
Пользователи Windows 11 (и предыдущей версии ОС), открыв вкладку «Производительность» в диспетчере задач, а в ней — раздел «Память», может увидеть, что часть оперативной памяти находится в статусе «Кэшировано», причём объем кэшированной памяти может быть значительным и расти со временем.
В этом материале о том, что такое кэшированная память в Windows, почему она может расти и занимать много от общего объема доступной RAM и как её можно очистить.
Память «Кэшировано» — что это?

Кэшированная память в Windows 11 — это занятая в настоящий момент оперативная память, которая сейчас не используется: эти страницы памяти содержат данные, которые потенциально могут потребоваться в работе как системных, так и сторонних процессов, но не задействованы прямо сейчас. В графическом представлении оперативной памяти в диспетчере задач она отображается как «Зарезервировано» с соответствующим описанием:

Задача — ускорить получение доступа к данным, которые часто используются или, с «точки зрения» менеджера памяти Windows 11 могут скоро потребоваться: из оперативной памяти получить эти данные можно будет значительно быстрее, чем с диска.
Иначе говоря, задача кэшированной памяти — ускорить работу системы и программ. По мере работы занятый памятью «кэшировано» объем будет увеличиваться, и он будет тем больше, чем больше свободной оперативной памяти присутствует на компьютере: лучше использовать её эффективно, чем просто держать свободной — сама по себе свободная оперативная память не несёт никакой пользы и не приводит к повышению производительности.
Как очистить кэшированную память
Частый вопрос пользователей касается очистки кэшированной памяти в Windows 11 или иных версиях системы. Здесь следует учитывать следующее: в большинстве случаев какая-либо ручная очистка этой памяти не требуется.
Если окажется, что какому-то из запущенных процессов: программе, игре или чему-либо ещё, потребуется больше оперативной памяти, чем доступно в статусе «Свободно», необходимое количество кэша будет очищено автоматически и с какими-либо проблемами из-за кэшированной оперативной памяти вы не столкнётесь.
Вы можете это легко проверить: запустите что-то такое, чему требуется очень много RAM, а потом снова зайдите в диспетчер задач — вы увидите, что объем памяти «Кэшировано» уменьшился сам по себе, хотя до этого лишь рос.
И, как я уже писал выше, числа в разделе «Свободно» сами по себе никак не влияют на общую производительность системы, хотя некоторые пользователи предпочитают видеть максимум свободной RAM.
Если же вы всё-таки решили очистить кэшированную память, для этого есть сторонние инструменты:
- EmptyStandbyList.exe (официальный сайт)
- Mem Reduct официальный сайт
- Intelligent Standby List Cleaner ( официальный сайт )
Например, при использовании первой потребуется запустить командную строку от имени администратора и ввести команду (указав полный путь к исполняемому файлу программы в команде)
emptystandbylist.exe standbylist
в результате кэшированная память будет очищена.
Я не могу прямо рекомендовать использование указанных инструментов: если кэшированная память не вызывает никаких проблем в работе системы, а лишь приводит к внутреннему дискомфорту, когда вы видите её объем, очистка не требуется.

Speed up your Windows 11 performance by clearing your RAM Cache. It’s your computer’s short-term memory—fast but limited in space. Overload it, and your system slows to a crawl.
Clearing RAM doesn’t just free up space; you’re supercharging your machine for the tasks ahead. Learn why it’s a critical part of your PC’s maintenance routine.
What is RAM?
RAM—Random Access Memory—is your computer’s mental scratchpad. RAM holds data for your CPU to grab instantly, making your system’s performance fast. But, when RAM reaches its limit, your PC’s performance stutters, making even the simplest tasks feel like a slog. Let’s dig into why that matters.
Why is RAM important?
The amount of RAM you have directly impacts your system’s performance. Insufficient RAM means your computer will struggle, as it doesn’t have the storage space to complete its tasks, particularly when multitasking or juggling multiple programs. More RAM equals a zippier, more responsive machine.
One solution is more RAM. It lets your computer hold more data at the ready, avoiding slower writes to your hard drive — making multitasking and app-switching almost telepathic.
Why is clearing RAM important?
Your RAM Cache is your computer’s real-time working memory. Managed by Windows, this temporary mini-storage compartment holds frequently used data for quick retrieval, acting as a buffer between your CPU and slower storage drives (SSD or HDD). By storing this data in its cache, it speeds up the performance of apps.
But here’s the hitch: overload your RAM Cache, and your system hits a bottleneck. Clearing this cache speeds up data access and fine-tunes your system’s performance. Plus, RAM is a volatile memory. This means every time you reboot, you’re giving your computer a fresh start.
Imagine it as the desk where your PC juggles all its tasks in real time. Cram too much onto this desk, and tasks get delayed; productivity takes a nosedive. Clearing RAM is like decluttering your desk and making room for new tasks.
5 signs it’s time to clear your RAM
Watch for these red flags to know when to free up memory:
- Error messages: Get pop-ups like «Low Memory» or «System Out of Resources»? That’s your cue to clear your RAM.
- Sluggish system response: Noticeable lag? Clearing RAM boosts performance immediately. An overloaded cache slows down your computer.
- Software crashes: Frequent application stalls or crashes? Resetting your RAM cache smooths out these disruptions for a better user experience.
- High CPU usage: CPU running at high capacity even for simple tasks? It’s a hint your RAM needs decluttering, relieving your processor from undue stress.
- Basic troubleshooting: Facing application errors or performance issues? Your first step should be to clear the RAM cache. This often resolves minor issues, allowing you to tackle more complex solutions if needed.
Keep reading for a few different ways you can free up RAM space.
How to check your RAM cache on Windows 11
To find out how much RAM cache your system uses, open the Task Manager. Here’s a quick list:
- Press Windows Key + X to open the Power User Menu.
- Select Task Manager.
- Select the hamburger menu that’s in the top-left corner.
- Navigate to Performance on the left sidebar, then click Memory in the right menu.
- Look for the Cached value to see your current RAM cache usage.
Now that you know where to find it, let’s work out how to clear your RAM Cache.
How to clear RAM cache on Windows 11
Here’s a step-by-step guide to clearing that RAM cache. Follow these methods to give your system a quick refresh.
1. Restart your computer to clear the RAM Cache
A restart is as basic as it gets. It’s effective because it flushes the RAM cache. Windows shuts down all your background applications and services, including those using the RAM cache.
- Press Alt + F4 to open the shutdown menu.
- Select Restart from the drop-down options.
- Click OK to confirm and restart your computer.
Restarting gives your system a clean slate, wiping the RAM cache and allowing your machine to start fresh. It’s not the best option if you’re in the middle of something, but it’s a surefire way to clear that RAM.
2. Analyze RAM with RAMMap
RAMMap is a nifty tool by Sysinternals that gives you a deep dive into how Windows allocates your RAM. You can discover which processes eat up your RAM to the nitty-gritty details. You can fine-tune your system’s performance and even clear specific cache areas.
Here’s how to use RAMMap
- Download RAMMap from the Sysinternals website.
- Extract the ZIP file and run the RAMMap.exe.
- Check out the various tabs to understand RAM allocation.
RAMMap is more of a diagnostic tool than a quick fix. But it’s a great way to understand what’s happening so you can make informed decisions on managing it.
3. Delete temporary files
Next on the list is clearing out temporary files. By deleting them, you remove unnecessary files that accumulate over time. This includes data that may be stored in the RAM cache.
Before clearing temp files, it’s best to save your work and close any open apps to play it safe.
Delete temporary data running under your user account
- Type Win + R to bring up the Run window.
- Enter %temp%. Click Enter to access the folder with temporary files. Usually, it’s: C:\Users\[Username]\AppData\Local\Temp
- Use Ctrl + A to highlight everything in that folder.
- Tap the Delete key to clear all the files.
Delete your system-level temporary directory files
- Type Win + R to re-open the Run dialog.
- Enter temp. Press Enter to locate your folder with temporary files.
- Wipe out all the files in this second folder to ensure you’ve covered all your bases.
Now, your RAM cache is looking a lot less cluttered.
4. End processes via Windows Task Manager
The Task Manager isn’t just for closing frozen apps but also for clearing RAM. You can end resource-hogging processes, freeing up more space for other tasks. Just proceed cautiously, as you don’t want to shut down essential system processes accidentally.
Here’s how to end processes through Task Manager:
- Press Ctrl + Shift + Esc to open Task Manager, or the steps outlined above.
- Navigate to the Processes tab. You’ll see a list of running apps and background processes.
- Identify high-memory usage processes: Click the Memory column header to sort from most to least RAM usage.
- Right-click on the app you want to end. Avoid system processes or ones you’re unfamiliar with.
- Select End Task from the context menu to terminate the process. Then, repeat the same process for other processes.
5. Reduce startup programs you don’t need
Startup programs are those that activate when your computer is booted up. Too many startup programs can slow down your computer and consume RAM immediately. Lighten the load by disabling non-essential apps that launch at startup.
How to disable startup programs
- Press Ctrl + Shift + Esc to open Task Manager.
- Click the Startup apps tab. You’ll see a list of apps set to launch at boot-up.
- Identify non-essential apps: Sort by Startup impact to see which apps are resource-heavy.
- Right-click and pick «Disable» for apps you don’t need at startup.
- Reboot your device for these changes to take effect.
When these programs start, each one consumes RAM in the background. By removing them, you’ve streamlined your startup process, freeing up RAM and accelerating boot time!
6. Uninstall unused apps to free up RAM
Ditch those apps you never touch. They do more than take up disk space; they can hog your RAM.
- In the taskbar search, enter ‘Control Panel’ and click to open it.
- Navigate to Programs > Programs and Features.
- Right-click on the unwanted program and choose Uninstall or Uninstall/Change.
- Follow the on-screen instructions to finalize.
7. Stop background apps
In Windows, apps can continue to operate even when they’re not open. Background apps can be silent memory consumers, eating up:
- RAM
- Battery life
- Mobile data
So, let’s remove them.
How to disable background apps in Windows 11
- Open Windows Settings: Hit Win + I to open.
- In the left pane, click Apps.
- Click on Installed apps in Windows 11. Use search if you need to find a specific app.
- Next to the app, click the three-dots menu, then select Advanced options. If the option isn’t there, the app doesn’t support this feature.
- Scroll down until you find the Background Apps permissions section.
- Click the drop-down for Let this app run in the background and select Never.
8. Use ReadyBoost to supplement RAM
ReadyBoost is an old-school trick for enhancing RAM without actually adding physical RAM. It uses a USB drive to act like extra RAM. Great for older systems but won’t work or speed up if you have an SSD.
Here’s how to set up ReadyBoost
- Plug in a USB drive that you’re willing to allocate to ReadyBoost.
- Open File Explorer and right-click on the USB drive, then select Properties.
- Go to the ReadyBoost tab.
- Choose Use this device and allocate the amount of space you want to use for ReadyBoost.
- Click OK to finalize the settings.
ReadyBoost won’t replace actual RAM, but it’s a helpful tweak when you need a quick performance boost.
The Takeaway: RAM’s Your Fast-Track in Windows 11
You now know why RAM is your PC’s MVP and how to keep it uncluttered. Clear your RAM, speed up Windows 11. It’s that simple. Make it a habit.
Recommended Products
Robert is a Taiwan-based writer and digital marketer at iamrobert design. He has a passion for helping people simplify their lives through tech.
When you run a program or a game, Windows will use some of your computer’s RAM as cache so that whenever the same data is requested by the program, it can be quickly retrieved from the RAM cache.
When the cached memory reaches the limit of your RAM (high memory usage), especially when you run too many programs or games at once, you will often encounter issues such as sudden slow down and lag when you use the application, out of memory errors, or even crashing of apps or games.
Also see: How to Clear DirectX Shader Cache (Windows 11)
In such situation, you can close some programs you don’t use to free up some RAM. However, when you close a program, Windows will sometimes not clear the cache the program used. The data will stay in the cache so that when you open the same program again, it can launch faster and run faster due to required data being still in the cache.
In spite of that, Windows is still smart enough to know that when RAM is required for another program, it will automatically free up the unnecessary memory cache so that other programs can use it.
Despite all that, you can actually manually clear the RAM cache in Windows 11 by using a simple community made tool called Empty Standby List. This tool is able to clear the cached memory even when the programs are running. The instruction below will show you how to clear memory cache and free up RAM in Windows 11.
Learn more: How to Clear Cache (Memory, Browser or Temp Files) on Windows 11
How to clear RAM cache in Windows 11
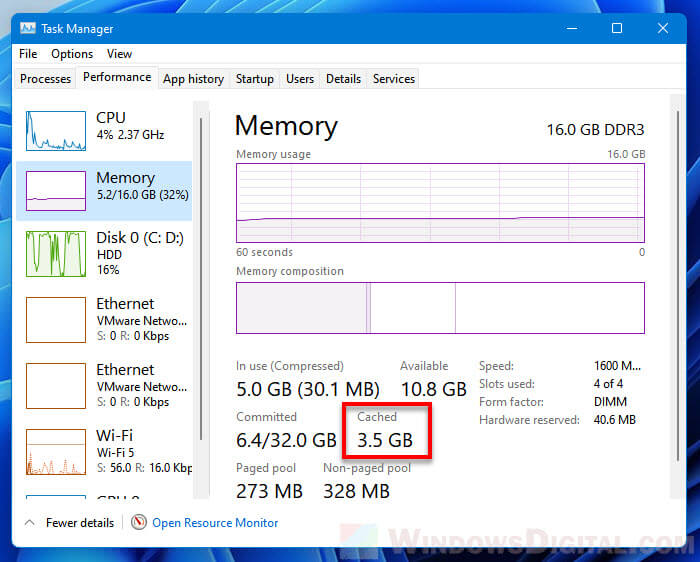
To learn how much RAM is currently being used for cached, first open Task Manager by pressing Ctrl + Shift + Esc keys. Next, select the Performance tab then select Memory from the left pane. You can see how much memory is currently in cache under “Cached” (next to Committed).
To clear the cached memory (RAM) in Windows 11, follow the steps below.
1. Download EmptyStandbyList.exe from the following page.
https://wj32.org/wp/software/empty-standby-list/
2. Once downloaded, place the executable file to the desktop or anywhere else you want. This is the file you need to run every time you want to clear the RAM cache. To run the executable file, right-click it and select Run as administrator. The tool requires administrative privileges to run, otherwise it won’t work.
3. Once you run the file, a command prompt window will appear for a split second. It means that the tool has been executed and the RAM cache is cleared. You can now open the Task Manager > Performance tab and check how much cached RAM has been cleared. If the EmptyStandbyList.exe is executed successfully (with administrative privileges), you should see that the cached memory is significantly cleared.
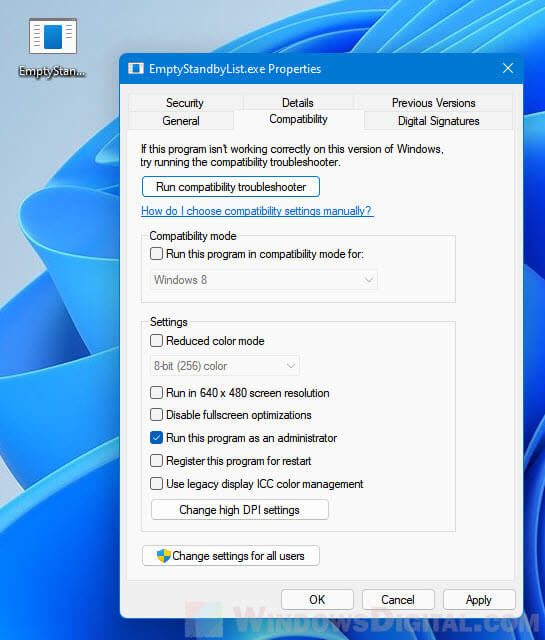
Since the executable file has to be run as administrator, to make it much easier to run the file as admin without first right-clicking it, you can change its properties so that it will always be run as admin whenever you double-click to open it.
Related: How to Fix Game Lag and Stuttering on Windows 11
To do so, right-click the file and select Properties. Select Compatibility tab and enable the checkbox that says “Run this program as an administrator” in the Settings section. Then, click OK to save the changes. After doing so, every time you double-click to run the file, it will automatically be run as administrator.
How to free up RAM in Windows 11
The workaround above to clear cached RAM may not be useful if you continue to run excessive amount of apps or games that your computer’s RAM couldn’t sustain. Even after force clearing cached memory that way, the running apps will eventually fill up the RAM cache again.
It’s a good practice to always check what else is running on your PC and terminate whatever process that you don’t need. Some programs may have background process that is running without your knowledge. You can check what processes take up most of your RAM and kill the processes that you don’t need running to free up some RAM.
See also: How to Force Close Program in Windows 11 Without Task Manager
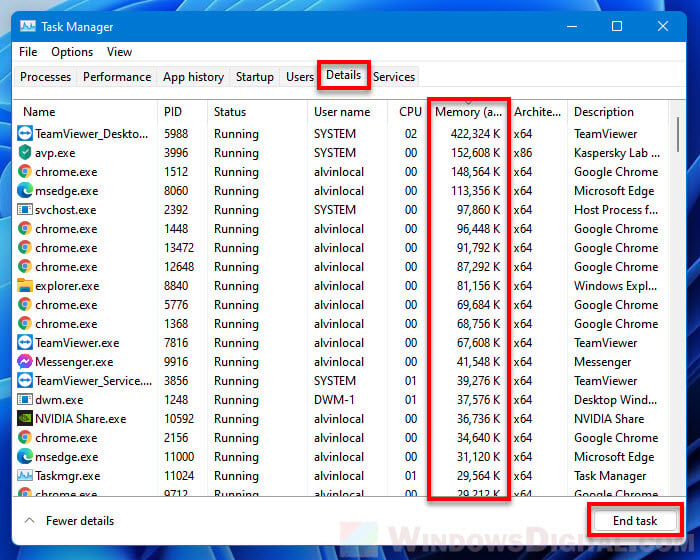
To terminate unnecessary processes to free up RAM in Windows 11, first press Ctrl + Shift + Esc to Task Manager. In the Processes tab, click the Memory column to sort the processes by their currently consuming memory from the most to the least. Select any app, program or game that you want to terminate, and click End task to kill it.

Alternatively, you can check the same by going to the Details tab in Task Manager. Click the Memory column to sort processes by memory (RAM) usage, and then decide which process you can safely terminate. To terminate a process, select the process and click End task.