
Пройдите тест, узнайте какой профессии подходите
Работать самостоятельно и не зависеть от других
Работать в команде и рассчитывать на помощь коллег
Организовывать и контролировать процесс работы
Введение в скрипты на Python
Python — это мощный и гибкий язык программирования, который идеально подходит для написания скриптов. Скрипты на Python могут автоматизировать рутинные задачи, обрабатывать данные и выполнять множество других полезных функций. В этой статье мы рассмотрим, как начать писать и использовать скрипты на Python, даже если вы новичок. Мы подробно разберем все этапы, начиная с установки и настройки среды разработки, и заканчивая примерами полезных скриптов, которые можно использовать в повседневной работе.

Установка и настройка среды разработки
Прежде чем начать писать скрипты, необходимо установить Python и настроить среду разработки. Следуйте этим шагам:
-
Скачайте и установите Python:
– Перейдите на официальный сайт python.org.
– Скачайте последнюю версию Python для вашей операционной системы. На сайте есть версии для Windows, macOS и Linux.
– Следуйте инструкциям по установке, которые включают в себя добавление Python в системный PATH, что позволит вам запускать Python из командной строки. -
Установите текстовый редактор или IDE:
– Рекомендуемые редакторы: Visual Studio Code, PyCharm, Sublime Text. Каждый из этих редакторов имеет свои преимущества. Visual Studio Code — это бесплатный и мощный редактор с множеством расширений. PyCharm — это профессиональная IDE, которая предлагает множество инструментов для разработки на Python. Sublime Text — это легкий и быстрый редактор с поддержкой множества языков программирования.
– Установите выбранный редактор и настройте его для работы с Python. Например, в Visual Studio Code можно установить расширение Python, которое добавляет поддержку синтаксиса, отладку и другие полезные функции. -
Проверьте установку Python:
– Откройте терминал (или командную строку).
– Введите командуpython --versionилиpython3 --version, в зависимости от вашей операционной системы.
– Убедитесь, что установлена последняя версия Python. Если команда возвращает ошибку, возможно, Python не был добавлен в системный PATH, и вам нужно будет сделать это вручную.
Основы написания скриптов на Python
Теперь, когда у вас установлена среда разработки, можно приступить к написанию первого скрипта. Рассмотрим основные элементы скрипта на Python и познакомимся с базовыми конструкциями языка.
Создание первого скрипта
- Откройте текстовый редактор.
- Создайте новый файл и сохраните его с расширением
.py(например,hello_world.py). Расширение.pyуказывает на то, что файл содержит код на Python. - Напишите следующий код:
- Сохраните файл. Теперь у вас есть первый скрипт на Python, который выводит строку «Hello, World!» на экран.
Основные конструкции языка
Python использует простую и понятную синтаксическую структуру. Вот несколько основных конструкций, которые вам нужно знать:
- Переменные и типы данных:
Переменные в Python не требуют явного указания типа данных, так как язык динамически типизирован. Это означает, что тип переменной определяется автоматически на основе присвоенного значения.
- Условные операторы:
Условные операторы позволяют выполнять разные блоки кода в зависимости от условий. В примере выше, если переменная age больше 18, будет выведено «Adult», иначе — «Minor».
- Циклы:
Циклы позволяют выполнять блок кода несколько раз. В данном примере цикл for выполняется 5 раз, выводя значения от 0 до 4.
- Функции:
Функции позволяют группировать код в логические блоки, которые можно вызывать по имени. В примере выше функция greet принимает один аргумент name и выводит приветственное сообщение.
Запуск и отладка скриптов
После написания скрипта его необходимо запустить и, возможно, отладить. Рассмотрим, как это сделать.
Запуск скрипта
- Откройте терминал.
- Перейдите в директорию, где сохранен ваш скрипт:
- Запустите скрипт:
Если все сделано правильно, вы увидите вывод «Hello, World!» в терминале. Это означает, что ваш скрипт успешно выполнен.
Отладка скриптов
Отладка помогает найти и исправить ошибки в коде. Вот несколько способов отладки:
- Используйте встроенные функции:
Добавление print-заявлений в код позволяет отслеживать значения переменных и выполнение программы. Это простой, но эффективный способ отладки.
- Используйте отладчик:
– В Visual Studio Code и PyCharm есть встроенные отладчики, которые позволяют пошагово выполнять код и проверять значения переменных. Вы можете устанавливать точки останова (breakpoints), чтобы остановить выполнение программы в определенных местах и исследовать состояние программы.
Примеры полезных скриптов и их применение
Теперь рассмотрим несколько примеров полезных скриптов, которые могут пригодиться в повседневной работе. Эти примеры помогут вам понять, как использовать Python для решения различных задач.
Скрипт для переименования файлов
Этот скрипт переименовывает все файлы в указанной директории, добавляя префикс к их именам:
Скрипт использует модуль os для работы с файловой системой. Функция rename_files принимает два аргумента: путь к директории и префикс, который будет добавлен к именам файлов. Скрипт перебирает все файлы в директории и переименовывает их, добавляя префикс.
Скрипт для отправки email
Этот скрипт отправляет email с использованием библиотеки smtplib:
Этот скрипт использует библиотеку smtplib для отправки email. Функция send_email принимает три аргумента: тему письма, тело письма и адрес получателя. Скрипт создает объект MIMEText для тела письма и устанавливает необходимые заголовки. Затем он подключается к SMTP-серверу и отправляет письмо.
Скрипт для парсинга веб-страниц
Этот скрипт извлекает заголовки статей с веб-страницы с использованием библиотеки BeautifulSoup:
Скрипт использует библиотеку requests для загрузки веб-страницы и библиотеку BeautifulSoup для парсинга HTML-кода. Функция fetch_article_titles принимает URL страницы, загружает ее содержимое и извлекает заголовки статей, заключенные в теги <h2>. Затем она возвращает список заголовков.
Эти примеры помогут вам понять, как использовать Python для решения различных задач. Начните с простых скриптов и постепенно переходите к более сложным задачам. 🚀
Читайте также
Время на прочтение10 мин
Количество просмотров81K
Python — это язык программирования, который отлично подходит для разработки самостоятельных скриптов. Для того чтобы добиться с помощью подобного скрипта желаемого результата, нужно написать несколько десятков или сотен строк кода. А после того, как дело сделано, можно просто забыть о написанном коде и перейти к решению следующей задачи.
Если, скажем, через полгода после того, как был написан некий «одноразовый» скрипт, кто-то спросит его автора о том, почему этот скрипт даёт сбои, об этом может не знать и автор скрипта. Происходит подобное из-за того, что к такому скрипту не была написана документация, из-за использования параметров, жёстко заданных в коде, из-за того, что скрипт ничего не логирует в ходе работы, и из-за отсутствия тестов, которые позволили бы быстро понять причину проблемы.

При этом надо отметить, что превратить скрипт, написанный на скорую руку, в нечто гораздо более качественное, не так уж и сложно. А именно, такой скрипт довольно легко превратить в надёжный и понятный код, которым удобно пользоваться, в код, который просто поддерживать как его автору, так и другим программистам.
Автор материала, перевод которого мы сегодня публикуем, собирается продемонстрировать подобное «превращение» на примере классической задачи «Fizz Buzz Test». Эта задача заключается в том, чтобы вывести список чисел от 1 до 100, заменив некоторые из них особыми строками. Так, если число кратно 3 — вместо него нужно вывести строку Fizz, если число кратно 5 — строку Buzz, а если соблюдаются оба этих условия — FizzBuzz.
Исходный код
Вот исходный код Python-скрипта, который позволяет решить задачу:
import sys
for n in range(int(sys.argv[1]), int(sys.argv[2])):
    if n % 3 == 0 and n % 5 == 0:
        print("fizzbuzz")
    elif n % 3 == 0:
        print("fizz")
    elif n % 5 == 0:
        print("buzz")
    else:
        print(n)
Поговорим о том, как его улучшить.
Документация
Я считаю, что полезно писать документацию до написания кода. Это упрощает работу и помогает не затягивать создание документации до бесконечности. Документацию к скрипту можно поместить в его верхнюю часть. Например, она может выглядеть так:
#!/usr/bin/env python3

"""Simple fizzbuzz generator.

This script prints out a sequence of numbers from a provided range
with the following restrictions:

 - if the number is divisible by 3, then print out "fizz",
 - if the number is divisible by 5, then print out "buzz",
 - if the number is divisible by 3 and 5, then print out "fizzbuzz".
"""
В первой строке даётся краткое описание цели скрипта. В оставшихся абзацах содержатся дополнительные сведения о том, что именно делает скрипт.
Аргументы командной строки
Следующей задачей по улучшению скрипта станет замена значений, жёстко заданных в коде, на документированные значения, передаваемые скрипту через аргументы командной строки. Реализовать это можно с использованием модуля argparse. В нашем примере мы предлагаем пользователю указать диапазон чисел и указать значения для «fizz» и «buzz», используемые при проверке чисел из указанного диапазона.
import argparse
import sys


class CustomFormatter(argparse.RawDescriptionHelpFormatter,
                      argparse.ArgumentDefaultsHelpFormatter):
    pass


def parse_args(args=sys.argv[1:]):
    """Parse arguments."""
    parser = argparse.ArgumentParser(
        description=sys.modules[__name__].__doc__,
        formatter_class=CustomFormatter)

    g = parser.add_argument_group("fizzbuzz settings")
    g.add_argument("--fizz", metavar="N",
                   default=3,
                   type=int,
                   help="Modulo value for fizz")
    g.add_argument("--buzz", metavar="N",
                   default=5,
                   type=int,
                   help="Modulo value for buzz")

    parser.add_argument("start", type=int, help="Start value")
    parser.add_argument("end", type=int, help="End value")

    return parser.parse_args(args)


options = parse_args()
for n in range(options.start, options.end + 1):
    # ...
Эти изменения приносят скрипту огромную пользу. А именно, параметры теперь надлежащим образом документированы, выяснить их предназначение можно с помощью флага --help. Более того, по соответствующей команде выводится и документация, которую мы написали в предыдущем разделе:
$ ./fizzbuzz.py --help
usage: fizzbuzz.py [-h] [--fizz N] [--buzz N] start end

Simple fizzbuzz generator.

This script prints out a sequence of numbers from a provided range
with the following restrictions:

 - if the number is divisible by 3, then print out "fizz",
 - if the number is divisible by 5, then print out "buzz",
 - if the number is divisible by 3 and 5, then print out "fizzbuzz".

positional arguments:
  start         Start value
  end           End value

optional arguments:
  -h, --help    show this help message and exit

fizzbuzz settings:
  --fizz N      Modulo value for fizz (default: 3)
  --buzz N      Modulo value for buzz (default: 5)
Модуль argparse — это весьма мощный инструмент. Если вы с ним не знакомы — вам полезно будет просмотреть документацию по нему. Мне, в частности, нравятся его возможности по определению подкоманд и групп аргументов.
Логирование
Если оснастить скрипт возможностями по выводу некоей информации в ходе его выполнения — это окажется приятным дополнением к его функционалу. Для этой цели хорошо подходит модуль logging. Для начала опишем объект, реализующий логирование:
import logging
import logging.handlers
import os
import sys

logger = logging.getLogger(os.path.splitext(os.path.basename(sys.argv[0]))[0])
Затем сделаем так, чтобы подробностью сведений, выводимых при логировании, можно было бы управлять. Так, команда logger.debug() должна выводить что-то только в том случае, если скрипт запускают с ключом --debug. Если же скрипт запускают с ключом --silent — скрипт не должен выводить ничего кроме сообщений об исключениях. Для реализации этих возможностей добавим в parse_args() следующий код:
# В parse_args()
g = parser.add_mutually_exclusive_group()
g.add_argument("--debug", "-d", action="store_true",
               default=False,
               help="enable debugging")
g.add_argument("--silent", "-s", action="store_true",
               default=False,
               help="don't log to console")
Добавим в код проекта следующую функцию для настройки логирования:
def setup_logging(options):
    """Configure logging."""
    root = logging.getLogger("")
    root.setLevel(logging.WARNING)
    logger.setLevel(options.debug and logging.DEBUG or logging.INFO)
    if not options.silent:
        ch = logging.StreamHandler()
        ch.setFormatter(logging.Formatter(
            "%(levelname)s[%(name)s] %(message)s"))
        root.addHandler(ch)
Основной код скрипта при этом изменится так:
if __name__ == "__main__":
    options = parse_args()
    setup_logging(options)

    try:
        logger.debug("compute fizzbuzz from {} to {}".format(options.start,
                                                             options.end))
        for n in range(options.start, options.end + 1):
            # ..
    except Exception as e:
        logger.exception("%s", e)
        sys.exit(1)
    sys.exit(0)
Если скрипт планируется запускать без прямого участия пользователя, например, с помощью crontab, можно сделать так, чтобы его вывод поступал бы в syslog:
def setup_logging(options):
    """Configure logging."""
    root = logging.getLogger("")
    root.setLevel(logging.WARNING)
    logger.setLevel(options.debug and logging.DEBUG or logging.INFO)
    if not options.silent:
        if not sys.stderr.isatty():
            facility = logging.handlers.SysLogHandler.LOG_DAEMON
            sh = logging.handlers.SysLogHandler(address='/dev/log',
                                                facility=facility)
            sh.setFormatter(logging.Formatter(
                "{0}[{1}]: %(message)s".format(
                    logger.name,
                    os.getpid())))
            root.addHandler(sh)
        else:
            ch = logging.StreamHandler()
            ch.setFormatter(logging.Formatter(
                "%(levelname)s[%(name)s] %(message)s"))
            root.addHandler(ch)
В нашем небольшом скрипте неоправданно большим кажется подобный объём кода, нужный только для того, чтобы воспользоваться командой logger.debug(). Но в реальных скриптах этот код уже таким не покажется и на первый план выйдет польза от него, заключающаяся в том, что с его помощью пользователи смогут узнавать о ходе решения задачи.
$ ./fizzbuzz.py --debug 1 3
DEBUG[fizzbuzz] compute fizzbuzz from 1 to 3
1
2
fizz
Тесты
Модульные тесты — это полезнейшее средство для проверки того, ведёт ли себя приложения так, как нужно. В скриптах модульные тесты используют нечасто, но их включение в скрипты значительно улучшает надёжность кода. Преобразуем код, находящийся внутри цикла, в функцию, и опишем несколько интерактивных примеров её использования в её документации:
def fizzbuzz(n, fizz, buzz):
    """Compute fizzbuzz nth item given modulo values for fizz and buzz.

    >>> fizzbuzz(5, fizz=3, buzz=5)
    'buzz'
    >>> fizzbuzz(3, fizz=3, buzz=5)
    'fizz'
    >>> fizzbuzz(15, fizz=3, buzz=5)
    'fizzbuzz'
    >>> fizzbuzz(4, fizz=3, buzz=5)
    4
    >>> fizzbuzz(4, fizz=4, buzz=6)
    'fizz'

    """
    if n % fizz == 0 and n % buzz == 0:
        return "fizzbuzz"
    if n % fizz == 0:
        return "fizz"
    if n % buzz == 0:
        return "buzz"
    return n
Проверить правильность работы функции можно с помощью pytest:
$ python3 -m pytest -v --doctest-modules ./fizzbuzz.py
============================ test session starts =============================
platform linux -- Python 3.7.4, pytest-3.10.1, py-1.8.0, pluggy-0.8.0 -- /usr/bin/python3
cachedir: .pytest_cache
rootdir: /home/bernat/code/perso/python-script, inifile:
plugins: xdist-1.26.1, timeout-1.3.3, forked-1.0.2, cov-2.6.0
collected 1 item

fizzbuzz.py::fizzbuzz.fizzbuzz PASSED                                  [100%]

========================== 1 passed in 0.05 seconds ==========================
Для того чтобы всё это заработало, нужно, чтобы после имени скрипта шло бы расширение .py. Мне не нравится добавлять расширения к именам скриптов: язык — это лишь техническая деталь, которую не нужно демонстрировать пользователю. Однако возникает такое ощущение, что оснащение имени скрипта расширением — это самый простой способ позволить системам для запуска тестов, вроде pytest, находить тесты, включённые в код.
В случае возникновения ошибки pytest выведет сообщение, указывающее на расположение соответствующего кода и на суть проблемы:
$ python3 -m pytest -v --doctest-modules ./fizzbuzz.py -k fizzbuzz.fizzbuzz
============================ test session starts =============================
platform linux -- Python 3.7.4, pytest-3.10.1, py-1.8.0, pluggy-0.8.0 -- /usr/bin/python3
cachedir: .pytest_cache
rootdir: /home/bernat/code/perso/python-script, inifile:
plugins: xdist-1.26.1, timeout-1.3.3, forked-1.0.2, cov-2.6.0
collected 1 item

fizzbuzz.py::fizzbuzz.fizzbuzz FAILED                                  [100%]

================================== FAILURES ==================================
________________________ [doctest] fizzbuzz.fizzbuzz _________________________
100
101     >>> fizzbuzz(5, fizz=3, buzz=5)
102     'buzz'
103     >>> fizzbuzz(3, fizz=3, buzz=5)
104     'fizz'
105     >>> fizzbuzz(15, fizz=3, buzz=5)
106     'fizzbuzz'
107     >>> fizzbuzz(4, fizz=3, buzz=5)
108     4
109     >>> fizzbuzz(4, fizz=4, buzz=6)
Expected:
    fizz
Got:
    4

/home/bernat/code/perso/python-script/fizzbuzz.py:109: DocTestFailure
========================== 1 failed in 0.02 seconds ==========================
Модульные тесты можно писать и в виде обычного кода. Представим, что нам нужно протестировать следующую функцию:
def main(options):
    """Compute a fizzbuzz set of strings and return them as an array."""
    logger.debug("compute fizzbuzz from {} to {}".format(options.start,
                                                         options.end))
    return [str(fizzbuzz(i, options.fizz, options.buzz))
            for i in range(options.start, options.end+1)]
В конце скрипта добавим следующие модульные тесты, использующие возможности pytest по использованию параметризованных тестовых функций:
# Модульные тесты
import pytest                   # noqa: E402
import shlex                    # noqa: E402


@pytest.mark.parametrize("args, expected", [
    ("0 0", ["fizzbuzz"]),
    ("3 5", ["fizz", "4", "buzz"]),
    ("9 12", ["fizz", "buzz", "11", "fizz"]),
    ("14 17", ["14", "fizzbuzz", "16", "17"]),
    ("14 17 --fizz=2", ["fizz", "buzz", "fizz", "17"]),
    ("17 20 --buzz=10", ["17", "fizz", "19", "buzz"]),
])
def test_main(args, expected):
    options = parse_args(shlex.split(args))
    options.debug = True
    options.silent = True
    setup_logging(options)
    assert main(options) == expected
Обратите внимание на то, что, так как код скрипта завершается вызовом sys.exit(), при его обычном вызове тесты выполняться не будут. Благодаря этому pytest для запуска скрипта не нужен.
Тестовая функция будет вызвана по одному разу для каждой группы параметров. Сущность args используется в качестве входных данных для функции parse_args(). Благодаря этому механизму мы получаем то, что нужно передать функции main(). Сущность expected сравнивается с тем, что выдаёт main(). Вот что сообщит нам pytest в том случае, если всё работает так, как ожидается:
$ python3 -m pytest -v --doctest-modules ./fizzbuzz.py
============================ test session starts =============================
platform linux -- Python 3.7.4, pytest-3.10.1, py-1.8.0, pluggy-0.8.0 -- /usr/bin/python3
cachedir: .pytest_cache
rootdir: /home/bernat/code/perso/python-script, inifile:
plugins: xdist-1.26.1, timeout-1.3.3, forked-1.0.2, cov-2.6.0
collected 7 items

fizzbuzz.py::fizzbuzz.fizzbuzz PASSED                                  [ 14%]
fizzbuzz.py::test_main[0 0-expected0] PASSED                           [ 28%]
fizzbuzz.py::test_main[3 5-expected1] PASSED                           [ 42%]
fizzbuzz.py::test_main[9 12-expected2] PASSED                          [ 57%]
fizzbuzz.py::test_main[14 17-expected3] PASSED                         [ 71%]
fizzbuzz.py::test_main[14 17 --fizz=2-expected4] PASSED                [ 85%]
fizzbuzz.py::test_main[17 20 --buzz=10-expected5] PASSED               [100%]

========================== 7 passed in 0.03 seconds ==========================
Если произойдёт ошибка — pytest даст полезные сведения о том, что случилось:
$ python3 -m pytest -v --doctest-modules ./fizzbuzz.py
[...]
================================== FAILURES ==================================
__________________________ test_main[0 0-expected0] __________________________

args = '0 0', expected = ['0']

    @pytest.mark.parametrize("args, expected", [
        ("0 0", ["0"]),
        ("3 5", ["fizz", "4", "buzz"]),
        ("9 12", ["fizz", "buzz", "11", "fizz"]),
        ("14 17", ["14", "fizzbuzz", "16", "17"]),
        ("14 17 --fizz=2", ["fizz", "buzz", "fizz", "17"]),
        ("17 20 --buzz=10", ["17", "fizz", "19", "buzz"]),
    ])
    def test_main(args, expected):
        options = parse_args(shlex.split(args))
        options.debug = True
        options.silent = True
        setup_logging(options)
       assert main(options) == expected
E       AssertionError: assert ['fizzbuzz'] == ['0']
E         At index 0 diff: 'fizzbuzz' != '0'
E         Full diff:
E         - ['fizzbuzz']
E         + ['0']

fizzbuzz.py:160: AssertionError
----------------------------- Captured log call ------------------------------
fizzbuzz.py                125 DEBUG    compute fizzbuzz from 0 to 0
===================== 1 failed, 6 passed in 0.05 seconds =====================
В эти выходные данные включён и вывод команды logger.debug(). Это — ещё одна веская причина для использования в скриптах механизмов логирования. Если вы хотите узнать подробности о замечательных возможностях pytest — взгляните на этот материал.
Итоги
Сделать Python-скрипты надёжнее можно, выполнив следующие четыре шага:
- Оснастить скрипт документацией, размещаемой в верхней части файла.
- Использовать модуль
argparseдля документирования параметров, с которыми можно вызывать скрипт. - Использовать модуль
loggingдля вывода сведений о процессе работы скрипта. - Написать модульные тесты.
Вот полный код рассмотренного здесь примера. Вы можете использовать его в качестве шаблона для собственных скриптов.
Вокруг этого материала развернулись интересные обсуждения — найти их можно здесь и здесь. Аудитория, как кажется, хорошо восприняла рекомендации по документации и по аргументам командной строки, а вот то, что касается логирования и тестов, показалось некоторым читателям «пальбой из пушки по воробьям». Вот материал, который был написан в ответ на данную статью.
Уважаемые читатели! Планируете ли вы применять рекомендации по написанию Python-скриптов, данные в этой публикации?

Have you heard about the Python programming language and do you want to create your first Python script? You will learn how to do it with this guide.
A Python script is a sequence of instructions that can be executed as a program to perform a specific task. The instructions are lines of Python code. The .py file extension is used to identify Python scripts.
In this guide, I will show you how to create and run your first Python script!
Pre-requisite: Make sure you have installed Python on your computer so you can execute the simple program you will create in this tutorial. You can download the Python version for your platform (Windows/Linux/macOS) on the Official Python website and follow the installation instructions.
What is a Python Script: The First Step If You Want to Learn Python
A Python script is a file that contains Python code. Python scripts have the .py extension which tells your computer to handle their content as a Python program. You set the .py extension for a file when you create it.
What are examples of scripts?
An example could be a Python script that generates a report of the monthly sales for a company. Another example is a script that calculates the result of a complex formula given a set of inputs.
Usually, when you get started with Python, you begin by writing simple scripts and then you increase the complexity of your programs the more you improve your skills as a Python developer.
Below you can see an example of a filename for a Python script:
your_program.pyOnce Python is installed and added to the PATH on your computer, you will be able to execute the code in this Python script using the following command:
python3 your_program.pyThis way, you will ask Python to execute the code in the file your_program.py line by line.
Notice that we have specified python3 in the command above. In this way, we make sure to execute the code in the file using the version of Python 3 installed on your computer.
Note: the previous version of Python was Python 2 and you shouldn’t use it considering that it’s no longer supported.
How Do I Create a Python Script Using a Text Editor?
Now that you know that to create a Python script you have to give the .py extension to it, let’s learn how to create a .py file.
To create a .py file with a text editor follow the steps below:
Open a Text Editor or Code Editor: Technically you can use any text editor for this, like Notepad on Windows or TextEdit on macOS but this is not a good approach. If you really have to use a text editor to start writing your first scripts at least use code editors like Visual Studio Code or Sublime Text. A code editor is a text editor with advanced features to support software development.
Write Some Code: Create a new file in your code editor and then write a simple Python program by adding the following line of code to the file you created:
print("Hello, CodeFatherTech!")This is the code of a program that prints the message “Hello, CodeFatherTech!” as output.
Note: Python provides a variety of built-in functions that allow you to build programs faster by using functionality already built for you. The print() function is one of Python’s built-in functions.
Save the File: Go to “File > Save As” and save your file with the .py extension. For example, you could name it:
hello_codefathertech.pyWell done! You have created your first Python program!
How Do I Write a Python Script Using a Python IDE?
Another approach to creating Python scripts is to use a Python IDE (Integrated Development Environment).
An IDE is a software application that gives you a complete set of tools to write, test, and execute your code. Popular IDEs for Python include PyCharm and JupyterLab.
To create a script in your IDE go through the following steps:
Open the IDE: Launch your chosen IDE and create a new file.
Write Some Code: Add the following line of code to the file:
print("Hello, CodeFatherTech!")Save the File: Save your file using the .py extension.
Et voilà, you have your script!
How to Create a .py File Using the Command Line or the Terminal
Another way to create a .py file for your Python code is via the command line. This is an approach for those of you who are used to the Windows/Linux/macOS command line.
Open the Command Line: Open the Command Prompt on Windows or the Terminal on macOS / Linux.
Navigate to the Folder: Use the cd command to navigate to the folder where you want to create your Python script.
Create the File:
- macOS / Linux: Type the following command to create an empty file: touch hello_codefathertech.py
- Windows: Type the following command to create an empty file: echo. > hello_codefathertech.py
Edit the File:
- macOS / Linux: Open this file using Vim with the following command: vim hello_codefathertech.py
- Windows: In the Windows cmd type the command copy con hello_codefathertech.py to start editing the file and add type the Python code in it. To save the file press Ctrl+Z followed by Enter.
The use of the command line can work just for very simple code changes but it’s not the ideal tool for creating scripts or making code changes to existing scripts.
As you can see from the commands mentioned above, the process of editing files in the Windows command line is quite convoluted. Definitely not ideal for code changes!
If you want to make code changes in a reliable way that you can test, using a strong code editor like Visual Studio Code or an IDE like PyCharm is the best option.
That’s because with Visual Studio Code or PyCharm, you have additional features like syntax highlighting, code auto-completion, and debugging. These three features will make your Python coding experience a lot smoother!
Where Should You Save Your Python Script?
You might be tempted to save your Python files in the first random directory that comes to your mind. For example, the desktop!
Please don’t do that as over time you will end up with a huge number of files that are impossible to find and maintain.
It’s a good idea to have a specific directory on your computer dedicated to your Python programming. You can then create sub-directories for individual Python projects.
This will make it easier for you to quickly open the code related to a specific project without having to remember where you saved the files for that project when you created it in the first place!
How Do You Add Python Code to a .py File
Now that you have created a .py file for your Python program, it’s time to add some code to it.
In one of the previous sections, we have written the following line of code in our file:
print("Hello, CodeFatherTech!")What if you want to add multiple lines to a .py file?
To add multiple lines of code to a Python script, open your code editor or IDE and write the lines of code one under the other. Python will execute each line of code in the script sequentially.
Depending on the programming constructs (or keywords) you will add to your code you will have to provide specific levels of indentation to your script. If you don’t do that, Python will flag those lines with syntax errors when you run your code.
This is also the reason why writing your code in a good code editor or IDE is important. That’s because they understand and verify Python syntax so they can immediately flag errors in your Python code while you are writing it (this is a way to fail fast and to get working code written faster).
How Do You Run a Python Script?
After creating a Python .py script, you can execute the code in that script using the “python” command.
In the examples below we will assume that the script we want to execute is called hello_codefathertech.py.
To execute the code in a script from the directory where the file is located (using a relative path), type the following commands:
cd <directory_where_the_python_file_is_located>
python3 hello_codefathertech.py
You can also run the script using its absolute path. In other words, you won’t have to enter the directory where the script is located before executing it.
python <directory_where_the_python_file_is_located>/hello_codefathertech.pyWhen you execute your Python program you want to make sure you are using the latest version of Python on your system which should be a version of Python 3 (for example Python 3.11.5).
Running Python code from the command line is not the only option you have. You can also execute your program directly from your Visual Studio Code or PyCharm IDE. They both provide a “Run” button that allows you to execute your code and see its output in the IDE.
This is quite handy because this means that you can develop Python code in your code editor / IDE and execute it from the same window without having to switch to a different window.
This could save you lots of time in the long term! That’s because while building a Python program you will have to run it multiple times to verify that it’s working fine at every stage of the development process.
Would You Use a Single File for a Python Project?
A single file can work well if you create a simple Python script that you want to execute.
The more the length of your Python application code increases the more you will realize that is not ideal to have all your Python code in a single .py file.
This means that for a Python project, you will need multiple .py files organized in a specific directory structure that makes your project easy to maintain and enhance over time.
What are Common Mistakes When Creating and Executing a Python Script?
Below you can see three common beginner mistakes to avoid when you write and run Python scripts for the first time.
Forgetting the .py Extension
It can happen to forget the .py extension when saving your Python script.
Always remember to include the .py extension. This way you and your computer will be able to identify that file as a Python script.
Syntax Errors
Make sure the syntax of the code you write in your Python script is correct. Even small errors like incorrect characters specified in the wrong place or missing/incorrect indentation can cause errors when executing your Python code.
Also, when you are getting started with Python it’s harder to understand the root cause of the errors. But don’t worry, it becomes easier when you get used to Python’s syntax.
That’s why it’s important to use an IDE or code editor that notifies you about syntax errors as early as possible in the development process.
Imagine how bad it would be if you wrote a 100-line script and found several syntax errors only after finishing writing the code.
You would have to go back and review your script from scratch to fix all the errors instead of dealing with them one at a time while they occur when writing your code.
Executing the Python script from the wrong directory
Another common error is accessing an incorrect directory when you try to execute your Python script. The result is that you will see an error that tells you that your Python script cannot be found.
Example of Windows/Linux/macOS error
python: can't open file 'C:\\dev\\test_file.py': [Errno 2] No such file or directoryThis is a common error especially if you are running your Python code via the command line.
Tutorial Summary
Well done!
You have taken the first step to becoming a Python developer and started understanding how Python works.
Now you know what you need to write your first Python scripts!
In this tutorial, we have also covered the commands you need to run your Python program.
As explained, the use of a simple text editor can work when creating a single Python file that contains very simple code. This would be just a test for you to start learning how to create your first Python script.
However, the right approach to create and modify files containing Python code is to use a robust code editor like Visual Studio Code or IDE like PyCharm.
Related article: Continue your journey to learn Python by going through the beginner CodeFatherTech tutorial to print “Hello, World” in multiple ways!
Claudio Sabato is an IT expert with over 15 years of professional experience in Python programming, Linux Systems Administration, Bash programming, and IT Systems Design. He is a professional certified by the Linux Professional Institute.
With a Master’s degree in Computer Science, he has a strong foundation in Software Engineering and a passion for helping others become Software Engineers.
В этом руководстве рассказывается о том, как создать и как запустить скрипт на Python.
- Программирование или скриптинг?
- Как создать скрипт Python
- Как превратить код Python для Jupyter Notebook в скрипт Python?
- Создадим скрипт Python
- Шаг №1 — откройте текстовый редактор.
- Шаг №2 — скопируйте и вставьте код!
- Шаг №3 — Сохраните файл как файл .py!
- Шаг № 4 — Снова откройте текстовый файл
- Шаг № 5 — Добавьте Shebang!
- Дополнительно: шаг № 6 — сделать скрипты на Python исполняемыми
- Шаг №7 — запустите скрипт на Python!
- Шаг № 8 — почему я ничего не вижу?
- Шаг № 9 — Вы создали скрипт на Python
- Заключение
Обработку данных на основе Python можно разбить на маленькие этапы. Например:
- Импорт numpy и pandas.
- Загрузка необработанных данных из .csv файла в DataFrame.
- Загрузка необработанных данных из словаря Python в другой DataFrame.
- Объединение двух фреймов данных.
- Сортировка значений.
- Заполнение пустых значений.
- И так далее…
Можно выполнить эти задачи вручную. Или поместить эти команды в скрипт Python . Это и есть скриптинг.
Скрипт Python похож на сценарий фильма. В нем вы точно записываете, должен делать компьютер.
Вы можете использовать любой код, написанный ранее в Jupyter. Например, вот мой Jupyter Notebook.

Для этого нужно скопировать все строки из Jupyter Notebook и поместить их в текстовый редактор. После чего сохранить в файл с расширением .py.
Если вы находитесь на удаленном сервере, откройте свой любимый текстовый редактор. Для этого введите команду:

Вы можете использовать любой текстовый редактор (vim, nano и т. д.).
Но если вы хотите что-то более продвинутое, я настоятельно рекомендую Sublime Text 3.

Скопируйте и вставьте весь код из Jupyter Notebook в текстовый редактор:

Нажмите кнопку 10-Quit в правом нижнем углу (или Esc+0 на клавиатуре).
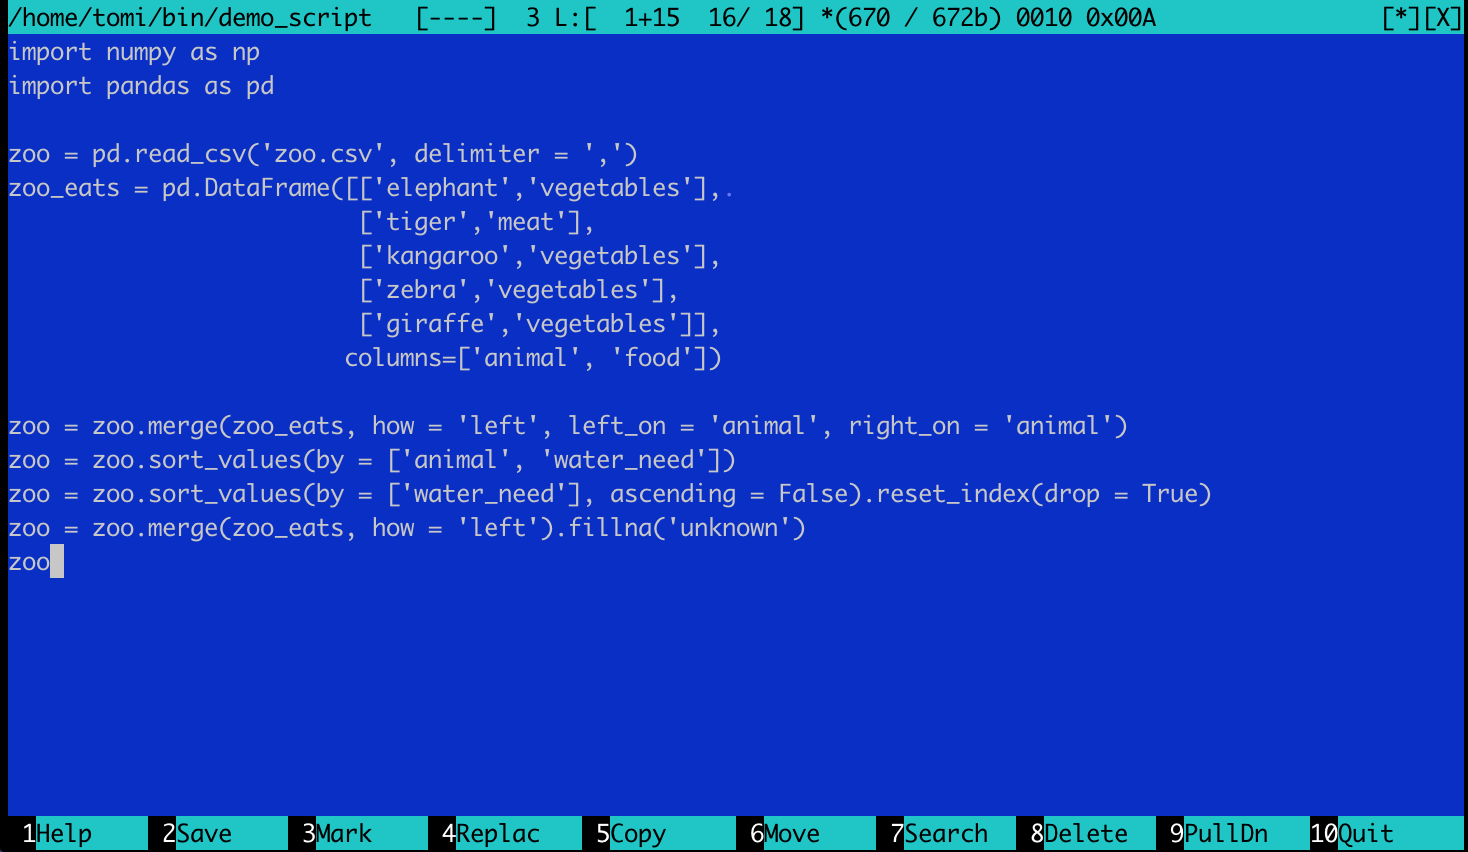
После чего mcedit спросит, хотите ли вы сохранить файл? Нажмите: Yes! Затем задайте имя новому текстовому файлу. Скрипты Python имеют собственное расширение: .py.

Нажмите ОК. Теперь текстовый файл теперь стал скриптом Python.
Вернемся к редактированию файла, набрав команду:
Теперь код выглядит более похожим на Python с различной подсветкой:

Это потому, что вы добавили расширение .py. В результате этого редактор mcedit распознал текстовый файл как скрипт Python.
Shebang — это строка кода, которую нужно поместить в самом начале скрипта. Его задача – сообщить ОС, что у вас есть исполняемый файл Python3.
Строка shebang для скриптов Python3 выглядит следующим образом:
#! / usr / bin / env python3

Добавленный Shebang
Если честно, ваш скрипт будет работать и без него. Несмотря на это, я предпочитаю добавлять Shebang по нескольким причинам:
- В среде разработки, в которой доступно сразу несколько версий Python, Shebang прояснит, какой интерпретатор должен выполнить скрипт.
- Когда один из ваших коллег откроет скрипт, он сразу увидит, на каком языке он написан.
После добавления Shebang, снова сохраните файл и попробуйте запустить скрипт, введя команду:
В некоторых случаях (в зависимости от конфигурации используемого сервера) вы получите ошибку прав доступа:
demoscript.py: Permission denied
В Python подобная ошибка прав доступа не возникает. Если вы не столкнулись с этой проблемой, просто перейдите к шагу № 7.
Если у вас возникла ошибка прав доступа, в командной строке введите этот код:
sudo chmod 777 demoscript.py

Затем введите свой пароль.
Запустите скрипт, введя команду:

Это означает, что ваш скрипт на Python запущен… Но вы не видите никакого результата на экране.
В большинстве случаев, когда вы конвертируете проект Jupyter Notebook в скрипт Python, вы не увидите на экране ничего. Это потому, что последняя строка вашего кода была такой:

Вернитесь к своему скрипту и измените последнюю строку на эту:

Нажмите 10-Quit и Save.
Перезапустите скрипт, введя для этого команду:
Победа!

Вы создали скрипт на Python, и он работает. Но вы все равно захотите использовать Jupyter Notebook. Так как он является идеальным инструментом для тестирования и настройки процессов. Поэтому:
- Я создаю прототип проекта на Python в Jupyter Notebook. Затем создаю код и выясняю, какие шаги необходимы.
- Затем удаляю ненужные фрагменты кода и импортированные пакеты, сортирую задачи Python в порядке их выполнения.
- Добавляю комментарии к коду.
- Перемещаю все в текстовый редактор (Sublime Text или mcedit) и создаю скрипт Python, который можно автоматизировать.
Написание и запуск скриптов Python это не магия. Если вы знаете, как писать код на Python, то сможете освоить и скрипты
Вадим Дворниковавтор-переводчик статьи «How to Run a Python Script (Step by Step Tutorial, with Example)»
Written by: Stefan Bradstreet
When it comes to learning to code, Python is one of the easiest coding languages to start with since it resembles standard English. It’s also an interpreted language which means you can write and run your code without compiling it down to binary executable files and shared object libraries where you have to deal with platform details and compiler scripts.
To write your first beginner Python script you’ll first need to spend some time setting up your development environment by installing the Python interpreters, downloading an IDE to create and edit Python Files, and then creating a project or workspace folder to collect your work.
Afterward, we will write a script to print out the “Hello World” message and then extend this script to take in a name as input, reuse code by making a function and loops, and display the Time using the standard library DateTime module. You can also check out my youtube channel for more videos on Python coding.
Install Python3
Important: Python2.7 will no longer be supported after 2019 so any new security holes found will not be updated. Use this version at your own risk.
To get started with Python, simply head over to the python.org website and download either the latest stable 3.7 builds or try out the new Python 3.8 version for a few new features and performance updates. Since Python 3.8 is the latest version it may contain security leaks that have not been found yet. If you plan to release enterprise-level software or Python-based web applications it is better to use 3.7.
After downloading, just install the interpreter from the setup file like you would any other program. The installer will add the “python” executable to your path so in a command prompt or a terminal you can run “python” to get an interactive shell or run your scripts using “python myscript.py”
Setup your code editor
To be able to create your script you will need something to type out your code. As a beginner at creating a single python script you may be most comfortable with just using Notepad or GEdit but I’ll list out other available options.
You could also install Notepad++ or Sublime3 text which supports code formatting which color codes variables, operators, comments, and other python Keywords. You can also open entire directories when you are working on multiple code files which interact with each other.
My preferred code editor for Python is Visual Studio Code. In addition to the above, you also get a built-in debugging tool for walking through more complex code and tracking variable assignments during runtime, an integrated terminal to be able to run scripts you are working on, autocomplete and IntelliSense for writing code quicker, git integration for tracking changes in your code, plugins, and more.
Another commonly used way of working with Python code is using an integrated development environment such as Jet Brains PyCharm which has a lot of advanced options for navigating, refactoring, and debugging code. There are also other tools such as Jupiter Notebook for data analysis or using server-based Linux editors such as Vim or Emacs through SSH to modify code directly on a deployed system.

Create a python sandbox folder
Somewhere on your computer create a workspace folder. This folder will serve as a collection of everything you are working on and a place where you can quickly create new test files and projects. I tend to structure my workspace like the below example. This allows me to see what projects I have in a single place.
- ~/python
- ~/python/project1
- __init__.py
- main.py
- ~/python/project1/submodule1
- __init__.py
- ~/python/project1/submodule2
- __init__.py
- ~/python/project2
- __init__.py
- main.py
- ~/python/project1
Open the folder in your IDE
If you are using Visual Studio Code you can use the shortcut (ctrl+k, ctrl+o) on windows to open an entire folder in your IDE.
Bringing in the entire folder is useful because it allows the IDE to be able to read your project folder structure and do auto-complete and advanced searching to make you more productive while coding.
You can also open files side by side, making it faster to work on code in one file that is being used in a second file as an import.

Create a HelloWorld.py file
In your workspace created above create a HelloWorld project folder and a HelloWorld.py file inside that folder with the content below.
You can now run this file by hitting F5 and debugging it as a python file. This will run the file in the Visual Code terminal and will output “Hello World” at the bottom of the IDE window. It will also show the command that was used to run your script with the debugger attached.

Extend your script to use variables, built-in functions, and operators
To make this script more realistic instead of just printing “Hello World” to the system out of the computer let’s restructure this to assign “Hello ” to a variable and input a name. We will then join these together to display a message to our users.
# This is a comment. It is used to display useful
# information to people who read our code

# Save the string "Hello " to a variable
# Space is added at the end for when we join our input
hello_text = "Hello "

# Get user input
name = input("Enter your name: ")

# Join our strings using the '+' operator which will
# concatenate two strings together into a new variable
message = hello_text + name

# Display the joined message to our user
print(message)
Running this script results in the screenshot below.

Reusing code by creating functions
In the above code, we created our “Hello ” message and formatted the spacing ourselves. While this is OK to do in a small example it would be nice to put our message formatting into a function. This function can be reused in our script to create different kind of messages and format it correctly.
# This is a comment. It is used to display useful
# information to people who read our code

# Get user input
first_name = input("Enter your first name: ")

# This is a function which can be called
# in other parts of our code to format a message
def print_message(prefix, first_name):
    print(prefix + " " + first_name)

# Display the joined message to our user
print_message("Hello", first_name)
print_message("Goodbye", first_name)
And the output for this:

Using a while loop to continually display messages
Now let’s say we want to make our script print out messages for multiple people’s names and keep running until someone inputs the letter ‘Q’. This kind of pattern is good for guessing the number type games where we need to keep running the same pieces of code.
You can use loops to keep checking for valid input in command-line interface scripts as shown in this YouTube video.
# This is a comment. It is used to display useful
# information to people who read our code

def print_message(prefix, first_name):
    print(prefix + " " + first_name)

# Get user input
first_name = input("Enter a name: ")

# Check if the first_name variable is equal to 'Q'
# If so we will skip the next intended lines and go to
# line 21
while first_name != "Q":

    # Display the joined message to our user
    print_message("Hello", first_name)
    print_message("Goodbye", first_name)
    # Get the next name to print message for or check 'quit condition'
    first_name = input("Enter another name or 'Q' to quit: ").title()

print("Quitting greeter")

Import libraries to reuse common features
Let’s add in the ability to also print out the time to our user after we say Hello. Tracking times is very common in programs to be able to save when an account was named, write the time in log files, or take the differences in time at the start of a function and the end of a function to get the latency of how long a piece of code has run.
Because working with times is such a common thing in programming, Python has a module in its standard runtime to make working with times easier. Simply “import” the DateTime module at the beginning of your code and you will have access to all the functions that are included in this module. You can also import a specific function using the from 'module' import 'variable' notation.
Without this library, we would need to write some kind of code ourselves to retrieve the internal computer time, change this into Months, Days, Years, Hours, Minutes, Seconds, and write our own formatter to print this in a way our user will recognize.
Let us import this into our HelloWorld code.
from datetime import datetime

# This is a comment. It is used to display useful
# information to people who read our code

def print_message(prefix, first_name):
    print(prefix + " " + first_name)

# Get user input
first_name = input("Enter a name: ")

# Check if the first_name variable is equal to 'Q'
# If so we will skip the next greeting
while first_name != "Q":

    # Display the joined message to our user
    print_message("Hello", first_name)

    # Display the current time using the datetime library
    # and chaining method calls to .now() and .strftime()
    print("The current time is ", datetime.now().strftime("%d/%m/%Y %H:%M:%S"))

    print_message("Goodbye", first_name)

    first_name = input("Enter another name or 'Q' to quit: ").title()

print("Quitting greeter")

That’s all there is to writing your first python script, getting user input, using the + operator to join strings, using a method to reuse sections of code, using a loop to get more user input and setting a break condition, and importing a library to print the time which is a common function in Python.
Thank you for visiting!
Please remember if you found this content useful and would like to see more python and software development articles from us, help us conquer the google algorithm in any of the ways below:
- Comment your thoughts below
- Share this on your social media
- follow me on twitter
- subscribe to our Youtube channel
- Contact me on the service page for coaching
- Shop through our affiliate links: Python crash course book
If you didn’t find what you expected feel free to use the contact page and let us know ways we can improve or what would help you grow as a developer better! I am honored by every view and it takes a village to really make this great.
About Stefan Bradstreet

Stefan is a Senior Software Developer at Amazon with 8+ years of experience in tech. He is passionate about helping people become better coders and climbing the ranks in their careers, as well as his own, through continued learning of leadership techniques and software best practices.