
Способ 1: Управление службами
Традиционно перезапуск служб в Windows 10 выполняется через встроенную оснастку управления службами.
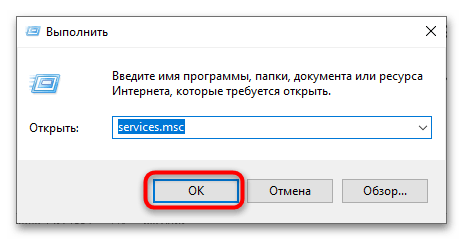
- Откройте оснастку «Службы», для чего вызовите нажатием клавиш Win + R окошко быстрого запуска и выполните в нем команду
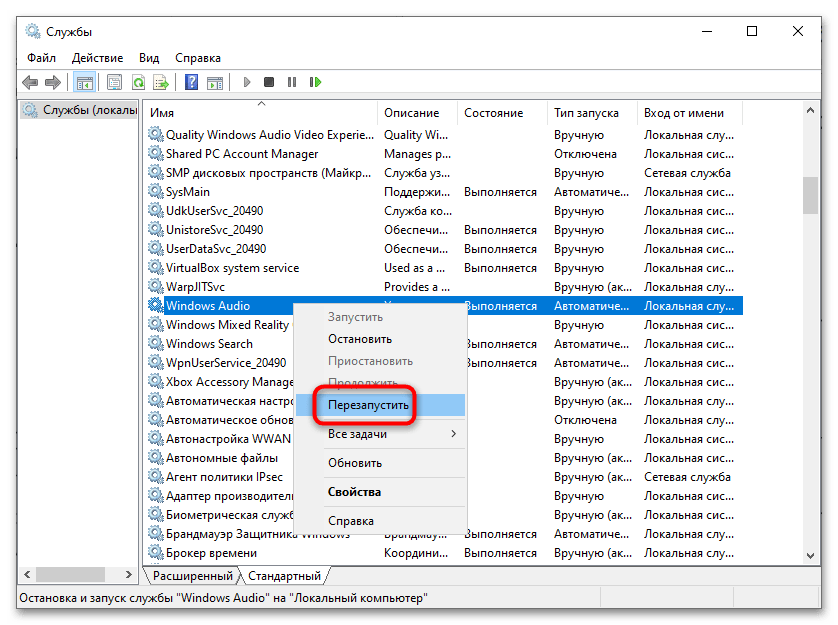
services.msc. - Откроется окно оснастки, отыщите в списке службу с именем «Windows Audio», кликните по ней правой кнопкой мыши и выберите из контекстного меню опцию «Перезапустить».
Альтернативный вариант:
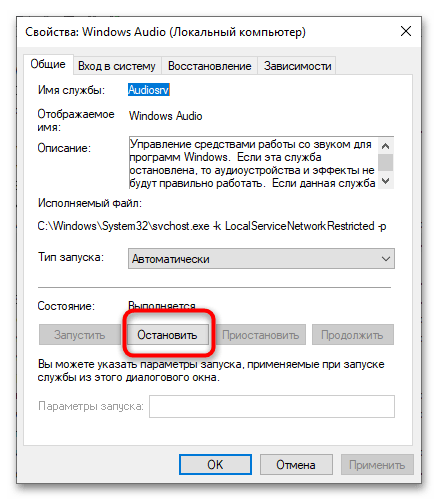
- Отыщите службу «Windows Audio» и откройте ее свойства двойным по ней кликом.
- В окошке свойств нажмите кнопку «Остановить».
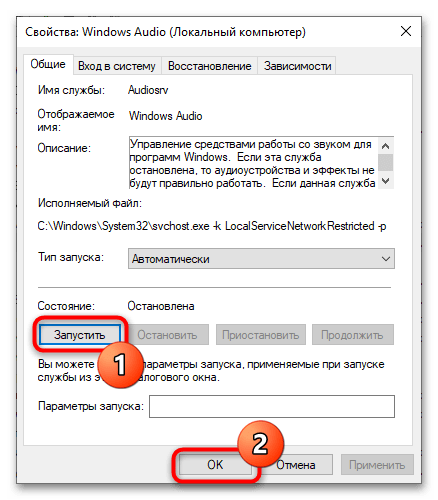
- После того как служба будет остановлена, запустите ее нажатием кнопки запуска, расположенной в этом же окне. Нажмите в окне свойств «OK» и завершите работу с оснасткой.
Способ 2: Консоль «PowerShell»
Пользователи, владеющие навыками работы в консоли, могут использовать для перезапуска службы аудио классическую «Командную строку» или «PowerShell».
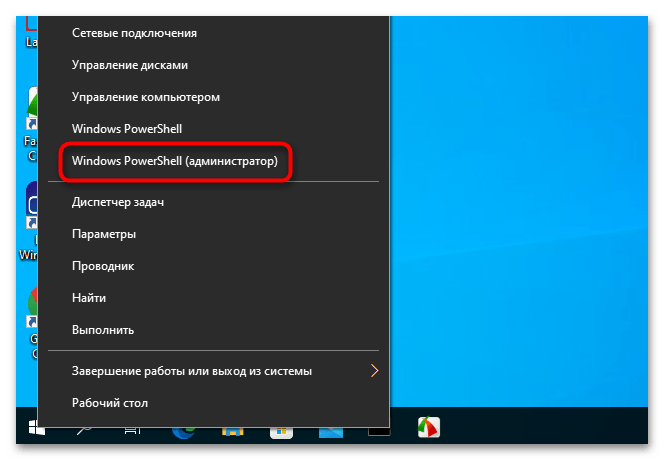
- Откройте консоль «PowerShell» из контекстного меню кнопки «Пуск».
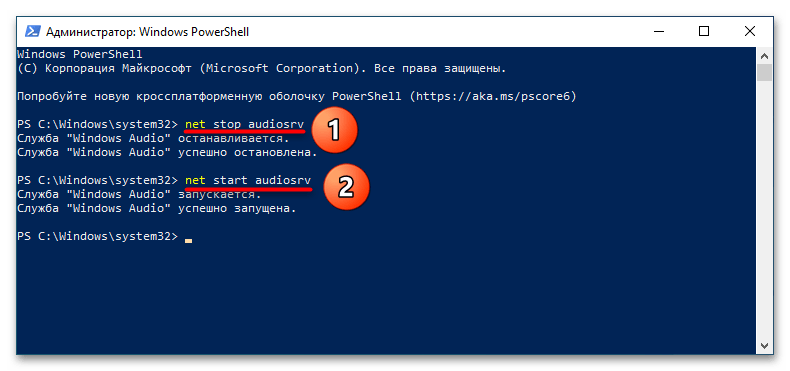
- Выполните одну за другой команды
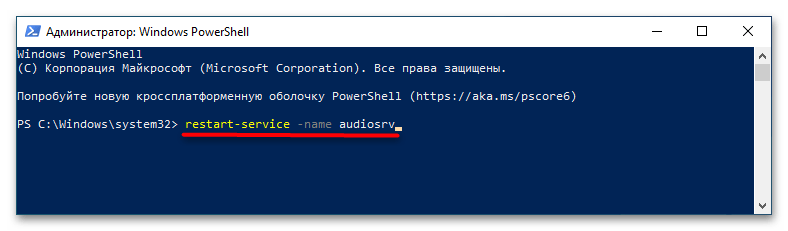
net stop audiosrvиnet start audiosrv, нажимая после каждой из них Enter. - Также вместо двух приведенных выше команд можно использовать одну –
restart-service -name audiosrv. Однако работает эта команда только в «PowerShell», тогда какnet stop audiosrvиnet start audiosrvможно использовать и в классической «Командной строке».
Способ 3: «Диспетчер задач»
Перезапустить службу звука в Windows 10 можно также и средствами штатного «Диспетчера задач».
Подробнее: Запуск «Диспетчера задач» в Windows 10
- Откройте «Диспетчер задач» любым удобным способом и переключитесь на вкладку «Службы».
- Отыщите в списке службу с именем «Audiosrv», щелкните по ней правой кнопкой мыши и из контекстного меню воспользуйтесь опцией «Перезапустить».
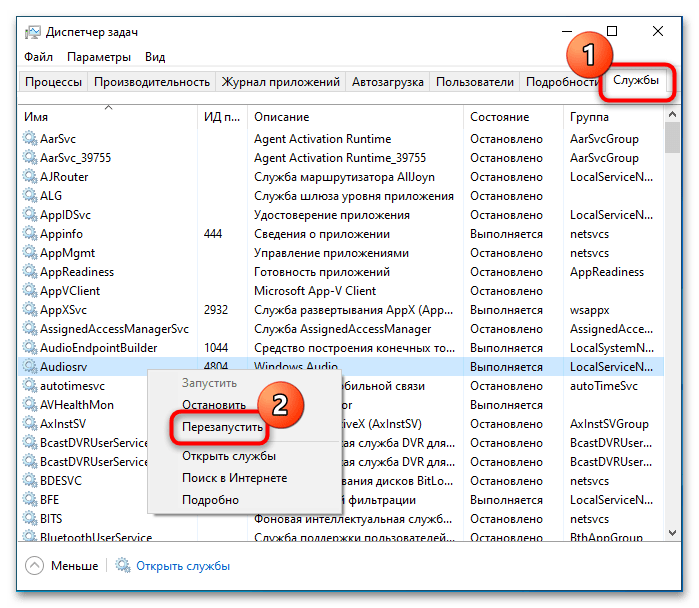
В результате службы будет сначала остановлена, а затем автоматически запущена.
Наша группа в TelegramПолезные советы и помощь
Audio issues on your PC can be incredibly frustrating, especially when you’re trying to watch a video, attend a meeting, or listen to music. Fortunately, most sound problems can be fixed by following a series of troubleshooting steps. This article provides a comprehensive guide to resolving audio issues in Windows. The tips are listed in order, so start with the first one, see if that helps, and then continue to the next one if it doesn’t.
Run the Windows audio troubleshooter
If you are using a Windows 11 device, start by running the automated audio troubleshooter in the Get Help app. It will automatically run diagnostics and attempt to fix most audio problems. If you are using an older version of Windows or a mobile device, please skip to General troubleshooting steps.
Run the troubleshooter in Get Help
If the Get Help app is unable to resolve your sound or audio issue, try the possible solutions listed.
General troubleshooting
Please try the following general troubleshooting steps to help solve the audio problem.
If multiple audio output devices are available, check that you have the appropriate one selected. Here’s how:
-
Select the Speakers icon on the taskbar.
-
Next, select the arrow to the right of the speaker volume slider to open a list of audio devices connected to your computer. The tool tip should display as Select a sound output when hovering over the arrow.
-
Check that your audio is playing to the audio device you prefer, such as a speaker or headphones.
If this doesn’t help, continue to the next tip.
Try these steps:
-
Check your speaker and headphone connections for loose cords or cables. Make sure all cords and cables are plugged in.
-
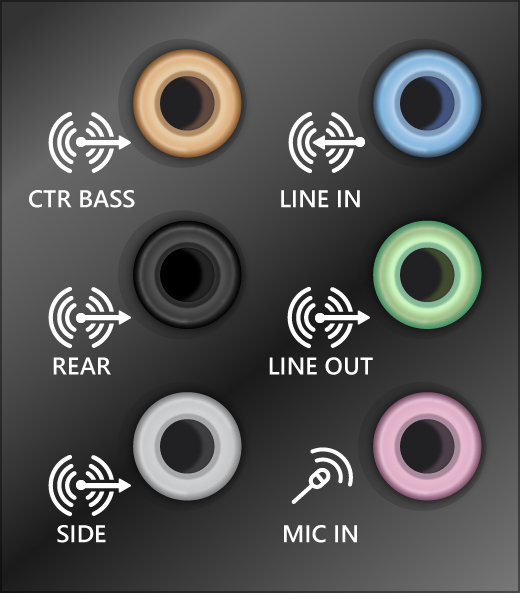
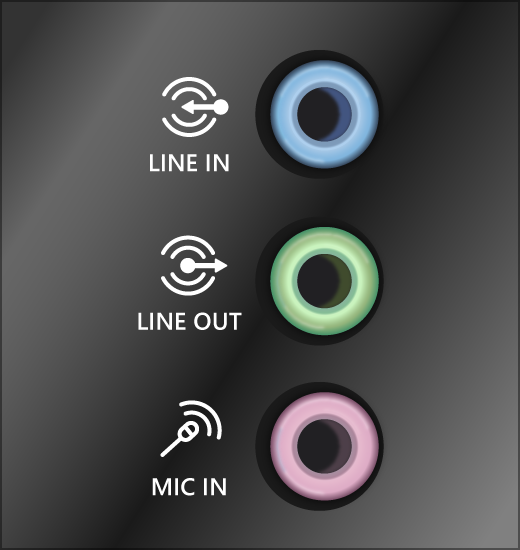
If you have multiple 5mm jacks to plug into, especially on a surround sound system, make sure all cords and cables are plugged into the correct jack.
-
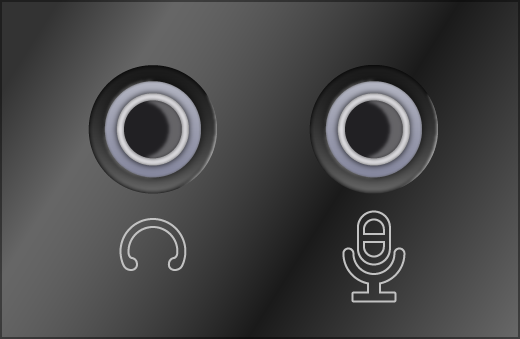
If it’s not clear which jack goes with which cord, consult your hardware manufacturer, or try the most obvious outputs one at a time and see if they work.

Note: Some systems use a green jack for output and a pink jack for mic input and others will be labeled «headphone» or «microphone.»
-
-
Make sure the power is turned on.
-
Make sure the mute setting is not turned on and try turning up all the volume controls.
Note: Some speakers and apps have their own volume controls. Be sure to check them all.
-
Try connecting your speaker and headphones to a different USB port.
-
It’s possible that your speakers won’t work when your headphones are plugged in. Unplug your headphones and see if that helps.
If you’re still having audio problems, see the next sections for additional troubleshooting.
Sometimes having audio enhancements on can result in audio issues. Disabling them may resolve your issue.
-
Select Start > Settings > Sound.
-
In the Output section, select the audio device you’re using (e.g., your speakers or headphones).
-
On the page that opens, scroll to Advanced settings,then set Audio enhancements to Off from the dropdown menu.
If turning off audio enhancements doesn’t help, see the next sections for additional troubleshooting.
-
Select Start > Settings > System.
-
Scroll down and select Troubleshoot > Other troubleshooters.
-
Go to Audio section and click the Run button to start the audio troubleshooter.
Check to make sure your audio devices aren’t muted and haven’t been disabled.
-
Select and hold (or right-click) the Speakers icon on the taskbar.
-
Next, select the arrow to the right of the speaker volume slider to open a list of audio devices connected to your computer. The tool tip should display as Select a sound output when hovering over the arrow.
Note: If you don’t see Speakers displayed, it may be in the overflow area. Select Show hidden icons to check there.
-
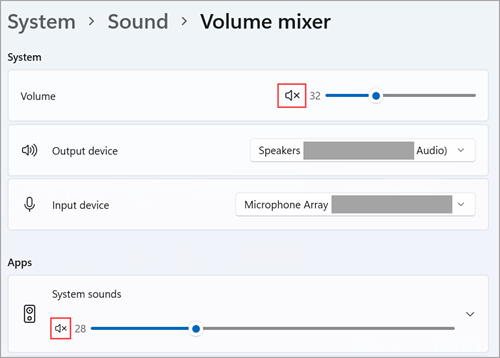
Select settings icon to the right of the Volume mixer slider to open Volume mixer settings. The tool tip should display as More mixer settings when hovering over the settings icon.
-
You’ll see a set of volume controls for your devices. Make sure none of them are muted. If any of them are muted, you’ll see an «x» next to the volume control . To unmute do one of the following:
-
Select the volume control and adjust to the desired volume level.
-
Select the Unmute speakers icon .

-
-
Check your device properties to make sure that your devices have not been disabled by mistake. Select Start > Settings > System > Sound .
-
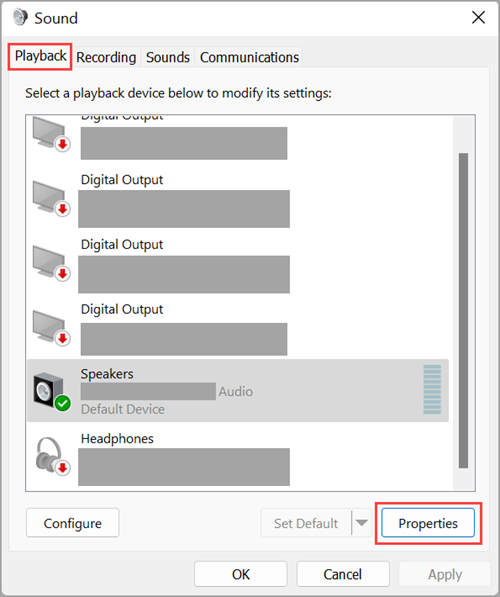
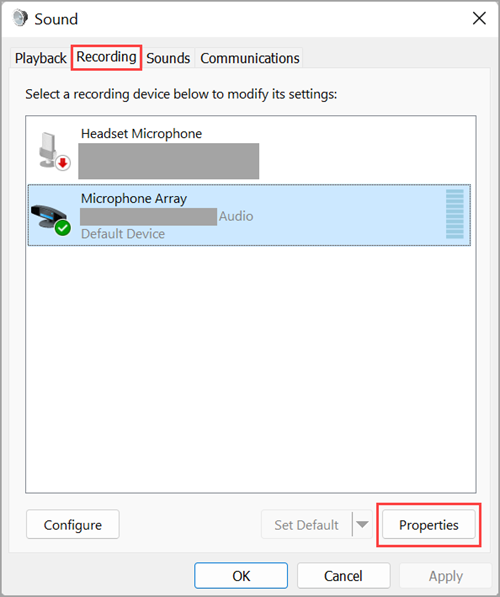
Under Advanced, select More sound settings and select either the Playback (output) or Recording (input) tab.
-
Select your device and then select Properties.
-
Next to Device usage, check that Use this device (enable) is selected from the list for the output and input devices.


If that didn’t solve your problem, continue to the next tip.
If you’re connecting to an audio device—such as headphones or speakers—using USB or HDMI, you might need to set that device as the default audio device. If you’re using an external monitor that doesn’t have built-in speakers, make sure that the monitor isn’t already selected as your default output device. if it is, you won’t have any audio. You can check that when you set your default output audio device. Here’s how:
-
Select Start > Settings > System > Sound .
-
In the Output section, select the device you want to use for playback as your output device. When you select this device, you’re also setting it as the default.
If setting your audio device as the default device doesn’t help, continue to the next tip for additional troubleshooting.
To check for updates:
-
Do one of the following:
-
If the status says, «You’re up to date,» go to the next tip.
-
If the status says, «Updates are available,» select Install now.
-
-
Select the updates you want to install, then select Install.
-
Restart your PC and check if your sound is working properly.
If that didn’t solve your problem, continue to the next tip.
Many updates require you to restart your device.
To check and see if you have installed updates pending and need to restart:
-
Save your work and close all open applications.
-
Select Start > Power . If you have installed updates pending, you’ll see options to Update and restart and Update and shut down.
-
Select one of those restart options to apply the updates.
Need help with Windows Update? See Troubleshoot problems updating Windows.
If restarting doesn’t help, see the next section for additional troubleshooting.
Hardware problems can be caused by outdated or malfunctioning drivers. Make sure your audio driver is up to date and update it if needed. If that doesn’t work, try uninstalling the audio driver (it will reinstall automatically). If that doesn’t work, try using the generic audio driver that comes with Windows. If you’re having audio issues after installing updates, try rolling back your audio driver.
To update your audio driver automatically:
-
In the search box on the taskbar, type device manager, then select it from the results.
-
Select the arrow next to Sound, video and game controllers to expand it.
-
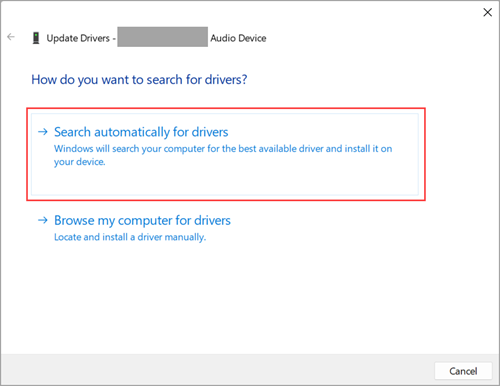
Select and hold (or right-click) the listing for your sound card or audio device, such as headphones or speakers, select Update driver, then select Search automatically for drivers. Follow the instructions to complete the update.


If Windows doesn’t find a new driver, look for one on the device manufacturer’s website and follow those instructions. If that doesn’t work, try uninstalling your audio driver.
To uninstall your audio driver:
-
In the search box on the taskbar, type device manager, then select it from the results.
-
Select the arrow next to Sound, video and game controllers to expand it.
-
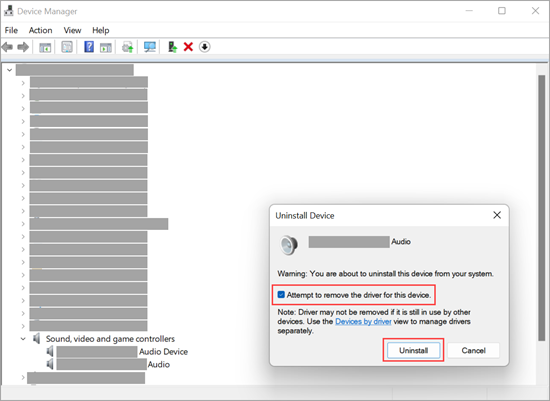
Select and hold (or right-click) the listing for your sound card or audio device, select Uninstall device, select the Attempt to remove the driver for this device check box, and then select Uninstall.

-
Restart your PC.
Note: Be sure to save your documents and any other current work before you restart.
-
This restart will automatically prompt your PC to reinstall your audio driver.
-
To restart, select Start > Power > Restart .
-
If those options didn’t work, try using the generic audio driver that comes with Windows.
To use the generic audio driver that comes with Windows:
-
In the search box on the taskbar, type device manager, then select it from the results.
-
Select the arrow next to Sound, video and game controllers to expand it.
-
Select and hold (or right-click) the listing for your sound card or audio device, then select Update driver > Browse my computer for drivers > Let me pick from a list of available drivers on my computer.
-
Select the audio device whose driver you want to update, select Next, and then follow the instructions to install it.
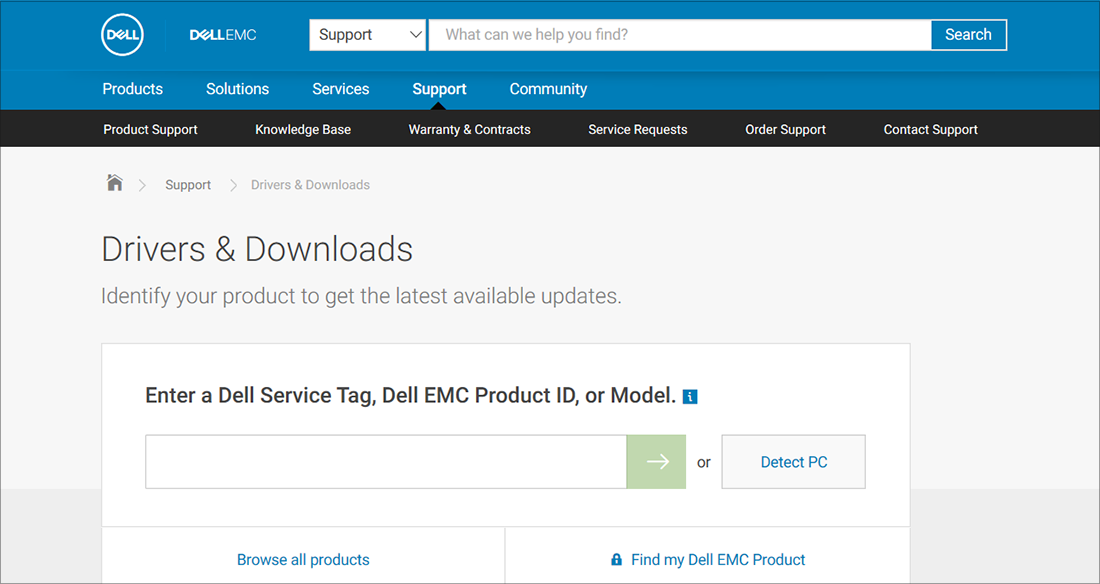
If these steps didn’t solve your audio issue, visit your device manufacturer’s website and install the most recent audio/sound drivers for your device. The following is an example of a driver download page for a sound device manufacturer.
If you have audio issues after installing updates
If your audio was working before you ran Windows Update and now isn’t working, try rolling back your audio driver.
To roll back your audio driver:
-
In the search box on the taskbar, type device manager, then select it from the results.
-
Select the arrow next to Sound, video and game controllers to expand it.
-
Select and hold (or right-click) the listing for your sound card or audio device, then select Properties.
-
Select the Driver tab, then select Roll Back Driver.
-
Read and follow the instructions and then select Yes if you want to roll back your audio driver.
If rolling back your audio driver didn’t work or wasn’t an option, you can try to restore your PC from a system restore point.
Restore your PC from a system restore point:
When Microsoft installs updates on your system, we create a system restore point in case problems arise. Try restoring from that point and see if that fixes your sound problems. For more info, see «Restore from a system restore point» in Recovery options in Windows.
Some audio problems might be caused by an issue with the audio system’s IDT High Definition Audio CODEC. This can be fixed with a manual driver update which allows you to choose the sound driver you want to use.
Note: Not all systems will have an IDT High Definition Audio CODEC.
To check and see if you have one, and to manually update the driver:
-
In the search box on the taskbar, type device manager, then select it from the results.
-
Select the arrow next to Sound, video and game controllers to expand it.
-
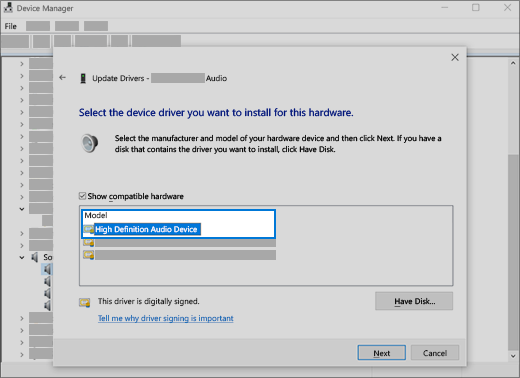
Look for IDT High Definition Audio CODEC. If it’s listed, select and hold (or right-click) it and select Update driver, then select Browse my computer for drivers > Let me pick from a list of available drivers on my computer.
-
You’ll see a list of pre-installed drivers. Select High Definition Audio Device, and then select Next.
-
In the search box on the taskbar, type control panel, and then select it from the results.
-
Select Hardware and Sound from the Control Panel, and then select Sound.
-
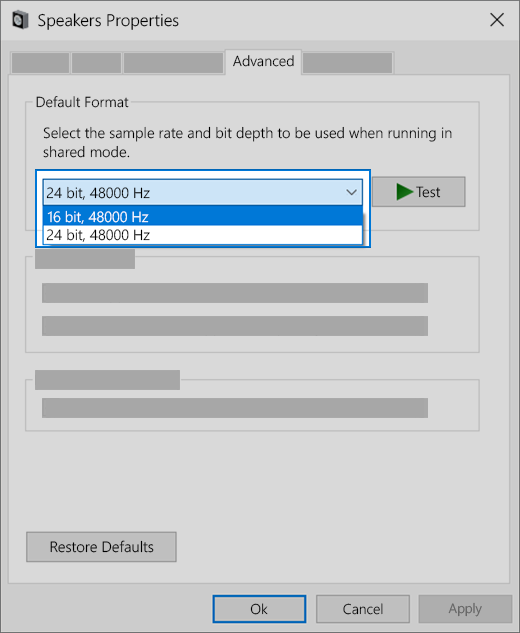
On the Playback tab, select and hold (or right-click) Default Device, and then select Properties.
-
On the Advanced tab, under Default Format, change the setting, select OK, and then test your audio device. If that doesn’t work, try changing the setting again.
If trying different audio formats doesn’t help, see the next sections for additional troubleshooting.
-
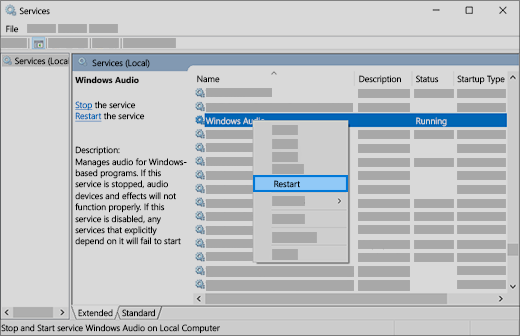
In the search box on the taskbar, type services, then select it from the results.
-
Select each of the following services, select and hold (or right-click), select Restart, and then select Yes:
-
Windows Audio
-
Windows Audio Endpoint Builder
-
Remote Procedure Call (RPC)
-
If restarting these services doesn’t resolve your issue, see the next sections for more troubleshooting.
-
Select Start > Settings > Privacy & security.
-
Under App permissions, select Microphone.
-
Make sure that the Microphone access and Let apps access your microphone toggles are turned On.
-
If you’re having this issue with a specific app, scroll down under Let apps access your microphone and make sure that the toggle next to that specific app is turned On as well.
Служба аудио не запущена — что делать?
Проблемы с воспроизведением звука в Windows 10, 8.1 или Windows 7 — одни из самых распространенных среди пользователей. Одна из таких проблем — сообщение «Служба аудио не запущена» и, соответственно, отсутствие звука в системе.
В этой инструкции подробно о том, что делать в такой ситуации, чтобы исправить проблему и некоторых дополнительных нюансах, которые могут оказаться полезными, если простые методы не помогают. Также может быть полезно: Пропал звук Windows 10.
Простой способ запустить службу аудио
При возникновении проблемы «Служба аудио не запущена» для начала рекомендую использовать простые методы:
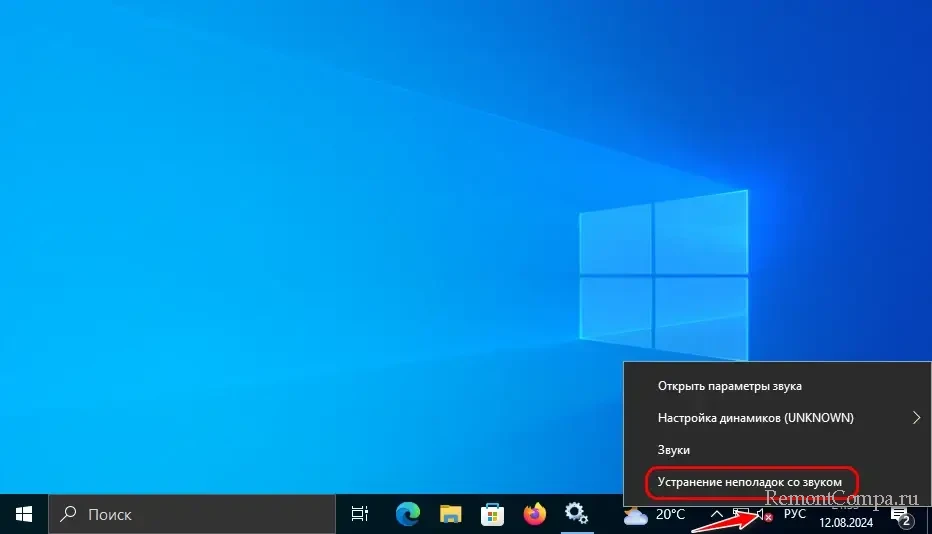
- Автоматическое устранение неполадок работы звука Windows (можно запустить двойным кликом по значку звука в области уведомлений после появления ошибки или через контекстное меню этого значка — пункт «Устранение неполадок со звуком»). Часто в этой ситуации (если только вы не отключили значительное число служб) автоматическое исправление исправно работает. Есть и другие способы запуска, см. Устранение неполадок Windows 10.

- Ручное включение службы аудио, о чем далее подробнее.
Под службой аудио понимается системная служба Windows Audio, присутствующая в Windows 10 и предыдущих версиях ОС. По умолчанию она включена и запускается автоматически при входе в Windows. Если же этого не происходит, можно попробовать выполнить следующие шаги
- Нажмите клавиши Win+R на клавиатуре, введите services.msc и нажмите Enter.
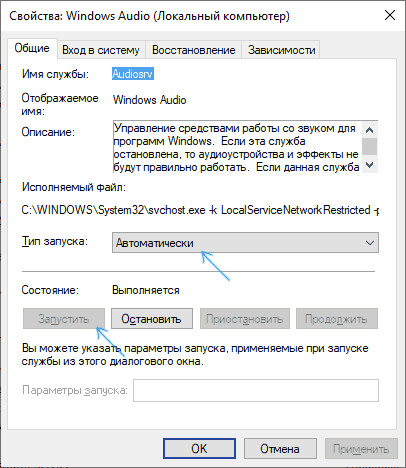
- В открывшемся списке служб найдите службу Windows Audio, дважды нажмите по ней.
- Установите тип запуска в «Автоматически», нажмите «Применить» (чтобы сохранить параметры на будущее), а затем — «Запустить».

Если после этих действий запуск все равно не происходит, возможно, у вас отключены какие-то дополнительные службы, от которых зависит запуск службы аудио.
Что делать, если служба аудио (Windows Audio) не запускается
Если простой запуск службы Windows Audio не срабатывает, там же, в services.msc проверьте параметры работы следующих служб (для всех служб тип запуска по умолчанию — Автоматически):
- Удаленный вызов процедур RPC
- Средство построения конечных точек Windows Audio
- Планировщик классов мультимедиа (при наличии такой службы в списке)
После применения всех настроек рекомендую также выполнить перезагрузку компьютера. Если же ни один из описанных методов не помог в вашей ситуации, но сохранились точки восстановления на дату, предшествующую появлению проблемы, используйте их, например, как описано в инструкции Точки восстановления Windows 10 (будет работать и для предыдущих версий).
В этой публикации, друзья, рассмотрим такую проблему: служба аудио не запущена в Windows. При работе с компьютером можем столкнуться с системной ошибкой «Служба аудио не запущена», её формулировка:
«Этот компьютер не может воспроизводить звуковые данные, так как служба Windows Audio не включена».
При этом звук на компьютере будет отсутствовать. Что за ошибка такая, почему возникает? Как её устранить?
При появлении ошибки «Служба аудио не запущена» на панели звука в системном трее Windows будем видеть значок звука с крестиком, и нам недоступно будет управление громкостью.
Всё это означает отсутствие звука на уровне операционной системы по причине неработающей службы аудио Windows.
Ошибка эта может возникнуть по разным причинам:
- При намеренном отключении службы аудио кем-то;
- Вследствие сбоя в работе или кривого обновления Windows;
- Вследствие некорректного обновления драйверов, связанных с медиаустройствами компьютера;
- Вследствие отключения различных сервисных служб Windows;
- Пользовательского некорректного вмешательства в системные настройки.
Для устранения проблемы необходимо как минимум включить службу аудио Windows.
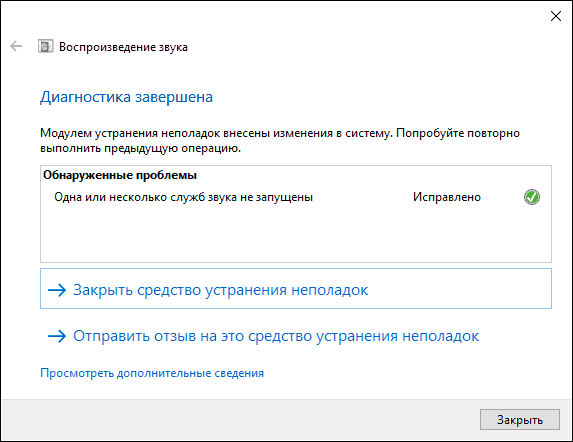
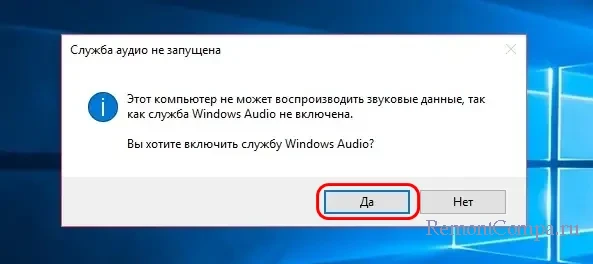
При отключённой этой службе иногда можем видеть на экране компьютера уведомление Windows об ошибке «Служба аудио не запущена». И в самом этом уведомлении нам будет предлагаться включение службы Windows Audio. Просто жмём «Да».
Тоже простой способ включения службы аудио Windows – с помощью системного средства устранения неполадок. Жмём контекстное меню на значке звука. Выбираем «Устранение неполадок со звуком». В Windows 10 только этого и достаточно.
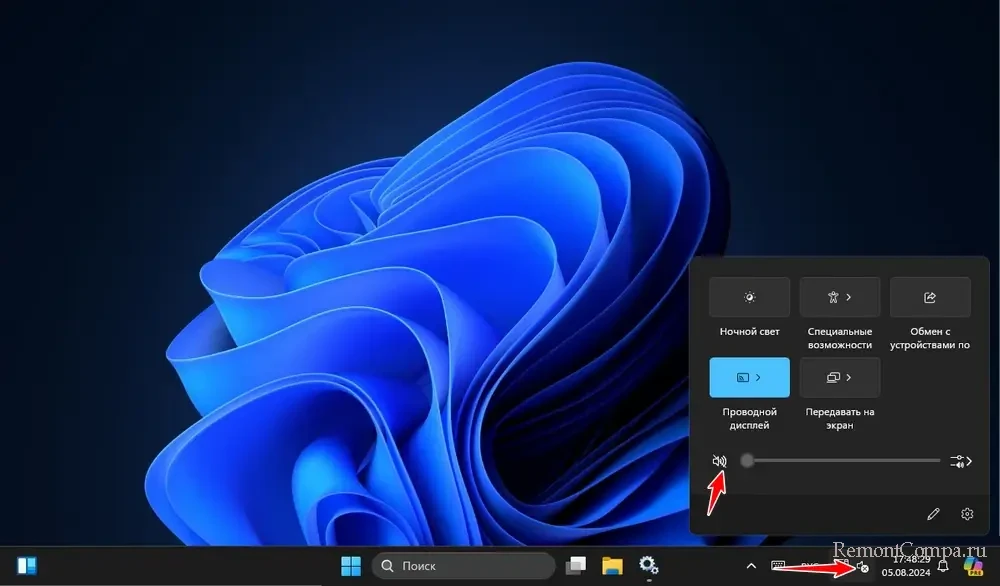
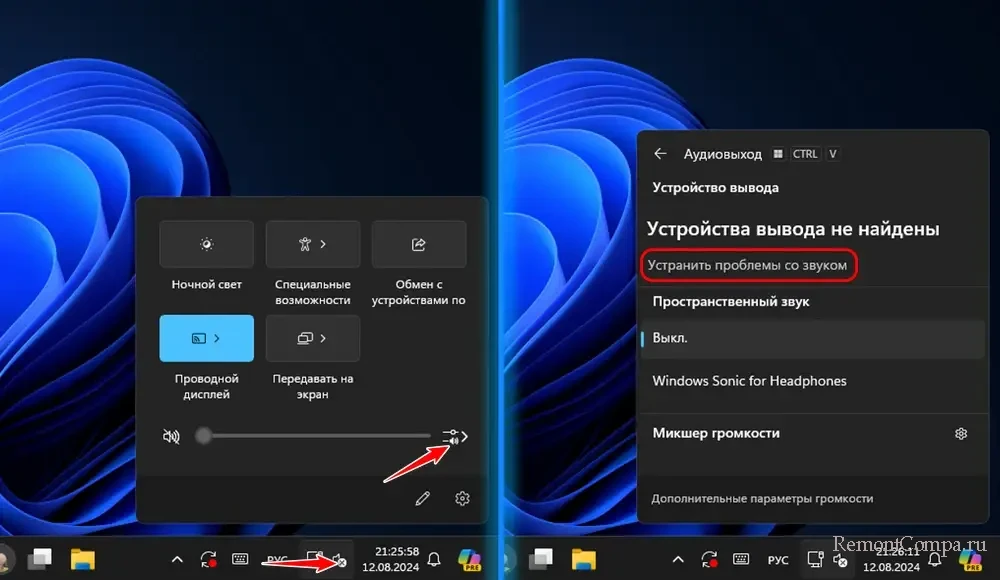
В Windows 11 просто жмём на значок звука для открытия звуковой панели. На этой панели жмём кнопку звуковых настроек. И выбираем «Устранить проблемы со звуком».
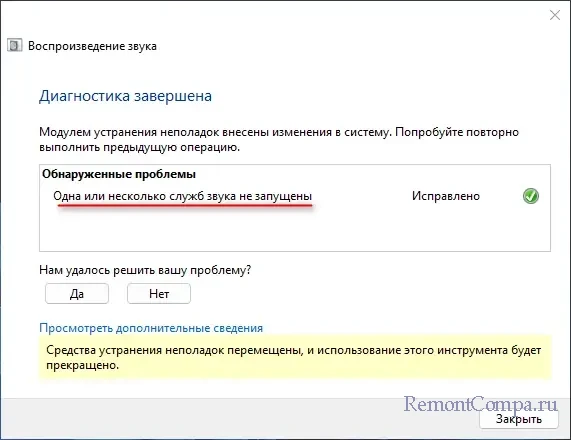
Далее в обоих случаях запустится системное средство устранения неполадок звука. Оно в автоматическом режиме включит службу аудио Windows и, возможно, другие системные службы, связанные с ней и необходимые для её работы.
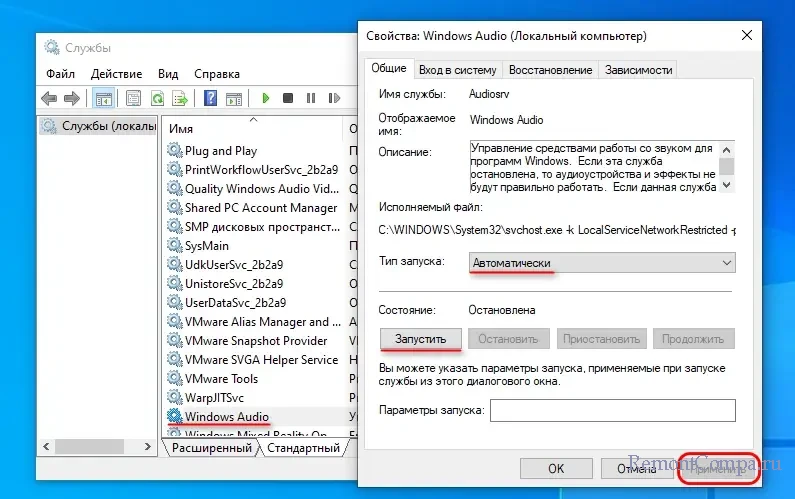
Службу аудио Windows можем включить вручную. Запускаем системную оснастку служб, в системный поиск или командлет «Выполнить» (клавиши запуска Win+R) вписываем:
В списке служб Windows ищем службу Windows Audio. Двойным кликом открываем её свойства. Выставляем тип запуска «Автоматически». Жмём кнопку «Запустить». И жмём внизу «Применить».
Если после этого звук не появился, проверяем и при необходимости таким же образом устанавливаем автоматический тип запуска и включаем службы, связанные с работой службы аудио Windows:
- Планировщик классов мультимедиа (при наличии такой службы в списке);
- Средство построения конечных точек Windows Audio;
- Удалённый вызов процедур RPC.
Иногда может потребоваться перезагрузка компьютера.
Друзья, если после включения службы аудио Windows и связанных с её работой служб звук по-прежнему отсутствует, можно предпринять следующее:
- Восстановить целостность системных файлов, возможно, в результате сбоя работы Windows затронуты файлы службы аудио и прочих системных компонентов, обеспечивающих звук;
- Обновить драйверы аудиоустройств и чипсета материнской платы, возможно, проблемы со звуком провоцируют повреждённые файлы драйверов;
- Прочие действия, детали – в статях «Пропал звук на компьютере» и «Пропал звук в Windows 11».
You are here:
Home » Windows 10 » How To Restart The Audio Driver In Windows 10/11
There is a built-in sound troubleshooter in Windows 10/11, which is pretty good at diagnosing and fixing common sound issues. When you are experiencing sound issues, you should run the sound troubleshooter (called Audio troubleshooter in Windows 11) before doing anything else.
If the troubleshooter fails to diagnose the issue, you can then try manually checking sound settings and restore sound settings to their defaults.
Reinstalling the audio driver is the last resort while troubleshooting sound issues. Before reinstalling the audio driver, you can try restarting the audio driver.
While restarting the audio driver might not fix the issue all the time, it might help at times. Besides, you can restart the audio driver with a few mouse clicks.
Complete the directions given below to restart the audio driver in Windows 10/11 via Device Manager.
Step 1: Open the Device Manager by right-clicking on the Start button on the taskbar and then clicking the Device Manager option. Alternatively, you can quickly launch the Device Manager by pressing the Windows logo + X keys and then pressing the M key.

Step 2: In the Device Manager, expand Sound, video and game controllers to see your audio driver entry.
Step 3: Right-click on your audio driver entry and then click Disable device option. Click the Yes button to disable the device driver. If you are asked to reboot your PC, save your work, close all programs, and reboot your PC once.


Step 4: Finally, right-click on the audio driver entry and click Enable device option. This will start the device driver again.

Check if the sound issue has been resolved. If not, try to uninstall the audio driver, reboot your PC once, and then install a fresh copy of the same.
You can also contact Microsoft support for assistance.
Also, learn how to simultaneously use speakers and headphones in Windows 10.