
Applies ToWindows 8.1 Windows 8.1 Enterprise Windows 8.1 Pro Windows 8 Windows 8 Enterprise Windows 8 Pro Windows RT Windows 7 Enterprise Windows 7 Home Basic Windows 7 Home Premium Windows 7 Professional Windows 7 Starter Windows 7 Ultimate Windows Server 2008 R2 Datacenter Windows Server 2008 R2 Enterprise Windows Server 2008 R2 for Itanium-Based Systems Windows Server 2008 R2 Standard Windows Vista Business Windows Vista Enterprise Windows Vista Home Basic Windows Vista Home Premium Windows Vista Starter Windows Vista Ultimate Windows Server 2008 Datacenter Windows Server 2008 Enterprise Windows Server 2008 for Itanium-Based Systems Windows Server 2008 Standard Microsoft Windows XP Service Pack 3 Microsoft Windows Server 2003 Service Pack 1 Microsoft Windows Server 2003 Service Pack 2 Windows 10
Что такое DirectX?
DirectX — это набор компонентов в Windows, который позволяет программному обеспечению, в первую очередь и особенно играм, работать непосредственно с видео- и аудиоустройством. Игры, использующие DirectX, могут более эффективно использовать встроенные в оборудование функции мультимедийного акселератора, что улучшает общий мультимедийный интерфейс.
Определение версии DirectX, установленной на компьютере
Инструмент DxDiag представляет подробную информацию о компонентах и драйверах DirectX, которые установлены в вашей системе и доступны к использованию.
-
Нажмите кнопку «Пуск», введите в поле поиска запрос dxdiag, затем нажмите клавишу «ВВОД».
-
Выберите элемент dxdiag в списке результатов поиска
-
Проверьте строку версия DirectX на первой странице отчета в разделе Информация о системе.
-
Проведите пальцем от правого края экрана к центру и коснитесь кнопки «Поиск». Введите запрос dxdiag в поле поиска. Или введите запрос dxdiag в строку поиска в меню «Пуск».
-
Выберите элемент dxdiag в списке результатов поиска
-
Проверьте строку версия DirectX на первой странице отчета в разделе Информация о системе.
-
Нажмите кнопку «Пуск» и введите в поле поиска запрос dxdiag.
-
Выберите элемент dxdiag в списке результатов поиска
-
Проверьте строку версия DirectX на первой странице отчета в разделе Информация о системе.
Версии DirectX и обновления через операционную систему
В этих версиях Windows DirectX 11.3 и 12 предустановлены.
Обновления будут доступны через Центр обновления Windows. Отдельного пакета данных версий DirectX не существует.
-
DirectX 11.1 входит в состав Windows 8, Windows RT и Windows Server 2012. Отдельного пакета обновления для DirectX 11.1 не существует. Эту версию DirectX можно установить только через клиентский компонент Центра обновления Windows в Windows 8, Windows RT и Windows Server 2012.
-
DirectX 11.2 предустановлен в системах Windows 8.1, Windows RT 8.1 и Windows Server 2012 R2. Отдельного пакета обновлений для DirectX 11.2 не существует. Эту версию DirectX можно установить только через Центр обновлений Windows в системах Windows 8.1, Windows RT 8.1 и Windows Server 2012 R2.
Примечание.Для дальнейшего обновления DirectX вам необходимо обновить операционную систему.
-
DirectX 11.0 предустановлен в системы Windows 7 и Server 2008 R2. Отдельного пакета обновлений для данной версии не существует. Вы можете обновить DirectX, установив пакет обновлений, а также обновления, перечисленные ниже.
-
DirectX 11.1 доступен для Windows 7 с пакетом обновления 1 (SP1) и Windows Server 2008 RS с пакетом обновления 1 (SP1) с обновлением платформы для Windows 7 и Windows Server 2008 (KB2670838).
Примечание. Для дальнейшего обновления DirectX вам необходимо обновить операционную систему.
-
DirectX 10 предустановлен в системах Windows Vista. Отдельного пакета обновлений для данной версии не существует. Вы можете обновить DirectX, установив пакет обновлений, а также обновления, перечисленные ниже.
-
DirectX 10.1 предустановлен в системах Windows Vista с пакетом обновления 1 (SP1) или более поздней версии и Windows Server с пакетом обновления 1 (SP1) или более поздней версии. Отдельного пакета обновлений для данной версии не существует. Вы можете обновить DirectX, установив пакет обновлений, а также обновления, перечисленные ниже.
-
DirectX 11.0 доступен для Windows Vista с пакетом обновления 2 (SP2) и Windows Server 2008 с пакетом обновления 2 (SP2) с установленными KB971512.
Примечание. Для дальнейшего обновления DirectX вам необходимо обновить операционную систему.
DirectX 9.0c доступен для Windows XP и Windows Server 2003 путем установки DirectX 9.0c End-User Runtime.
Некоторые приложения и игры требуют наличия DirectX 9. Тем не менее, на вашем компьютере установлена более поздняя версия DirectX. Если вы установили и запустили приложение или игру, для которой требуется DirectX 9, может появиться сообщение об ошибке, например «Запуск программы невозможен, так как на компьютере отсутствует d3dx9_35.dll. Попробуйте переустановить программу».
Чтобы устранить эту проблему, установите DirectX End-User Runtime.
Примечания.
-
При запуске этот пакет не вносит изменения в версию DirectX, Direct3D 9, Direct3D 10.x, Direct3D 11.x, DirectInput, DirectSound, DirectPlay, DirectShow и DirectMusic.
-
Для дальнейшего обновления DirectX необходимо обновить операционную систему.
Нужна дополнительная помощь?
Нужны дополнительные параметры?
Изучите преимущества подписки, просмотрите учебные курсы, узнайте, как защитить свое устройство и т. д.
Все способы:
- Переустанавливаем компоненты DirectX в Windows 10
- Шаг 1: Подготовка системы
- Шаг 2: Удаление или восстановление файлов DirectX
- Шаг 3: Инсталляция недостающих файлов
- Добавление и включение старых библиотек DirectX
- Вопросы и ответы: 8
По умолчанию библиотека компонентов DirectX уже встроена в операционную систему Виндовс 10. В зависимости от типа графического адаптера будет установлена версия 11 или 12. Однако иногда пользователи сталкиваются с проблемами в работе данных файлов, особенно при попытке поиграть в компьютерную игру. В таком случае потребуется переустановка директорий, о чем и пойдет речь далее.
Переустанавливаем компоненты DirectX в Windows 10
Перед переходом к непосредственной переустановке хотелось бы отметить, что обойтись можно и без нее, если на компьютере инсталлирована не последняя версия DirectX. Достаточно провести обновление, после чего все программы должны работать нормально. Сначала мы рекомендуем определить, какая версия компонентов стоит на вашем ПК.
Если вы обнаружили устаревшую версию, провести ее апгрейд можно только через центр обновлений Windows, осуществив предварительный поиск и инсталляцию свежей версии. Детальное руководство о том, как это осуществить, вы найдете в отдельной нашей статье далее.
Подробнее: Обновление Windows 10 до последней версии
Теперь же мы хотим продемонстрировать как быть, если верная сборка DirectX функционирует некорректно на компьютере под управлением ОС Виндовс 10. Разделим весь процесс на шаги, чтобы было удобнее во всем разобраться.
Шаг 1: Подготовка системы
Так как необходимый компонент является встроенной частью ОС, самостоятельно деинсталлировать его не получится — нужно обращаться за помощью к стороннему ПО. Поскольку такой софт использует системные файлы, понадобится отключить защиту, чтобы избежать конфликтных ситуаций. Осуществляется эта задача так:
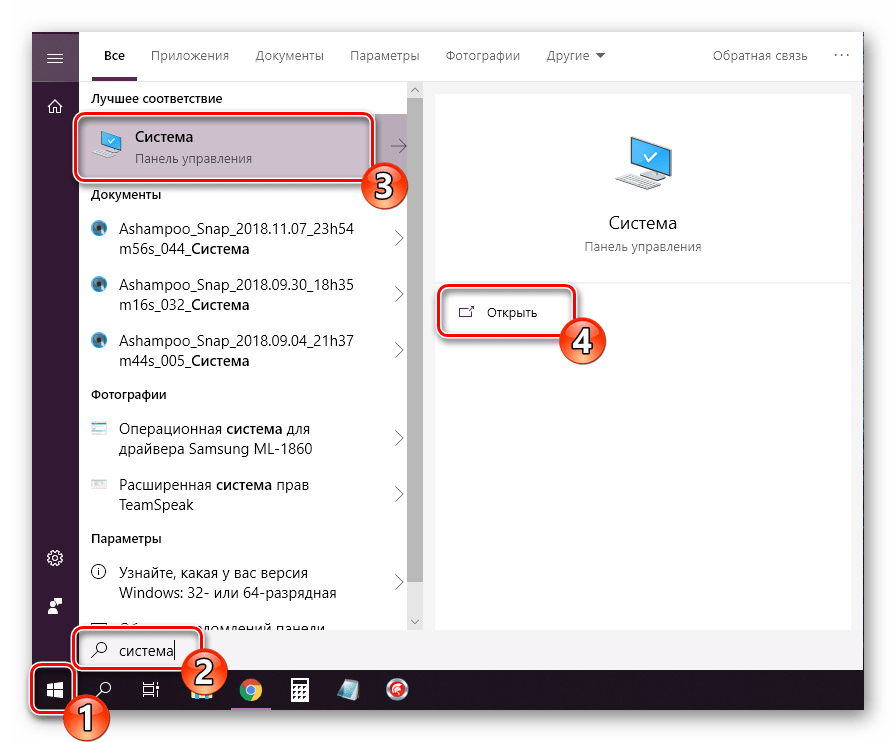
- Откройте «Пуск» и с помощью поиска отыщите раздел «Система».
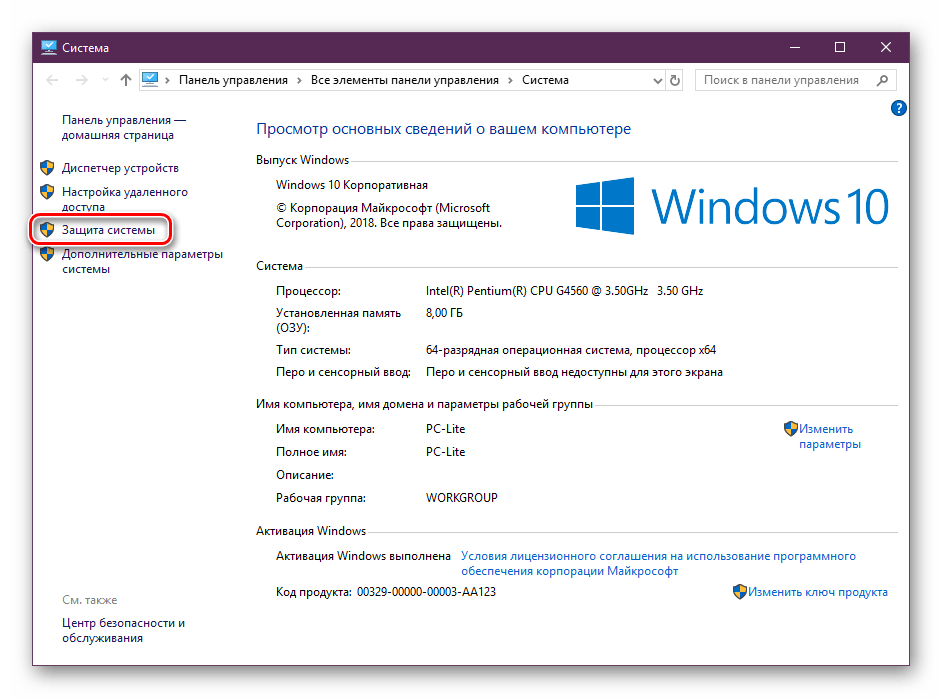
- Обратите внимание на панель слева. Здесь нажмите на «Защита системы».
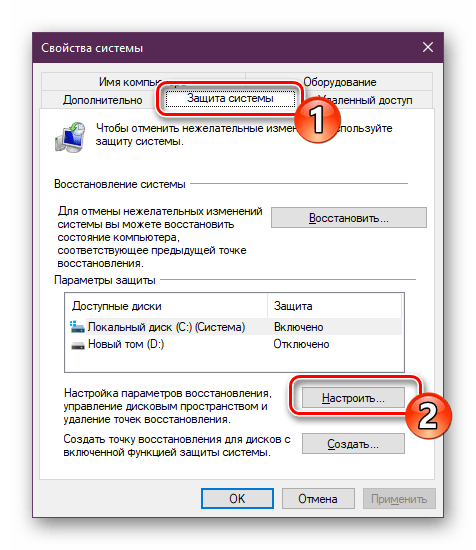
- Переместитесь во вкладку «Защита системы» и щелкните на кнопке «Настроить».
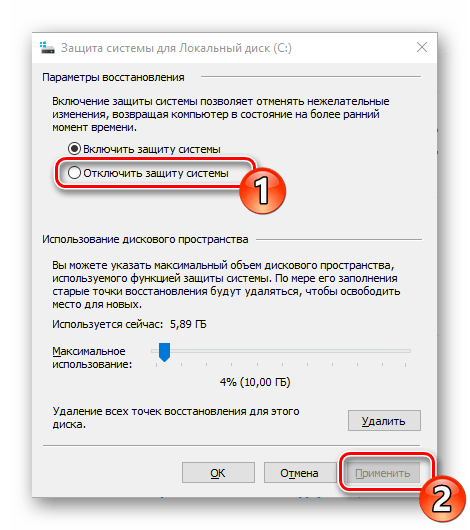
- Отметьте маркером «Отключить защиту системы» и примените изменения.
Поздравляем, вы успешно отключили отмену нежелательных изменений, поэтому далее при удалении DirectX не должно возникнуть никаких трудностей.
Шаг 2: Удаление или восстановление файлов DirectX
Сегодня мы будем задействовать специальную программу под названием DirectX Happy Uninstall. Она не только позволяет стереть основные файлы рассматриваемой библиотеки, но и проводит их восстановление, что может помочь избежать переустановки. Работа в этом ПО выглядит следующим образом:
Скачать программу DirectX Happy Uninstall
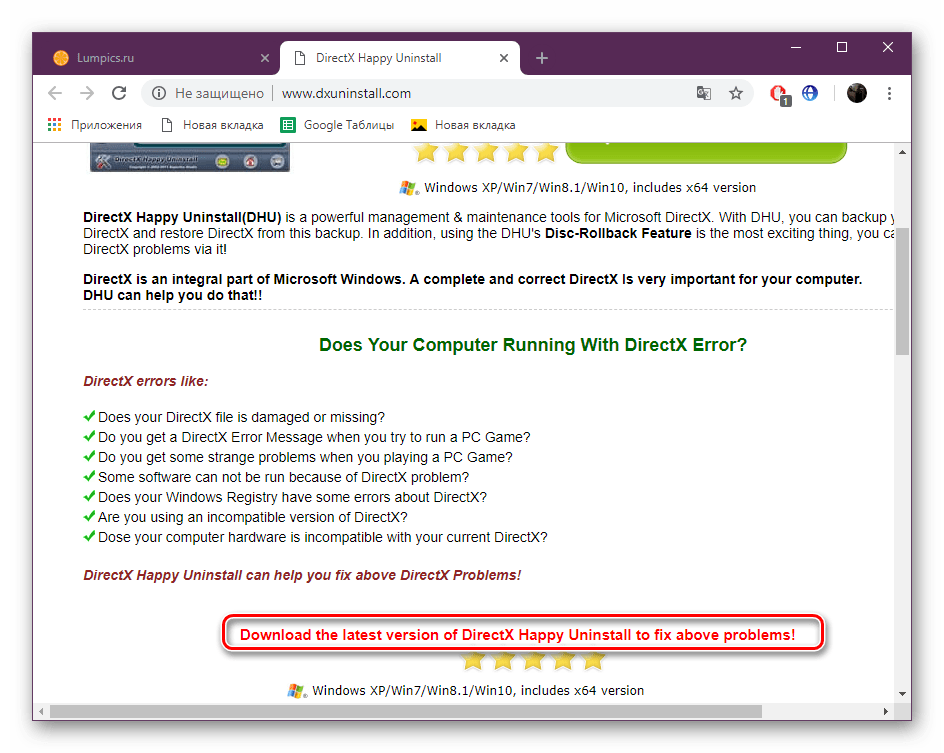
- Воспользуйтесь указанной выше ссылкой, чтобы перейти на главный сайт DirectX Happy Uninstall. Скачайте программу, нажав на соответствующую надпись.
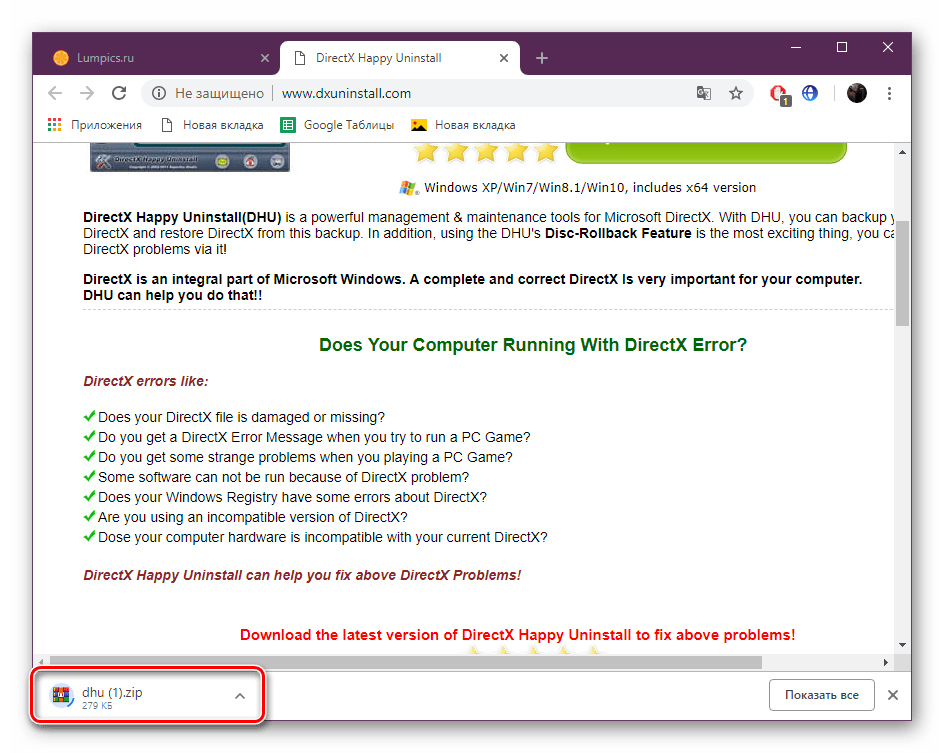
- Откройте архив и откройте находящийся там исполняемый файл, после этого проведите простую инсталляцию софта и запустите его.
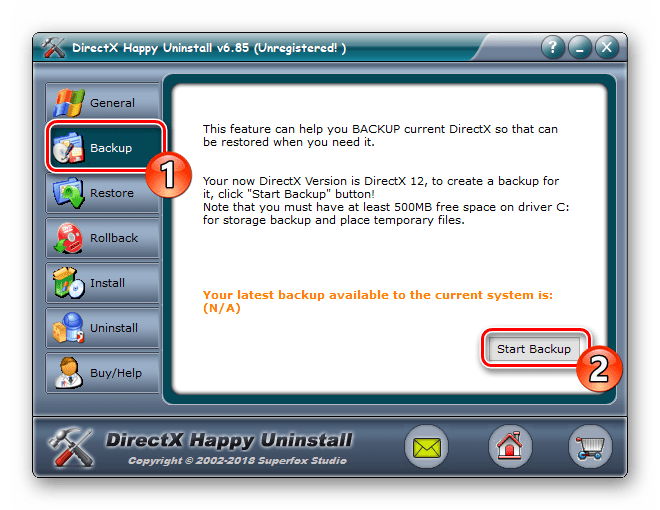
- В главном окне вы увидите информацию о DirectX и кнопки, запускающие встроенные инструменты.
- Переместитесь во вкладку «Backup» и создайте резервную копию директории, чтобы восстановить ее в случае неудачной деинсталляции.
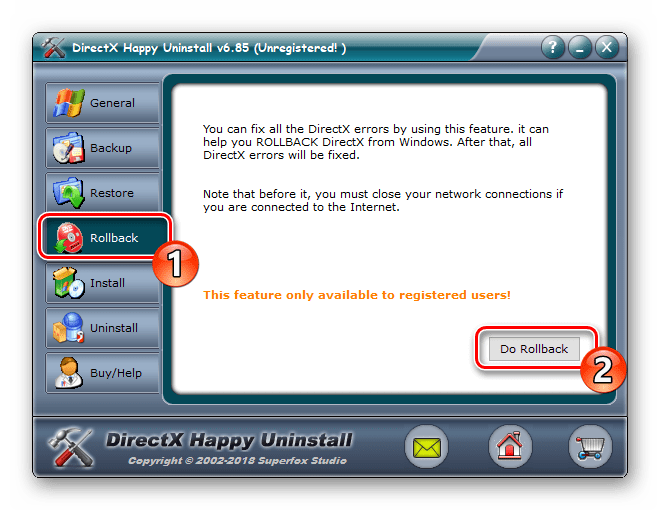
- Инструмент «RollBack» находится в одноименном разделе, а его открытие позволяет исправить ошибки, возникшие со встроенным компонентом. Поэтому сначала мы рекомендуем запустить эту процедуру. Если она помогла решить неполадку с функционированием библиотеки, дальнейшие действия выполнять не нужно.
- Если же неполадки остались, произведите удаление, однако перед этим внимательно изучите предупреждения, отображенные в открывшейся вкладке.

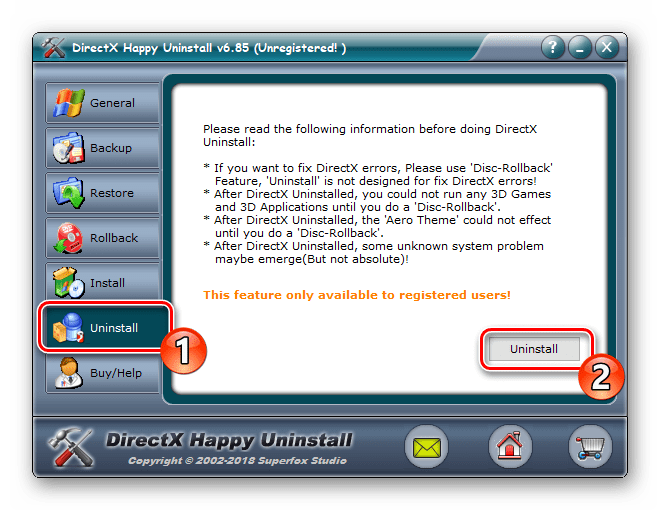
Хотим отметить, что DirectX Happy Uninstall удаляет не все файлы, а лишь основную их часть. Важные элементы все равно остаются на компьютере, однако это не помешает провести самостоятельную инсталляцию отсутствующих данных.
Шаг 3: Инсталляция недостающих файлов
Как уже было сказано выше, DirectX является встроенной составляющей Виндовс 10, поэтому его новая версия устанавливается со всеми остальными обновлениями, а автономный инсталлятор не предусмотрен. Однако есть небольшая утилита под названием «Веб-установщик исполняемых библиотек DirectX для конечного пользователя». Если вы откроете его, он автоматически проведет сканирование ОС и добавит недостающие библиотеки. Скачать и открыть его можно так:
Веб-установщик исполняемых библиотек DirectX для конечного пользователя
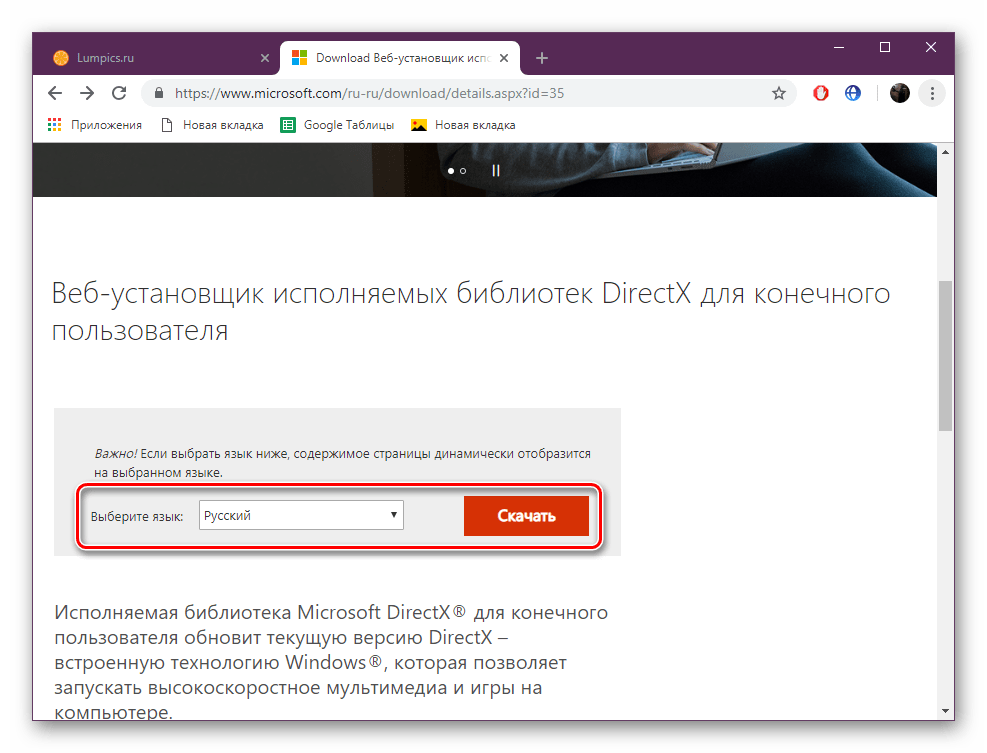
- Перейдите на страницу загрузки установщика, выберите подходящий язык и нажмите на «Скачать».
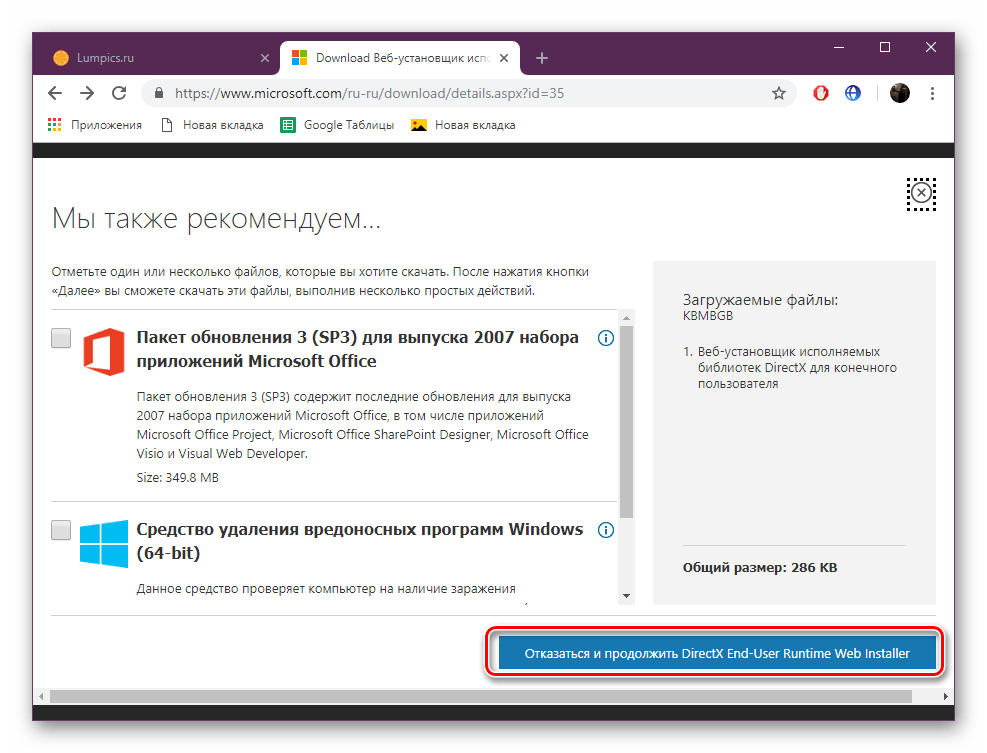
- Откажитесь или примите рекомендации дополнительного софта и продолжайте загрузку.
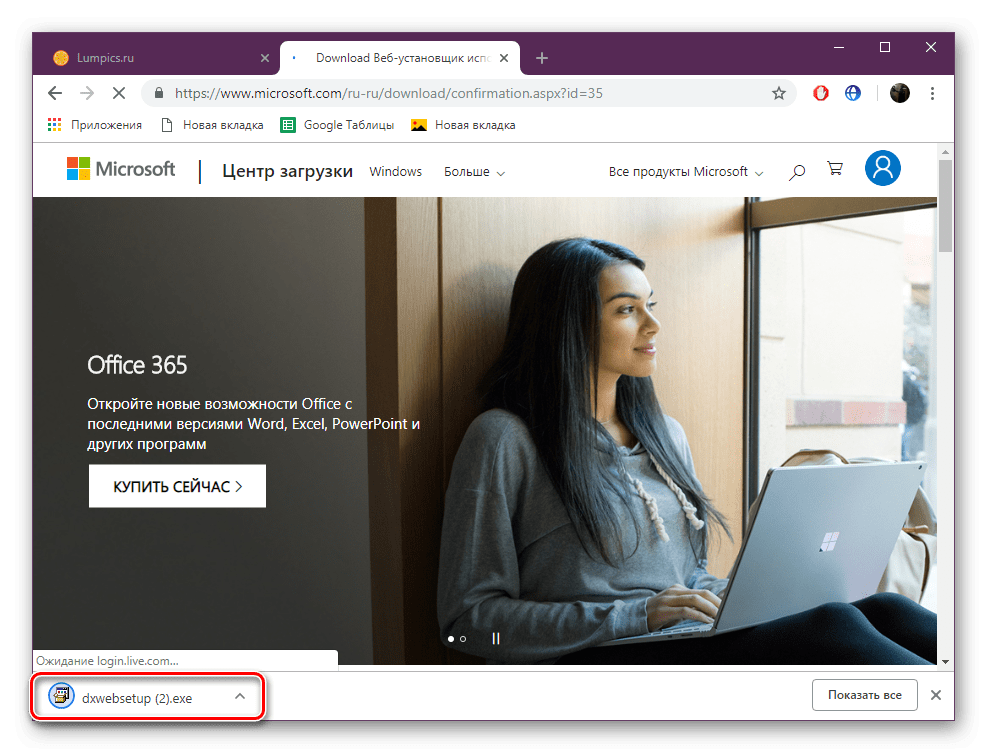
- Откройте скачанный инсталлятор.
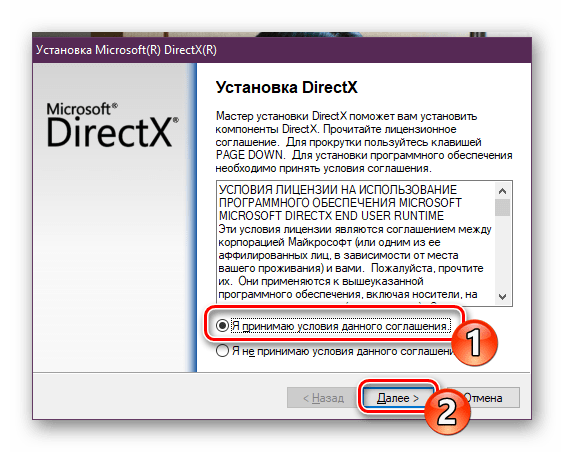
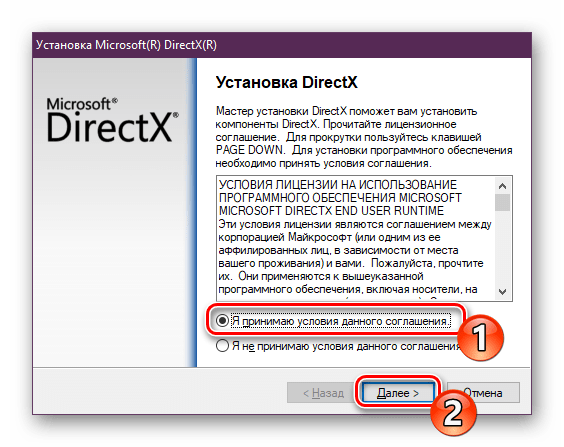
- Примите лицензионное соглашение и щелкните на «Далее».
- Ожидайте завершения инициализации и последующего добавления новых файлов.

По окончании процесса перезагрузите компьютер. На этом все ошибки с работой рассматриваемого компонента должны быть исправлены. Проведите восстановление через используемый софт, если работа ОС была нарушена после деинсталляции файлов, это вернет все в изначальное состояние. После этого снова активируйте защиту системы, как было описано в Шаге 1.
Добавление и включение старых библиотек DirectX
Некоторые пользователи пытаются запустить на Виндовс 10 старые игры и сталкиваются с отсутствием библиотек, входящих в старые версии DirectX, ввиду того, что новые версии не предусматривают наличие некоторых из них. В таком случае, если вы хотите наладить работу приложения, потребуется произвести небольшую манипуляцию. Сначала нужно включить один из компонентов Windows. Для этого следуйте инструкции:
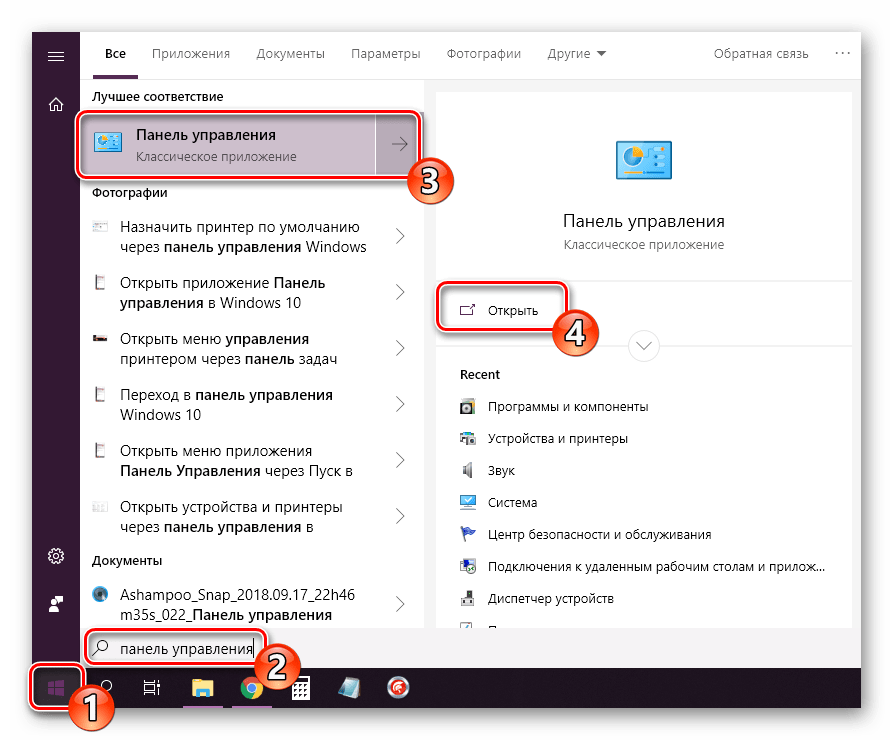
- Перейдите в «Панель управления» через «Пуск».
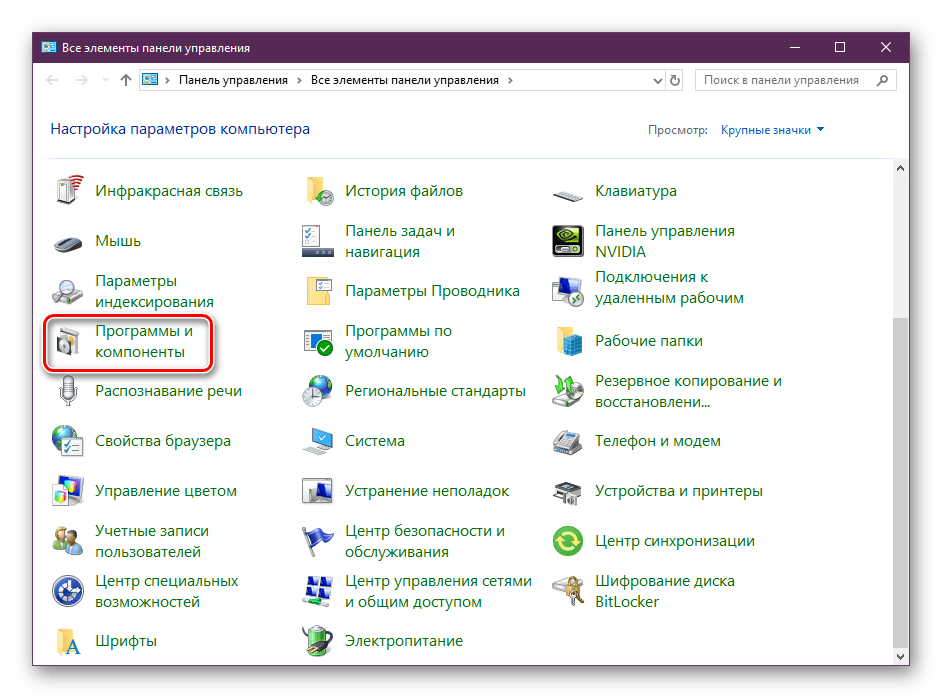
- Отыщите там раздел «Программы и компоненты».
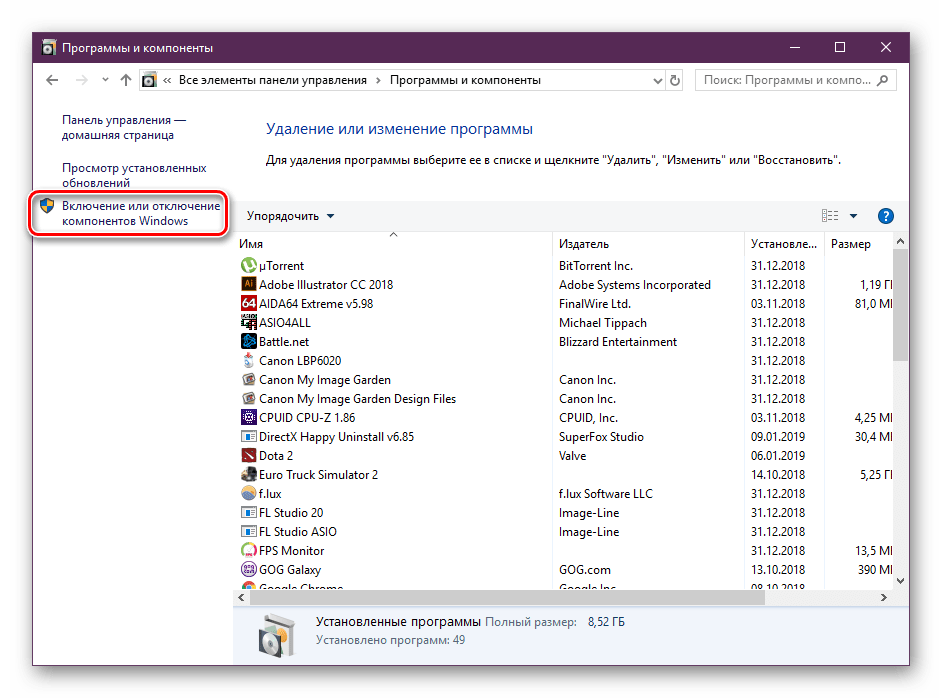
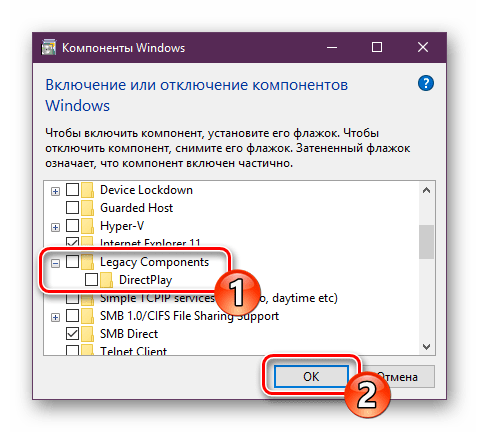
- Нажмите по ссылке «Включение или отключение компонентов Windows».
- Найдите в списке директорию «Legacy Components» и отметьте маркером «DirectPlay».
Далее потребуется загрузить недостающие библиотеки с официального сайта, а для этого выполните такие действия:
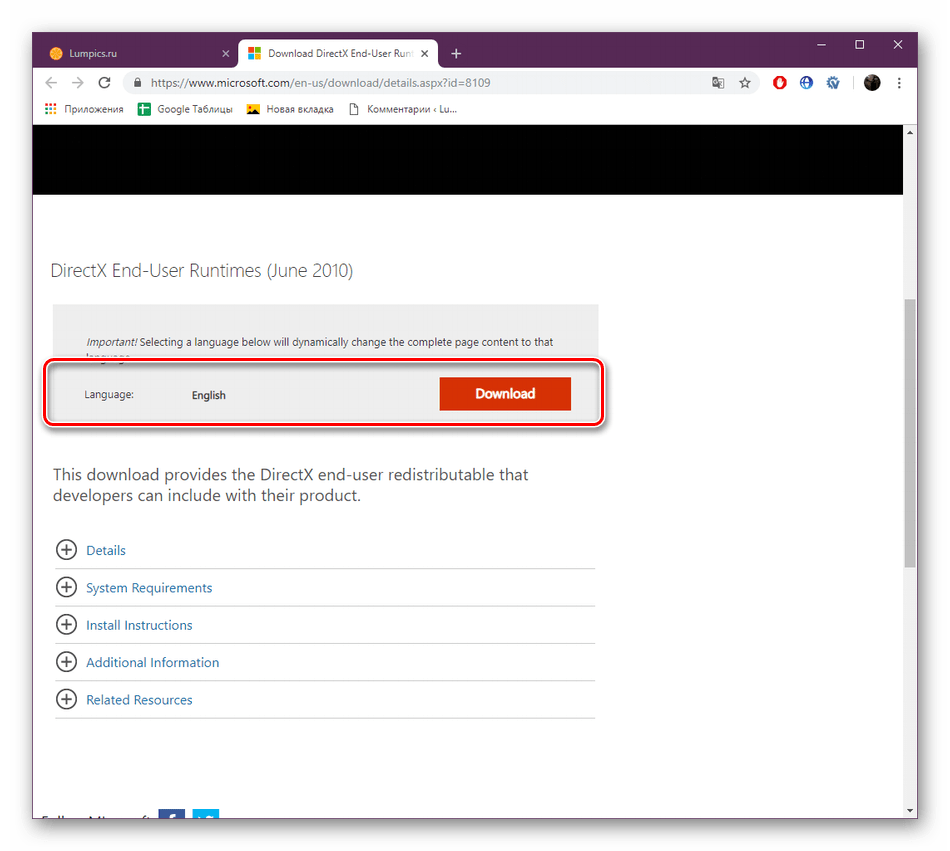
DirectX End-User Runtimes (June 2010)
- Перейдите по указанной выше ссылке и скачайте последнюю версию офлайн-установщика, нажав на соответствующую кнопку.
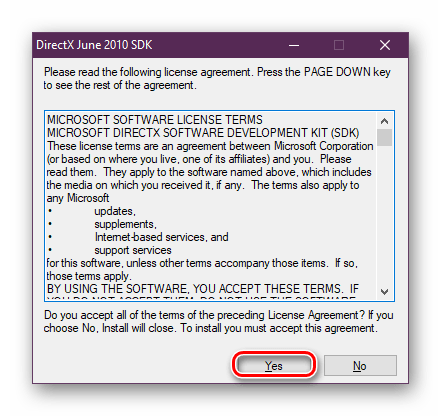
- Запустите загруженный файл и подтвердите лицензионное соглашение.
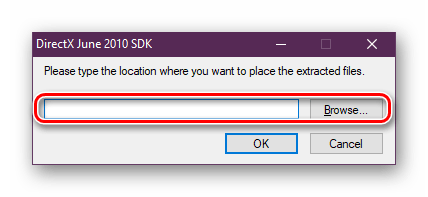
- Выберите место, куда будут помещены все компоненты и исполняемый файл для их дальнейшей установки. Рекомендуем создать отдельную папку, например, на рабочем столе, куда произойдет распаковка.
- После завершения распаковки перейдите в выбранное ранее место и запустите исполняемый файл.
- В открывшемся окне следуйте простой процедуре установки.

Все новые файлы, добавленные таким образом, будут сохранены в папке «System32», что находится в системной директории «Windows». Теперь вы можете смело запускать старые компьютерные игры — для них будет включена поддержка необходимых библиотек.
На этом наша статья подходит к концу. Сегодня мы постарались представить максимально детальную и понятную информацию, касающуюся переустановки DirectX на компьютерах с Виндовс 10. Кроме этого мы разобрали решение проблемы с отсутствующими файлами. Надеемся, мы помогли исправить возникшие сложности и у вас больше не осталось вопросов по этой теме.
Читайте также: Настройка компонентов DirectX в Windows
Наша группа в TelegramПолезные советы и помощь
How To Install DirectX 12 On Windows 11 and Windows 10 [Tutorial]
DirectX is a set of application programming interfaces (APIs) created by Microsoft that allows software, primarily games, to interface with graphics hardware. DirectX 12, in particular, is known for its advanced features that enhance performance and enable rendering of complex graphics, making it a critical component for modern gaming and graphic design applications. This guide will provide a detailed tutorial on how to install DirectX 12 on Windows 10 and Windows 11.
Understanding DirectX 12
Before we delve into the installation process, it’s vital to understand why DirectX 12 is important. This version of DirectX includes several enhancements over its predecessors, including:
-
Performance Improvements: DirectX 12 allows developers to have more control over the hardware, reducing CPU overhead, which can lead to higher frame rates and better utilization of multi-core processors.
-
Low-Latency Graphics: It supports less latency between CPU and GPU, allowing for a more fluid and responsive gaming experience.
-
Advanced Features: DirectX 12 includes features such as DirectX Raytracing for more realistic lighting and shadows, Variable Rate Shading to optimize rendering workloads, and better support for asynchronous compute operations.
-
Broad Compatibility: DirectX 12 is designed to work seamlessly with a wide array of hardware, making it compatible with both new and older systems.
Checking Your DirectX Version
Before you begin the installation process, it’s a good idea to check which version of DirectX is currently installed on your system. To do this:
- Press
Windows + Rto open the Run dialog. - Type
dxdiagand hit Enter. This will open the DirectX Diagnostic Tool. - In the tool, check the “DirectX Version” field near the bottom. If it says “DirectX 12”, your system is already equipped with the latest version.
If it shows a version lower than DirectX 12, follow the steps below to install or upgrade DirectX.
Prerequisites for Installing DirectX 12
DirectX 12 is included natively in Windows 10 and Windows 11, meaning you don’t need to install it manually as a separate package. However, the key to ensuring it works correctly lies in keeping your Windows operating system updated. Here are the prerequisites to consider:
- Operating System: Ensure you are running Windows 10 (Version 1507 or later) or Windows 11.
- Windows Updates: Make sure your OS is up-to-date by checking for and installing Windows Updates, as DirectX updates are often rolled out through these updates.
- Hardware Requirements: Ensure your GPU supports DirectX 12. You can check the specifications of your graphics card from the manufacturer’s website.
Installing or Updating DirectX 12
Step 1: Update Windows
The most reliable way to ensure that DirectX 12 is installed is by updating Windows. Here are the steps to do so:
- Click on the Start menu or press the Windows key.
- Go to Settings (the gear icon).
- Navigate to Update & Security.
- Click on Windows Update.
- Click on the Check for updates button. If there are updates available, Windows will start downloading and installing them.
After the update process is complete, you’ll likely have the latest version of DirectX installed.
Step 2: Install the DirectX End-User Runtime Web Installer
If in some cases, Windows Update does not install the DirectX components that some programs may require, you might need to manually download and install the DirectX End-User Runtime Web Installer. Here’s how:
- Open your preferred web browser and visit the official Microsoft DirectX download page.
- Click on the Download button to get the DirectX End-User Runtime Web Installer.
- Once downloaded, navigate to the folder where you saved the installer and double-click the setup file to begin the installation.
- Follow the installation prompts:
- Accept the End User License Agreement (EULA).
- The installer will check your system for missing DirectX components and download them from the internet.
- After the installation process is complete, restart your computer for the changes to take effect.
Step 3: Verify the Installation
After completing the installation or update, it’s a good practice to verify that DirectX 12 is indeed installed and functioning as expected:
- Open the Run dialog again using
Windows + R. - Type
dxdiagand hit Enter to launch the DirectX Diagnostic Tool. - Under the “DirectX Version” field, confirm that it displays “DirectX 12.”
Troubleshooting Installation Issues
If you encounter issues while installing or if DirectX 12 is not functioning correctly, consider the following troubleshooting steps:
Check for Software Conflicts
Sometimes third-party applications can interfere with the installation. Make sure to close all running applications, especially game clients, before attempting the installation.
Reinstall Graphics Drivers
Incompatibility with older graphics drivers can cause problems with DirectX 12. Reinstalling or updating your graphics drivers may resolve these issues:
- Press
Windows + Xand select Device Manager. - Expand the Display drivers section.
- Right-click on your graphics card and select Update driver. You can choose to search automatically for updated driver software.
Run Windows Troubleshooter
Windows has built-in troubleshooters that can help diagnose and fix common problems:
- Go to Settings.
- Navigate to Update & Security > Troubleshoot.
- Click on Additional troubleshooters and run the relevant troubleshooter.
DirectX Repair Tool
Although not an official Microsoft tool, some third-party applications claim to repair DirectX components. Ensure that you download such tools from reputable sources if you choose to go this route.
Conclusion
Installing DirectX 12 on Windows 10 or Windows 11 is a straightforward process that primarily involves keeping your operating system updated. Given its critical importance to modern gaming and graphics applications, ensuring that you have DirectX 12 can significantly enhance your computing experience.
Whether you’re a gamer seeking better performance or an application developer creating graphics-intensive software, DirectX 12 offers several advantages that make it worth having on your system. By following the above tutorial and troubleshooting steps, you should be well-equipped to install and configure DirectX 12 successfully.
Keep an eye on updates and regularly check your DirectX version to ensure that your system continues to deliver optimal performance. Happy gaming!
Thanks to the graphical capabilities of the DirectX API, Microsoft Windows has established itself as the best operating system for gaming. But what should you do when this crucial component is not functioning properly on your computer?
DirectX had to be installed separately in earlier versions of Windows since it was often packaged along with games. These days, however, the process is supposed to be automatic, which makes finding a way to do it manually a bit tricky. To help you out, here are all the methods to reinstall DirectX on your Windows PC.

When Do You Need To Reinstall DirectX on Your Computer?
By default, Windows 11/10 already includes the latest version of DirectX 12. Usually, this means that your PC remains up to date on any new drivers, giving you the best graphical performance on your hardware.
But it is sometimes possible to run into glitches. Maybe your Windows updates are paused. Perhaps the DirectX installation has gotten corrupted. Whatever the reason, if there are any graphical issues on your computer (such as in running video games), then the first thing to try is to reinstall DirectX.
Method #1: Download the DirectX Installer
While DirectX is installed and updated automatically, a standalone installer still exists. It can be used to manually add outdated DirectX modules on your computer without removing your existing DirectX installation.
- To get the DirectX End-User Runtime Web Installer, head to Microsoft’s official website. The installer is tiny, as the files required during installation are downloaded.

- Run this setup and accept the license agreement. Make sure you are still connected to the internet, as any modules that need to be installed will be retrieved now.

- Depending on the version of DirectX already installed, it can take anything between a few seconds to an hour. If your PC is not missing any DirectX components, the setup will exit without making any changes.

Using the official Windows installer is the recommended method for reinstalling DirectX on your system. You shouldn’t face any DirectX-related issues once the Runtime Installer has done its thing.
Method #2: Check for Windows Updates
As DirectX is included in Windows 11/10 by default, you don’t need to look for a standalone installer. Just staying updated is enough to ensure that your system is running the latest version of DirectX 12, as Windows updates include DirectX packages.
- To check for Windows Updates, head to the Start menu and open Settings.

- In the window that appears, select Update & Security.

- The very first tab in this category of settings is the Windows Update. Use the Check for updates button to refresh Windows. If any updates are pending, Windows will now detect and install them.

Once you are up-to-date with your Windows Updates, you don’t need to worry about reinstalling DirectX anymore. The operating system will automatically configure the DirectX modules to give you the latest possible version that your hardware can support.
Method #3: Disable Third-Party Apps and Services
In case the first two methods don’t work, it’s likely the problem lies elsewhere. Very rarely, a third-party application or service interferes with DirectX. This interference can cause DirectX issues even with the correct version installed on your computer.
- To disable Startup Services, open the Task Manager. You can either use the Ctrl + Alt + Del keyboard shortcut or right-click on the Taskbar and select Task Manager from the menu.

- If this is your first time opening Task Manager, you will only be able to see running applications rather than any services or processes. To get the full view, select More details.

- Task Manager will now display every running task on your PC, including system processes or background tasks. Switch to the Startup tab.

- In the Startup tab is the list of all services run by default upon booting up your PC. Not only do these apps slow down your computer, but they can often cause conflicts with other more critical applications. Select all unnecessary services and select the Disable button.

- Startup services aren’t the only resource-hogging applications running on your computer. There are plenty of services that do not show up in that list but keep running in the background anyway. To disable such tasks, open System Configuration by searching for it from the Start menu.

- The MSConfig system utility lets you configure the startup option on your computer and is much more detailed than the Task Manager. Note the Normal startup option on this screen; once you are done with diagnostics, you need to enable this to return things to normal. For now, select the Services tab to continue.

- All the background services running on your PC are listed here. This includes system processes as well, so enable the Hide all Microsoft services checkbox to remove them. Now you can use the Disable all button to shut down all these extra processes.

Note that this step is not permanent. Many of the services on this list, while not essential, are still somewhat useful and need to be working for the best performance of your computer. This only allows us to check if any third-party application might be interfering with your DirectX installation.
All you now need to do is to restart your PC and see if DirectX is functioning. If it is, then one of the services from the previous list is the culprit. We recommend enabling them one by one to find the offending application, after which you can uninstall or disable it.
Once done, remember to go back to the System Configuration app and select Normal startup to set things back to the default.
Method #4: Run System File Checker in Command Prompt
If you’ve installed DirectX correctly, updated your computer, and even checked for any conflicting services, the only possibility remaining is data corruption. Corrupted drivers and system files can often throw weird errors and can be hard to diagnose.
- To find and fix any corrupted system files on your computer, open Command Prompt as an administrator. Just type cmd in the Search box to find the application.

- We will be using a command prompt utility called System File Checker. As the name suggests, it checks all system files for any data corruption, fixing the affected files. Enter the command sfc /scannow to run the tool.

- System File Checker will now scan your Windows installation and verify the integrity of each file. Once the scan is complete, all your system files have been checked and repaired.

What Is the Best Way To Reinstall DirectX on Windows 11/10?
Since DirectX is an integral component of Windows 11/10, you usually don’t have to worry about installing it yourself. Instead, windows updates will patch DirectX issues automatically, leaving you free to play games and run other graphical applications.
But in case your computer shows issues with the DirectX, it wouldn’t be a bad idea to reinstall it manually. You can use Microsoft’s standalone installer for this purpose or just ensure that your Windows Updates are not being stalled.
When installing DirectX is not the issue, you should check for conflicting applications and system corruption. Fixing these things ensures that DirectX will run smoothly on your Windows computer.
Related Posts
- How to Fix a “This file does not have an app associated with it” Error on Windows
- How to Fix an Update Error 0x800705b4 on Windows
- How to Resolve “A JavaScript error occured in the main process” Error on Windows
- How to Fix the Network Discovery Is Turned Off Error on Windows
- How to Change Folder Icons in Windows
DirectX is a critical component of Windows 10 that ensures optimal performance for various multimedia applications and games. However, if you encounter issues with DirectX or suspect that it’s causing problems with your system’s graphics and multimedia capabilities, reinstalling it can often resolve these issues. In this guide, we’ll show you how to re-install DirectX in Windows 10, ensuring that your system is equipped with the latest version and that your multimedia experiences run smoothly. So, if you’re facing DirectX-related problems, let’s get started on the process of re-installing it to get your system back on track.

Table of Contents
Even though DirectX is an in-built application in Windows 10 and it updates automatically with the system update, it is possible that your system continues to run on older versions of DirectX. This can happen due to certain programs that interfere with the reinstall DirectX 11 process. Also, issues during the upgrading process can also lead to DirectX becoming corrupt. As there are no standalone packages for downloading DirectX, follow the given steps that can help you with reinstalling it on your Windows PC.
Easiest Method: Check for & Install Windows Update
Usually, an update for Windows is installed automatically on a PC or a laptop. In case it does not happen, you can check for Windows update manually and install it. Because in Windows 10 and above versions, updating the operating system helps in refreshing DirectX too. This will help you with the same experience as to reinstall DirectX 11. You can check our guide on How to Download and Install Windows 10 Latest Update for more.

Step I: Uninstall DirectX
The first thing that needs to be done is the uninstallation of DirectX from your PC. Uninstalling all the files of DirectX is the only way to install Microsoft DirectX for Windows 10 later. There are many ways to achieve this such as:
- uninstalling the program from the Control Panel,
- removing DirectX with its uninstaller.exe.,
- using system restore to remove DirectX, and many more.
Explained below is the simplest method for uninstalling DirectX using the Programs and Features option on your PC. So, let us begin with the steps so you can further reinstall DirectX Windows 10:
1. Right-click on the Start icon on your Desktop and choose Run as shown.
2. Enter Control Panel in Run dialog box & press Enter.

3. Now, select Programs and Features.

4. Next, look for DirectX in the list of programs and right-click on it.

5. Select Uninstall from the given menu as shown.

6. Confirm the same & follow on-screen instructions, as prompted.
Also Read: How to use the DirectX Diagnostic Tool in Windows 10
Step II: Download DirectX Installer
The next method that is extremely helpful to reinstall DirectX Windows 10 is to manually download the DirectX installer which is available in the Microsoft Download Centre. This method helps in restoring missing files, if any, and processing reinstallation of DirectX. Now, follow the steps given below to use the DirectX installer:
1. Open any web browser to download DirectX End-User Runtime Web Installer.

2. Once you have selected the language, click on Download.

3. Click on the dxwebsetup.exe file downloaded on your PC.

4. Select I accept the agreement and click on Next in the Installing Microsoft(R) DirectX(R) window.

5. Now, click on Next again.

6. The DirectX Setup will start to install as shown.

Also Read: How to Update DirectX in Windows 10
Additional Method: Install DirectX in Safe Mode
Another way to DirectX 12 update is to force your PC to update DirectX indirectly. You can try running your PC in safe mode to do it. Safe mode in PC helps in dealing with issues of the operating system and also processes any pending updates.
In case you are having trouble installing the DirectX update, follow our guide How to Boot to Safe Mode in Windows 10.

Then, follow our guide on How to Download and Install Windows 10 Latest Update for DirectX 11 or DirectX 12 installation.
Recommended: Fix Unable to Install DirectX on Windows 10
Since DirectX comes pre-installed on Windows latest versions, you don’t have to worry about installing it manually. But as issues with DirectX are sometimes inevitable, you can reinstall Microsoft DirectX for Windows 10 using our helpful guide. Let us know about your suggestions or any queries if you have regarding the topic by leaving them in the comments section below.