
Версию веб-сервера можно узнать несколькими способами, например, в панели phpMyAdmin, или с помощью PHP функции
<?php
phpinfo ();
Можно узнать прямо в командной строке:
c:\Server\bin\Apache24\bin\httpd.exe -v
Пример вывода:
Server version: Apache/2.4.34 (Win64)
Apache Lounge VC15 Server built: Jul 11 2018 13:09:01
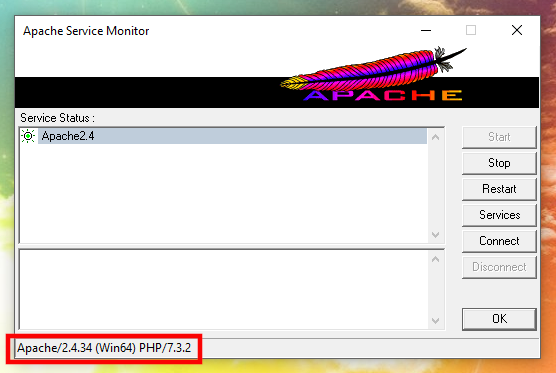
Или можно посмотреть открыв ApacheMonitor.exe:
Скачать Apache Windows
Заходим на главную страницу сайта https://apache-windows.ru:
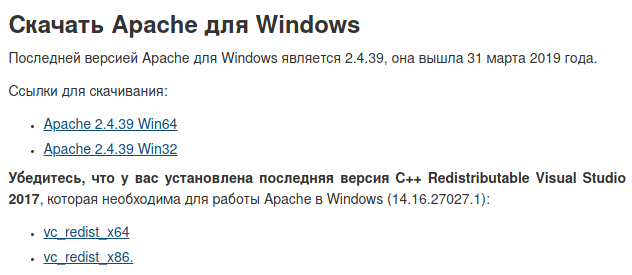
и видим, что вышла новая версия — скачиваем её для 64 битных систем (Win64) или 32-битных (Win32).
Заодно можно обновить и C++ Redistributable Visual Studio 2017.
Далее я исхожу из того, что веб-сервер у меня установлен в c:\Server\bin\Apache24 — если у вас другое расположение, то отредактируйте пути соответствующим образом.
Скопируйте в безопасное место файл c:\Server\bin\Apache24\conf\httpd.conf — это главный конфигурационный файл Apache. Мы делаем его резервную копию чтобы не пришлось заново настраивать Apache.
Остановите и удалите службу Apache:
c:\Server\bin\Apache24\bin\httpd.exe -k stop
c:\Server\bin\Apache24\bin\httpd.exe -k uninstall
Эти команды надо ввести в командную строку, чтобы открыть командную строку нажмите Win+x, и там выберите Windows PowerShell (Администратор).
Удалите папку C:\Server\bin\Apache24\. Пмните о ваших сайтах и базах данных — у меня они расположены в другой папке, специально, чтобы было легко обновлять сервер. Если у вас сайты размещены в папке c:\Server\bin\Apache24\htdocs\ (внутри директории Apache24, как это сделано по умолчанию), то вам самостоятельно нужно позаботиться об их резервном копировании.
Распакуйте новый архив в C:\Server\bin\. Скопируйте сохранённый ранее файл httpd.conf в c:\Server\bin\Apache24\conf\httpd.conf.
Запустите службу Apache:
c:\Server\bin\Apache24\bin\httpd.exe -k install
c:\Server\bin\Apache24\bin\httpd.exe -k start
Связанные статьи:
- Как обновить PHP (94.6%)
- Как обновить MySQL (94.6%)
- Как обновить phpMyAdmin (94.6%)
- Как обновить MariaDB в Windows (94.6%)
- Apache для Windows (55.5%)
- Как в Windows подключиться к MySQL в командной строке (RANDOM — 50%)
Table of Contents
- Introduction
- Let’s Do It
- Solution 1: Using the Official Apache Windows Binaries
- Solution 2: Using a Third-party Distribution like XAMPP
- Solution 3: Installing Apache via Windows Package Management Tools like Chocolatey
- Conclusion
Introduction
Apache HTTP Server is one of the most widely used web servers in the world. Installing or upgrading Apache on Windows might seem daunting, but there are several straightforward methods to do so. In this guide, we will explore multiple solutions to install or upgrade Apache on a Windows system, each suitable for different scenarios.
Let’s Do It
Solution 1: Using the Official Apache Windows Binaries
The Apache Software Foundation provides official binaries for Windows that can be used for both installation and upgrades. This method is straightforward and recommended for those who prefer an official source.
- Step 1: Visit the Apache Haus or Apache Lounge website to download the official binaries.
- Step 2: Unzip the downloaded file to your desired installation directory.
- Step 3: Open the ‘conf’ folder and edit the ‘httpd.conf’ file to suit your requirements.
- Step 4: Use the Windows command prompt to start the server using ‘httpd.exe’.
Notes: This method provides a stable and trustworthy source for Apache binaries. However, the manual configuration might be complex for beginners, and there are no automated updates.
Solution 2: Using a Third-party Distribution like XAMPP
XAMPP is a popular PHP development environment that comes bundled with Apache, MySQL, and other tools. It’s a good option for development and testing environments.
- Step 1: Download the latest version of XAMPP from the official website.
- Step 2: Run the installer, and follow the prompts to install the components you need, including Apache.
- Step 3: Start the Apache server through the XAMPP control panel.
Again, no commands or code is necessary because the XAMPP installer provides a graphical user interface for installation and management.
Notes: XAMPP is easy to set up and ideal for beginners, but it is not suited for production environments due to its pre-configured security settings designed for convenience over security.
Solution 3: Installing Apache via Windows Package Management Tools like Chocolatey
Chocolatey is a Windows package manager that can be used to install and upgrade software, including Apache HTTP Server.
- Step 1: Install Chocolatey following the instructions on their website.
- Step 2: Open an administrative command prompt and execute `choco install apache-httpd` to install Apache.
- Step 3: To upgrade, run `choco upgrade apache-httpd` from an administrative command prompt.
Commands:
choco install apache-httpd
choco upgrade apache-httpd
Notes: Package managers make the installation and upgrade process much simpler by handling dependencies. However, availability of the latest version may depend on the maintainers of the Chocolatey package.
Conclusion
There are several ways to install or upgrade Apache HTTP Server on a Windows environment that cater to different levels of expertise and use cases. The official binaries offer a stable and secure method for those who are comfortable with manual configuration. For developers seeking a more turn-key solution, XAMPP provides a quick setup at the cost of not being suited for production. Finally, package managers like Chocolatey offer a convenient, scripted installation process that saves time but may lag behind the latest Apache release. The choice depends on the user’s requirements and expertise.
Все способы:
- Шаг 1: Скачивание и распаковка файлов
- Шаг 2: Изменение конфигурационного файла
- Шаг 3: Первый запуск локального веб-сервера
- Вопросы и ответы: 17
В этой статье мы разберем только основные принципы установки и первого запуска веб-сервера Apache на компьютере под управлением Windows. Учитывайте, что все остальные действия, такие как: установка PHP, подключение MySQL, добавление других необходимых компонентов для локального сервера, придется выполнять вручную, из-за чего могут изменяться настройки Apache. Если во время редактирования глобальных параметров возникнут проблемы, не стесняйтесь обращаться к официальной документации и искать в поисковике решение ошибок по их кодам.
Шаг 1: Скачивание и распаковка файлов
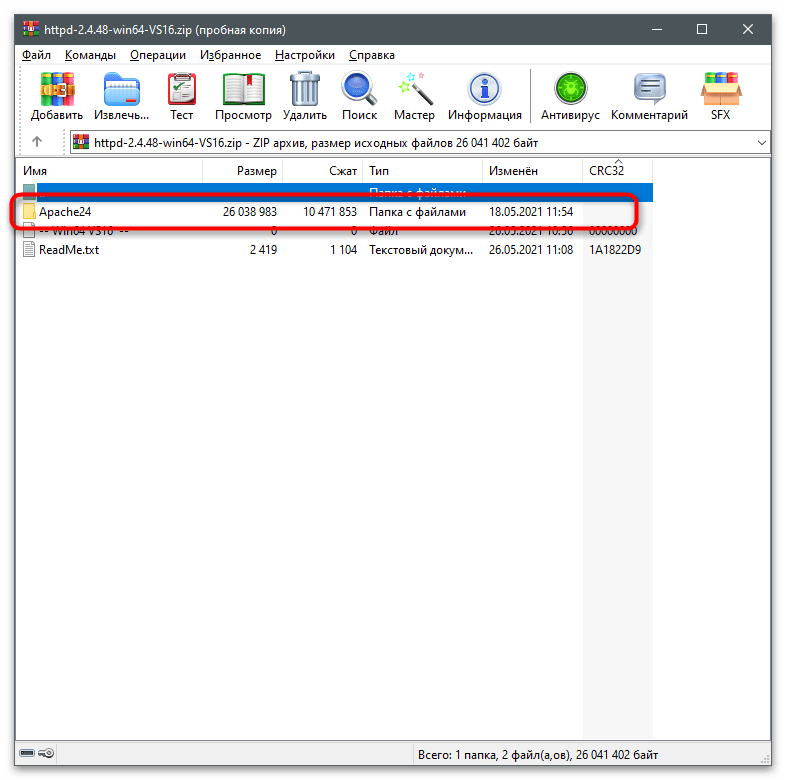
Apache для Windows распространяется в виде ZIP-архива, в котором находятся все нужные файлы. Установка через Терминал, как это осуществляется в дистрибутивах Linux, в этом случае недоступна, поэтому для получения файлов выполните следующие действия:
Скачать Apache с официального сайта
- Кликните по кнопке выше, чтобы перейти на официальный сайт веб-сервера, где нажмите по ссылке с названием последней доступной версии Apache.
- Вы окажетесь на странице описания версии, после чего выберите «Files for Microsoft Windows».
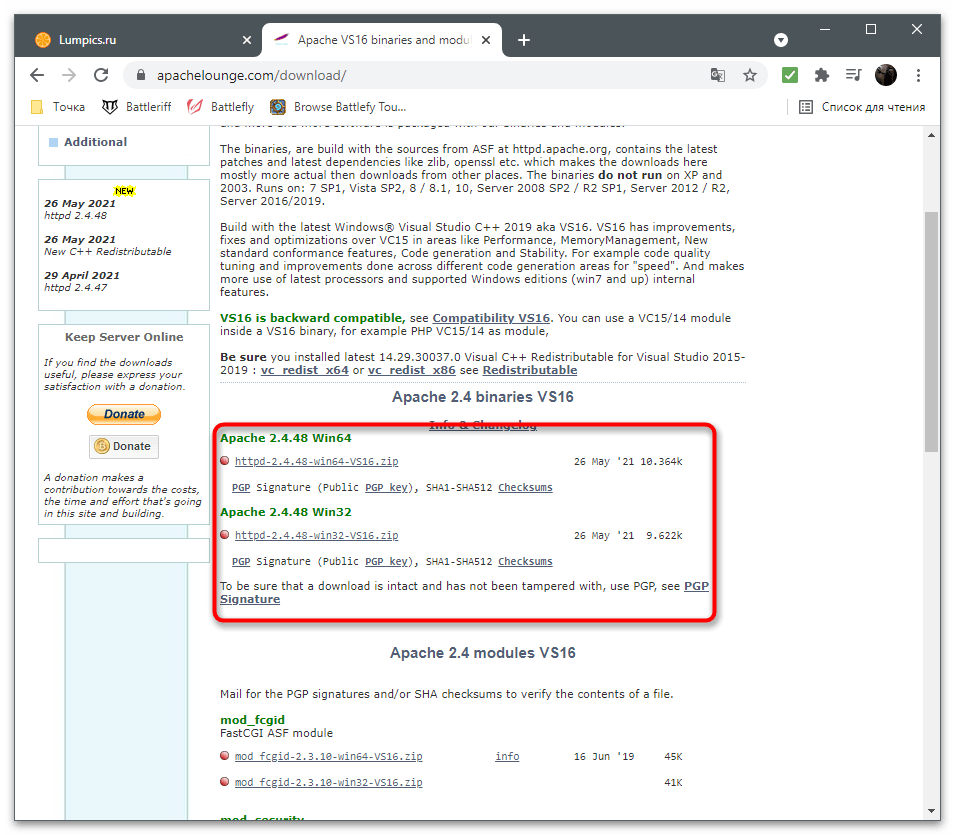
- В разделе «Downloading Apache for Windows» нажмите на ссылку «Apache Lounge».
- Выберите версию для разрядности своей операционной системы и начните загрузку.
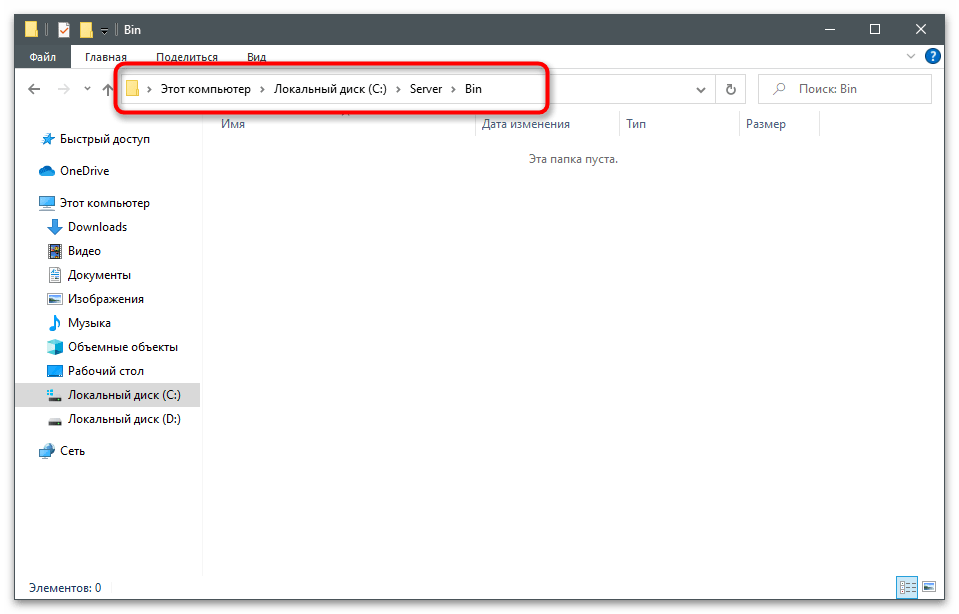
- Пока файлы скачиваются, создайте папку, куда будут помещены все элементы, связанные с веб-сервером. Мы выбрали для этого системный раздел жесткого диска, создали папку «Server», а в ней — «Bin». Это стандартные названия каталогов, поэтому при редактировании конфигурационного файла будем учитывать именно данное расположение.
- Перетащите папку «Apache24» из скачанного архива в созданный ранее каталог «Bin».


Шаг 2: Изменение конфигурационного файла
Конфигурация локального веб-сервера, установленная по умолчанию, не подходит для его нормального запуска, чтобы проверить работу и подключить остальные компоненты. Связано это с изменением пути расположения файлов и другими параметрами, влияющими на старт программы. Измените их, выполнив представленные далее шаги.
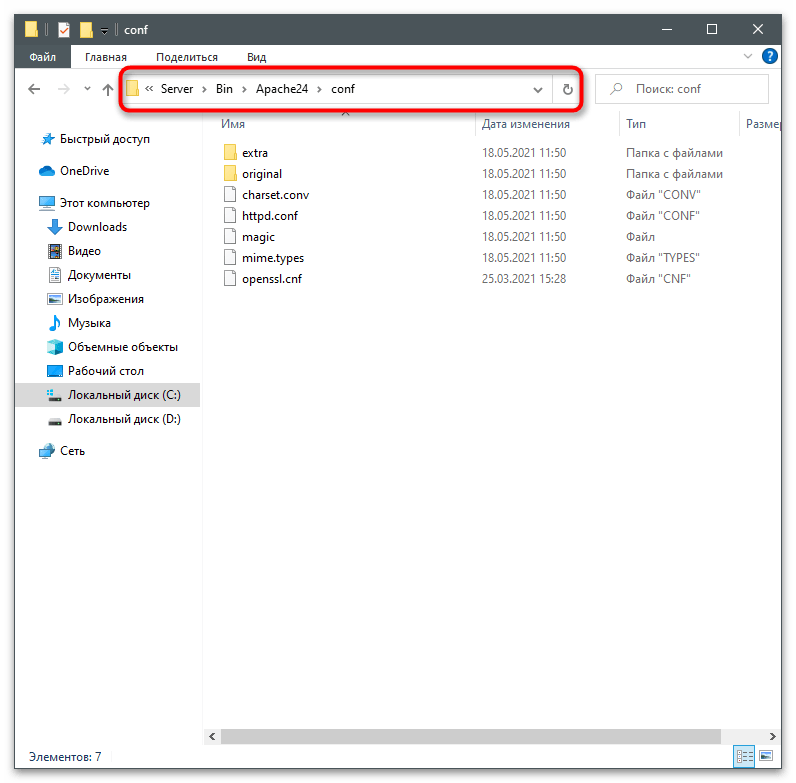
- Перейдите по пути
C:\Server\bin\Apache24\conf\. - Дважды кликните по файлу «httpd.conf» для его открытия.
- Если у вас есть продвинутый текстовый редактор, выберите его для просмотра файла конфигурации. В противном случае используйте стандартный «Блокнот».
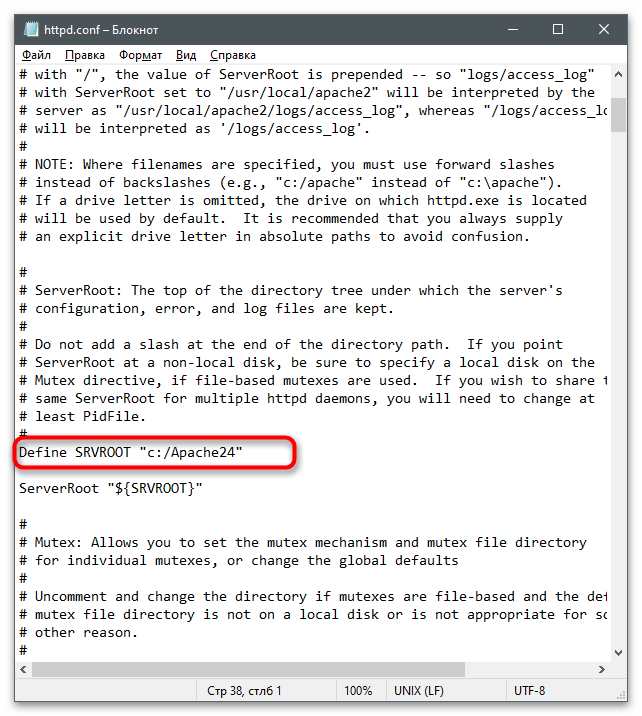
- В документе найдите строку
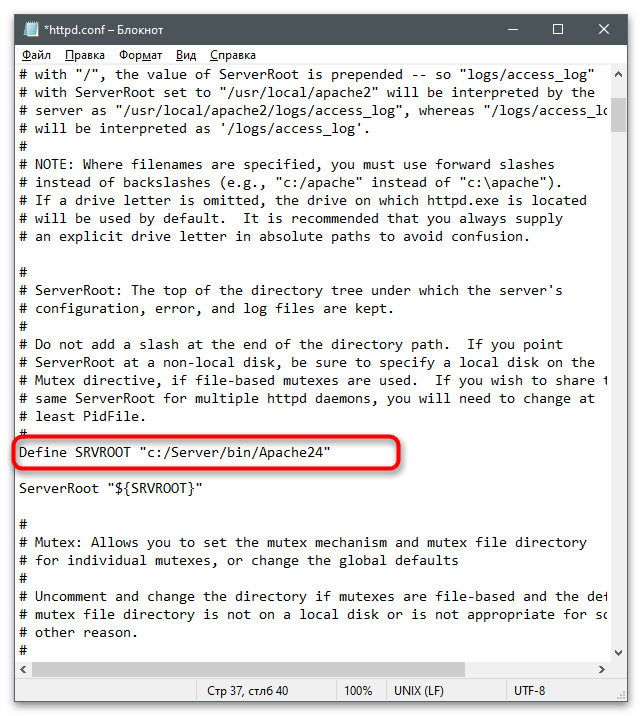
Define SRVROOT "c:/Apache24". - Замените ее на
Define SRVROOT "c:/Server/bin/Apache24", чтобы указать новый путь к файлам. Учитывайте, что в строке мы указали созданный ранее путь. Если у вас он отличается, поменяйте выражение в кавычках. - Далее найдите строку
#ServerName www.example.com:80, которая по умолчанию заключена в комментарий и неактивна. - Измените ее на
ServerName localhost, указав тем самым локальный адрес, который в дальнейшем и будет использоваться для проверки веб-сервера. - Отыщите строки
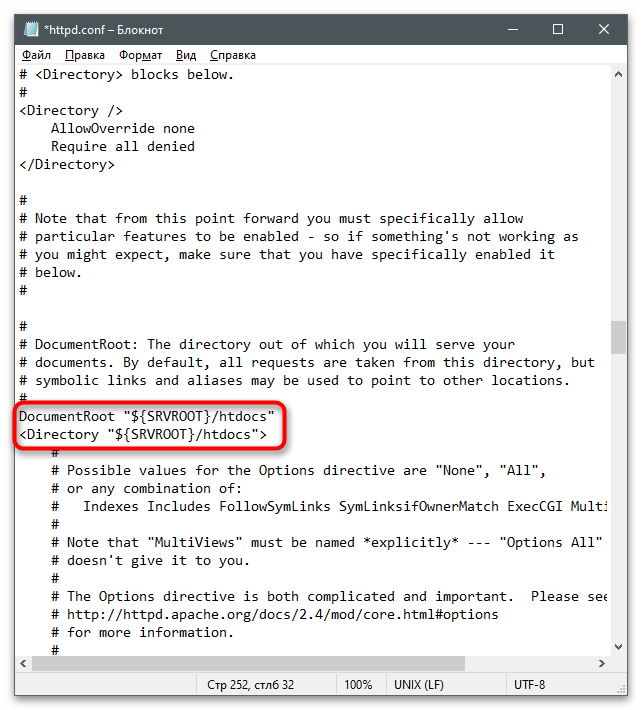
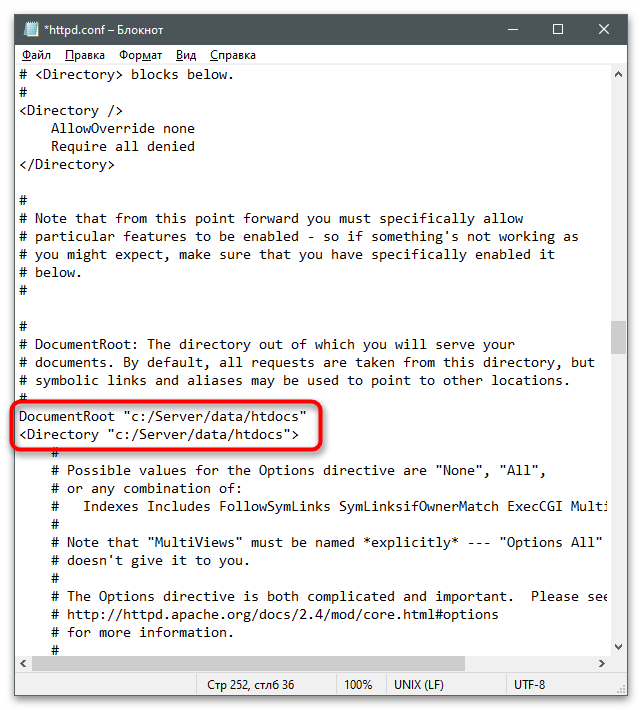
DocumentRoot "${SRVROOT}/htdocs"и<Directory "${SRVROOT}/htdocs">, которые отвечают за расположение связанных с сервером файлов. - Замените их на
DocumentRoot "c:/Server/data/htdocs"и<Directory "c:/Server/data/htdocs">. - Сейчас параметр
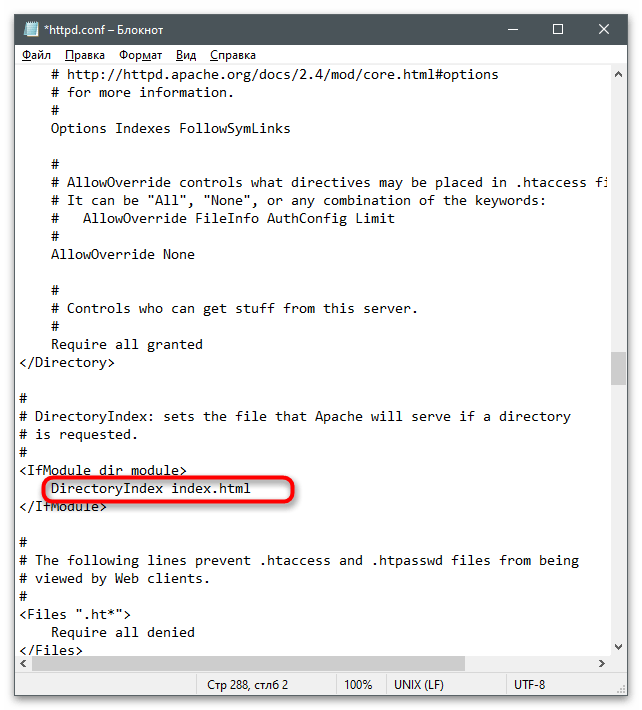
DirectoryIndexимеет только значениеindex.html, поэтому его тоже нужно найти и отредактировать. - Добавьте еще несколько доступных форматов файлов, чтобы в итоге строка обрела вид
DirectoryIndex index.php index.html index.htm. - Для строки
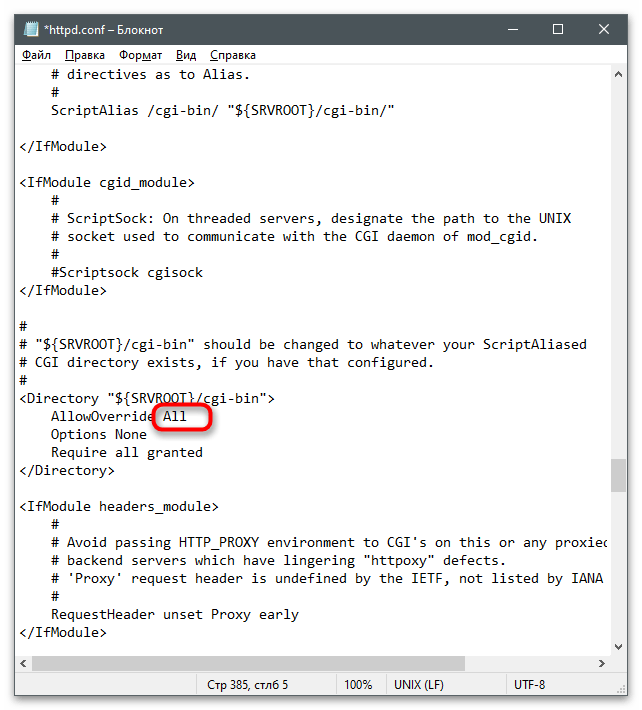
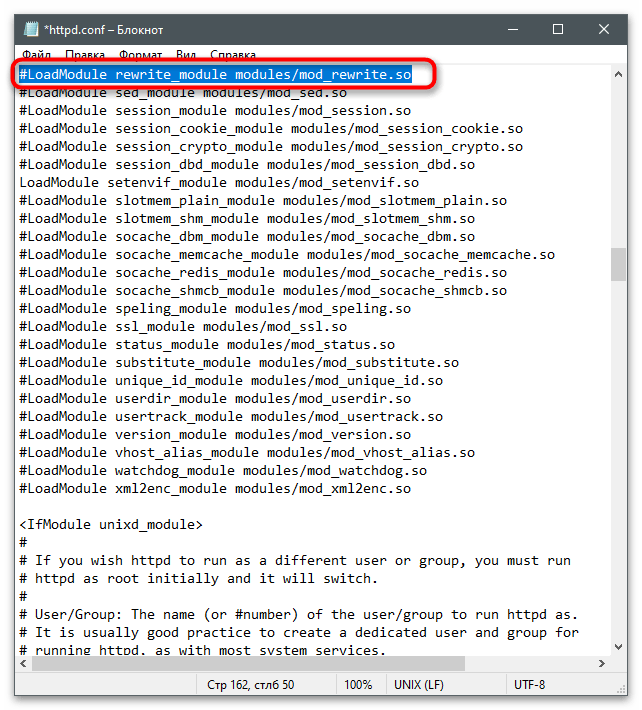
AllowOverride Noneпоменяйте состояние наAll, удалив предыдущее выражение. - Осталось только найти
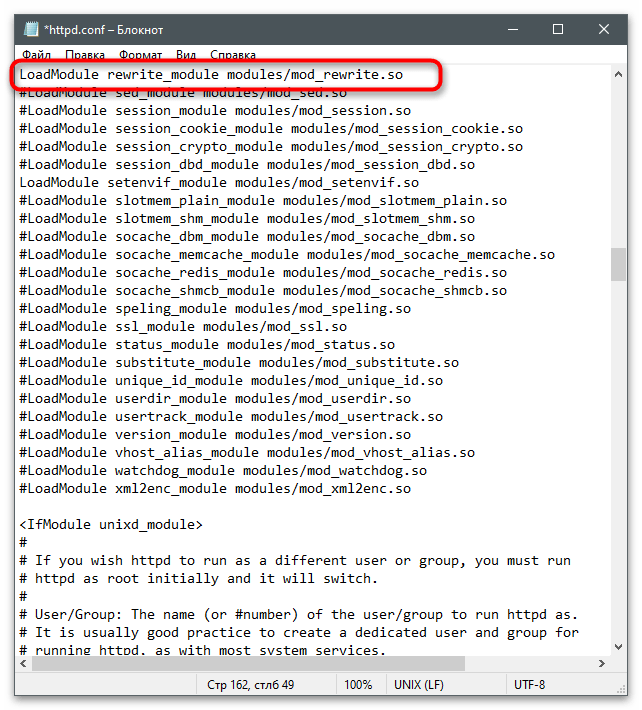
#LoadModule rewrite_module modules/mod_rewrite.soи убрать значок #, активировав тем самым строку. - В итоге она должна отображаться так, как это показано на следующем скриншоте.
- Если с поиском конкретных строк у вас возникают проблемы, используйте сочетание клавиш Ctrl + F, чтобы вызвать инструмент «Найти» и вписать там необходимое выражение.
- Перед выходом не забудьте сохранить изменения в конфигурационном файле.


Шаг 3: Первый запуск локального веб-сервера
Приступим к первому запуску локального веб-сервера Apache для проверки его работоспособности. Надо это для того, чтобы при дальнейшей настройке у вас не возникло серьезных неполадок, на решение которых потратится много времени.
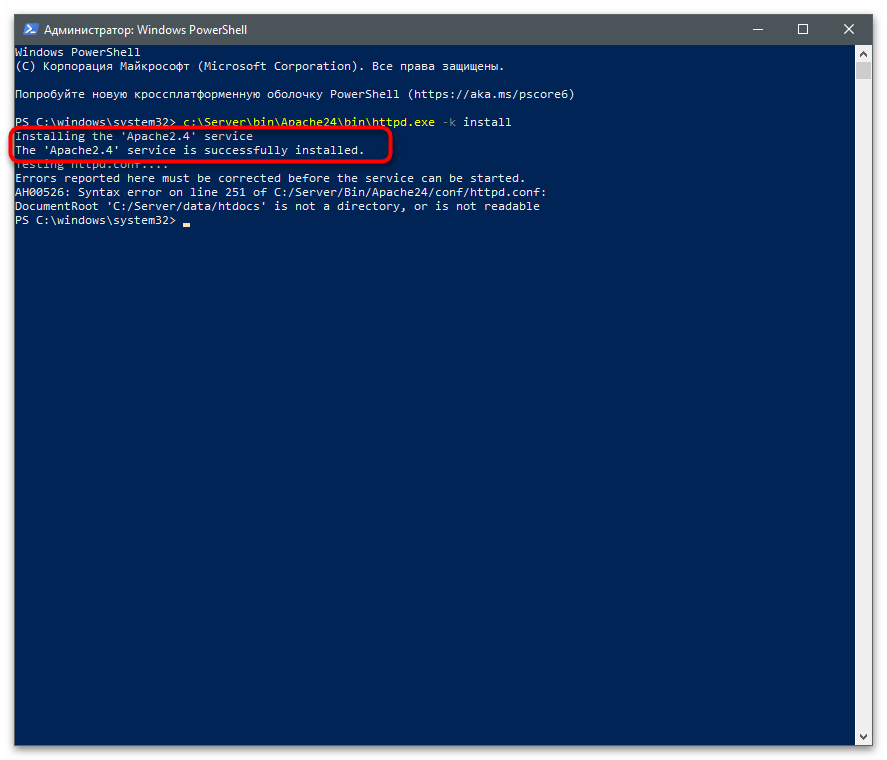
- Щелкните правой кнопкой мыши по меню «Пуск» и из появившегося меню выберите пункт «Windows PowerShell (администратор)».
- Введите команду
c:\Server\bin\Apache24\bin\httpd.exe -k installи нажмите Enter для ее активации. Она установит компоненты Apache и подготовит их к работе. - После получения информации об успешной установке сервисов переходите к следующему шагу.
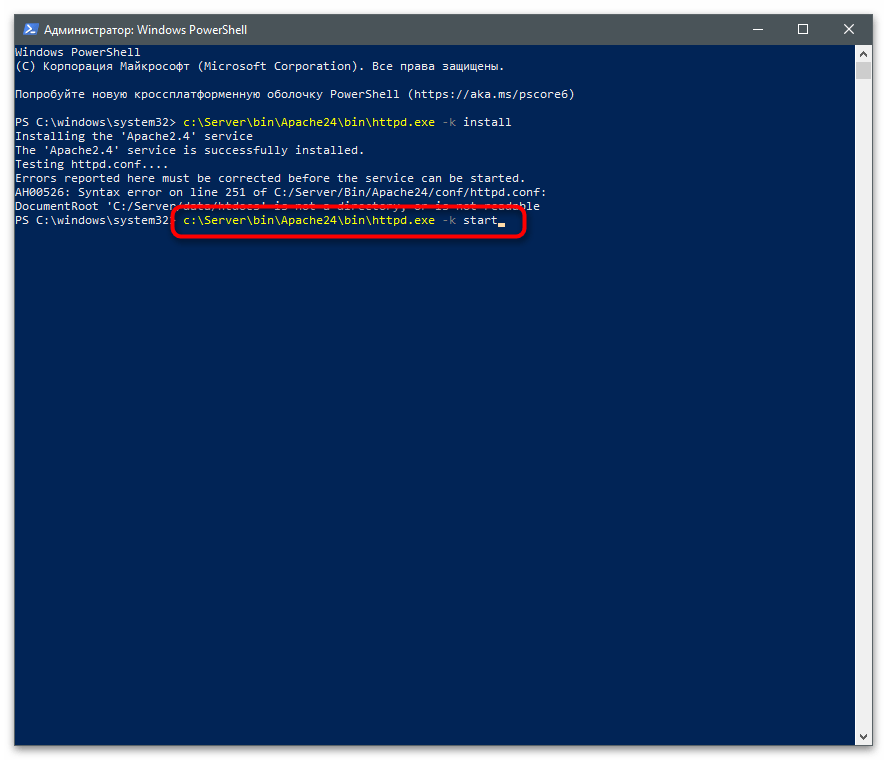
- Запуск веб-сервера осуществляется через команду c
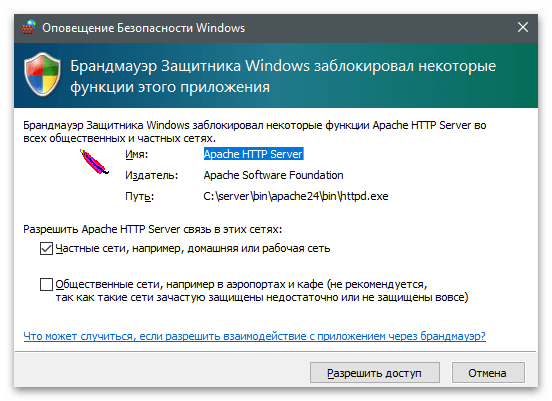
:\Server\bin\Apache24\bin\httpd.exe -k start. - Появится оповещение Безопасности Windows, которое следует подтвердить, нажав «Разрешить доступ».
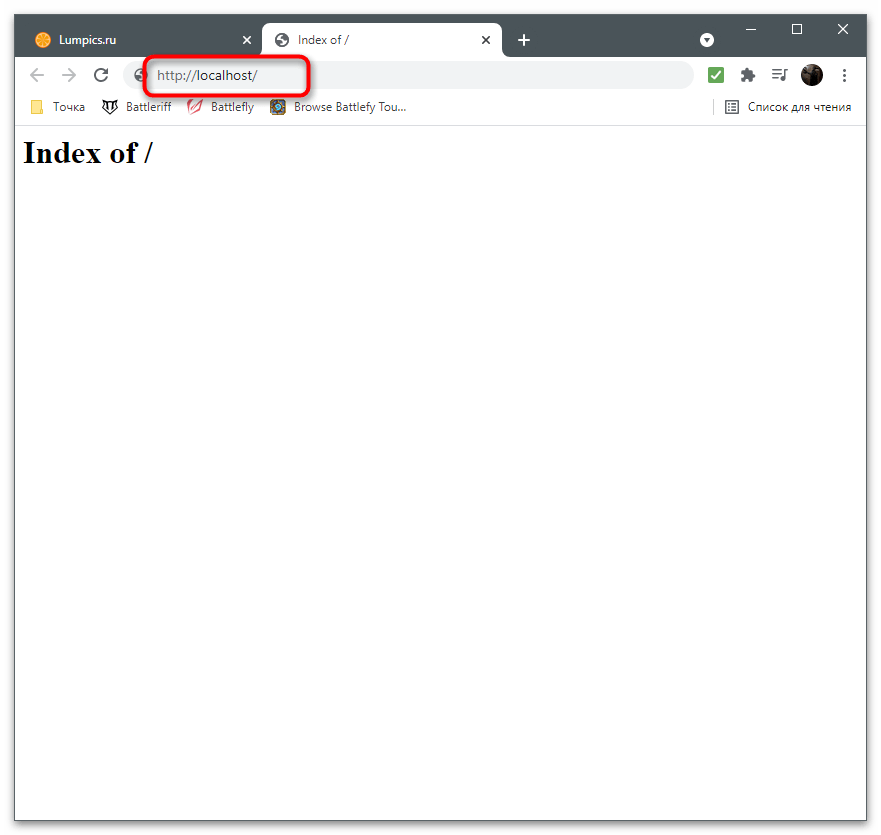
- Откройте любой браузер и перейдите по адресу
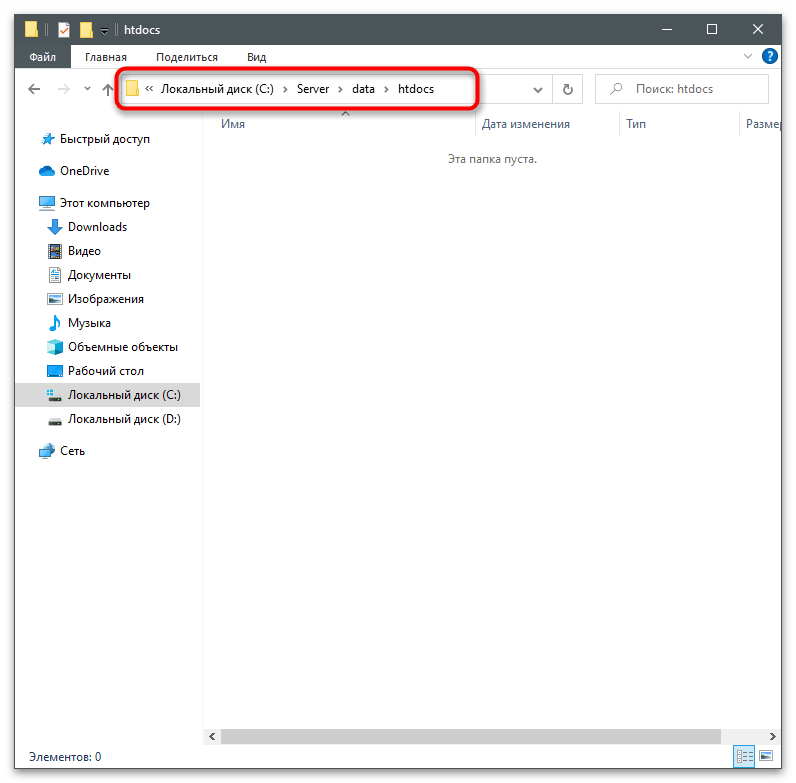
http://localhost/. Если на странице появилась надпись «Index of /», значит, все действия выполнены правильно. - При получении ошибки в консоли, свидетельствующей об отсутствии необходимых папок, перейдите в каталог «Server», создайте там директорию «data» с подпапкой «htdocs».

Наша группа в TelegramПолезные советы и помощь
Cross Platform Web Server Apache
If you install a cross platform web server just like xampp Easyphp or wamp you will find that the apache version used is not the last version and there is 4 or more new version available after that version, that’s why you may want to install and update to the last available version, if you are in localhost you can install any version and try it, otherwise if you install it in online server using windows server make sure that the version you want install is stable and not beta to avoid fail and vulnerability, so let’s see step per step how to update apache server version for most popular cross platform web servers.
Apache Current Platform
Before you get a new apache version you must know which version you are using 64 bit or 32 bit, because if your current apache version is 64 bit, that mean your php version also 64 bit so if you install apache 32 bit and your php version is 64 bit the apache server will not start, to know what is your apache platform version you can use the php function apache_get_version() and you can use phpinfo() to know your php version
echo apache_get_version();
echo phpinfo();
Download Apache Last Version
If you want install apache last version for windows cross platform web server software first you must download a compiled binary version usually official apache website doesn’t give a compiled version for windows, it give an open source project you have to compiled yourself whatever platform you want you can use use visual studio because apache created with c++, or you can download it manually from apache partner website from links below.
- ApacheHaus
- Apache Lounge
Video How Update apache server version Xampp Wamp Easyphp
If you don’t like reading this video demonstrate how to update apache server version of Xampp Wamp Easyphp under windows
Update Apache Xampp
After you download apache last version, to use it in xampp you have to replace the current apache folder with a new apache folder make sure you make a a backup of older apache folder next you have to update configuration file httpd.conf. the below is the 5 detailed steps to update apache version for xampp let’s take them step per step.
- Stop Apache And Xampp
- Rename apache folder to apache_old from xampp directory
- Copy new apache folder inside xampp so you will have 2 folder xampp/apache/ and xampp/apache_old/
- Copy and Replace new xampp/apache/cgi-bin/ files to xampp/cgi-bin/ folder
- Update httpd.conf file of new xampp/apache/
- Copy httpd-xampp.conf file from xampp/apache_old/conf/extra/ to the new xampp/apache/conf/extra/
- Start Apache And Xampp
Stop Apache And Xampp
If your apache server under xampp is running and you just closed xampp from the windows taskbar by right click Quit the apache server will not stop, only xampp interface will be closed so you have to stop apache server by click stop inside xampp window next quit apache.
Rename Apache Xampp Folder
Navigate to where xampp installed let’s say it’s inside C:/xampp next rename the current apache folder example apache_old don’t delete it, we need some files from the old apache folder to add to the new apache folder
Copy New Apache Folder To Xampp
usually the apache folder you download inside zip archive extract it using zip software next you will have an apache folder it may called apache or apache2 apache3… copy the new apache version you download inside xampp folder make sure the folder name is apache so you will have C:/xampp/apache/ and C:/xampp/apache_old/
Copy New Cgi-bin Files Xampp
This step is optional if you will not use cgi-bin, you only have to copy and replace the new C:/xampp/apache/cgi-bin/ files inside C:/xampp/cgi-bin/
Update Httpd.conf File Xampp
After your apache folder is in location now you have to update httpd.conf and it’s is a configuration file you will specify server path and default www or htdocs folder location and you can enable and disable a few module etc… it’s located inside C:/xampp/apache/conf/ let’s see most important value you have to change.
Httpd.conf File New Values Xampp
Define SRVROOT "C:/xampp/apache"
ServerRoot "C:/xampp/apache"  LoadFile "C:/xampp/php/libssh2.dll"
LoadFile "C:/xampp/php/libsqlite3.dll"  LoadModule access_compat_module modules/mod_access_compat.so
LoadModule rewrite_module modules/mod_rewrite.so  DocumentRoot "C:/xampp/htdocs"
<Directory "C:/xampp/htdocs">
Options Indexes FollowSymLinks
AllowOverride All
Require all granted
</Directory>  <IfModule dir_module>
DirectoryIndex index.php index.php3 index.html index.htm
</IfModule>  <IfModule alias_module>
ScriptAlias /cgi-bin/ "C:/xampp/cgi-bin/"
</IfModule>  <Directory "C:/xampp/cgi-bin">
AllowOverride None
Options None
Require all granted
</Directory>  Include conf/extra/httpd-xampp.conf
libssh2.dll and libsqlite3 are libraries needed to run sqlite3 and ssh make sure those file found inside C:/xampp/php/ it can be php7.0 or any other version, if those file not found search for other name they can be libssh3.dll libssh4.dll… if those file still not found you have to remove those 2 line from your httpd.conf file because apache will not start, but also sqlite3 and ssh will not work… So make sure to install new php version that contain those files.
Copy Httpd-xampp.conf From Old Apache Xampp
As you see in the above code we added a line Include conf/extra/httpd-xampp.conf but if you check inside C:/xampp/apache/conf/extra/httpd-xampp.conf you will not find httpd-xampp.conf that’s why you need to copy it from the old apache folder navigate to C:/xampp/apache_old/conf/extra/httpd-xampp.conf and copy it to C:/xampp/apache/conf/extra/httpd-xampp.conf
Start Apache And Xampp
The above is the minimum requirement for installing new apache server it’s tested and work if apache doesn’t work try to disable including a few files from the end of http.conf file like httpd-mpm.conf httpd-multilang-errordoc.conf httpd-autoindex.conf httpd-languages.conf httpd-userdir.conf httpd-info.conf httpd-vhosts.conf httpd-manual.conf httpd-dav.conf httpd-default.conf just add # before every line and restart apache server, if you have any problem you can put a comment below.
Update Apache Easyphp
To update Easyphp apache version it’s little bit different from xampp because Easyphp create different configuration files and you need additional steps but at the end both doing the same thing you have to and check download compatible new apache version next change httpd.conf then copy a few php configuration file then change default server to the new apache server let’s see those steps with more detail.
- Stop Easyphp and Apache
- Copy new apache version to httpserver folder Easyphp
- Copy php configuration files from older apache to the new apache folder Easyphp
- Create a copy of httpd.exe and name it as eds-httpserver.exe Easyphp
- Update httpd.conf Easyphp
- Update conf_httpserver.php Easyphp
- Restart Easyphp
Stop Easyphp And Apache
First step is to stop Apache server so you can change the configuration files write click in Easyphp icon in windows taskbar click stop all servers next click Exit
Copy New Apache Version Inside Httpserver Easyphp
Let’s say your Easyphp installed inside C:/Easyphp/ you must have a folder C:/Easyphp/eds-binaries/httpserver/ this folder contain apache servers folder you must find at least one folder for the current installed apache version and it look like apache1234vc11x86x123411151354 just extract the new apache folder and copy it inside httpserver folder let’s say you name it /apache/
Copy Php Configuration Files From Old To The New Apache Folder Easyphp
As we mentioned before you must have apache folder like apache1234vc11x86x123411151354 inside C:/Easyphp/eds-binaries/httpserver/ in that folder you must have some php files like eds-app-actions.php eds-app-dashboard.php eds-app-restart.php eds-app-settings.php eds-app-start.php eds-app-stop.php copy all the php files from that folder the new apache folder
Create A Copy Of Httpd.exe And Name It Eds-httpserver.exe Easyphp
There is httpd.exe file inside apache bin folder and it’s useful to connect to apache server in Easyphp it create a copy of it and give it a new name usually it’s eds-httpserver.exe so you have to navigate to your new apache bin folder C:/Easyphp/eds-binaries/httpserver/apache/bin/ find httpd.exe create a copy and call it eds-httpserver.exe to make sure it’s eds-httpserver.exe just go to the old apache folder bin and check maybe they call it another name
Update Httpd.conf File Easyphp
Update httpd.conf for Easyphp is like Xampp the only difference that xampp create a new config file for php configuration while Easyphp append them to the httpd.conf file and auto generate a file httpd-php.conf that contain php path let’s see what change we must do.
Httpd.conf File New Values Easyphp
Define SRVROOT "C:/Easyphp/eds-binaries/httpserver/apache"
ServerRoot "C:/Easyphp/eds-binaries/httpserver/apache"  LoadFile "C:/EasyPHP/eds-binaries/php/php7.0/libssh2.dll"
LoadFile "C:/EasyPHP/eds-binaries/php/php7.0/libsqlite3.dll"  LoadModule access_compat_module modules/mod_access_compat.so
LoadModule rewrite_module modules/mod_rewrite.so  DocumentRoot "C:/Easyphp/eds-www"
<Directory "C:/Easyphp/eds-www">
Options Indexes FollowSymLinks
AllowOverride All
Require all granted
</Directory>  <IfModule dir_module>
DirectoryIndex index.php index.php3 index.html index.htm
</IfModule>  <IfModule alias_module>
ScriptAlias /cgi-bin/ "C:/Easyphp/eds-binaries/httpserver/apache/cgi-bin/"
</IfModule>  <Directory "C:/Easyphp/eds-binaries/httpserver/apache/cgi-bin">
AllowOverride None
Options None
Require all granted
</Directory>  <IfModule mime_module>
TypesConfig conf/mime.types
AddType application/x-compress .Z
AddType application/x-gzip .gz .tgz
AddType application/x-tar .tgz
AddType image/x-icon .ico
AddType application/vnd.wap.wmlc .wmlc
AddType application/x-httpd-php .phtml .pwml .php5 .php4 .php3 .php2 .php .inc
AddType text/vnd.wap.wml .wml
AddType text/vnd.wap.wmlscript .wmls
AddType text/vnd.wap.wmlscriptc .wmlsc
AddType image/vnd.wap.wbmp .wbmp
</IfModule>  Include conf/httpd-php.conf
libssh2.dll and libsqlite3 are libraries needed to run sqlite3 and ssh make sure those file found inside C:/EasyPHP/eds-binaries/php/php7.0/ it can be php7.0 or any other version, if those file not found search for other name they can be libssh3.dll libssh4.dll… if those file still not found you have to remove those 2 line from your httpd.conf file because apache will not start, but also sqlite3 and ssh will not work… So make sure to install new php version that contain those files.
Update Conf_httpserver.php Easyphp
After you updated the httpd.conf now you have to tell to Easyphp which apache version you will use that’s why you have to navigate to C:/Easyphp/eds-dashboard you will find conf_httpserver.php open it and you will find an array change httpserver_folder to your new apache folder name.
Restart Easyphp
After doing all those steps start again apache and Easyphp if everything goes well and you didnt do any mistake the new server will be installed maybe in future there will be some change make sure you compare both httpd.conf of your new apache with httpd.conf of your old apache
update apache version for wamp it’s the same thing copy compatible apache binary folder to wamp directory next update http.conf file with the right configuration let’s see them step per step with details
- Stop Wamp and Apache
- Copy new apache version to wamp bin folder
- Copy php configuration files from older apache to the new apache folder wamp
- Update httpd.conf wamp
- Restart Wamp
- Change Apache Version from Taskbar
Stop Wamp And Apache
Just like xampp and easyphp first step is make sure that wamp and apache not running, so first step single right click over wamp icon in taskbar and click stop all services next click exit.
Copy New Apache Version To Wamp Bin Folder
After you get your compatible apache server file extract and copy it inside wamp bin apache folder, lets say your wamp installed inside C:/wamp apache folder will be C:/wamp/bin/apache/ and you will find an available apache folder example C:/wamp/bin/apache/apache2.3/ let’s say the new apache version you download is apache2.4 just copy the apache2.4 folder inside apache so you will have C:/wamp/bin/apache/apache2.4/
Copy php configuration files from older apache to the new apache folder wamp
There is 2 necessary files wamp use them to identify apache envirement those file wampdefineapache.conf and wampserver.conf you have to update wampdefineapache.conf variable those variables will be used to identify the apache version as below an example: VERSION_APACHE = «2.3.0» the 2.3.0 must be a part of folder name like apache2.3.0 because wamp work like that
APACHE23 = «Apache2.3»
VERSION_APACHE = «2.3.0»
INSTALL_DIR = «C:/wamp»
APACHE_DIR = «C:/wamp/bin/apache/apache2.3.0»
SRVROOT = «C:/wamp/bin/apache/apache2.3.0»
Update Httpd.conf Wamp
Just like all other software you have to update httpd.conf configuration file with the right directory and the right configuration like in below code find those line inside your C:/wamp/bin/apache/apache2.4/conf/httpd.conf any line missing add it and any line with comment just remove the hashtag remove all the comment to understand what is in the file.
Define APACHE24 Apache2.4
Define VERSION_APACHE 2.4
Define INSTALL_DIR C:/wamp
Define APACHE_DIR ${INSTALL_DIR}/bin/apache/apache${VERSION_APACHE}
Define SRVROOT ${INSTALL_DIR}/bin/apache/apache${VERSION_APACHE}
ServerRoot "${SRVROOT}"  LoadFile "C:/wamp/bin/php/php7.0/libssh2.dll"
LoadFile "C:/wamp/bin/php/php7.0/libsqlite3.dll"  LoadModule access_compat_module modules/mod_access_compat.so
LoadModule rewrite_module modules/mod_rewrite.so  DocumentRoot "${INSTALL_DIR}/www/"
<Directory "${INSTALL_DIR}/www/">
Options Indexes FollowSymLinks
AllowOverride All
Require all granted
</Directory>  <IfModule dir_module>
DirectoryIndex index.php index.php3 index.html index.htm
</IfModule>  <IfModule mime_module>
TypesConfig conf/mime.types
AddEncoding x-compress .Z
AddEncoding x-gzip .gz .tgz
AddType application/x-compress .Z
AddType application/x-gzip .gz .tgz
AddType application/x-httpd-php .php
AddType application/x-httpd-php .php3
</IfModule>  Include "${INSTALL_DIR}/alias/*.conf"
All those define variables used by wamp in httpd.conf are optional you just can insert real path inside every path from httpd.conf and remove all the define variables just like xampp and easyphp, this is below some details of wamp variable:
Define APACHE24 Apache2.4 is just a variable it’s never used any other place but it may be used for other files just add it it can be apache2.4 2.5 2.6 ….
Define VERSION_APACHE 2.4 the version of apache is 2.4 and it must be the same as your apache folder name, example when your apache folder name is apache2.3 you must define variable as Define VERSION_APACHE 2.3
Define INSTALL_DIR C:/wamp is the directory where wamp installed
Define APACHE_DIR ${INSTALL_DIR}/bin/apache/apache${VERSION_APACHE} now in this line APACHE_DIR is where you apache folder ${INSTALL_DIR} is C:/wamp and ${VERSION_APACHE} is apache version
Define SRVROOT ${INSTALL_DIR}/bin/apache/apache${VERSION_APACHE} SRVROOT and APACHE_DIR is the same
libssh2.dll and libsqlite3 are libraries needed to run sqlite3 and ssh make sure those file found inside C:/wamp/bin/php/php7.0/ it can be php7.0 or any other version, if those file not found search for other name they can be libssh3.dll libssh4.dll… if those file still not found you have to remove those 2 line from your httpd.conf file because apache will not start, but also sqlite3 and ssh will not work… So make sure to install new php version that contain those files.
Restart Wamp
After you updated correctly your wamp apache configuration files just start wamp make sure to start it as administrator, if you didn’t do any error the new apache version will be installed
Change Apache Version from Taskbar
After your new apache version configuration is ready, right click over wamp icon from taskbar next go Apache next Version next select the new version you installed, the new apache version will be activated
Apache-Service-Upgradation-on-windows
This guide outlines the steps to upgrade Apache HTTP Server on a Windows system. It covers downloading the latest version, backing up key files, replacing the old Apache folder, and restarting the service. The process ensures a smooth upgrade while preserving configurations, content, and modules.
Prerequisites
- An existing Apache installation on your Windows machine (either physical or virtual).
- Administrative access to your Windows server to stop and restart Apache services.
- Backup storage (optional but recommended) to store copies of your configuration files and website content.
Steps to Upgrade Apache on Windows
1. Download the Latest Apache Version
- Visit Apache Lounge Download and download the latest version of Apache HTTP Server that is compatible with your system architecture (32-bit or 64-bit).
2. Unzip the New Apache Version
- Extract the downloaded zip file into a temporary directory on your server.
- Locate the Apache files (e.g.,
httpd.exe,bin,conffolders).
3. Check Current Apache Version
- Open a Command Prompt and type the following command to verify the version of your currently installed Apache:
- Note down the current version for reference.
4. Backup the Existing Apache Folder
- To prevent data loss, backup the current Apache installation directory (e.g.,
C:\Apache24\orC:\Program Files\Apache Software Foundation\Apache2.4\). - Copy the folder to another location as a precaution.
5. Compare Old and New Apache Folders
- Compare the
htdocs,conf, andmodulesdirectories between the old and new Apache directories. - Ensure your custom configurations, content, and modules are identified.
6. Backup Key Directories
- Copy the
htdocs,conf, andmodulesfolders from the new Apache directory and temporarily store them in a backup location to avoid overwriting.
7. Transfer Old Apache Configurations to New Version
- Copy the
htdocs,conf, andmodulesfolders from the old Apache directory and paste them into the new Apache directory. - This ensures that your website content, configurations, and modules are preserved.
8. Stop Apache Service
- Open Services (
Windows + R> typeservices.msc> press Enter) and locate Apache2.4. - Right-click and select Stop to stop the running Apache service.
9. Replace the Old Apache Folder
- After stopping Apache, replace the entire old Apache folder with the new version.
- Copy the extracted Apache directory to the installation path (e.g.,
C:\Apache24\orC:\Program Files\Apache Software Foundation\Apache2.4\).
10. Run Apache as Administrator
- Navigate to the new Apache directory (e.g.,
C:\Apache24\bin) and right-click onhttpd.exe. - Select Run as administrator to allow necessary permissions.
11. Restart Apache Service
- Open a Command Prompt with administrative privileges and run the following command:
- This will restart Apache with the newly upgraded version.
12. Verify Apache is Running
- Open a browser and go to
http://localhost/or the IP address of your server to verify that Apache is running properly. - Run the following command to confirm the updated Apache version:
13. Troubleshooting
- If Apache fails to start, review the Apache error logs in the
logsdirectory (e.g.,C:\Apache24\logs). - Ensure there are no conflicts in configuration files and all modules are compatible with the new version.
Conclusion
Congratulations! You have successfully upgraded Apache HTTP Server on your Windows machine. Make sure to test your website thoroughly and monitor the Apache service for any issues post-upgrade.
Additional Notes
- Always perform upgrades during off-peak hours to minimize downtime.
- Regularly backup your configuration and website files to ensure recovery in case of issues.