

Вы можете синхронизировать Google Контакты с телефоном, планшетом или компьютером. Если вы измените данные контакта, сведения о нем обновятся на всех устройствах.
На компьютере Mac
- Откройте раздел «Системные настройки».
- Нажмите Учетные записи Интернета.
- Выберите Google.
Примечание. Чтобы использовать другой аккаунт, слева внизу нажмите «Добавить» Google. - Введите свой адрес электронной почты и пароль. Нажмите Далее.
- Установите флажок Контакты.
- Нажмите Готово.
На компьютере c Windows 10
- Откройте раздел «Параметры».
- Нажмите Учетные записи Адрес электронной почты; учетные записи приложений Добавить учетную запись Google.
- Введите свой адрес электронной почты и пароль.
- Просмотрите права доступа и нажмите Разрешить.
- Нажмите Готово.
Quick Answer
- In fact, you needn’t transfer contacts, you will see them on your new Android phone as soon as you sign in to your Gmail account.
- After selecting the contacts that you want to export, it will ask you which format you want to export your contacts in.
- But, what if you are switching not from one Android to another, but, in fact, from an Android phone to a Windows phone.
The one thing Android users continuously rave about is the ease of use. All you need is a Gmail account and it activates many services, ranging from mail backup to calendar to even contacts! Well, yes, Google contacts is the easy way of getting rid of your dependency on phone/SIM storage for contacts. It is actually the best way of transferring your contacts from one phone to another. In fact, you needn’t transfer contacts, you will see them on your new Android phone as soon as you sign in to your Gmail account.

But, what if you are switching not from one Android to another, but, in fact, from an Android phone to a Windows phone? You definitely won’t have the option of getting your Google contacts ASAP.
Why can’t you see Google contacts immediately on your Windows Phone?
Well, here is a simple reason – there are no free lunches in life. When Google offers you free storage, it is actually providing those services so that when your free storage runs out, you will actually spend money to get some storage from Google. Microsoft doesn’t not let you use this storage simply to push you towards its own OneDrive service.
Recommended: Top 5 Best Android Home Screen Replacement Apps
So, here are some simple ways to get your Google Contacts on your Windows phone.
1. Synchronize your contacts automatically
This is probably the best way to sync your contacts. Here’s how to do it:
1. Navigate to Settings –> Email + Account –> Add an account –> Google.
2. Put in your Google Account credentials.
3. Two options will show up – Email and Email, contacts and calendar. Select Email, contacts and calendar.
4. Click on sign in and wait for it to sync.
5. Once the sync completes, you will see all your Google Contacts on your Windows phone.
Note: It might not work sometimes, on some Windows phones.
2. Syncing Google Contacts via third-party apps.
You can also transfer contacts from an Android phone to a Windows phone using third-party apps such as PhoneSwappr.
Here’s how to do it.
1. Download PhoneSwappr on both your phones. Here’s the link for Windows Phone.
2. Install the app on both phones.
3. Open the app on your Android phone.
4. It will show you a screen with ‘Sync Contacts’. Click on Send Contacts to Cloud. It will then show you a PIN. Note it down.
5. Open PhoneSwappr on your Windows Phone. Click on Get Contacts from Cloud. Enter the PIN you noted earlier. Phone Swappr will now sync contacts between your devices.
Recommended: 5 Reasons Why You Should Not Use WhatsApp Web
You can also use apps such Contacts Transfer from Microsoft, which would transfer contacts between your devices using Bluetooth PBAP.
3. Export Google Contacts in .csv format
Here’s how to do it:
1. Sign in to your Google Account on your Android phone.
2. In the main frame, click the drop down window next to Gmail and choose Contacts.
3. On the Contacts page, press More and select Export.
Note: This will transfer all your contacts to your Windows phone. If you want specific contacts, select those and then click export.
4. After selecting the contacts that you want to export, it will ask you which format you want to export your contacts in. Select Google CSV.
5. Press Save.
6. Transfer this file via Bluetooth or by swapping SDcard to your Windows phone.
7. Open your Windows Live account on your Windows phone.
8. Now, click on the People app.
9. Go to settings, click Import –> Google.
10. Click on browse. Open the Google CSV file.
11. Press Upload.
12. Your contacts will be visible, now verify the contacts and click Import.
13. Navigate to Settings –> Email + Account –> Add an account –> Microsoft Account.
14. Tap Sync to sync your contacts to your Windows Phone.
Recommended: 10 Things You Should Know About Microsoft Windows 10
4. Syncing Contacts from the cloud
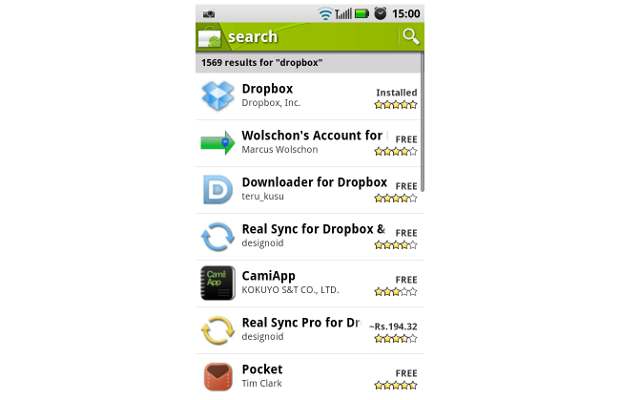
You can sync contacts from the cloud using a service such as Dropbox.
Here’s how to do it.
1. Register at www.dropbox.com
2. Install the Dropbox application on both devices.
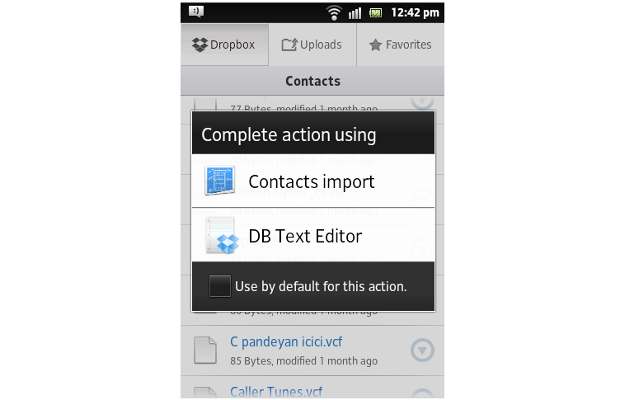
3. Go to the application on the Android device, and backup your contacts to Dropbox. You can use the Contacts Importer in the Dropbox app itself.
4. Open the Dropbox app on your Windows phone and sync the contacts.
Importing contacts manually via SIM
You can actually transfer contacts by simply copying them to SIM and import them in your Windows Phone, but that’s a lot of effort. It also might result in many duplicate contacts on the SIM and you might run out of SIM storage.
Conclusion
If you are a Windows Phone user who wants to import contacts from Google Contacts, we have listed the above ways in order of the ease with which you can implement them. Do let us know, if you know of any other way around it.
Was this article helpful?
YesNo
Back to Blog
Two-Minute Drill: Sync Google Contacts with Windows Phone
Chances are, if you’ve been a Gmail user for a while, you’re looking at this and wondering why we need a blog post about it. For almost every mobile OS, Google has allowed for syncing to and from your device via Exchange ActiveSync. All you had to do was set up your Gmail using the Exchange option and it would just work.
But then Google changed its mind, and because of this, Windows Phone users will start having problems after December 31st of 2013.
Fortunately, the solution isn’t overly difficult. It’s called CardDAV, and it’s being supported for Windows Phone 8 as of August 2013. Let’s dive in and see what it’s all about.
CardDAV and You
First thing’s first – You need to have a working understanding of what CardDAV is. Essentially it’s a standardized protocol for the sharing of contact information between two sources.
Now that Google will be ending support for Exchange ActiveSync, CardDAV is what you’ll want to use on Windows Phone (and by no small coincidence on iOS as well). The unfortunate tradeoff is that you’ll no longer get real-time delivery of your email — the shortest duration is every 15 minutes — but at least you’ll still get synchronization of your contacts.
The good part of this otherwise-annoying problem is that the setup process should be automatic for you. Just by setting up a Google account inside of Windows Phone, the device should transfer your information into a CardDAV account. But just in case you want the details, you can go in and look at the Google account that you’ve set up in the phone and you’ll see some screens that look like this:
[getImage id=”” class=”alignnone size-large wp-image-7636″ src=”/wp-content/uploads/2013/11/1google2-372×620.jpg” width=”250″]
So the short version of this story is that you shouldn’t have any problems if you’re setting up a new account, but those of you with older accounts might end up with a bit of a headache. If you find yourself in a bind, it’s likely that the best answer is (sadly) to delete the Google account and set it up again with the new process.
WP8 Images: All About Windows Phone
Главная
/
Статьи
/
Как перенести свои контакты, сообщения, закладки и другие данные с Android на Windows Phone

Операционная система Windows Phone за последние несколько лет сделала большой шаг вперёд, став по удобству использования и функциональности в один ряд с основными конкурентами. При этом компания Microsoft в стремлении привлечь новых пользователей проводит весьма гибкую политику, особенно в нижнем ценовом сегменте. Если вы не удержались от соблазна и стали обладателем смартфона под управлением Windows Phone, то перед вами обязательно встанет вопрос о переносе всех своих данных на новый гаджет. В этой статье вы узнаете, как перейти с Android на Windows Phone.
Контакты, почта и календари
Практически все пользователи смартфонов под управлением Android пользуются сервисами Google, в том числе Gmail и Контактами. Это значительно упрощает перенос своей адресной книги и почты на устройства Windows Phone, так как они по умолчанию поддерживают подключение учётной записи Google c последующей синхронизацией данных почтового клиента, календаря и адресной книги.
Для того, чтобы это сделать, выполните следующие действия.
1. Откройте настройки устройства. Перейдите в раздел «Почта+учётные записи».
2. Нажмите ссылку «Добавить службу».
3. Выберите пункт «Google». Кстати, обратите внимание, что в списке присутствуют практически все популярные почтовые сервисы, так что если вы даже пользуетесь другой службой, то проблем, скорее всего, не будет.
4. Появится новое окно, в котором следует нажать кнопку «Соединиться». На следующем экране введите свои учётные данные Google.
5. Ознакомьтесь с перечнем данных, которыми вы делитесь, и дайте разрешение нажатием на кнопку «Принять».
После этого понадобится некоторое время на загрузку и синхронизацию данных. В результате все ваши контакты, почта и календари появятся на смартфоне Windows Phone. В дальнейшем вы можете сделать тап по соответствующей строке в списке подключённых учётных записей и детально настроить, какие данные и как часто будут синхронизироваться.
Контакты, SMS и MMS
Если на вашем старом Android имеются контакты, которые не загружены в учётную запись Google, то описанный выше способ, разумеется, не поможет. В таком случае можно воспользоваться специальной утилитой под названием Transfer my Data (Передача данных). Но основная ценность этой утилиты состоит в том, что она способна перенести ваши SMS-сообщения со смартфонов под управлением iOS или Android на Windows Phone.
Для передачи данных используется Bluetooth, так что требуется поддержка этого интерфейса на обоих устройствах. Для переноса контактов и сообщений вам нужно выполнить следующее.
1. Включите интерфейс Bluetooth на обоих устройствах. Запустите программу Передача данных.
2. Прочитайте короткое руководство по работе программы и нажмите кнопку «Продолжить».
3. Выполните сопряжение между двумя устройствами по интерфейсу Bluetooth. Во время этого процесса вы увидите на смартфоне под управлением Android последовательно несколько запросов на доступ к списку контактов, текстовым сообщениям и логу вызовов, на которые вы должны ответить утвердительно.
4. Если всё прошло нормально, то на экране Windows Phone появится список данных, которые можно перенести с одного телефона на другой. Отметьте флажками необходимые элементы и нажмите кнопку «Пуск».
Через небольшой промежуток времени, который зависит только от количества импортируемой информации, все ваши текстовые сообщения будут перенесены на Windows Phone.
Закладки
Для переноса закладок браузера придётся воспользоваться методом, использующим в качестве промежуточного пункта десктопный Internet Explorer. Учтите, что данный метод работает только в Windows 8.1 и Windows Phone 8.1.
Прежде всего, вам необходимо будет передать список своих закладок в десктопный IE. Если вы пользуетесь на Android мобильной версией Chrome, то ваши закладки благодаря встроенной синхронизации имеются и в десктопной версии Chrome. Вам остаётся только перенести их в браузер Internet Explorer с помощью имеющегося в нём инструмента экспорта закладок.
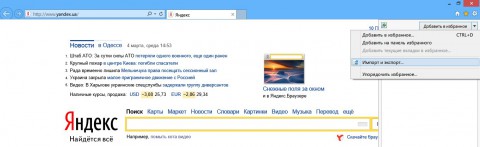
Если же вы используете в Android какой-либо другой браузер, то вам придётся сохранить сначала все свои закладки в один файл, затем перенести его на компьютер под управлением Windows и только потом экспортировать закладки из этого файла в Internet Explorer.

Когда ваши закладки оказались в IE, вам остаётся только включить синхронизацию настроек браузера с Windows Phone. Для этого откройте приложение «Параметры компьютера» и на вкладке «Синхронизация параметров» активируйте опцию «Веб-браузер».

Кроме этого необходимо проверить, включена ли синхронизация на вашем мобильном устройстве. Для этого выполните следующие действия.
1. Откройте настройки смартфона.
2. Перейдите в раздел «Синхронизация настроек».
3. Убедитесь, что ползунок возле элемента Internet Explorer находится в активном положении.
Если вы правильно выполнили все описанные выше действия, то все ваши закладки должны вскоре появиться в дефолтном браузере Windows Phone.
Музыка, видео, фотографии
Методы переноса мультимедийного контента сильно зависят от того, где он у вас находится. Если вы предпочитаете использовать для хранения музыки, видео и фотографий облачные сервисы, то вопрос сводится просто к поиску и установке клиентов соответствующих сервисов для платформы Windows Phone. Поэтому мы не будем останавливаться на этом варианте подробно, а рассмотрим тот вариант, когда музыка, видео и фото находятся непосредственно на смартфоне или планшете под управлением Android.
В этом случае для переноса файлов существует несколько путей, но мы ограничимся только рассмотрением экспорта через облачное хранилище OneDrive или с помощью вашего компьютера.
Перенос файлов через облако OneDrive
1. Установите клиент сервиса OneDrive на Android и, если он отсутствует, на смартфон под управлением Windows Phone.
2. Запустите программу OneDrive на Android и введите данные своей учётной записи Microsoft. По умолчанию клиент настроен на автоматическую синхронизацию ваших фотографий и видео в фоновом режиме. Но если хотите, вы можете также вручную загрузить любые необходимые файлы в облако OneDrive.
3. Когда процесс синхронизации закончится (это может занять довольно продолжительное время, если вы имеете обширную фото- и видео коллекцию), запустите клиент OneDrive на Windows Phone. После обновления данных вы обнаружите все данные со своего старого устройства в облаке OneDrive. Можно их там и оставить, а можно в случае необходимости загрузить файлы на карту памяти своего нового смартфона.
Перенос фотографий, видео и музыки через компьютер
Этот метод стоит применять в тех случаях, когда объём экспортируемых данных велик, а соединение с сетью у вас медленное или вообще отсутствует. В качестве промежуточного звена в данном примере может использоваться компьютер под управлением Windows 8 или 8.1.
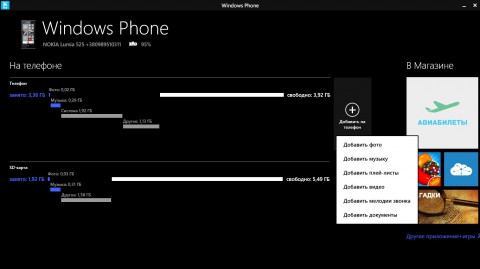
1. Подключите Android-смартфон к компьютеру через USB. Скопируйте все необходимые файлы на жёсткий диск вашего компьютера.
2. Отключите Android и подключите к компьютеру вместо него смартфон под управлением Windows Phone. Запустите программу синхронизации данных и перенесите на смартфон необходимую музыку, плейлисты, видео, изображения.
Как вы можете убедиться, в переезде с привычного Android на новый Windows Phone нет ничего сложного. Вам понадобится только немного времени, внимательность и наши инструкции, чтобы сохранить все свои данные при переезде на новую платформу.
Назад
,
If you recently bought a new Windows phone to replace your old Android phone, then you will probably want to transfer all your contacts from the Android mobile to your Windows mobile. This tutorial is written for all users that want to migrate all (or specific) contacts from their Android Phone to their new Windows phone. The method described here is very simple and can be followed by everyone.
Before you continue to follow these steps, make sure that you already have a Google (Gmail) account and you have setup (Added) that account on your Android phone. If you don’t have a Google Account you can easily create one here (it’s free): Create Google Account.
The next thing that is required to transfer your contacts from your Android mobile device to your Windows mobile (by using this method) is to have a Microsoft Account (Windows Live, Hotmail, Outlook) and to have setup (Added) that account in your Windows Phone. If you don’t have a Microsoft account, then you can create a new one here: Sign-Up Microsoft Account.
How to move contacts from an Android to a Windows Mobile.
From your Android Phone, after you have added your Google account, synchronize your Android phone contacts with your Google account contacts. To do that:
- On the Android phone, go to “Settings” > “Accounts and Sync”.
- Under “Manage Accounts”, select (or “Add”) the Google account you used to import WLM contacts.
- Finally press “Sync Contacts”.
Info: When you are syncing your Android mobile with your Google account, then you also sync all your contacts, calendar & Google mail from your phone to that account and vice versa. So if you open your Google account from any computer or mobile device and navigate to e.g. Google contacts page, you can find that all your Android Phone contacts are also stored online.
The next step is to export your Google contacts:
Step 1: Export Google contacts.
From a desktop computer:
1. Sign-in to your Gmail account.
2. In the main Gmail window, press the drop-down arrow next to “Gmail” and choose “Contacts”.


3. In “Contacts” page, press the “More” menu and select “Export”. *
* Note: By doing this you ‘re going to export (and transfer) all your Android contacts to your Windows Phone. In the case that you want to transfer specific contacts or (or Group(s)) then you must select these contacts (or Groups) before you select the “Export” option.

4. At “Export contacts” page, select the “Google CSV format (for importing into a Google account)” option and press “Export”.*
Note: At “Which contact do you want to export section” you have to select “Selected contacts” if you want to transfer only the selected contacts contacts to your Windows phone, or “The group (Group Name)” if you want to transfer a specific group or groups.

4. Finally press “Save” and store the exported contacts file “google.csv” on your computer (e.g. on your “Downloads” folder).

5. Close Google Mail.
Step 2. Import Google contacts into Windows live (Hotmail, Outlook live).
1. Sign-In to your Windows Live (Hotmail) account using a desktop computer: Windows Live (Hotmail) Login Page
2. While on the main window, press the drop-down arrow next to “Outlook” and choose “People”.


3. In “People” page, click at “Start import” icon.

4. At “Import contacts” page, select import from “Google” (icon).

5. At “Import contacts from Google” page, select “Browse”.

6. Navigate to the location where you saved the “google.csv” file, in the previous step, select the “google.csv” file and click “Open”.

7. Press “Upload”.

8. Finally verify that all the imported contacts look correct and then press the “Import” button.

Close Windows live and sync your Windows phone with your Windows live Account.
How to Sync Windows live Contacts to your Windows phone.
Before continuing, first add your Microsoft account (if you haven’t already done that) to your Windows phone. {“Add an account” > “Microsoft account” (or “Windows Live”) > type your MS account username and password and press “Sign in”}.
1. From Windows phone “App list” go to “Settings” > “Email + accounts”.*
2. Tap and hold your finger at your Microsoft account until you see the “sync” option.
3. Tap “sync” to synchronize your Windows live contacts with your Windows phone .
You ‘re done!
If this article was useful for you, please consider supporting us by making a donation. Even $1 can a make a huge difference for us in our effort to continue to help others while keeping this site free:
- Author
- Recent Posts
Konstantinos is the founder and administrator of Wintips.org. Since 1995 he works and provides IT support as a computer and network expert to individuals and large companies. He is specialized in solving problems related to Windows or other Microsoft products (Windows Server, Office, Microsoft 365, etc.).