
Are you looking for a way to quickly transfer files from your Windows computer to your Linux computer and back again? The open source PSCP utility makes it easy to transfer files and folders, and of course it’s open source.
Setting your PATH in Windows
Knowing how to set your command path in Windows makes it easier to use a handy utility like PSCP. If you’re unfamiliar with that process, read how to set a PATH on Windows.
Using PSCP
PSCP (PuTTY Secure Copy Protocol) is a command-line tool for transferring files and folders from a Windows computer to a Linux computer.
-
Download
pscp.exefrom its website. -
Move
pscp.exeto a folder in your PATH (for example,Desktop\Appif you followed the PATH tutorial here on Opensource.com). If you haven’t set a PATH variable for yourself, you can alternately movepscp.exeto the folder holding the files you’re going to transfer. -
Open Powershell on your Windows computer using the search bar in the Windows taskbar (type ‘powershell` into the search bar.)
-
Type
pscp –versionto confirm that your computer can find the command.
IP address
Before you can make the transfer, you must know the IP address or fully-qualified domain name of the destination computer. Assuming it’s a computer on your same network, and that you’re not running a DNS server to resolve computer names, you can find the destination IP address using the ip command on the Linux machine:
[linux]$ ip addr show | grep 'inet '
inet 127.0.0.1/8 scope host lo
inet 192.168.1.23/24 brd 10.0.1.255 scope global noprefixroute eth0
In all cases, 127.0.0.1 is a loopback address that the computer uses only to talk to itself, so in this example the correct address is 192.168.1.23. On your system, the IP address is likely to be different. If you’re not sure which is which, you can try each one in succession until you get the right one (and then write it down somewhere!)
Alternately, you can look in the settings of your router, which lists all addresses assigned over DHCP.
Firewalls and servers
The pscp command uses the OpenSSH protocol, so your Linux computer must be running the OpenSSH server software, and its firewall must allow SSH traffic.
If you’re not sure whether your Linux machine is running SSH, then run this command on the Linux machine:
[linux]$ sudo systemctl enable --now sshd
To ensure your firewall allows SSH traffic, run this command:
[linux]$ sudo firewall-cmd --add-service ssh --permanent
For more information on firewalls on Linux, read Make Linux stronger with firewalls.
Transfer the file
In this example, I have a file called pscp-test.txt that I want to transfer from C:\Users\paul\Documents on my Windows computer to my destination Linux computer home directory /_home_/paul.
Now that you have the pscp command and the destination address, you’re ready to transfer the test file pscp-test.txt. Open Powershell and use the dir command to change to the Documents folder, where the sample file is located:
PS> dir %USERPROFILE%\Documents\
Now execute the transfer:
PS> pscp pscp-test.txt paul@192.168.1.23:/home/paul
| Password:
End of keyboard-interactive prompts from server
pscp-test.txt | 0 kb | 0.0 kB/s | ETA: 00:00:00 | 100%
Here’s the syntax, word for word:
-
pscp: The command used to transfer the file. -
pscp-test.txtis the name of the file you want to transfer from Windows. -
paul@192.168.1.23is my username on the Linux computer, and the IP address of the Linux computer. You must replace this with your own user and destination information. Notice thatpscprequires a destination path on the target computer, and:/home/paulat the end of the IP address specifies that I want the file copied to my home folder.
After you authenticate to the Linux computer, the pscp-test.txt file is transferred to the Linux computer.
[ Related read Share files between Linux and Windows computers ]
Verifying the transferred
On your Linux computer, open a terminal and use the ls command to verify that the file pscp-test.txt appears in your home directory.
[linux]$ ls
Documents
Downloads
Music
Pictures
pscp-test.txt
Copying a file off of a Linux system
You aren’t limited to just copying files to your Linux system. With pscp, you can also copy a file from Linux onto Windows. The syntax is the same, only in reverse:
PS> pscp paul@192.168.1.23:/home/paul/pscp-test.txt %USERPROFILE%\Documents\pscp-win.txtHere’s the syntax:
-
pscp: The command used to transfer the file. -
paul@192.168.1.23:/home/paul/pscp-test.txtis my username on the Linux computer, the IP address of the Linux computer, and the path to the file I want to copy. -
%USERPROFILE%\Documentsis the location on my Windows computer where I want to save the file. Notice that in copying the file back to my Windows computer, I can give it a new name, such aspscp-win.txt, to differentiate it from the original. You don’t have to rename the file, of course, but for this demonstration it’s a useful shortcut.
Open your file manager to verify that the pscp-win.txt file was copied to the Windows C:\Users\paul\Documents path from the Linux computer.
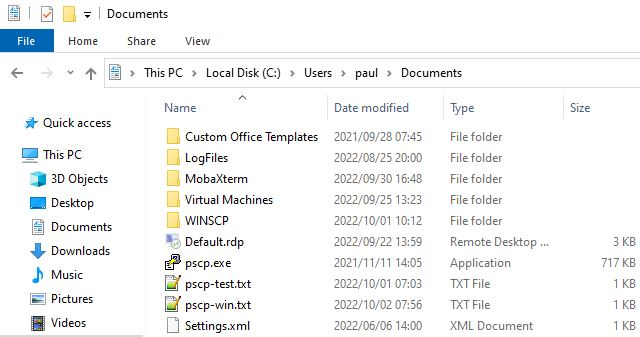
Image by:
(Paul Laubscher, CC BY-SA 4.0)
Remote copying
With the power of the open source pscp command, you have access to any computer in your house, and servers you have accounts on, and even mobile and edge devices.
This work is licensed under a Creative Commons Attribution-Share Alike 4.0 International License.
Introduction
While there are various methods available for file transfers from a Windows system to a Linux system, using the Command lines provides a straightforward and reliable approach. In this guide, we’ll walk you through the step-by-step process, highlighting the necessary commands and techniques to seamlessly transfer your files from Windows to Linux.
Prerequisites
Verify Your Remote Linux Server is Ready
If you have ordered one from Database Mart, you will receive an email containing the information of your VPS, including server IP and login credentials. You can also obtain the information on the overview page in the control panel. Please refer to this guide on how to get server credentials if you need assistance.
Steps to Transfer Files from Windows to Linux Using Command Prompt
Step 1. Open the Command Prompt in Local Windows
Search cmd in the search bar, and double-click the Command Prompt to open it. Or press the Windows key + R, then type cmd or cmd.exe in the Run command box, and press Enter.
Then, you should see the command prompt interface as below.
Step 2. Transfer Files between Local Windows and Remote Linux
Before the transfer, we will explain some terms used in the command. When using the command, you should replace these terms with the actual value.
filename.extension: it’s the name of a file and file extension that’s to be transferred. In this case, we may use mydata.txt and website.txt.
folderName: it’s the name of a folder that’s to be transferred. In this case, we may use the Website folder.
customPort: it’s the custom port you use to connect to your remote Linux server.
localFilePath: it’s the path on your local Windows PC.
username: it’s the username used to log into the remote Linux server.
remoteServerAddress: it’s the server IP of the remote Linux server.
remoteFilePath: it’s the path on the remote Linux server. In this case, we use /home/administrator.
2.1 Transfer a File from Local to Remote Server
For demonstration purposes, we have created a file in the desktop>website named «mydata.txt». First, we need to go to the file’s directory by inputting cd, followed by the file path on our local Windows. In this case, the file is located at desktop\website. Therefore, we enter the following command.
After that, you can see that we navigate to the folder where the file is located.
Then, we use the following command to transfer the «mydata.text» from local Window to the remote Linux server.
scp filename.extension username@remoteServerAddress:remoteFilePath
After entering the command, you will be prompted for the password for connecting to the remote server. Input the password and hit the Enter button, the file will be transferred. In this case, we have transferred the local file mydata.txt (located at desktop/website) to the /home/administrator directory on the remote Linux server.
2.2 Transfer a File from Remote Server to Local
You can run the following command to copy a file from the remote server to your local Windows PC.
scp username@remoteServerAddress:remoteFilePath/filename.extension localFilePath
In this case, we have transferred the mydata.txt (located at home/administrator on the remote server) to the desktop directory on the local server.
2.3 Transfer Multiple Files from Local to Remote Server
The SCP command also allows you to transfer multiple files in a single command. Navigate to the file folder and run the following command.
scp localFilePath/filename1.extension localFilePath/filename2.extension username@remoteServerAddress:remoteFilePath
In this case, we have transferred two local files mydata.txt (located at desktop) and mywebsite.txt (located at desktop/website) to the /home/administrator directory on the remote Linux server.
2.4 Transfer a Folder from Local to Remote Server
Besides files, the SCP command also allows you to securely copy folders between the local and remote server. Use the following command to copy a folder from local to the remote server.
scp -r localFilePath/folderName username@remoteServerAddress:remoteFilePath
In this case, we have transferred the local Website folder, which contains two files mydata.txt and mywebsite.txt, to the /home/administrator directory on the remote Linux server.
2.5 Transfer a File Faster
Adding the -c option after the scp command will compress the file while it’s being transferred. Once the file reaches its destination, it returns to its normal size.
scp -c localFilePath/filename.extension username@remoteServerAddress:remoteFilePath
In this case, we have transferred the local Website folder, which contains two files mydata.txt and mywebsite.txt, to the /home/administrator directory on the remote Linux server.
2.6 Transfer a File Using a Custom Port
The scp command uses the 22 port by default. If you have changed to a custom port, please run the following command to transfer a file. Make sure to capitalize the P.
scp -P customPort localFilePath/filename.extension username@remoteServerAddress:remoteFilePath
In this case, we have transferred the local file mydata.txt to the /home/administrator directory on the remote Linux server using a custom port.
Step 3. Verify the File has been Transferred
Then, Use a preferred editor to open the file. Here, we use the «Nano editor.» In this example, the remoteFilePath is /home/administrator, and the filename.extention can be mydata.txt, mywebsite.txt, and myweb.txt.
nano remoteFilePath/filename.extention
We can also check if the folder has been copied to the remote server. Go to the /home/administrator directory and check if the Website folder is there.
cd /home/administrator
ll
Conclusion
In conclusion, transferring files from a local Windows machine to a remote Linux server using the command prompt (CMD) is a powerful and efficient method for managing data. By following the step-by-step guide outlined in this blog, you can establish a secure connection, utilize the SCP (Secure Copy Protocol) command, and successfully transfer files between these two platforms.
Other Methods to Transfer Files between Windows and Linux Server
Transferring files between Windows and Linux systems may seem daunting due to their different operating systems and file systems. However, there are several methods to accomplish this task securely and efficiently.
This article will explore four simple ways to transfer files from Windows to Linux, ensuring seamless data exchange.
4 Ways to Transfer Files From Windows to Linux
This section will explore four straightforward and efficient methods to transfer files from Windows to Linux. These methods offer practical solutions for seamless data exchange between the two operating systems. Let’s dive in and discover how to make file transfers hassle-free!
Securely Copy Files via SSH
Secure Shell (SSH) is a cryptographic network protocol that allows secure data communication between two devices. You can use SSH for remote access and file transfer. To securely transfer a file from Windows to Linux, you can use the SSH protocol with the scp command.
Example:
Let’s say you have a file called data.txt on your Windows machine, and you want to transfer it to your Linux server with the IP address 192.168.1.100. Open the Command Prompt on your Windows machine and use the following command:
Replace C:\path\to\data.txt with the actual path to your file and username with your Linux username. When you initiate the transfer, the system will prompt you to enter your Linux password for authentication. After providing the correct password, the system securely copies the file to the specified location on the Linux server.
Windows to Linux File Transfer with FTP
With File Transfer Protocol (FTP), you can conveniently transfer a file from Windows to Linux using an FTP client connected to the Linux FTP server. In this method, one device acts as an FTP server, and the other connects to it as an FTP client to exchange files.
Example:
First, set up an FTP server on your Linux machine. Install vsftpd, a widely used FTP server for Linux:
Next, start the FTP server:
Now, on your Windows machine, use an FTP client like FileZilla to connect to the Linux FTP server using its IP address, username, and password. Once connected, you can transfer files by dragging and dropping them between the Windows and Linux systems.
Utilize sync software like Resilio Sync to keep specific directories up-to-date when you transfer a file from Windows to Linux. Sync software enables seamless synchronization of files and folders between multiple devices. This method helps you keep specific directories up-to-date between your Windows and Linux systems.
Example:
One popular sync software is Resilio Sync (formerly known as BitTorrent Sync). Install it on both your Windows and Linux machines. Set up a sync folder on your Windows machine and share it with your Linux machine using a secret key. Once both devices are connected, any changes made to the shared folder on Windows will automatically sync to the Linux machine and vice versa.
The key to seamlessly transferring a file from Windows to Linux is to share the secret key for synchronization using sync software.
Use Shared Folders in Your Linux Virtual Machine
When running Linux as a virtual machine on your Windows PC, you can easily transfer a file from Windows to Linux using shared folders. It enables seamless file sharing between Windows and Linux.
Example:
Imagine you have Oracle VirtualBox running a Linux VM on your Windows PC. In VirtualBox settings, set up a shared folder that directs to a directory on your Windows host. Once the shared folder is set up within your Linux virtual machine, you can effortlessly transfer a file from Windows to Linux as needed.
Use these four methods to transfer and share files between Windows and Linux systems. Whether using the secure SSH protocol, the traditional FTP method, sync software, or shared folders in a virtual machine, these techniques provide flexible solutions for your data exchange needs. Choose the method that suits your requirements and start transferring files with ease.
Moving files between Windows and Linux through a network share is indeed possible and can be an effective method for file transfer. Network shares allow folders on one system to be accessed by another over the network, enabling seamless data exchange between the two operating systems.
To set up file sharing between Windows and Linux, follow these steps:
-
Configure File Sharing on Windows:
- Select the folder or directory you want to share on your Windows machine.
- Right-click on the folder, choose Properties, and navigate to the Sharing tab.
- Click Advanced Sharing and check the box for Share this folder.
- Optionally, you can modify the share name for easier identification.
-
Access the Shared Folder from Linux:
- On your Linux machine, open the file manager or use the mount command to access the shared folder.
- In the file manager’s address bar, type the Windows machine’s IP address or hostname in the following format:
The command smb://<windows-ip-or-hostname>/<share-name> is a URI used in Linux to access a shared folder on a Windows machine. It requires the Windows machine’s IP address or hostname and the name of the shared folder. By entering this command in the Linux file manager’s address bar, users can connect to the specified Windows machine’s shared folder and seamlessly transfer files between Windows and Linux systems using the SMB protocol.
- Alternatively, use the mount command to mount the network share to a specific directory on your Linux system.
-
Transfer Files Between Windows and Linux:
- Once the network share is accessible from your Linux machine, you can transfer files by dragging and dropping them to and from the shared folder.
- Changes made to the files in the shared folder will be reflected on both systems, ensuring data consistency.
Ensure you configure network share permissions to grant access to the shared folder. Additionally, consider security aspects such as using strong passwords and restricting access to authorized users only.
You can utilize network shares to conveniently move files between Windows and Linux without additional software or complex configurations. This method streamlines the file transfer process and facilitates seamless collaboration between the two operating systems.
Conclusion
In conclusion, transferring and sharing files between Windows and Linux systems can be achieved seamlessly through various methods.
Here are the key takeaways from the article:
- Securely copy files using SSH with the scp command.
- Utilize FTP for Windows to Linux file transfers by setting up an FTP server on the Linux machine and using an FTP client on Windows.
- Keep specific directories in sync between Windows and Linux using sync software like Resilio Sync.
- Share folders between your Windows host and Linux virtual machine to facilitate file sharing within the virtual environment.
Users can effortlessly exchange data between the two operating systems using SSH, FTP, sync software, or shared folders in a virtual machine. Each method offers its unique advantages, ensuring seamless and secure file transfer.
The fastest way to transfer files and folders over SSH from Windows 10 to Linux is with the SCP tool. It works within the SSH protocol and allows users to quickly and easily transfer data right over the command-line from one computer to another!
In this guide, we’ll show you how to use SCP on your Windows 10. We’ll cover two methods. The first method is using the Windows PowerShell, Microsoft’s equivalent to the Linux command-line. The second method we will cover is WinSCP, a utility that allows Windows users to transfer files using SCP over SSH with a nice GUI.
Note: for SCP to work on Windows 10, the Linux PC you plan to transfer files to must already be running an OpenSSH server. To set up an SSH server on your Linux system, please follow our guide on the subject!
Method 1 – PowerShell
Windows PowerShell is arguably the best way to use SCP on Windows 10. The reason? Windows 10 users all already have access to PowerShell, and there’s no need to configure or tweak anything to use it. Better still, Microsoft has SCP built into PowerShell, so Windows 10 users don’t even have to install it!
To use SCP in PowerShell, start by launching the PowerShell console on your Windows 10 desktop. To do that, press Win on the keyboard, search for “PowerShell” and launch the app with the blue terminal icon. Then, follow the step-by-step instructions below to learn how to SCP files and folders to your Linux box.
Step 1: Open up Windows Explorer and navigate to the location of the file/folder you wish to transfer to the Linux system. So, for example, if there were a file or folder in “Documents,” the location would be C:\Users\EXAMPLE_USERNAME\Documents\. Then, copy the location data to your clipboard using Ctrl + C.
Step 2: Go back to the PowerShell window, and write cd into the command prompt. Then, after writing cd, right-click with the mouse. By right-clicking, you will paste the location you copied to the clipboard.
Once the location is pasted in the PowerShell prompt, it should look like the following command.
cd C:\Some\location\of\files\or\folders\to\transfer\
Press the Enter key to execute the command.
Step 3: After executing the cd command, PowerShell will be in the directory where the files are that you want to transfer. From here, go back to Windows Explorer and look through this same directory for files/folders you want to transfer.
For example, if you wish to transfer example-photo.png to your Linux PC, take note of the filename. Or, if you’d like to transfer a directory, say, “Important-Files“, remember the folder name.
Step 4: In PowerShell, use the SCP command to transfer a file or directory over SSH to your Linux PC.
Note: when attempting to transfer files or folders, PowerShell may say, “The authenticity of host can’t be established. Are you sure you want to continue connecting?” You must select “yes,” or SCP will fail.
Transfer a file
To transfer a file over SCP from Windows 10 to a Linux PC over SSH, customize the command below. Note that you must change example-photo.png to the actual file you wish to transfer, remote_linux_username to the username on the Linux PC, linux_hostname_or_local_ip to the Linux PC’s hostname/LAN IP address, and /remote/directory/on/linux/pc to a real directory on the Linux PC.
scp example-photo.png remote_linux_username@linux_hostname_or_local_ip:/remote/directory/on/linux/pc
Transfer the contents of a directory
Need to transfer the contents of an entire folder? Make use of scp -r. Remember to change C:\Users\EXAMPLE_USERNAME\Documents\Important-Files to the actual file folder on your Windows 10 PC, remote_linux_username to the username on the Linux PC, linux_hostname_or_local_ip to the Linux PC’s hostname/LAN IP address, and /remote/directory/on/linux/pc to an actual directory on the Linux PC.
scp -r 'C:\Users\EXAMPLE_USERNAME\Documents\Important-Files' remote_linux_username@linux_hostname_or_local_ip:/remote/directory/on/linux/pc
Method 2 – WinSCP
If you’re not a huge fan of the command-line but still need to transfer files from Windows 10 to a remote Linux system via SSH, you can use WinSCP. It adds on a beautiful GUI on top of SCP (it also supports other protocols). Here’s how to use it to transfer files and folders.
Step 1: Download and install the WinSCP application on your Windows 10 PC. To download the app, head over to winscp.net, and click on the green “DOWNLOAD NOW” button. Once the installer is done, launch it and install the program on your Windows 10 PC.
Step 2: After WinSCP is installed, launch it on your Windows 10 desktop. Upon launching, you will see a “Login” window. In the login window, look for “File protocol” and change it from “SFTP” to “SCP.”
Step 3: Find “Host name” and write out the hostname of the Linux PC. Can’t figure out the hostname? The LAN IP address also works.
Step 4: Find the “User name” text-box, and write in the name of the user on the remote Linux PC in the box.
Step 5: Find the “Password” box and write in the name of the password to the remote Linux PC. Then, click “Save” to save the information.
Step 6: Select the “Login” button to access your remote Linux PC over SCP/SSH. While logging in, be sure to select “Yes” when WinSCP asks, “Continue connecting to an unknown server and add its host key to a cache?”
Step 7: Open up the Windows Explorer and browse for the file or folder you wish to share over SCP/SSH protocol. Then, drag it into the WinSCP window. It will instantly transfer to the remote Linux PC using SCP!

Copy Files from Windows to WSL Ubuntu
Windows Subsystem for Linux (WSL) is a powerful tool that allows you to run Linux distributions on your Windows PC. This can be a great way to get access to Linux-only software, or to simply have a more versatile development environment.
One of the most common tasks you’ll need to do when using WSL is copying files between your Windows and Linux directories. This can be done in a few different ways, but the easiest way is to use the wsl.exe command-line tool.
In this article, we’ll show you how to copy files from Windows to WSL Ubuntu using the wsl.exe command. We’ll also cover some of the other ways you can copy files between Windows and WSL.
Prerequisites
To follow along with this tutorial, you’ll need the following:
- A Windows PC with WSL installed
- A Linux distribution installed in WSL (Ubuntu is the most popular choice)
- The wsl.exe command-line tool installed
Getting Started
To get started, open a Command Prompt window and type the following command:
wsl.exe –list
This will list all of the Linux distributions that are installed on your PC. If you don’t see Ubuntu listed, you can install it by following the instructions in the [WSL documentation](https://docs.microsoft.com/en-us/windows/wsl/install-win10).
Once Ubuntu is installed, you can open a terminal window by typing the following command:
wsl.exe -d ubuntu
This will open a terminal window in the Ubuntu distribution.
Copying Files
To copy a file from Windows to WSL, you can use the following command:
wsl.exe -v
For example, to copy the file `C:\myfile.txt` to the directory `/home/user/myfiles` in Ubuntu, you would use the following command:
wsl.exe -v C:\myfile.txt /home/user/myfiles/myfile.txt
You can also use the following command to copy a directory from Windows to WSL:
wsl.exe -r
For example, to copy the directory `C:\mydirectory` to the directory `/home/user/myfiles` in Ubuntu, you would use the following command:
wsl.exe -r C:\mydirectory /home/user/myfiles/mydirectory
Troubleshooting
If you’re having trouble copying files between Windows and WSL, there are a few things you can check.
First, make sure that you’re using the correct path to the files. The path to a file in Windows will start with `C:\`, while the path to a file in Ubuntu will start with `/`.
Second, make sure that the files you’re trying to copy are not read-only. You can check the read-only status of a file by using the following command:
ls -l
If the file is read-only, you can change its permissions by using the following command:
chmod a+r
Finally, make sure that you have the correct permissions to copy the files. You can check your permissions by using the following command:
ls -l
If you don’t have the correct permissions, you can change them by using the following command:
chmod 777
Copying files between Windows and WSL is a simple process that can be done using the wsl.exe command-line tool. By following the steps in this article, you can easily transfer files between your two operating systems.
| Step | Instructions | Example |
|---|---|---|
| 1 | Open the Windows File Explorer and navigate to the folder containing the files you want to copy. | |
| 2 | Click on the “Select” button and select all of the files you want to copy. | |
| 3 | Right-click on the selected files and select “Copy”. | |
| 4 | Open the WSL Ubuntu terminal and navigate to the directory where you want to copy the files. | |
| 5 | Paste the files by pressing Ctrl+V or by using the “Enter” key. |
Overview of the process
What is WSL Ubuntu?
WSL Ubuntu is a version of Ubuntu that runs on Windows as a native Windows application. This means that you can use Ubuntu on Windows without having to install a separate operating system. WSL Ubuntu is fully integrated with Windows, so you can use it to run Linux applications and access Linux files from Windows.
How to enable WSL Ubuntu on Windows
To enable WSL Ubuntu on Windows, you need to have the following:
- Windows 10 version 1903 or later
- The Windows Subsystem for Linux (WSL) feature
To check if you have the WSL feature, open the **Settings** app and go to **Apps** > Optional features. If the Windows Subsystem for Linux feature is not listed, you can install it by clicking the Add a feature button.
Once you have the WSL feature installed, you can enable WSL Ubuntu by following these steps:
1. Open the Windows Terminal app.
2. Click the New button and select Ubuntu.
3. In the Ubuntu terminal, type the following command and press Enter:
wsl –install -d ubuntu
This will install the latest version of Ubuntu on your computer.
There are three ways to copy files from Windows to WSL Ubuntu:
- Using the command line
- Using a graphical user interface (GUI)
- Using a third-party tool
Using the command line
To copy files from Windows to WSL Ubuntu using the command line, you can use the following command:
wsl -v -t
For example, to copy the file `C:\Users\user\Documents\file.txt` to the directory `/home/user/Documents` in WSL Ubuntu, you would use the following command:
wsl -v -t C:\Users\user\Documents\file.txt /home/user/Documents
Using a graphical user interface (GUI)
To copy files from Windows to WSL Ubuntu using a graphical user interface, you can use the following steps:
1. Open the File Explorer app on Windows.
2. Navigate to the folder that contains the files you want to copy.
3. Select the files you want to copy and click the Copy button.
4. Open the Windows Terminal app.
5. Click the New button and select Ubuntu.
6. In the Ubuntu terminal, navigate to the directory where you want to copy the files.
7. Type the following command and press Enter:
paste
This will paste the files that you copied from Windows into the directory in WSL Ubuntu.
Using a third-party tool
There are a number of third-party tools that you can use to copy files from Windows to WSL Ubuntu. Some popular tools include:
- [WinSCP](https://winscp.net/)
- [FileZilla](https://filezilla-project.org/)
- [Cyberduck](https://cyberduck.io/)
These tools can make it easier to copy files between Windows and WSL Ubuntu, as they provide a graphical user interface that makes it easy to select the files you want to copy and the destination directory.
Detailed steps for copying files
In addition to the overview of the process, below are detailed steps for copying files from Windows to WSL Ubuntu using the command line, a graphical user interface (GUI), and a third-party tool.
Using the command line
To copy files from Windows to WSL Ubuntu using the command line, you can use the following command:
wsl -v -t
For example, to copy the file `C:\Users\user\Documents\file.txt` to the directory `/home/user/Documents` in WSL Ubuntu, you would use the following command:
wsl -v -t C:\Users\user\Documents\file.txt /home/user/Documents
The `-v` flag tells WSL to verbosely output the progress of the copy operation. The `-t` flag tells WSL to create the destination directory if it does not exist.
Here are some additional tips for copying files from Windows to WSL Ubuntu using the command line:
- To
3. Common problems and solutions
Files not showing up in WSL Ubuntu
One of the most common problems people encounter when trying to copy files from Windows to WSL Ubuntu is that the files don’t show up in WSL Ubuntu. This is usually because the file system in WSL Ubuntu is different from the file system in Windows.
To fix this problem, you need to make sure that the file system in WSL Ubuntu is the same as the file system in Windows. To do this, open a terminal window in WSL Ubuntu and run the following command:
sudo apt-get install ntfs-3g
This will install the NTFS-3G driver, which allows WSL Ubuntu to read and write to NTFS drives. Once the driver is installed, you can restart WSL Ubuntu and the files should show up.
File permissions errors
Another common problem people encounter when trying to copy files from Windows to WSL Ubuntu is that they get a file permissions error. This is usually because the files in Windows are owned by the user who created them, and the user who is logged into WSL Ubuntu does not have permission to access those files.
To fix this problem, you need to change the permissions on the files in Windows so that the user who is logged into WSL Ubuntu has permission to access them. To do this, open a File Explorer window in Windows and right-click on the files that you want to copy. Then, select the “Properties” option and click on the “Security” tab. In the “Security” tab, click on the “Advanced” button. In the “Advanced Security Settings” dialog box, click on the “Owner” tab and select the user who is logged into WSL Ubuntu. Then, click on the “Apply” button and click on the “OK” button.
Once you have changed the permissions on the files in Windows, you can try copying them to WSL Ubuntu again. This time, you should not get a file permissions error.
Other problems
There are a few other problems that people can encounter when trying to copy files from Windows to WSL Ubuntu. These problems include:
- The files are corrupted.
- The files are not the correct format.
- The files are too large.
- The files are in a different location.
If you encounter any of these problems, you can try the following solutions:
- Check the integrity of the files.
- Convert the files to the correct format.
- Split the files into smaller files.
- Move the files to a different location.
If you are still having problems, you can contact Microsoft support for help.
4. Tips and tricks
Using symbolic links to create shortcuts
One of the best ways to copy files from Windows to WSL Ubuntu is to use symbolic links. A symbolic link is a file that points to another file or directory. When you create a symbolic link, you can access the file or directory that it points to as if it were located in the same directory as the symbolic link.
To create a symbolic link in WSL Ubuntu, you can use the following command:
ln -s
For example, to create a symbolic link that points to the `Documents` folder in Windows, you would use the following command:
ln -s /mnt/c/Users//Documents ~/Documents
Once you have created the symbolic link, you can access the `Documents` folder in WSL Ubuntu by simply typing the following command:
cd ~/Documents
Using WSL Ubuntu as a development environment
WSL Ubuntu can be a great development environment for Windows developers. It allows you to develop Linux applications on your Windows machine without having to dual-boot or install a virtual machine.
To use WSL Ubuntu as a development environment, you can install the following tools:
- [Visual Studio Code](https://code.visualstudio.com/)
- [Remote Development Extension for Visual Studio Code](https://marketplace.visualstudio.com/items?itemName=ms-vscode-remote.remote-development)
- [Ubuntu Development Tools](https://marketplace.visualstudio.com/items?itemName=ms-vscode-remote.ubuntu-dev-tools)
Once you have installed these tools, you can open a remote WSL Ubuntu terminal in Visual Studio Code. You can then use Visual Studio Code to develop Linux applications on your Windows machine.
Other tips and tricks
Here are some other tips and tricks for using WSL Ubuntu:
- Use the `wsl.exe`
Q: How do I copy files from Windows to WSL Ubuntu?
A: There are a few ways to copy files from Windows to WSL Ubuntu.
1. Using the wsl.exe command
The wsl.exe command can be used to copy files between Windows and WSL Ubuntu. To copy a file from Windows to WSL Ubuntu, use the following command:
wsl.exe -v file-path-in-windows file-path-in-wsl-ubuntu
For example, to copy the file `C:\Users\user\Documents\file.txt` to the `/home/user/Documents` directory in WSL Ubuntu, you would use the following command:
wsl.exe -v C:\Users\user\Documents\file.txt /home/user/Documents
2. Using the scp command
The scp command can also be used to copy files between Windows and WSL Ubuntu. To copy a file from Windows to WSL Ubuntu, use the following command:
scp -r file-path-in-windows user@localhost:file-path-in-wsl-ubuntu
For example, to copy the file `C:\Users\user\Documents\file.txt` to the `/home/user/Documents` directory in WSL Ubuntu, you would use the following command:
scp -r C:\Users\user\Documents\file.txt user@localhost:/home/user/Documents
3. Using a file manager**
You can also use a file manager, such as [File Explorer](https://www.microsoft.com/en-us/software-download/file-explorer) or [WinSCP](https://winscp.net/eng/index.php), to copy files between Windows and WSL Ubuntu.
To copy a file from Windows to WSL Ubuntu using a file manager, simply open the file manager and navigate to the file you want to copy. Then, drag and drop the file to the WSL Ubuntu directory.
Q: What are the limitations of copying files from Windows to WSL Ubuntu?
A: There are a few limitations to copying files from Windows to WSL Ubuntu.
- File permissions. By default, files copied from Windows to WSL Ubuntu will have the same permissions as the files in Windows. This means that you may not be able to access or modify the files in WSL Ubuntu without changing their permissions.
- File formats. Some file formats may not be supported by WSL Ubuntu. If you try to copy a file that is not supported, you may receive an error message.
- Network speed. The speed at which you can copy files from Windows to WSL Ubuntu will depend on your network connection. If you have a slow network connection, it may take a long time to copy large files.
Q: What are some best practices for copying files from Windows to WSL Ubuntu?
A: Here are some best practices for copying files from Windows to WSL Ubuntu:
- Use a file manager. Using a file manager can make it easier to copy files between Windows and WSL Ubuntu.
- Check the file permissions. Make sure that the files you are copying have the correct permissions.
- Test the files. Once you have copied the files, test them to make sure that they work correctly.
- Back up your files. Always make a backup of your files before you copy them. This will help protect your files in case something goes wrong.
Q: Where can I get more help with copying files from Windows to WSL Ubuntu?
A: There are a few resources available to help you with copying files from Windows to WSL Ubuntu.
- The [WSL documentation](https://docs.microsoft.com/en-us/windows/wsl/) provides detailed information on how to use WSL.
- The [WSL forum](https://forums.microsoft.com/en-us/windows/categories/windows-subsystem-for-linux) is a good place to ask questions and get help from other WSL users.
- The [WSL GitHub repository](https://github.com/microsoft/wsl) contains the source code for WSL. This can be a helpful resource for troubleshooting problems.
In this blog post, we discussed how to copy files from Windows to WSL Ubuntu. We covered three methods: using the command line, using the GUI, and using a third-party tool. We also provided tips on how to troubleshoot common problems.
We hope this blog post has been helpful. If you have any questions, please feel free to leave a comment below.
Author Profile
-
Hatch, established in 2011 by Marcus Greenwood, has evolved significantly over the years. Marcus, a seasoned developer, brought a rich background in developing both B2B and consumer software for a diverse range of organizations, including hedge funds and web agencies.
Originally, Hatch was designed to seamlessly merge content management with social networking. We observed that social functionalities were often an afterthought in CMS-driven websites and set out to change that. Hatch was built to be inherently social, ensuring a fully integrated experience for users.
Now, Hatch embarks on a new chapter. While our past was rooted in bridging technical gaps and fostering open-source collaboration, our present and future are focused on unraveling mysteries and answering a myriad of questions. We have expanded our horizons to cover an extensive array of topics and inquiries, delving into the unknown and the unexplored.