
Изменение местоположения папки OneDrive
Applies ToMicrosoft365.com «Мой Office» для iPhone OneDrive (для дома или персональный) OneDrive для Mac OneDrive для Windows
Чтобы переместить расположение папок OneDrive на компьютере, необходимо удалить связь, переместить, а затем повторно связать OneDrive с расположением.
1. Отмена связи с OneDrive
-
Выберите облако OneDrive в области уведомлений, чтобы отобразить всплывающее окно OneDrive.
-
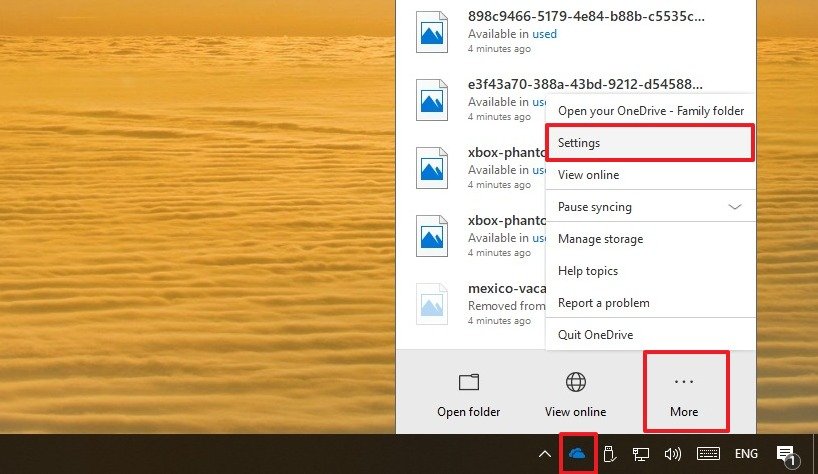
Нажмите значок справки и параметров OneDrive , а затем выберите Параметры.
-
Перейдите на вкладку Учетная запись.
-
Выберите Удалить связь с этим компьютером, а затем Удалить связь с учетной записью.
2. Перемещение папок OneDrive
С помощью проводник или Mac Finder перетащите папкиOneDrive компьютера в нужное расположение.
Совет: Если вы хотите использовать OneDrive на другом диске (например, D:\ или флэш-памяти), прочитайте статью Установка OneDrive на внешнем диске.
3. Повторное связывание OneDrive
Выполните следующие действия, чтобы повторно связать OneDrive
-
Назад на экран настройки OneDrive и выберите Начало работы.
-
Следуйте инструкциям, пока не перейдете на экран, где отображается расположение папки OneDrive. Выберите Изменить расположение.
-
Выберите новое расположение папки и нажмите кнопку ОК.
-
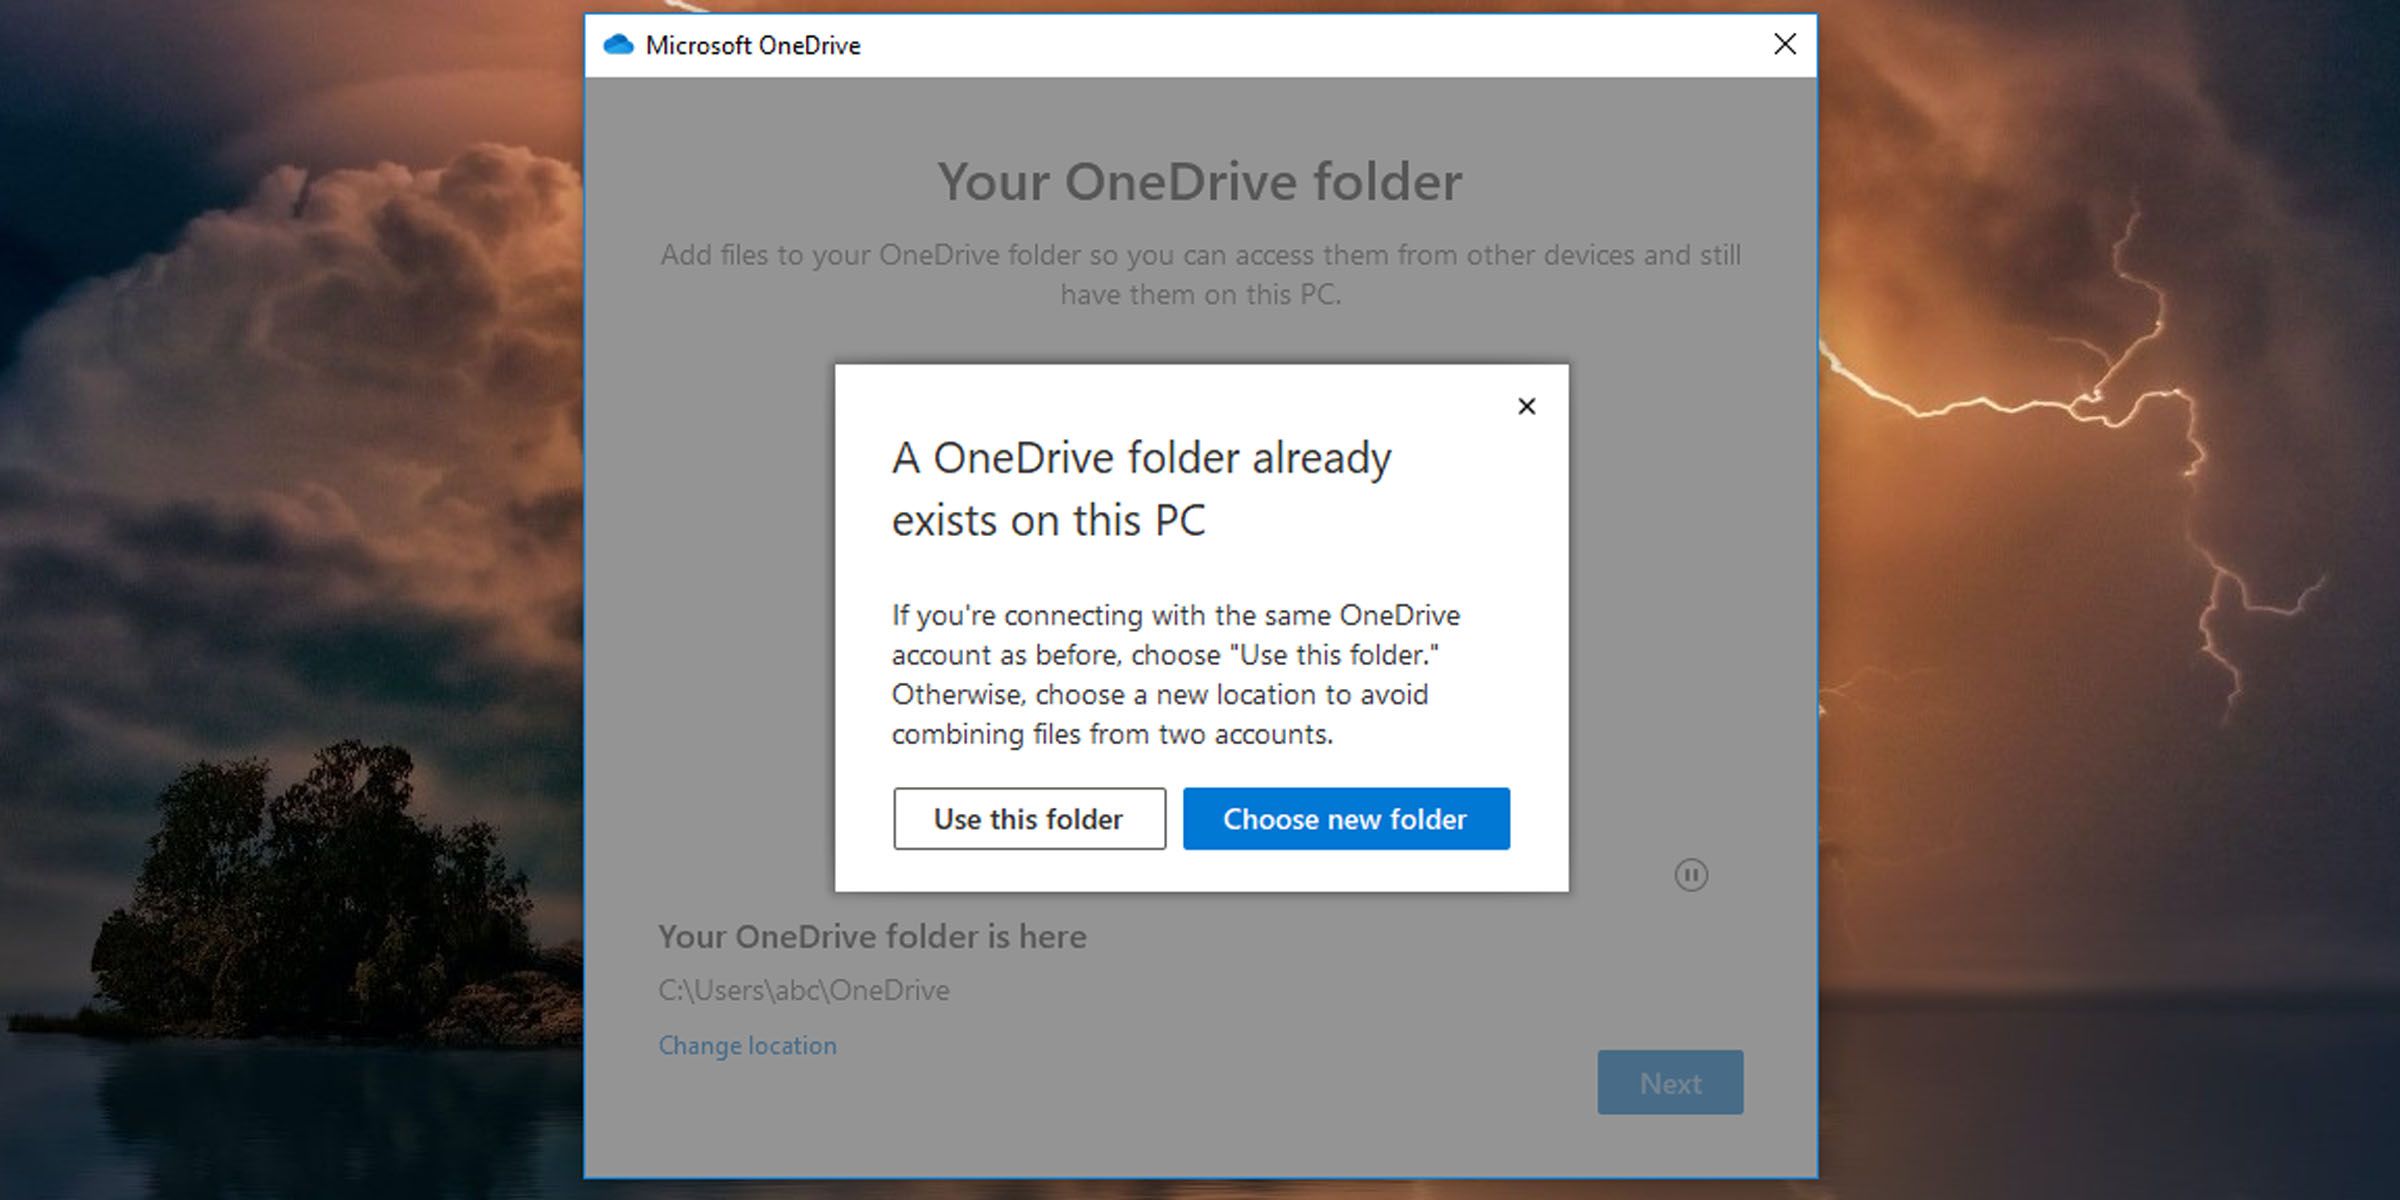
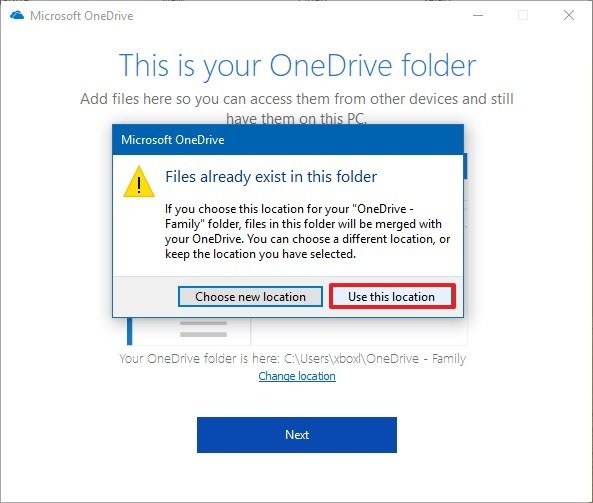
Вы увидите сообщение о том, что в папке OneDrive в новом расположении уже есть файлы. Выберите Использовать это расположение, а затем завершите настройку OneDrive.
Совет: Если вы выбрали синхронизацию только некоторых папок перед сбросом, вам потребуется снова сделать это после завершения синхронизации. Дополнительные сведения см. в статье Выбор папок OneDrive для синхронизации с компьютером .
Дополнительные сведения
Нужна дополнительная помощь?
Нужны дополнительные параметры?
Изучите преимущества подписки, просмотрите учебные курсы, узнайте, как защитить свое устройство и т. д.
Программное обеспечение облачного хранилища OneDrive интегрировано в Windows 10 и по умолчанию сохраненные в облаке данные синхронизируются с папкой OneDrive, находящейся на системном диске, обычно в C:\ Пользователи\ Имя_Пользователя\ (соответственно, если в системе несколько пользователей, для каждого из них может быть своя папка OneDrive).
Если вы пользуетесь OneDrive и со временем оказалось, что размещение папки на системном диске не очень разумно и требуется освободить место на этом диске, вы можете перенести папку OneDrive в другое расположение, например, на другой раздел или диск, при этом выполнять заново синхронизацию всех данных не придется. О перемещении папки — далее в пошаговой инструкции. См. также: Как отключить OneDrive в Windows 10.
Примечание: если описываемое выполняется в целях очистки системного диска, вам могут пригодиться следующие материалы: Как очистить диск C, Как перенести временные файлы на другой диск.
Перемещение папки OneDrive
Действия, необходимые для переноса папки OneDrive на другой диск или просто в другое расположение, а также для ее переименования достаточно просты и заключаются в простом переносе данных с временно отключенной работой OneDrive, а затем — повторной настройке облачного хранилища.
- Зайдите в параметры OneDrive (сделать это можно через правый клик по значку OneDrive в области уведомлений Windows 10).
- На вкладке «Учетная запись» нажмите «Удалить связь с этим компьютером».

- Сразу после этого действия вы увидите предложение снова настроить OneDrive, однако не делайте этого на данный момент, но окно можно не закрывать.
- Перенесите папку OneDrive на новый диск или в другое расположение. При желании вы можете изменить имя этой папки.

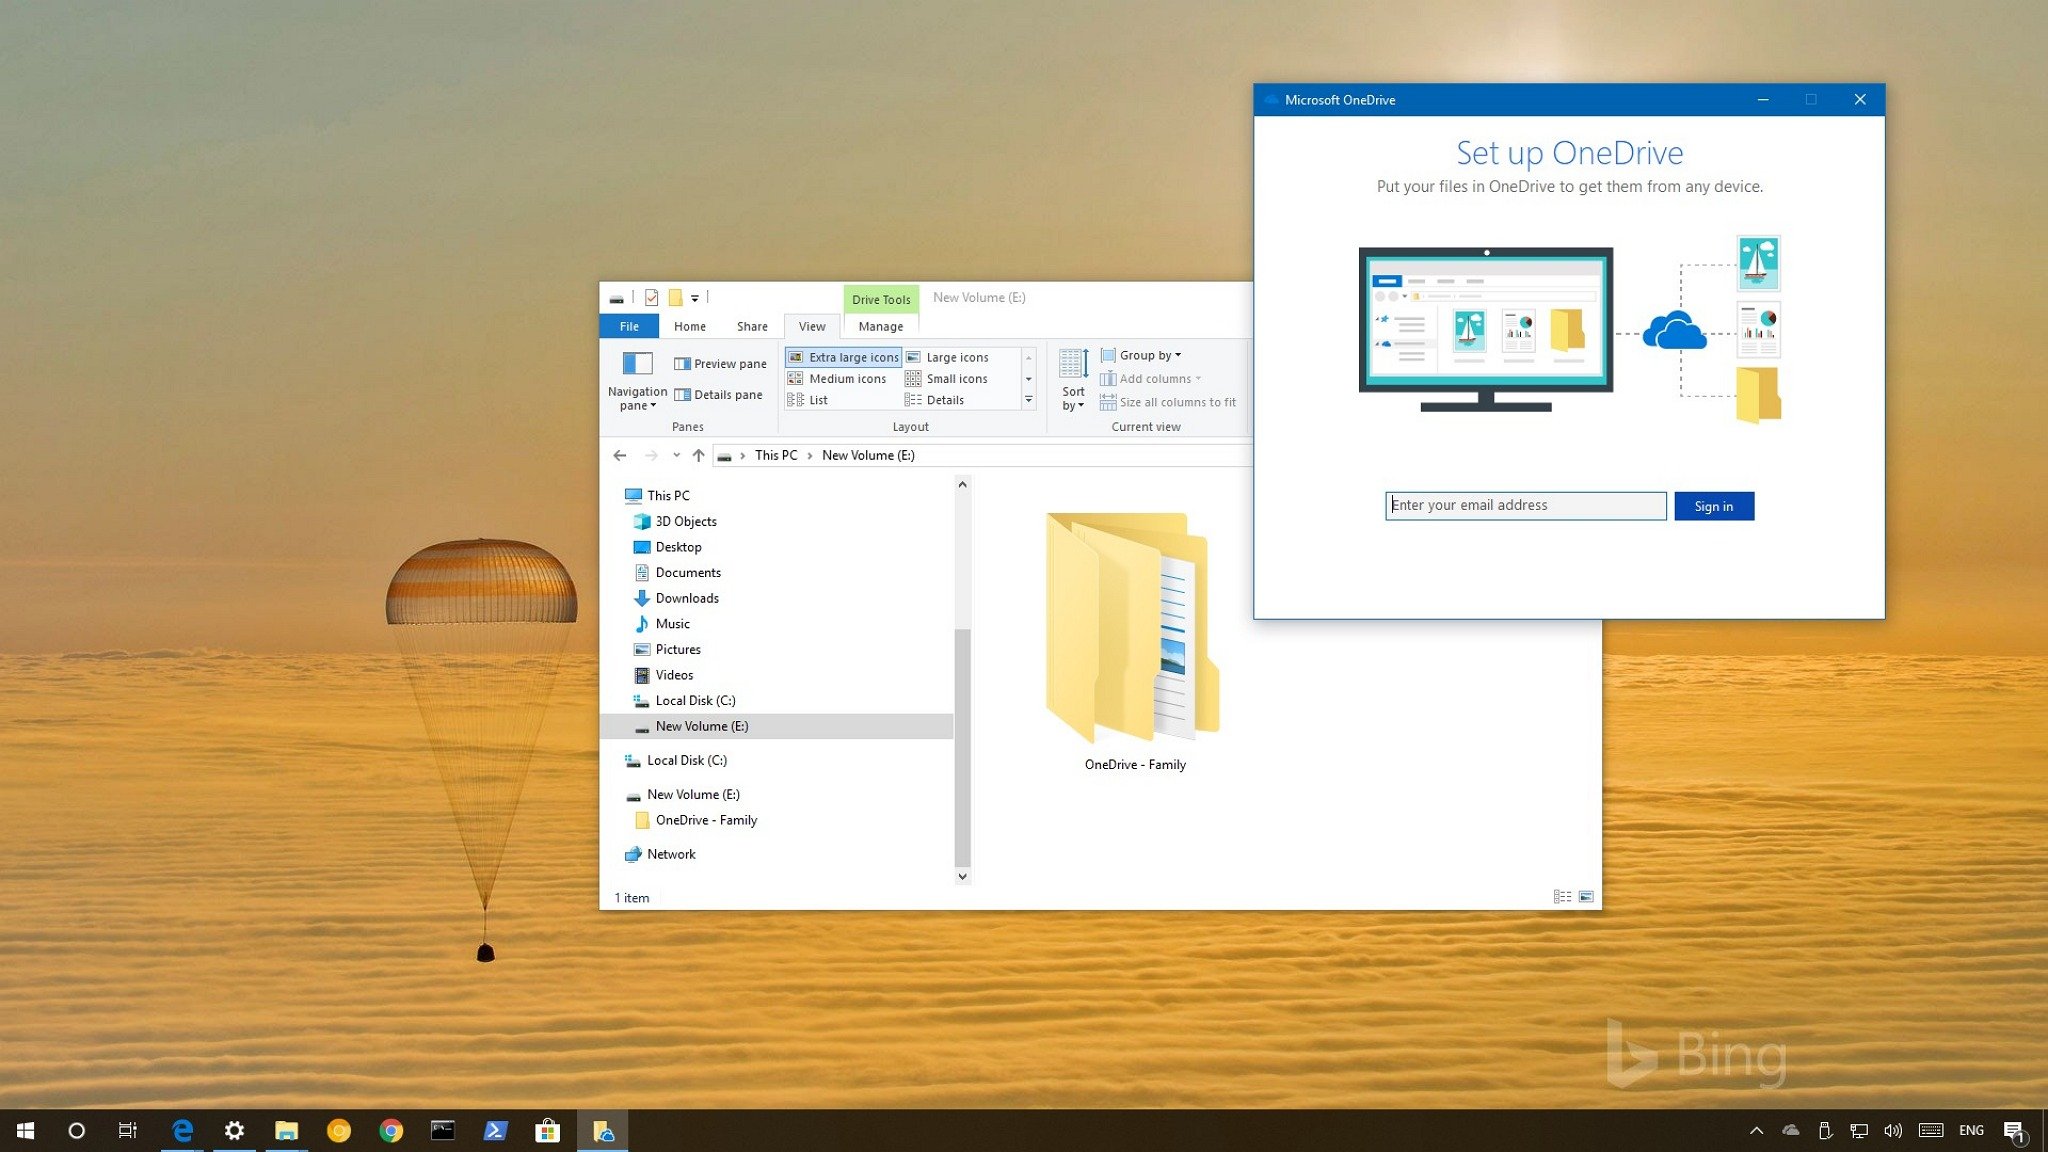
- В окне настройки OneDrive из п.3 введите ваш E-mail и пароль от учетной записи Майкрософт.
- В следующем окне с информацией «Ваша папка OneDrive находится здесь» нажмите «Изменить расположение».

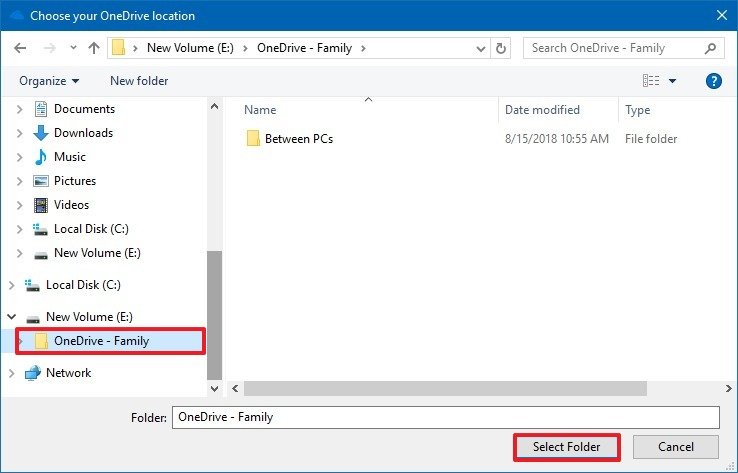
- Укажите путь к папке OneDrive (но не заходите в неё, это важно) и нажмите «Выбрать папку». В моем примере на скриншоте я переместил и переименовал папку OneDrive.

- Нажмите «Использовать это расположение» на запрос «В этой папке OneDrive уже есть файлы» — это как раз то, что нам нужно, чтобы синхронизация не проводилась повторно (а только сверка файлов в облаке и на компьютере).

- Нажмите «Далее».
- Выберите папки из облака, которые нужно синхронизировать, и еще раз нажмите «Далее».


Готово: после этих простых шагов и непродолжительного процесса поиска различий между данными в облаке и локальными файлами, ваша папка OneDrive будет в новом расположении, полностью готовой к работе.
Дополнительная информация
Если системные пользовательские папки «Изображения» и «Документы» на вашем компьютере также синхронизировались с OneDrive, то после выполнения переноса задайте для них новые расположения.
Для этого зайдите в свойства каждой из этих папок (например, в меню «Быстрый доступ» проводника, через правый клик по папке — «Свойства»), а потом на вкладке «Расположение» переместите их в новое расположение папки «Документы» и «Изображения» внутри папки OneDrive.
Sign in to your MUO account
If you don’t already know, OneDrive is Microsoft’s online storage service that you can use with your Microsoft account. You can save your files to the cloud and access them on any PC, tablet or phone by signing in to your Microsoft account. By default, your OneDrive folder is found in your user folder, but you can change where it is located. However, it isn’t a simple cut-and-paste operation; you have to make sure the new location syncs to the cloud. Here’s how to move your OneDrive folder to a new location.
How to Change the Location of Your OneDrive Folder
When you change where your OneDrive folder is located, you’ll also have to set it to sync with your files on the cloud. You’ll have to unlink your OneDrive folder on your PC first, then move the folder to a new location, and finally re-link your PC to your Microsoft account. These steps will help you set that up.
If you’re new to the concept, check out our articles on what OneDrive is and why you should use it.
1. Unlinking OneDrive
The first thing to do is to unlink your OneDrive folder from your Microsoft account so that files on the cloud no longer sync to their current location.
Your OneDrive files on your PC will no longer synchronize to the cloud. Don’t worry; a little later you’ll be re-linking your OneDrive folder to your Microsoft account.
Once you’ve done this, you will be presented with a window to set up OneDrive. Leave this open for the moment. You will need to revisit it once you’ve moved your OneDrive folder to a different location on your PC.
2. Moving Your OneDrive Folder
With that done, you can now relocate your OneDrive folder.
- Navigate to where your OneDrive folder is currently located. It should be in your user files by default.
- Click on the Home tab on the File Explorer ribbon.
-
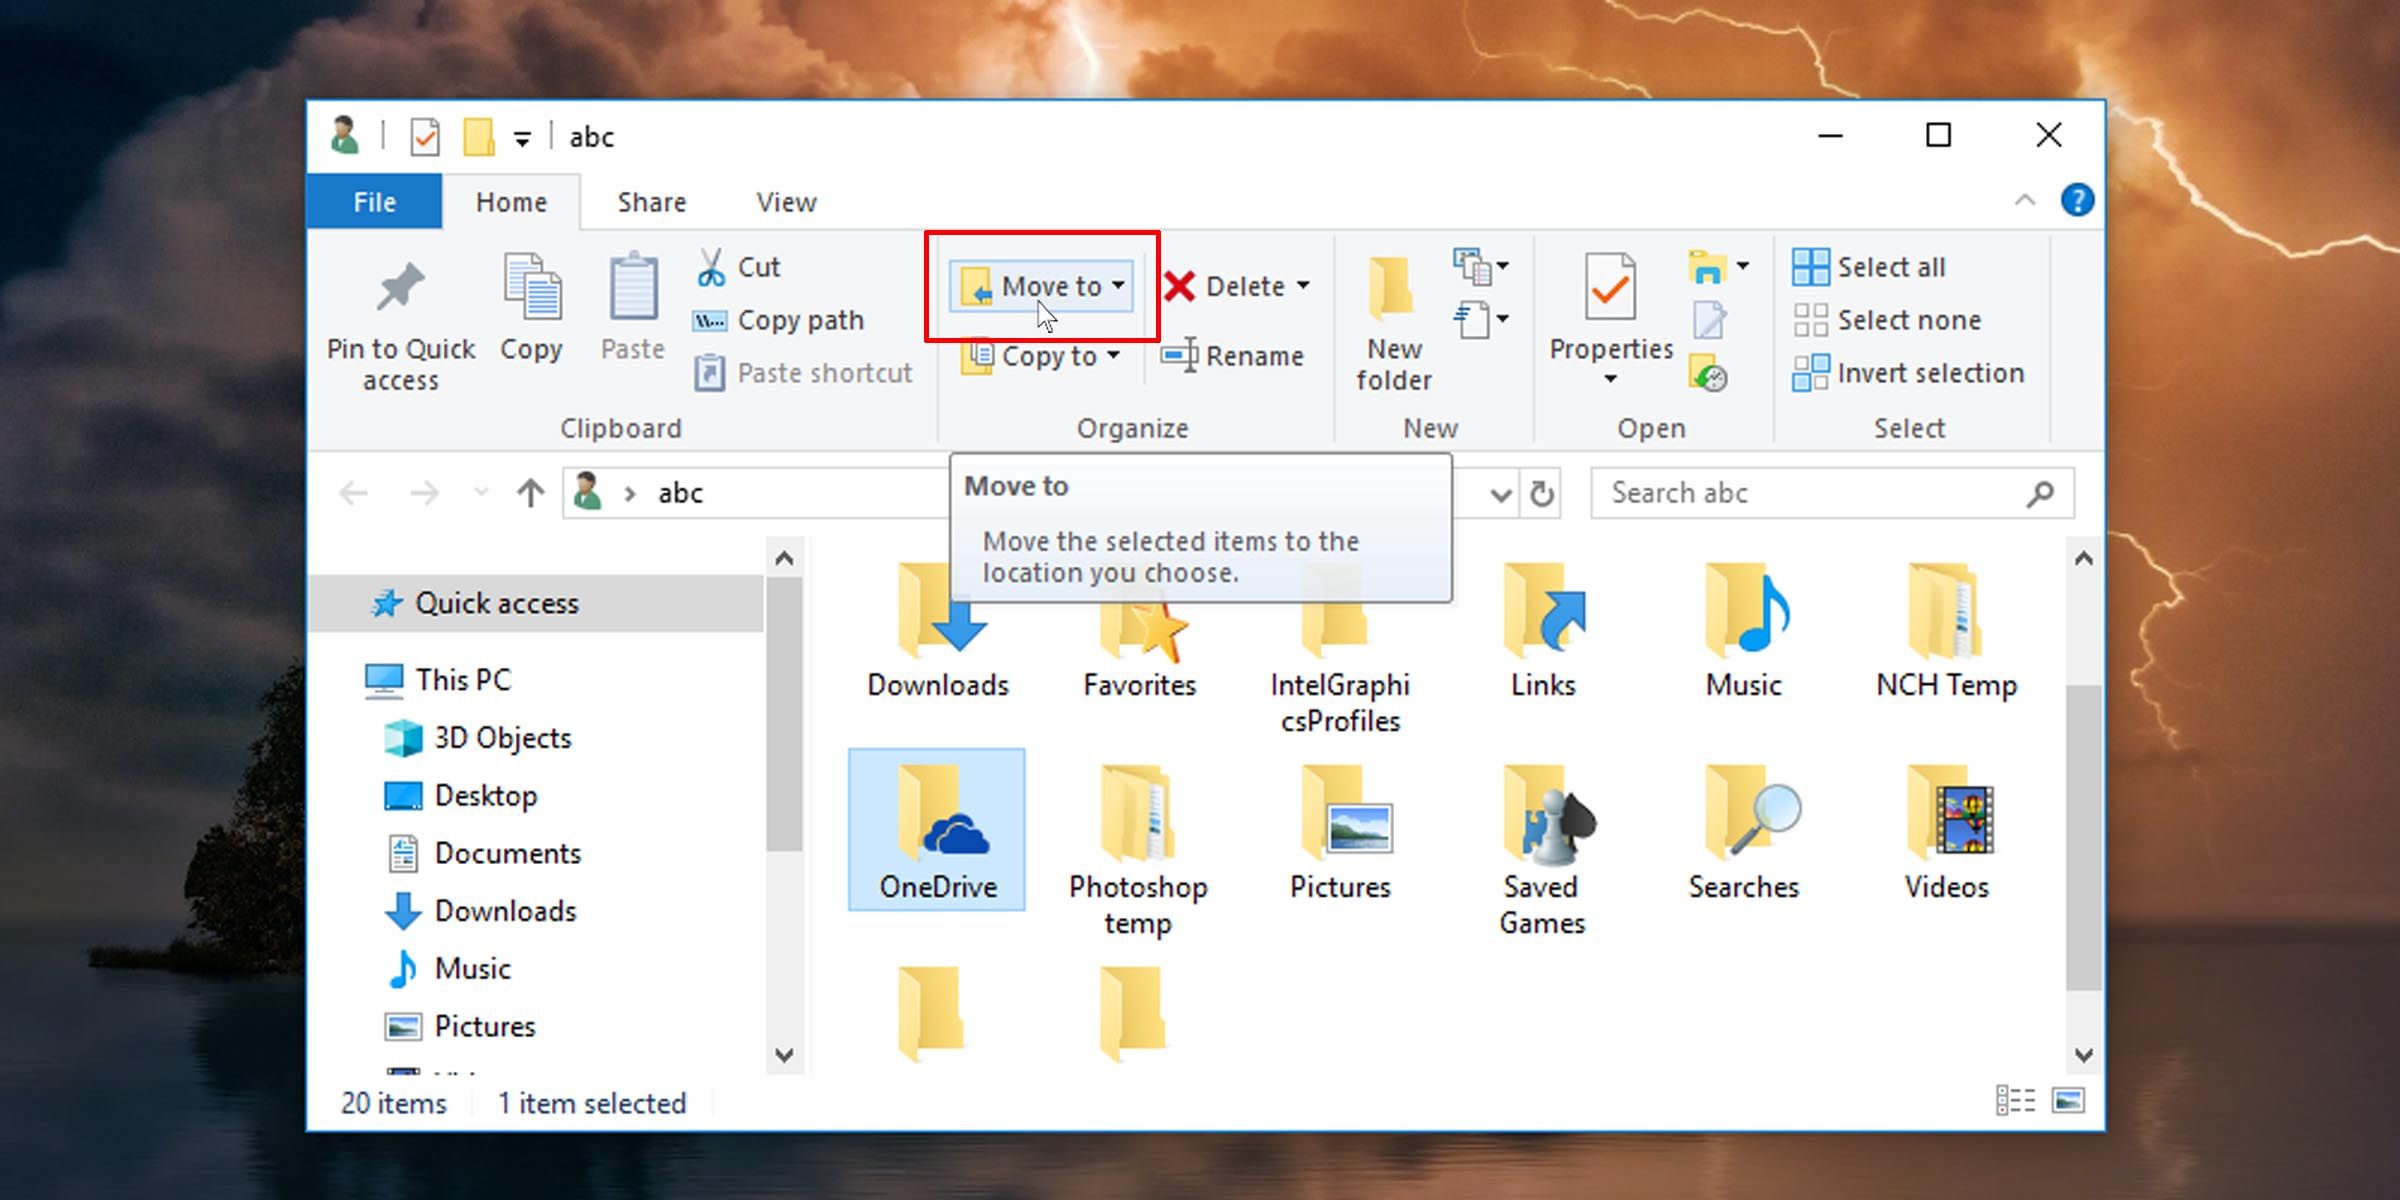
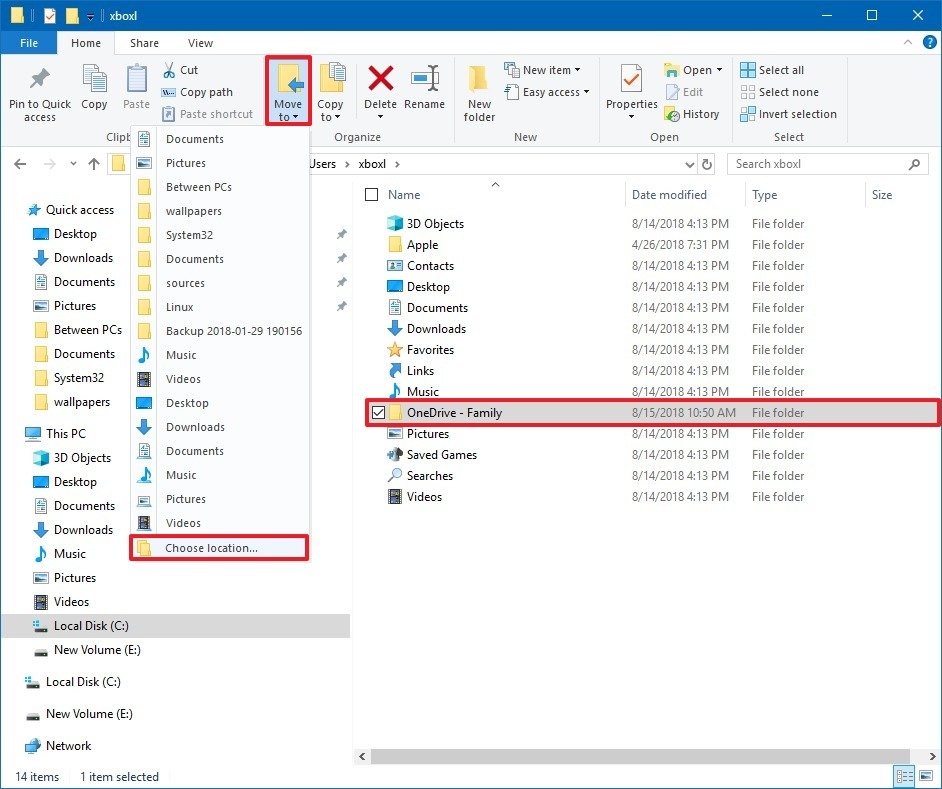
Select your OneDrive folder and in the ribbon click on the Move to button.

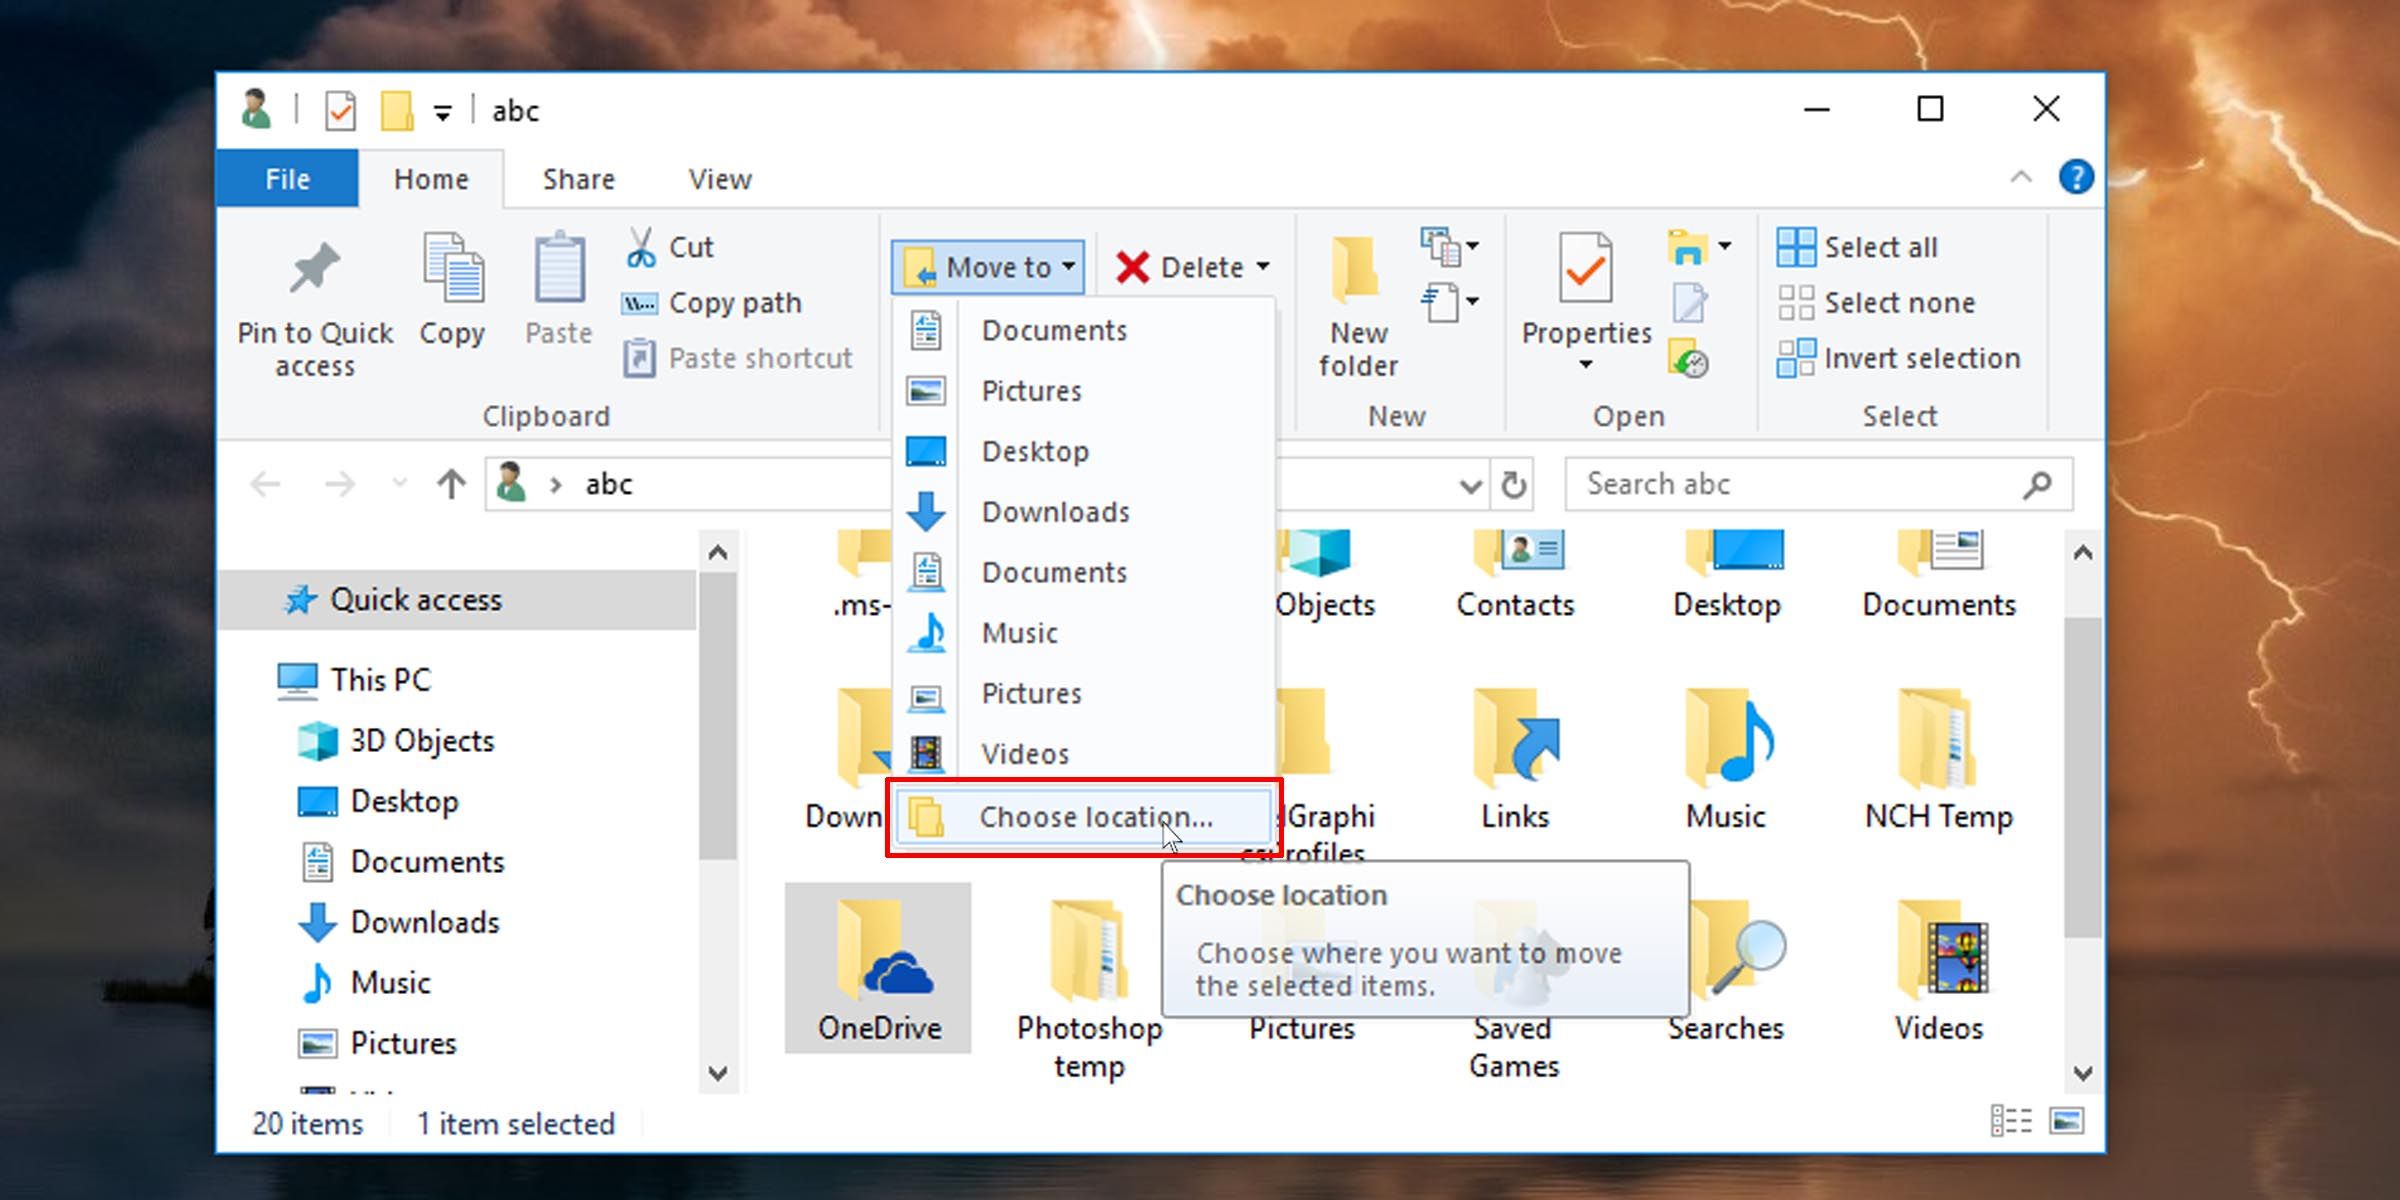
-
From the drop-down that appears, click on the Choose location option.
-
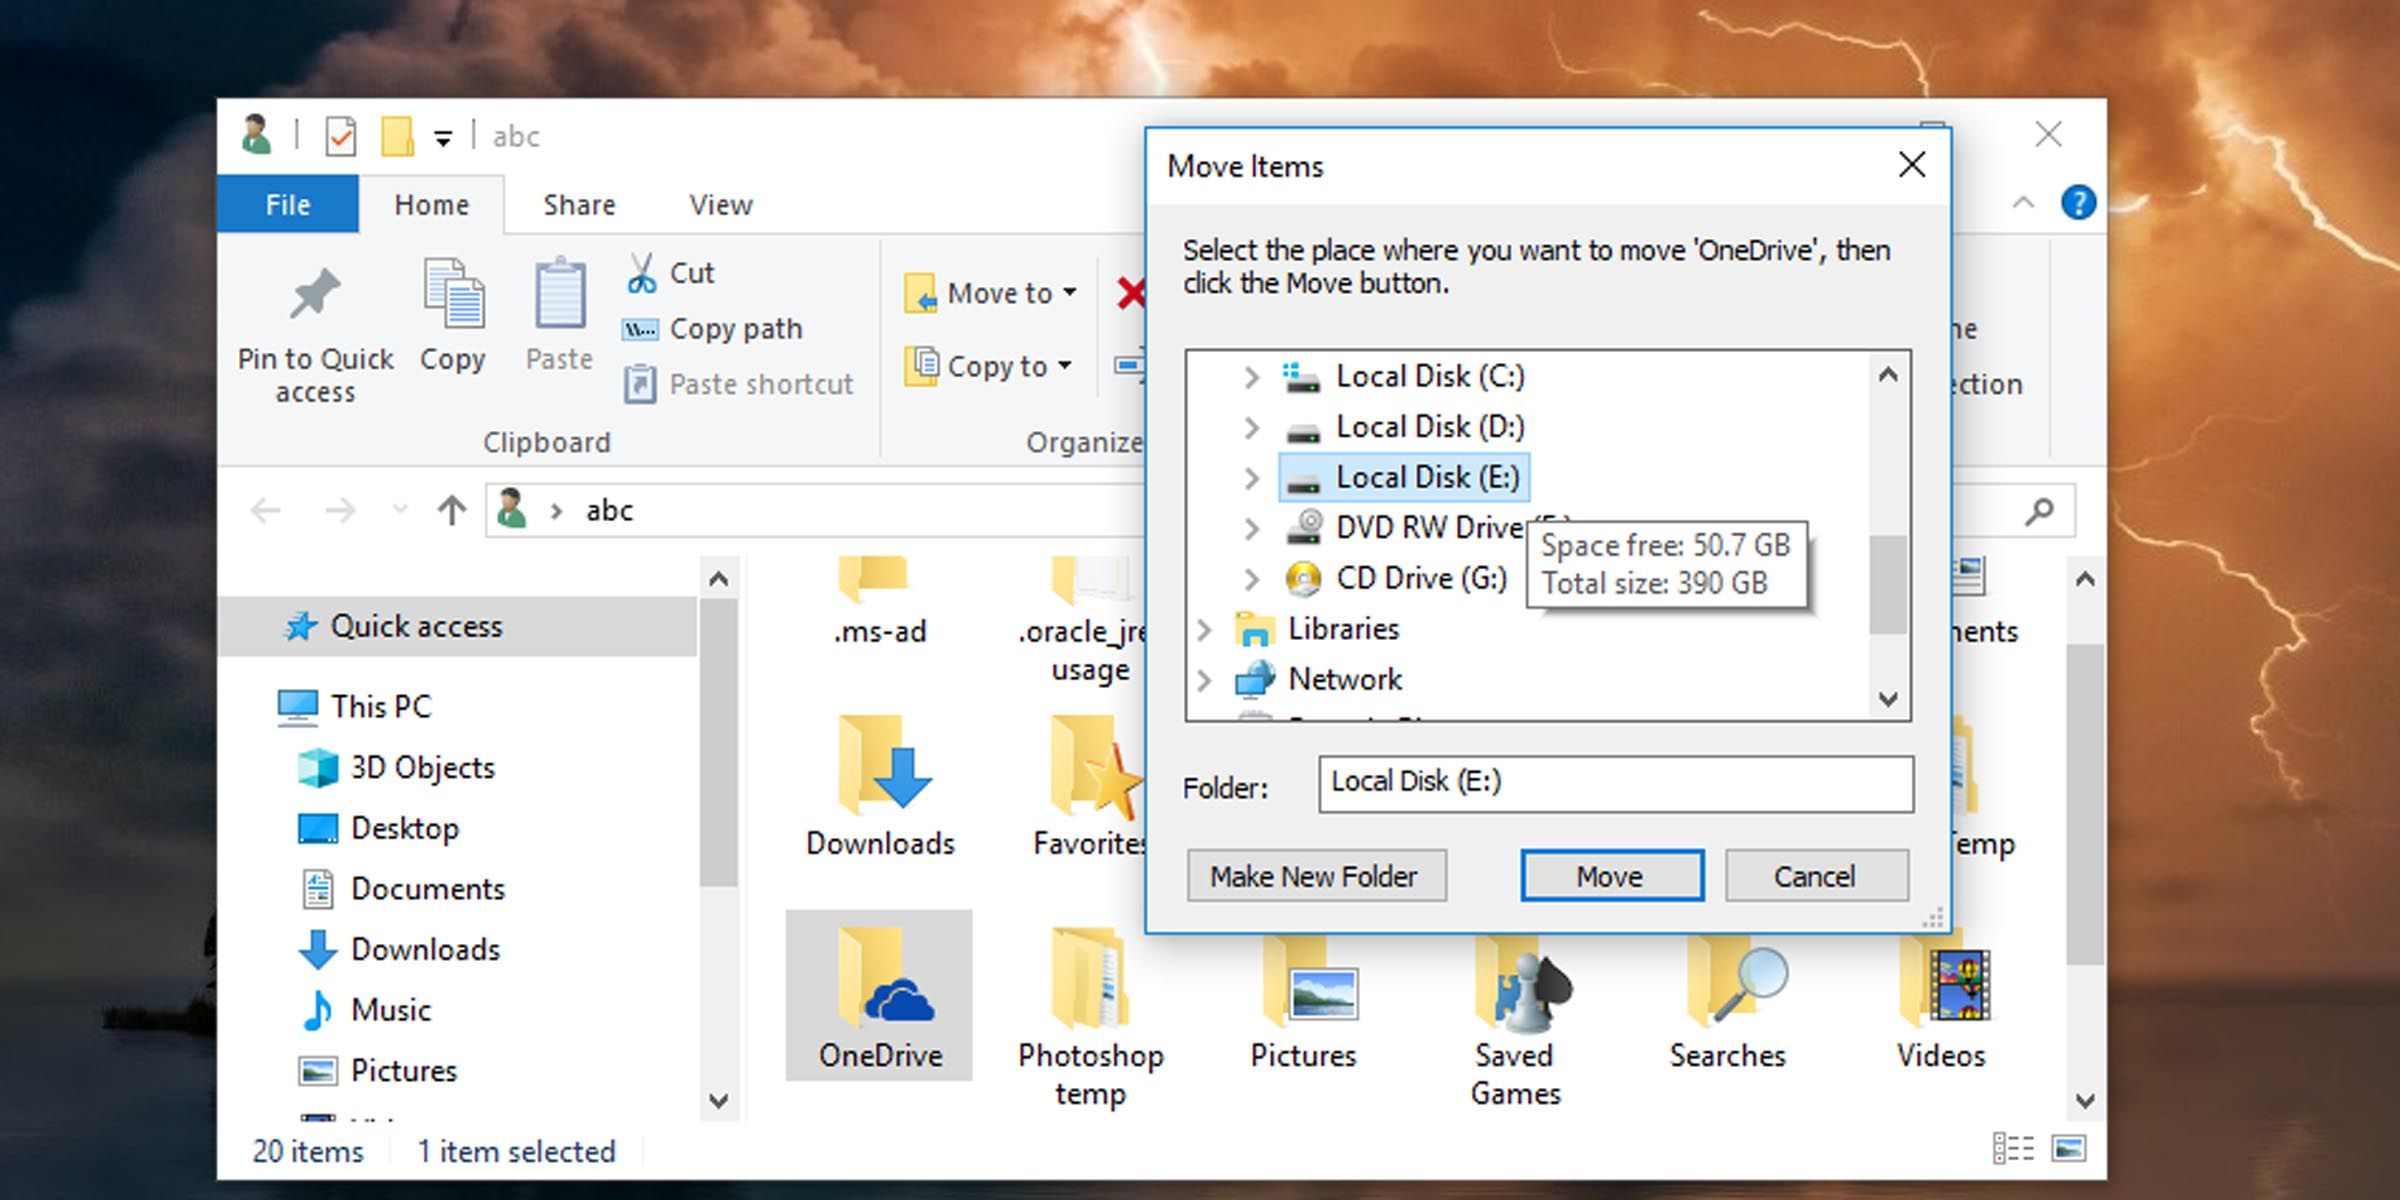
A pop-up will appear. Browse to the location you want your new OneDrive folder to reside, and click on the Move button on the bottom of the pop-up.
- Windows will start to move your OneDrive folder and all of its contents to the new location you’ve selected. This may take a while depending on the size of the folder.
That’s it! You’ve moved your OneDrive folder to a new location on your Windows PC.
3. Re-Linking OneDrive
Now all that’s left is to re-link your Microsoft account with OneDrive on your PC, this time pointing to the new location. Follow the steps below to do that.
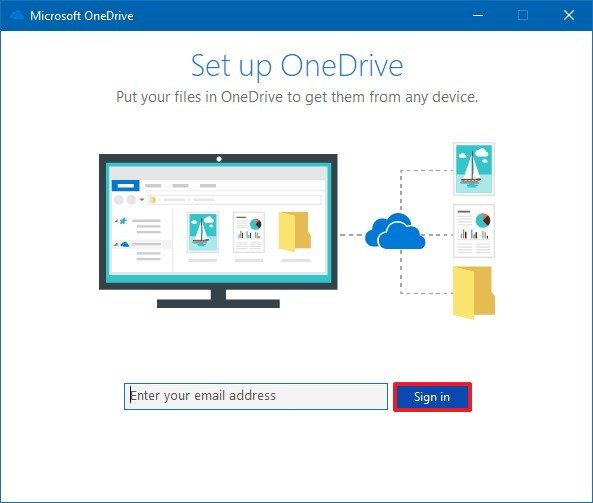
- Return to the Set up OneDrive window you left open earlier. (If you didn’t leave it open, or it got shut, you can pull it up again by opening the OneDrive application.) This is how you’ll re-link your OneDrive account to your PC.
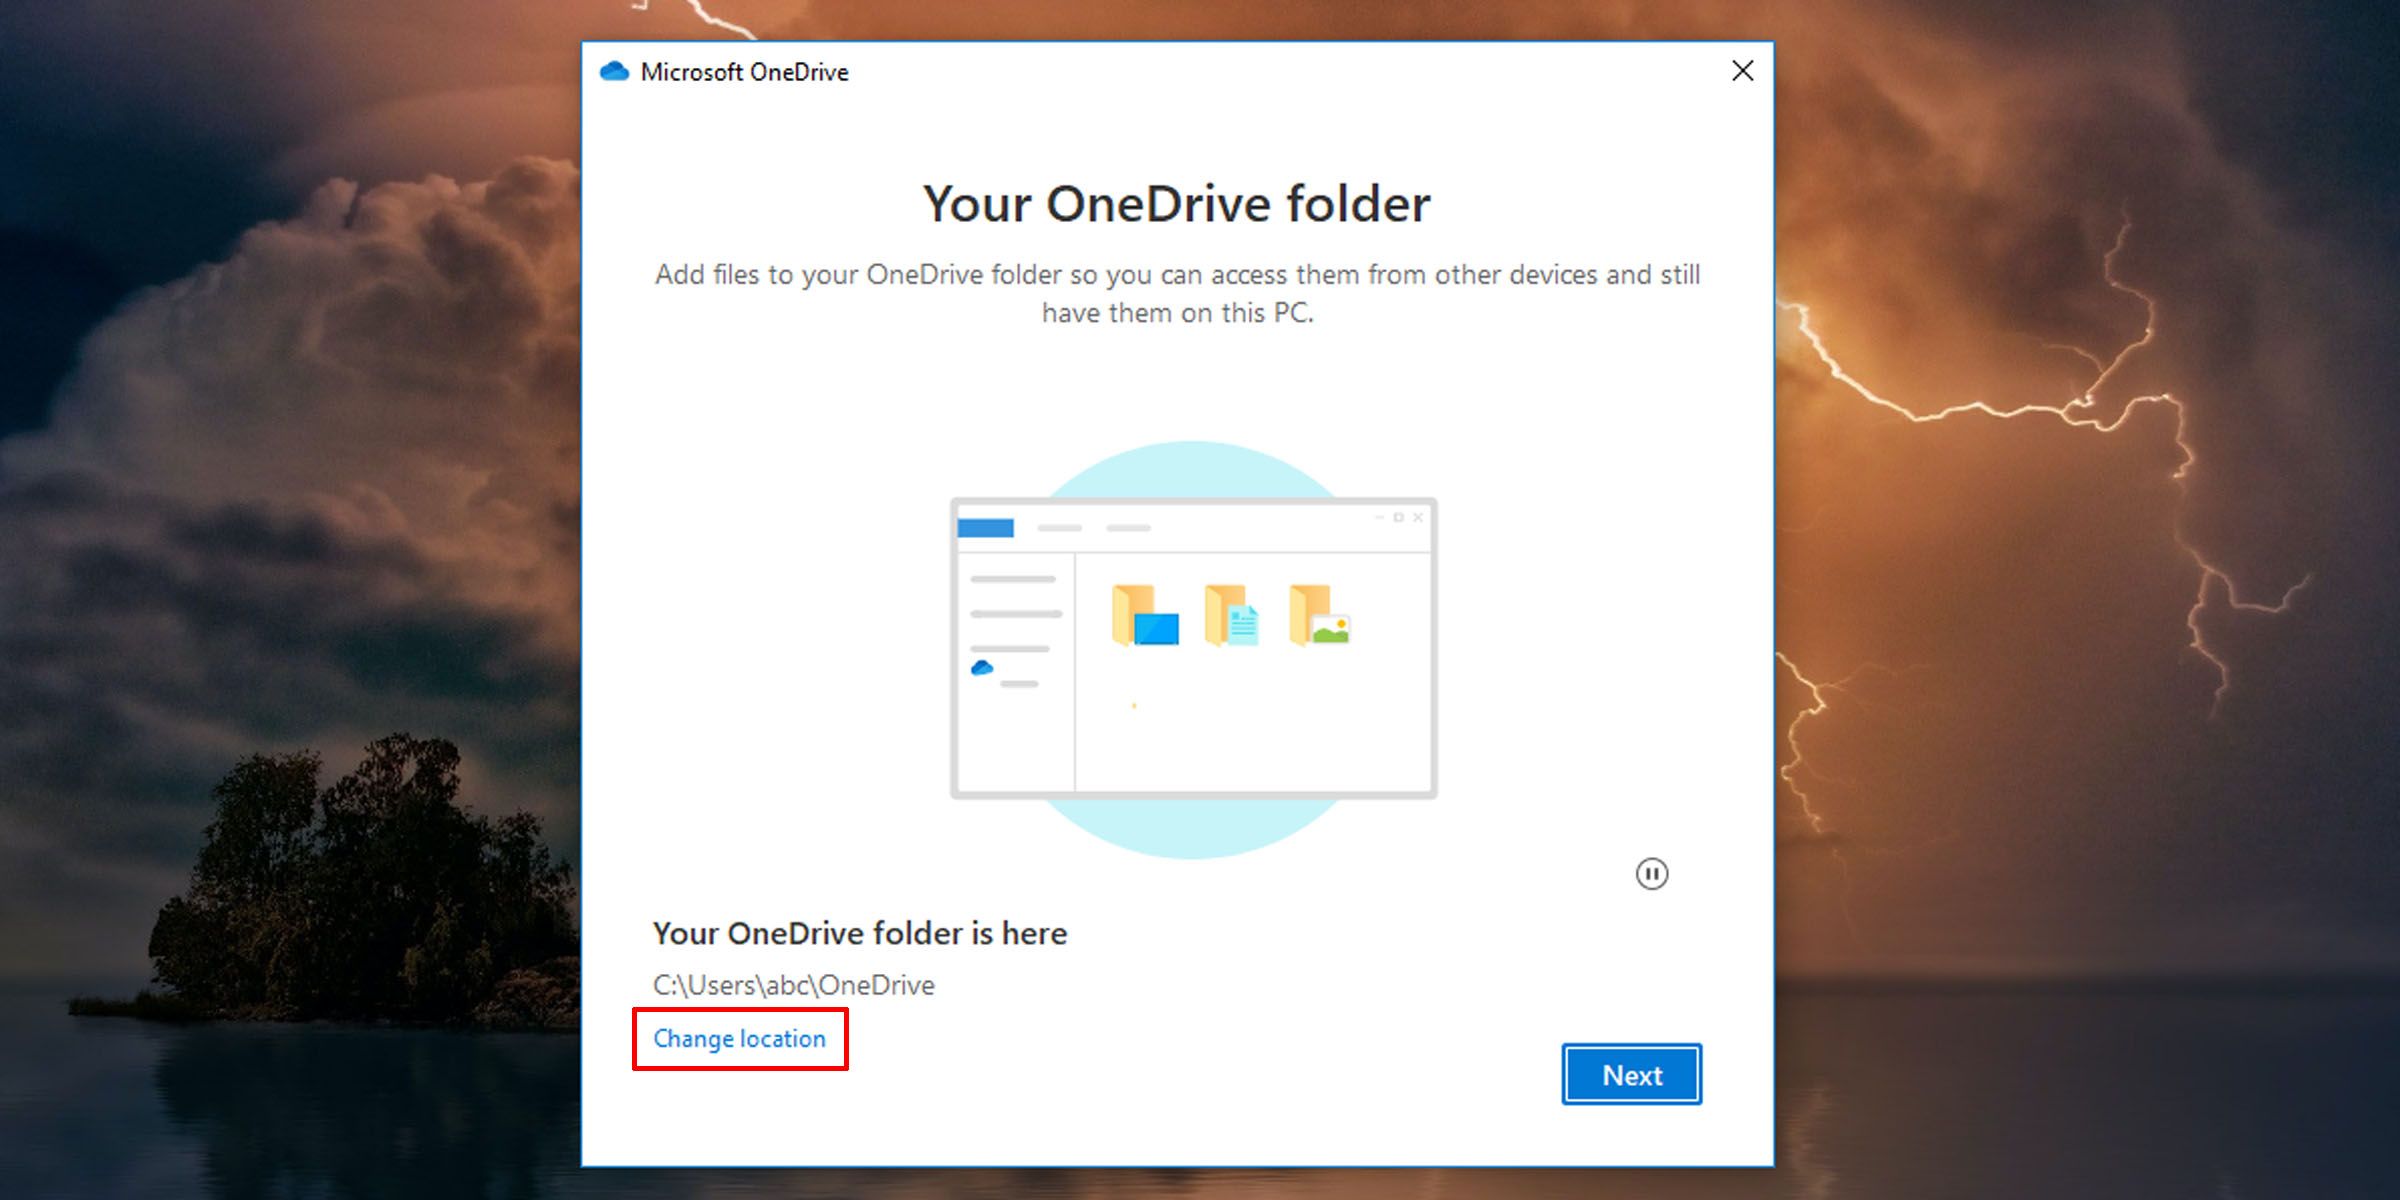
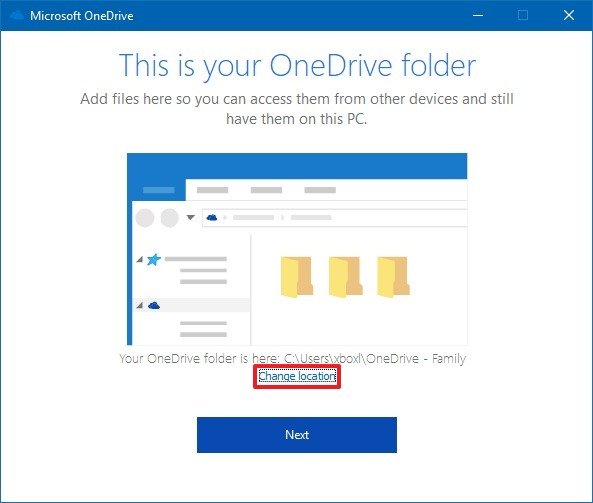
- Once you’re signed in, you are presented with a screen that shows where Windows will set up your OneDrive folder. (By default, the system selects your user folder.)
-
Click on the Change location link.
- Then browse to the new location where you moved your OneDrive folder on your PC, and click on the Select Folder button.
-
You’ll be presented with a warning screen, telling you that files already exist in this folder. Click on the Use this folder button.
- Verify that the location you’ve selected is the correct one, and click on Next.
- You’ll be presented with a welcome screen. Scroll through it and close the setup window.
Your OneDrive folder has been moved, and any files you add, or existing ones you modify, will be synced to the cloud from this new OneDrive location on your PC.
Additionally, there are many ways to control how OneDrive syncs files on your PC, from pausing automatic sync on metered networks to stopping specific folders from syncing.
Free Up PC Storage by Moving Your OneDrive Folder
Files on your OneDrive can take up a lot of disk space. You don’t have to settle for your OneDrive folder’s default location. You can free up space on your root drive by moving it to a different location, perhaps even on a different drive.
The OneDrive client for Windows 10 now includes Files On-Demand, a feature that allows you to access your files in the cloud using File Explorer without having to sync them directly to your device. Although File On-Demand is a nifty feature, if you must keep your files always available locally and backed up in the cloud, but your system drive doesn’t have enough storage, OneDrive doesn’t include an option to use a removable storage or secondary hard drive in its settings.
However, if you’re in this situation, you can relocate the default OneDrive folder to another folder, partition, or external hard drive doing a simple disconnect, move, and reconnect process.
In this Windows 10 guide, we’ll walk you through the steps to change the OneDrive default folder location without having to re-sync the files already stored locally on your computer.
How to relocate OneDrive folder on Windows 10
If you want to use a different location to store your OneDrive folder without spending additional time and bandwidth to sync your files again, then use these steps:
- Click theOneDrive (cloud) icon in the taskbar.
- Click the More button.
- Click on Settings.
- Click on the Accounts tab.
- Click the Unlink OneDrive option.
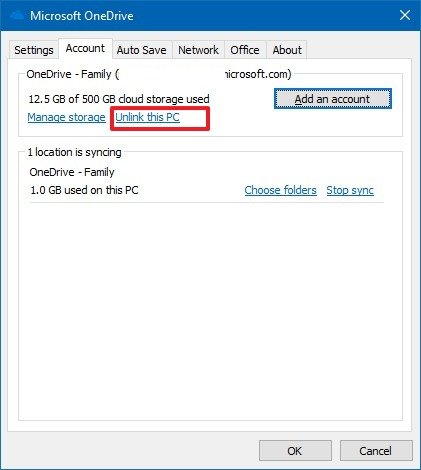
- Click the Unlink account button.
- Close the «Set up OneDrive» page (if applicable).
- Open the Run command (Windows key + R).
- Enter the following path and click OK:
%USERPROFILE%

- Select the OneDrive folder.
- Click the Home tab.
- Click the Move to drop-down menu, and select the Choose location option.
- Browse and select the new location to move your OneDrive files locally stored on your computer.Quick Tip: You can use a different partition, secondary drive, or even an external USB storage. The only requirement is that it needs to be a drive that will be connected all the time to your device.
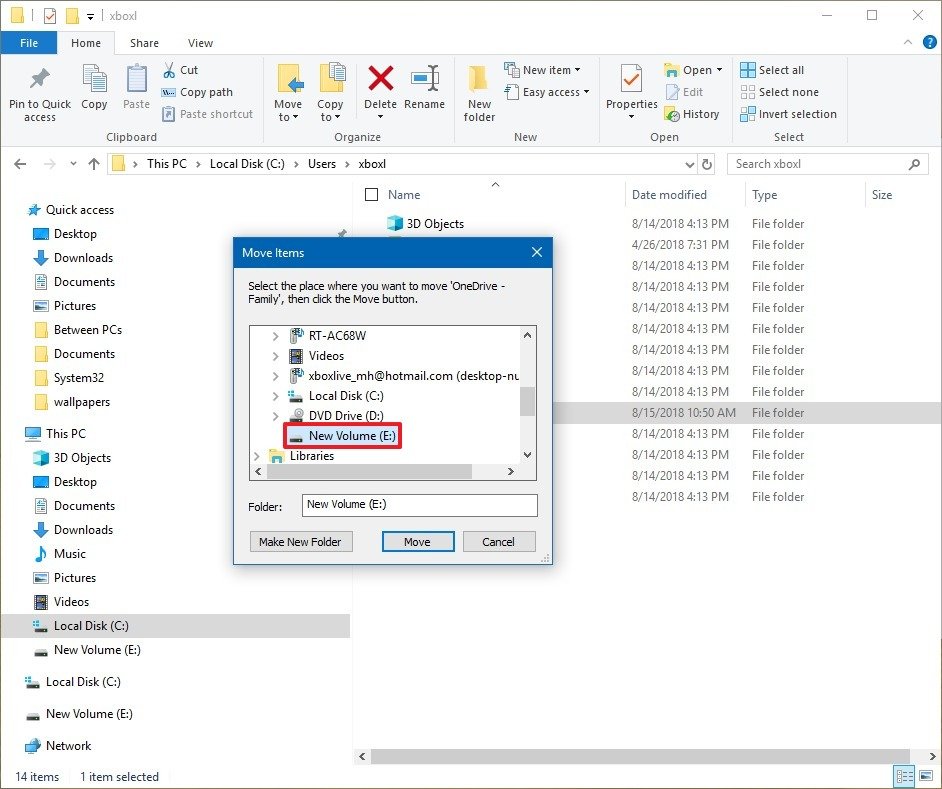
- Click the Move button.
- Open Start.
- Search for OneDrive, and click the top result to open the experience.
- Enter your email address.
- Click the Sign in button.
- Enter your account password.
- Click the Sign in button.
- Click the Change location link.
- Browse to the new folder location, and click the Select Folder button.
- Click the Use this location button.
- Click the Next button.
- Click through the OneDrive tips.
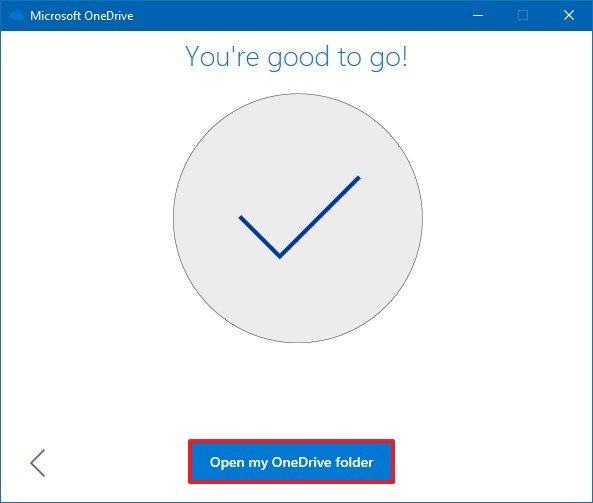
- Click the Open my OneDrive folder button.
Using this new version of OneDrive won’t prompt you to select the folders you want to sync. If you’ve previously selected a set of folders that you want to sync, you’ll need to open the OneDrive settings, and in the Account tab, click the Choose folder to select the files you want to access locally.
Once you’ve completed the steps, the OneDrive folder will now sync your files in the new location.
Although you could have a lot of reasons to use the approach that we’re outlining in this guide, you should consider changing the OneDrive folder default location only with a good reason. Also, after moving your files to another location, make sure that you keep the drive in a secure place to prevent your data falling into the wrong hands.
All the latest news, reviews, and guides for Windows and Xbox diehards.
More Windows 10 resources
For more helpful articles, coverage, and answers to common questions about Windows 10, visit the following resources:
- Windows 10 on Windows Central – All you need to know
- Windows 10 help, tips, and tricks
- Windows 10 forums on Windows Central
Mauro Huculak has been a Windows How-To Expert contributor for WindowsCentral.com for nearly a decade and has over 15 years of experience writing comprehensive guides. He also has an IT background and has achieved different professional certifications from Microsoft, Cisco, VMware, and CompTIA. He has been recognized as a Microsoft MVP for many years.