
Microsoft made a few different feature overhauls in Windows 11. One missing feature in Windows 11 seems to be the option to move files and folders, which is absent from the ribbon bar in the file explorer, where it used to be in Windows 10.
Move lets you change the current location of a file or a folder to the desired location. By using move, you will not leave behind an identical copy of the file or folder in the original location. Move is an integral aspect of file and folder management.
What Does it Mean to Move a File?
Your files and data are stored on your hard drive. The Windows Directory’s job is to point to the exact location of the file. When you move your file from one place to the other, on a surface level it seems like the entire file is physically moved to the next directory. But, this is farther from the truth.
When you relocate the file, only the index is changed. Everything physically remains intact and in the same location.
But if you copy/cut and paste it to a completely different physical location, then there will be physical changes on the files as well. This is the reason why there is a delay in these types of transfers.
Why Should You Move Your Files
Moving files is a simple process. Maybe you do not need a reason to move one of your files. Or maybe, you are trying to achieve one of the following goals:
- Grouping together files by projects or categories.
- Moving archived files to a different drive or volume.
- Relocating a file you saved in a hurry without looking to its proper location.
- Arranging your files and folders in an orderly manner.
How to Move Files in Windows 11
Here are a few different methods to move a file or a folder in Windows 11. Try them out and pick one that you like the best.
Cut and Paste by Using Right-Click Context Menu
Technically speaking, “Cut and Paste” is not exactly the same as moving since it requires two different actions, but it accomplishes the same result in the end, which is what matters.
- Navigate to the file or folder location and right-click on it.
- On the context menu, select Show more options > Cut

- Navigate to the location where you want to move your file or folder.
- Right-click anywhere in the empty space.
- On the context menu, select Show more options > Paste.

Alternatively,
- Navigate to the location of the file or the folder and select it.
- Press Ctrl + X
- Navigate to the location where you want to move your file or folder.
- Press Ctrl + V
Cut and Paste by Using File Explorer Ribbon Menu
You can also cut and paste straight from the ribbon menu in the file explorer. The idea is the same as using the right-click context menu, just the buttons to click are slightly different. Anyhow, here’s how you’d go about doing this:
- Navigate to the file or folder you want to move and select it.
- At the top of the file explorer is a ribbon menu, which has the cut button that looks like a scissor. Click on the cut button.

- Navigate to the target location where you want the file or folder moved.
On the File Explorer ribbon menu, click on the paste button.


Drag and Drop
Drag and drop is an easy way to move files and folders from a source location to the target destination, especially if you have both the source and the target locations already open. Here’s how you can drag and drop to move a file or a folder:
- Open both source and target folders side-by-side.
- Left-click on the target file or folder, and without letting go of the left-click button, drag it to the target folder.

- Release the mouse left click.

Note: Make sure to release the left mouse-click over an empty space in the target folder. If you release it over an already existing folder, the file or folder will be moved into that folder instead.
Modifying Registry to Add “Move to” to the Right-Click Context Menu
While “cut and paste” is a nifty tool that essentially performs the same function as move when used together, it’s not the same as move as it takes two actions to complete the task. If you had a dedicated “Move to..” option, you could perform the task with just one click.
With a simple tweak of the registry, you can access the “Move to” function within the right-click context menu (don’t forget to backup the registry first, though!). Does this pique your interest? Follow along, and you can use “Move to” directly instead of “cut and paste.”
- Press Win + R and type in regedit.
- Navigate to
HKEY_CLASSES_ROOT\AllFilesystemObjects\shellex\ContextMenuHandlersv. - Right-click on ContextMenuHandlers, and select New > Key.

- Name the new key:
{C2FBB631-2971-11D1-A18C-00C04FD75D13}

You can now close the registry. To move a file or folder, now follow the steps below:
- Navigate to the target file or folder.
- Right-click on it and select Show more options.
- Click on Move To folder…

- Navigate to the target folder on the Move Items windows and click Move.


Tip: You can similarly add Copy To folder… option in the context menu by using key: {C2FBB630-2971-11D1-A18C-00C04FD75D13}
Moving File or Folder by Using the Command Prompt
Follow the steps below to use a file or folder to a different location in Windows 11 using the command prompt:
- Press Win + R and type in cmd
- In the command prompt, type in:
move <name with full source path> <destination path>

Moving File or Folder by Using Windows PowerShell
Windows PowerShell is a command-line tool similar to the command prompt. You can think of PowerShell as the more advanced version of the command prompt. Thus, you can also use the same command that you used in the command prompt to move files or folders using PowerShell.
- Press Win + R and type in powershell
- Type in:
move <name with full source path> <destination path>

Frequently Asked Questions
How Do I Use Windows Explorer in Windows 11?
To launch a new Windows Explorer, press Win + E key combination.
You can also launch a new explorer from the Task Manager. To do so:
- Press Ctrl + Shift + Esc to launch the task manager.
- Select File > Run new task.
- Type explorer and press enter.


How Do I Create a Folder in Windows Explorer 11?
To create a new folder in Windows 11, please follow these steps:
- Navigate to where you want your new folder created.
- Right-click on an empty space.
- Click on New > Folder
- Give your new folder a name.

Is File Explorer the Same as Windows Explorer?
Yes, File Explorer and Windows Explorer are the same names for the file browser found in every version of Windows since Windows 95. You can use it to navigate to, and manage, various files and folders.
What Is the Difference Between a File and a Folder?
Files are the actual contents in a computer. They serve various purposes depending upon their type. Files can be programs, documents, pictures, media, music, etc. Think of them as storage units of the computer.
Folders are directories where files are stored. Their function is mostly to provide file management for easy navigation and addressing (Although special folders exist, such as the Desktop).
Sometimes, a file can actually be a folder that stores several related files together. Examples of such files are .docx and .xlsx files that Microsoft Office uses to store user-created data. However, when you launch them, instead of navigating to the contents, they will launch the files stored in their archive to recreate the information that is stored inside.
Решил побыть пользователем Windows 11 и обнаружил неприятный для себя факт — в Проводнике Windows 11 просто исчезли функции «Переместить в…», «Копировать в…».
Можно копировать, вставить вырезать… но я не понимаю каким образом это может быть удобнее — вырезать файл, открывать другое окно и уже тогда его вставлять (ну или вырезать файл, заходить в папку нужную и там уже нажимать вставить). Раньше мне всегда было удобно находясь в одном окне перемещать и копировать файлы в другие папки, а сейчас, получается, отобрали эту возможность — нужно куда-то заходить или держать второе окно с нужной папкой. Возможно это и было бы удобно, если бы в проводнике была функция вкладок, как в браузерах… но ведь ее нет.
И что меня смущает — похоже ни для кого другого это проблемой не является. потому я подумал может это проблема со мной и все другие занимаются менеджментом файлом иначе, быстрее и удобнее? Я ведь, по сути, обычный пользователь. Подскажите, пожалуйста, каким образом и с помощью чего вы занимаетесь копированием и перемещением файлов? Желательно стандартными функциям Windows.
Может я не знаю чего-то и люди через стандартный проводник спокойно, быстро и удобно копируют и перемещают файлы. Спасибо!
PS — Я знаю, что можно зайти в реестр Windows 11 и вернуть контекстное меню с командами по нажатию правой клавиши мыши, но я предпочитаю никогда не соваться в реестр; сами эти команды видны только через «Показать дополнительные параметры»; да и кто знает сколько эта лазейка будет доступна…
Совсем недавно мы писали статью о том, как переименовать папки в Windows 11. Там мы говорили о том, что контекстное меню в новой версии системы было переработано. Соответственно, изменения коснулись не только функции «Переименовать», но и таких, как «Копировать», «Вставить» и «Вырезать». Как же теперь выполнить эти действия? Также как и функция «Переименовать» они никуда не пропали, а просто изменили своё местоположение и внешний вид.
{banner_google1}
Ранее, в предыдущих версиях операционной системы, для того, чтобы вырезать или копировать нужно было нажать ПКМ по файлу, либо по папке и сразу в контекстном меню выбрать надпись с соответствующей функцией.
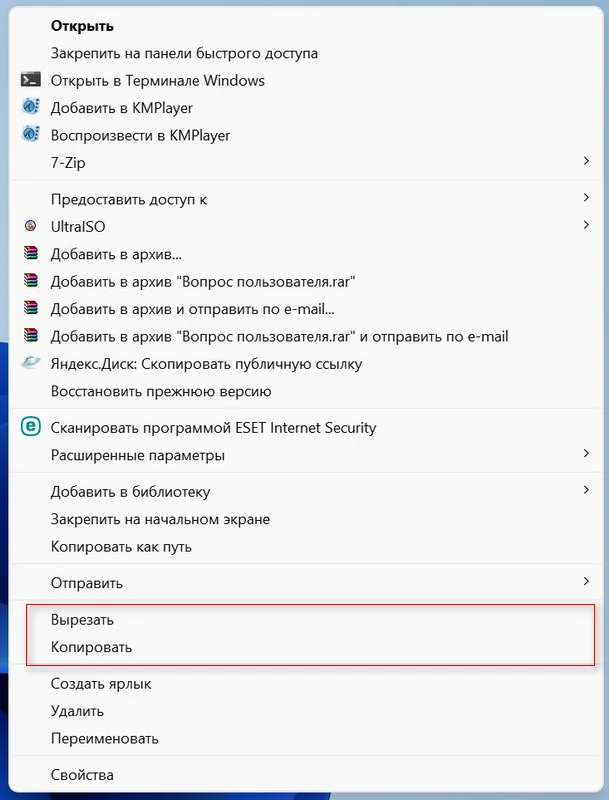
Теперь же действия остались те же, только надписи с названием функций были заменены на значки.
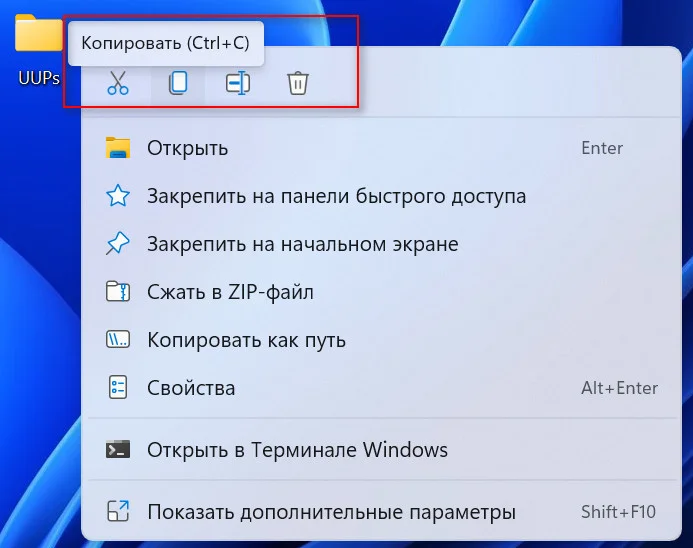
К тому же они изменили своё местоположение, переместившись наверх контекстного меню. Так иконка действия «Вырезать» имеет вид ножниц, а значок «Копировать» изображение в виде двух листов. А вот комбинации клавиш перекочевали из более старых версий Windows и изменений не потерпели. Так скопировать данные можно с помощью «Ctrl+C», а вырезать — «Ctrl+X».
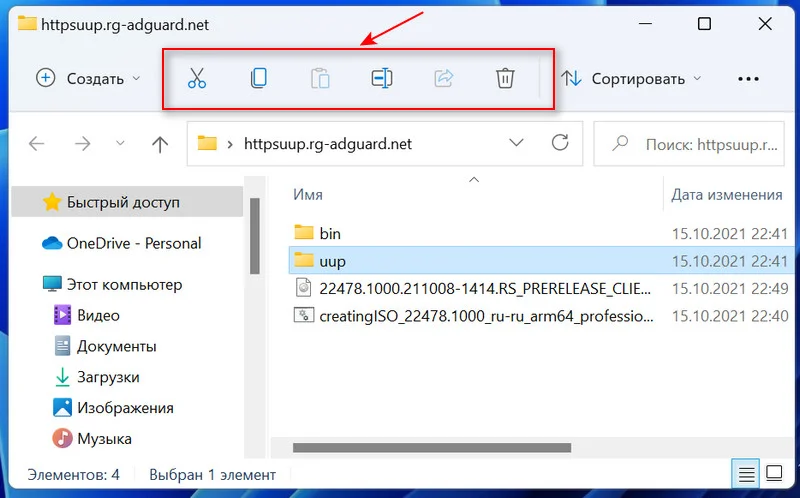
Помимо такого способа ещё можно непосредственно в проводнике выделить нужный файл и на верхней панели, которая сейчас называется панель быстрого доступа, выбрать нужное действие.
{banner_google1}
В Windows 11 новое контекстное меню изменило не только внешний вид, но и из него были выпилены некоторые параметры. Чтобы их найти иногда требуется вернуться к «старому стилю».
Довольно странное решение, конечно, оставить возможность заходить в старое контекстное меню. Не проще ли было добавить недостающие пункты в новое? Но что имеем, то имеем.
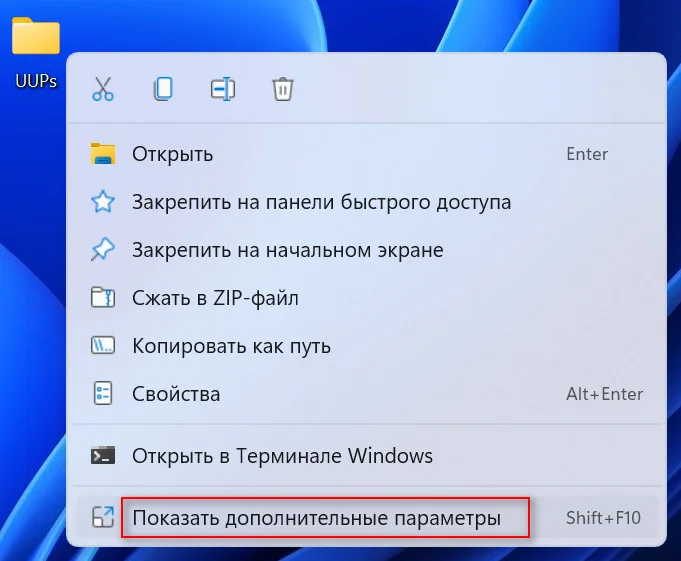
Итак, чтобы перейти в привычное нам контекстное меню, нужно щёлкнуть по файлу или папке ПКМ и выбрать «Показать дополнительные параметры» или просто воспользоваться комбинацией «Shift+F10». Далее, как обычно, выбираем строку с нужным нам действием.
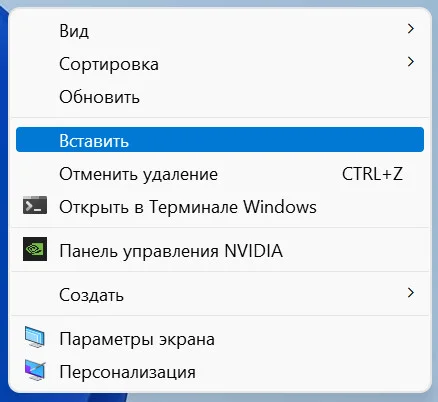
При вставке действуем по аналогии с вышерассмотренными действиями. Щелкаем на пустое место окна ПКМ и выбираем иконку «Вставить» в верхней части меню. Выглядит он как папка и страница. Известную всем комбинацию «Ctrl+V» также можно применять.

В проводнике также можно легко вставить файл через панель быстрого доступа. Для этого нужно зайти в желаемую папку и на панели быстрого доступа выбрать соответствующий значок.

Как и в случае с копированием мы можем воспользоваться старой версией контекстного меню. Щелкаем ПКМ на свободном месте, далее нажимаем «Показать дополнительные параметры» и выбираем команду «Вставить».
Хотелось бы отметить что способ копирования через панель задач в Windows 11 не работает.
Вырезать, копировать, вставить и переименовать — основные функции, к которым приходится обращаться при работе с системой Windows, а использовать их все также просто, как и раньше.
Перемещать файлы можно будет с помощью адресной строки. Пока что функция работает в тестовом режиме.
Редактор новостей Hi-Tech Mail
Microsoft сделает более удобной перемещение файлов в «Проводнике» в операционной системе Windows 11. Изменения заметили в тестовой версии ОС под номером 22635.3420, сообщает портал MSPowerUser.
Пользователи смогут перемещать как различные файлы, так и папки с помощью адресной строки. Например, можно зажать левой клавишей мыши картинку и передвинуть иконку в один из подпунктов директории, где хранится изображение. Сейчас для этого требуется вырезать файл, перейти в другую папку, а затем вставить его. Такой же метод придется использовать, если нужно переместить данные в совершенно другое место на компьютере, которое не указано в адресной строке.

Пока что новая функция постепенно появляется у пользователей тестовой сборки Windows. При этом, как сообщил инсайдер PhanthonOfEarth, ее можно специально включить. Для этого используется инструмент ViVeTool.
Еще одно изменение в Windows нашли в меню «Пуск». Теперь приложения выглядят в формате сетки с возможностью прокрутки списка. Такая функция также доступна ограниченному ряду пользователей тестовой сборки.

Ранее компания Samsung случайно раскрыла новые фишки чат-бота Microsoft Copilot. Их показали в рекламе.