
Applies ToWindows 11 Windows 10
В этой статье описываются действия входа, выхода, блокировки и переключения учетных записей пользователей в Windows. Чтобы узнать больше, разверните следующие разделы.
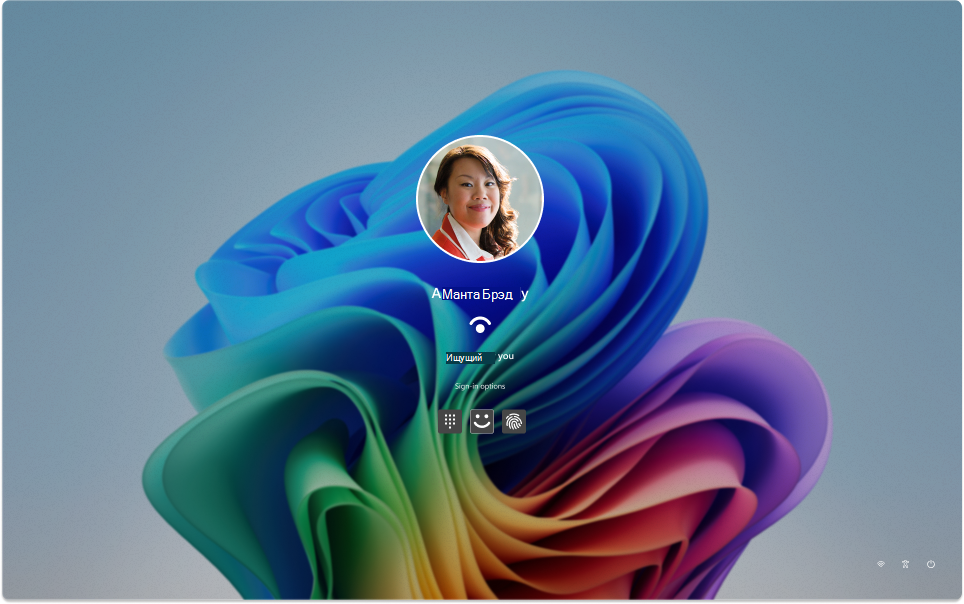
Вход в Windows — это процесс проверки личности для получения доступа к устройству с Windows. Этот процесс помогает защитить персональные данные и параметры от несанкционированного доступа.
При входе вы можете использовать пароль, ПИН-код или биометрические данные, такие как отпечатки пальцев или распознавание лиц, если у вас настроено Windows Hello.
-
Включите устройство. Если он уже включен, убедитесь, что вы находитесь на экране входа.
-
При появлении запроса выберите свою учетную запись. Если вы единственный пользователь, ваша учетная запись должна быть выбрана по умолчанию.
-
Введите пароль или ПИН-код, если он настроен. Если вы используете учетную запись Майкрософт, убедитесь, что используете пароль для этой учетной записи.
Если вы настроили Windows Hello, вы можете использовать распознавание лиц, отпечатки пальцев или ПИН-код вместо пароля для более быстрого и безопасного входа.
После ввода учетных данных нажмите клавишу ВВОД или щелкните стрелку входа, чтобы получить доступ к рабочему столу Windows.
Если у вас возникли проблемы со входом, вы можете сбросить пароль или ПИН-код на экране входа. Найдите ссылку Я забыл пароль или забыл ссылки на ПИН-код , чтобы начать процесс сброса.
-
Проблемы с Windows Hello см. в статье Устранение неполадок с Windows Hello
-
Для локальной учетной записи следуйте инструкциям в разделе Сброс пароля локальной учетной записи Windows.
-
Сведения о пин-коде см. в статье Сброс ПИН-кода, если вы не вошли в Windows.
Выход из Windows — это процесс закрытия сеанса и обеспечения того, чтобы ваша учетная запись больше не была активна на устройстве. Это помогает обеспечить безопасность и конфиденциальность вашей учетной записи, так как запрещает другим пользователям доступ к вашим личным файлам, приложениям и параметрам.
При выходе все открытые приложения закрываются, и несохраненные трудоемки могут быть потеряны. Всегда рекомендуется сохранить работу перед выходом.
Чтобы выйти из Windows, нажмите кнопку Пуск , выберите изображение пользователя или значок Учетные записи и нажмите кнопку Выйти.

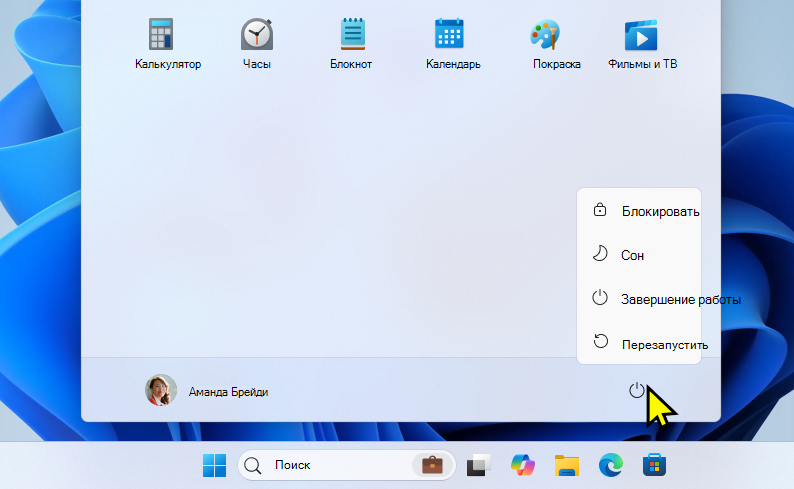
Блокировка устройства с Windows позволяет быстро защитить устройство, сохраняя приложения и файлы открытыми в фоновом режиме. При блокировке устройства любой пользователь, пытающийся получить к нему доступ, должен ввести пароль, ПИН-код или использовать биометрическую проверку подлинности, если вы настроили Windows Hello. Это полезно, если вам нужно отойти от устройства, но не хотите закрывать все, над чем вы работаете.
Чтобы заблокировать устройство с Windows, вы можете:
-
НажмитеКлавиша Windows + L на клавиатуре
-
Кроме того, выберите Пуск, щелкните значок питания и нажмите кнопку Заблокировать.
Примечание: В более ранних версиях Windows 11 действие «Блокировка» отображалось в меню «Учетные записи».
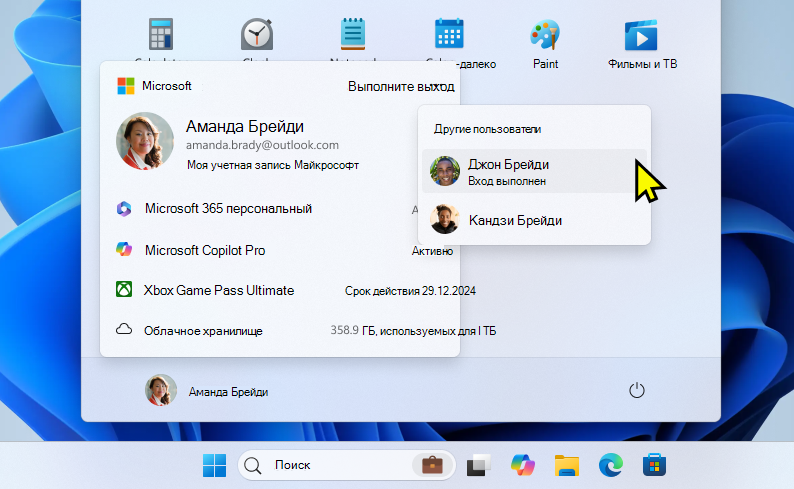
При переключении учетных записей пользователей в Windows вы перемещаетесь между разными учетными записями пользователей на одном устройстве, не закрывая приложения и не завершая текущий сеанс. Это позволяет нескольким пользователям быстро получить доступ к своим учетным записям и рабочим областям, не нарушая поток работы. Это особенно полезно, если устройство совместно используется несколькими пользователями.
Чтобы переключить пользователя, нажмите кнопку Пуск , выберите изображение пользователя или значок Учетные записи и выберите . Затем выберите учетную запись пользователя, на которую вы хотите переключиться.
Примечание: на устройствах, управляемых организацией, у вас есть дополнительный параметр Переключить пользователя.
Нужна дополнительная помощь?
Нужны дополнительные параметры?
Изучите преимущества подписки, просмотрите учебные курсы, узнайте, как защитить свое устройство и т. д.
Switching users in Windows 11 is a straightforward process that allows multiple people to use the same computer without closing each other’s programs or logging out. You just need to navigate through the Start Menu and select the desired user. This feature is especially useful for families or shared computers in an office setting, where different individuals need to access their personal files and settings without interrupting others. Follow the steps below to switch users seamlessly and efficiently in Windows 11.
Switching users in Windows 11 enables different people to use the same computer without signing out of any ongoing sessions. This can be handy when multiple users share a PC and want to access their files and settings without disrupting others. Let’s dive into the steps.
Step 1: Open the Start Menu
Click on the Start button located at the bottom-left corner of the screen.
The Start Menu is your gateway to all things Windows. Clicking it opens up various options like installed applications, system settings, and quick access to user accounts. Familiarize yourself with this section as it’s key to navigating Windows 11.
Step 2: Access the User Icon
Locate and click on your user icon in the lower-left corner of the Start Menu.
This icon usually shows your profile picture or just a simple silhouette. By clicking on it, a menu will appear showing all the user accounts available on the computer, making it easy to select and switch to another user.
Step 3: Select Another User
Choose the desired user account from the list that appears.
Each listed account represents a different user profile saved on your Windows 11 system. Clicking on a different user account will prompt Windows to switch to that account without signing you out of your current session.
Step 4: Enter the Password
If prompted, enter the password for the selected user account.
Depending on the security settings, you might need to enter a password or use another form of authentication, such as a PIN or fingerprint, to access the selected account. This step ensures that only authorized users can access their own profiles.
Step 5: Wait for the Profile to Load
Allow the system a moment to load the new user’s profile.
Windows will take a few seconds to switch to the selected user, during which it loads the desktop, applications, and settings associated with that account. Patience is key here, especially if the user’s profile is resource-heavy.
After you complete these actions, Windows 11 will switch to the selected user account, and the new user’s desktop and settings will appear. This seamless transition allows multiple users to access their accounts without disrupting each other’s work or open applications.
Tips for Switching Users in Windows 11
- Ensure all unsaved work is saved before switching users to prevent data loss.
- Set up a password or PIN for each user to maintain privacy.
- Regularly update your Windows 11 to get the latest features and security patches.
- Use the Windows key shortcut (Ctrl + Alt + Del) for quicker access to user switching.
- Customize profiles with unique backgrounds to easily identify each account.
Frequently Asked Questions
Can I switch users without logging out?
Yes, switching users lets you change accounts without logging out, keeping your apps and work intact.
What if I forget my password when switching users?
Use the “Forgot Password” option or reset your password using another admin account.
Is it possible to have multiple user accounts on Windows 11?
Absolutely! You can create several user accounts, each with unique settings and files.
Does switching users affect open applications?
No, switching users preserves the state of open applications in each user’s profile.
Can I switch users while an application is running?
Yes, but it’s best to save all work to avoid losing data during the switch.
Summary
- Open the Start Menu.
- Access the user icon.
- Select another user.
- Enter the password.
- Wait for the profile to load.
Conclusion
Switching users in Windows 11 is a breeze once you get the hang of it. It’s like having multiple virtual rooms in one house, each customized to its inhabitant’s liking. You don’t have to pack up your things each time someone else wants to use the space—everything remains as you left it, ready for when you return.
By following these simple steps, you can easily navigate between user accounts, ensuring a smooth and uninterrupted computing experience for everyone involved. Whether you’re in a bustling office or a busy household, knowing how to switch users efficiently can save you time and hassle.
For more tech tips and tricks, keep exploring the vast landscape of Windows 11. It’s packed with features designed to enhance your digital life. Happy computing!
Matthew Burleigh has been writing tech tutorials since 2008. His writing has appeared on dozens of different websites and been read over 50 million times.
After receiving his Bachelor’s and Master’s degrees in Computer Science he spent several years working in IT management for small businesses. However, he now works full time writing content online and creating websites.
His main writing topics include iPhones, Microsoft Office, Google Apps, Android, and Photoshop, but he has also written about many other tech topics as well.
Read his full bio here.
Sign in to your How-To Geek account

Quick Links
-
Switch Accounts From the Start Menu
-
Switch Accounts Using Ctrl+Alt+Delete
-
Switch Accounts Using Alt+F4
-
Switch Accounts From Windows Terminal (Windows 11 Pro or Higher)
When you have multiple user accounts, ideal if you’re working on a shared Windows PC, you can switch between accounts without closing any apps you have open or files you’re working on. Here’s how it’s done.
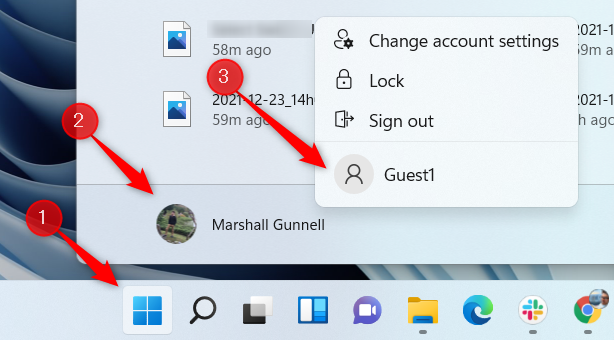
You can switch user accounts straight from the Windows Start menu. Click the Windows icon in the taskbar, click your profile image, and then select the user account you would like to switch to from the context menu.
Once selected, enter the password for that account and it will switch over.
Switch Accounts Using Ctrl+Alt+Delete
You can also use the infamous Ctrl+Alt+Delete keyboard shortcut to switch user accounts. Press Ctrl+Alt+Delete simultaneously on your keyboard. Next, select «Switch User» on the screen that appears.
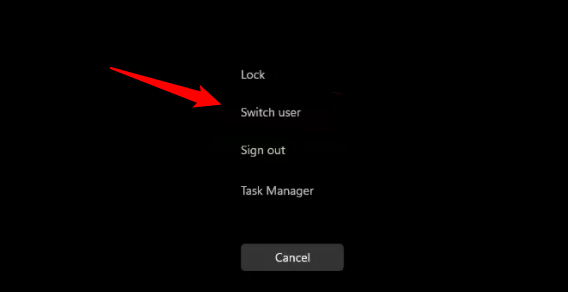
You’ll then be on the login screen. Select the user account you want to switch over to.
Switch Accounts Using Alt+F4
Another keyboard shortcut you can use when viewing the desktop is the Alt+F4 shortcut. Note that if you have any windows open, this shortcut will simply close the open window instead.
Press Alt+F4 on your keyboard and the «Shut Down Windows» dialog will appear. Click the down arrow next to the text box and then select «Switch User» from the drop-down menu that appears.
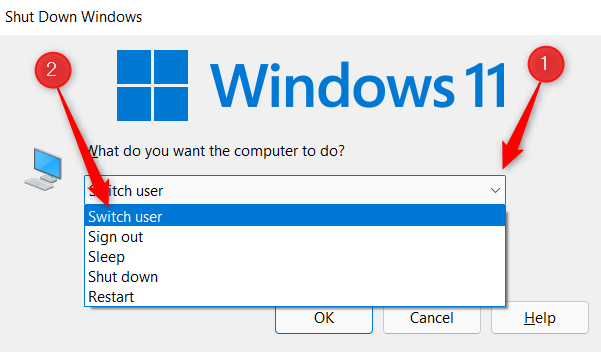
Next, click «OK’ or press the «Enter» key on your keyboard. You’ll then be on the login screen where you can select a different user account.
Switch Accounts From Windows Terminal (Windows 11 Pro or Higher)
If you want to feel like a hacker, then you can run a command in Windows Terminal that allows you to lock your PC, effectively bringing you back to the login screen where you can select a different account. Note that this method only works on Windows 11 Pro or higher.
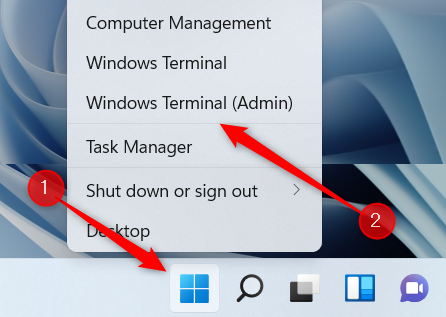
First, open Windows Terminal as an admin by right-clicking the Windows icon in the taskbar to open the Power User menu, and then select «Windows Terminal (Admin)» from the menu.
Next, run this command:
tsdiscon
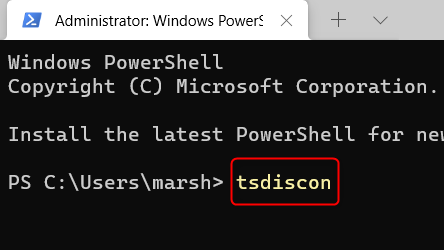
Once you run the command your screen will lock. Unlock the screen and you’ll be on the login screen. Select the user account you would like to switch to. You can also quickly lock your screen by using the Windows+L keyboard shortcut.
Microsoft made it easy to switch between user accounts on Windows. Not only that, if you need to give one of the users admin rights, there’s an easy way to grant them these privileges, as well.
Quick Answer
- Similar to Command Prompt method, you can also use the Windows Powershell utility app to switch to a different user account in Windows 11.
- If you’ve logged in to your Windows 11 system and wish to change your user account, then you can easily do it with the help of the start menu.
- If you’ve multiple accounts in your Windows 11 system, you will see the listing of all the available accounts in the bottom left corner of the sign-in window.
Like previous versions, Windows 11 also offers the feature of multiple accounts to their users. Using this feature, you can seamlessly switch between multiple user accounts present on a single system hence boosting productivity. Later on, you can anytime remove accounts from your system. In this article, we will take about ways to switch user accounts in Windows 11.
Suggested | 3 Ways to Turn Off Startup Sounds in Windows 11
Ways to Switch User Accounts in Windows 11
Switch User Accounts from Windows Lockscreen
One of the easiest methods to switch user accounts in Windows 11 is with the help of its lock screen. Follow these steps to quickly change your user account using Windows 11 lock screen.
- First, you need to move to the Windows lock screen. If you’ve just booted up your system, the lock screen will be the first window to appear for login. If you’ve logged in already, you can enable the lock screen by pressing Windows + L key combination.

- Click anywhere on the lock screen to move to the Sign In Window.
- If you’ve multiple accounts in your Windows 11 system, you will see the listing of all the available accounts in the bottom left corner of the sign-in window.
- Click on the available account and sign in with the appropriate credentials to log in to that account.

Use Start Menu to Change User Account
If you’ve logged in to your Windows 11 system and wish to change your user account, then you can easily do it with the help of the start menu.
- Press the Windows key to open the start menu.
- Click on the User Account name in the bottom left corner of the start screen.
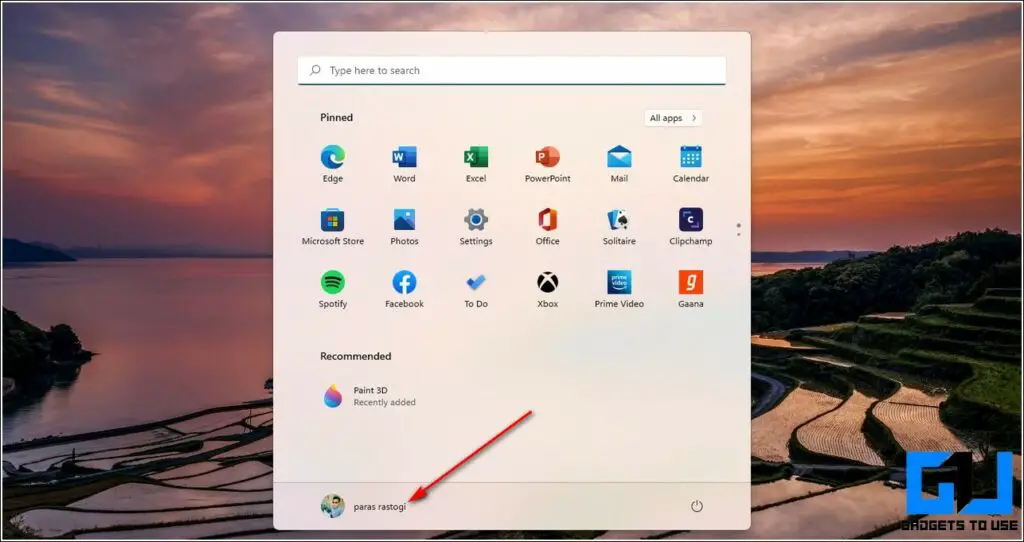
- You will see the list of all the available accounts along with the account settings option.
- Click on your preferred user account name to switch to that account.

- You will be instantly navigated to the sign-in screen of the chosen user account. Enter the required credentials here to sign in and switch to the user account.
Use Command Prompt to Navigate Between User Accounts
Command Prompt is one of the fastest methods to switch instantly between multiple user accounts on Windows 11. Follow these easy steps to do the same.
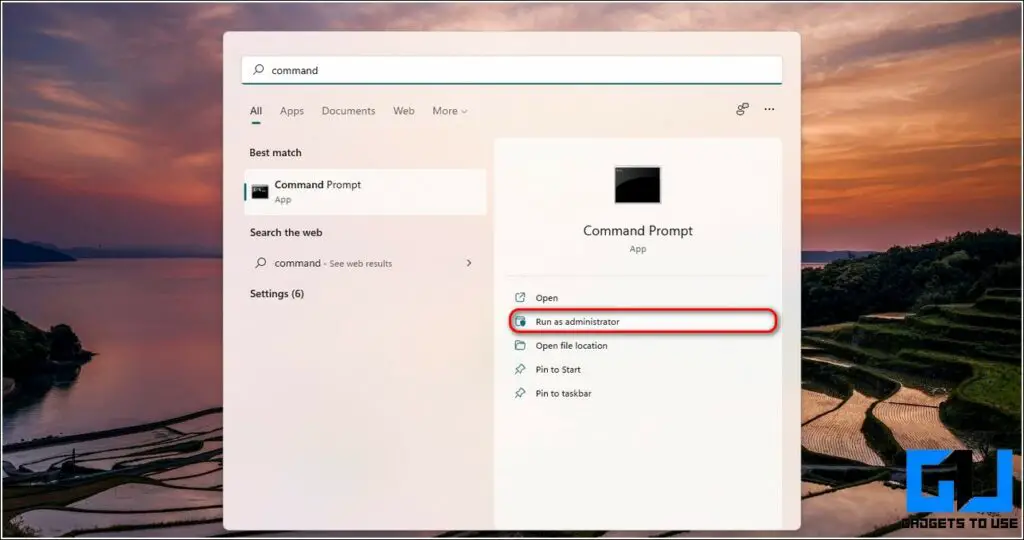
- Press the Windows key and search for the Command Prompt app.
- Click on the Run as Administrator option to run the app with administrative privileges.
- For this method, you need to know the name and password of the user account that you wish to switch to.
- Enter the following command:
runas /user:<User Account Name> explorer.exe
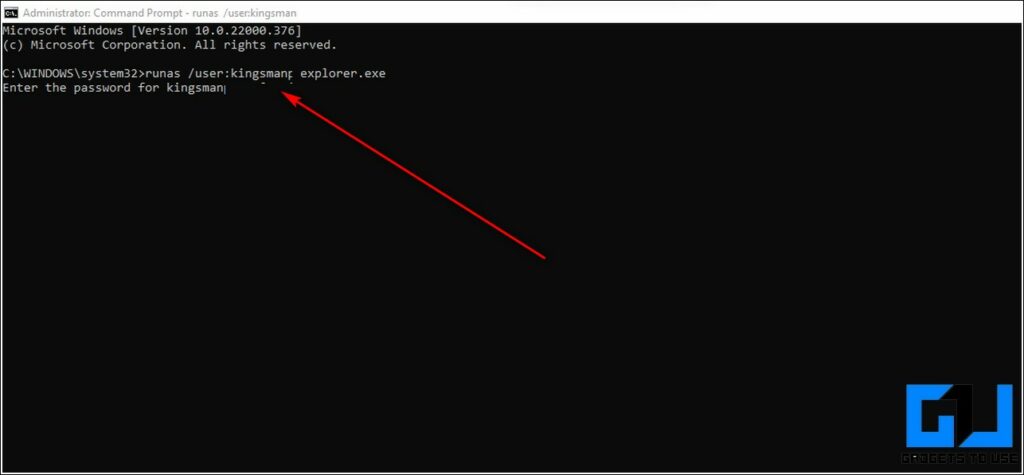
- You will be prompted to enter the password for the entered user account. Type the password in the window and hit Enter to switch to the entered user account.
- Congratulations. You’ve successfully switched to your preferred user account using Command Prompt.
Use Windows Powershell to Switch User Accounts in Windows 11
Similar to Command Prompt method, you can also use the Windows Powershell utility app to switch to a different user account in Windows 11.
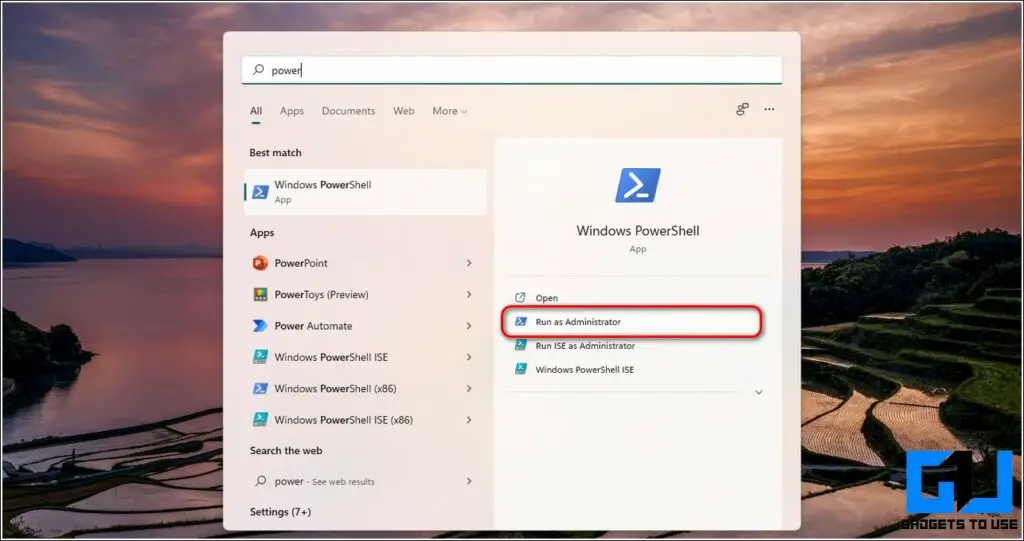
- Press the Windows key and search for the Powershell app.
- Click on the Run as Administrator option to run the app with administrative privileges.
- Type the following command in the Powershell window:
runas /user:<User Account Name> explorer.exe
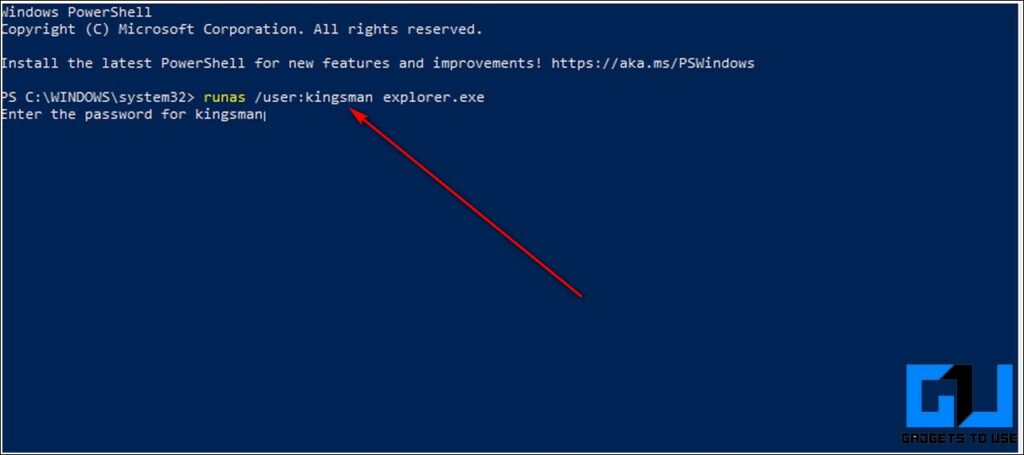
- You will be instantly prompted to enter the associated user account password.
- Upon entering the correct password, you will be able to access the entered user account.
Switch to a Different User Account Using Security Keys Combo
Microsoft Windows 11 also offers you the option to quickly switch user accounts with the help of the security hotkey combination. This hotkey comprises simultaneously pressing the CTRL, ALT, and DEL keys. Follow these easy steps to achieve the same.
- Press CTRL + ALT + DEL key simultaneously on your keyboard to open the Security Menu.
- Click on the Switch User button to browse through available user accounts.

- You will be instantly redirected to the sign-in page where you have to enter the associated credentials to log into the user account.
Bonus Tip: Use Classic ShutDown Window to Switch Between User Accounts
If you prefer the classic method to switch between multiple user accounts on Windows 11 then, you need to follow these simple steps to achieve it.
- Navigate to your Windows desktop and press the ALT+F4 Key combination to open the Shut Down Window popup.
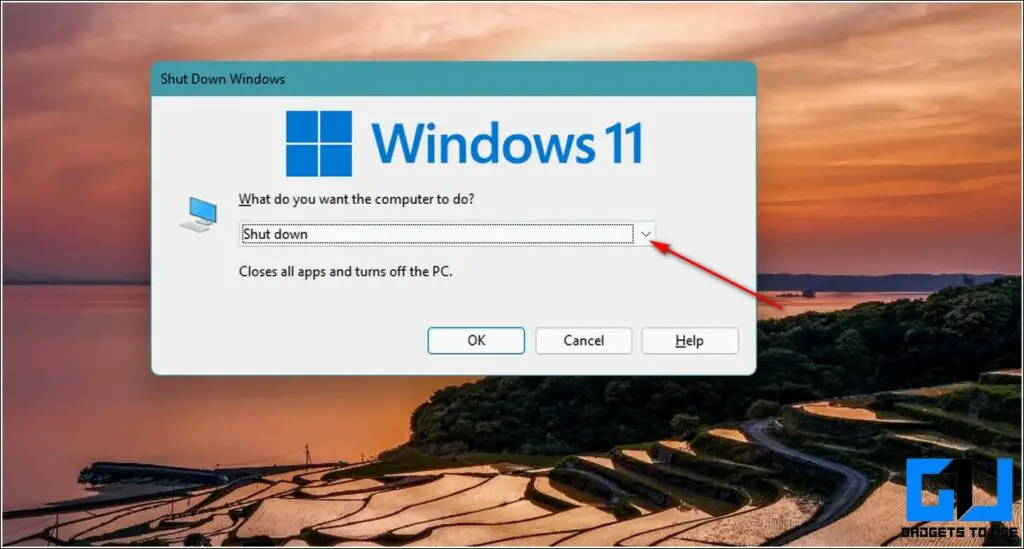
- Click on the arrow icon to show the drop-down list and choose the Switch User option. Click on the OK button to apply your selection.
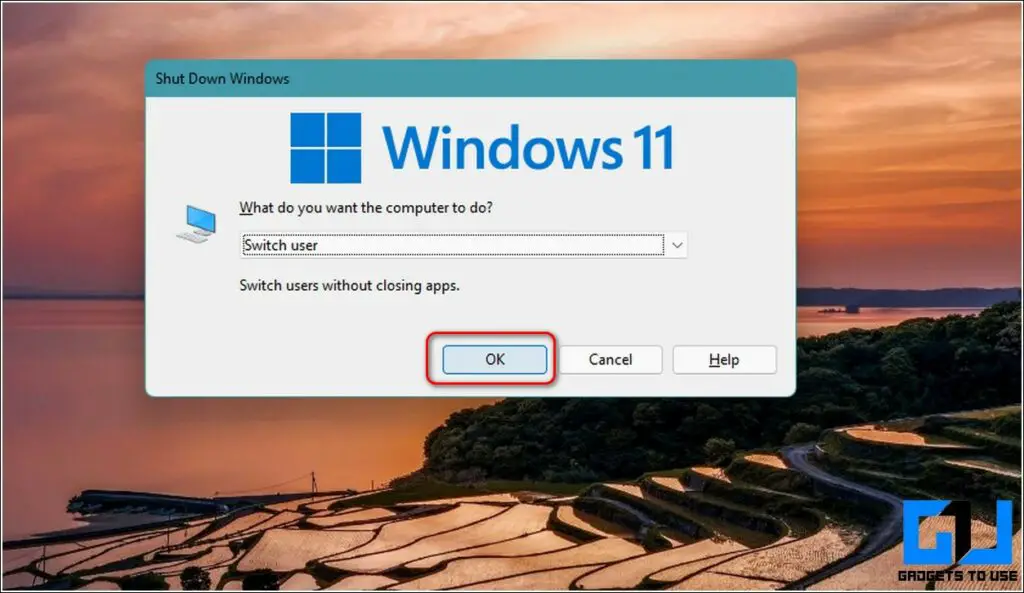
- You will be instantly navigated to the Sign-in screen where you can choose from the available user accounts to log in to the system.
Wrapping Up: Switching Multiple User Accounts
So, that’s a wrap for the 6 effective ways to switch user accounts in Windows 11. We hope that you’ve now learned to seamlessly navigate to your account in the Windows environment. If this article has helped you in achieving the same then, hit the Like button and share this with your friends to assist them in using Windows 11. Stay tuned for more informative reads.
You may also like:
- 11 Hidden Windows 11 Features
- Customize the Windows 11 Start Menu
- 6 Privacy Features of Windows 11
You can also follow us for instant tech news at Google News or for tips and tricks, smartphones & gadgets reviews, join GadgetsToUse Telegram Group, or for the latest review videos subscribe GadgetsToUse Youtube Channel.
Was this article helpful?
YesNo
If your Windows computer has more than one user account, then you will probably see the “Switch User” option in the Start menu. This option lets you quickly change your user account when needed. In a situation where you have one account set up for work and another for home, this option is a seemingly convenient way to switch between them instantly.
That said, there have been reports that the “Switch User” option has been missing for some Windows users, even when they have multiple accounts on their system. Some have even reported that the option is only visible when all accounts are explicitly logged out.
That shouldn’t be the case. In this article, we show you how to fix this error on a Windows computer without having to repair or reinstall your operating system.
Table of Contents
Why the Switch User Option is Missing?
There can be several reasons for the “Switch User” option to be missing in the start menu. Here are the most common reasons:
- You only have one account enabled on your computer.
- Your domain administrator has disabled the option.
- The “Switch User” option is disabled from the Group Policy or the Windows Registry.
- A Windows update has disabled the option.
Whatever the reason, you can always fix it and get the “Switch User” option back and instantly switch to another user account.
Restore Missing “Switch User” Option
Create Another User Account
This is not a proper solution, but a workaround to get the “Switch User” option in the Start menu or the Alt + F4 shutdown menu. You may not see the “Switch User” option in either of these menus if there is no user account to switch to.
There are multiple ways to create a new user account on a Windows PC. You can create an administrative account, enable the built-in Administrator account, or create a standard account. You can create an account from the Settings app, the Local Users and Groups console, and the Computer Management console.
Here, we show you how to create a local, standard account from the Settings app:
-
Go to the following:
Settings app >> Accounts >> Other users
-
Click “Add account.”

Create a new user account from the Settings app -
From the popup, click “I don’t have this person’s sign-in information.”

Don’t have the sign-in information -
Now click “Add a user without a Microsoft account.”
Create a local account from Settings app -
Next, enter a name for the user account, set a password, set up recovery questions and answers, and click Next.
Enter the details for the account


The new account will now be created. Now, you should be able to see the name of the new account in the Start menu or the “Switch user” option in the Alt + F4 shutdown menu.
As we mentioned earlier; this is not a solution, but a simple workaround. If you already have multiple accounts set up and still can’t see the “Switch user” option, then implement the following fixes given below.
Enable Fast User Switching from Group Policy
The “Switch User” option may be disabled from the Group Policy. If your computer is part of an organization/domain, then this solution won’t help you. Instead, proceed to make the changes at a registry level, shared in the next section of this post.
However, if your system administrator has disabled it explicitly for your computer while it is not part of a domain, then you can try and re-enable the “Switch user” option from Group Policy. Here is how:
-
Open the Group Policy Editor by typing in “gpedit.msc” in the Run Command box.

Open the Group Policy Editor -
Now navigate to the following path from the left pane:
Computer Configuration >> Administrative Templates >> System >> Logon
-
Double-click the Group Policy “Hide entry points for Fast User Switching” on the right.

Open policy for Fast User Switching -
Select “Disabled” and then click Apply and Ok.

Enable entry points to switch users using Group Policy -
Now run the following cmdlet in an elevated Command Prompt to enforce the new policies:
GPUpdate /Force
Enforce Group Policy


This should bring back the “Switch User” option. If this doesn’t work, you can use the steps in the next section to enable the option directly from Windows Registry.
Enable “Switch User” Option from Windows Registry
If none of the solutions above have worked for you, you can try out this method to restore the “Switch user” option from the Windows Registry.
You can download and run the batch file to instantly make the necessary changes to the Windows Registry, or perform the steps below manually.
Enable Fast User Switching (unknown, 316 hits)
To use the .bat file, download it and extract the contents. Then, run the .bat file as an administrator.
Alternatively, you can perform the steps yourself using these steps:
Note: Misconfiguration of critical values in the system’s registry could be fatal for your operating system. Therefore, we insist that you create a system restore point or a complete system image backup before proceeding forward with the process.
You can also use our top selection of disk imaging and backup software so you never lose your data or operating system again.
-
Open the Registry Editor by typing in “regedit” in the Run Command box.
Open the Registry Editor -
Paste the following in the navigation bar and hit Enter for quick navigation:
Computer\HKEY_CURRENT_USER\Software\Microsoft\Windows\CurrentVersion\Policies

Navigate to the Policies Key -
Right-click the Policies key, expand New, and then click Key from the context menu. Name this key “System“.
Create the System key under Policies -
Right-click the System key, expand New, and then click DWORD (32-bit) Value from the context menu. Name this DWORD “HideFastUserSwitching“.
Create the HideFastUserSwitching DWORD -
Double-click the DWORD “HideFastUserSwitching” and set its Value Data to “0“.
Enable Fast User Switching from Windows Registry -
Now restart the computer for the changes to take effect.


Once the computer restarts, and you have more than one user account on the computer, then the “Switch User” option should be visible in the Start menu as well as the Alt + F4 shutdown menu.
Conclusion
The “Switch User” option isn’t mandatory for you to be able to sign into a different user account. However, it is a convenient option to have. This way, you do not have to sign out of your current account and close all the apps, and instantly sign into another account.
If you have multiple users created and activated on your Windows PC, enable the “Switch User” option today and easily change your working profiles.