
MS-DOS Mode for Windows 10 and 11.
This is MS-DOS Mode
It enables the BCPE (Bootscreen Command Prompt Exploit.) The latest release (Pre-release) contains 3 files. I may add another file called WinXEditor.zip, so you can add msdos mode to the menu when you click Win + X.
How to get files
Click Code > Download ZIP.
OR the more known method. Check out the releases — https://github.com/AaravRepos/MS-DOS-Mode-for-newer-versions/releases/
msdos.bat
Starts MS-DOS Mode
win.bat
Disables the BCPE and gets you back into Windows
reboot.bat
Reboots your system.
WinXEditor.zip (Releases only)
Lets you add easy acess to MS-DOS Mode.
download-winxeditor.zip.cmd (Code > Download ZIP only)
Downloads WinXEditor.zip from the online github page. Might be edited to download a newer version.
Существует много полезных программ, а также интересных игр под DOS. Могут ли они работать в новой Windows 10 (или 7, 8, 8.1)?
Вы задавали себе вопрос, какой у вас ПК, какую версию Windows он имеет, 32- или 64-битную разрядность? Если у вас компьютер 32-разрядной версии (именуемые x86 по историческим причинам), вы не должны иметь никаких проблем с запуском многих (но не всех) DOS программ. Но если вы используете 64-разрядную версию (x64), запуск программы DOS официально не поддерживается.
Некоторые DOS программы могут не запустится с текущей версии Windows. Как правило, это различного рода аппаратные утилиты, такие как defraggers и диагностические средства. Также могут не запуститься и обыкновенные старые игры, поскольку они могут использовать аппаратные возможности старой ОС и не работать в последних версиях Windows.
Если вы не знаете, какую версию Windows использует ваш компьютер, 32- или 64-разрядную, то сейчас самое время это узнать. В новых версиях Windows (все что выше XP, это Windows 7, 8, 8.1, 10) щелкните по кнопке Пуск правой кнопкой мыши и выберите пункт Система.
Или наберите в поиске или выберите сразу пункт Параметры->Система->О системе
Удостоверьтесь, что вы имеете 64-разрядную версию Windows
Если вы используете 32-разрядную версию, вы можете запустить программу DOS, просто выбрав соответствующий .com файл. Если вы это делаете впервые из Windows 7 и выше, вам, вероятно, будет предложено установить компонент под названием NTVDM; нажмите кнопку Установить.
Некоторые очень старые программы, могут не запуститься даже в Windows 7 x86.
Если программа не запускается, или если вы работаете в Windows 10 (7,8) x64, попробуйте запустить его в среде DOSBox. Эта простая, бесплатная программа работает с DOS в виртуальной машине, которая создает достаточно близкую эмуляцию старого компьютера.
Настроить DOSBox очень просто, существует один хитрый момент, который вы должны знать. Для того что бы в нем запустить нужную вам программу, вы должны ее сначала примонтировать. Точно также как вы монтируете образ диска, только папку с программой.
Делается это следующим образом:
Запустите программу DOSBox и выполните команду mount a c:\dosfiles
Но что бы каждый раз не выполнять одно и тоже, сделаем так, что бы указанный путь монтировался автоматически.
Для этого необходимо создать папку как можно ближе к корню реального диска или раздела, и дать ему краткое имя без пробелов и знаков препинания. Я рекомендую C: \ DOSfiles. Поместите ваши программы и файлы DOS в эту папку.
Затем, в поле поиска программ Windows (в меню Пуск) наберите DOSBox 0,74 Options (число зависит от версии). Кликните по нему, откроется довольно большой файл конфигурации в блокноте. Перейдите к нижней части файла. Вы увидите секцию [AutoExec], строчкой ниже пропишите mount a c:\dosfiles. Это именно тот путь, где у вас расположены ваши программы DOS, которые необходимо запустить. Сохраните файл.
Теперь, когда вы запустите DOSBox, он автоматически подключит диск C: с папкой \ DOSfiles как привод A :. Дальше вы работаете с этим диском A : точно также, как и с любым другим из под ДОС.
Загрузка
Если вы попробуйте запустить исполняемый файл DOS в современной версии Windows, вместо окна соответствующей программы появится сообщение: «Невозможно запустить это приложение на вашем ПК», поскольку приложения DOS не поддерживаются. Однако, возможности их запуска существуют.
В этой инструкции способы запуска DOS программ и игр в Windows 11 и Windows 10, для чего можно применить несколько различных подходов. На близкую тему: Запуск 16-бит программ в Windows x64.
DOSBox
Если основная ваша задача — запуск старых DOS-игр, возможно, DOSBox будет лучшим вариантом для этого за счет своей отличной совместимости, удобства и сравнительно стабильной работы.
Пример использования DOSBox:
- Скачайте DOSBox для вашей ОС с сайта https://www.dosbox.com/ (в нашем примере — это Windows 11, загружаем Win32 Installer несмотря на то, что система 64-разрядная).
- Подготовьте файлы DOS, которые вы планируете запускать в какой-либо папке на компьютере.
- Запустите DOSBox и подключите эту папку с помощью команды mount. Пример использования:
mount c c:\dos\
в результате выполнения внутри DOSBox содержимое папки C:\dos на компьютере окажется подключено как виртуальный диск C.

- Запустите то, что требуется в командной строке DOSBox с подключенного диска. В примере на изображении ниже я запускаю Norton Commander.
- А уже из него — игру, которая исправно работает.

- И, на всякий случай: Ctrl+F10 — освобождает мышь из окна DOSBox, а Ctrl+F9 — выходит из него.


После установки DOSBox в меню «Пуск», помимо прочего, будет добавлен ярлык для открытия файла конфигурации (открывается в текстовом редакторе, в нём же сохраняется). Для большинства пользователей всё сравнительно исправно работает, но мне пригодилось изменение чувствительности мыши (пункт sensitivity).

Подробные сведения о конфигурации DOSBox можно найти на странице https://www.dosbox.com/wiki/Dosbox.conf
Существуют и альтернативные сборки DOSBox с расширенными возможностями: например, DOSBox-X и DOSBox SVN Daum.
vDos
vDos также позволяет запускать DOS-приложения в Windows последних версий, но стабильную работу мне удалось получить лишь для программ с текстовым интерфейсом, и то далеко не со всеми. Порядок использования:
- Скачиваем и устанавливаем vDos, официальный сайт — https://www.vdos.info/
- Скопируйте папки и файлы DOS в папку с vDos, эта папка со всей внутренней структурой будет работать как диск C: в запущенном vDos.
- Если сразу после установки запустить vDos, автоматически запустится демонстрационная программа DataPerfect. Так как нам это не требуется, откройте файл autoexec.txt в папке установки vDos и удалите строку CALL DPTEST\STARTDP.BAT, сохраните файл и лишь затем запускайте vDos.

- Используйте командную строку для запуска игры. Например, игра расположена в папке vDos во вложенной папке Games\game.exe. Используйте две команды: cd Games для перехода к папке, а затем game.exe для запуска игры. По какой-то причине запуск с указанием полного пути у меня не сработал.
- Как было отмечено выше, мало что получилось запустить с помощью vDos в моем тесте, потому повторю скриншот с файловым менеджером, но уже не из DOSBox.


Возможно, поработав с конфигурацией vDos возможно обеспечить и лучшую работу эмуляции.
NTVDMx64
Старые версии Windows умели запускать DOS-программы без каких-либо дополнительных трюков. В Windows NT это было реализовано с помощью виртуальной машины NTVDM.
NTVDMx64 — патч для современных версий Windows, включая Windows 11 и Windows 10 x64, встраивающий нативную поддержку запуска DOS-программ в систему. Учитывайте следующие нюансы:
- Установка NTVDMx64 меняет файлы системы и требует отключения Secure Boot в БИОС/UEFI
- Антивирусы ругаются на файлы NTVDMx
Поэтому, установка NTVDMx64 — под вашу ответственность.
Принцип использования:
- Компилируем сами из исходников автора https://github.com/leecher1337/ntvdmx64 или берем готовый установщик, например, здесь и используем файл install.bat для установки (вариант HAXM требует включенной виртуализации Intel VT-x, вариант CCPU — нет), запускаем файл install.bat и перезапускаем систему после установки.
- Запускаем программы DOS также, как и любые другие программы прямо из среды Windows.


В моем тесте полностью исправно работали программы DOS с текстовым интерфейсом и, сравнительно нестабильно и медленно — отдельные игры с графическим режимом экрана.

Виртуальная машина
При желании можно попробовать запускать DOS-игры и программы в виртуальной машине. Возможны разные подходы, в моём случае хороший был получен при установке Windows 98, эта система поддерживает запуск DOS-программ в VirtualBox (и не был достигнут при установке FreeDOS и некоторых других попытках).
Я использовал готовый образ виртуального жесткого диска Windows 98 для VirtualBox загруженный с Archive.org (подробнее о том, как найти старые программы на archive.org). Создал виртуальную машину, подключил диск, запустил — почти всё, включая Интернет (для загрузки старых DOS-программ с сайта old-dos.ru) и их запуск исправно, но иногда медленно, работали:

На эту тему может пригодиться инструкция Виртуальные машины VirtualBox для начинающих.
Надеюсь, один из вариантов подойдёт для ваших целей и запуска нужных DOS-программ в современных ОС.
Madeline absolutely must run a particular DOS program for her medical transcription business. Can she do this in Windows 10?
The real issue isn’t whether you’re running Windows 7, 8, or 10. It’s whether you’re using a 32- or 64-bit version of the operating system. Any 32-bit version of Windows can handle DOS programs easily. A 64-bit version needs a little help.
[Have a tech question? As Answer Line transitions from Lincoln Spector to Josh Norem, you can still send your query to answer@pcworld.com.]
Chances are overwhelming that you’re using a 64-bit version. To find out, right-click Start and select System. In the resulting Control Panel window, check the System type.
Windows 32-bit
Just launch the DOS program (which will have either a .EXE or .COM file extension) as you would any other Windows file. The first time you do this, a window will pop up, telling you that you need a feature called NTDVM. Click Install this feature, and your program will load.
Once you’ve done that, you won’t have to do it again. DOS programs will just run in Windows.
Windows 64-bit
But if you’re running a 64-bit version of Windows (and you probably are), you’ll need a program that can run DOS in a virtual machine inside Windows. And no, that’s nowhere near as scary as it sounds.
Download and install vDos. By default, it installs to C:vDos, but I recommend you install it into a new folder you create inside your Documents folder. That way, all of your DOS data files will be backed up and protected (assuming you back up—and you should).
Why is this important? vDos uses the folder containing the vDos program as a virtual drive C:. Every file you access, create, or alter in the DOS environment will remain in that folder.
When you load vDos, you’ll get a DOS environment in a window. You’ll have to press any key to run a database program. Press 0 to exit that program and get to the old-fashioned DOS prompt. From there you can run any DOS command or launch any DOS program you choose.
I found the vDos window uncomfortably big. You can press Win-F11 to shrink it. If you shrink it too much, press Win-F12 to enlarge it.
Then I suggest that you read the Getting Started.pdf file in Windows. If you need more information on the program, type help at the C:> DOS prompt.
Running old DOS programs
Are you overcome with a twinge of nostalgia when you remember battling against the forces of hell in Doom with nothing but a shotgun and a chainsaw? Do you long for the simplicity of earlier word processors like Microsoft Word 5.0 with no annoying spell checkers?
If so, you may be disappointed to learn that Windows 10 cannot run many classic DOS programs. In most cases if you try to run older programs, you’ll just see an error message.
Luckily, the free and open source emulator DOSBox can mimic the functions of old-school MS-DOS systems and allow you to relive your glory days!
In this guide, we’ll learn how to find the old programs and games you love as well as how to setup and install DOSBox on your system.

2. Download your retroware
If you’re reading this guide, it’s likely that there’s a specific game or program you want to run but you may not already have a copy.
Websites like Amazon and eBay often have retro games on floppy disk and CD-ROM.
There are also a number of websites available offering ‘Abandonware’ : programs which are no longer actively maintained or whose developers no longer exist, which may be legal to download in your jurisdiction.
The Internet Archive contains a huge collection of MS-DOS games. The website also has a collection of older MS-DOS applications. Many of these can be run in your browser.
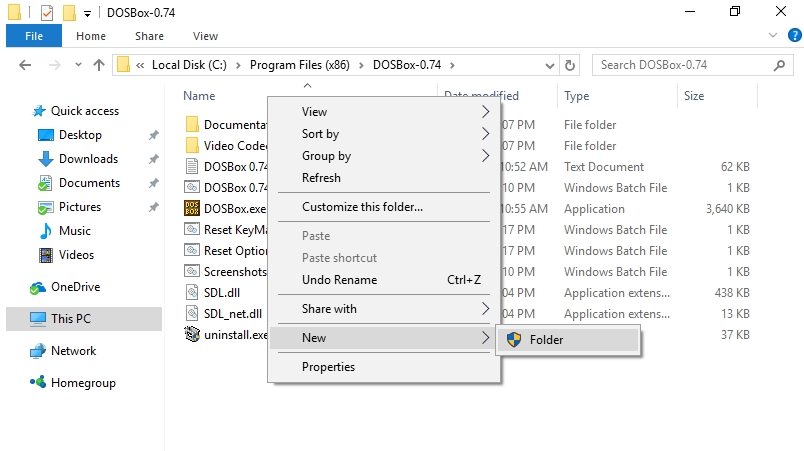
3. Copy program files
Open the Windows File Explorer and navigate to the directory where DOSBox is installed, for instance: C:\Program Files (x86)\DOSBox-0.74.
Right-click anywhere inside the windows and choose New > Folder. This folder will be used to store your programs so give it an easy to remember name such as ‘GAMES’.
Once this has been done, move the folder containing the game or application you want to play into this new folder using copy and paste. If your game is an ISO image of a CD or DVD, you can also copy it here.
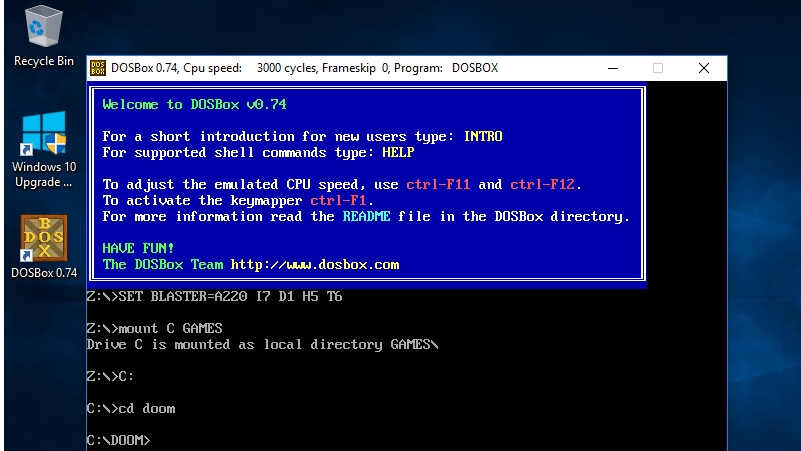
4. Launch DOSBox
Double click on the DOSBox shortcut on the Windows 10 desktop.
First you need to point DOSBox to the location of your games by creating a virtual ‘C:\’ drive. You can do this with the ‘mount’ command e.g.:
mount C GAMESFeel free to substitute ‘GAMES’ for the name of the folder you created earlier.
Press ‘return’ to enter this command. Next, switch to this virtual C drive simply by typing:
C:At this point you can use the ‘cd’ command to change to the directory containing the game or application you want to use e.g:
cd doom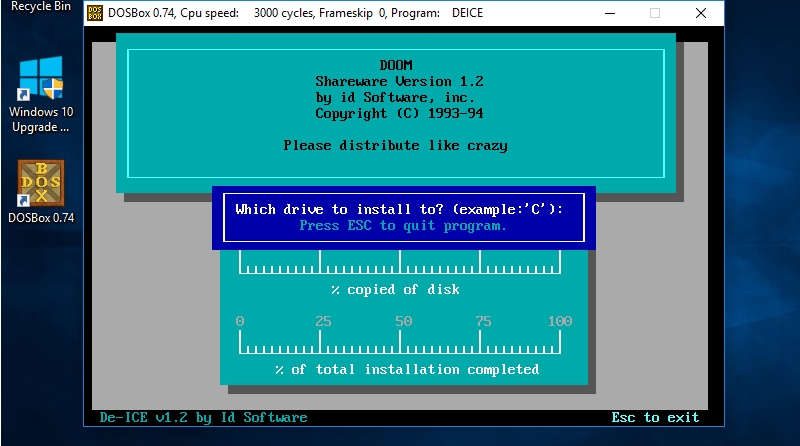
5. Install your program
Use the DIR command to list all files inside your folder. The exact steps for installing and/or running an application or game will vary. Look out for batch (BAT) files and executables (EXE).
You will most likely see a file named SETUP.EXE. Simply type ‘setup» to run it.
If the folder contains only an ISO, you will need to mount this separately using the ‘imgmount’ command e.g:
imgmount D REDALERT.ISOYou can then switch to the virtual ‘D:\’ drive using:
D:Don’t forget to use the ‘DIR’ command to list files, so you can find the installer.
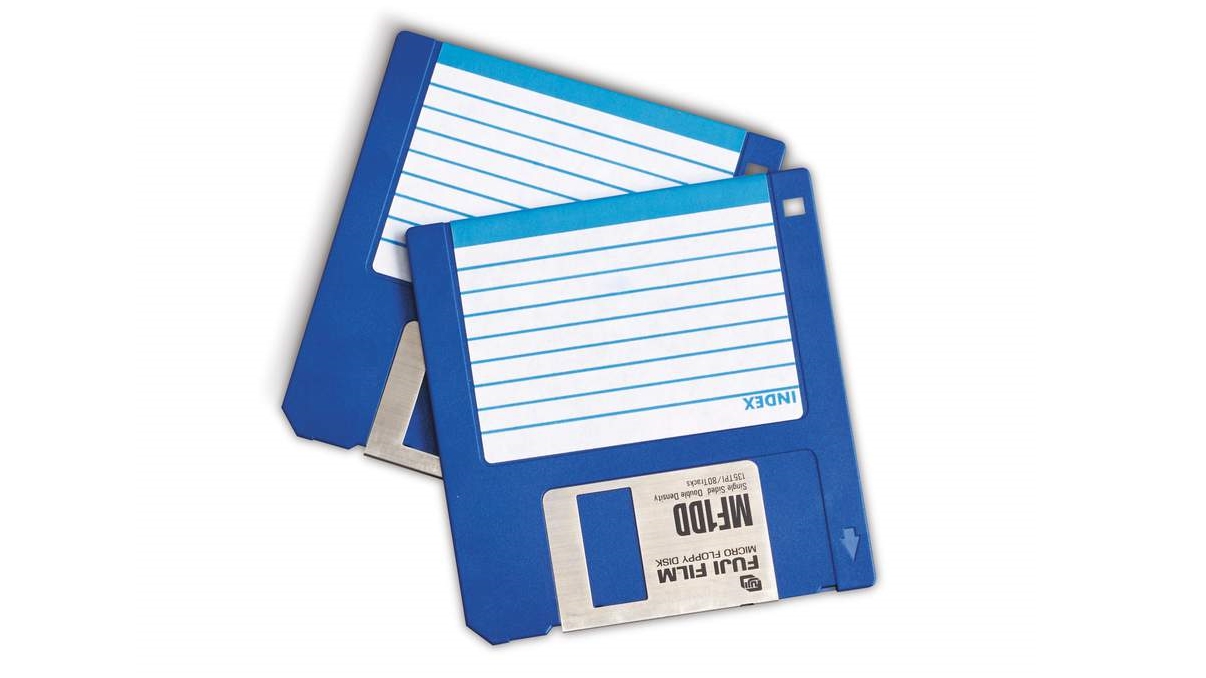
6. Image your floppy disks
If your program is super-retro, it may be on a floppy disk. The easiest way to load the floppies is to create an image file (IMG) of their contents and then mount them in the same way as you would an ISO image.
There are a number of programs available that allow you to image a floppy disk on Windows. These include WinImage, and MagicISO Maker.
Once the floppy image files are inside your ‘GAMES’ folder, mount them using ‘imgmount’, for instance:
IMGMOUNT A image_1 -t floppyRun the command ‘A:’ to switch to the virtual floppy drive.
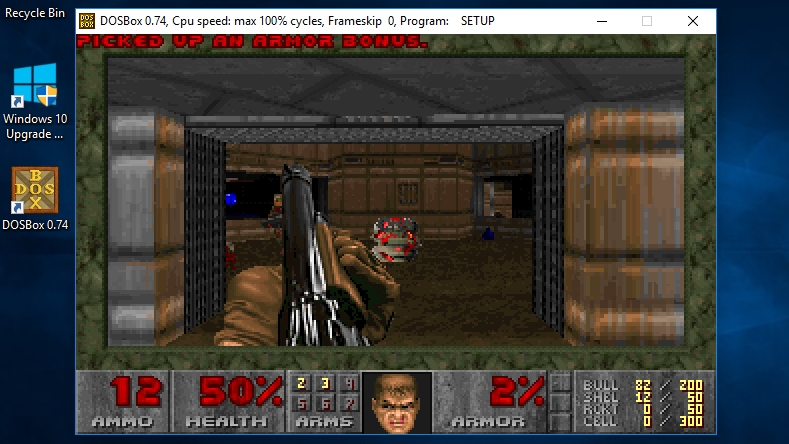
7. Run your program
Once installation is complete, you most likely will be switched automatically to the folder in question. If not use ‘cd’ to change to the folder you chose during setup.
Running an application or game is accomplished in exactly the same way as for the installer. Simply use ‘DIR’ to list the files then enter the name of the .exe.
Once the game is running, if you find the speed is off, use Ctrl + F11 and Ctrl + F12 to slow it down and speed it up respectively.
Capture a screenshot of your progress, using Ctrl + F5. It will be saved in C:\Users\yourusername\AppData\Local\DOSBox\capture.
8. Enable IPX
Certain older games support multiplayer through IPX (Internetwork Packet Exchange). DOSBox includes an emulator to allow two or more people on the same network to play multiplayer games via UDP.
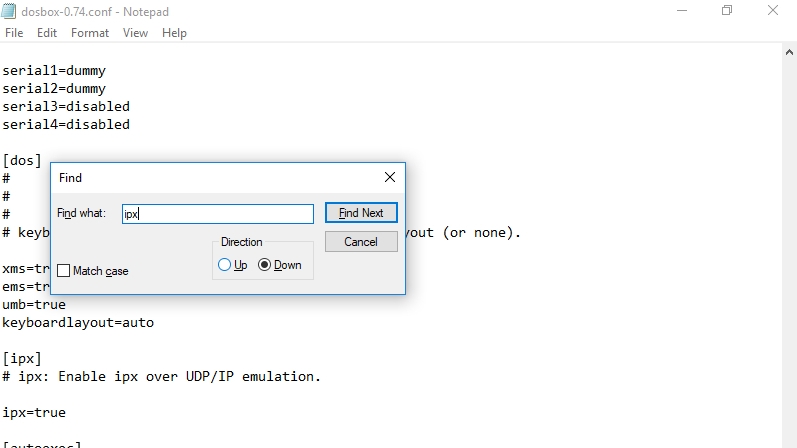
To get started, you need to enable IPX in your DOSBox configuration file (.conf). Close the program if it’s running, open your file explorer and navigate to :
C:\Users\yourusername\AppData\Local\DOSBox
Right click on the file and choose ‘Open With’, then ‘More apps’. Click on ‘Notepad’.
Hold down Ctrl + F and type ‘ipx’ to find the section relating to multiplayer. Change «ipx=false» to «ipx=true».
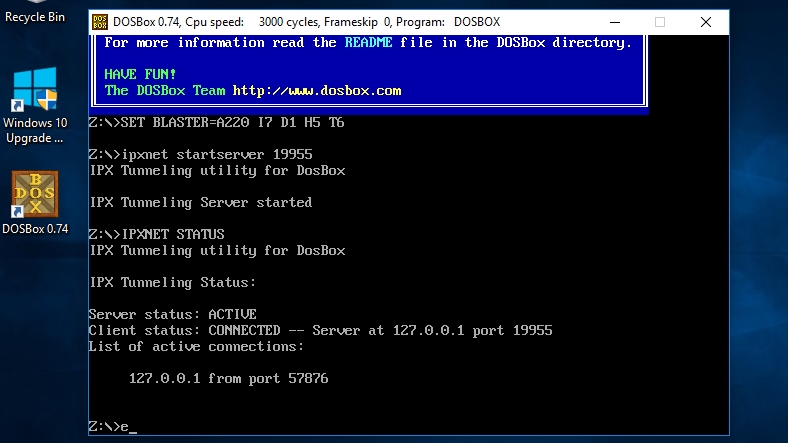
9. Start IPX Server
Once you have enabled IPX in the DOSBox Configuration file, start DOSBox itself by double clicking on the desktop shortcut.
You can now start the IPX server, which will allow other clients on the local network to connect to you. To get started, enter the command:
ipxnet start server <port> e.g. ipxnet start server 19955Windows Firewall may show an alert at this stage. Click ‘Allow Access’ to make sure multiplayer will work.
Ask any other clients on your network to open DOSBox and run the following command to connect to you:
ipxnet connect <your-ip> <port> e.g. ipxnet connect 192.168.1.87 19955You can now start your game.
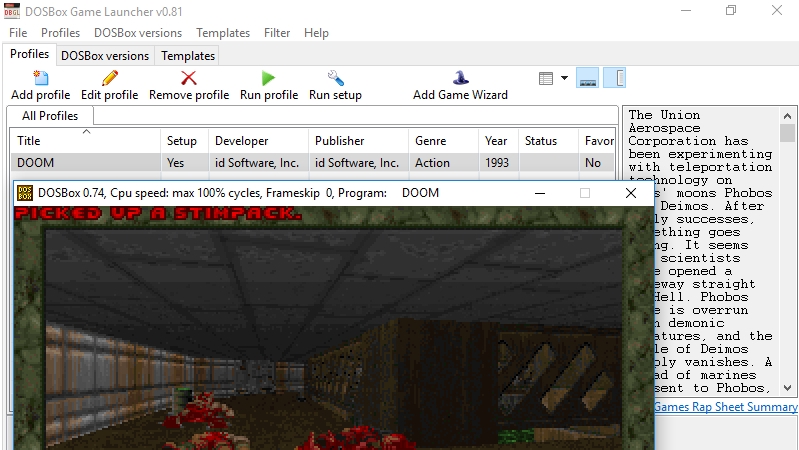
10. Install a DOSBox frontend
As useful as DOSBox is, it can be a pain to run commands each time you want to play. There are several graphical frontends for DOSBox which try to make the process a little easier.
Once such frontend is DGBL (DOSBox Game Launcher) which allows you to create and save profile settings for games you’ve already installed so you can just run them straight away without going through the trouble of locating and mounting them each time.
Many of the frontends are a work in progress, so make sure to back up your files before installing. If you download DGBL, you will need to extract the ZIP files and run ‘launch.exe’.
- Got an Apple machine? Here’s how to run old software and games on your Mac