
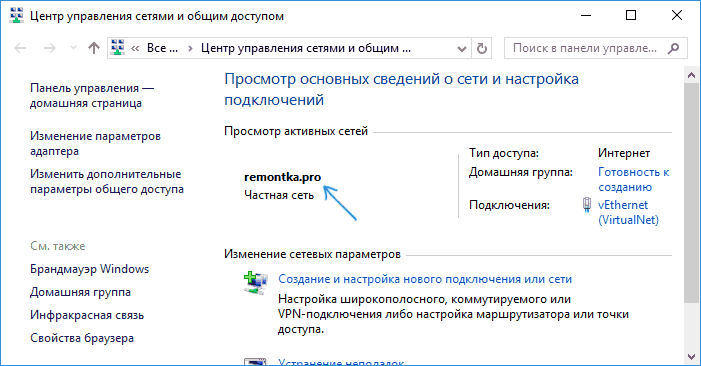
Если вы зайдете в Центр управления сетями и общим доступом в Windows 10 (правый клик по значку соединения — соответствующий пункт контекстного меню) вы увидите имя активной сети, его же вы можете посмотреть в списке сетевых подключений, перейдя в «Изменение параметров адаптера».
Часто для локальных подключений это имя — «Сеть», «Сеть 2», для беспроводных имя соответствует имени беспроводной сети, однако его можно изменить. Далее в инструкции — о том, как изменить отображаемое имя сетевого подключения в Windows 10.
Для чего это может пригодиться? Например, если у вас есть несколько сетевых подключений и все носят имена «Сеть», это может затруднять идентификацию конкретного подключения, а в некоторых случаях при использовании специальных символов, может отображаться некорректно.
Примечание: способ работает как для Ethernet соединений, так и для Wi-Fi подключения. Однако, в последнем случае, имя сети в списке доступных беспроводных сетей не изменяется (только в центре управления сетями). Если вам нужно изменить его, то сделать это можно в настройках роутера, где именно см. в инструкции: Как изменить пароль на Wi-Fi (там же описывается и изменение имени SSID беспроводной сети).
Изменение имени сети с помощью редактора реестра
Для того, чтобы изменить имя сетевого подключения в Windows 10 потребуется воспользоваться редактором реестра. Порядок действий будет следующим.
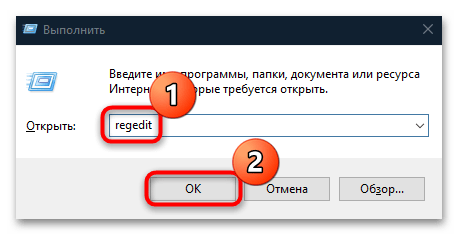
- Запустите редактор реестра (нажать клавиши Win+R, ввести regedit, нажать Enter).
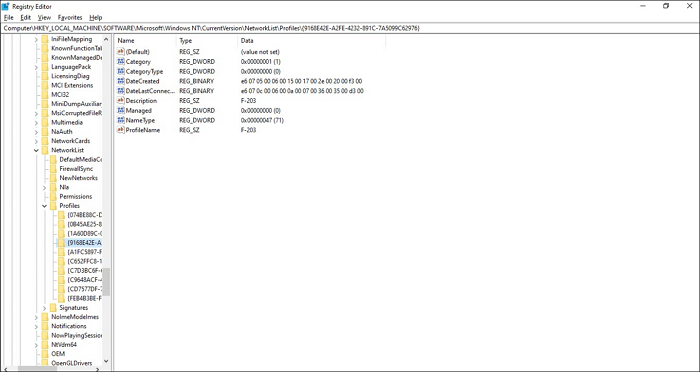
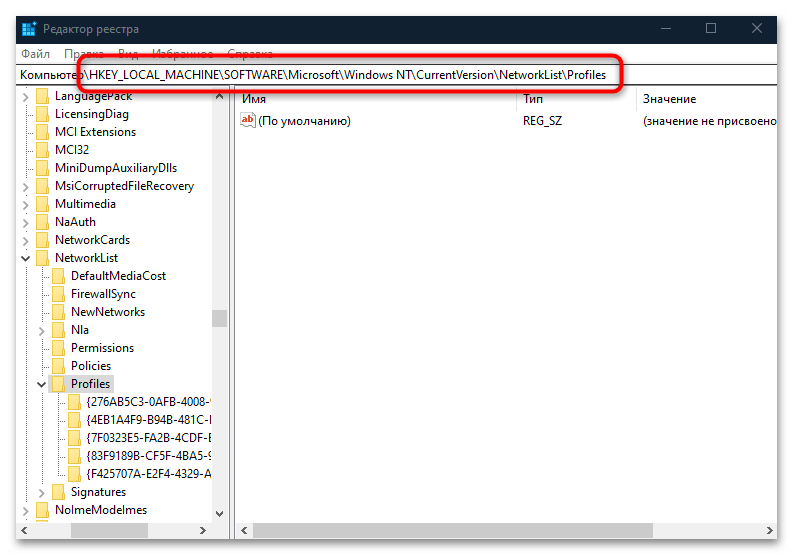
- В редакторе реестра перейдите к разделу (папки в левой части) HKEY_LOCAL_MACHINE\ SOFTWARE\ Microsoft\ Windows NT\ CurrentVersion\ NetworkList\ Profiles
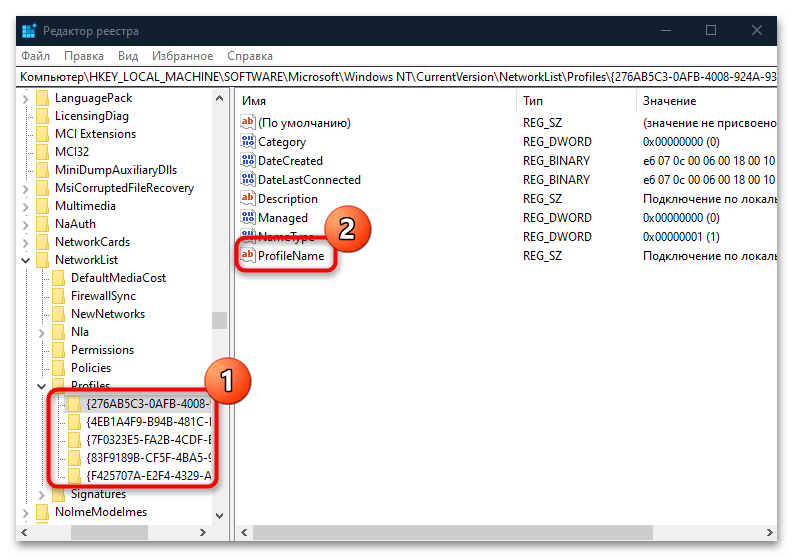
- Внутри этого раздела будет находиться один и более подразделов, каждый из которых соответствует сохраненному профилю сетевого подключения. Найдите тот из них, который требуется изменить: для этого выберите профиль и посмотрите значение имени сети в параметре ProfileName (в правой панели редактора реестра).

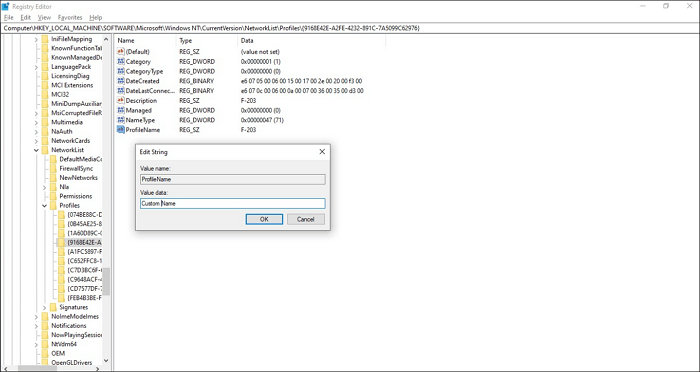
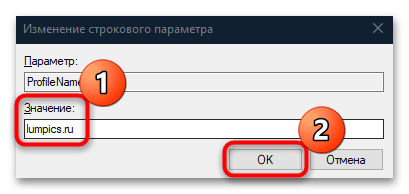
- Дважды щелкните мышью по значению параметра ProfileName и задайте новое имя для сетевого подключения.
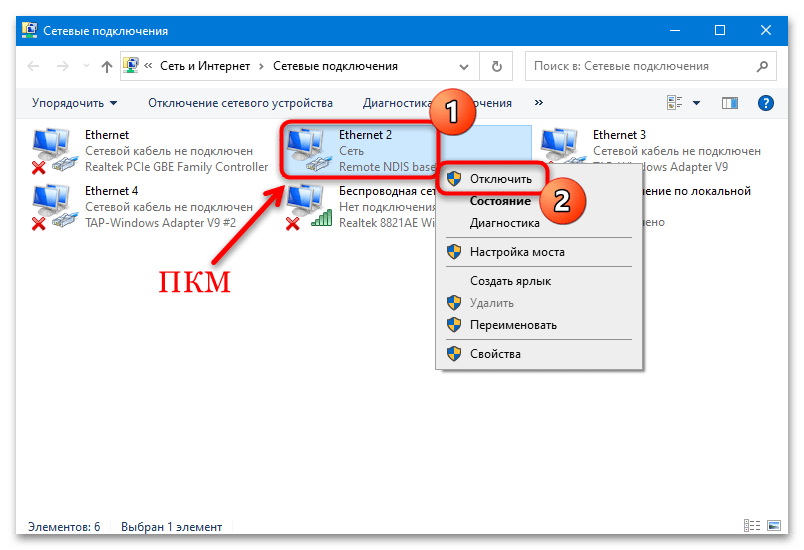
- Закройте редактор реестра. Почти сразу в центре управления сетями и списке подключений имя сети изменится (если этого не произошло, попробуйте отключиться и снова подключиться к сети).


На этом всё — имя сети изменено и отображается так, как было задано: как видите, ничего сложного.
Кстати, если вы пришли на это руководство из поиска, не могли бы поделиться в комментариях, для каких целей вам потребовалось изменение имени подключения?
Even though we regularly connect different networks to our computers, very few people know how to change network names on Windows 10. So if you’re looking for ways to change network names on Windows 10, but don’t know how to do so, there’s no need to worry.
You can just follow the steps outlined in this post to change the names on your network if you’re using Windows 10. We’ll be sharing two methods to change network names in this post, so make sure to read the full post so you can see which method will work best for you.
Why Would You Need to Change Network Names on Windows 10
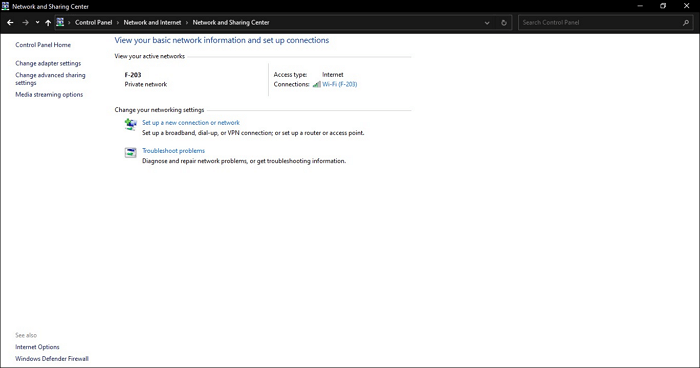
Changing the network name on your Windows computer can have a lot of benefits, especially if you connect your computer to many different Internet connections regularly. Whenever you connect your computer to a Wi-Fi or LAN network, these networks automatically get assigned a specific network name that can be seen in the connectivities dialog box.
Methods to Change Network Name
You can use two methods to change network names on Windows 10. If you’re a user of Windows 10 Home, you can use Windows Registry for this purpose. If you’re using Windows 10 Pro, Education, or Enterprise, you can use the Local Security Policy, to use the Windows 10 change network name option.
- Method 1. Using Windows Registry
- Method 2. Using Local Security Policy
Method 1. Using Windows Registry
If you’re using Windows 10 Home, here’s how you can change your network names.
Step 1. Press the «Windows Key» or click on the search bar and type in regedit.msc. You’ll see the Registry Editor app in the search results.

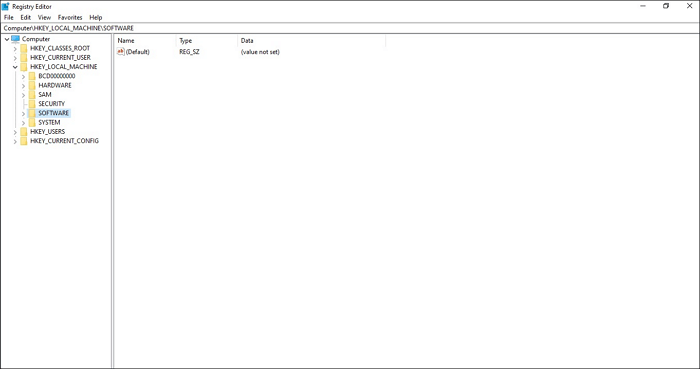
Step 2. Once you open this app, you’ll need to click on «Computer» in the left bar of the app window.
Step 3. Now, search for a folder titled «HKEY_LOCAL_MACHINE.» Once you’ve located this folder, click on it.
Step 4. You need to search for the «SOFTWARE» folder and click on it.
Step 5. Once you’ve opened this folder, you’ll see that this folder contains a lot of subfolders. You need to search for the one named Microsoft and click on it.
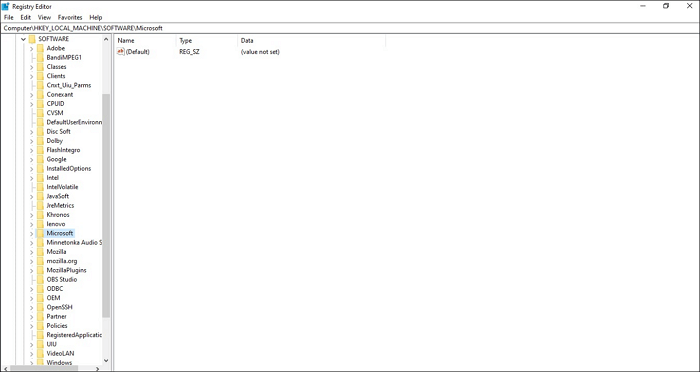
In the Microsoft folder, navigate to the folder named «WindowsNT» and open it.
Step 6. In this folder, look for a folder called «CurrentVersion.» Once found, click on it.

In the CurrentVersion folder, locate the «NetworkList» folder. You’ll need to click on this folder and go to the folder titled «Profiles.»
Step 7. Once you’ve clicked on the Profiles folder, you’ll see many different folders which have their names in brackets. Every one of these folders corresponds to a network you connected your computer to.
To change the name of a particular network, you’ll need to click on each of these folders until you find the folder that corresponds to the network whose name you’re trying to change.
Step 8. In our case, the fourth folder in the Profiles folder was for the network we wish to rename.
Step 9. In this folder, you’ll see that the file at the bottom of the list is titled ProfileName, which tells you the current name of the network. To change the network name, right-click on the «ProfileName file.»
A dialogue box titled «Edit String» will open as a result. In this dialogue box, you need to click on the text bar under «Value Data» and type in the name you wish to use for this network.
Method 2. Using Local Security Policy
If you’re using Windows 10 Pro, Enterprise, or Education, you won’t be able to change your network names using the Registry Editor. In these versions of Windows 10, you need to use the Local Security Policy to change network names.
Step 1. To do that, you’ll need to type in secpol.msc in the Windows search bar and open the «Local Security Policy.»
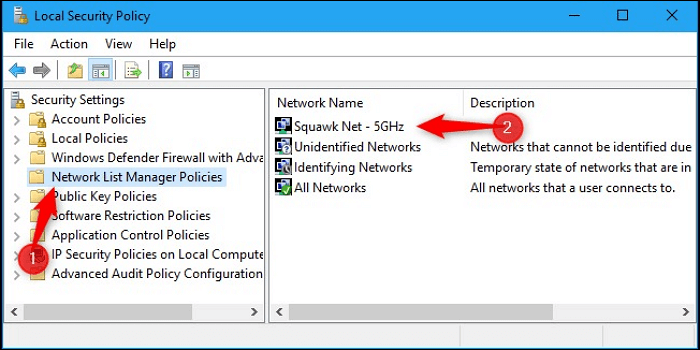
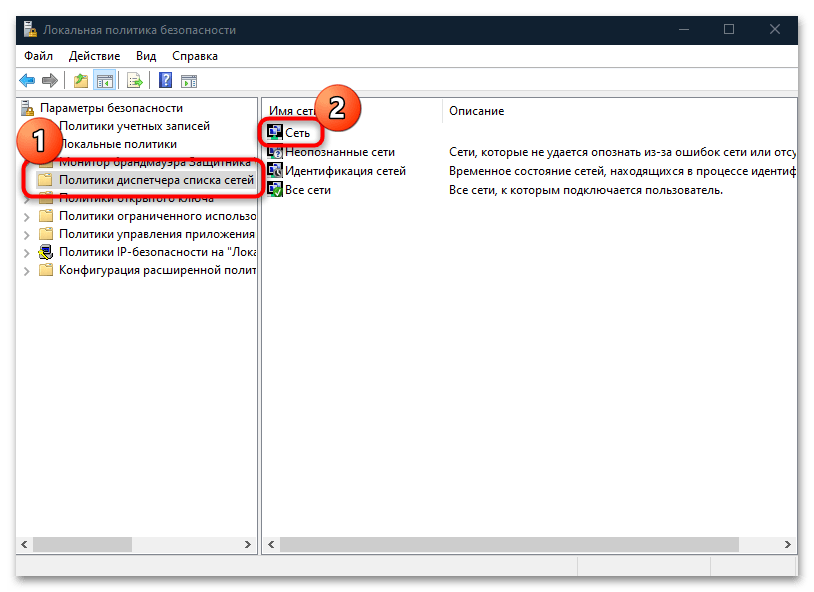
Step 2. In the Local Security Policy, you need to click on «Security Settings.» Under this, you’ll see a folder named «Network List Manager Policies.» Once you click on this folder, you’ll see a list of networks that your computer connects to.
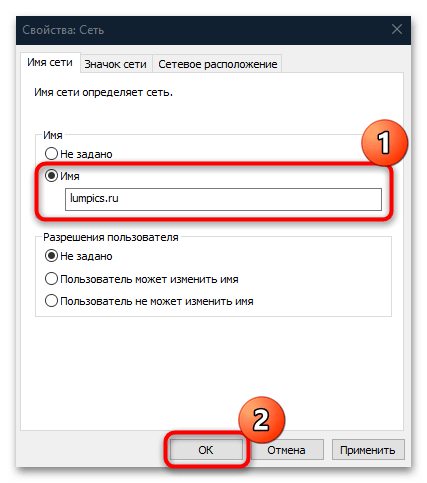
Step 3. Now, you’ll need to locate the network whose name you wish to change and click on it. You’ll see a dialogue box pop up that lists the properties of that connection. In the Network Name page of this dialogue box, type in the new network name in the text box present under «Name.»
Step 4. After typing in your new network name, you just need to click on «OK,» and your network will show on your computer with its new name.
Conclusion
In this post, we’ve discussed the methods that can be used for changing network names on Windows 10 computers. If you’re using Windows 10 Home, you can use the Registry Editor to do this. If you’re using Windows 10 Pro, Enterprise, or Education, you can change network names using the Local Security Policy.
Способ 1: Редактирование реестра
Чтобы изменить название сети в Windows 10, можно воспользоваться встроенным средством – «Редактором реестра». Но стоит понимать, что неправильные действия могут привести к серьезным системным ошибкам, поэтому лучше создать контрольную точку восстановления перед процедурой. Это поможет вернуть систему к состоянию, которое было до внесения изменений.
Читайте также: Инструкция по созданию точки восстановления Windows 10
- Нажмите на клавиши «Win + R», в строке диалогового окна «Выполнить» введите
regeditи нажмите на кнопку «ОК». - Разверните ветки на панели слева
HKEY_LOCAL_MACHINE\SOFTWARE\Microsoft\Windows NT\CurrentVersion\NetworkList\Profilesили вставьте путь в адресную строку, расположенную вверху. - Внутри раздела «Profiles» должны находиться подразделы, параметры каждого из которых связаны с профилями сетевых подключений. Если он один, то каталог также будет один. Если несколько, то отыщите тот, который нужно отредактировать, и раскройте окно со свойствами параметра «ProfileName» двойным кликом левой кнопкой мыши. Параметры располагаются в основной части окна «Редактора реестра».
- Далее останется вручную написать новое имя сети в строке «Значение», затем сохранить настройки, кликнув по кнопке «ОК».
На этом изменение названия подключения завершено. Перейдите в соответствующий раздел «Панели управления» и проверьте его имя. Если ничего не поменялось, попробуйте отключить, затем снова включить сеть, используя контекстное меню.
Способ 2: «Локальная политика безопасности»
Более безопасный метод, в отличие от редактирования системного реестра, заключается в использовании приложения «Локальная политика безопасности». Но вариант подойдет для владельцев редакций Pro и Enterprise Windows 10. Чтобы переименовать сеть в Windows 10 через «Локальную политику безопасности», проделайте несколько простых шагов:
Читайте также: Отсутствует «Локальная политика безопасности» в Windows 10
- Через окно «Выполнить» запустите приложение, вставив команду
secpol.mscи выполнив ее. - На панели слева выберите «Политики диспетчера списка сетей». В центральной части окна дважды кликните по названию активного подключения.
- Откроется окно со свойствами. По умолчанию название не задано, поэтому отметьте пункт «Имя» и в строке ниже пропишите его. Нажмите на кнопку «ОК».

Следует отметить, что Windows 10 отдаст предпочтение настройке в реестре, поэтому если вы решили изменить название через «Редактор реестра», то в «Локальной политики безопасности» сначала выставьте в окне свойств подключения значение «Не задано», а затем вносите изменения в системном реестре.
Читайте также: Расположение локальной политики безопасности в Windows 10
Наша группа в TelegramПолезные советы и помощь
Readers help support Windows Report. We may get a commission if you buy through our links.
Read our disclosure page to find out how can you help Windows Report sustain the editorial team. Read more
In previous versions of Windows, you could easily change the name of your network, but in Windows 10 it seems that it’s harder to rename the network.
If you wish to change the name of the network in Windows 10, today we’re going to show you how.
In Windows 7 it was easy to rename your network connection, you just had to go to the Network and Sharing center and click your connection to change its name.
In Windows 10 you can’t do that anymore, but luckily there’s a different way to change your network name.
Become an expert with our complete guide on Network and Sharing Center!
How can I rename the network in Windows 10?
1. Use the Registry Editor
-
1. Press the Windows Key + R and type regedit, then click on OK.
-
2. Navigate to the following key in the left pane: HKEY_LOCAL_MACHINE\SOFTWARE\Microsoft\Windows NT\CurrentVersion\NetworkList\Profiles
-
3. Now you need go through all subkeys (they are all labeled with random numbers and letters) under the Profiles key until you find the key with that has ProfileName set as the name of your network.
-
4. In the right pane double click the ProfileName in order to change its value.

-
5. Change the value data to the desired name of your network connection.
-
6. Close the Registry Editor.
-
7. In order to apply the changes to your network, you might have to restart your computer, or to sign out and sign in again.
You can easily change the name of a certain network by performing one registry tweak. All of this can done through the built-in Registry Editor.

More and more people use registry editing/cleaning tools. Much friendlier and more efficient than the Registry Editor.
2. Use Local Security Policy
If you don’t want to experiment with your Registry, there’s another way to rename a network. So, here’s how to rename a network by using the Local Security Policy:
- Press Windows Key + R, type secpol.msc and press Enter to run it.
- In Local Security Policy window, go to the Network List Manager Policies in the left pane.
- Now in the right pane double click on the network name that you want to change.
- In the Properties windows under the Name section make sure that Name is selected.
- Now in the input field enter the name that you wish to use for your connection.

- Click Apply then OK to save the changes.
- You might have to log in again or to restart your computer before the changes are applied.

And that’s how you rename the network in Windows 10. If you have any comments or questions, just reach for the comments section, below.
Ivan Jenic
Windows Hardware Expert
Passionate about all elements related to Windows and combined with his innate curiosity, Ivan has delved deep into understanding this operating system, with a specialization in drivers and driver troubleshooting.
When he’s not tackling diverse driver-related problems, Ivan enjoys watching good movies and spending time hiking with his family and friends.
Applies ToWindows 11 Windows 10
Поддержка Windows 10 прекратится в октябре 2025 г.
После 14 октября 2025 г. корпорация Майкрософт больше не будет предоставлять бесплатные обновления программного обеспечения из Центра обновления Windows, техническую помощь и исправления безопасности для Windows 10. Ваш компьютер по-прежнему будет работать, но мы рекомендуем перейти на Windows 11.
Подробнее
Переименование устройства может быть полезным по нескольким причинам:
-
Организация: если вы используете несколько устройств с учетной записью Майкрософт, их переименование поможет четко определить и различать их.
-
Безопасность: имена устройств по умолчанию могут предоставлять указания о типе устройства или пользователе, что может быть угрозой безопасности. Переименование может помочь скрыть такие сведения
-
Управление. Для организаций и ИТ-управления наличие согласованного соглашения об именовании может упростить процесс отслеживания устройств и управления ими.
Переименование устройства
-
В приложении «Настройки» на устройстве с Windows, выберите Сведения осистеме > или используйте следующий ярлык:
Около
-
Выберите Переименовать этот компьютер
-
Введите новое имя и нажмите кнопку Далее.
-
Выберите Перезапустить сейчас или Перезапустить позже.
Нужна дополнительная помощь?
Нужны дополнительные параметры?
Изучите преимущества подписки, просмотрите учебные курсы, узнайте, как защитить свое устройство и т. д.