
Introduction
When using Linux machines, either as a Virtual Private Server or as a Virtual Machine on your local computer, one of the major problems that people encounter is to transfer their files from their host (main) machine to the Linux machine. This problem is generally resolved by a file transfer protocol client such as WinSCP and FileZilla. In this article, we shall learn how to transfer files and folders from Microsoft Windows to a Linux machine using the WinSCP software. WinSCP is a File Transfer Protocol client for Microsoft Windows. As said, it uses the FTP (File Transfer Protocol) and SFTP (Secure File Transfer Protocol) protocols to transfer files from a Windows machine to any other machine (Linux in this case).
Prerequisites
- Windows machine with WinSCP installed.
- Linux machine connected to the internet.
Transferring Files/Folders from Windows to Linux using WinSCP
Once you have the prerequisites, you can follow the following steps to transfer files and folders using WinSCP.
Step 1: Get the Public IP Address of your Linux Machine
The first thing we need is the IP address of the target Linux machine. To get this, open a terminal and then, type the curl command in the terminal:
curl ipinfo.io/ip
Here, we are sending an HTTP request to the ipinfo.io/ip website which is a utility that returns the Public IP address of the client machine. Thus, you will get an IPv4 address on your machine.

Getting the public IP Address
Step 2: Allowing FTP in the firewall
Now, if you are using a firewall, it is important to allow the FTP in your firewall otherwise the WinSCP will not be able to connect to your machine. Generally, Linux machines use the ufw firewall. To allow the FTP service, type the following command in your Linux terminal.
ufw allow ftp
On success, you will see a message like the following:
Allowing FTP in the firewall.
If you use some other firewall manager, use its corresponding commands to allow FTP.
Step 3: Connecting WinSCP to the Linux machine using the IP address
Now, open the WinSCP application on your windows machine. You will get a login prompt as follows:

WinSCP Login Window
Here, we will leave the File protocol to SFTP (Secure File Transfer Protocol), which means it will use port 22 for connecting to our Linux machine.
- In the hostname, enter the Public IP address of the Linux machine found in step 1.
- Then, enter the username which you want to connect using the machine and its password.
- (Optional) You can also save the connection settings if you desire.
Once all the fields are filled, click on ‘Login‘ and you will be given a warning about whether you want to connect to the unknown target machine or not, like the following:

Warning for new connections.
Allow it by clicking on the ‘yes‘ button and it will be added to your trusted sources, which means that the next time you connect to this same machine, you will not be given such a warning again. Now, you have an active connection between the Windows and the target Linux machine. The WinSCP will now show you files from both your host machine and the remote Linux machine as well like below:
.png)
WinSCP Window after successful connection
On the left split window, we have the host machine and on the right, we have the remote Linux machine.
Step 4: Copying Files and Folders from host to remote machine.
Now, to transfer any files/folders all you have to do is copy them from the right window and paste it in the left window.
To copy, right-click on a file or folder and click on copy to clipboard. We are taking the dummy_tranfer.txt file and dummy_folder directory for copying in this example.

Copying file to Clipboard
Then, in the remote machine, navigate to the folder you want to save the file/folder and right-click in it then, choose ‘Paste From Clipboard‘. In this example, we are copying the files into the /home/transfers/ directory in our Linux machine but, you are free to choose any directory However, be cautious of using the same later in the article as well.

Pasting the file/folder into the remote machine
The contents of the transfers folder will now look like:

Contents after successful transfer of files and folders.
We have now successfully learned how to transfer files and folders from Windows to a Linux machine using WinSCP.
Note: There is no difference between transferring a file and a folder. You copy and paste them both in the same manner as shown above.
Step 5: Verifying the copied files
Now, to verify whether we have the files in our Linux machine, open a terminal on your Linux machine and type the following ls command:
ls <path to the directory used in WinSCP transfer (Step 4)>
This will give us the contents of the /home/transfers directory in which we copied our files.

Verifying Transfer
As we can see, we have got the folder and the file we copied to our Linux machine.
Step 6: Closing the connection
Once you are done transferring files/folders, always close the connection properly as an unclosed connection might lead to unexpected errors sometimes. To close the connection, navigate to the Tabs option in the toolbar then, choose Disconnect Session. Now, the session is successfully logged out.

Closing the connection to a remote server.
Conclusion
In this article, we learned how to fetch the public IP address of a Linux machine and then, use that IP address to set up a login session in WinSCP using the SFTP protocol to transfer files and folders. Then, we ended the tutorial by learning how to close the connection. The WinSCP provides other protocols, such as FTP, SCP, etc. to transfer files. It depends on the user’s need to choose the appropriate one. However, in most general cases you would use the SFTP protocol, which is also recommended due to security reasons.
Are you looking for a way to quickly transfer files from your Windows computer to your Linux computer and back again? The open source PSCP utility makes it easy to transfer files and folders, and of course it’s open source.
Setting your PATH in Windows
Knowing how to set your command path in Windows makes it easier to use a handy utility like PSCP. If you’re unfamiliar with that process, read how to set a PATH on Windows.
Using PSCP
PSCP (PuTTY Secure Copy Protocol) is a command-line tool for transferring files and folders from a Windows computer to a Linux computer.
-
Download
pscp.exefrom its website. -
Move
pscp.exeto a folder in your PATH (for example,Desktop\Appif you followed the PATH tutorial here on Opensource.com). If you haven’t set a PATH variable for yourself, you can alternately movepscp.exeto the folder holding the files you’re going to transfer. -
Open Powershell on your Windows computer using the search bar in the Windows taskbar (type ‘powershell` into the search bar.)
-
Type
pscp –versionto confirm that your computer can find the command.
IP address
Before you can make the transfer, you must know the IP address or fully-qualified domain name of the destination computer. Assuming it’s a computer on your same network, and that you’re not running a DNS server to resolve computer names, you can find the destination IP address using the ip command on the Linux machine:
[linux]$ ip addr show | grep 'inet '
inet 127.0.0.1/8 scope host lo
inet 192.168.1.23/24 brd 10.0.1.255 scope global noprefixroute eth0
In all cases, 127.0.0.1 is a loopback address that the computer uses only to talk to itself, so in this example the correct address is 192.168.1.23. On your system, the IP address is likely to be different. If you’re not sure which is which, you can try each one in succession until you get the right one (and then write it down somewhere!)
Alternately, you can look in the settings of your router, which lists all addresses assigned over DHCP.
Firewalls and servers
The pscp command uses the OpenSSH protocol, so your Linux computer must be running the OpenSSH server software, and its firewall must allow SSH traffic.
If you’re not sure whether your Linux machine is running SSH, then run this command on the Linux machine:
[linux]$ sudo systemctl enable --now sshd
To ensure your firewall allows SSH traffic, run this command:
[linux]$ sudo firewall-cmd --add-service ssh --permanent
For more information on firewalls on Linux, read Make Linux stronger with firewalls.
Transfer the file
In this example, I have a file called pscp-test.txt that I want to transfer from C:\Users\paul\Documents on my Windows computer to my destination Linux computer home directory /_home_/paul.
Now that you have the pscp command and the destination address, you’re ready to transfer the test file pscp-test.txt. Open Powershell and use the dir command to change to the Documents folder, where the sample file is located:
PS> dir %USERPROFILE%\Documents\
Now execute the transfer:
PS> pscp pscp-test.txt paul@192.168.1.23:/home/paul
| Password:
End of keyboard-interactive prompts from server
pscp-test.txt | 0 kb | 0.0 kB/s | ETA: 00:00:00 | 100%
Here’s the syntax, word for word:
-
pscp: The command used to transfer the file. -
pscp-test.txtis the name of the file you want to transfer from Windows. -
paul@192.168.1.23is my username on the Linux computer, and the IP address of the Linux computer. You must replace this with your own user and destination information. Notice thatpscprequires a destination path on the target computer, and:/home/paulat the end of the IP address specifies that I want the file copied to my home folder.
After you authenticate to the Linux computer, the pscp-test.txt file is transferred to the Linux computer.
[ Related read Share files between Linux and Windows computers ]
Verifying the transferred
On your Linux computer, open a terminal and use the ls command to verify that the file pscp-test.txt appears in your home directory.
[linux]$ ls
Documents
Downloads
Music
Pictures
pscp-test.txt
Copying a file off of a Linux system
You aren’t limited to just copying files to your Linux system. With pscp, you can also copy a file from Linux onto Windows. The syntax is the same, only in reverse:
PS> pscp paul@192.168.1.23:/home/paul/pscp-test.txt %USERPROFILE%\Documents\pscp-win.txtHere’s the syntax:
-
pscp: The command used to transfer the file. -
paul@192.168.1.23:/home/paul/pscp-test.txtis my username on the Linux computer, the IP address of the Linux computer, and the path to the file I want to copy. -
%USERPROFILE%\Documentsis the location on my Windows computer where I want to save the file. Notice that in copying the file back to my Windows computer, I can give it a new name, such aspscp-win.txt, to differentiate it from the original. You don’t have to rename the file, of course, but for this demonstration it’s a useful shortcut.
Open your file manager to verify that the pscp-win.txt file was copied to the Windows C:\Users\paul\Documents path from the Linux computer.
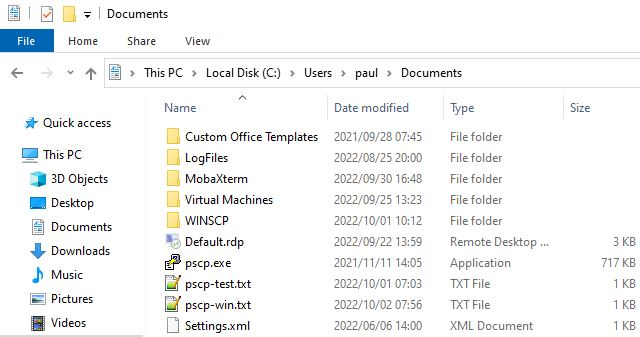
Image by:
(Paul Laubscher, CC BY-SA 4.0)
Remote copying
With the power of the open source pscp command, you have access to any computer in your house, and servers you have accounts on, and even mobile and edge devices.
This work is licensed under a Creative Commons Attribution-Share Alike 4.0 International License.
Introduction
While there are various methods available for file transfers from a Windows system to a Linux system, using the Command lines provides a straightforward and reliable approach. In this guide, we’ll walk you through the step-by-step process, highlighting the necessary commands and techniques to seamlessly transfer your files from Windows to Linux.
Prerequisites
Verify Your Remote Linux Server is Ready
If you have ordered one from Database Mart, you will receive an email containing the information of your VPS, including server IP and login credentials. You can also obtain the information on the overview page in the control panel. Please refer to this guide on how to get server credentials if you need assistance.
Steps to Transfer Files from Windows to Linux Using Command Prompt
Step 1. Open the Command Prompt in Local Windows
Search cmd in the search bar, and double-click the Command Prompt to open it. Or press the Windows key + R, then type cmd or cmd.exe in the Run command box, and press Enter.
Then, you should see the command prompt interface as below.
Step 2. Transfer Files between Local Windows and Remote Linux
Before the transfer, we will explain some terms used in the command. When using the command, you should replace these terms with the actual value.
filename.extension: it’s the name of a file and file extension that’s to be transferred. In this case, we may use mydata.txt and website.txt.
folderName: it’s the name of a folder that’s to be transferred. In this case, we may use the Website folder.
customPort: it’s the custom port you use to connect to your remote Linux server.
localFilePath: it’s the path on your local Windows PC.
username: it’s the username used to log into the remote Linux server.
remoteServerAddress: it’s the server IP of the remote Linux server.
remoteFilePath: it’s the path on the remote Linux server. In this case, we use /home/administrator.
2.1 Transfer a File from Local to Remote Server
For demonstration purposes, we have created a file in the desktop>website named «mydata.txt». First, we need to go to the file’s directory by inputting cd, followed by the file path on our local Windows. In this case, the file is located at desktop\website. Therefore, we enter the following command.
After that, you can see that we navigate to the folder where the file is located.
Then, we use the following command to transfer the «mydata.text» from local Window to the remote Linux server.
scp filename.extension username@remoteServerAddress:remoteFilePath
After entering the command, you will be prompted for the password for connecting to the remote server. Input the password and hit the Enter button, the file will be transferred. In this case, we have transferred the local file mydata.txt (located at desktop/website) to the /home/administrator directory on the remote Linux server.
2.2 Transfer a File from Remote Server to Local
You can run the following command to copy a file from the remote server to your local Windows PC.
scp username@remoteServerAddress:remoteFilePath/filename.extension localFilePath
In this case, we have transferred the mydata.txt (located at home/administrator on the remote server) to the desktop directory on the local server.
2.3 Transfer Multiple Files from Local to Remote Server
The SCP command also allows you to transfer multiple files in a single command. Navigate to the file folder and run the following command.
scp localFilePath/filename1.extension localFilePath/filename2.extension username@remoteServerAddress:remoteFilePath
In this case, we have transferred two local files mydata.txt (located at desktop) and mywebsite.txt (located at desktop/website) to the /home/administrator directory on the remote Linux server.
2.4 Transfer a Folder from Local to Remote Server
Besides files, the SCP command also allows you to securely copy folders between the local and remote server. Use the following command to copy a folder from local to the remote server.
scp -r localFilePath/folderName username@remoteServerAddress:remoteFilePath
In this case, we have transferred the local Website folder, which contains two files mydata.txt and mywebsite.txt, to the /home/administrator directory on the remote Linux server.
2.5 Transfer a File Faster
Adding the -c option after the scp command will compress the file while it’s being transferred. Once the file reaches its destination, it returns to its normal size.
scp -c localFilePath/filename.extension username@remoteServerAddress:remoteFilePath
In this case, we have transferred the local Website folder, which contains two files mydata.txt and mywebsite.txt, to the /home/administrator directory on the remote Linux server.
2.6 Transfer a File Using a Custom Port
The scp command uses the 22 port by default. If you have changed to a custom port, please run the following command to transfer a file. Make sure to capitalize the P.
scp -P customPort localFilePath/filename.extension username@remoteServerAddress:remoteFilePath
In this case, we have transferred the local file mydata.txt to the /home/administrator directory on the remote Linux server using a custom port.
Step 3. Verify the File has been Transferred
Then, Use a preferred editor to open the file. Here, we use the «Nano editor.» In this example, the remoteFilePath is /home/administrator, and the filename.extention can be mydata.txt, mywebsite.txt, and myweb.txt.
nano remoteFilePath/filename.extention
We can also check if the folder has been copied to the remote server. Go to the /home/administrator directory and check if the Website folder is there.
cd /home/administrator
ll
Conclusion
In conclusion, transferring files from a local Windows machine to a remote Linux server using the command prompt (CMD) is a powerful and efficient method for managing data. By following the step-by-step guide outlined in this blog, you can establish a secure connection, utilize the SCP (Secure Copy Protocol) command, and successfully transfer files between these two platforms.
Other Methods to Transfer Files between Windows and Linux Server
The fastest way to transfer files and folders over SSH from Windows 10 to Linux is with the SCP tool. It works within the SSH protocol and allows users to quickly and easily transfer data right over the command-line from one computer to another!
In this guide, we’ll show you how to use SCP on your Windows 10. We’ll cover two methods. The first method is using the Windows PowerShell, Microsoft’s equivalent to the Linux command-line. The second method we will cover is WinSCP, a utility that allows Windows users to transfer files using SCP over SSH with a nice GUI.
Note: for SCP to work on Windows 10, the Linux PC you plan to transfer files to must already be running an OpenSSH server. To set up an SSH server on your Linux system, please follow our guide on the subject!
Method 1 – PowerShell
Windows PowerShell is arguably the best way to use SCP on Windows 10. The reason? Windows 10 users all already have access to PowerShell, and there’s no need to configure or tweak anything to use it. Better still, Microsoft has SCP built into PowerShell, so Windows 10 users don’t even have to install it!
To use SCP in PowerShell, start by launching the PowerShell console on your Windows 10 desktop. To do that, press Win on the keyboard, search for “PowerShell” and launch the app with the blue terminal icon. Then, follow the step-by-step instructions below to learn how to SCP files and folders to your Linux box.
Step 1: Open up Windows Explorer and navigate to the location of the file/folder you wish to transfer to the Linux system. So, for example, if there were a file or folder in “Documents,” the location would be C:\Users\EXAMPLE_USERNAME\Documents\. Then, copy the location data to your clipboard using Ctrl + C.
Step 2: Go back to the PowerShell window, and write cd into the command prompt. Then, after writing cd, right-click with the mouse. By right-clicking, you will paste the location you copied to the clipboard.
Once the location is pasted in the PowerShell prompt, it should look like the following command.
cd C:\Some\location\of\files\or\folders\to\transfer\
Press the Enter key to execute the command.
Step 3: After executing the cd command, PowerShell will be in the directory where the files are that you want to transfer. From here, go back to Windows Explorer and look through this same directory for files/folders you want to transfer.
For example, if you wish to transfer example-photo.png to your Linux PC, take note of the filename. Or, if you’d like to transfer a directory, say, “Important-Files“, remember the folder name.
Step 4: In PowerShell, use the SCP command to transfer a file or directory over SSH to your Linux PC.
Note: when attempting to transfer files or folders, PowerShell may say, “The authenticity of host can’t be established. Are you sure you want to continue connecting?” You must select “yes,” or SCP will fail.
Transfer a file
To transfer a file over SCP from Windows 10 to a Linux PC over SSH, customize the command below. Note that you must change example-photo.png to the actual file you wish to transfer, remote_linux_username to the username on the Linux PC, linux_hostname_or_local_ip to the Linux PC’s hostname/LAN IP address, and /remote/directory/on/linux/pc to a real directory on the Linux PC.
scp example-photo.png remote_linux_username@linux_hostname_or_local_ip:/remote/directory/on/linux/pc
Transfer the contents of a directory
Need to transfer the contents of an entire folder? Make use of scp -r. Remember to change C:\Users\EXAMPLE_USERNAME\Documents\Important-Files to the actual file folder on your Windows 10 PC, remote_linux_username to the username on the Linux PC, linux_hostname_or_local_ip to the Linux PC’s hostname/LAN IP address, and /remote/directory/on/linux/pc to an actual directory on the Linux PC.
scp -r 'C:\Users\EXAMPLE_USERNAME\Documents\Important-Files' remote_linux_username@linux_hostname_or_local_ip:/remote/directory/on/linux/pc
Method 2 – WinSCP
If you’re not a huge fan of the command-line but still need to transfer files from Windows 10 to a remote Linux system via SSH, you can use WinSCP. It adds on a beautiful GUI on top of SCP (it also supports other protocols). Here’s how to use it to transfer files and folders.
Step 1: Download and install the WinSCP application on your Windows 10 PC. To download the app, head over to winscp.net, and click on the green “DOWNLOAD NOW” button. Once the installer is done, launch it and install the program on your Windows 10 PC.
Step 2: After WinSCP is installed, launch it on your Windows 10 desktop. Upon launching, you will see a “Login” window. In the login window, look for “File protocol” and change it from “SFTP” to “SCP.”
Step 3: Find “Host name” and write out the hostname of the Linux PC. Can’t figure out the hostname? The LAN IP address also works.
Step 4: Find the “User name” text-box, and write in the name of the user on the remote Linux PC in the box.
Step 5: Find the “Password” box and write in the name of the password to the remote Linux PC. Then, click “Save” to save the information.
Step 6: Select the “Login” button to access your remote Linux PC over SCP/SSH. While logging in, be sure to select “Yes” when WinSCP asks, “Continue connecting to an unknown server and add its host key to a cache?”
Step 7: Open up the Windows Explorer and browse for the file or folder you wish to share over SCP/SSH protocol. Then, drag it into the WinSCP window. It will instantly transfer to the remote Linux PC using SCP!


This guide has everything you need to successfully transfer files from Windows to Linux with Rsync and SSH. Rsync is a reliable tool for file synchronization, and when combined with SSH, it ensures secure file transfers between systems. In this step-by-step guide, we’ll show you how to set up Rsync and SSH on your Windows computer and Linux server, making file transfers effortless.
Setting up SSH on both Windows and Linux systems
Let’s start by setting up SSH on both your Windows and Linux environments.
For Windows, you can use the built-in OpenSSH client, which was introduced in Windows 10 version 1809 and later. To enable the OpenSSH client, open the Windows PowerShell or Command Prompt and run the following command:
Get-WindowsCapability -Online | Where-Object {$_.Name -like 'OpenSSH.Client*'} | Add-WindowsCapability -OnlineThis command will install the OpenSSH client on your Windows system.

Once the installation is complete, you can test the SSH connection by running the following command:
ssh user@remote_linux_serverReplace user with the username you use to log in to your Linux server, and remote_linux_server with the IP address or hostname of your Linux server.

On the Linux side, SSH is typically pre-installed, but you may need to ensure that the SSH server (sshd) is running. Open a terminal on your Linux system and run the following command to check SSH is available or not:
ssh -VIf this command shows an output, it means the SSH is installed on the machine. If not install OpenSSH and also make sure to check the status of the SSH on your machine before going to the next steps.
Refer to this article: How to install and use SSH on Linux for OpenSSH installation and checking status of it.

Now that you have SSH set up on both your Windows and Linux systems, you’re ready to move on to the next step.
Installing and configuring Rsync on Windows and Linux
Rsync is a powerful file synchronization tool that can be used in combination with SSH to efficiently transfer files between Windows and Linux systems. Let’s start by installing Rsync on your Windows computer.
For Windows, you can download and install the Cygwin tool, which includes the Rsync utility. Visit the Cygwin website (https://www.cygwin.com/) and download the Cygwin installer. During the installation process, make sure to select the “Rsync” package from the list of available packages.

Alternatively, you can use the WinSCP application, which includes a built-in Rsync implementation. Visit the WinSCP website (https://winscp.net/eng/index.php) and download the latest version of the software.
On the Linux side, Rsync is typically pre-installed, but you can install it using your distribution’s package manager. For example, on Ubuntu or Debian-based systems, you can run the following command:
sudo apt-get update
sudo apt-get install rsync
Once Rsync is installed on both your Windows and Linux systems, you can configure it to work seamlessly with SSH.
Also, you’ll need to ensure that the SSH server is set up to allow Rsync connections in the Linux machine. You can do this by editing the SSH server configuration file, typically located at /etc/ssh/sshd_config. Look for the line that says Subsystem sftp /usr/lib/openssh/sftp-server and uncomment it (remove the “ at the beginning of the line).
vi /etc/ssh/sshd_configSave the configuration file and restart the SSH service using the following command:
sudo systemctl restart sshThe command to restart the SSH service can differ based on the Linux distribution you’re using. It’s essential to use the appropriate command that corresponds to the OpenSSH version installed on your machine to ensure a smooth and successful restart.

With Rsync and SSH set up on both your Windows and Linux systems, you’re now ready to start transferring files between the two environments.
Experience the Power of Veeble VPS Hosting
Experience the power of Veeble VPS hosting. Our plans are affordable, reliable, and packed with features that will help you take your business to the next level.
Choose Your Plan
Transferring files from Windows to Linux using Rsync and SSH
Now that you have Rsync and SSH configured on both your Windows and Linux systems, let’s explore how to use them to transfer files from your Windows computer to your Linux server.
Open a Command Prompt or PowerShell window on your Windows computer and navigate to the directory containing the files you want to transfer. Then, use the following Rsync command to copy the files to your Linux server:
rsync -avzc --delete -e "ssh" /path/to/local/files user@remote_linux_server:/path/to/remote/destination
When using rsync in Cygwin, you need to reference Windows directories through the /cygdrive mount point. For example, if your folder to sync is located in the Downloads directory of your user profile, the path would be something like /cygdrive/c/Users/your_username/Downloads/<your folder>.
Here’s what each part of the command does:
rsync: Invokes the Rsync utility.-avzc: Enables the following options:-a: Preserves file attributes and permissions.-v: Enables verbose mode, providing more detailed output.-z: Compresses the data during transfer to reduce the amount of data sent.-c: Checks the file checksums to ensure data integrity.--delete: Deletes any files on the remote server that are not present in the local directory.-e "ssh": Specifies that the transfer should be done over an SSH connection./path/to/local/files: The path to the local files or directory you want to transfer.user@remote_linux_server:/path/to/remote/destination: The SSH username and the path to the remote destination on your Linux server.
Replace the placeholders in the command with the appropriate values for your setup.
The first time you run this command, it will prompt you to accept the host key of the remote Linux server. Once you’ve accepted the host key, the transfer will begin, and you’ll see the progress displayed in the console.
If you need to transfer files regularly, you can create a batch file or a PowerShell script to automate the process. This will save you time and ensure that the file transfers are consistent and reliable.
Troubleshooting common issues during file transfer
While Rsync and SSH generally provide a seamless file transfer experience, you may occasionally encounter some issues. Let’s explore some common problems and their solutions.
- SSH connection refused: If you encounter an error message indicating that the SSH connection was refused, it’s likely that the SSH server on your Linux system is not running or is not accessible. Please refer to the article: Troubleshooting “SSH Connection Refused” Error and Regaining Access to resolve it.
- Permission denied: If you receive a “Permission denied” error during the file transfer, it means that the user account you’re using on the Linux server does not have the necessary permissions to access the destination directory. You can either log in as a user with higher privileges or change the permissions of the destination directory using the
sudo chmodcommand.
Reference: Managing File Ownership and Group Ownership in Linux - Checksum mismatch: Rsync uses checksums to ensure data integrity during the transfer process. If you encounter a checksum mismatch error, it could be due to a network issue or a problem with the source files. Try running the Rsync command with the
--checksumoption to perform a more thorough checksum verification. - Insufficient disk space: If the transfer fails due to insufficient disk space on the remote Linux server, you’ll need to free up some space or transfer the files to a different location with more available storage.
- Firewall or network issues: If the transfer is slow or intermittent, it could be due to firewall or network-related issues. Ensure that the necessary ports (typically 22 for SSH) are open and accessible between your Windows computer and the Linux server.
To troubleshoot these issues, you can try the following steps:
- Check the SSH server logs on the Linux system for any error messages.
- Verify the user permissions and directory access on the Linux server.
- Run the Rsync command with additional verbose options (
-vvv) to get more detailed output. - Test the network connectivity between your Windows computer and the Linux server using tools like
pingortelnet. - Temporarily disable any firewalls or antivirus software that might be interfering with the file transfer.
By addressing these common issues, you can ensure a smooth and reliable file transfer process between your Windows and Linux systems.
Best practices for efficient file transfer between Windows and Linux
To get the most out of your file transfers using Rsync and SSH, consider the following best practices:
- Use compression: Enabling the
-zoption in the Rsync command compresses the data during the transfer process, which can significantly reduce the amount of data sent over the network, especially for large files or directories. - Exclude unnecessary files: Use the
--excludeoption in the Rsync command to exclude files or directories that you don’t need to transfer, such as temporary files, log files, or hidden system files. This can help speed up the transfer process and reduce the amount of data transferred.
Refer: Optimizing Rsync: Ignore Unwanted Files and Directories - Maintain a consistent file structure: Try to keep the file structure and directory hierarchy the same on both the Windows and Linux systems. This will make it easier to manage and locate files after the transfer is complete.
- Use relative paths: When specifying the source and destination paths in the Rsync command, use relative paths instead of absolute paths. This will make the command more portable and easier to use in different scenarios.
- Automate the transfer process: Create a batch file or a PowerShell script to automate the Rsync command, making it easy to run the file transfer regularly or as needed.
- Monitor the transfer progress: Use the verbose options (
-vvv) in the Rsync command to get detailed output on the transfer progress, file sizes, and any errors that may occur. This will help you troubleshoot issues more effectively. - Leverage incremental backups: Rsync is particularly useful for performing incremental backups, where it only transfers the files that have changed since the last backup. This can save a significant amount of time and bandwidth, especially for large data sets.
- Consider using a graphical tool: While the command-line Rsync approach is powerful, you may also want to explore graphical tools like WinSCP or FileZilla, which provide a user-friendly interface for managing file transfers between Windows and Linux.
- Secure the SSH connection: Ensure that the SSH connection is secure by using strong passwords or SSH keys for authentication. Avoid using weak or default passwords, and consider implementing two-factor authentication for added security.
- Monitor disk space on the Linux server: Keep an eye on the available disk space on the Linux server to ensure that there is enough room to accommodate the transferred files. Set up alerts or monitoring tools to notify you when disk space is running low.
By following these best practices, you can streamline the file transfer process, improve efficiency, and maintain the security and integrity of your data during the transfer between your Windows and Linux systems.
Alternatives to Rsync and SSH for file transfer
While Rsync and SSH are a powerful combination for transferring files between Windows and Linux, there are alternative tools and methods you can consider:
- FTP/FTPS/SFTP: File Transfer Protocol (FTP) and its secure variants, FTPS (FTP over SSL/TLS) and SFTP (SSH File Transfer Protocol), are widely used for file transfers. These protocols can be used with various FTP client applications, such as FileZilla or WinSCP, to transfer files between Windows and Linux systems.
- Cloud storage services: Services like Dropbox, Google Drive, or Microsoft OneDrive provide a convenient way to transfer files between Windows and Linux systems. Simply upload the files to the cloud storage, and then download them on the other system.
- Network file sharing: You can set up network file sharing between your Windows and Linux systems using protocols like SMB (Server Message Block) or NFS (Network File System). This allows you to access and transfer files directly between the two systems over the network.
- Web-based file transfer tools: There are various web-based file transfer tools, such as WeTransfer or Sendspace, that you can use to transfer files between your Windows and Linux systems. These tools typically provide a simple and user-friendly interface for uploading and downloading files.
- Portable storage devices: If you have a portable storage device, such as a USB flash drive or an external hard drive, you can use it to physically transfer files between your Windows and Linux systems.
Each of these alternatives has its advantages and disadvantages, and the choice will depend on your specific requirements, such as the size of the files, the frequency of transfers, and the level of security needed.
For example, FTP/FTPS/SFTP may be a good option if you need to transfer files regularly, but they may not provide the same level of security as Rsync and SSH. Cloud storage services can be convenient, but they may not be suitable for transferring sensitive or large files. Network file sharing can be efficient, but it may require additional configuration and setup.
When choosing an alternative method, consider factors such as ease of use, transfer speed, security, and compatibility with your Windows and Linux systems. Evaluate the trade-offs and select the solution that best fits your needs.
By following these guidelines, you’ll be able to seamlessly transfer files between your Windows computer and Linux server, whether you need to perform regular backups, share important documents, or synchronize project files. The combination of Rsync and SSH provides a robust and secure solution for your file transfer needs.
Scale Without Limits
Adapt to changing demands with flexible and scalable solutions. Grow your business seamlessly.
Choose Your Plan