
Are you seeking complete guidance on transferring files to a flash drive in Windows 11? Now look no further! This article will offer you a detailed tutorial to ensure smooth file transfers to a flash drive.
Whether you want to create backups, share data among devices, or expand the storage capacity of your computer, let’s get started with this article from EaseUS.
Preparing the Flash Drive
Before beginning file transfers, make sure that you prepare your flash drive. Preparing the flash drive guarantees that the data transfer procedure runs smoothly and without disruptions. You can do it by taking two easy actions:
First, check the flash drive format for compatibility with Windows 11. FAT32, exFAT, and NTFS are examples of common file systems. If necessary, reformat the drive accordingly.
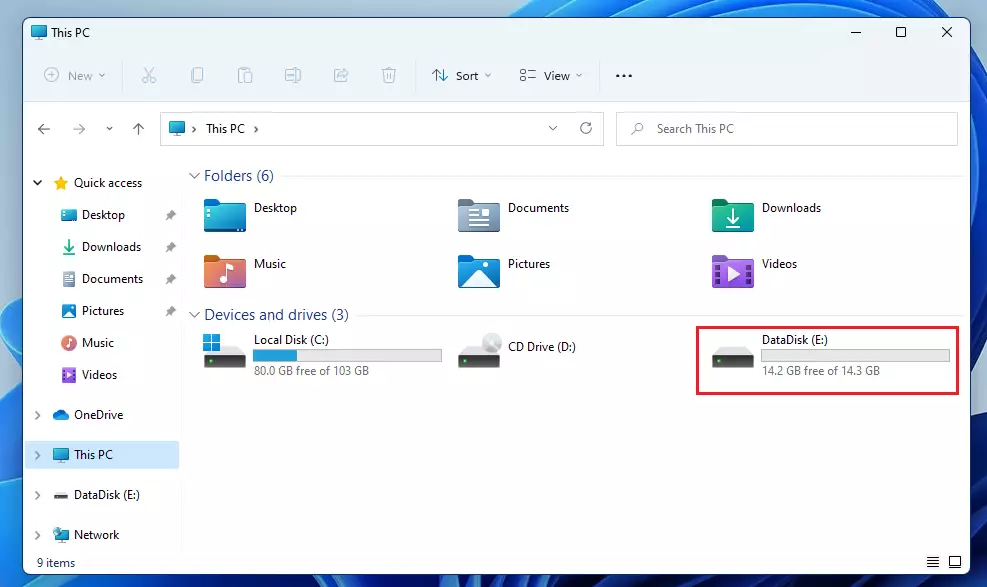
Second, examine the available storage capacity to avoid any transfer glitches caused by a lack of space. To check capacity, right-click the drive icon in File Explorer and select «Properties.»
You can ensure a smooth file transfer experience by ensuring adequate storage and the appropriate formats. Now that you are prepared to transfer files to a flash drive on Windows 11, proceed to the next section to explore the article and discover the three methods showcased within.
Moreover, ensure to share this invaluable article with your friends and acquaintances. Equip them with the expertise to prepare their flash drives for safe and secure data transfers in Windows 11.
Way 1. Transfer Files to Flash Drive Windows 11 via File Explorer
Generally, you can simply transfer files to a flash drive via File Explorer on Windows 11. It’s a flexible application that enables easy access and administration of your files and folders.
Follow the steps given below to transfer files to a flash drive in Windows 11 via File Explorer:
Step 1. Insert your flash drive into your device and open File Explorer by pressing the «Windows» + «E.»
Step 2. Navigate to the folder you want to transfer to the flash drive.
Step 3. Choose the desired files or folders by clicking on them.
Step 4. Now right-click on the selected items and select «Send to» > your flash drive.
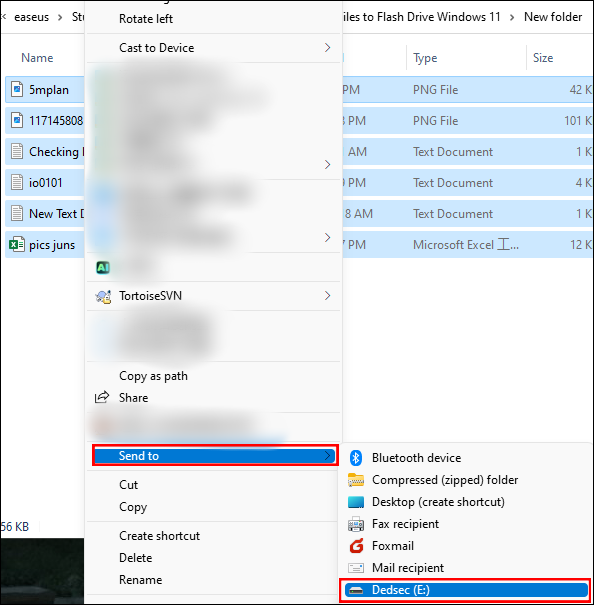
Step 5. Wait for the process to finish.
If you encounter the file explorer not responding issue, please go to the following page and learn how to fix it.
Fix File Explorer Not Responding on Windows 11/10 | 8 Plans
When File Explorer not responding on Windows 11/10, how do we fix it? Do not panic. This article will offer you a detailed guide to resolve the problem. Read more >>
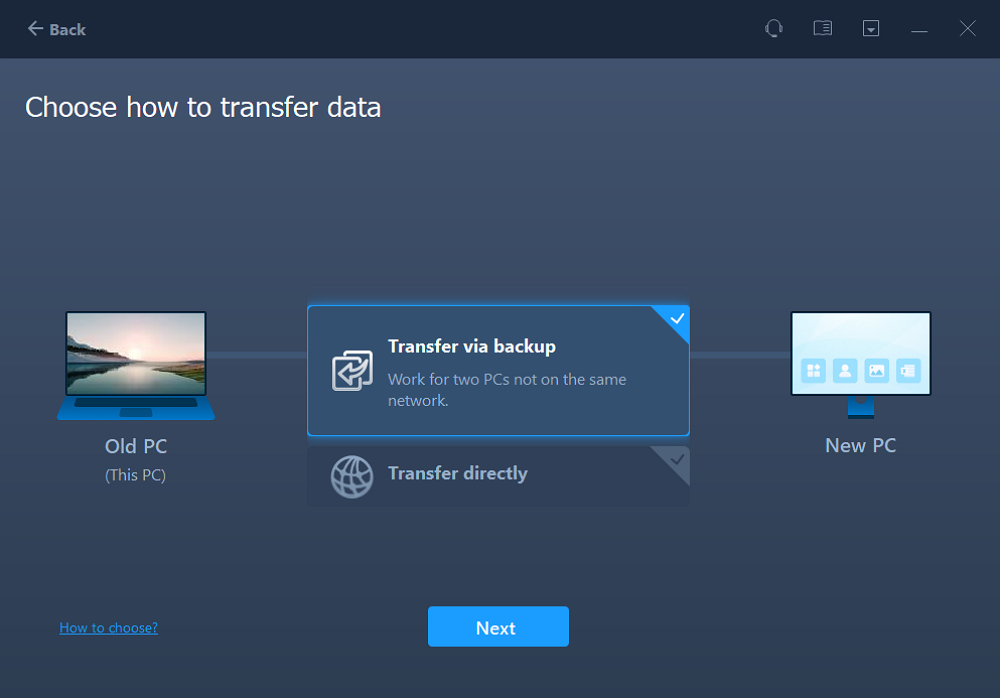
For a hassle-free experience, consider copying data to a flash drive using a specialized transfer application in Windows 11.
EaseUS Todo PCTrans Professional is a powerful transfer tool known for its speed, reliability, and efficiency. It provides sophisticated features to help you expedite your file transfer process, including quicker transfer rates, increased dependability, and optimal performance for large files.
Now, follow the steps here to transfer your files to the flash drive:
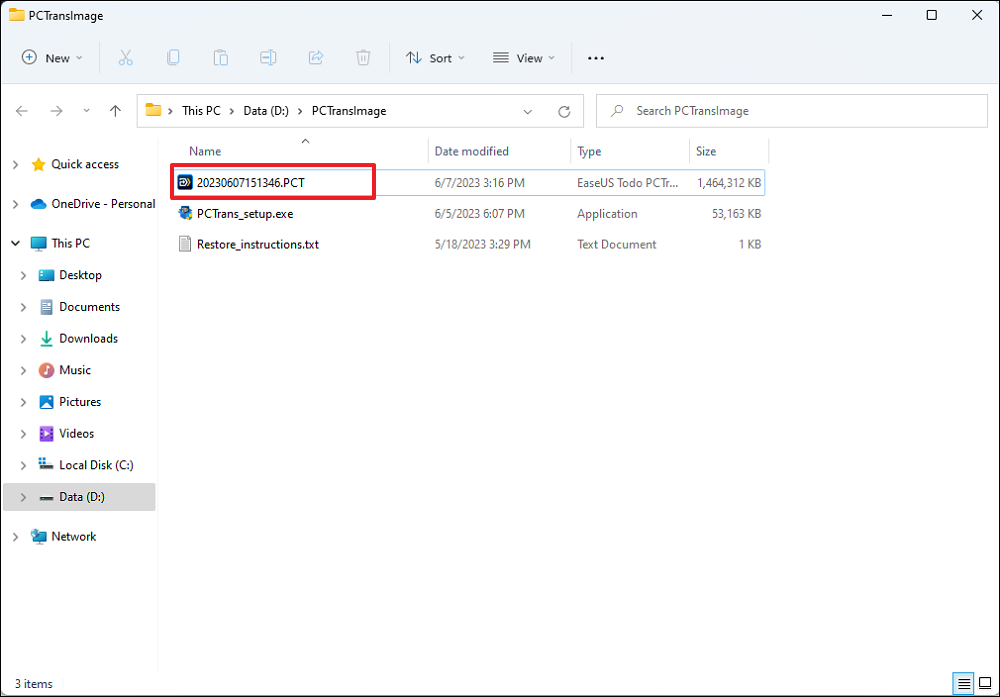
Step 1. Create a backup file of the source hard drive
Launch EaseUS Todo PCTrans on your Windows computer. Click «data transfer» and select «Transfer via backup.»
Hover your mouse over «Data Backup», and click «Next». Later, confirm the default settings of the file name and file path, or you can customize the settings on your own.
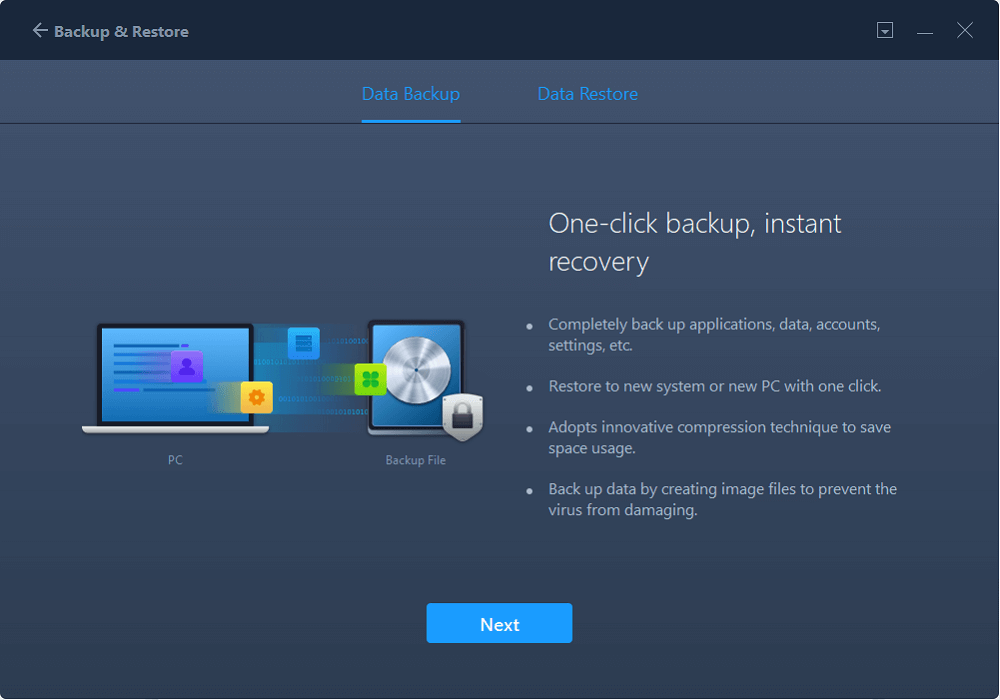
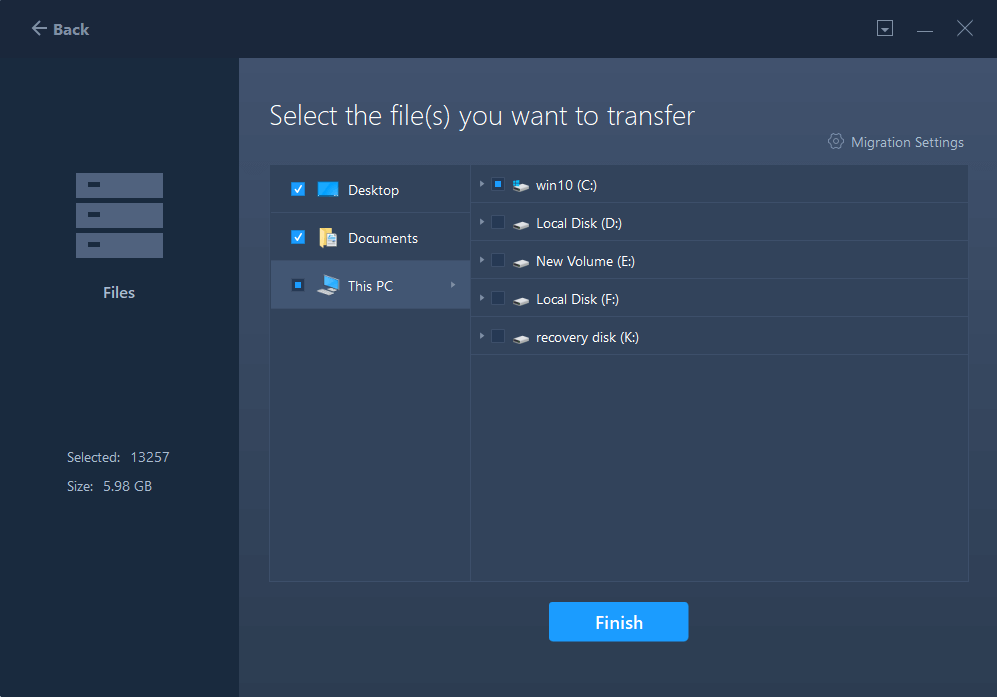
Now select the items you want to transfer to the other hard drive. EaseUS Todo PCTrans allows users to create backup files of multiple file types, including applications, personal data, and user accounts. To transfer files from one drive to another, deselect the «Applications» and «Accounts», hover your mouse over «Files», and click «Edit».

This is where you need to select files on the source drive. Expand the drive so you can selectively choose desired files, after then click «Finish». In the end, click «Backup». Wait for the process completes.
Step 2. Restore the file to the destination drive
Launch EaseUS Todo PCTrans and follow the same way to reach the step of selecting a transfer method. This time choose «Data Restore» and click «Next».
Choose the existing backup file presenting on the interface, or navigate to the exact file path where the backup file is, click «Restore».
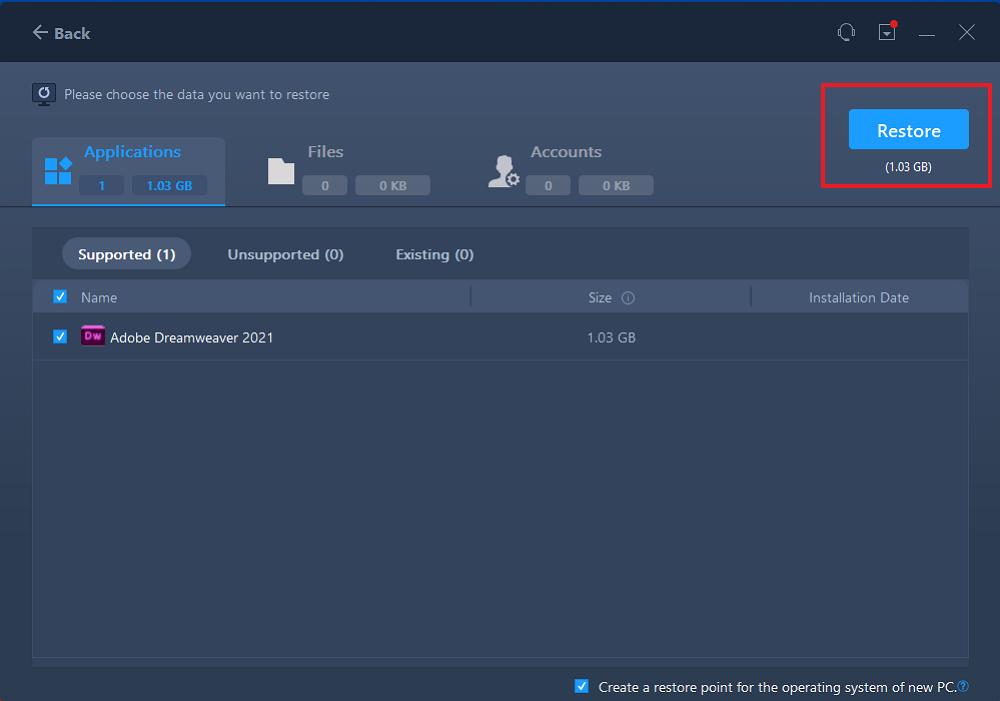
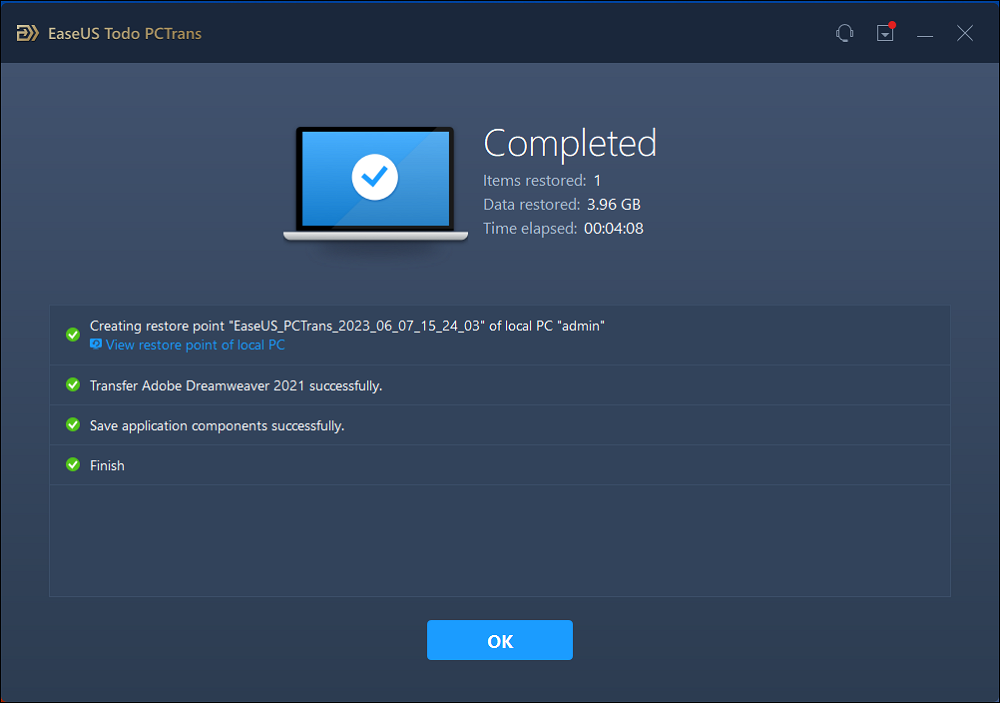
You’re back to the «Files», click «Edit» to get in. The backup file is viewable here. You need to click the pencil icon to set the target location, which is the other hard drive, and submit the change. After the basic settings, click «Finish» and finally «Restore». Wait patiently until the transfer process is over.
This tool not only transfers regular files to flash drives, but it also supports applications and user files. Below are its main features:
- Transfer programs, files, settings, and multiple data between computers.
- Transfer Adobe software to another PC with the product keys; also support finding Office and Windows keys.
- Rescue data from a broken or dead computer.
- Migrate software from one drive to another.
So, download and try EaseUS Todo PCTrans Professional to experience seamless file transfers like never before. Do not forget to recommend it to your friends, enabling them to enjoy the same convenience and efficiency.
Way 3. Transfer Files to Flash Drive Windows 11 via Command Prompt
In this part, you will look at how to use Command Prompt to transfer data to a flash drive on Windows 11. Command Prompt is a robust command-line interpreter in Windows that enables comprehensive system control and file operations using text-only commands. While effective, this technique needs experience with Command Prompt and command-line tools, making it a little more complex.
Here are the steps:
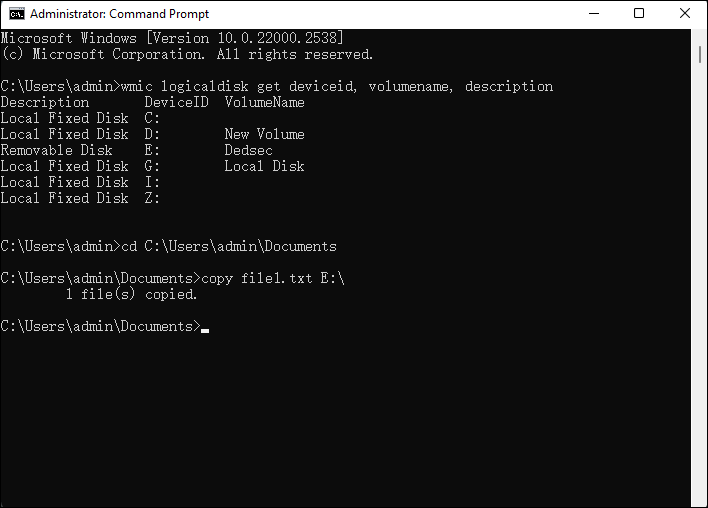
Step 1. To launch Command Prompt, hit the Windows key, type «cmd,» and press Enter.
Step 2. Type wmic logicaldisk get deviceid, volumename, description to list all the drives connected to your computer, including the flash drive. Note the drive letter of your flash drive (e.g., E:).
Step 3. Use the cd command to navigate to the folder containing the files you want to copy. For example, to navigate to the Documents folder, type cd C:\Users\admin\Documents (Replace admin with your actual username).
Step 4. Here are two options:
- To copy a single file to the flash drive, you can type copy file1.txt E:\ (Replace file1.txt with the actual name and extension of the file).
- To copy an entire folder to the flash drive, use the xcopy command with the /s switch to include subfolders: xcopy FolderName E:\ /s (Replace FolderName with the name of the folder you want to copy, and «E:» with the drive letter and root directory of your flash drive.)
- Tip
- If prompted to overwrite existing files, type A to copy all files or N to skip copying files that already exist on the flash drive.
Step 5. After the transfer is complete, safely eject the flash drive.
By following these steps, you can efficiently use cmd to transfer files and folders to your flash drive in Windows 11.
If you find any methods in this page helpful, share it on your social media to help more users.
Conclusion
To sum up, the goal of this extensive guide was to provide Windows 11 users with the skills and resources they needed to effectively transfer data to a flash drive. You must have explored three techniques to meet several needs, from using File Explorer for simple transfers to investigating Command Prompt for more experienced users.
However, you must utilize EaseUS Todo PCTrans if you want a more straightforward and user-friendly experience. It provides a smooth solution for managing your data with its sophisticated features, which include quicker transfer speeds, increased dependability, and optimum performance for huge files.
Transfer Files to Flash Drive Windows 11 FAQs
This section will address some common queries regarding transferring files to a flash drive on Windows 11. So, if you still have questions, you may find the answers right here.
1. Does Windows 11 have a transfer tool?
The answer is NO. Windows Easy Transfer is no longer available on Windows 10 and 11. Thus, you can only resort to third-party transfer software like EaseUS Todo PCTrans.
2. Why can’t I transfer files to my flash drive in Windows?
Several factors could prevent file transfer to a flash drive, including insufficient storage space, file system compatibility issues, or hardware malfunctions.
3. Why is my USB read-only?
A USB drive may become read-only due to write protection settings, file system errors, or physical damage. To resolve this, check if the drive has a physical write-protection switch and ensure it is in the correct position.
Moving files to a flash drive in Windows 11 is pretty simple. Plug in your flash drive, open File Explorer, find the files you want to transfer, and then drag and drop them into your flash drive. That’s it! You’ll see your files copied to your flash drive in no time.
Step by Step Tutorial: Transferring Files to a Flash Drive in Windows 11
Let’s break down the process of transferring files to a flash drive in Windows 11 into easy steps.
Step 1: Plug in Your Flash Drive
Plug your flash drive into an available USB port on your computer.
Make sure your flash drive is securely connected. You might notice a notification confirming that your device is recognized.
Step 2: Open File Explorer
Open the File Explorer by clicking on the folder icon located on your taskbar.
File Explorer is your main tool for navigating through files and folders on your computer. You can also open it by pressing the Windows and E keys together.
Step 3: Locate Your Files
Navigate to the folder where the files you want to transfer are stored.
Take your time to find the exact files. You can use the search bar at the top right of the File Explorer window if you have a lot of files and folders.
Step 4: Select Your Files
Click on the files you want to transfer. Hold down the Ctrl key to select multiple files.
Selected files will be highlighted. Double-check that you have all the desired files selected before proceeding.
Step 5: Drag and Drop Files
Drag the selected files to your flash drive’s icon, which is typically found in the left pane under “This PC.”
You’ll see a progress bar indicating the transfer status. Larger files or multiple files might take longer to copy.
Step 6: Safely Eject Your Flash Drive
Right-click on the flash drive icon in File Explorer and select “Eject” before removing it from the USB port.
This step ensures that all files are completely transferred and prevents data corruption.
After you complete this action, your files will be safely copied to your flash drive. You can now use these files on any other computer or device with a USB port.
Tips for Transferring Files to a Flash Drive in Windows 11
- Organize Your Files: Before transferring, organize your files in their respective folders to make them easier to find later.
- Check Available Space: Ensure your flash drive has enough storage space for the files you want to transfer.
- Use USB 3.0: If you have USB 3.0 ports and a compatible flash drive, use them for faster transfer speeds.
- Scan for Viruses: Run a quick virus scan on your flash drive to prevent transferring any malicious files.
- Label Your Flash Drive: Assign a recognizable name to your flash drive to easily identify it in File Explorer.
Frequently Asked Questions
How do I know if my files have transferred successfully?
You will see a progress bar during the transfer, and once complete, the files will appear in your flash drive’s folder.
Can I transfer multiple folders at once?
Yes, you can select multiple folders and drag them all to your flash drive at the same time.
What if my flash drive is not recognized?
Try plugging it into a different USB port or restarting your computer. Ensure your flash drive is working properly by testing it on another device.
Is it safe to remove my flash drive without ejecting it first?
No, always eject your flash drive safely to prevent data loss or corruption.
How can I speed up the transfer process?
Using a USB 3.0 port and flash drive can significantly speed up the transfer. Also, transferring fewer files at a time can help.
Summary
- Plug in your flash drive.
- Open File Explorer.
- Locate your files.
- Select your files.
- Drag and drop files to the flash drive.
- Safely eject your flash drive.
Conclusion
Transferring files to a flash drive in Windows 11 is a straightforward task that anyone can master with a few simple steps. Whether you’re moving documents for a school project or sharing photos with friends, knowing how to transfer your files efficiently and safely is essential.
Remember to organize your files beforehand, check that your flash drive has enough space, and always safely eject the device to avoid potential data loss. For further reading, you might want to explore tips on optimizing flash drive performance or troubleshooting common issues. Now that you’ve got the hang of it, why not transfer some files and see the process in action? Happy transferring!
Matthew Burleigh has been writing tech tutorials since 2008. His writing has appeared on dozens of different websites and been read over 50 million times.
After receiving his Bachelor’s and Master’s degrees in Computer Science he spent several years working in IT management for small businesses. However, he now works full time writing content online and creating websites.
His main writing topics include iPhones, Microsoft Office, Google Apps, Android, and Photoshop, but he has also written about many other tech topics as well.
Read his full bio here.
Applies ToWindows 11 Windows 10
Если вы переходите на новый компьютер, вы можете взять с собой файлы с помощью внешнего запоминающего устройства, такого как USB-накопитель, SD-карта или внешний жесткий диск. Сначала вы скопируете файлы на диск, а затем перенесите их на новый компьютер.
Примечание: Сведения о том, как перемещать файлы на новый компьютер без использования запоминающего устройства, см. в статье Перемещение файлов на новый компьютер с Windows с помощью OneDrive. OneDrive могут безопасно хранить ваши файлы, поэтому они будут создаваться и защищаться в облаке и доступны с любого устройства, включая новый компьютер.
Чтобы переместить файлы с устройства Windows с помощью внешнего запоминающего устройства, следуйте этим инструкциям.
Резервное копирование файлов с текущего компьютера на внешнее запоминающее устройство
-
Подключение внешнего запоминающее устройство к текущему компьютеру с Windows
-
На панели задач выберите проводник
-
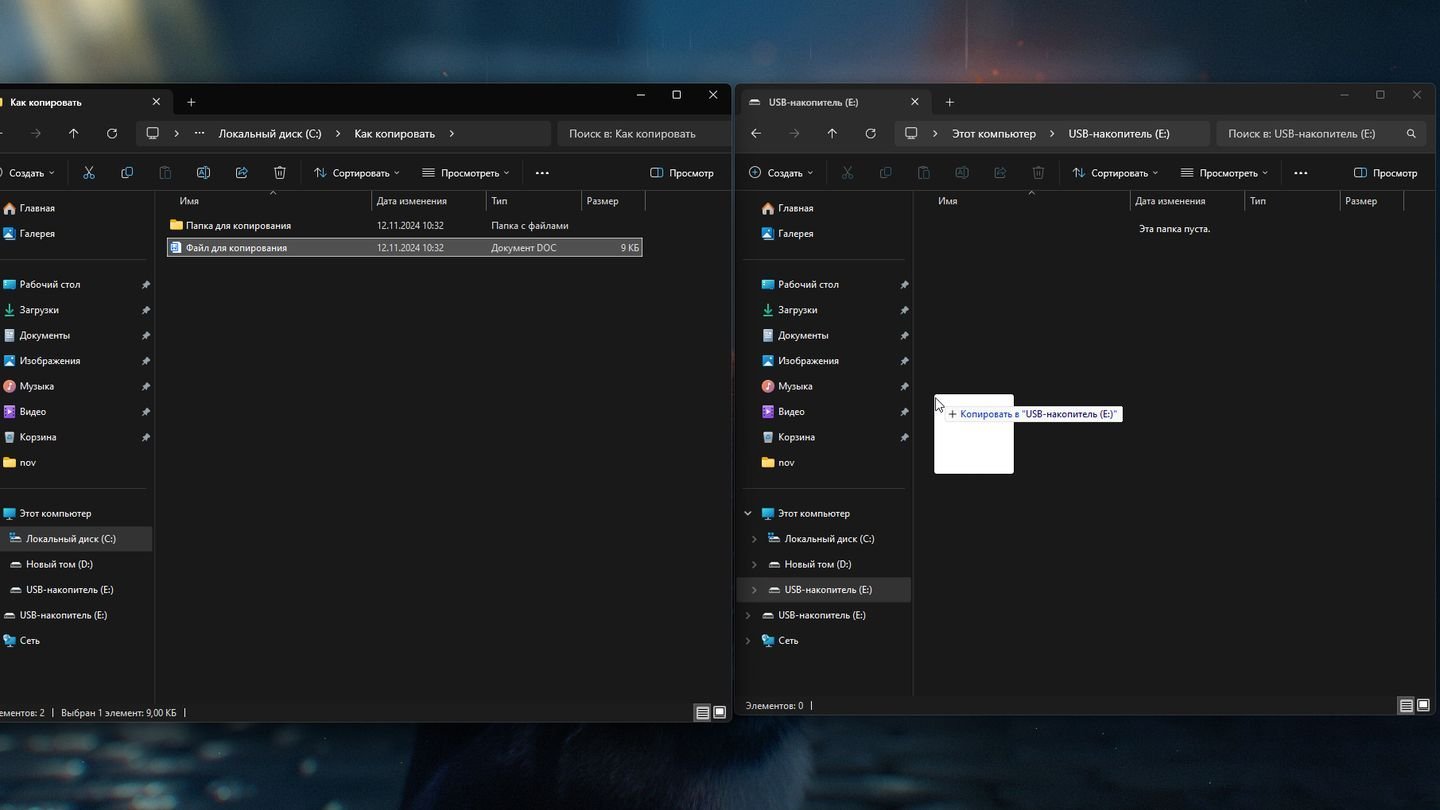
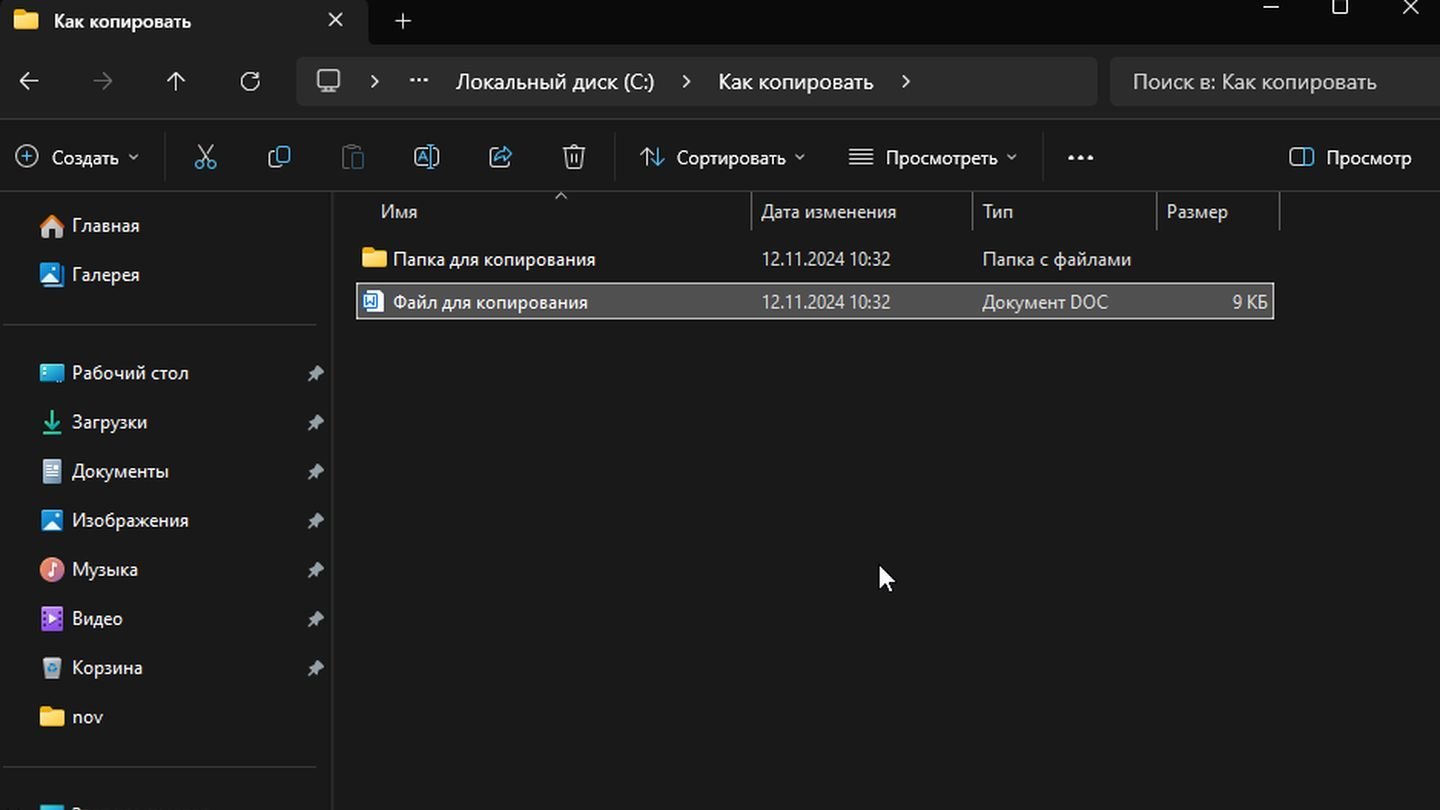
Найдите файлы, которые нужно скопировать, или папки, в которых хранятся эти файлы.
-
Чтобы скопировать несколько файлов, удерживайте нажатой клавишу CTRL при выборе дополнительных файлов или папок.
-
После выделения файлов и папок выберите и удерживайте (или щелкните правой кнопкой мыши) папки, а затем выберите Показать дополнительные параметры > Отправить. Выберите имя внешнего запоминающего устройства в списке параметров
-
Файлы и папки начнут копироваться на диск. При наличии файлов, хранящихся в нескольких расположениях, может потребоваться повторить шаги 3–5. Обязательно перемещайте файлы из папок «Документы», «Рабочий стол«, «Загрузки«, «Избранное», «Музыка», «Изображения» и «Видео».
Проверка правильности файлов и удаление запоминающего устройства
Копировав или переместив файлы на внешнее запоминающее устройство, можно проверить, что они сохранены в правильном расположении, просмотрев внешний диск.
После этого необходимо безопасно извлечь диск, чтобы не потерять и не повредить файлы. Чтобы удалить устройство, выберите Извлечь перед отключением диска от компьютера.
Переместив файлы на внешнее запоминающее устройство, вы сможете перенести их на новый компьютер с Windows.
Передача файлов на новый компьютер
-
Подключение внешнего запоминающее устройство к новому компьютеру с Windows
-
Выберите проводник на панели задач
-
На левой панели направляющей выберите Этот компьютер
-
Найдите внешний диск и дважды щелкните соответствующий значок
-
Найдите папку, в которой сохраняются файлы, и дважды щелкните значок этой папки.
-
Чтобы выбрать все файлы в этом расположении, выберите > Выбрать все. Все файлы в этой папке будут выделены. Чтобы скопировать только один файл, выберите его.
-
После выбора на панели инструментов будут доступны параметры Вырезать и Копировать . Выберите , чтобы вырезать или скопировать выбранные файлы.
Чтобы вставить файл, перейдите в расположение, куда нужно вставить файл, а затем щелкните значок Вставить на панели инструментов.
-
Ваши файлы начнут передаваться на компьютер с Windows. Обратите внимание, что это может занять время в зависимости от количества и размера передаваемых файлов.
-
После копирования файлов можно перейти к их новому расположению, чтобы убедиться, что файлы успешно перенесены.
Нужна дополнительная помощь?
Нужны дополнительные параметры?
Изучите преимущества подписки, просмотрите учебные курсы, узнайте, как защитить свое устройство и т. д.
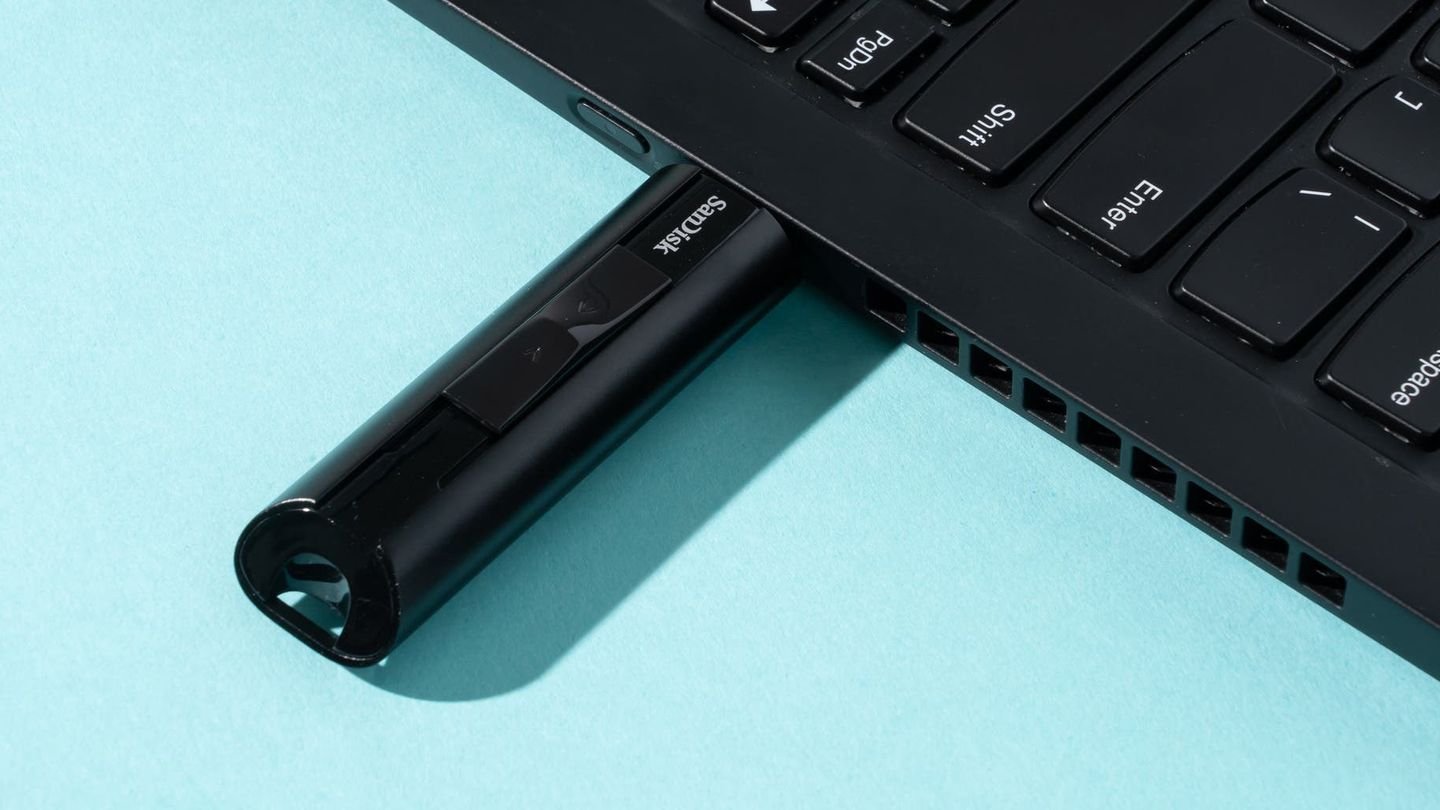
Флешка — один из самых распространенных способов переноса информации с одного устройства на другое. В этом материале мы подробно рассмотрим весь процесс, начиная от подготовки USB-накопителя к работе и заканчивая решением распространенных проблем.
Подготовка флешки к работе
Перед тем как начать перенос файлов, важно убедиться, что флешка готова к использованию.
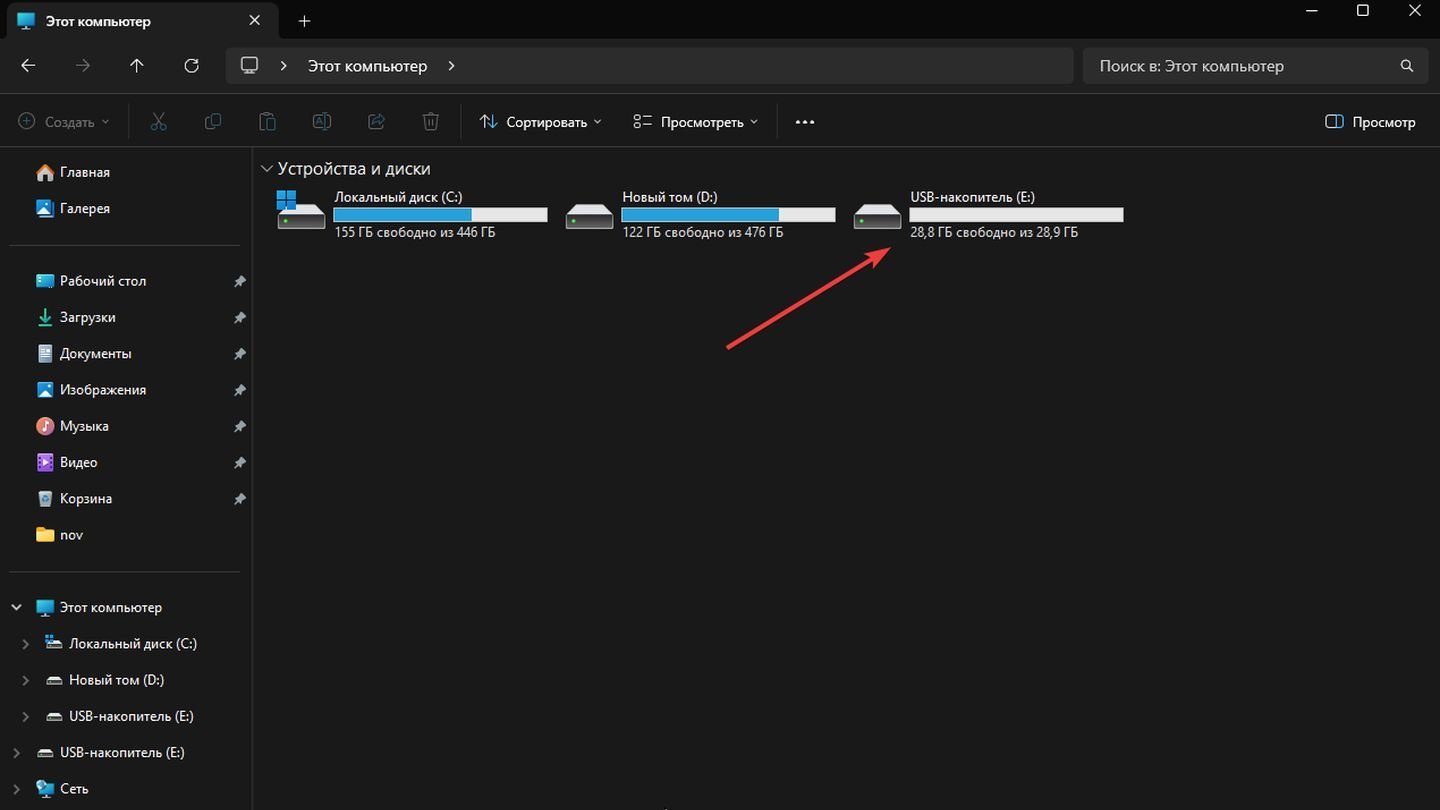
Проверка работоспособности флешки
Источник: New York Times / Подключение флешки
- Подключите флешку к USB-порту компьютера;
Источник: CQ / Windows 11
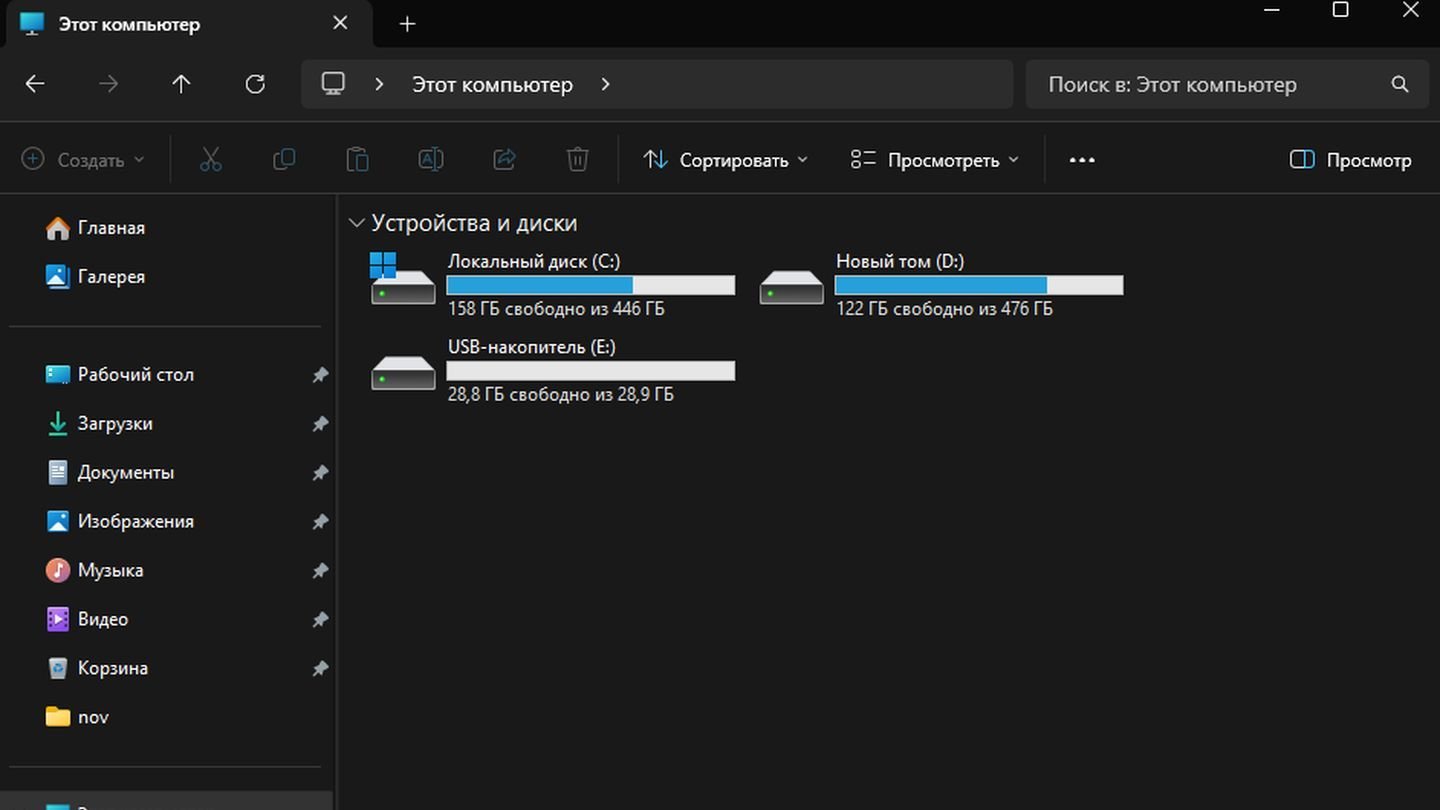
- Убедитесь, что устройство распознано: на экране должен появиться новый съемный диск в проводнике (для Windows) или на рабочем столе (для macOS);
Источник: CQ / Windows 11
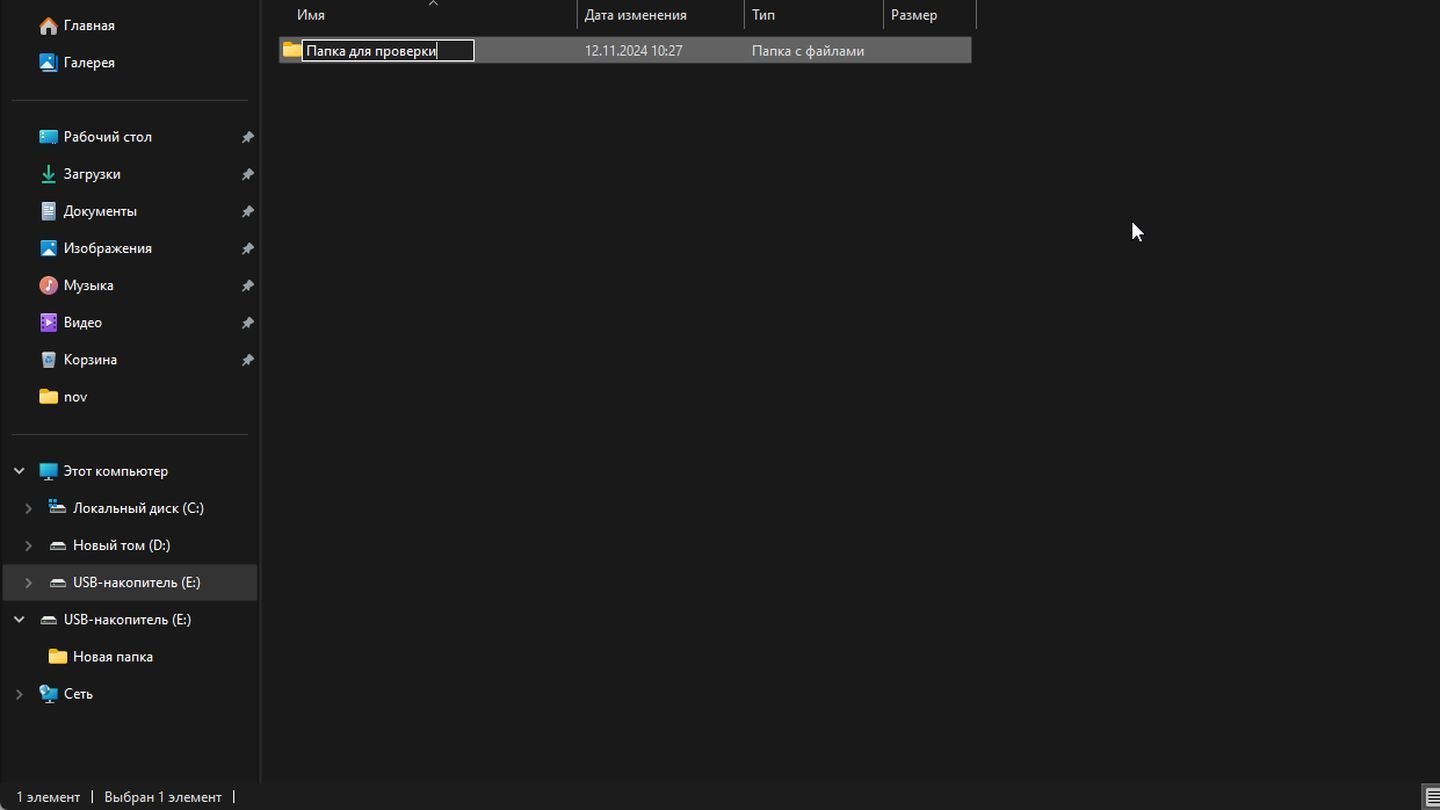
- Проверьте флешку на ошибки: откройте ее и попробуйте создать тестовый файл или папку.
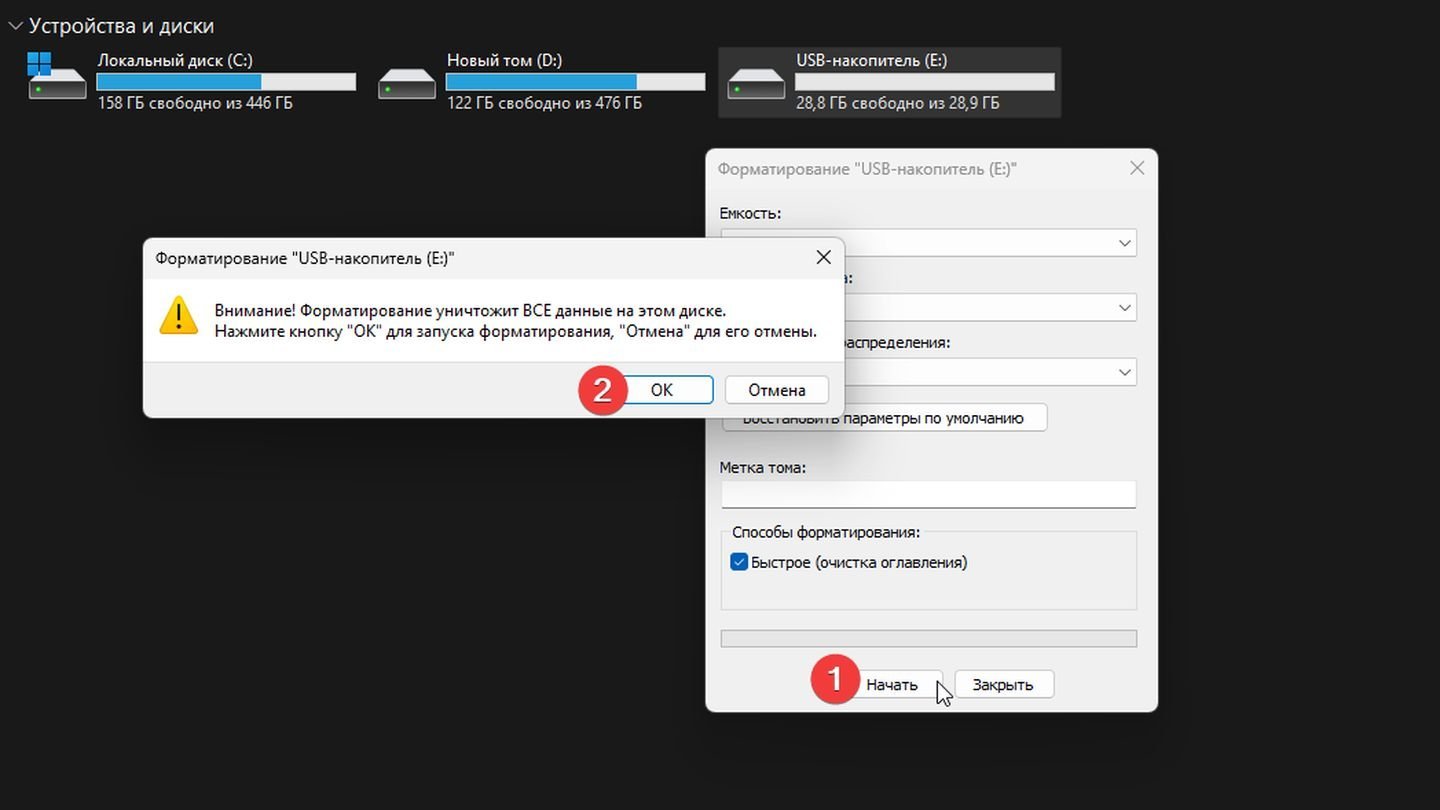
Форматирование флешки (при необходимости)
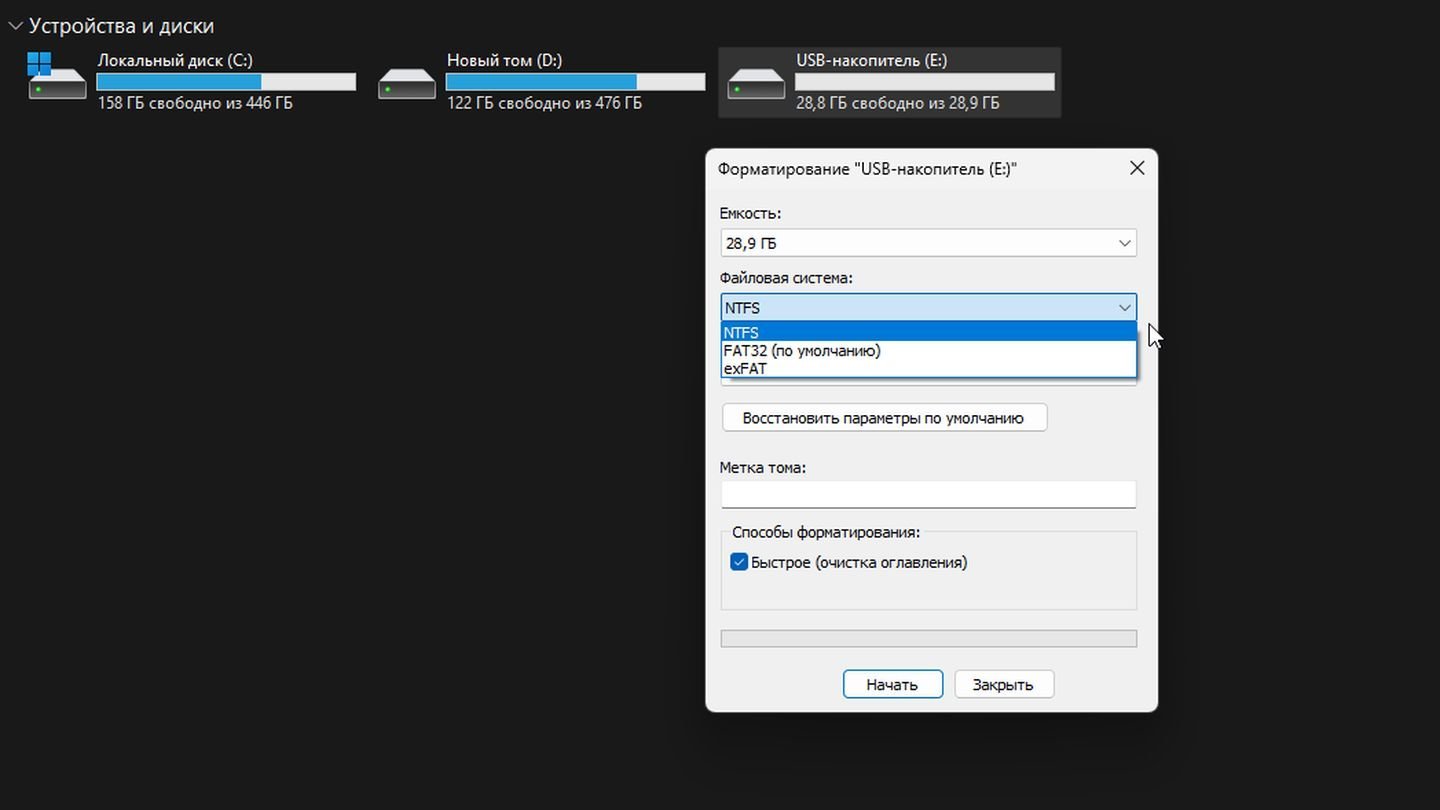
Если флешка новая или вы хотите очистить ее от всех данных, то это можно сделать, следуя описанным далее шагам. Но сначала сделайте резервную копию всех важных файлов с флешки, так как форматирование удалит все данные;

Источник: CQ / Windows 11
- Правой кнопкой мыши нажмите на иконку флешки и выберите «Форматировать» (Windows) или «Стереть» (macOS);
Источник: CQ / Windows 11
-
Выберите файловую систему:
- FAT32: совместима с большинством устройств, но не поддерживает файлы более 4 ГБ;
- exFAT: поддерживает большие файлы и совместима с Windows и macOS;
- NTFS: подходит для Windows, но может быть проблематичной на других устройствах;
Источник: CQ / Windows 11
- Нажмите «Начать» и дождитесь окончания процесса.
Способы переноса файлов на флешку
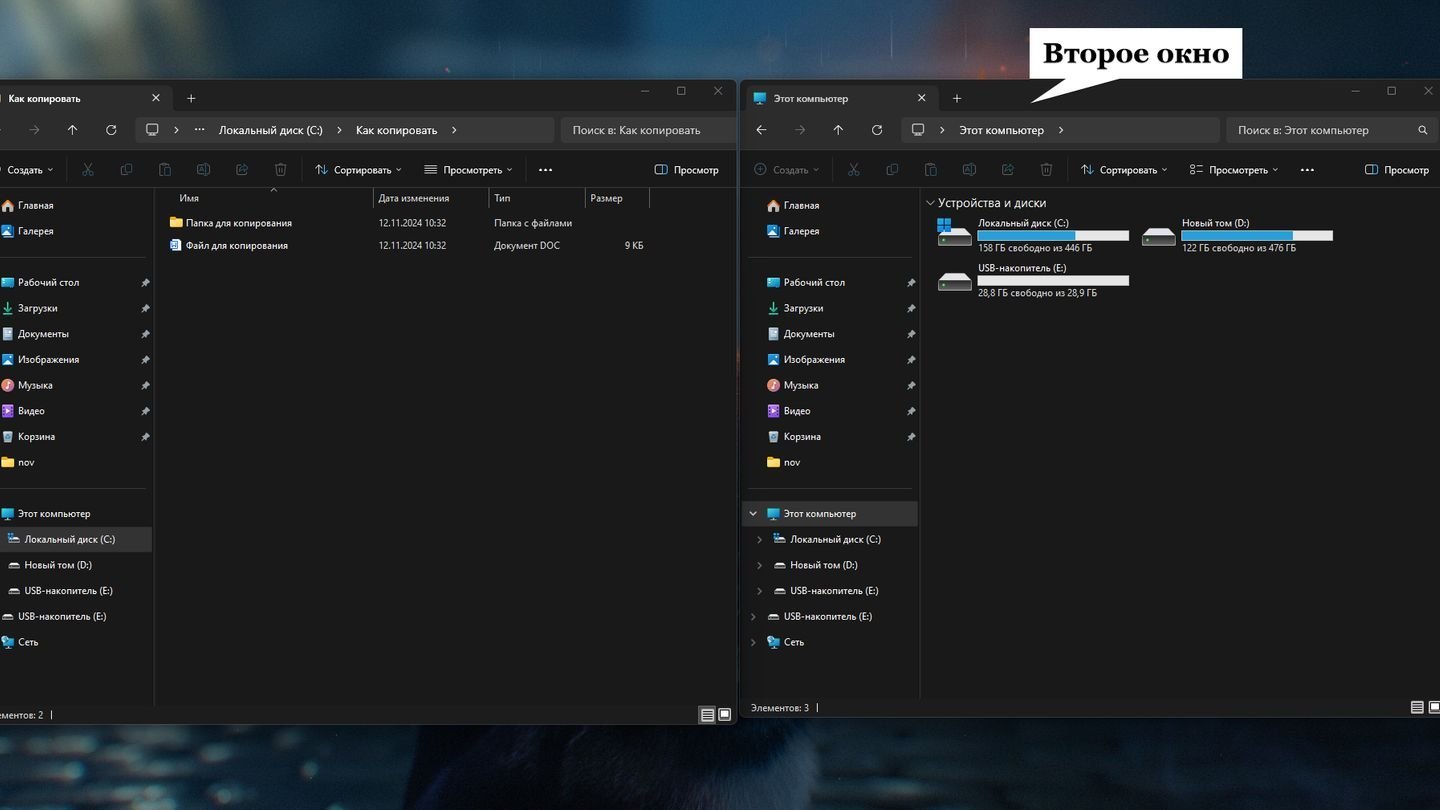
Перетаскивание через проводник (Windows) или Finder (macOS)
Источник: CQ / Windows 11
- Откройте проводник (Windows) или Finder (macOS);
Источник: CQ / Windows 11
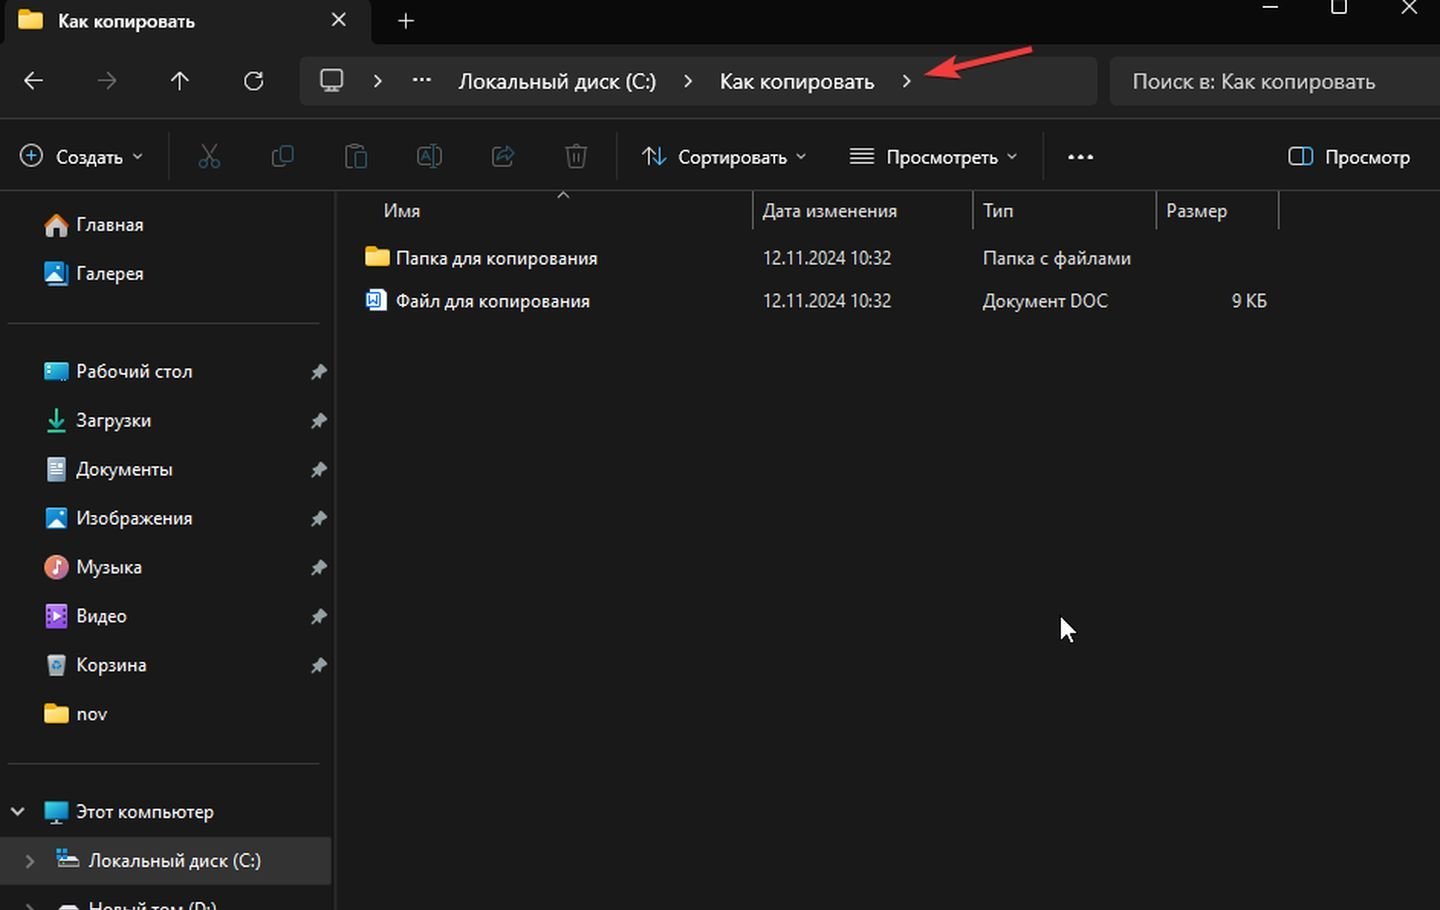
- Найдите файл или папку, которую хотите перенести;
Источник: CQ / Windows 11
- Подключите флешку и откройте ее в новом окне;
Источник: CQ / Windows 11
- Перетащите файл из исходной папки в окно флешки.
Копировать и вставить
Источник: CQ / Windows 11
- Выберите файл или папку, которую хотите скопировать;
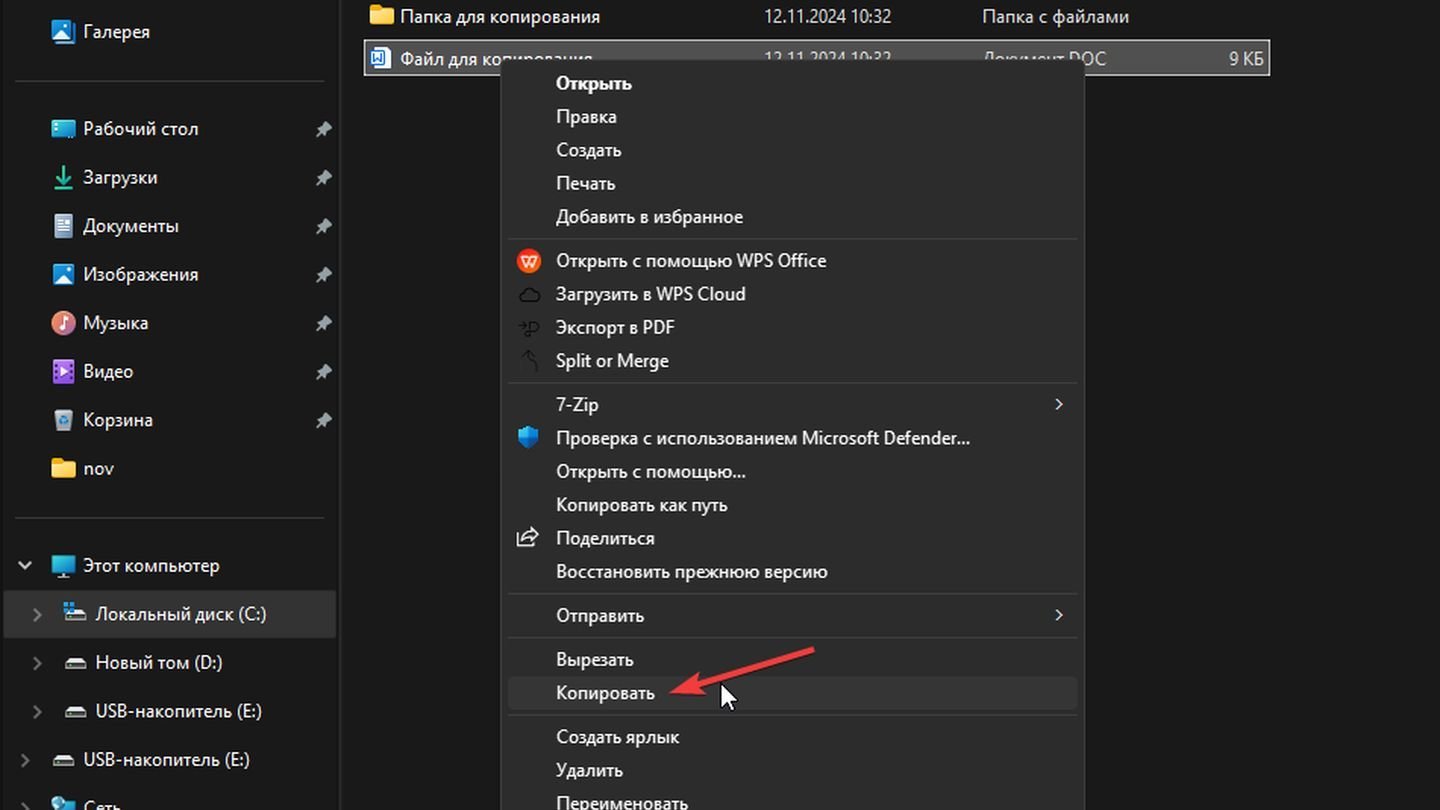
Источник: CQ / Windows 11
- Правой кнопкой мыши нажмите на объект и выберите «Копировать»;
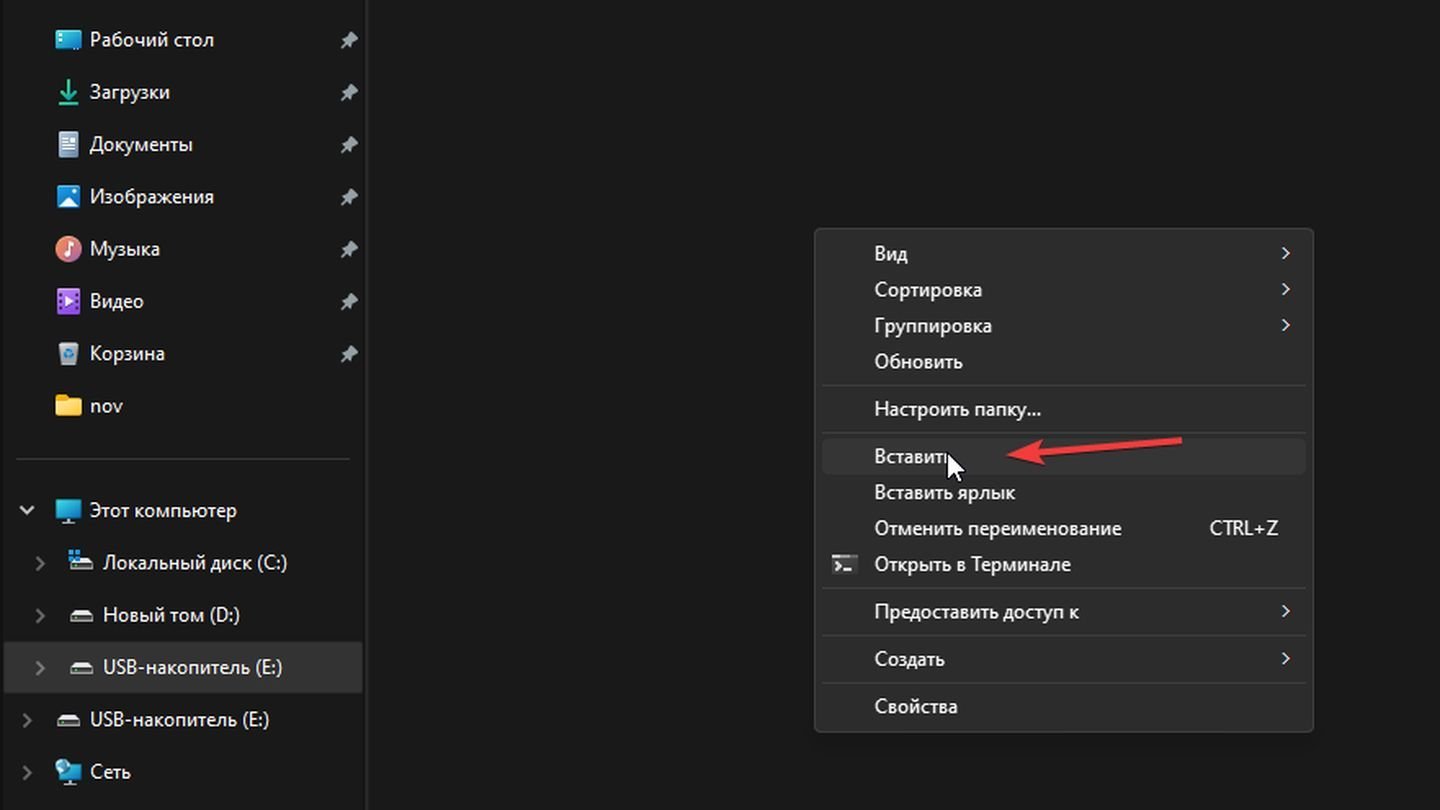
Источник: CQ / Windows 11
- Откройте флешку, правой кнопкой мыши нажмите внутри окна и выберите «Вставить».
Использование комбинаций клавиш
Источник: CQ / Windows 11
- Выберите файл или папку;
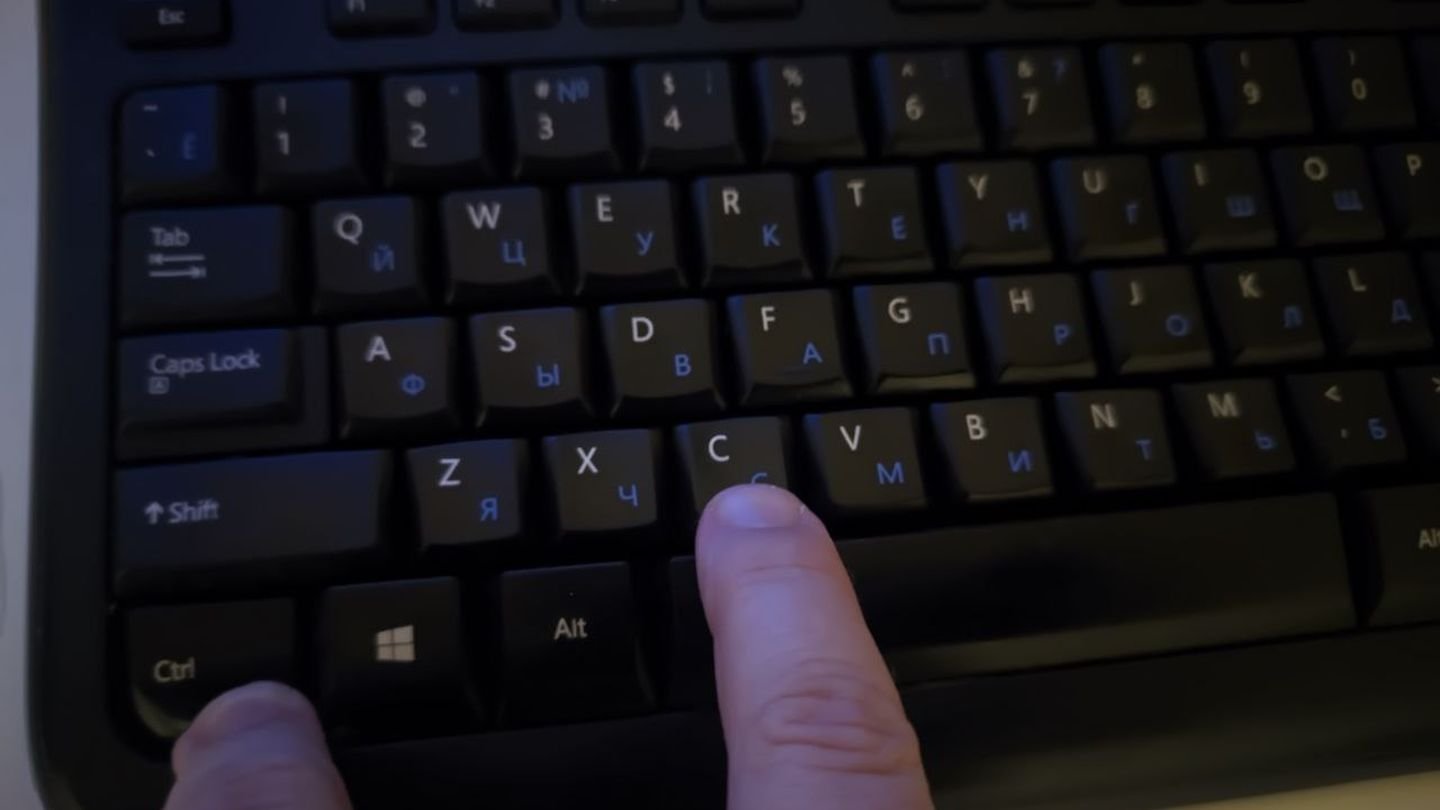
Источник: CQ / Клавиатура
- Нажмите Ctrl + C (Windows) или Cmd + C (macOS) для копирования;
Источник: CQ / Windows 11
- Откройте флешку;

Источник: CQ / Клавиатура
- Нажмите Ctrl + V (Windows) или Cmd + V (macOS) для вставки.
Использование командной строки (для продвинутых пользователей)
Для Windows:
- Откройте «Командную строку»: нажмите Win + R, введите cmd и нажмите Enter;
- Введите команду copy «путь_к_файлу» «путь_к_флешке» и нажмите Enter (без кавычек);
Для macOS:
- Откройте «Терминал»;
- Введите команду cp /путь/к/файлу /путь/к/флешке и нажмите Enter.
Использование сторонних программ (для продвинутых пользователей)
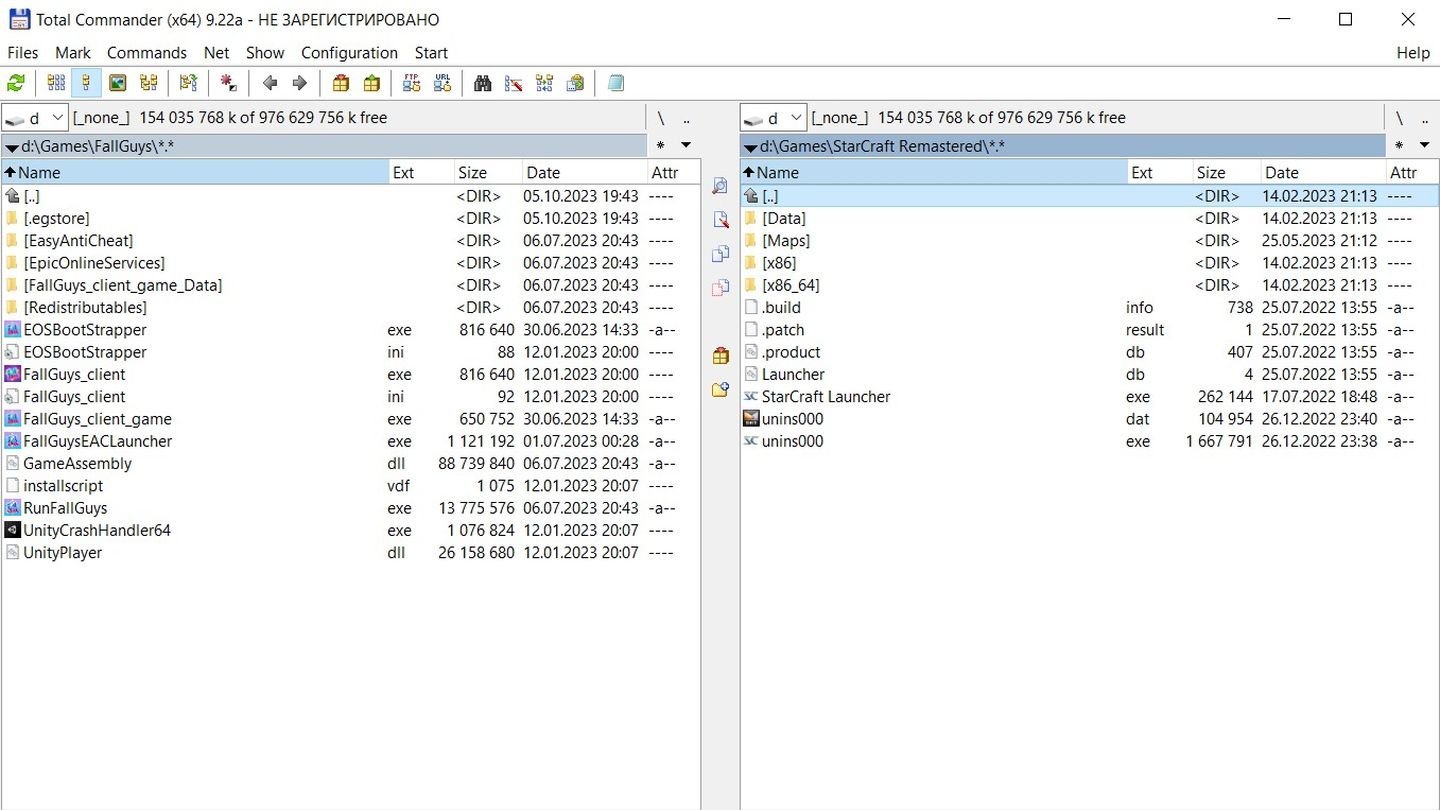
Источник: trueprogs / Интерфейс Total Commander
- Total Commander (Windows): предоставляет удобный двухпанельный интерфейс для управления файлами. Скачать;
- Far Manager (Windows): текстовый файловый менеджер для продвинутых пользователей. Скачать;
- ForkLift (macOS): мощный файловый менеджер с расширенными функциями. Скачать.
Возможные ошибки и способы их устранения
Флешка не определяется компьютером
Причины:
- Неисправный USB-порт;
- Проблемы с драйверами;
- Физическое повреждение флешки.
Решения:
- Попробуйте другой USB-порт или другой компьютер;
- Обновите драйверы USB-контроллеров через диспетчер устройств (Windows);
- Проверьте флешку на другом устройстве.
Недостаточно места на флешке
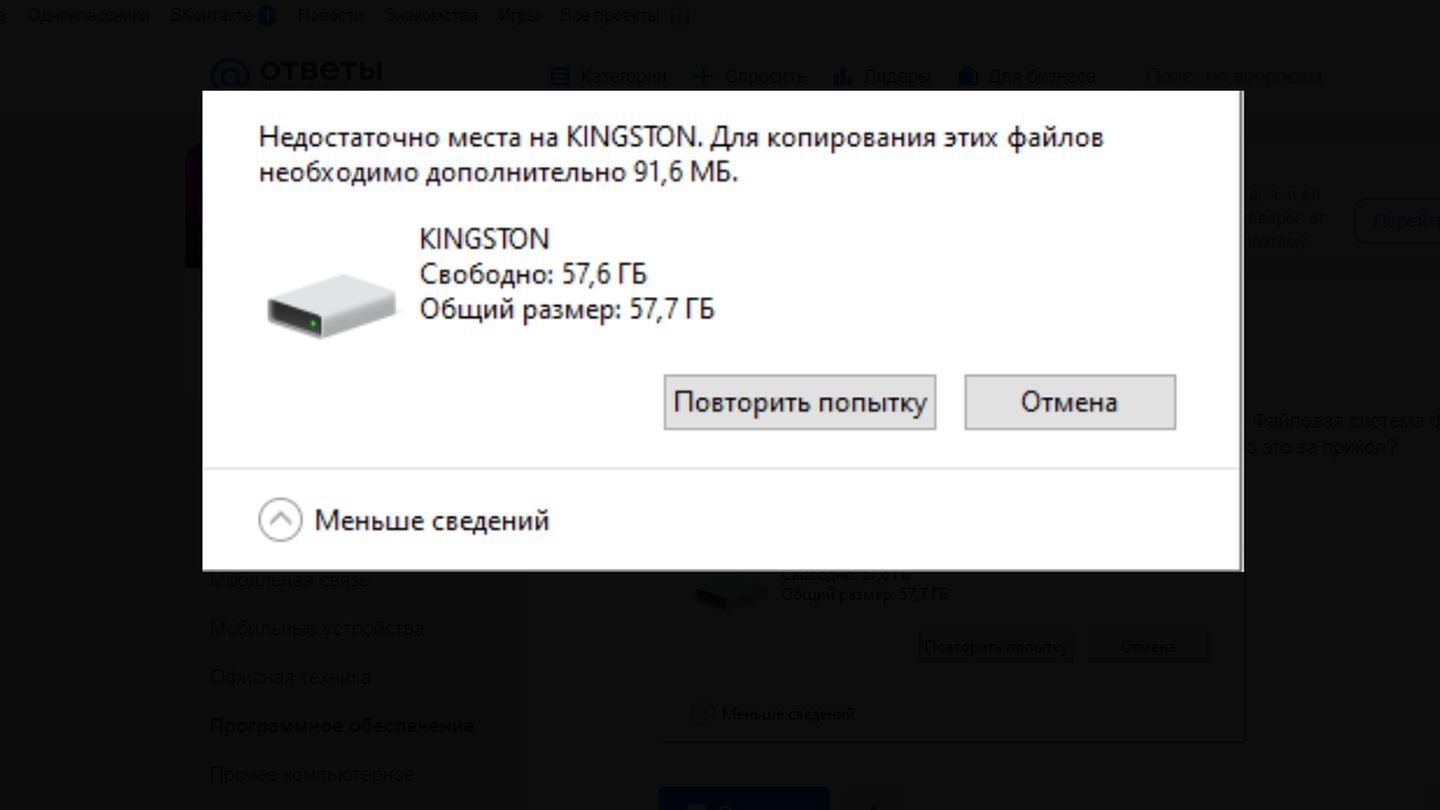
Источник: mai.ru / Пример ошибки
Решения:
- Удалите ненужные файлы с флешки;
- Архивируйте файлы с помощью программ, таких как WinRAR или 7-Zip;
- Используйте флешку большего объема.
Файл слишком большой для файловой системы флешки
Файловая система FAT32 не поддерживает файлы размером более 4 ГБ.
Решения:
- Переформатируйте флешку в файловую систему exFAT или NTFS;
- Разбейте файл на части с помощью архиватора с функцией разделения на тома.
Отказано в доступе или недостаточно прав
Причины:
- Ограничения учетной записи пользователя;
- Файл защищен от копирования.
Решения:
- Запустите проводник от имени администратора;
- Снимите защиту с файла: правой кнопкой мыши по файлу → «Свойства» → снимите галочку с «Только чтение»;
- Проверьте права доступа к файлу и папке.
Флешка заражена вирусами
Решения:
- Просканируйте флешку антивирусной программой;
- Не открывайте подозрительные файлы;
- Обновите антивирусные базы данных перед сканированием.
Ошибка «Устройство используется»
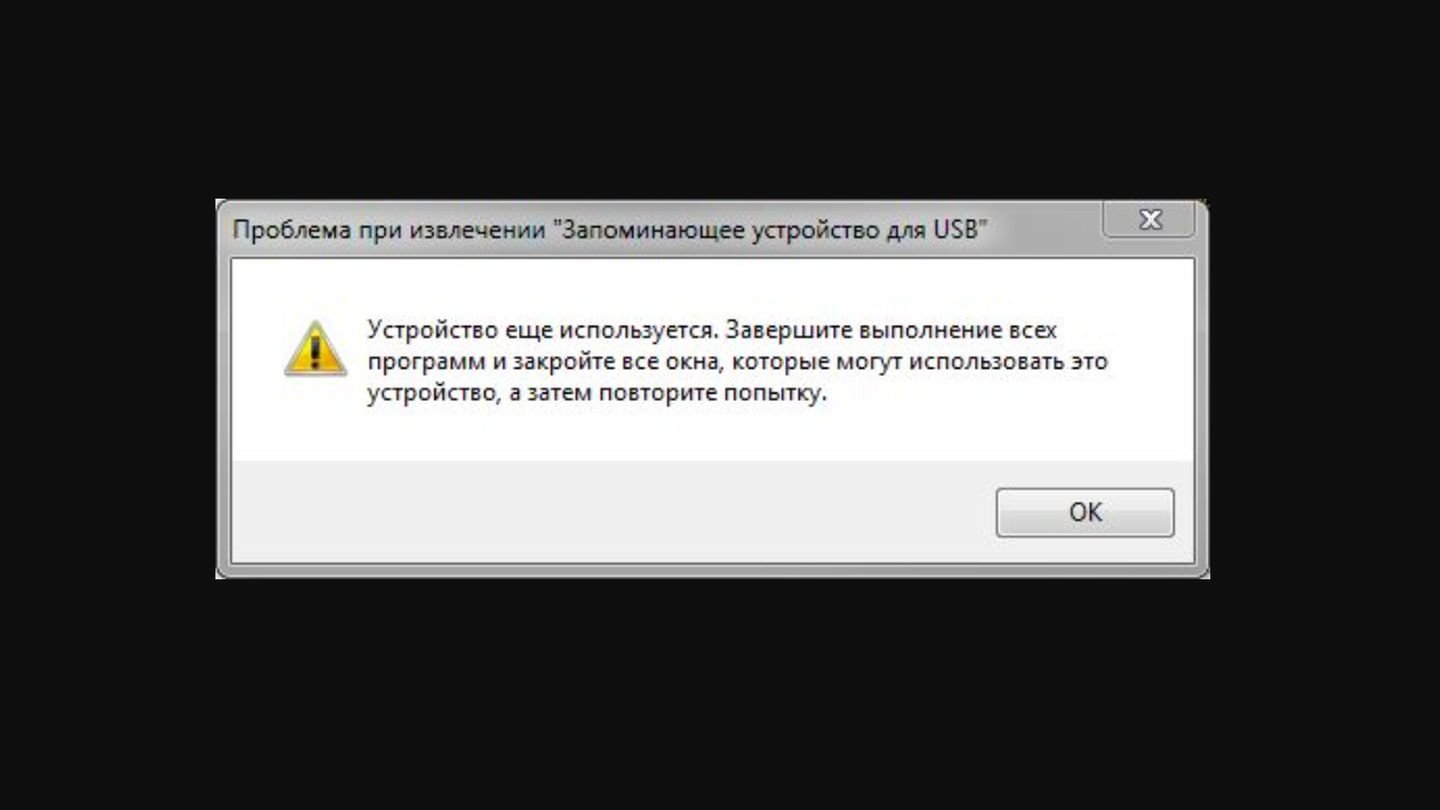
Источник: WordPress / Пример ошибки
Файлы на флешке открыты в программах или процессы все еще обращаются к флешке.
Решения:
- Закройте все программы, которые могут использовать файлы на флешке;
- Используйте функцию «Безопасное извлечение устройства» перед отключением.
Советы по безопасному использованию флешки
Безопасное извлечение устройства
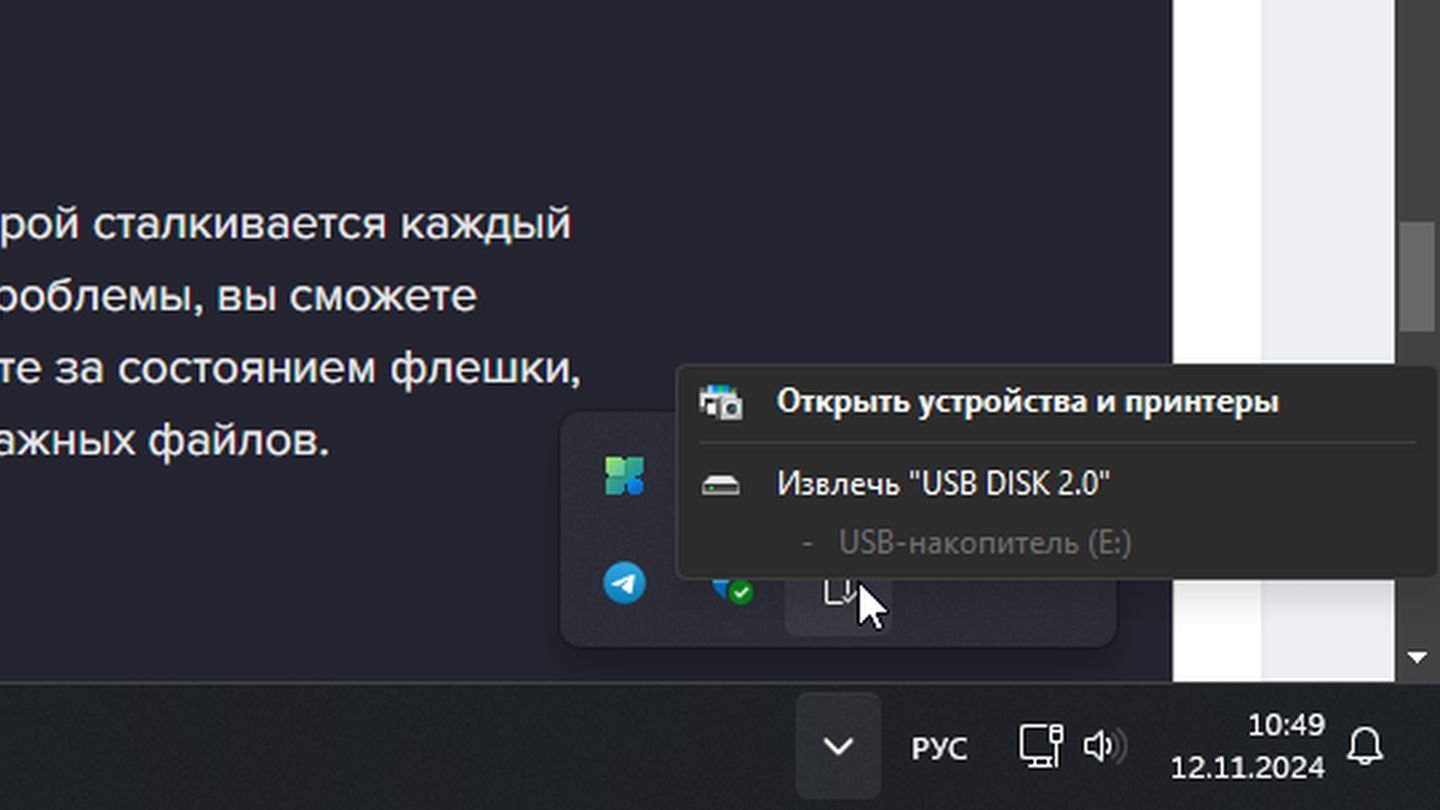
Источник: CQ / Windows 11
- На Windows: нажмите на иконку USB в системном трее и выберите «Извлечь устройство»;
- На macOS: нажмите правой кнопкой мыши на иконку флешки и выберите «Извлечь».
Регулярное резервное копирование
- Храните важные файлы не только на флешке, но и на другом носителе или облачном сервисе;
- Проверяйте флешку на ошибки с помощью встроенных инструментов ОС.
Обновление файловой системы
- Используйте актуальные файловые системы (exFAT, NTFS) для поддержки больших файлов и улучшенной стабильности.
Заглавное фото: LifeWire
Читайте также:
- Как восстановить Windows 10 с флешки
- Как отформатировать USB-флешку
- Как подключить флешку к телефону
- Что делать, если компьютер не видит флешку
This article explains how to copy or transfer files from a USB flash or thumb drive to a Windows 11 computer.
A USB or portable drive is a common way of easily transferring files from one computer to another.
Windows 11 supports many types of USB and portable drives, from USB 2.0/3.0 to USB-C to pen drives and more, depending on whether your computer has a port or external USB adapters available.
A lot of computers already have built-in USB ports available. You may purchase an external adapter if your laptop lacks enough USB ports. Once a USB drive is connected to your computer, ensure it’s properly plugged in and working.
Transfer files from a USB flash drive to Windows 11
Once you have the correct USB ports available for the thumb drive with your files, insert the drive into the USB port. A USB-C drive goes into the USB-C port, and a USB 2.0/3.0 goes into the standard USB port.
Depending on your computer settings, Windows 11 will notify you to choose what to do with the files, similar to the notification below.
“Select to choose what happens with removable drives.“
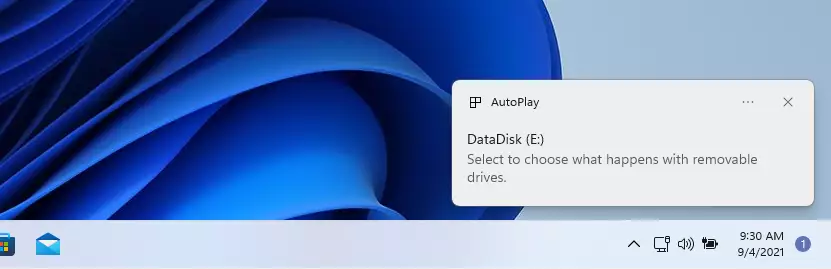
The new pop-up should have options on what to do with the drive inserted. At this point, click Open folder to view files.
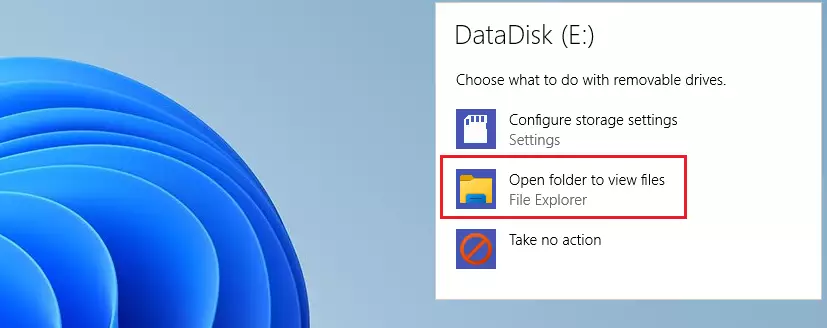
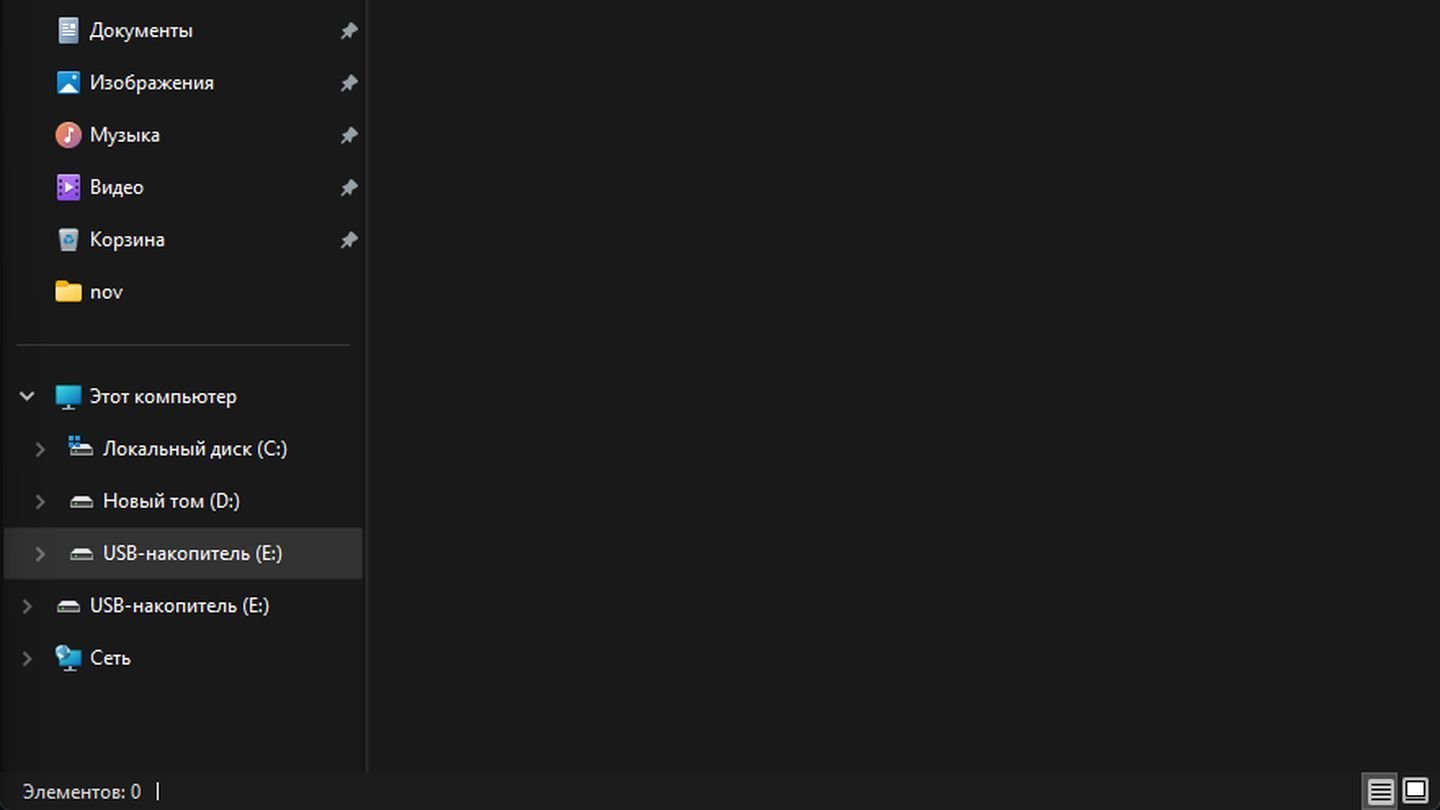
Sometimes, you may not get a prompt, and File Explorer will automatically open and show you the drive’s content. If File Explorer doesn’t open the memory card or drive automatically, click on This PC on the left, then double-click a newly attached drive with the letters E, F, G, or H.
You can transfer a single file or all the files on the memory card to your computer. If you’re transferring all the files, press CTRL + A on your keyboard to select all the files. You can also read this post to learn how to select files.
Once you’ve selected the file or all the files, press the Windows key and E on your keyboard. A new window of File Explorer will open up. Browse where you want to put the copied files, then press the CTRL + V on your keyboard to paste the file(s).
You may also use the mouse to select and copy/paste files to Windows 11. Read the post below to learn how to choose items on Windows 11 to copy and paste.
How Select Files and Folders in Windows 11
That should do it.
Conclusion:
Transferring files from a USB flash drive to a Windows 11 computer is straightforward. Here are the key points to remember:
- Ensure your USB drive is correctly connected to a working USB port.
- Windows 11 may prompt you with options upon connecting the drive; choose to open the folder to view files.
- If the prompt doesn’t appear, manually access the drive through File Explorer by selecting “This PC.”
- Select the files you want to transfer using CTRL + A or your mouse.
- Paste the files into your desired location using CTRL + V or the right-click context menu.
- Familiarize yourself with keyboard shortcuts to streamline the process.
Following these steps, you can efficiently transfer files to your Windows 11 computer.