
Все способы:
- Способ 1: Диалоговое окно «Выполнить»
- Способ 2: «Командная строка»
- Способ 3: Создание ярлыка отмены выключения
- Вопросы и ответы: 1
Способ 1: Диалоговое окно «Выполнить»
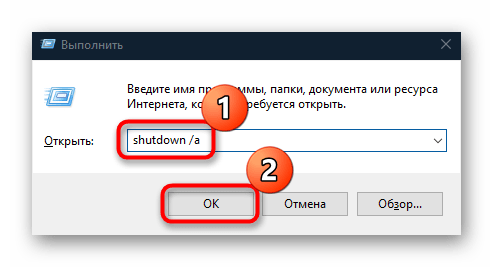
Если вы передумали завершать работу Windows 10, и если есть время, то отменить выключение можно, используя диалоговое окно «Выполнить». Для этого нажмите на клавиши «Win + R», затем в строке «Открыть» введите команду shutdown /a и нажмите на кнопку «ОК».
После этого начавшийся процесс выключения будет остановлен, но, скорее всего, некоторые службы прекратят свою работу. Принудительная приостановка отключения позволит сохранить данные, если вы не успели или забыли это делать.
Способ 2: «Командная строка»
Еще один не слишком быстрый, но действенный способ принудительно остановить выключение – это выполнение команды в консоли «Командная строка». По сути, он является альтернативой первому методу и удобен лишь если на момент завершения работы эта консоль уже была открыта:
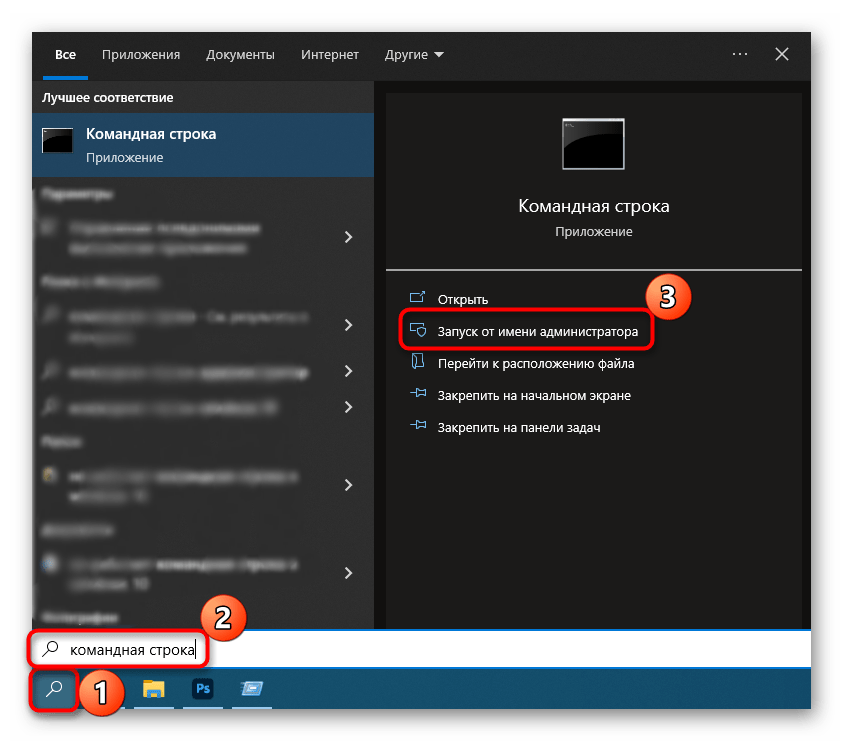
- Запустите ее от имени администратора, используя строку системного поиска.
- В появившемся окне вставьте
shutdown /aи нажмите на клавишу «Enter».
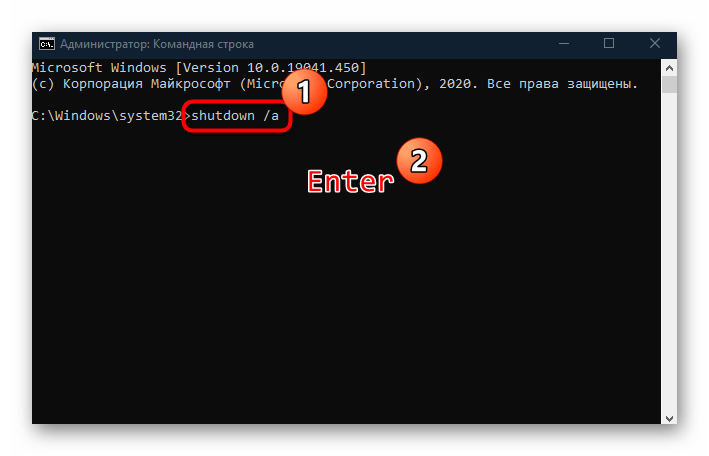
Как и в предыдущем способе, после выполнения команды произойдет принудительная отмена завершения работы Windows 10.
Способ 3: Создание ярлыка отмены выключения
В качестве альтернативного метода можно использовать заранее созданный ярлык. Если позаботиться об этом заблаговременно, то остановить процесс выключения компьютера есть возможность буквально в два клика: достаточно просто запустить ярлык.
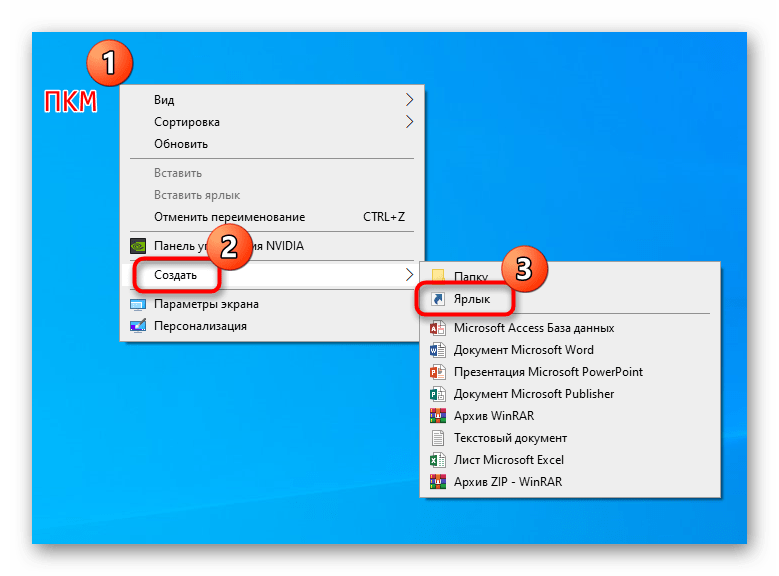
- Щелкните правой кнопкой мыши по свободному пространству в любом месте, логичнее всего на рабочем столе. В контекстном меню наведите курсор на пункт «Создать», затем выберите «Ярлык».
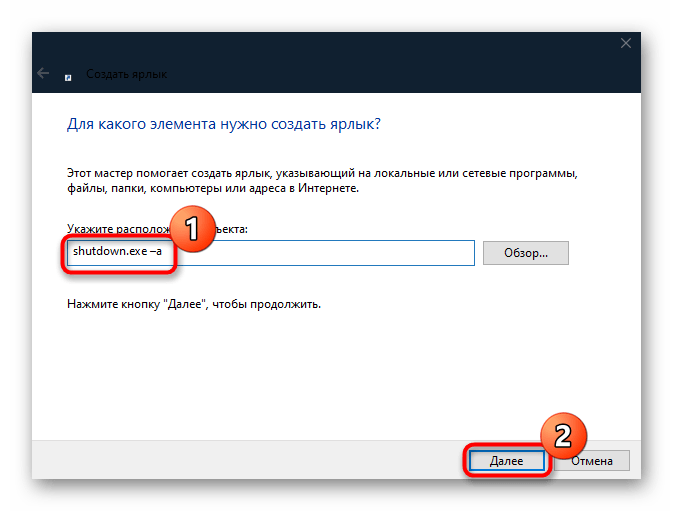
- В появившемся окне нужно указать расположение объекта, для этого введите в строке
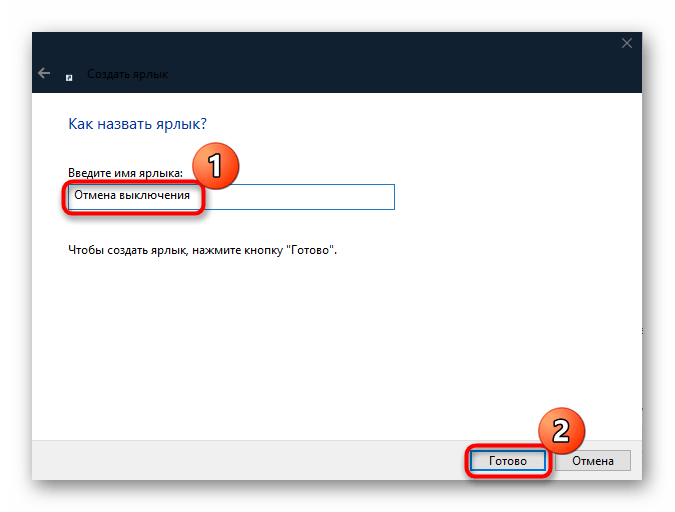
shutdown.exe –aи кликните по кнопке «Далее». - Затем задайте имя своему ярлыку, например «Отмена выключения», и нажмите на «Готово».
После этого ярлык отмены завершения работы появится в выбранном месте. Для удобства вы можете его немного отредактировать.
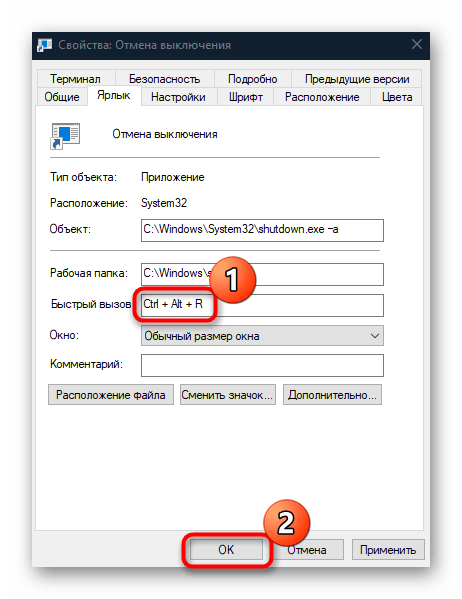
Гораздо быстрее вызывать запуск ярлыка сочетанием клавиш, нежели кликом мышкой. Для этого кликните по ярлыку правой кнопкой мыши и перейдите в «Свойства».

Находясь на вкладке «Ярлык», поставьте курсор в строку «Быстрый вызов», затем нажмите на ту клавишу, которая будет использоваться в сочетании с «Ctrl + Alt», и сохраните настройку.
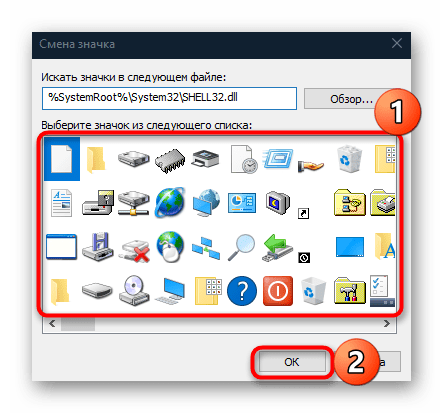
Чтобы у ярлыка была тематическая иконка, на той же вкладке «Ярлык» нажмите на кнопку «Сменить значок».
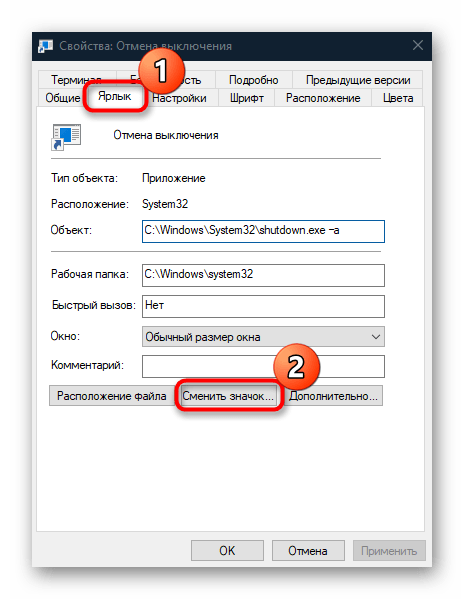
В новом окне останется подобрать подходящую иконку и подтвердить действие.
Если вы хотите деактивировать ранее настроенный таймер отключения в Windows 10, ознакомьтесь с другой нашей статьей.
Подробнее: Отключение таймера выключения Windows 10
Наша группа в TelegramПолезные советы и помощь
Introduction
Automatic shutdown in Windows 10 is one of the features of Windows 10 and if you want to use this automatic shutdown schedule on your laptop/PC then read this article on the topic of, How to Schedule Automatic Shutdown in Windows 10.
If you set down the Auto Shutdown Schedule in Windows 10 and suddenly you remember that you have urgent work and want to cancel this auto Shutdown Schedule, then you have to know the procedure to Cancel the Auto Shutdown Schedule in Windows 10.
This tutorial will show you various ways, how to Cancel the Auto Shutdown Schedule or Task in Windows 10.
Method 1. Via run
Step 1. From the Start menu, open the Run dialog box or you can Press the «Window + R» key to open the RUN window.
Step 2. Type «shutdown -a» and click on the «OK» button.
After clicking on the OK button or pressing the enter key, the auto-shutdown schedule or task will be canceled automatically.
Method 2. Via command prompt
Step 1. Open Command Prompt.
Step 2. Type «shutdown -a» and press enter key.
By pressing the enter key, the Auto Shutdown Schedule will be Canceled Automatically.
Method 3. Via windows powershell
Step 1. Open Windows PowerShell. (Alternatively, you can press the «Windows + X» key and click on «Windows PowerShell» to open it.)
Step 2. Type «shutdown -a» and press enter key.
After pressing the enter key, the Auto Shutdown schedule will be canceled automatically.
Method 4. Through the creation of a shortcut icon
Step 1. Right-click on the empty area of the desktop and select «New > Shortcut».
Step 2. Click on the browse button and choose «shutdown.exe» from C/Windows/System32 and add «-a» or you can type directly «shutdown.exe -a» and click on the Next Button.
Step 3. Choose any name for this shortcut that you want, and then click on Finish Button.
Step 4. After clicking on this Finish Button, the Shortcut Icon will be generated.
By clicking the «Cancel Auto Shutdown» Shortcut Icon, you can cancel the Auto Shutdown Schedule or Task and If you want, you can change the default icon of this shortcut, by choosing the properties option.
Conclusion
By following any of the above methods, you can Cancel the Automatic Shutdown in Windows 10.
I hope you enjoyed this article. Follow C# Corner to learn more new and amazing things about Windows 10.
Thanks for reading this article.
Readers help support Windows Report. We may get a commission if you buy through our links.
Read our disclosure page to find out how can you help Windows Report sustain the editorial team. Read more
You might have accidentally turned on the automatic shutdown timer on your Windows PC and now looking for ways to turn it off. Because, if you don’t turn it off, your PC will turn off after the said time.
In this guide, we will give you a guide on how to turn off the shutdown timer. The methods explained here will be applicable to both Windows 10 and 11 computers. Let us check it out.
Why should I turn off the shutdown timer on Windows 11 & 10?
There are several reasons why you would want to turn off the automatic shutdown timer on your PC. Some of the reasons are mentioned below.
- There is a pending Windows update going on. If your PC shuts down during that time, then you need to download the update again from the start.
- You are working on something important and if the automatic shutdown happens, then you might lose track of what you were doing, and also lose important files if they aren’t saved.
- There might be an important installation that is going on and if there is an automatic shutdown in place, you will abruptly close the installation and cause multiple issues.
Let us take a look at the steps that will help how to turn off the shutdown timer on both the Windows 11 and Windows 10 PC.
How to turn off the shutdown timer?
1. Using the Run dialogue
1.1 Windows 11
- Press the Win + R keys to open the Run dialogue.
- Type shutdown-a and press OK.

- If you see a message Logoff is canceled. The scheduled shutdown has been canceled, which means that the shutdown timer has been turned off.


1.2 Windows 10
- Press the Win + R keys to open the Run dialogue.
- Type shutdown-a and press OK.

- If you see a message Logoff is canceled. The scheduled shutdown has been canceled, which means that the shutdown timer has been turned off.


Using the Run dialogue to turn off the shutdown timer on your PC is a simple way to accomplish the task. All you need to do is run a simple command and get the job done.
- Windows 11 Shutdown After Inactivity: 4 Ways to Stop it
- Windows Shuts Down Instead of Restarting: 4 Ways to Fix it
- Windows 11 Shutdown But User Stays Logged in: How to Fix it
- Microsoft Office Lens: A Powerful Tool for Capturing and Organizing Information
- Swap Left/Right Speaker in Realtek Audio Console [How to]
2. Use Command Prompt
2.1 Windows 11
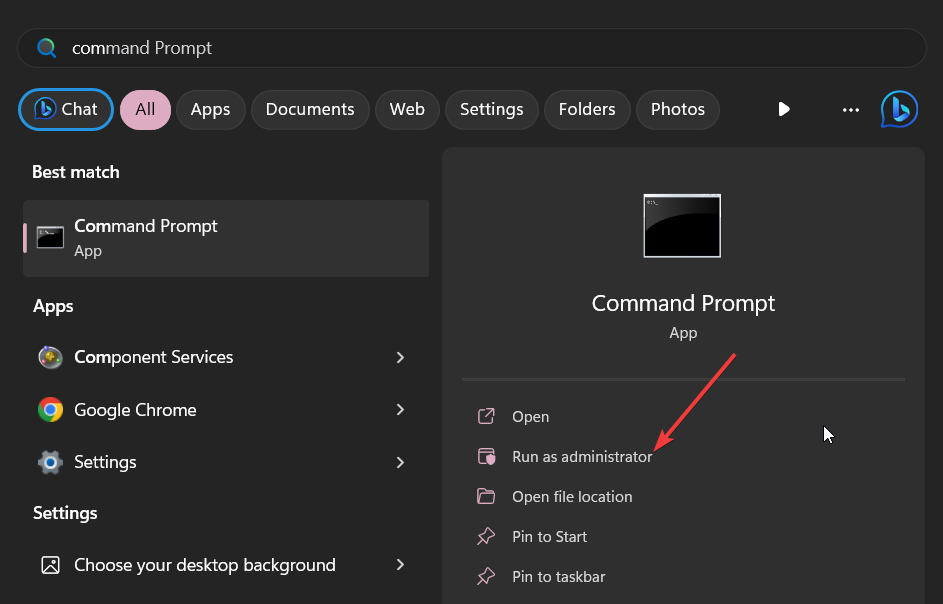
- Press the Win key to open the Start menu.
- Type Command Prompt and run it as an administrator.

- Type the below command and press Enter.
shutdown -a
- You will see a message Logoff is canceled. The scheduled shutdown has been canceled, confirming that the shutdown timer has been turned off.

2.2 Windows 10
- Press the Win key to open the Start menu.
- Type Command Prompt and run it as an administrator.

- Type the below command and press Enter.
shutdown -a
- You will see a message Logoff is canceled. The scheduled shutdown has been canceled, confirming that the shutdown timer has been turned off.

Running a command on your Windows 10 and Windows 11 can also help you turn off the shutdown timer on your PC.
3. Create a desktop shortcut
3.1 Windows 11
- Right-click on your desktop and select Shortcut.

- In the Create a shortcut wizard enter type the below location in the text area, and click Next to continue.
C:\Windows\System32\Shutdown.exe -a
- Give the shortcut any name you like and hit the Finish button to complete the wizard.
- Once the shortcut is created, simply open the shortcut anytime you would like to turn off the shutdown timer.


3.2 Windows 10
- Right-click on your desktop and select Shortcut.
- In the Create a shortcut wizard enter type the below location in the text area, and click Next to continue.
C:\Windows\System32\Shutdown.exe -a
- Give the shortcut any name you like and hit the Finish button to complete the wizard.
- After the shortcut is created, all you need to do is open the shortcut anytime you would like to turn off the shutdown timer.
When you run this desktop shortcut, you will see a window appear just for a split second and then disappear, confirming that the action has been successfully taken.
This desktop shortcut will help you to turn off the shutdown timer if case the automatic shutdown is scheduled so frequently in your Windows 11 PC.
That is it from us in this guide. You can read our guide on how to fix Windows 11 shutdown box keeps popping up randomly in between your tasks.
Moreover, several readers have reported that their Windows 11 PCs randomly or automatically shut down. You can resolve this issue by applying the solutions mentioned in our guide.
Let us know in the comments below, which one of the above solutions resolved your query on how to turn off the shutdown timer on Windows 11 and Windows 10.
Sagar Naresh
Sagar is a web developer and technology journalist. Currently associated with WindowsReport and SamMobile. When not writing, he is either at the gym sweating it out or playing country music on his guitar.
He is an avid traveler and has been to 15 countries, going to more places soon. TRAVEL and WORK is his mantra for a peaceful life.
Если вы видите это сообщение, значит, произошла проблема с загрузкой файлов в стилей (CSS) нашего сайта. Попробуйте сбросить кэш браузера (Ctrl+F5).
Если это не поможет, а вы находитесь в регионе, где возможны ограничения интернет-трафика с российских серверов — воспользуйтесь VPN.
|
Для настройки таймера пишу в командной строке соответствующую команду. Но иногда нужно отменить таймер и продлить время работы компьютера. Как это сделать? Отменить уже запущенный таймер выключения компьютера довольно просто… Необходимо в командной строке «Выполнить» ввести следующую команду: «shutdown /a«! Данная операция приведёт к отмене выполняемой команды отложенного выключения… Проще всего в таком случае создать исполняемый файл *.bat, в котором и прописать команду отмены выключения ваше компьютера! система выбрала этот ответ лучшим ЧипИД 5 лет назад Часто для отложенного выключения компьютера используется обращение к программе «shutdown.exe» из командной строки с соответствующими параметрами для задержки. Например «shutdown /s /f /t 2100» (запущен таймер на 25 минут до выключения компьютера). В этом случае отменить выключение можно также из командной строки с помощью запуска той же «shutdown.exe», но уже с другими параметрами. Для отмены завершения работы компьютера нужно использовать параметр «/a» (английская буква «a»). Командная строка в этом случае должна выглядеть так: «shutdown /a» (естественно без кавычек). Необходимо понимать, что параметр «/a» применим только в период ожидания, то есть пока таймер ведет обратный отсчет. Вот так это должно выглядеть: 
Знаете ответ? |