
-
Become a Premium Member for $25/year with no ads to improve your community experience. Upgrade to Pro Account for faster response and no wait times!
You should upgrade or use an alternative browser.
- Joined
- Jul 22, 2018
- Messages
- 8,664
- Motherboard
- Supermicro X11SPA-T
- CPU
- Intel Xeon W-3275 28 Core
- Graphics
- 2xAMD RX 580 8GB
- OS X/macOS
- 13.x
- Bootloader
-
- OpenCore (UEFI)
- Mac
-
- Mac mini
- MacBook Pro
- Mobile Phone
-
- Android
- iOS
-
-
#1
How to Boot macOS Installer on Desktops and Laptops using OpenCore [UEFI/Legacy] — OpenCore Install Guide
Booting the OS X/macOS installers on a non-Apple computer can be challenging for new users. This guide is intended for those who wish to use OpenCore as a Bootloader and it covers a step-by-step process to boot the OS X/macOS installer on your target Desktop or Laptop using the OpenCore bootloader along with the installation and post-installation. Both installing using OpenCore UEFI and OpenCore Legacy are described in this guide.
By following this guide, you’ll also be able to create a complete OpenCore EFI for your particular system. This guide supports both Intel and AMD Desktops and Intel and AMD Laptops with UEFI/Legacy boot mode. Of course, the hardware compatibility must be taken care of. Those who are still using Clover as a primary bootloader, can either switch to OpenCore or can follow Clover Installation Guide.
Although UEFI Capable Systems have several advantages over Legacy, there can be systems that do not support UEFI booting and are only capable of Legacy booting. But if you do have a system that supports UEFI booting, it is recommended to use UEFI booting over the legacy boot.
- If you’re having a computer that is UEFI capable, follow the UEFI instructions.
- If you’re having a system that doesn’t have UEFI capabilities, then follow the Legacy instructions.
What is OpenCore?
OpenCore is a bootloader — Unlike any other bootloader such as GRUB, it is an advanced bootloader especially designed to boot macOS/OS X on Non-Apple computers and is capable of booting a variety of other Operating Systems including Windows and Linux. OpenCore differs a lot from Clover and has been designed with security and quality, allowing us to use many security features found on real Macs such as System Integrity Protection and FileVault. Moreover, configuring an OpenCore EFI (used for booting) is way less complex than Clover and provides much more modern functionality than Clover. Although, still lacks some of the great features which are implemented in Clover such as on-the-fly hot patching. However, there are more advantages to using OpenCore due to its easy-to-configure in nature and regular updates. More in-depth information can be found in Why you should use OpenCore over Clover and other Bootloaders.
OpenCore is almost always changing to support recent versions of macOS and newer computers. It is complex and more difficult to set up OpenCore when you are not familiar with all the components and a variety of options that can be used to configure OpenCore for booting into macOS.
The purpose of this guide is to show how to create a macOS Bootable USB and create OpenCore EFI which can be used to install macOS/OS X on a target computer. Where creating EFI is the main essence of the guide as that’s what most people are looking for. It is strongly advised to create a configuration (OpenCore EFI) from scratch without the involvement of someone’s else configuration and files and this is where this guide comes into place.
Using OpenCore EFI from another system or picking from the Internet (mostly from Github or other forums) is relatively easy than creating yours, but will not result in many benefits due to the difference in the hardware and the vendor. Although it may be capable of booting macOS/OS X on a target system, these pre-made EFIs not only come with a lot of unnecessary SSDTs, Kexts, and Quirks but also includes custom branding and are usually way lot cluttered than the original method and are generally not reliable (missing hardware functionality and/or features) which is not the preferred choice. Often, it makes it difficult to inject patches, Device Properties, and Quirks due to being prevented from being injected which is why most of the guides generally don’t work with such EFIs. Everything is injected forcibly to ensure the macOS/OS X installer boots anyhow on the target system, which still fails in several cases.
There could be known performance-related issues i.e. getting less performance than the system is actually capable of or it may not perform well on your system in general (even if it is working for the primary user). In addition, despite having the same hardware configuration, there are chances that your system may require some additional configuration than the EFI you’re using to boot. Most of the users just want to boot the macOS installer on their systems, without getting to know the basics involved which is the key and this is why it makes it more difficult to troubleshoot if such configuration fails to boot the macOS/OS X installer on the target system.
Just to avoid reading and investing time into building a proper EFI, several users use the EFI of someone else. This is a very common practice often followed by new users building their OpenCore EFI and this is why such users run into different issues and invest their time effortlessly to fix the junk. Rather than investing time in troubleshooting the installation and fixing someone’s else EFI configuration, which is not even intended for your particular system, it would make more sense to create your own OpenCore EFI and move in the right direction in the first place. Using someone’s EFI not just makes it difficult to boot the macOS/OS X installer, but it invites way more issues than it could have originally.
Due to all these reasons, using OpenCore EFI from some other computer or user is never advised and such practice is highly discouraged, especially on this forum. If you don’t follow the guide carefully, after a point of time, you will end up frustrated if you’re lacking time and patience. Of course, it’s your computer and you have the right to decide whether to install macOS for your use case or not.
Please do not expect to have everything working (in terms of hardware, feature, or functionality) once you’re booted into macOS/OS X. This guide only aims to install macOS/OS X on a target computer and the rest of the steps are covered in the Postinstallation guide.
For users who are not familiar with OpenCore or if they haven’t used it before, this guide may seem a bit complex to them, but it is quite simple if you read and go through the steps carefully. Those users who are familiar with OpenCore or have used it before will find this guide relatively easy to follow than any other guide!
I. Requirements
Before you jump into making an OpenCore based EFI, you need to take care of the following.
Hardware Information
You should have at least the following information to check the compatibility of your system.
- Motherboard Chipset Series
- CPU Model and Generation
- GPU Model
- Storage Devices and their Configuration (AHCI/RAID/IDE)
- Laptop/Desktop model if it is branded/OEM
- Ethernet chip Model
- WiFi/BT Model
A Compatible Hardware
This guide requires compatible hardware to work. Even if you manage to install OS X/macOS, some features either may work partially or may not work at all. See the compatibility section for more information.
Storage Devices and Space
- A Compatible HDD or SSD (NVMe/PCIe/SATA SSD) for installation. If you’re using High Sierra and later, an SSD is recommended for optimal performance.
- At least 16GB of USB if you’re going to use macOS to create the Bootable USB using the Offline Method.
- At least 2GB of USB if you’re going to use macOS, Windows, or Linux to create the Bootable USB using the Online Method.
- At least 30GB of space for macOS/OS X installation on the target Drive.
Internet Connection
An internet connection is required to download the files. If using the Online Method for Installation, you’ll also require a compatible working Ethernet or WiFi connection with a proper speed. Ethernet is generally preferred over WiFi or any other network setup to avoid hassles. However, if you do not wish to use Ethernet or don’t have a proper setup yet, you can also use a Compatible WiFi Card to achieve the same. Please be advised that a majority of WiFi Cards are not supported under macOS. USB based WiFi Dongles and USB to LAN Adapters may not work in this case. iPhone/iPad supporting Mobile Data can be used but requires proper USB mapping (since Big Sur 11.3 and later). If you do not have a compatible Ethernet, WiFi Card, or iPhone/iPad, you can use HoRNDIS to tether your Android’s Mobile Data. In addition, please be advised that carrier charges may apply if using Mobile Data for the internet.
A Computer
To create the Bootable USB and the OpenCore EFI, you’ll need a computer with either macOS (preferred) or Windows (Windows 10 or newer) or any Linux distribution (Ubuntu preferred), and the OS must be functioning properly. In addition, you’ll need at least 30GB (macOS) and 15GB (Windows or Linux) of disk space to download the required files.
BIOS
Although always recommended, you must flash the latest available BIOS/UEFI on the target system, if not already. However, there could be exceptional cases where the new/latest BIOS has bugs which can prevent from booting the macOS/OS X Installer. In such cases, you’ll need to roll back the BIOS until you find the stable version.
Time and Patience
To create a clutter-free, highly reliable OpenCore EFI especially curated for your particular system, you’ll get to know the basics of the OpenCore EFI and how to build it for a target system, you should be prepared to read, learn, and even search for the specific issue on the internet if you’re encountering one. This is not a simple one-click setup or the copy/paste method. Having said that, please be advised that it would require a tremendous amount of patience and time to get the expected results.
Experience
Although this guide includes every crucial step, including the basic ones, having experience with the basic usage of tools such as Command Prompt, Terminal or File Explorer can be really helpful when following the guide.
II. Gathering System Info
Before you start, get to know about your hardware. This is mainly required for OEM machines like Laptops and pre-built systems. Starting your journey without knowing your hardware will make your journey difficult with no chance of success. Also when seeking support on this forum, the hardware details should be present in your profile. Before asking for support, make sure your profile includes the hardware details.
To find out the complete details of your system, refer to the following guide linked below for more information.
You can skip this section and head to Creating macOS Bootable USB if you’re already aware of the system specifications.
III. Checking Compatibility
Once you have gathered the system details, the next step is to perform a compatibility check against the hardware you have. This step is important as it will give you an exact idea of whether your system is compatible or not, what exact hardware is compatible, what hardware needs to be replaced with a compatible one, and whether you can proceed with the purpose of installing macOS or not. To check whether your hardware is compatible or not, simply match your hardware from the compatibility list given below.
If you determine that your hardware is compatible, you can proceed to the next step. If not, you’ll have to replace the hardware with a compatible one if you’re willing to have a perfect setup with general functionality such as graphics acceleration and network. Make sure you pay attention to the hardware limitations while checking the compatibility. You’ll find the limitations for each of the hardware types.
CPU Compatibility
GPU Compatibility
Storage Compatibility
Network Compatibility
Ethernet Compatibility List for macOS [1GbE, 5GbE, 10GbE, 25GbE, 40GbE, 50GbE, 100GbE, 200GbE, 400GbE]
elitemacx86.com
Thunderbolt Compatibility
Last edited:
- Joined
- Jul 22, 2018
- Messages
- 8,664
- Motherboard
- Supermicro X11SPA-T
- CPU
- Intel Xeon W-3275 28 Core
- Graphics
- 2xAMD RX 580 8GB
- OS X/macOS
- 13.x
- Bootloader
-
- OpenCore (UEFI)
- Mac
-
- Mac mini
- MacBook Pro
- Mobile Phone
-
- Android
- iOS
-
-
#2
If you determine that your hardware is compatible according to the above-provided compatibility lists, you can start your journey by creating a Bootable USB for your target computer.
I. Requirements
- USB Flash Drive (16GB at least for OS X 10.11 and newer and 8GB for OS X 10.10 and prior).
- Access to a computer with OS X/macOS installed (Offline Method)
- Access to a computer with macOS/OS X or Windows or Linux installed (Online Method).
- Internet connection to download the required files.
QUICK INFO:
- It is recommended to choose a good USB brand with good Read and Write speeds. Avoid the Chinese USBs due to their poor Read and Write speeds. It can literally take hours to create a Bootable USB.
- External Hard Drive or SSD can offer a good speed but is not recommended due to their large capacity.
- It would be best to use a USB 2.0 Flash Drive for this purpose due to the USB issue which can be fixed after post-installation. Slow, but reliable.
- Do not use a Virtual Machine or VMware to create your USB, regardless of the Operating System (especially if using macOS/OS X). Virtual Machines and VMware are known to create invalid/corrupt USB Installers. You must use real hardware to create your Bootable USB.
II. Making the Bootable USB
A macOS Bootable USB can be made either online or offline. Depending on your choice, select one from below
| Method | Notes |
|---|---|
| Online |
|
| Offline |
|
Now, depending on the Operating System you have, choose one of the below options to create the Bootable USB. You can skip this step and head to preparing the OpenCore EFI if you have already a Bootable USB with macOS Installer you wish to install on the target computer.
For macOS users
For users with macOS computers, there are two methods available which are described below. Depending on your preferences, choose one of the methods described below. For users with macOS computers, we recommend Offline Method for creating the Bootable USB.
I. Offline Method
1. Downloading macOS (10.13 and newer)
(a). Method #1: Using App Store
If you’re running OS X El Capitan 10.11.6 or macOS Sierra 10.12.5 or later, you can use App Store Method to download the required version of macOS. However, this method is limited and will only allow you to download macOS High Sierra 10.13 and newer. For macOS Sierra (10.12) and older, see Downloading Legacy OS. Follow the steps below to download macOS High Sierra and newer using Mac App Store.
1. Depending on the macOS version you want to install, open the appropriate link given below using Safari. You can use other browsers as well (such as Chrome or Firefox). When using other browsers than Safari, click on Open App Store when prompted. This will open the App Store download page for the particular macOS. For the active macOS release versions, you can also directly go to App Store and download the desired macOS release and continue Preparing the installer.
macOS Sonoma (14.x)
macappstores://apps.apple.com/app/macos-sonoma/id6450717509?mt=12

macOS Ventura (13.x)
macappstores://apps.apple.com/app/macos-ventura/id1638787999?mt=12

macOS Monterey (12.x)
macappstores://apps.apple.com/us/app/macos-monterey/id1576738294?mt=12

macOS Big Sur (11.x)
macappstores://apps.apple.com/us/app/macos-big-sur/id1526878132?mt=12

macOS Catalina (10.15)
macappstores://apps.apple.com/us/app/macos-catalina/id1466841314?mt=12

macOS Mojave (10.14)
macappstores://apps.apple.com/us/app/macos-mojave/id1398502828?mt=12

macOS High Sierra (10.13)
macappstores://apps.apple.com/us/app/macos-high-sierra/id1246284741?mt=12
2. When the App Store opens, click on the GET button to begin downloading the macOS installer.
If you’re downloading the macOS on a system running macOS Monterey or later, you’ll see something like below. Click on the Download button to download the macOS.
Once you click on the Download button, the system will start downloading the required version of macOS.
3. Once the download is complete, the macOS installer will appear in the Applications folder and will open automatically.
4. Quit the installer using Command+Q. When prompted, click on Quit.
For old versions of macOS (such as High Sierra), you may see a warning once the system finishes downloading macOS. Simply click on Quit as we’ll have to create a Bootable USB instead of installing it on the same computer.
(b). Method #2: Using Command Line Software Update Utility
If you’re running an old macOS/OS X version or cannot use App Store or cannot download from App Store, you can use this method to download a desired copy of macOS. However, unlike the App Store method, this method is also limited and will allow you to download macOS High Sierra (10.13) and newer. For macOS Sierra (10.12) and older, see Downloading Legacy OS. Follow the steps below to download macOS High Sierra and newer using Command Line Software Update Utility.
1. Open the Terminal and execute the following command. When prompted for a password, enter your password.
softwareupdate --list-full-installers;echo;echo "Please enter the version number you wish to download:";read;$(if [ -n "$REPLY" ]; then; echo "softwareupdate --fetch-full-installer --full-installer-version "$REPLY; fi);You’ll get a list of available products for download:
3. Depending on the macOS version you want to install, type the version number right to the macOS release name and press enter key. The Terminal will start downloading the files.
Once the download is completed, you’ll see the following screen:
4. Quit Terminal. You’ll find the macOS installer in .app format under the Applications folder.
5. Verify the size of the downloaded installer by getting the info of the Installer. Usually, this should be near about 12GiB approx in size. This is required as sometimes the installer gets downloaded as an incomplete installer which can prevent booting the macOS/OS X installer.
(c). Method #3: Using OCLP
If you’re running an old macOS/OS X version or cannot use App Store or cannot download from App Store, you can use this method to download a desired copy of macOS. However, unlike the App Store, Command Line method, and macadmin scripts, this method is also limited and will allow you to download macOS High Sierra (10.13) and newer. For macOS Sierra (10.12) and older, see Downloading Legacy OS. Follow the steps below to download macOS High Sierra and newer using OCLP.
1. Download OpenCore Legacy Patcher, if you haven’t already
2. Open OCLP and you’ll see something similar to the screenshot attached below.
3. Click on Create macOS Installer. When prompted, click on Download macOS Installer
You’ll see a list of recent macOS installers. For a complete list, click on Show all available installers and you’ll get a complete list of the available macOS installers.
4. Depending on the macOS version you want to install, simply click on that version and the OCLP will start downloading the files. You can also get the installer size right next to the installer’s name.
Once the download is completed, OCLP will verify the macOS installer.
5. Once OCLP completes validating, it will prompt for a password to extract the installer into the /Applications directory. When prompted, enter your password and click on OK to continue with the extraction.
Once OCLP finishes extracting the installer, you’ll see a success message. OCLP will also prompt to create the bootable USB.
6. Click on No and then click on Return to Main Menu.
7. Quit OCLP.
You can find the respective macOS Installer in the /Applications directory.
(d). Method #4: Using macadmin scripts
If you’re running an old macOS/OS X version or cannot use App Store or cannot download from App Store, you can use this method to download a desired copy of macOS. However, unlike the App Store and Command Line method, this method is also limited and will allow you to download macOS High Sierra (10.13) and newer. For macOS Sierra (10.12) and older, see Downloading Legacy OS. Follow the steps below to download macOS High Sierra and newer using macadmin scripts.
1. Install Command Line Tools, if you haven’t already.
2. Open the Terminal and execute the following commands:
#Clone macadmin scripts
git clone https://github.com/munki/macadmin-scripts

#Move to the directory
cd macadmin-scripts

#Run installinstallmacos.py
sudo ./installinstallmacos.pyThis tool requires the Python xattr module. Perhaps run 'pip install xattr' to install it.
To overcome this issue, you’ll need to follow the steps below:
1. Open the Terminal and execute the following commands. When prompted for the password, enter your password.
#Install Command Line Tools for Xcode
sudo xcode-select --install

#Install xattr module
pip3 install xattr

#Move to the directory
cd macadmin-scripts

#Run installinstallmacos.py
sudo python3 ./installinstallmacos.py
2. Continue with step #6.
6. When prompted for a password, enter your password. You’ll get a list of available products for download.
7. Depending on the macOS version you want to install, type the number left to the macOS version and press enter key. The script will start downloading the files.
Once the download is completed, you’ll see the following screen:
8. Quit Terminal. You’ll find the macOS Installer in a DMG file in /Users/yourusername directory
9. Mount the .DMG file by double-clicking it.
10. Once mounted, copy the Install macOS.app to the /Applications folder of your Mac.
Once copied, Install macOS.app will appear in your Applications folder:
11. Verify the size of the downloaded installer by getting the info of the Installer. Usually, this should be near about 12GiB approx in size. This is required as sometimes the installer gets downloaded as an incomplete installer which can prevent booting the macOS/OS X installer.
(e). Method #5: Using gibMacOS
1. Install Command Line Tools, if you haven’t already.
2. Open the Terminal and execute the following commands:
git clone https://github.com/corpnewt/gibMacOS

#Move to the directory
cd gibMacOS

#Run gibMacOS
sudo /.gibMacOS.command
3. When prompted for a password, enter your password. You’ll get a list of available products for download:
2. Type M and press the enter key to change the Max-OS version.
3. When prompted, type 15 and press enter key, which is for macOS Sequoia.
Once changed, you’ll see something similar:
4. Type C and press the enter key to change the Catalog.
5. When prompted, type 4 and press the enter key, which is for the Developer seed.
Once changed, you’ll see something similar:
6. Type 1 and press enter key, which is for macOS Sequoia.
The script will start downloading the files.
Once the download is completed, you’ll see the following screen:
Press enter key and you’ll get back to the main screen:
7. Once downloaded, quit Terminal using Q.
The downloads can be found under the following directory:
1. Open the InstallAssistant.pkg file using double click which you downloaded in step #2.
2. Install the package file. When prompted, enter your password and proceed with the installation.
Once the package file is installed, the installer will prompt you to either delete or keep the package installer. Select one as per your choice.
After installing the package file, Install macOS.app will appear under the Applications folder:
Verify the size of the downloaded installer by getting the installer’s info. Usually, this should be near about 12GiB approx in size. This is required as sometimes the installer gets downloaded as an incomplete installer which can prevent booting the macOS/OS X installer.
QUICK INFO: Booting macOS Big Sur 11.3 and newer without mapping of the USB Ports will result in boot loop due to the broken XhciPort Limit. Therefore, it is recommended to install 11.2.3 or map your USB Ports first using Windows before installing macOS. Note that if you have already mapped your USB Ports, you can boot macOS 11.3 and newer without such issues. See Mapping USB Ports for more information.
2. Downloading macOS (10.7-10.12)
Using this method, you can download a complete installer, directly from Apple. However, this method is limited and will allow you to download OS X 10.7 to macOS 10.12 only. Follow the steps below to download OS X 10.7 to macOS Sierra (10.12). For macOS High Sierra (10.13) and later, see Downloading Modern OS. Follow the steps below to download macOS Sierra and prior.
QUICK INFO:
OS X 10.9 (Mavericks) isn’t available with this method. If you’re looking for OS X 10.9, see Online Method for more information.
1. Depending on the macOS version you want to install, download the required version by opening the link below. This will download a .DMG file.
macOS Sierra (10.12)
http://updates-http.cdn-apple.com/2019/cert/061-39476-20191023-48f365f4-0015-4c41-9f44-39d3d2aca067/InstallOS.dmg

OS X El Capitan (10.11)
http://updates-http.cdn-apple.com/2019/cert/061-41424-20191024-218af9ec-cf50-4516-9011-228c78eda3d2/InstallMacOSX.dmg

OS X Yosemite (10.10)
http://updates-http.cdn-apple.com/2019/cert/061-41343-20191023-02465f92-3ab5-4c92-bfe2-b725447a070d/InstallMacOSX.dmg

OS X Mountain Lion (10.8)
https://updates.cdn-apple.com/2021/macos/031-0627-20210614-90D11F33-1A65-42DD-BBEA-E1D9F43A6B3F/InstallMacOSX.dmg

OS X Lion (10.7)
https://updates.cdn-apple.com/2021/macos/041-7683-20210614-E610947E-C7CE-46EB-8860-D26D71F0D3EA/InstallMacOSX.dmg
2. Once the .DMG file is downloaded, double-click the .DMG file to open it and you’ll see a .pkg file within.
3. Double-click the .pkg file and this will automatically move the macOS/OS X installer into your /Applications folder upon installing .pkg file. However, if you’re on a new macOS/OS X version than the .pkg file you’re installing, you’ll receive the following error:
This is because the package checks for system compatibility, even if you’re creating a Bootable USB for a different target computer. To fix this issue, you’ll need to manually extract the installer from the .pkg file. Follow the steps below to extract the installer.
Extracting the Installer
(a). Method #1: Using App Method
1. Download the required macOS/OS X version using the guide above.
2. Download and install Pacifist.
3. Mount the .DMG file
4. Open the .pkg file using Pacifist and you’ll see the following.
From the top, click on Package Resources, just next to Archive Contents and you’ll see something similar to the following
Expand the InstallOS/Instal OS X Contents and you’ll see something similar to the following
Right-click on InstallESD.dmg and select Extract to Custom Location and you’ll see something like below
When prompted, select the location for storing the .dmg file and click on Choose
When prompted, click on Extract to begin the extraction process.
When prompted, enter your password and click on OK button.
Pacifist will start extracting the ESD file to your chosen location.
For both the Offline Methods described above, you can use the createinstallmedia command to create a Bootable USB.
Verify the size of the downloaded installer by getting the info of the Installer. Usually, this should be near about 8GiB approx in size. This is required as sometimes the installer gets downloaded as an incomplete installer which can prevent booting the macOS/OS X installer.
3. Hybrid: Downloading OS X Lion (10.7.5) and Later
Using this Hybrid method, you can download a variety of installers, including Beta installers. However, by default, Mist will not include Beta installer downloads, unless you explicitly allow it to download such. Using this method, you can download the current macOS installer as well as Legacy macOS installers such as macOS Sierra and prior (except for Mavericks (10.9) and Snow Leopard (10.6)) in one click. Moreover, unlike OCLP, Mist is also capable of downloading the macOS installers and has the ability to create the bootable USB for OS X Yosemite (10.10.X) and later. Follow the steps below to download OS X Yosemite (10.10.x) and later.
1. Download Mist
2. Once the .DMG is downloaded, double-click the .DMG file to open it.
3. Move the Mist to your /Applications folder
4. Open Mist.app to launch the Application
5. From the Menu bar, select Mist and click on Install Privileged Helper Tool. When prompted, enter your password and click on Install Helper.
You can also install the Privileged Helper Tool from the Mist>Preferences
6. From the Menu bar, select Mist>Preferences and ensure the Privileged Helper Tool is installed.
7. In the same window, click on Check now to ensure you’re using the latest version of the Mist. If there’s an update available, install the update and check for the updates again to ensure you’re running the latest version.
8. Click on OK and close the Preferences and you’ll be back at the app.
1. Open Mist>Preferences and go to the Installers tab.
2. In the Software Update Catalogs section, select the type of Catalog i.e. Customer, Developer, or Public. You can either select them individually or can select all of them.
3. Close Preferences and you’ll be back in the App. From the bottom, select Include Betas and then click on the Refresh button at the top, left to the Search menu and Mist will rescan the catalogs.
Now, you should be able to see the Beta Installers in the download list.
4. Continue from the step #10
9. By default, the Mist will land on the Firmware download. Click on the Installers tab.
10. Depending on the macOS version you want to install, click on the download button right next to the macOS version.
When downloading a legacy version of macOS, i.e. macOS Sierra and prior, you may get this warning. Simply click on Continue to proceed with the download.
NOTE: If the Privileged Helper Tool is not installed, you’ll get the following error when you click on the Download button.
11. When prompted, select the desired location to download the macOS installer and click on Save
Once you click on Save, the Mist will start downloading the requested installer.
Once the installer is downloaded, the Mist will save the installer in the particular location you chose previously and will also perform a cleanup.
Once tasks are completed, you’ll see the tasks in green and you’ll find the macOS Installer in the directory you chose earlier.
12. Click on Close and Quit Mist.
4. Preparing Installer
Once you have obtained the desired copy of macOS Installer, you can prepare the installer. To prepare the installer, we’ll use createinstallmedia command.
OpenCore and the macOS/OS X Installer are placed on separate partitions on the Bootable USB. There are two possible options for the USB partitions which are listed below. Depending on your choice, choose one of the methods to create the Bootable USB.
| Method | Notes |
|---|---|
| MBR |
|
| GPT |
|
We recommend using MBR with two partitions as most of the computers can boot from it (including Legacy), and it is convenient that the EFI partition will mount automatically when the USB is inserted. This can be very helpful in case if you want to make any changes to the contents of the EFI Partition.
(a). Method #1: MBR
QUICK INFO:
Be careful withdiskutilcommands as you can lose data without a mechanism for recovery if you repartition the wrong disk.
If you’re using OS X EL Capitan or prior, Disk Utility cannot be used for MBR partitioning.
1. Insert your USB Flash Drive
2. Open the Terminal and execute the following commands
In our case, the output is
As you can see, the USB Flash drive is
To partition,
diskutil partitionDisk /dev/disk1 2 MBR FAT32 "OpenCore EFI" 200Mi HFS+J "macOS Installer" RYou’ll see the following as an output of the operation:
3. Quit Terminal
(b). Method #2: GPT
1. Insert your USB Flash Drive
2. Open Disk Utility. The Disk Utility is located at /Applications/Utilities.
3. Click on View and then select Show All Devices
4. Select your target USB Flash Drive in the left pane and click on Erase button, at the top and a popup will appear. Use the following parameters to erase your drive.
Name: USB
Format: Mac OS Extended (Journaled)
Scheme: GUID Partition Map
NOTE:
Do NOT use any other format other than Mac OS Extended (Journaled) to erase the USB.
5. When done, click on Done and close Disk Utility. You can click on Show Details to verify if the USB has been erased with HFS+ format.
6. Launch Terminal, located at /Applications/Utilities.
7. Depending on the macOS/OS X version you want to install, execute the appropriate createinstallmedia command in the Terminal.
macOS Sonoma (14.x):
sudo /Applications/Install\ macOS\ Sonoma.app/Contents/Resources/createinstallmedia --volume /Volumes/USB

macOS Ventura:
sudo /Applications/Install\ macOS\ Ventura.app/Contents/Resources/createinstallmedia --volume /Volumes/USB

macOS Monterey:
sudo /Applications/Install\ macOS\ Monterey.app/Contents/Resources/createinstallmedia --volume /Volumes/USB

macOS Big Sur:
sudo /Applications/Install\ macOS\ Big\ Sur.app/Contents/Resources/createinstallmedia --volume /Volumes/USB

macOS Catalina:
sudo /Applications/Install\ macOS\ Catalina.app/Contents/Resources/createinstallmedia --volume /Volumes/USB

macOS Mojave:
sudo /Applications/Install\ macOS\ Mojave.app/Contents/Resources/createinstallmedia --volume /Volumes/USB

macOS High Sierra:
sudo /Applications/Install\ macOS\ High\ Sierra.app/Contents/Resources/createinstallmedia --volume /Volumes/USB

macOS Sierra:
sudo /Applications/Install\ macOS\ Sierra.app/Contents/Resources/createinstallmedia --volume /Volumes/USB --applicationpath /Applications/Install\ macOS\ Sierra.app

OS X El Capitan:
sudo /Applications/Install\ OS\ X\ El\ Capitan.app/Contents/Resources/createinstallmedia --volume /Volumes/USB --applicationpath /Applications/Install\ OS\ X\ El\ Capitan.app

OX X Yosemite:
sudo /Applications/Install\ OS\ X\ Yosemite.app/Contents/Resources/createinstallmedia --volume /Volumes/USB --applicationpath /Applications/Install\ OS\ X\ Yosemite.app

OS X Mavericks:
sudo /Applications/Install\ OS\ X\ Mavericks.app/Contents/Resources/createinstallmedia --volume /Volumes/USB --applicationpath /Applications/Install\ OS\ X\ Mavericks.app --nointeraction
8. When prompted, enter your password.
NOTE: Sometimes, after you enter your password, the createinstallmedia will not start the process. It’s due to the USB being in a locked state. In such cases, a workaround is to remove and replug the USB Flash Drive or just reformat it as shown in the above steps.
9. Press (Y) to confirm and then press enter key and it will start erasing the disk and will create macOS Bootable USB.
If you’re on Big Sur or later, the Terminal may prompt for access. When prompted, click on OK to allow access.
Once the process is completed, you’ll see the following screen:
10. Quit Terminal. The USB Flash Drive will be renamed itself as per the OS X/macOS Installer
- macOS/OS X Installer must exist in the Applications folder.
- Createinstallmedia is only supported by OS X Mavericks and newer. For OS X 10.4-10.8, see Legacy OS X for more information.
(c). Method #3: Using OCLP
Using OCLP, you cannot only download the macOS Installer but can also create the Bootable USB in a single click. However, this method is limited to macOS High Sierra (10.13.x) and later only. If you want to install macOS Sierra (10.12.x) or prior, please use. Follow the steps below to create a macOS Bootable USB using OCLP.
1. Insert your USB Flash Drive
2. Download OpenCore Legacy Patcher, if you haven’t already
3. Open OCLP and you’ll see something similar to the screenshot attached below.
4. Click on Use existing macOS Installer. Depending on the macOS/OS X version you want to install, select the appropriate installer from the drop-down list when prompted.
NOTE: OCLP will find all the installers automatically if it exists in the /Applications directory. If you do not have an existing installer, you can download one using OCLP. See Method #3 for more information.
5. When prompted, select the appropriate USB Flash Drive from the drop-down list for creating the Bootable USB.
6. OCLP will now ask for a confirmation to erase the target Flash Drive. Click on Yes to proceed with the erasure of the USB Flash Drive. When prompted, enter your password and click on OK.
Now OCLP will create the macOS Bootable USB. Depending on the USB Flash Drive quality and size, it may take a while.
Once OCLP is completed, it will verify the installer’s integrity.
7. Once the process is completed, you’ll see the following screen. Click on OK and then quit OCLP.
(d). Method #4: Using Mist
Unlike OCLP, you cannot only download the macOS Installer but can also create the Bootable USB in a single click using Mist. However, this method is limited to OS X Yosemite (10.10.X) and later only. If you want to install OS X Mountain Lion (10.8.5) or prior, please use . Follow the steps below to create a macOS Bootable USB using Mist.
1. Insert your USB Flash Drive
2. Follow Step #1-#8 in the Hybrid section
3. Depending on the OS X/macOS version you want to install, click on the disk icon right next to the OS X/macOS version.
When downloading a legacy version of macOS, i.e. macOS Sierra and prior, you may get this warning. Simply click on Continue to proceed with the download.
When prompted, click on Open Disk Utility.
Click on View and then select Show All Devices
4. Select your target USB Flash Drive in the left pane and click on Erase button, at the top and a popup will appear. Use the following parameters to erase your drive.
Name: USB
Format: Mac OS Extended (Journaled)
Scheme: GUID Partition Map
NOTE:
Do NOT use any other format other than Mac OS Extended (Journaled) to erase the USB.
5. When done, click on Done and close Disk Utility. You can click on Show Details to verify if the USB has been erased with HFS+ format.
Click on the refresh button right next to the volume list and then select the target USB Flash Drive from the drop-down list and click on Select.
Once you click on Select, the Mist will start downloading the requested installer.
Once the installer is downloaded, the Mist will save the installer in a temporary location and then it will create the Bootable USB, and will also perform a cleanup. Depending on the USB Flash Drive quality and size, it may take a while.
Once tasks are completed, you’ll see the tasks in green and you’ll find the Bootable USB in the Finder.
Click on Close and Quit Mist.
II. Online Method
1. Downloading macOS (10.7-13.4)
Using this method, you can download from OS X Lion 10.7 to macOS Ventura 13.4. However, these are the recovery image and therefore requires an internet connection to download the full installer during the time of installation. You’ll need to have the exact Recovery image of the target OS you want to install. To download the recovery image, follow the steps below.
1. Within the downloaded OpenCorePkg (RELEASE), navigate to the Utilities/macrecovery directory.
2. Open the Terminal and execute the following commands.
#Move to the directory
cd Downloads/OpenCore-0.9.2-RELEASE/Utilities/macrecovery
NOTE: Replace the X with the OpenCore version.
3. Depending on the macOS version you need (See Recovery Table below), execute the commands. When prompted, enter your password.
Recovery Table
| OS Version | Command |
|---|---|
| OS X Lion | python3 ./macrecovery.py -b Mac-C3EC7CD22292981F -m 00000000000F0HM00 download |
| OS X Mountain Lion | python3 ./macrecovery.py -b Mac-7DF2A3B5E5D671ED -m 00000000000F65100 download |
| OS X Mavericks | python3 ./macrecovery.py -b Mac-F60DEB81FF30ACF6 -m 00000000000FNN100 download |
| OS X Yosemite | python3 ./macrecovery.py -b Mac-E43C1C25D4880AD6 -m 00000000000GDVW00 download |
| OS X El Capitan | python3 ./macrecovery.py -b Mac-FFE5EF870D7BA81A -m 00000000000GQRX00 download |
| macOS Sierra | python3 ./macrecovery.py -b Mac-77F17D7DA9285301 -m 00000000000J0DX00 download |
| macOS High Sierra | python3 ./macrecovery.py -b Mac-7BA5B2D9E42DDD94 -m 00000000000J80300 download |
| macOS Mojave | python3 ./macrecovery.py -b Mac-7BA5B2DFE22DDD8C -m 00000000000KXPG00 download |
| macOS Catalina | python3 ./macrecovery.py -b Mac-CFF7D910A743CAAF -m 00000000000PHCD00 download |
| macOS Big Sur | python3 ./macrecovery.py -b Mac-42FD25EABCABB274 -m 00000000000000000 download |
| macOS Monterey | python3 ./macrecovery.py -b Mac-E43C1C25D4880AD6 -m 00000000000000000 download |
| macOS Ventura | python3 ./macrecovery.py -b Mac-7BA5B2D9E42DDD94 -m 00000000000000000 -os latest download |
The script will start downloading the required recovery files:
6. Once the download is completed, you’ll see something like below:
This will create a com.apple.recovery.boot directory inside OpenCore-0.X.X-RELEASE/Utilities/macrecovery directory.
You can find BaseSystem.dmg and BaseSystem.chunklist in OpenCore-0.X.X-RELEASE/Utilities/macrecovery/com.apple.recovery.boot directory.
- Depending on the macOS version, the script will either download BaseSystem or RecoveryImage files.
- Booting macOS Big Sur 11.3 and newer without mapping of the USB Ports will result in boot loop due to the broken XhciPort Limit. Therefore, it is recommended to install 11.2.3 or map your USB Ports first using Windows before installing macOS. Note that if you have already mapped your USB Ports, you can boot macOS 11.3 and newer without such issues. See Mapping USB Ports for more information.
2. Preparing Installer
Once you have the Recovery image, you can create the installer. To prepare the installer, follow the steps below
1. Insert your USB Flash Drive (less than 64GB ).
2. Open Disk Utility. The Disk Utility is located at /Applications/Utilities/Disk Utility
3. Click on View and then select Show All Devices.
4. Select your target USB Flash Drive in the left pane and click on Erase button at the top and a popup will appear.
5. Use the following parameters to erase your drive.
Name: EFI
Format: MS-DOS (FAT)
Scheme: Master Boot Record
6. When done, click on Done and close Disk Utility.
7. Copy the com.apple.recovery.boot folder downloaded in the above step to your USB Flash Drive in Finder. Please ensure that the directory contains BaseSystem.chunklist and BaseSystem.dmg files respectively.
For Windows users
STEP 1: Downloading macOS
You’ll need to have the exact Recovery image of the target OS you want to install. To download the recovery image, follow the steps below.
1. Install the latest Python from the Microsoft Store.
2. Download OpenCore Pkg from the downloads section of this forum.
3. Extract the downloaded file to your Desktop.
4. Move into the OpenCore-0.X.X-RELEASE/Utilities directory
5. Right-click on macreceovery folder and select Copy as path
6. Open Command Prompt with Administrator Privileges
7. Type cd and then paste the path you copied earlier in step 5 and then press enter key. The command would be the following
cd "C:\Users\Your User Name\Desktop\OpenCore-0.X.X-RELEASE\Utiities\macrecovery"- Replace the X with the OpenCore version.
- Replace Your User Name with your actual username
8. Depending on the macOS version you need (See Recovery Table below), type the command.
Recovery Table
| OS Version | Command |
|---|---|
| OS X Lion | ./macrecovery.py -b Mac-C3EC7CD22292981F -m 00000000000F0HM00 download |
| OS X Mountain Lion | ./macrecovery.py -b Mac-7DF2A3B5E5D671ED -m 00000000000F65100 download |
| OS X Mavericks | ./macrecovery.py -b Mac-F60DEB81FF30ACF6 -m 00000000000FNN100 download |
| OS X Yosemite | ./macrecovery.py -b Mac-E43C1C25D4880AD6 -m 00000000000GDVW00 download |
| OS X El Capitan | ./macrecovery.py -b Mac-FFE5EF870D7BA81A -m 00000000000GQRX00 download |
| macOS Sierra | ./macrecovery.py -b Mac-77F17D7DA9285301 -m 00000000000J0DX00 download |
| macOS High Sierra | ./macrecovery.py -b Mac-7BA5B2D9E42DDD94 -m 00000000000J80300 download |
| macOS Mojave | ./macrecovery.py -b Mac-7BA5B2DFE22DDD8C -m 00000000000KXPG00 download |
| macOS Catalina | ./macrecovery.py -b Mac-CFF7D910A743CAAF -m 00000000000PHCD00 download |
| macOS Big Sur | ./macrecovery.py -b Mac-E43C1C25D4880AD6 -m 00000000000000000 download |
| Latest Version | ./macrecovery.py -b Mac-E43C1C25D4880AD6 -m 00000000000000000 -os latest download |
9. Once the download is completed, you’ll see something like below
You can find BaseSystem.dmg and BaseSystem.chunklist in OpenCore-0.X.X-RELEASE/Utilities/macrecovery directory.
- Depending on the macOS version, the script will either download BaseSystem or RecoveryImage files.
STEP 2: Preparing Installer
Once you have the Recovery image, you can create the installer. To prepare the installer, follow the steps below
1. Insert your USB Flash Drive (less than 64GB) into your Windows Computer.
2. Download Rufus.
3. Open Rufus and under Device select your target USB Flash Drive
4. Under Boot selection select Non Bootable
5. Under Volume label type EFI
6. Under File System select Large FAT32 (default) and click on START.
7. When prompted, click on OK
Once erased, you’ll see the READY status in Rufus
8. When done, click on Close to close Rufus.
9. Now open your USB Flash Drive in Explorer
10. Delete autorun.ico and autorun.inf file from the USB Flash Drive
11. Create a folder named com.apple.recovery.boot in root of the USB Flash Drive
12. Copy BaseSystem.dmg and BaseSystem.chunklist downloaded above into com.apple.recovery.boot directory.
For Linux users
STEP 1: Downloading macOS
You’ll need to have the exact Recovery image of the target OS you want to install. To download the recovery image, follow the steps below.
1. Download OpenCore Pkg from the downloads section of this forum.
2. Extract the downloaded file
3. Move into the OpenCore-0.X.X-RELEASE/Utilities directory
4. Right click on macreceovery folder and select Copy
5. Open Terminal
6. Type cd and then paste the path you copied earlier in step 4 and then press enter key. The command would be the following
cd /home/tech/Downloads/OpenCore-0.X.X-RELEASE/utilities/macrecovery- Replace the X with the OpenCore version.
- Replace Your User Name with your actual username
7. Depending on the macOS version you need (See Recovery Table below), type the command.
Recovery Table
| OS Version | Command |
|---|---|
| OS X Lion | ./macrecovery.py -b Mac-C3EC7CD22292981F -m 00000000000F0HM00 download |
| OS X Mountain Lion | ./macrecovery.py -b Mac-7DF2A3B5E5D671ED -m 00000000000F65100 download |
| OS X Mavericks | ./macrecovery.py -b Mac-F60DEB81FF30ACF6 -m 00000000000FNN100 download |
| OS X Yosemite | ./macrecovery.py -b Mac-E43C1C25D4880AD6 -m 00000000000GDVW00 download |
| OS X El Capitan | ./macrecovery.py -b Mac-FFE5EF870D7BA81A -m 00000000000GQRX00 download |
| macOS Sierra | ./macrecovery.py -b Mac-77F17D7DA9285301 -m 00000000000J0DX00 download |
| macOS High Sierra | ./macrecovery.py -b Mac-7BA5B2D9E42DDD94 -m 00000000000J80300 download |
| macOS Mojave | ./macrecovery.py -b Mac-7BA5B2DFE22DDD8C -m 00000000000KXPG00 download |
| macOS Catalina | ./macrecovery.py -b Mac-CFF7D910A743CAAF -m 00000000000PHCD00 download |
| macOS Big Sur | ./macrecovery.py -b Mac-E43C1C25D4880AD6 -m 00000000000000000 download |
| Latest Version | ./macrecovery.py -b Mac-E43C1C25D4880AD6 -m 00000000000000000 -os latest download |
8. Once the download is completed, you’ll see something like below
You can find BaseSystem.dmg and BaseSystem.chunklist in OpenCore-0.X.X-RELEASE/Utilities/macrecovery directory.
- Depending on the macOS version, the script will either download BaseSystem or RecoveryImage files.
STEP 2: Preparing Installer
Once you have the Recovery image, you can create the installer. To prepare the installer, follow the steps below
1. Insert your USB Flash Drive (less than 64GB) into your Ubuntu Computer.
2. Open Disks
For Unallocated Disks
1. For USB Drives which is unallocated, click on the Settings button and then click on Next
2. Under Volume Name, type EFI
3. Under Type, select For use with all systems and devices (FAT) and click on Create
4. Once erased, you’ll see the created partition in Disks
5. Click on the play button to mount the USB Flash Drive
For USB with existing Data
1. For USB Drives which is unallocated, click on the Settings button and then click on the Format button
2. Click on Format
3. Once erased, you’ll see the created partition in Disks
4. Click on the play button to mount the USB Flash Drive
Now open your USB Flash Drive in Explorer
Create a folder named com.apple.recovery.boot in the root of the USB Flash Drive
Copy BaseSystem.dmg and BaseSystem.chunklist downloaded above into com.apple.recovery.boot directory.
Last edited:
- Joined
- Jul 22, 2018
- Messages
- 8,664
- Motherboard
- Supermicro X11SPA-T
- CPU
- Intel Xeon W-3275 28 Core
- Graphics
- 2xAMD RX 580 8GB
- OS X/macOS
- 13.x
- Bootloader
-
- OpenCore (UEFI)
- Mac
-
- Mac mini
- MacBook Pro
- Mobile Phone
-
- Android
- iOS
-
-
#3
To prepare the OpenCore EFI, you’ll need to download OpenCorePkg. Follow the steps below to prepare OpenCore EFI for your target system.
Requirements
- OpenCore Package
- OCAuxiliary Tool
1. Download OpenCore Pkg. The OpenCore Pkg comes in two variants. DEBUG and RELEASE.
| Version | Notes |
|---|---|
| DEBUG |
|
| RELEASE |
|
2. Download the RELEASE folder followed by the release version.
3. Extract the zip. When extracting, you’ll get 4 folders as listed below.
| Directories | Description |
|---|---|
| Docs | Contains documentation, changelog, sample config.plist, and ACPI samples for OpenCore. |
| IA32 | Contains OpenCore EFI, 32-bit OpenCore Boot Loader. Required for OS X 10.4.1 through 10.4.7 |
| Utilities | Contains several utilities. |
| X64 | Contains OpenCore EFI, 64-bit OpenCore Boot Loader. Required for OS X 10.8 and newer |
1. Depending on your System Type, copy the EFI folder from IA32 (For 32-bit CPU) or X64 (For 64-bit CPU) to your working directory and you should have the following structure.
EFI
├── BOOT
│   └── BOOTx64.efi
└── OC
    ├── ACPI
    ├── Drivers
    │   ├── AudioDxe.efi
    │   ├── BIOSVideo.efi
    │   ├── CrScreenshotDxe.efi
    │   ├── HiiDatabase.efi
    │   ├── NvmExpressDxe.efi
    │   ├── OpenCanopy.efi
    │   ├── OpenHfsPlus.efi
    │   ├── OpenLinuxBoot.efi
    │   ├── OpenPartitionDxe.efi
    │   ├── OpenRuntime.efi
    │   ├── OpenUsbKbDxe.efi
    │   ├── Ps2KeyboardDxe.efi
    │   ├── Ps2MouseDxe.efi
    │   ├── ResetNvramEntry.efi
    │   ├── ToggleSipEntry.efi
    │   ├── UsbMouseDxe.efi
    │   └── XhciDxe.efi
    ├── Kexts
    ├── Resources
    │   ├── Audio
    │   ├── Font
    │   ├── Image
    │   └── Label
    ├── Tools
    │   ├── BootKicker.efi
    │   ├── ChipTune.efi
    │   ├── CleanNvram.efi
    │   ├── ControlMsrE2.efi
    │   ├── CsrUtil.efi
    │   ├── GopStop.efi
    │   ├── KeyTester.efi
    │   ├── MmapDump.efi
    │   ├── OpenControl.efi
    │   ├── OpenShell.efi
    │   ├── ResetSystem.efi
    │   ├── RtcRw.efi
    │   └── TpmInfo.efi
    └── OpenCore.efi
Directory Structure
| Directories and Files | Notes |
|---|---|
| BOOT/ Bootx64.efi |
|
| ACPI |
|
| Drivers |
|
| Kexts |
|
| Resources |
|
| Tools |
|
| OpenCore.efi |
|
Cleaning Up
By default, OpenCore includes numerous Drivers, Resources, and Tools for several purposes and all of them may not be required on the target System. Therefore, a clean-up is required to ensure there is no clutter which makes troubleshooting difficult, and also to reduce the file size of the EFI. Follow the steps below to perform a cleanup.
I. Drivers
Drivers are essentials that allow several important functions and are required to boot the system, including Recovery mode. By default, OpenCore includes numerous drivers for different purposes. You need to use the drivers required by your system. Depending on the System Type you have, only keep the required drivers as instructed below and delete the rest of the drivers (where applicable) from the EFI/OC/Drivers directory. You can find all the unlinked drivers in the EFI/OC/Drivers directory.
| Driver Name | Required | Notes |
|---|---|---|
| AudioDxe.efi | Optional |
|
| BiosVideo.efi | Optional |
|
| CrScreenshotDxe.efi | Optional |
|
| Ext4Dxe.efi | Optional |
|
| HiiDatabase.efi | Optional |
|
| NvmExpressDxe.efi | Optional |
|
| OpenCanopy.efi | Optional |
|
| OpenHfsPlus.efi | YES |
|
| OpenLinuxBoot.efi | Optional |
|
| OpenNtfsDxe.efi | Optional |
|
| OpenPartitionDxe.efi | Optional |
|
| OpenRuntime.efi | YES |
|
| OpenUsbKbDxe.efi | Optional |
|
| OpenVariableRuntimeDxe.efi | Optional |
|
| Ps2KeyboardDxe.efi | Optional |
|
| Ps2MouseDxe.efi | Optional |
|
| ResetNvramEntry.efi | YES |
|
| ToggleSipEntry.efi | Optional |
|
| UsbMouseDxe.efi | Optional |
|
| XhciDxe.efi | Optional |
|
Summary
If you’re still confused regarding which drivers to use, we’ve summarized it to understand it better for your convenience. Simply choose the combination of the drivers based on your System Type. Please note that this combination is sufficient in most cases, however, depending on your system, the driver’s requirement may vary and your system may require some other drivers.
I. Drivers for UEFI-based Systems
- OpenRuntime.efi
- OpenHfsPlus.efi
- OpenCanopy.efi
- AudioDxe.efi
- ResetNvramEntry.efi
II. Drivers for Legacy based Systems
- OpenRuntime.efi
- HfsPlusLegacy.efi
- OpenUsbKbDxe.efi
- UsbMouseDxe.efi
- OpenCanopy.efi
- AudioDxe.efi
- ResetNvramEntry.efi
- OpenCore and Drivers should be from the same RELEASE version and should not mismatch.
- UEFI Drivers from Clover are not supported with OpenCore. See Switching Clover to OpenCore if you’re using Clover and want to switch to OpenCore.
The resulting Drivers directory should look something like this:
picture here
II. Tools
Tools are of great use but are for specific purposes only and most of them are optional. Although, it will not harm even if you keep these tools. However, to reduce the size and have less clutter, it is advised to delete the tools which you don’t need. For debugging and later use, it is recommended to keep these tools. You can either keep them or delete them as per your personal preferences. These standalone tools help to debug the firmware and hardware.
| Tool Name | Required | Notes |
|---|---|---|
| BootKicker.efi | Optional | Enter Apple BootPicker menu (exclusive for Macs with compatible GPUs). |
| ChipTune.efi | Optional | Test BeepGen protocol and generate audio signals of different styles and lengths. |
| CleanNvram.efi | Optional | Reset NVRAM alternative bundled as a standalone tool. |
| ControlMsrE2.efi | Optional | Check CFG Lock (MSR 0xE2 write protection) consistency across all cores and change such hidden options on selected platforms. |
| CsrUtil.efi | Optional | Simple implementation of SIP-related features of Apple csrutil. |
| GopStop.efi | Optional | Test GraphicsOutput protocol with a simple scenario. |
| KeyTester.efi | Optional | Test keyboard input in SimpleText mode. |
| MmapDump.efi | Optional | |
| OpenControl.efi | Optional | Unlock and lock back NVRAM protection for other tools to be able to get full NVRAM access when launching from OpenCore. |
| OpenShell.efi | Optional |
|
| ResetSystem.efi | Optional | Utility to perform system reset. Takes reset type as an argument: cold reset, firmware, shutdown, warm reset. Defaults to cold reset. |
| RtcRw.efi | Optional | Utility to read and write RTC (CMOS) memory. |
| TpmInfo.efi | Optional | Check Intel PTT (Platform Trust Technology) capability on the platform, which allows using fTPM 2.0 if enabled. The tool does not check whether fTPM 2.0 is actually enabled. |
A cleaned-up EFI should be like the following:
For UEFI based Systems
EFI
├── BOOT
│   └── BOOTx64.efi
└── OC
    ├── ACPI
    ├── Drivers
    │   ├── OpenRuntime.efi
    │   ├── OpenHfsPlus.efi
    │   ├── OpenCanopy.efi
    │   ├── AudioDxe.efi
    │   └── ResetNvramEntry.efi
    ├── Kexts
    ├── Resources
    │   ├── Audio
    │   ├── Font
    │   ├── Image
    │   └── Label
    ├── Tools
    │   ├── BootKicker.efi
    │   ├── ChipTune.efi
    │   ├── CleanNvram.efi
    │   ├── ControlMsrE2.efi
    │   ├── CsrUtil.efi
    │   ├── GopStop.efi
    │   ├── KeyTester.efi
    │   ├── MmapDump.efi
    │   ├── OpenControl.efi
    │   ├── OpenShell.efi
    │   ├── ResetSystem.efi
    │   ├── RtcRw.efi
    │   └── TpmInfo.efi
    └── OpenCore.efi
For Legacy based Systems
EFI
├── BOOT
│   └── BOOTx64.efi
└── OC
    ├── ACPI
    ├── Drivers
    │   ├── OpenRuntime.efi
    │   ├── HfsPlusLegacy.efi
    │   ├── OpenUsbKbDxe.efi
    │   ├── UsbMouseDxe.efi
    │   ├── OpenCanopy.efi
    │   ├── AudioDxe.efi
    │   └── ResetNvramEntry.efi
    ├── Kexts
    ├── Resources
    │   ├── Audio
    │   ├── Font
    │   ├── Image
    │   └── Label
    ├── Tools
    │   ├── BootKicker.efi
    │   ├── ChipTune.efi
    │   ├── CleanNvram.efi
    │   ├── ControlMsrE2.efi
    │   ├── CsrUtil.efi
    │   ├── GopStop.efi
    │   ├── KeyTester.efi
    │   ├── MmapDump.efi
    │   ├── OpenControl.efi
    │   ├── OpenShell.efi
    │   ├── ResetSystem.efi
    │   ├── RtcRw.efi
    │   └── TpmInfo.efi
    └── OpenCore.efi
The resulting cleaned up EFI should look something like this:
UEFI picture
Legacy picture
Last edited:
- Joined
- Jul 22, 2018
- Messages
- 8,664
- Motherboard
- Supermicro X11SPA-T
- CPU
- Intel Xeon W-3275 28 Core
- Graphics
- 2xAMD RX 580 8GB
- OS X/macOS
- 13.x
- Bootloader
-
- OpenCore (UEFI)
- Mac
-
- Mac mini
- MacBook Pro
- Mobile Phone
-
- Android
- iOS
-
-
#4
Once you have the base OpenCore EFI containing the necessary boot files, you will need to add essential SSDTs, Drivers, and Kexts for booting macOS. As this step would require the system specification of the target machine, we assume that you’re already aware of the specification. If you still aren’t aware, see Gathering System Details for more information.
I. ACPI (SSDTs)
In order to boot into the installation, you need to add the necessary SSDTs. A majority of ACPI (SSDTs) are already included in the OpenCore Package. These ACPI (SSDTs) also must be linked in the config.plist which you’ll get to know in Chapter 4 of this guide. Follow the steps below to place the necessary ACPI (SSDTs).
STEP 1: Depending on the Platform you have, copy the SSDTs from OpenCore/RELEASE/Docs/AcpiSamples/Binaries to EFI/OC/ACPI directory.
QUICK INFO:
SSDT marked with * are bundled with OpenCore. Additional SSDTs described here can be downloaded from the SSDTs Download section.
| SSDT Name | Notes |
|---|---|
| SSDT-ALS0.aml* |
|
| SSDT-BRG0.aml |
|
| SSDT-EC.aml* |
|
| SSDT-EC-USBX.aml* |
|
| SSDT-AWAC-DISABLE.aml* |
|
| SSDT-PM.aml |
|
| SSDT-PLUG.aml* |
|
| SSDT-PLUG-ALT.aml* |
|
| SSDT-PNLF.aml* |
|
| SSDT-EHCx-DISABLE.aml* | Required for 7, 8, and 9-series Chipsets on 10.11 and newer. |
| SSDT-HV-DEV-WS2022.aml |
|
| SSDT-HV-CPU.aml* |
|
| SSDT-HV-VMBUS.aml* |
|
| SSDT-HV-PLUG.aml* |
|
| SSDT-IMEI.aml* |
|
| SSDT-PMC.aml* |
|
| SSDT-RTC0.aml* |
|
| SSDT-RTC0-RANGE.aml* |
|
| SSDT-SBUS-MCHC.aml* |
|
| SSDT-UNC.aml* |
|
Although an additional SSDT for a target system may be a requirement, to fix a problem or a hardware and/or its function, it is a minimum set of SSDTs that is necessary and is sufficient enough to boot the macOS installer and perform the installation. The rest of the additional required SSDTs can be added during the post-installation time unless it is mandatory for booting the macOS/OS X installer. See Tuning ACPI for more information.
Summary
If you’re still confused regarding which SSDTs to use, we’ve summarized it to understand it better for your convenience. Simply choose the combination of the SSDTs based on your CPU Code Name. For example, if you have a Raptor Lake as a target system, the typical SSDTs you would need is SSDT-EC-USBX.aml+SSDT-AWAC-DISABLE.aml+SSDT-PLUG-ALT.aml as per the Table given below. Please note that this combination will work in most cases, however, you may need a different combination in special cases for your hardware.
I. Intel Desktops
| CPU Code Name | EC | AWAC | IMEI | NVRAM | USB | CPU |
|---|---|---|---|---|---|---|
| Penryn | SSDT-EC.aml | — | — | — | — | — |
| Lynfield, Clarkdale | SSDT-EC.aml | — | — | — | — | — |
| Sandy Bridge | SSDT-EC.aml | — | SSDT-IMEI | — | — | CPU-PM.aml (Post-install task) |
| Ivy Bridge | SSDT-EC.aml | — | SSDT-IMEI | — | — | CPU-PM.aml (Post-install task) |
| Haswell | SSDT-EC.aml | — | — | — | — | SSDT-PLUG.aml |
| Broadwell | SSDT-EC.aml | — | — | — | — | SSDT-PLUG.aml |
| Skylake | SSDT-EC-USBX.aml | — | — | — | — | SSDT-PLUG.aml |
| Kaby Lake | SSDT-EC-USBX.aml | — | — | — | — | SSDT-PLUG.aml |
| Coffee Lake | SSDT-EC-USBX.aml | SSDT-AWAC-DISABLE.aml | — | SSDT-PMC.aml | — | SSDT-PLUG.aml |
| Comet Lake | SSDT-EC-USBX.aml | SSDT-AWAC-DISABLE.aml | — | — | SSDT-RHUB-Reset.aml | SSDT-PLUG.aml |
| Rocket Lake | SSDT-EC-USBX.aml | SSDT-AWAC-DISABLE.aml | — | — | — | SSDT-PLUG-ALT.aml |
| Alder Lake | SSDT-EC-USBX.aml | SSDT-AWAC-DISABLE.aml | — | — | — | SSDT-PLUG-ALT.aml |
| Raptor Lake | SSDT-EC-USBX.aml | SSDT-AWAC-DISABLE.aml | — | — | — | SSDT-PLUG-ALT.aml |
II. AMD Desktops
| CPU Code Name | EC | AWAC | IMEI | NVRAM | USB | CPU |
|---|---|---|---|---|---|---|
| Bulldozer/Piledriver/Steamroller/Excavator | SSDT-EC-USBX-DESKTOP.aml | — | — | — | — | — |
| Jaguar/Puma | SSDT-EC-USBX-DESKTOP.aml | — | — | — | — | — |
| Zen/Zen+/Zen2 | SSDT-EC-USBX-DESKTOP.aml | — | — | — | — | SSDT-CPUR.aml |
| Zen3/Zen3+/Zen4 | SSDT-EC-USBX-DESKTOP.aml | — | — | — | — | SSDT-CPUR.aml |
II. Intel HEDT
| CPU Code Name | EC | RTC | PCI | CPU |
|---|---|---|---|---|
| Nehalem and Westmere | SSDT-EC.aml | — | — | SSDT-CPU-PM.aml |
| Sandy Bridge-E | SSDT-EC.aml | — | SSDT-UNC.aml | SSDT-CPU-PM.aml |
| Ivy Bridge-E | SSDT-EC.aml | — | SSDT-UNC.aml | SSDT-CPU-PM.aml |
| Haswell-E | SSDT-EC-USBX.aml | SSDT-RTC0-RANGE.aml | SSDT-UNC.aml | SSDT-PLUG.aml |
| Broadwell-E | SSDT-EC-USBX.aml | SSDT-RTC0-RANGE.aml | SSDT-UNC.aml | SSDT-PLUG.aml |
| Skylake-X/W | SSDT-EC-USBX.aml | SSDT-RTC0-RANGE.aml | — | SSDT-PLUG.aml |
III. Intel Laptops
| CPU Code Name | EC | AWAC | IMEI | NVRAM | USB | CPU | Backlight |
|---|---|---|---|---|---|---|---|
| Clarksfield, Arrandale | SSDT-EC.aml | — | — | — | — | — | SSDT-PNLF.aml |
| Sandy Bridge | SSDT-EC.aml | — | SSDT-IMEI | — | — | CPU-PM.aml | SSDT-PNLF.aml |
| Ivy Bridge | SSDT-EC.aml | — | SSDT-IMEI | — | — | CPU-PM.aml | SSDT-PNLF.aml |
| Haswell | SSDT-EC.aml | — | — | — | SSDT-PLUG.aml | SSDT-PNLF.aml | |
| Broadwell | SSDT-EC.aml | — | — | — | SSDT-PLUG.aml | SSDT-PNLF.aml | |
| Skylake | SSDT-EC-USBX.aml | — | — | — | SSDT-PLUG.aml | SSDT-PNLF.aml | |
| Kaby Lake/Kaby Lake-R/Amber Lake | SSDT-EC-USBX.aml | — | — | — | SSDT-PLUG.aml | SSDT-PNLF.aml | |
| Coffee Lake/Whiskey Lake | SSDT-EC-USBX.aml | SSDT-AWAC-DISABLE.aml | SSDT-PMC.aml | — | SSDT-PLUG.aml | SSDT-PNLF.aml | |
| Comet Lake | SSDT-EC-USBX.aml | SSDT-AWAC-DISABLE.aml | — | — | SSDT-PLUG.aml | SSDT-PNLF.aml | |
| Ice Lake | SSDT-EC-USBX.aml | SSDT-AWAC-DISABLE.aml | — | SSDT-RHUB-Reset.aml | SSDT-PLUG.aml | SSDT-PNLF.aml |
III. AMD Laptops
| CPU Code Name | EC | AWAC | IMEI | NVRAM | USB | CPU | Backlight |
|---|---|---|---|---|---|---|---|
| Zen | SSDT-EC-USBX.aml | — | — | — | — | — | SSDT-PNLF.aml |
| Zen+ | SSDT-EC-USBX.aml | — | — | — | — | — | SSDT-PNLF.aml |
| Zen2 | SSDT-EC-USBX.aml | — | — | — | — | SSDT-CPUR.aml | SSDT-PNLF.aml |
| Zen3 | SSDT-EC-USBX.aml | — | — | — | — | SSDT-PNLF.aml | |
| Zen3+ | SSDT-EC-USBX.aml | — | — | — | — | SSDT-PNLF.aml | |
| Zen4 | SSDT-EC-USBX.aml | — | — | — | — | SSDT-PNLF.aml |
II. Drivers
Unlike the SSDTs, the drivers are one of the essential elements in OpenCore EFI and are mainly required for booting macOS on the target machine for either UEFI or a Legacy environment.
Depending on the firmware, a different set of drivers may be required. Loading an incompatible driver may lead the system to an unbootable state or even cause permanent firmware damage. There are drivers which provide the ability to scan different formats of drives in the OpenCore picker (such as HFS+ Drives). These drivers also must be linked in the config.plist which you’ll get to know in Chapter 4 of this guide. Follow the steps below to place the necessary Drivers.
STEP 1: Download OcBinaryData
STEP 2: Extract the downloaded .zip file.
STEP 3: Copy the appropriate drivers from OCBinaryData/Drivers to EFI/OC/Drivers directory.
Although OpenCorePkg contains the necessary drivers to boot the macOS installer on the target machine, there is an OpenHFSPlus.efi driver which is generally slow as compared to HFSPlus.efi proprietary driver. Therefore, it is advised to use HFSPlus.efi instead of OpenHFSPlus.efi to avoid unnecessary delays. The HFSPlus.efi driver comes in different flavors and must be used accordingly. You can find which version to use below.
| Driver Name | Required | Notes |
|---|---|---|
| HfsPlus.efi | YES |
|
| HfsPlusLegacy.efi | Optional |
|
| HfsPlus32.efi | Optional |
|
III. Kexts
Unlike drivers for other OSes, a Kext (Kernel Extension) is a driver for macOS. In order to boot into the installation, you need to add the necessary kexts. Follow the steps below to place the necessary kexts.
STEP 1: Download the required kexts as per your hardware.
STEP 2: Extract the kexts from the RELEASE folder.
STEP 3: Copy the required kexts with .kext extension to EFI/OC/Kexts directory.
System
- Required for Booting into macOS and are mandatory.
Lilu
- Provides arbitrary patching.
- Required for AppleALC, WhateverGreen, VirtualSMC and several other kexts.
VirtualSMC
- SMC Emulator. Emulates Apple hardware.
- VirtualSMC is a successor of FakeSMC.
- This kext requires
Lilu.kextto function.
CPU and SMC
CpuTopologyRebuild
- Optimizes Alder Lake/Raptor Lake’s heterogenous core configuration
- Reports Hyper-Threading Technology to Enabled in Alder Lake/Raptor Lake systems.
- Improves performance by rebuilding the topology for the cores and threads.
- Requires
ProvideCurrentCpuInfoQuirk along with-ctrsmtboot arg.
CPUFriend
- Enables dynamic power management data injection
- Requires
Lilu.kextto function
AsusSMC
- Enables Native support for ALS, Keyboard Backlight and Fn Keys for ASUS Laptops
- Requires
Lilu.kextto function
CPUTscSync
- Enables synchronization of the TSC with the CPU
- Required for Laptops and HEDT Systems.
- A quick way to find if your Laptop needs CpuTscSync.kext, while booting the installer, you may feel lags and the installer getting stuck at several stages or you may see the Apple logo or other pop-ups appearing in background. On some Laptops, you may get CPU panic for threads. f you’re having such scenarios, you’ll need to use this kext.
- This kext is mostly needed by Lenovo and newer ASUS Laptops with the latest BIOS.
- This kext requires
Lilu.kextto function. - This kext is only supported by Intel CPUs only.
AmdTscSync
- Enables synchronization of the TSC with the CPU
- Required for Laptops and HEDT Systems.
- A quick way to find if your Laptop needs CpuTscSync.kext, while booting the installer, you may feel lags and the installer getting stuck at several stages or you may see the Apple logo or other pop-ups appearing in background. On some Laptops, you may get CPU panic for threads. f you’re having such scenarios, you’ll need to use this kext.
- This kext is mostly needed by Lenovo and newer ASUS Laptops with the latest BIOS.
- This kext requires
Lilu.kextto function. - This kext is only supported by AMD CPUs only.
AppleMCEReporterDisabler
- Disables
AppleMCEReporter.kextto prevent Kernel Panics - Required for AMD CPUs running macOS 12.3 and newer
- Required for macOS 10.15 and later on Dual-Socket Systems.
- Only applicable if using MacPro6,1, MacPro7,1 or iMacPro1,1 SMBIOS.
AMDRyzenCPUPowerManagement.kext
- Required for AMD Power Management Features
- This kext is also required if you would like to use AMD Power Gadget.
- Requires
SMCAMDProcessor.kextto enable sensor data AMDRyzenCPUPowerManagement.kextshould load beforeSMCAMDProcessor.kext
CryptexFixup.kext
- Enables Rosetta Cryptex installation in macOS Ventura Ventura.
- Supports OS Installation and updates.
- Required for systems lacking AVX2.0 instruction set who wish to run macOS Ventura.
- Does not supports macOS Delta Updates (typically 1-3GB in size). However, full updates are supported.
- In addition, Rapid Security Response Updates are currently not supported.
- This kext does not drop the requirement of AVX2.0 in some of Ventura’s Graphics Stack.
- This kext also disables Cryptex hash verification in
APFS.kext. - Requires
Lilu.kextto function.
telemetrap.kext
- Disables AppleMCEReporter kext to prevent Kernel Panics
- Required for AMD CPUs and Dual-Socket Systems.
AAAMouSSE.kext
- Enables SSE4.2 Support
- Allows old CPUs to use the newer AMD drivers.
- Required by AMD drivers for Metal Support
- Only required for CPUs lacking SSE4.2 instructions.
Graphics
WhateverGreen.kext
- Provides GPU patching on macOS.
- Fixes various Graphics related issues.
- Required for Intel, NVIDIA, and AMD GPUs.
- This kext requires
Lilu.kextto function.
Nooted.kext
- Provides AMD (APU) patching on macOS.
- Fixes various Graphics related issues.
- Required for AMD APUs.
- This kext requires
Lilu.kextto function.
dAGPM.kext
- Enables Power Management for Discrete Graphics (NVIDIA/AMD)
- Requires Board ID configuration to work.
USB
- Required for USB functioning.
USBInjectAll
- Enables USB ports.
- Required for Intel-based Motherboards only.
- It’s advised to map the USB ports during the post-install for a better USB speed, improved sleep/wake and hotplug.
XHCI-Unsupported
- Enables Intel USB Controllers on 9, 200, 300, 400, 500, and 600 series and some HEDT Motherboards such as X99 and X299.
- Required for Intel-based Motherboards only.
GenericUSBXHCI.kext
- Enables non-Intel USB3 Controllers.
- Usually found on Sandy Bridge, Ivy Bridge, and some Haswell
- Required for non-Intel USB3 Controllers. Only use if you have a non-Intel USB3 Controller
- Required for AMD Ryzen Laptops having Dual XHC Controllers.
ASMedia.kext
- Enables ASMedia USB3.1 Controllers.
- Required for macOS Big Sur and later.
- Required for ASMedia USB 3.1 Controller. Only use if you have an AsMedia USB3.1 Controller
mXHCD.kext
- Enables ASMedia USB3.0 1040/1042 Controllers.
- Required for ASMedia USB 3.0 Controller. Only use if you have an AsMedia USB3.0 Controller
XLNCUSBFIX
- Fixes USB on AMD FX Systems
- Do not use it on Ryzen Systems
- Requires macOS 10.13 and later
Audio
- Required for Audio functioning.
AppleALC.kext
- Provides AppleHDA patching on macOS.
- Enables onboard/built-in Audio.
- Fixes various Audio related issues.
- This kext requires
Lilu.kextto function.
AppleALCU.kext
- Required for Onboard/built-in USB Audio.
- This kext requires
Lilu.kextto function. - Only use if you have an Onboard/built-in Realtek USB Audio Controller
EMUUSBAudio
- Required for Creative Labs EMU USB Audio.
- Only use if you have Creative Labs EMU USB Audio Interface
Ethernet
- Required for Ethernet functioning.
IntelMausi.kext
- Enables Intel Family onboard Ethernet Controller.
- Required for Intel-based Motherboards only.
SmallTreeIntel82576.kext
SmallTreeIntel8259x.kext
LucyRTL8125Ethernet.kext
- Enables Realtek RTL8125 2.5GBit Ethernet Family onboard Ethernet Controller.
RealtekRTL8111.kext
- Enables Realtek RTL8111/8168 Family onboard Ethernet Controller.
RealtekRTL8100.kext
- Enables RTL810X Fast Ethernet Family onboard Ethernet Controller.
AtherosE2200Ethernet
- Enables Qualcomm Atheros Killer Family onboard Ethernet Controller.
AtherosL1cEthernet
- Enables Atheros AR813x/815x onboard Ethernet Controller.
- For newer chipsets, use
AtherosE2200.kext.
BCM5722D.kext
- Enables Broadcom BCM5722 NetXtreme and NetLink family gigabit onboard Ethernet Controller.
- For server-grade Broadcom chipsets, use
AzulNX2Ethernet.kext.
AzulNX2Ethernet
- Enables QLogic (formerly Broadcom) NetXtreme II server-grade network cards.
- For consumer-grade Broadcom chipsets, use
BCM5722D.kext.
AppleIntelE1000e.kext
- Enables Intel Fast Ethernet onboard Ethernet Controller
Intel82566MM
NullEthernetInjector
- Fake Ethernet.
- Enables Mac App Store access.
- Required for Laptops where you don’t have a built-in Ethernet port or built-in WiFi with supporting drivers
- Suitable for Third Party (non-native) USB WiFi Adapters.
WiFi
- Required for WiFi functioning.
AirportBrcmFixup
- Required for WiFi functioning of non-Apple/non-Fenvi Broadcom Cards
- Requires a compatible Broadcom WiFi Card. Only use if you have a compatible Broadcom WiFi Card.
- This kext requires Lilu.kext to function.
AirportItlwm
- Works as standalone kext.
- Has AirDrop and Handoff support.
- Works as WiFi Interface.
- Requires a compatible Intel WiFi Card. Only use if you have a compatible Intel WiFi Card.
itlwm
- Similar to AirportItlwm.
- Required where AirportIlwm is not compatible. Varies from system to system.
- Requires HeliPort App, which acts as a WiFi Client for Intel WiFi.
- Has no AirDrop or Handoff support.
- Works as Ethernet Interface.
- Requires a compatible Intel WiFi Card. Only use if you have a compatible Intel WiFi Card.
Bluetooth
- Required for Bluetooth functioning.
BlueToolFixup
- Skips Bluetool’s firmware check
- Required for Broadcom and Intel Bluetooth
- Mandatory for macOS 12 (Monterey) and Later
- Do not use it with
BrcmBluetoothInjector.kextorIntelBluetoothInjector.kext - This kext requires Lilu.kext to function.
BrcmBluetoothInjector
- Bluetooth Injector for Broadcom
- Required for OS X 10.11 (El Capitan) to macOS Big Sur
- This kext requires
BrcmFirmwareData.kextandBrcmPatchRAM3to function. - Do not use BrcmPatchRAM.kext or BrcmPatchRAM2.kext with this kext.
BrcmBluetoothInjectorLegacy
- Bluetooth Injector for Broadcom
- Required for OS X 10.10 (Yosemite) and older
BrcmFirmwareData
- Enables Firmware Upload to Bluetooth Device.
- Required for all non-Apple and non-Fenvi Cards
- This kext can be injected via Bootloader and is the preferred configuration.
- This kext requires
BrcmBluetoothInjector.kextandBrcmPatchRAM3.kextto function.
BrcmFirmwareRepo
- Enables Firmware Upload to Bluetooth Device.
- Required for all non-Apple and non-Fenvi Cards
- Required for OS X 10.11 and later.
- Must be installed in /S/L/E or /L/E.
- This kext is slightly more memory efficient than
BrcmFirmwareData.kext, but cannot be injected by a bootloader.
BrcmNonPatchRAM2
- Required for non-PatchRAM device
- For OS X 10.11 (El Capitan) and Later
BrcmNonPatchRAM
- Required for non-PatchRAM device
- For OS X 10.10 (Yosemite) and older
BrcmPatchRAM3
- For macOS Catalina and Later
- This kext requires
BrcmBluetoothInjector.kextandBrcmFirmwareData.kextto function.
BrcmPatchRAM2
- For OS X 10.11 (El Capitan) to macOS Mojave
- This kext requires
BrcmBluetoothInjectorLegacy.kextandBrcmFirmwareRepo.kextto function.
BrcmPatchRAM
- For OS X 10.10 and older
- This kext requires
BrcmBluetoothInjectorLegacy.kextandBrcmFirmwareRepo.kextto function.
IntelBluetoothInjector
- Bluetooth Injector for Intel
- Required for macOS High Sierra to macOS Big Sur only. For latter, use BlueToolFixup.
- Do not use his kext on macOS Monterey and newer.
- This kext requires
IntelBluetoothFirmware.kextto function.
IntelBluetoothFirmware
- Enables Intel Bluetooth.
- Enables Firmware Upload to Bluetooth Device.
- Required for all compatible Intel Bluetooth
IntelBTPatcher
- Fixes several Bluetooth bugs for Intel Bluetooth on macOS.
- On Monterey and newer, this provides a workaround for a bug in
bluetoothdby initializing the Bluetooth module properly before attempting a LE scan. - Prior to Monterey, this provides a workaround for a bug in the
IOBluetoothHostControllerthat prevents certain Bluetooth 4.X devices from connecting. - This kext requires
Lilu.kextto function.
Storage
- Required for SATA/NVMe Controller functioning.
EmeraldSDHC
- Enables eMMC/MMC Cards complying with the Secure Digital Host Controller (SDHC) specification under macOS.
- Only supports eMMC/MMC cards at up to HS200 speeds.
- Due to work in progress, you may experience a poor performance or even non-functional on some hardware.
- SD Cards are not supported by this driver.
NVMeFix
- Fixes Power Management for NVMe Drives.
- This kext may slower the R/W speeds of your NVMe Drives.
- Not recommended for NVMe Drives in RAID Card such as High Point SSD7000.
- This kext requires
Lilu.kextto function.
SATA-Unsupported
- Enables certain SATA Controllers under macOS.
- Certain SATA Controllers may not be recognised by the installer and due to this, you may not be able to see the target drive or the other drive connected to the particular controller.
- Such SATA Controllers are not recognised by the SATA kexts provided by Apple and this is due to Apple doesn’t uses that specific controller in their hardware.
- If you’re having a similar issue, you’ll need to use this kext to overcome this issue.
- Use «SATA-unsupported.kext» for macOS Sierra and later.
CtlnaAHCIPort
- Similar to SATA-Unsupported.kext
- Required for macOS Big Sur and Later.
ACHIPortInjector
- Enables unsupported SATA Controller on macOS
ATAPortInjector
- Enables unsupported IDE and ATA Controller on macOS
SASMegaRAID
- Enables LSI RAID 8xxx/92xxx Controllers.
- Enables Dell PERC 5, PERC6, H310, H700 and H800
- Enables IBM ServeRAID M1115
- Enables Intel RAID SRCSAS18E/SRCSAS144E
- Does not supports LSI Controllers with non-MegaRAID firmware
DiskArbitrationFixup
- Disables the uninitialized disk message for an uninitialized disk
- Removes
The disk you inserted was not readable by this computermessage when an uninitialized disk is connected.
Innie
- Makes PCIe drives appear as Internal
- An alternative option is to add the built-in device property for each drive installed.
Keyboard/Trackpad/Touchscreen
- Required for input functioning.
- Only for Laptops and mobile devices.
VoodooPS2Controller
- Enables PS/2 Keyboard, Mouse, and Trackpad
- Enables multi-gestures for Trackpad.
ApplePS2SmartTouchpad
- Multitouch driver for ELAN, FocalTech, and Synaptics Touchpad
- Similar to VoodooPS2Controller
VoodooInput
- Enables Magic Trackpad 2 software emulation for arbitrary input sources like VoodooPS2.
- Requires VoodooPS2.kext or VoodooI2c.kext to function.
VoodooRMI
- Required for Laptops with Synaptics SMBus Trackpads
- Requires
VoodooPS2Controller.kextandVoodooSMBus.kextfor SMBus based Trackpads to function. - Requires
VoodooI2C.kextfor I2C-based Synaptics Trackpads to function. - Similar to VoodooPS2Controller.kext
VoodooSMBus
- Required for Laptops with ELAN SMBus Trackpads.
- Enables multi-gestures for Trackpad.
- Similar to VoodooPS2Controller
- Provides support for the SMBUs capabilities of Intel I/O Controller Hubs (ICH), also called i801 SMBus.
- Do not use
VoodooPS2Controller.kextwith this kext.
VoodooI2C
- Enables I2C functioning.
- Required for Laptops with I2C Trackpads and Touchscreens.
- Requires a Satellite kext to function [
VoodooI2CHID,VoodooI2CAtmelMXT,VoodooI2CELAN,VoodooI2CFTEorVoodooI2CSynaptics] - Enables multi-gestures for Trackpad.
- Requires DSDT patching to work.
- Requires a working Battery meter for enabling Trackpad Preferences.
VoodooI2CHID
- Satellite kext.
- Adds support for I2C-HID device.
- Required for Laptops with I2C Trackpads and Touchscreens.
- Common Satellite kext for VoodooI2C.kext
- Requires
VoodooI2C.kextto function
VoodooI2CAtmelMXT
- Satellite kext.
- Required for Laptops with Atmel Multitouch I2C Device.
- Requires
VoodooI2C.kextto function
VoodooI2CELAN
- Satellite kext
- Required for Laptops with ELAN I2C Device.
- ELAN1200 and later requires VoodooI2CHID.kext to function
- Requires
VoodooI2C.kextto function
VoodooI2CFTE
- Satellite kext
- Required for Laptops with FTE I2C Device.
- Requires
VoodooI2C.kextto function
VoodooI2CSynaptics
- Satellite kext
- Required for Laptops with Synaptics I2C Device.
- Requires
VoodooI2C.kextto function
AlpsHID
- Satellite kext
- Required for Laptops with Alps I2C Device.
- Requires
VoodooI2C.kextto function - Requires AlpsHID VoodI2CHID version.
SerialMouse
- Enables Serial Mouse that uses the Microsoft Serial Mouse protocol
- Requires Mice to be connected before macOS is booted or it will not be detected.
- Does not supports HotPlug.
GK701HIDDevice
- Fixes two different keys registering instead of one for certain MSI GK-701 and related Keyboards.
- Requires SIP disabled.
BrightnessKeys
- Enables Automatic handling of Brightness Hotkeys.
- Requires
Lilu.kextto function
NoTouchID
- Disables Touch ID support on macOS when a compatible board ID is used.
- Fixes lag in authentication dialogs and delay in the login screen by disabling the Touch ID support.
- This kext is not required on 10.15.7 and later.
- This kext requires
Lilu.kextto function.
Battery
SMCBatteryManager.kext
- Enables Battery readings
- Required for Laptops only.
- Requires DSDT patching for battery meter.
Card Reader
- Required for Card Reader functioning.
Sinetek-rtsx
- Enables Realtek SD Card Reader
RealtekCardReader
- Enables Realtek PCIe/USB-based SD card readers
- Requires
RealtekCardReaderFriend.kextto function
RealtekCardReaderFriend
- Supporting kext for
RealtekCardReader.kext - Enables Card Reader information under
System Information>Card Reader - Helps to recognize the Card Reader as a native one.
- Requires
RealtekCardReader.kextandLilu.kextto function.
JMB38X
- Enables JMicron based Card Readers.
- Requires
HSSDBlockStorage.kextto function.
HSSDBlockStorage
- Supporting kext for
JMB38X.kext. - Requires
JMB38X.kextto function.
GenericCardReaderFriend
- Enables Card Reader information under System Information>Card Reader
- Required for built-in USB Card Reader which works OOTB but does not show up in System Information.
- Do not use this kext if your Card Reader is powered by either
AppleUSBCardReader.kextorRealtekCardReader.kext - Requires specifying the Vendor and the Product ID of your Card Reader.
- Requires
Lilu.kextto function
Sleep/Wake
HibernationFixup.kext
- Enables sync between RTC variables and NVRAM
- Enables native hibernation on systems with hardware NVRAM
- Supports Hibdernation modes 3 and 25
USBWakeFixup.kext
- Creates fake ACPI device with the right wakeup params
- Fixes display on wakeup from a USB device.
- Requires SSDT-USBW.aml to function.
Thunderbolt
ThunderboltReset
- Disables the ICM in the Alpine Ridge Controller for OS X/macOS to take over as the LC.
- Requires
Lilu.kextto function.
IOElectrify
- Enables always-on power to Intel Thunderbolt hardware
Kryptonite
- Enables eGPUs on macOS using Thunderbolt 1 and 2.
- Intended for real Macs without compromising Security features such as System Integrity Protection, FileVault and Authenticated-Root.
- Supports NVIDIA/AMD GPUs.
- Requires
Lilu.kext to function.
Virtualization
MacHyperVSupport
- Provides Hyper-V integration services for macOS
- Requires
SSDT-HV-CPU.aml,SSDT-HV-PLUG.amlandSSDT-HV-VMBUS.amlto function. - Requires Windows 8.1 and above
Sensors and Monitoring
SMCProcessor.kext
- Enables CPU Temperature for monitoring.
- Required for CPU sensing.
- Required for Intel CPUs only.
- Available in VirtualSMC package.
SMCSuperIO.kext
- Enables FAN Speed for monitoring.
- Required for fans reading.
- Required for Intel CPUs only.
SMCAMDProcessor.kext
- Enables Power Management and Monitoring for AMD CPUs.
- Requires
AMDRyzenCPUPowerManagement.kextandVirtualSMC.kextto function.
RadeonSensor.kext
- Enables Radeon GPUs temperature monitoring.
SMCLightSensor.kext
- Required for Ambient Light Sensor
- Required for Laptops only.
- Available in VirtualSMC package.
SMCDellSensors.kext
- Enables finer monitoring and Control of FANs
- Only required for Dell systems supporting System Management Mode (SMM).
- Available in VirtualSMC package.
Miscellaneous
RestrictEvents.kext
- Blocks unwanted processes causing compatibility issues on different hardware and unlocks the support for certain features restricted to other hardware
- Fixes ExpansionSlotNotification and MemorySlotNotification on MacPro7,1 SMBIOS.
- Required for MacPro7,1 SMBIOS.
FeatureUnlock.kext
- Enables Sidecar, NightShift, AirPlay, and Universal Control
RTCMemoryFixup
- Emulates some offsets in CMOS (RTC) memory
- Helps to avoid some conflicts between macOS AppleRTC and BIOS/firmware of your System.
SystemProfilerMemoryFixup
- Enables memory tab on systems when using MacBook SMBIOS which have soldered RAM.
- Requires
Lilu.kextto function
TOSMotionSensor
- Enables accelerometer for Toshiba Laptops.
- This kext does not offer HDD protection.
Debugging
DebugEnhancer
- Enables Debug putout in the macOS Kernel.
- Requires
Lilu.kextto function
- Do not download the project files. The pre-built binaries/downloads are available in the README.md section. Make sure you read it carefully.
- Download the latest version for better support.
- Use the Kexts from the RELEASE folder and the RELEASE.zip file.
- If you’re following the process on Windows or Linux, you’ll see the Kexts like normal folders.
- Only copy the files with the
.kextExtension. - Do not copy the
.dsYMfile from the RELEASE folder. They’re only for debugging purposes. - Do not place unnecessary kexts here. It might prevent booting the installer.
- Only use basic kexts which are required to boot off the installer. You can install the rest required kexts at the time of post-installation.
- The VirtualSMC package includes Battery and Sensors plugins (SMCBatteryManager.kext, SMCDellSensors.kext, SMCLightSensor.kext, SMCProcessor.kext, and SMCSuperIO.kext). You do not need these kexts for booting the installer.
- Do not use «SATA-unsupported.kext» and «CtlnaAHCIPort.kext» together.
- The Optional kexts are purely dependent on the hardware you have. If you’re having matching hardware, then only add the kexts otherwise adding unnecessary kexts isn’t a good idea and is highly discouraged.
Here’s what your EFI somewhat look like:
Now that you have obtained the OpenCore Base EFI and gathered SSDTs (.aml), Drivers (.efi) and Kexts (.kext), the resulting EFI folder in your working directory should look something like this:
Last edited:
- Joined
- Jul 22, 2018
- Messages
- 8,664
- Motherboard
- Supermicro X11SPA-T
- CPU
- Intel Xeon W-3275 28 Core
- Graphics
- 2xAMD RX 580 8GB
- OS X/macOS
- 13.x
- Bootloader
-
- OpenCore (UEFI)
- Mac
-
- Mac mini
- MacBook Pro
- Mobile Phone
-
- Android
- iOS
-
-
#5
Now, as you have things in order, the next step is to set up config.plist. It is highly recommended to create your own config.plist as the hardware differs. Copying from somewhere else isn’t a good idea. You can obtain a sample.plist which is bundled with OpenCore pkg and this sample.plist will be used as a base for setting up config.plist.
I. Obtaining Sample config.plist
1. As you already have downloaded OpenCore Pkg, simply copy sample.plist from OpenCore/RELEASE/Docs to EFI/OC working directory and rename it to config.plist. The directory structure for OpenCore Pkg for Docs has been provided below.
Docs
├── AcpiSamples
│   ├── Binaries
│   └── Source
├── Changelog.md
├── configuration.pdf
├── Differences.pdf
├── Sample.plist
└── SampleCustom.plist- To avoid any conflicts and outdated settings, OpenCore and sample.plist should be from the same RELEASE version and should not mismatch.
Now, as we have setup OpenCore and the required SSDTs (.aml), Drivers (.efi), Kexts (.kext) and config (.plist), the resulting EFI folder in your working directory should look something like this:
EFI
├── BOOT
│   └── BOOTx64.efi
└── OC
    ├── ACPI
    │   ├── SSDT-AWAC-DISABLE.aml
    │   ├── SSDT-EC-USBX.aml
    │   └── SSDT-PLUG.aml
    ├── Drivers
    │   ├── OpenRuntime.efi
    │   ├── OpenHfsPlus.efi
    │   └── ResetNvramEntry.efi
    ├── Kexts
    │   ├── Lilu.kext
    │   ├── VirtualSMC.kext
    │   ├── WhateverGreen.kext
    │   ├── AppleALC.kext
    │   ├── USBInjectAll.kext
    │   └── RealtekRTL8111.kext
    ├── Resources
    ├── Tools
    │   ├── BootKicker.efi
    │   ├── ChipTune.efi
    │   ├── CleanNvram.efi
    │   ├── ControlMsrE2.efi
    │   ├── CsrUtil.efi
    │   ├── GopStop.efi
    │   ├── KeyTester.efi
    │   ├── MmapDump.efi
    │   ├── OpenControl.efi
    │   ├── OpenShell.efi
    │   ├── ResetSystem.efi
    │   ├── RtcRw.efi
    │   └── TpmInfo.efi
    ├── config.plist
└── OpenCore.efi- Your EFI might differ as each system is different and will have different requirements.
II. Cleaning up config.plist
Now before you start working with your config.plist, it is highly recommended to clean up the config.plist to have the required settings only. A basic clean-up is required as by default, OpenCore includes numerous settings, for several purposes and all of them may not be required by a particular system. You need to use the settings required by your system and remove all irrelevant entries and settings from your config.plist. Although, most of such settings are already off, but do exist. Keeping such settings will not harm but to reduce the size and have less clutter, it is strongly advised to delete the irrelevant settings which you don’t need.
Starting from this step, you’ll need to use a tool to edit the config.plist and we’ll use OC Auxiliary Tools to edit the config.plist and configure it accordingly. With OC Auxiliary Tools, you have the advantage of Cross-Platform i.e. you can use the tool on Windows, Mac, and Linux. To edit your OpenCore config.plist using OC Auxiliary Tools, follow the steps below.
1. Download OC Auxiliary Tools from the downloads section of this forum.
For macOS
Mount the .DMG file by openening the .dmg file
Move the OCAuxiliaryTools to your Applications folder
Open OCAuxiliaryTools.app to launch the Application
For Windows
Extract the zip and you’ll get the OCAT-Win64 folder
Use OCAuxiliaryTools.exe to launch the Application
For Linux
Update OC Auxiliary Tools
Perform an upgrade check for OC Auxiliary Tools App using Help>Download Upgrade Packages. If there’s any available package for an upgrade, it will download it. Once it finishes downloading, click on Close and start upgrade and the App will upgrade to its latest version. After the upgrade, when the App reopens, check for an update using Help> Update Check. If you’re using the latest version, you’ll see the following
Note that you don’t need to follow this step if you have downloaded the latest OC Auxiliary Tools.
Update OpenCore Package
Now, click on the Sync icon Upgrade OpenCore and Kexts icon and you’ll see something similar to the following
Select Latest Version from Choose OpenCore Version option.
Click on Get OpenCore and it will update the OpenCore Database.
Once the OpenCore Database is updated, you’ll see the following
Open your config.plist from the directory EFI/OC/ using OC Auxiliary Tools
ACPI
Add
1. Select all the ACPI entries using Command+A or CTRL+A on your Keyboard.
2. Click on the delete button to remove all the entries and you should have all the entries removed.
Delete
1. Move to the Delete Tab and select all the entries using Command+A or CTRL+A on your Keyboard
2. Click on the delete button to remove all the entries and you should have all the entries removed.
Patch
1. Move to Patch Tab and select all the entries using Command+A or CTRL+A on your Keyboard
2. Click on the delete button to remove all the entries and you should have all the entries removed.
Quirks
Remove ResetLogoStatus
Booter
MmioWhitelist
1. Select all the entries using Command+A or CTRL+A on your Keyboard
2. Click on the delete button to remove all the entries and you should have all the entries removed.
Patch
1. Move to Patch Tab and select all the entries using Command+A or CTRL+A on your Keyboard
2. Click on the delete button to remove all the entries and you should have all the entries removed.
DP (Device Properties)
Add
1. Select all the Device entries using Command+A or CTRL+A on your Keyboard
2. Click on the delete button to remove all the entries and you should have all the entries removed.
Kernel
Add
1. Select all the Kext entries using Command+A or CTRL+A on your Keyboard
2. Click on the delete button to remove all the entries and you should have all the entries removed.
Block
1. Move to Patch Tab and select all the entries using Command+A or CTRL+A on your Keyboard
2. Click on the delete button to remove all the entries and you should have all the entries removed.
Force
1. Move to Patch Tab and select all the entries using Command+A or CTRL+A on your Keyboard
2. Click on the delete button to remove all the entries and you should have all the entries removed.
Patch
1. Move to Patch Tab and select all the entries using Command+A or CTRL+A on your Keyboard
2. Click on the delete button to remove all the entries and you should have all the entries removed.
Misc
Entries
1. Select all the Boot entries using Command+A or CTRL+A on your Keyboard
2. Click on the delete button to remove all the entries and you should have all the entries removed.
Tools
1. Move to Tools Tab and select all the Tools entries using Command+A or CTRL+A on your Keyboard
2. Click on the delete button to remove all the entries and you should have all the entries removed.
NVRAM
Add
1. Select the UUID 7C436110-AB2A-4BBB-A880-FE41995C9F82
2. From the right pane, select the entry shown and click on the delete button to remove the key and you should have the key entry removed.
3. From the right pane, select the value for the Key prev-lang:kbd and click on the Delete button to delete the value.
UEFI
Drivers
1. Select all the Drivers entries using Command+A or CTRL+A on your Keyboard
2. Click on the delete button to remove all the entries and you should have all the entries removed.
ReservedMemory
1. Move to Patch Tab and select all the entries using Command+A or CTRL+A on your Keyboard
2. Click on the delete button to remove all the entries and you should have all the entries removed.
Finally, Save your config.plist using the Menu File>Save option
III. Adding SSDTs, Kexts and Drivers in config.plist
Now, as we have got a cleaned-up config.plist, we can start adding the SSDTs (.aml), Kexts (.kext) and Drivers (.efi) to our config.plist. Unlike Clover, OpenCore requires the entries of the particular SSDTs, Kexts and Drivers in the appropriate section of the config.plist which are present in their respective directories. This linking step is necessary as OpenCore requires the entries to be present in the config.plist and without them, OpenCore will simply not boot to the target OS. To add the SSDTs, Kexts and Drivers, follow the steps below.
1. Open your config.plist using OC Auxiliary Tools from EFI/OC directory.
SSDTs
1. In the Add Tab, click on Add button and select all the .aml files from EFI/OC/ACPI directory and you should have all the .aml files entries added.
- The .aml files must exist in EFI/OC/ACPI directory
- As the ACPI loading order is important for OpenCore, it is advised to load the SSDTs in sorted order. This means all the necessary SSDTs should be loaded first and dependencies SSDTs should load later to avoid issues.
- Your entries might differ as each system is different and will have different requirements.
Kexts
1. In the Add tab, click on Add button and select all the .kext files from EFI/OC/Kexts directory and you should have all the .kext files entries added.
2. Arrange the kexts using arrow buttons. < button for up and > for down
- The .kext files must exist in EFI/OC/Kexts directory
- As the kext loading order is important for OpenCore, it is advised to load the kexts in sorted order. This means all the necessary kexts should be loaded first and dependencies kexts should load later to avoid issues.
- Your entries might differ as each system is different and will have different requirements.
Drivers
1. In the Drivers tab, click on Add button and select all the .efi files from EFI/OC/Drivers directory and you should have all the .efi files entries added.
2. Arrange the drivers using arrow buttons. < button for up and > for down
NOTES:
- The .efi files must exist in EFI/OC/Drivers directory
- As the driver loading order is important for OpenCore, it is advised to load the drivers in sorted order. This means all the necessary drivers should be loaded first.
- Your entries might differ as each system is different and will have different requirements.
- The config.plist must match the SSDTs, Kexts, and Drivers in the respective directories of the EFI folder. If you tend to delete a file in these directories and the entries are left linked in the config.plist, OpenCore will halt and will not boot further.
2. Finally, Save your config.plist using the Menu File>Save option.
- Joined
- Jul 22, 2018
- Messages
- 8,664
- Motherboard
- Supermicro X11SPA-T
- CPU
- Intel Xeon W-3275 28 Core
- Graphics
- 2xAMD RX 580 8GB
- OS X/macOS
- 13.x
- Bootloader
-
- OpenCore (UEFI)
- Mac
-
- Mac mini
- MacBook Pro
- Mobile Phone
-
- Android
- iOS
-
-
#6
OpenCore comes with default sample config.plist file. This config.plist cannot be used to boot most of the systems. You’ll need to configure the config.plist according to your hardware, mainly the Quirks. Each System has a different set of Quirks which is required for booting. Therefore knowing your hardware is very important. In addition, you may need to configure Graphics and other PCIe devices in order to boot.
We’ve already created a separate thread on configuring your config.plist to boot the installer. Depending on your hardware, configure the config.plist according to the guide. Depending on the Platform and CPU you have, select the appropriate config.plist building guide.
Intel Desktops
| CPU Code Name | Guide Link |
|---|---|
| Penryn | |
| Lynfield | |
| Sandy Bridge | |
| Ivy Bridge | |
| Haswell | |
| Broadwell | |
| Skylake | |
| Kaby Lake | |
| Coffee Lake | |
| Comet Lake | |
| Rocket Lake | |
| Alder Lake |
- Intel NUC and a few AIO use Mobile CPUs. For all such hardware, it is advised to use the config.plist from
Intel Laptopssection.
Intel Laptops
| CPU Code Name | Guide Link |
|---|---|
| Penryn | |
| Lynfield | |
| Sandy Bridge | |
| Ivy Bridge | |
| Haswell | |
| Broadwell | |
| Skylake | |
| Kaby Lake | |
| Coffee Lake | |
| Comet Lake | |
| Rocket Lake | |
| Alder Lake |
Intel HEDT
| CPU Code Name | Guide Link |
|---|---|
| Penryn | |
| Lynfield | |
| Sandy Bridge | |
| Ivy Bridge | |
| Haswell | |
| Broadwell | |
| Skylake | |
| Kaby Lake | |
| Coffee Lake | |
| Comet Lake | |
| Rocket Lake | |
| Alder Lake |
AMD Desktops
- Joined
- Jul 22, 2018
- Messages
- 8,664
- Motherboard
- Supermicro X11SPA-T
- CPU
- Intel Xeon W-3275 28 Core
- Graphics
- 2xAMD RX 580 8GB
- OS X/macOS
- 13.x
- Bootloader
-
- OpenCore (UEFI)
- Mac
-
- Mac mini
- MacBook Pro
- Mobile Phone
-
- Android
- iOS
-
-
#7
Once you’re done editing the config.plist file, the next step is to validate the config.plist to make sure no error exists. To validate your config.plist, follow the steps below.
- Joined
- Jul 22, 2018
- Messages
- 8,664
- Motherboard
- Supermicro X11SPA-T
- CPU
- Intel Xeon W-3275 28 Core
- Graphics
- 2xAMD RX 580 8GB
- OS X/macOS
- 13.x
- Bootloader
-
- OpenCore (UEFI)
- Mac
-
- Mac mini
- MacBook Pro
- Mobile Phone
-
- Android
- iOS
-
-
#8
After validating the config.plist, all you need to do is install OpenCore to Bootable USB. To install OpenCore, follow the steps below.
For macOS Users
I. UEFI
If the target system is UEFI capable system, follow the steps below to install OpenCore
If you have used Online Method to create the Bootable USB (see Chapter 2), simply copy the final EFI folder from the working directory to the root of the USB Flash Drive you made earlier.
If you have used Offline Method to create the Bootable USB (see Chapter 2), follow the steps below
Assuming the Bootable USB is still plugged into the computer running macOS, follow the steps below
1. Mount the EFI Partition of your Bootable USB Flash Drive
2. Copy the final EFI folder from the working directory to the EFI Partition of the Bootable USB Flash Drive you made earlier.
II. Legacy
If the target system is not UEFI capable and only supports Legacy Boot Mode, it will involve a few more steps to install OpenCore.
For either of the method used for creating the Bootable USB, either the Offline or Online Method, you’ll need to
For booting OpenCore on Legacy systems which does not support UEFI Boot Mode, a third-party UEFI environment provider is required. OpenDuetPkg is one such UEFI environment provider for legacy systems. To run OpenCore on such a legacy system, OpenDuetPkg can be installed with a dedicated tool BootInstall (bundled with OpenCore). Third-party utilities can be also used to perform the same on systems other than macOS.
For either of the method used for creating the Bootable USB, either the Offline or Online Method, you can use the same method to install the UEFI environment provider.
Within the downloaded OpenCorePkg (RELEASE), navigate to the Utilities/LegacyBoot directory.
1. Open the Terminal and execute the following command:
#Move to the OpenCore directory
cd Downloads/OpenCore-0.X.X-RELEASE/Utilities/LegacyBoot
NOTE: Replace the X with the OpenCore version.
2. Depending on the CPU type, execute BootInstallIA32.tool (for 32-bit) or BootInstall_X64.tool (for 64-bit) in Terminal. When prompted, enter your password.
#Run BootInstall tool
sudo ./BootInstall X64.tool
You’ll see something similar to the following as an output of the operation:
3. Determine the disk number of your Bootable USB and type the same and press enter key. In our case, it is disk2.
Now, the BootInstall tool will install the required boot file on the target drive and you’ll see the following as an output of the operation.
In case you’re using the BootInstall tool for the Online Method, you’ll see the following as an output of the operation.
4. Once the process is finished, you’ll be provided with a boot file in the EFI Partition of your macOS Bootable USB.
5. Quit Terminal.
For Windows Users
Copy the final EFI folder from the working directory to the root of the USB Flash Drive you made earlier.
Legacy
1. Open BOOTICE and select the macOS Bootable USB as a Destination Disk.
2. Click on Process MBR and then select Restore MBR. When prompted, select the boot0 file from the Utilities/LegacyBoot directory found in OpenCorePlg you downloaded earlier (see Chapter 2).
3. Click on Process PBR and then select Restore PBR. When prompted, select the boot1f32 file from the Utilities/LegacyBoot directory found in OpenCorePlg you downloaded earlier (see Chapter 2).
4. Depending on the target system, copy bootx64 (64-bit CPUs) or bootia32 (32-bit CPUs) file from the Utilities/LegacyBoot directory found in OpenCorePlg you downloaded earlier (see Chapter 2) to the root of the USB Flash Drive you made earlier.
5. Rename bootx64 or bootia32 to boot to ensure it can boot properly.
For Linux Users
Copy the final EFI folder from the working directory to the root of the USB Flash Drive you made earlier.
- Joined
- Jul 22, 2018
- Messages
- 8,664
- Motherboard
- Supermicro X11SPA-T
- CPU
- Intel Xeon W-3275 28 Core
- Graphics
- 2xAMD RX 580 8GB
- OS X/macOS
- 13.x
- Bootloader
-
- OpenCore (UEFI)
- Mac
-
- Mac mini
- MacBook Pro
- Mobile Phone
-
- Android
- iOS
-
-
#9
Before you rush and try to boot using the USB Installer, there are a few steps that you need to perform. This will eliminate any possible conflicts and make the installation hassle free with great reliability.
Performing a Backup
Although, while performing OS X/macOS installation, unless you delete Disk/Partition by mistake, OS X/macOS does not format the Disk/partition without your consent. Even though, it is recommended to perform a complete backup of your target Disk before proceeding to avoid any possible data loss. This will ensure that your data is safe and you can debug the installation without any hassle. This becomes necessary for Dual Booting Configuration.
Removing Extra Installed and Connected Devices
When booting the OS X/macOS Installer, it is important that you only have the basic Devices connected and any extra installed hardware and connected Devices must be removed or the installer may fail to boot or it can even throw a Kernel Panic. Therefore it is advised to remove the following if it exists
— Thunderbolt Cards
— FireWire Cards
— External PCIe and USB Sound Cards
— eGPU
— SATA/SAS Expanders
— SATA/RAID Cards
— External PCIe Ethernet Card
— Any USB Flash Drive, External Storage Drive, NAS, Mobile Phones, Audio Interface (USB/FireWire/Thunderbolt)
NOTE:
- Once the installation is complete, the compatible Devices can be installed back to the computer and can be configured during postinstallation time.
Setting up Installation Drive
In order to have a seamless experience with OS X/macOS, this guide recommends using a separate/spare drive for the installation. This way, you don’t need to create a separate partition on your main drive on which you have the primary OS. If you don’t have an option to use a separate/spare drive, follow Multiboot Installation Guide.
Setting Up BIOS/UEFI
In order to boot OS X/macOS, you need to set up your BIOS/UEFI. To set up your BIOS/UEFI, refer to the guide linked below
Last edited:
- Joined
- Jul 22, 2018
- Messages
- 8,664
- Motherboard
- Supermicro X11SPA-T
- CPU
- Intel Xeon W-3275 28 Core
- Graphics
- 2xAMD RX 580 8GB
- OS X/macOS
- 13.x
- Bootloader
-
- OpenCore (UEFI)
- Mac
-
- Mac mini
- MacBook Pro
- Mobile Phone
-
- Android
- iOS
-
-
#10
STEP 1: Booting the macOS Installer
After preparing your installation USB, OpenCore EFI, and setting up your BIOS/UEFI, you’re ready to install macOS on the target computer.
1. Turn on your target Computer.
2. Insert the Bootable USB containing macOS Installer and OpenCore EFI. It is always recommended to use the USB 2.0 ports for the installation. If the USB 2.0 ports does not work, try USB 3.0. The ports which will be working without patching (post-install process) are usually hardware dependent and may differ from case to case basis.
2. Boot to Boot Menu. The common Boot Menu Keys are Esc (ASUS Laptops), F8 (ASUS Desktops), F9 (HP), F12 (GIGABYTE)
NOTE:
- Several people use BIOS to override the Boot Device. It is advised to use the Boot Menu Key to enter the Boot Menu
- Refer to your Computer user manual if necessary
3. Select your USB Flash Drive with the UEFI Prefix and press enter to boot. For Legacy BIOS, select the USB Flash Drive
4. When at OC Boot picker, you’ll something similar to this.
NOTE:
- Depending on the type of the Bootable USB you created, you’ll see either EFI (External) (dmg) or Install macOS Big Sur (External)
5. Select Reset NVRAM and press enter.
6. Boot back to OC by following steps 2 and 3.
7. When at the OC Boot picker, select macOS Base System (External) or Install macOS (External) and press enter to boot and the installer will load in a while. You’ll see lots of scrolling texts while the installer loads.
STEP 2: Installing OS X/macOS
1. When at the installation screen, select your preferred language and continue
2. Select Disk Utility and continue, click on View, and select Show all Devices.
3. Now select your Hard Drive or SSD on which you want to install macOS and use the following parameters to erase your drive.
| Name | Macintosh HD |
| Format | APFS |
| Scheme | GUID Partition Map |
NOTES:
- The target disk/partition must be GUID
- APFS format is recommended for High Sierra and Later
- Users who plan to use High Sierra on HDD should use macOS Journaled (HFS+) Format instead of APFS Format.
- See Multiboot Guide for more info on installing on an existing Windows Drive
4. Close Disk Utility
5. Select Install macOS and continue with the options.
6. Now select Macintosh HD and click on Continue.
NOTES:
- Step #6 will format the target disk. Proceed with caution.
- This will take a couple of minutes and will restart at «Less than a minute is remaining». Upon completion, the system will automatically restart. Your Mac will restart to complete the installation.
Here it ends the first phase of the installation.
7. When your Mac restarts, select Boot macOS Install from Macintosh HD or (Your drive name) and then boot. The installer screen will appear and continue the second phase of the installation. During this phase, the installer will install files to your target disk and create a Recovery HD partition. Upon completion, your Mac will automatically restart.
STEP 3: Finishing OS X/macOS Setup
After finishing the macOS installation, it’s time to set up the macOS for the first usage with the newly installed macOS.
When you’re at the welcome screen, continue with the basics options such as Keyboard setup, Network, Computer Account, and Privacy settings.
Now the installation is complete! You should be logged in to your Desktop with the beautiful Wallpaper
NOTE:
- The first boot may be slower as the caches are not built yet. Once the caches are built, it will boot normally.
Please read post #2 of this thread for additional information on Post-Installation
Last edited:
Similar threads
-
This site uses cookies to help personalise content, tailor your experience and to keep you logged in if you register.
By continuing to use this site, you are consenting to our use of cookies.
Regardless of your OS – whether it’s Windows 10 or macOS Sierra – you could face the instance where your device refuses to reboot. This can happen for numerous reasons, including hardware failure, file corruption, malicious update, and the likes. If something similar happens with your Apple PC, you can repair it with macOS bootable USB that features installation media.
This is one of the core arguments for making a macOS bootable USB on a Windows PC when your Mac is working correctly. However, if none of your Apple computers [MacBook Air, iMac, Mac Pro, Mac Mini, MacBook Pro or MacBook] are working, then a Windows PC can be used to rescue the PC. You can use a Windows 10, or Windows 8.1/7 to create a bootable USB installation media for reinstalling macOS Sierra on your Apple PC.
Guide to Creating a macOS bootable USB on a Windows PC
In this tutorial, we’ll take you through the steps you need to take to create a macOS Sierra bootable USB installation on a PC featuring Windows 10, 8 or Windows 7. This can then be used to upgrade or reinstall Apple’s MacOS.
The pre-requisites
Before taking any step, you’d need the following:
- A problematic Mac PC with OS X or MacOS Sierra [10.12 or a later version].
- TransMac software [trial version would be sufficient].
- 16GB flash storage.
- A copy of macOS DMG file.
To use the latest macOS version to make a bootable USB drive, take these steps:
Step 1: Download, launch and install the TransMac software on Windows. The software comes at a cost, but you’ll get a 15-day trial free of cost, which is just enough. P.S. If you like TransMac, you can buy the paid version and show some love to the developer.
Step 2: Put in the USB flash drive you wish to use to resolve the problem of Mac. If you have a backup on the USB, remember to copy it somewhere, as the USB’s content will be erased.
Step 3: Right click on TransMac and choose “Run as administrator.”
Step 4: If you’re using TransMac’s free trial, click Run after waiting for a total of 15 seconds.
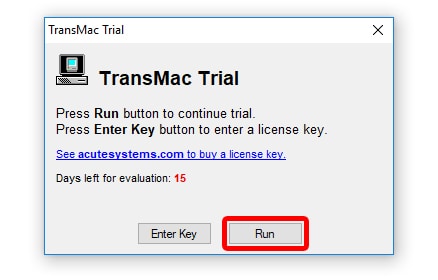
Step 5: On the late pane, right click the flash drive of USB, and choose “Format Disk for Mac.” You should do this before making bootable media because there is a probability that a Windows device was used to format the drive. If that’s the case, it’s likely that it is making use of the MBR partition. However, for it to work on Mac, it requires GPT partition.
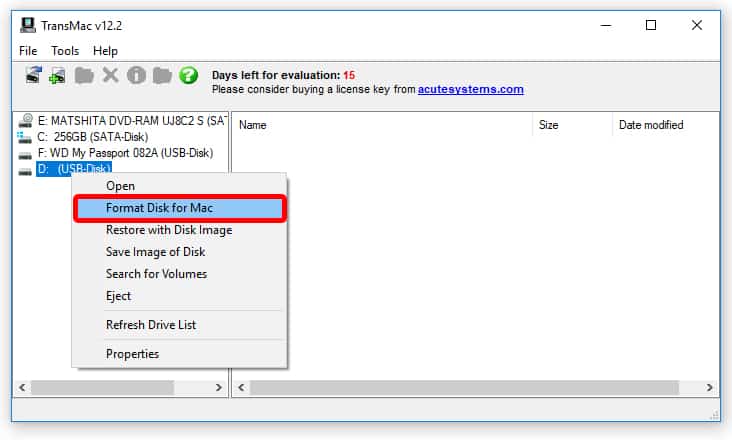
Step 6: Click “Yes” on the warning message when prompted to continue formatting.
Step 7: Give some name to the drive and click “OK.” For example, you could name it “macOS bootable USB.”
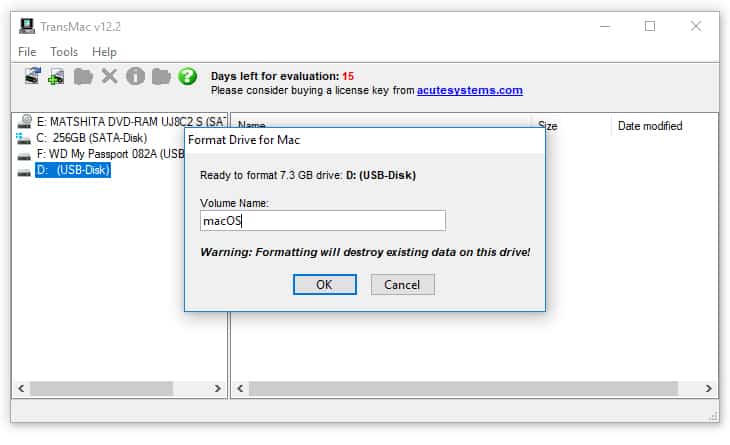
Step 8: Now proceed further by clicking “Yes.”
Step 9: Click “OK” to continue when the formatting finishes.
Step 10: Next, right click on the flash drive of the USB, choose “Restore with Disk Image.”
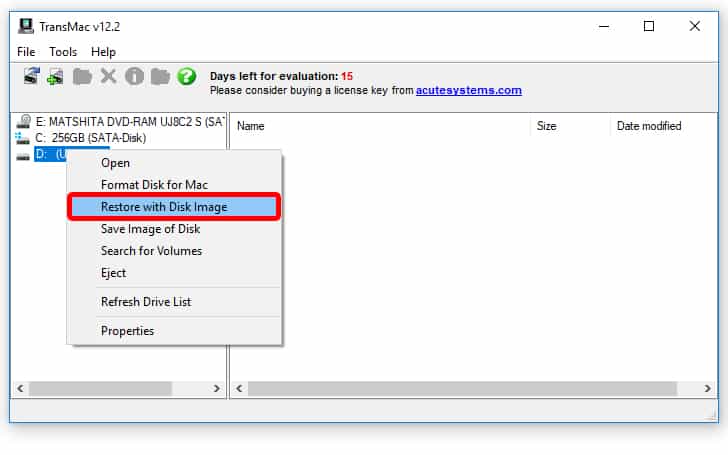
Step 11: Click “yes” to erase the data on the flash drive when you get the warning message.
Step 12: Now on the right, click the button that says browse, and find the .dmg file with the installation files of macOS.
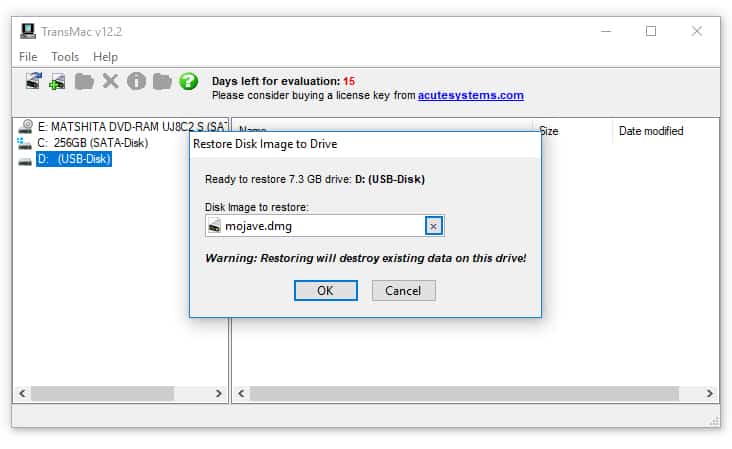
Step 13: Now click “Open” > “OK” > “Yes’ to make the macOS USB bootable media.
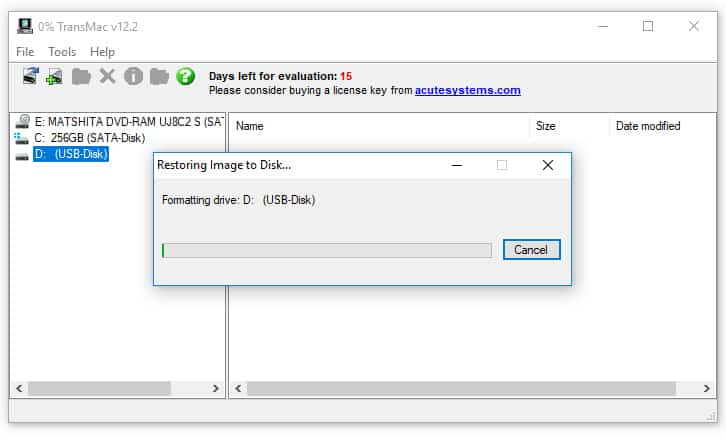
Once the process comes to an end, put the USB flash drive on your Mac PS to reinstall, install, or ugrade the OS to macOS’s newest version, which could be Sierra or above.
Steps to Create GPT Partition on a USB flash drive
If the USB flash drive doesn’t work with TransMac, you could still be facing an issue of partition. When that happens, you’ll want to repeat the whole process, but this time around, follow the steps listed below to utilize the Dispart command-line utility on the Windows PC for creating the relevant GPT partition.
- Launch Command Prompt in system administrator
- Type the command “diskpart” and press “Enter.”
- Enter the “list disk” command to each drive connected to your PC and press “Enter.”
- Now type the command “select disk” followed by the assigned number for the flash drive “select disk 4”, and press “Enter” again.
- Now enter “clean” command and press “Enter.”
- Enter the “convert GPT” command and hit “Enter.”
- Type the “create partition primary” command and tap “Enter” to finish the process.
After you’ve made a GPT partition for the USB flash drive, you can leverage the instructions above to leverage TransMac to make bootable media, but ignore the steps 5-9 this time around, and do what it says from the tenth step onward.
Once the process ends (note that it could take 30-60 minutes), connect the flash drive of USB and switch on the Mac PC while holding the “Option” key, and choose the USB flash drive to start the installation.
If you’re facing an issue producing bootable media, you can buy a flash drive that comes in the package of macOS Sierra.
That’s it. You’ve successfully created a macOS Bootable USB on a Windows PC. Feel free to use it at your will to fresh install macOS’s latest OS on Mac.
Узнайте, как подружить Mac и ПК.
macOS и Windows имеют массу отличий, одно из главных — файловая система. И если на Mac NTFS-диски можно хотя бы читать, то Windows диски, отформатированные в HFS+, не видит вообще. Но если вам очень надо, то есть несколько обходных путей.
Ситуации, когда это может понадобиться, бывают разными. Самая распространённая — это доступ к вашим файлам из Windows, установленной через Boot Camp (по умолчанию доступно только чтение файлов). В таких случаях либо ставят драйвер HFS+, добавляющий поддержку файловой системы Apple в Windows, либо используют специальные утилиты, которые уже умеют работать с HFS+. Мы рассмотрим оба варианта плюс ещё один, бонусный.
Способ 1. Работаем с HFS+ через драйверы
Драйверы хороши тем, что добавляют поддержку HFS+ на системном уровне, а значит, Mac-диски будут отображаться в «Проводнике» и других приложениях. Драйвер загружается при старте Windows, и разница между файловыми системами попросту перестаёт существовать: вы можете работать с дисками любых форматов.
Главное преимущество драйверов — это поддержка как чтения, так и записи файлов. Кроме того, этот способ обеспечивает максимально возможную скорость передачи данных. В качестве минуса можно упомянуть высокую цену: все популярные драйверы, обеспечивающие стабильную работу, довольно дороги.
Paragon HFS+ for Windows
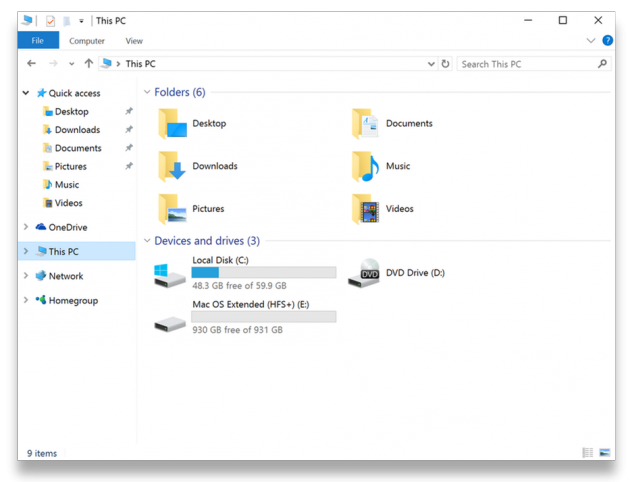
Самый популярный драйвер с полной поддержкой HFS+ на дисках любого типа (GPT и MBR) и набором дополнительных утилит. Отличается высокой производительностью при передаче файлов большого объёма по различным интерфейсам, включая SATA и USB. Совместим с Windows 10.
Лицензия стоит относительно недорого — 790 рублей. При этом есть 10-дневная пробная версия.
Попробовать Paragon HFS+ for Windows →
MacDrive
Более мощный драйвер с дополнительными возможностями. MacDrive умеет всё то же, что и драйвер от Paragon, но при этом позволяет открывать резервные копии Time Machine и копировать файлы из них на Windows-диски. Также драйвер работает в виртуальных машинах и позволяет монтировать Mac-диски в режиме Target Disk Mode для загрузки на других компьютерах.
MacDrive стоит дороже — целых 50 долларов. Пробная версия тоже есть, но на 5 дней.
Попробовать MacDrive →
Способ 2. Работаем с HFS+ через утилиты
Работа с Mac-дисками через специальные приложения предоставляет более ограниченную поддержку HFS+. Доступ к файловой системе при этом будет возможен только в них, а в «Проводнике» диски даже не будут отображаться. Обычно приложения позволяют только просматривать и копировать файлы, но не записывать.
Утилиты для работы с HFS+ стоят гораздо дешевле, причём встречаются даже бесплатные. Этот способ подойдёт тем, кому нужно только чтение файлов. Кроме того, с помощью не требующих установки утилит можно просматривать файлы с Mac-дисков на компьютерах, где нельзя установить драйвер или стороннее ПО.
HFSExplorer
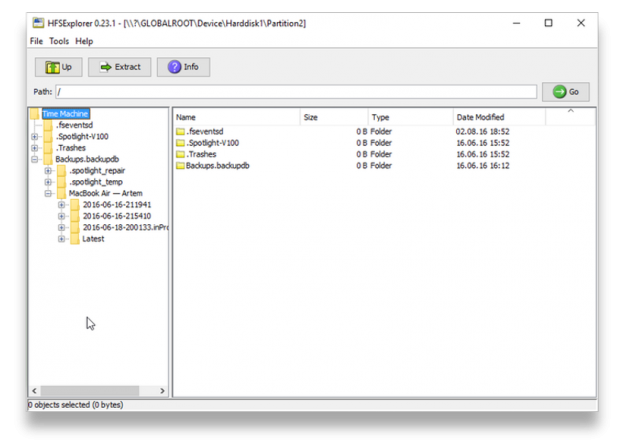
Простая и, что немаловажно, бесплатная утилита, которая позволит просматривать файлы с дисков HFS+ в среде Windows. HFSExplorer открывает содержимое Mac-дисков в виде дерева каталогов, где можно выбрать нужные файлы. Для просмотра их нужно скопировать на диск Windows. Также есть возможность создания образов дисков HFS+ для последующей работы уже с ними.
Утилита HFSExplorer не так удобна, как драйверы, и умеет только просматривать файлы, зато не стоит ни копейки.
Скачать HFSExplorer →
TransMac
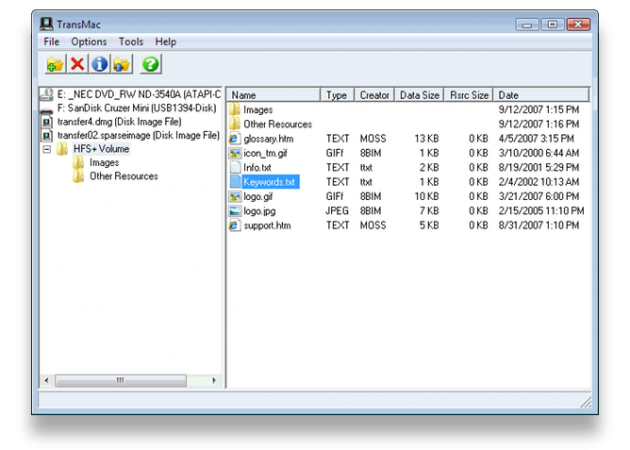
Как и HFSExplorer, TransMac не устанавливает драйверы в систему, а открывает доступ к дискам HFS+ внутри своего окна. Более того, приложение вообще не нужно инсталлировать, благодаря чему его можно использовать на рабочем компьютере или в гостях. При этом доступны не только чтение, но и запись данных. Есть даже поддержка изменения и форматирования разделов на дисках HFS+.
Утилита будет полезна всем, кто по каким-либо причинам не хочет (или не может) установить драйверы, но нуждается в полноценной поддержке HFS+.
Стоимость лицензии — 59 долларов, ознакомительный период — 15 дней.
Скачать TransMac →
Бонус
Если вы не хотите тратиться и заморачиваться с установкой драйверов или дополнительных утилит, можно поступить по-другому: воспользоваться Live-USB-дистрибутивом Linux. Загрузившись с него, вы получите доступ ко всем вашим дискам, включая HFS+ и NTFS, а затем сможете просмотреть или скопировать любые файлы на них. Так умеет, например, Ubuntu.
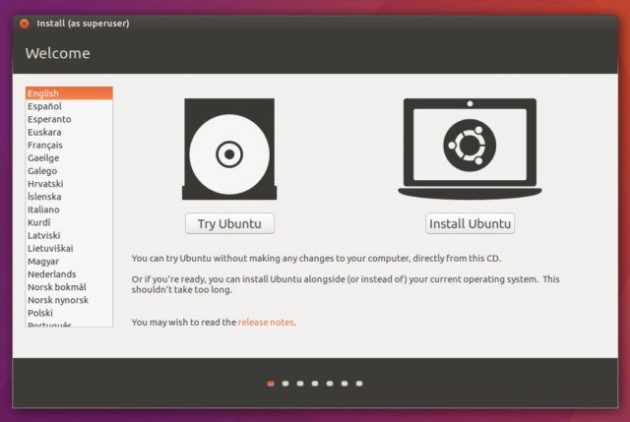
Установочный образ обычно имеет и Live USB, поэтому всё, что вам останется сделать, — это скачать образ и записать его на флешку.
Уровень сложностиПростой
Время на прочтение3 мин
Количество просмотров80K
Описываю свой рабочий опыт установки macOS на старенький macbook, так как другие способы описанные в интернете не дали результатов, либо привели к новым ошибкам.
Для начала скачиваем дистрибутив в формате *.dmg. Сделать это можно из App Store со второго macbook, либо с торрент (важно чтобы это была чистая копия из App Store).
Берем флешку на 8Гб и более, вставляем в компьютер с Windows, нажимаем Win+R, пишем cmd.
Запускается консоль и в ней уже пишем diskpart потом list disk, на экран выводиться список дисков windows, теперь важно не перепутать диски и выбрать именно диск с флешкой. Пишем select disk (номер флешки):

Теперь нам нужно преобразовать загрузочную область в формат GPT, набираем по очереди команды:
clean, convert GPT, create partition primary, exit.
C сайта https://www.acutesystems.com/ скачиваем программу TransMac, она платная, но работает 15 дней которых должно хватить. Запускаем, выбираем наш флеш накопитель, сначала выбираем пункт Format Disk fo Mac. И после завершения процесса выбираем Restore with Disk Image где нам нужно будет указать наш дистрибутив с macOS в формате *.dmg.

Все флешка готова, но загрузиться с нее не выйдет. Если загрузить мак удерживая клавишу alt, слоты загрузки будут пустые. Поэтому загружаем Recovery system удерживая клавиши cmd+R (нажимать нужно сразу после кнопки включения до появления яблока или земного шара).
Тут нам понадобиться дисковая утилита, запускаем ее, смотрим что флешка определилась и далее нам нужно отформатировать основной диск (Тут я подразумеваю что все ваши нужные файлы лежат в облаке, важных файлов на самом маке нет, так как после форматирования все файлы будут УТЕРЯНЫ).
Нажимаем в меню пункт вид-показывать все устройства. Выбираем APPLE SSD, нажимаем кнопку стереть. Вводим имя, Mac OS Extended, Схема разделов GUID.

Ну а теперь можно и загрузочную флешку сделать. Выходим из дисковой утилиты и в меню выбираем пункт Утилиты-Терминал. Пишем команду df -h и смотрим что в файловой системе есть флеш накопитель с названием который был в дисковой утилите (у меня это /Volumes/Install macOS Mojave) после этого копируем дистрибутив на жесткий диск командой
cp -R "/Volumes/Install macOS Mojave/Install macOS Mojave.app" "/Volumes/Macintosh HD"
После копирования закрываем терминал cmd+Q. Выбираем флешку и форматируем также как форматировали жесткий диск (Имя: USB, Mac OS Extended, Схема разделов GUID.).
Теперь запускаем терминал и создаем загрузочный образ:
"/Volumes/Macintosh HD/Install macOS Mojave.app/Contents/Resources/createinstallmedia" --volume /Volumes/USB
Соглашаемся, вводим y и возможно потребуется пароль от системы.
Теперь можно перезагрузить мак с зажатой клавишей alt и в пункте загрузки мы увидим картинку Install macOS Mojave. Теперь можно нажать пункт Установить macOS.
Если в процессе установки вылетела ошибка “Экземпляр программы установка macOS Mojave поврежден и не может быть использован.”
Нужно найти в интернете дату выпуска дистрибутива, отключить WiFi, запустить терминал ввести команду установки даты date: месяц-число-время-год в формате ммддччммгггг
Например, 12 декабря 10:00 2017 будет выглядеть так:
date 120110002017
Если не помогло, перезагружаем, отключаем интернет, ставим дату и после этого только запускаем установку.
После этого устанавливаем mac OS как обычно.
P.S.1: Чтобы восстановить флешку для пользования под Windows скачиваем программу SD Memory Card Formatter for Windows с сайта https://www.sdcard.org/ так как в проводнике вряд ли получиться отформатировать.
P.S.2: У других дистрибутивов названия путей будут другие, так что смотрите по возможности название папок например командой ls в терминале.
парпар
MacOS Developer Preview от Apple поставляется в архиве Apple DMG, доступ к которому на ПК с Windows невозможен, без DMG Extractor для извлечения файлов из архива DMG.
Если вы пользователь Windows и хотите запустить macOS Developer Preview, вам понадобится DMG Extractor для извлечения Developer Preview.app или InstallESD.dmg же, как вы открываете любой файл DMG в Windows .
MacOS / OS X Developer Preview доступен на веб-сайте Apple для зарегистрированных разработчиков, и его можно запустить на ПК с Windows при определенных условиях.

Как запустить OS X на Windows Hackintosh
Установка Mac OS на ПК без Mac является сложной задачей даже для технических пользователей. MacBreaker имеет полное руководство myHack, которое может быть полезным. Более полезные инструкции и руководства на сайте Hackintosh .
Как запустить macOS в Windows с VMware
Sysprobs содержит инструктивное руководство по загрузке OS X 10.9 в VMware с образом VMDK и описывает, как загружать Mavericks с Windows 7 или Windows 8. Проверьте руководство здесь
Как запустить macOS в Windows с виртуальной машиной Parallels Desktop
Установка OS X 10.9 Mavericks Developer Preview на пустой виртуальной машине в настоящее время не поддерживается.
Parallels предлагает полную статью базы знаний о том, как обновить виртуальную машину OS X до OS X Mavericks Developer Preview, просто создав снимок существующей виртуальной машины и установив на него Mavericks.
Вы использовали разные виртуальные машины для загрузки Mac OS X на Windows? Если у вас есть какие-либо советы и рекомендации о том, как легко получить OS X 10.9 Mavericks Developer Preview на виртуальной машине, поделитесь ими ниже.