
Узнайте, как подружить Mac и ПК.
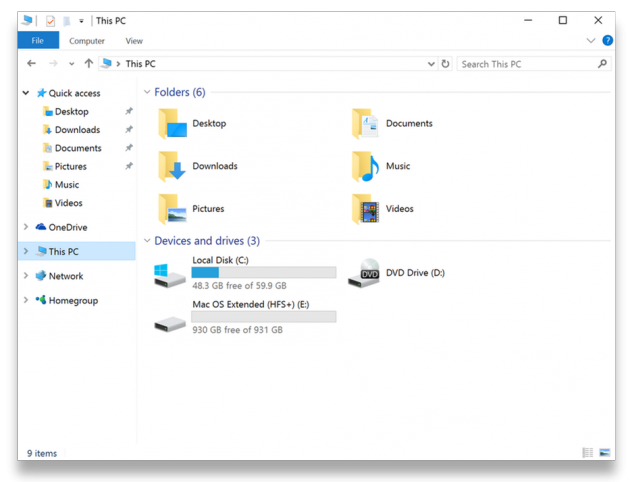
macOS и Windows имеют массу отличий, одно из главных — файловая система. И если на Mac NTFS-диски можно хотя бы читать, то Windows диски, отформатированные в HFS+, не видит вообще. Но если вам очень надо, то есть несколько обходных путей.
Ситуации, когда это может понадобиться, бывают разными. Самая распространённая — это доступ к вашим файлам из Windows, установленной через Boot Camp (по умолчанию доступно только чтение файлов). В таких случаях либо ставят драйвер HFS+, добавляющий поддержку файловой системы Apple в Windows, либо используют специальные утилиты, которые уже умеют работать с HFS+. Мы рассмотрим оба варианта плюс ещё один, бонусный.
Способ 1. Работаем с HFS+ через драйверы
Драйверы хороши тем, что добавляют поддержку HFS+ на системном уровне, а значит, Mac-диски будут отображаться в «Проводнике» и других приложениях. Драйвер загружается при старте Windows, и разница между файловыми системами попросту перестаёт существовать: вы можете работать с дисками любых форматов.
Главное преимущество драйверов — это поддержка как чтения, так и записи файлов. Кроме того, этот способ обеспечивает максимально возможную скорость передачи данных. В качестве минуса можно упомянуть высокую цену: все популярные драйверы, обеспечивающие стабильную работу, довольно дороги.
Paragon HFS+ for Windows
Самый популярный драйвер с полной поддержкой HFS+ на дисках любого типа (GPT и MBR) и набором дополнительных утилит. Отличается высокой производительностью при передаче файлов большого объёма по различным интерфейсам, включая SATA и USB. Совместим с Windows 10.
Лицензия стоит относительно недорого — 790 рублей. При этом есть 10-дневная пробная версия.
Попробовать Paragon HFS+ for Windows →
MacDrive
Более мощный драйвер с дополнительными возможностями. MacDrive умеет всё то же, что и драйвер от Paragon, но при этом позволяет открывать резервные копии Time Machine и копировать файлы из них на Windows-диски. Также драйвер работает в виртуальных машинах и позволяет монтировать Mac-диски в режиме Target Disk Mode для загрузки на других компьютерах.
MacDrive стоит дороже — целых 50 долларов. Пробная версия тоже есть, но на 5 дней.
Попробовать MacDrive →
Способ 2. Работаем с HFS+ через утилиты
Работа с Mac-дисками через специальные приложения предоставляет более ограниченную поддержку HFS+. Доступ к файловой системе при этом будет возможен только в них, а в «Проводнике» диски даже не будут отображаться. Обычно приложения позволяют только просматривать и копировать файлы, но не записывать.
Утилиты для работы с HFS+ стоят гораздо дешевле, причём встречаются даже бесплатные. Этот способ подойдёт тем, кому нужно только чтение файлов. Кроме того, с помощью не требующих установки утилит можно просматривать файлы с Mac-дисков на компьютерах, где нельзя установить драйвер или стороннее ПО.
HFSExplorer
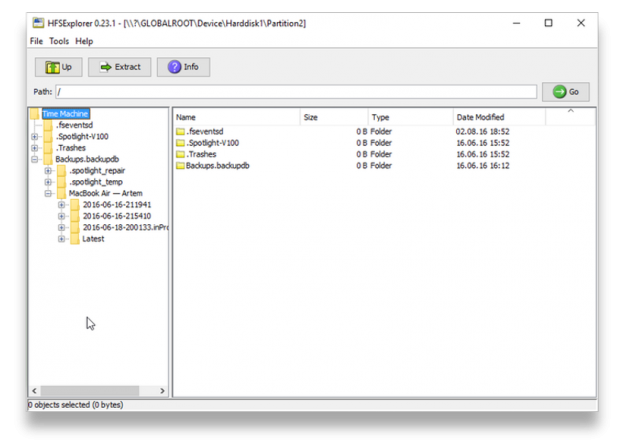
Простая и, что немаловажно, бесплатная утилита, которая позволит просматривать файлы с дисков HFS+ в среде Windows. HFSExplorer открывает содержимое Mac-дисков в виде дерева каталогов, где можно выбрать нужные файлы. Для просмотра их нужно скопировать на диск Windows. Также есть возможность создания образов дисков HFS+ для последующей работы уже с ними.
Утилита HFSExplorer не так удобна, как драйверы, и умеет только просматривать файлы, зато не стоит ни копейки.
Скачать HFSExplorer →
TransMac
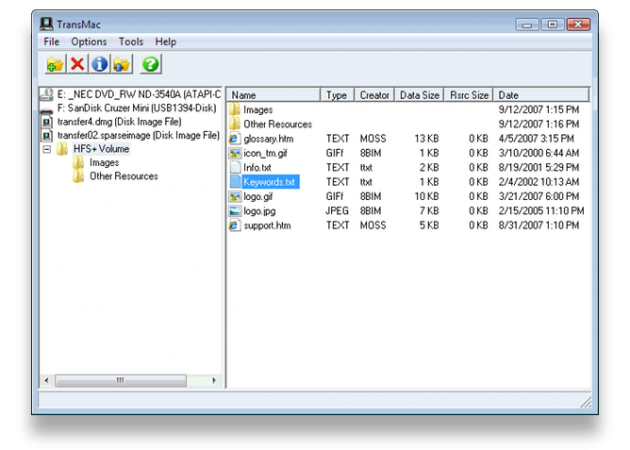
Как и HFSExplorer, TransMac не устанавливает драйверы в систему, а открывает доступ к дискам HFS+ внутри своего окна. Более того, приложение вообще не нужно инсталлировать, благодаря чему его можно использовать на рабочем компьютере или в гостях. При этом доступны не только чтение, но и запись данных. Есть даже поддержка изменения и форматирования разделов на дисках HFS+.
Утилита будет полезна всем, кто по каким-либо причинам не хочет (или не может) установить драйверы, но нуждается в полноценной поддержке HFS+.
Стоимость лицензии — 59 долларов, ознакомительный период — 15 дней.
Скачать TransMac →
Бонус
Если вы не хотите тратиться и заморачиваться с установкой драйверов или дополнительных утилит, можно поступить по-другому: воспользоваться Live-USB-дистрибутивом Linux. Загрузившись с него, вы получите доступ ко всем вашим дискам, включая HFS+ и NTFS, а затем сможете просмотреть или скопировать любые файлы на них. Так умеет, например, Ubuntu.
Установочный образ обычно имеет и Live USB, поэтому всё, что вам останется сделать, — это скачать образ и записать его на флешку.
Need to read Mac drives on your Windows PC?
Unfortunately, it’s not a straightforward process; you can’t just connect the Mac drive and expect it to work. Here’s everything you need to know to get it working.
Why Can’t Windows Read Mac Hard Drives?
Windows and macOS use different file systems. Windows uses the NTFS file system for its internal drives, whereas Apple replaced HFS+ with its successor—Apple File System (APFS)—in early 2017. Today, APFS is used on Macs, iPhones, iPads, and Apple TVs.
External hard disks and USB drives are generally formatted with either the Windows FAT32 file system (if they are smaller) or the NTFS file system for maximum compatibility. Most Apple devices, including Macs, can read from FAT32 and NTFS devices, although the newer macOSes don’t allow writing to NTFS drives.
All new Macs will be formatted with APFS. Older Mac drives are likely still formatted with the HFS+ file system. Windows can’t read either file system by default.
We’ll show you how to access your Mac-formatted APFS or HFS+ drive on Windows.
How to Read APFS on Windows
Firstly, let’s look at how to read the newer Apple File System format on Windows. All these apps will allow you to read drives from any updated Apple device, not just Macs.
1. MacDrive
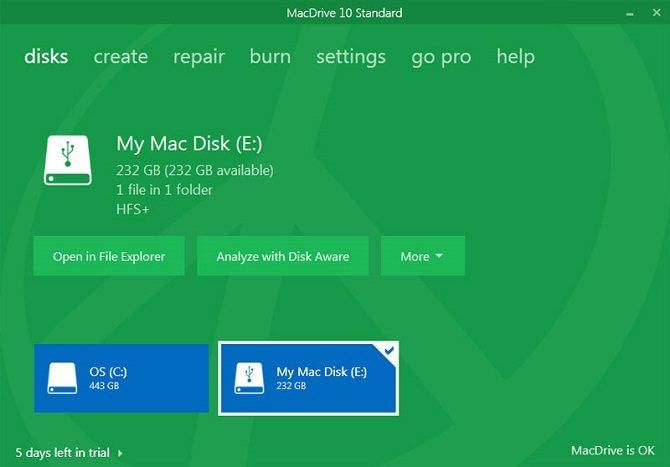
MacDrive has been one of the go-to Windows apps to read Mac-formatted drives for a long time—the first version was released in 1996. If you’re prepared to spend some money, you don’t need to look elsewhere.
The app works with both APFS and HFS+ drives.
Unlike other options for reading Mac-formatted drives on Windows, this software lets you read and write data to your Mac-formatted drive directly from Windows.
The app is focused on the freshly redesigned Disk Management Window. It acts as a hub for all the Mac drives connected to Windows.
You will also be able to see your APFS or HFS+ drive directly within File Explorer, allowing easy integration with the rest of the Windows operating system.
Other valuable features include the ability to create and partition Mac disks directly from your PC, a powerful disk repair feature, and robust security tools.
The standard version costs $49.99. There’s also a Pro version, which adds several features, including automatic file defragmentation, support for RAID setups, and a way to create Mac ISO files.
A five-day free trial is available.
Download: MacDrive for Windows ($49.99)
2. APFS for Windows by Paragon Software

Paragon’s APFS for Windows is another paid app and is MacDrive’s main competitor.
The app provides read-and-write access to APFS-formatted Mac partitions on Windows, read-and-write access to compressed and cloned files, and read-only support for encrypted volumes.
It supports disk auto-mounting at start-up but doesn’t have MacDrive’s partition tools.
MacDrive has one big advantage over Paragon’s app: HFS+ support. Paragon’s APFS for Windows only supports APFS-formatted drives. If you have some older Mac drives lying around that are still running HFS+, you will need to purchase Paragon HFS+ for Windows separately. MacDrive, therefore, is a more economical option.
However, one Paragon APFS license—which costs $49.95—works on three Windows PCs.
Download: APFS for Windows by Paragon Software ($49.95)
3. UFS Explorer Standard Access
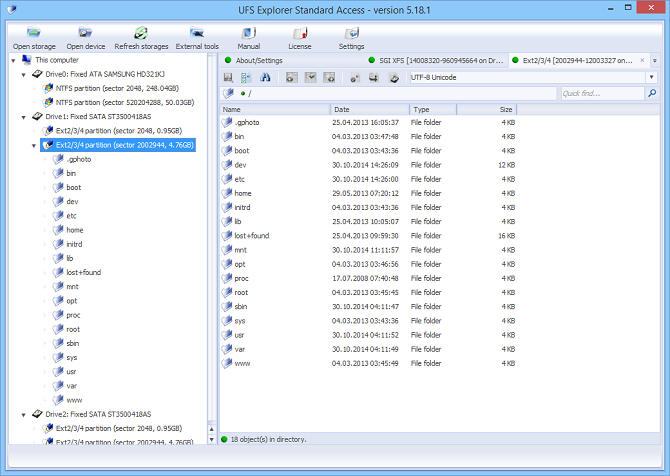
Our third and final recommendation for reading APFS Mac drives on Windows is UFS Explorer Standard Access. This is a paid option. The app costs $24.95 for personal use.
UFS Explorer Standard Access is the most versatile app on this list of options to read Mac-formatted hard drives on Windows. It can read the two formats we care about—APFS and HFS+—as well as NTFS, FAT, FAT32, exFAT, SGI XFS, Linux JFS, Unix/BSD, UFS/UFS2, and VMware VMFS.
UFS Explorer Standard Access also comes with RAID support as standard. The app has a built-in RAID builder, so you can customize it for your array.
There is a free version of the app that doesn’t have any time use restriction, but it will only let you copy files smaller than 256KB in size.
Download: UFS Explorer Standard Access for Windows ($24.95)
How to Read HFS+ on Windows
If your Mac-formatted drive is still running HFS+, use one of these three methods instead.
1. Install Apple HFS+ Drivers
If you only need read access for your Mac drive on Windows, you can install Apple HFS+ drivers for Windows. Be sure to remove Paragon or MacDrive before proceeding. Not doing so can cause system issues and crashes.
Download the correct Windows driver package, then follow these steps:
- Copy the ApplsHFS.sys and AppleMNT.sys files to C:\Windows\System32\drivers
- Merge the Add_AppleHFS.reg file with your Windows registry.
- Restart your system.
The video above also demonstrates the process.
After restarting Windows, your Mac-formatted drive should show up under This PC. As we’ve mentioned above, this method gives you read-only access to the Mac drive on Windows. If you would like to edit or delete files, try one of the alternative methods below.
2. HFSExplorer

HFSExplorer is completely free. You can use it to access Mac file systems from Windows without paying a dime. The developer hasn’t updated it since October 2015 due to the arrival of APFS, but it still works on older systems.
HFSExplorer requires Java. We generally recommend against having Java installed, but it’s necessary here unless you want to spend money. You also need to run the app as an Administrator.
This tool is simple to use. Connect your Mac-formatted drive to your Windows system, open HFSExplorer, and click File > Load File System From Device. HFSExplorer can automatically locate any connected devices with HFS+ file systems and access them. You can then extract files from the HFSExplorer window to your Windows drive.
Note that HFSExplorer is read-only, so you can’t modify or delete files on your Mac drive. Also, it doesn’t integrate with Windows File Explorer—files are available in the HFSExplorer application, and you must copy them elsewhere.
Download: HFSExplorer for Windows (Free)
3. HFS+ for Windows by Paragon Software
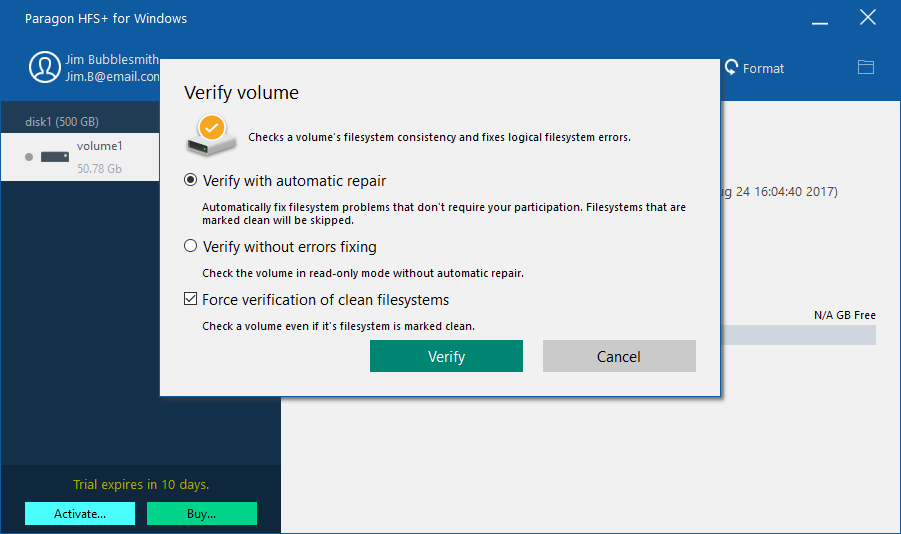
Paragon’s HFS+ for Windows is a paid application, but it distinguishes itself from other ways of reading Mac drives on Windows with additional functionality.
Unlike HFSExplorer, HFS+ for Windows provides full read/write access to Mac drives on Windows and promises high performance. It even integrates the HFS+ file system with Windows Explorer or File Explorer on Windows. Any Windows program can read from or write to the Mac drive.
The app costs $19.95, but it also offers a 10-day free trial. If you need to recover files from a drive, 10 days is plenty of time to install this file system driver, copy your files over, and uninstall it.
Additionally, Paragon’s HFS+ for Windows doesn’t need Java to work.
Download: HFS+ for Windows by Paragon Software ($19.95)
Format Your Mac Drive for Windows
If you have a Mac drive lying around and you no longer have a Mac, you’re not stuck with the Mac file system forever. After recovering the files from your drive with one of the tools above, you can format the drive and convert it to a standard FAT32 or NTFS partition that will work with most devices.
Formatting will erase all the files on your drive, so make sure you have backed up your files.
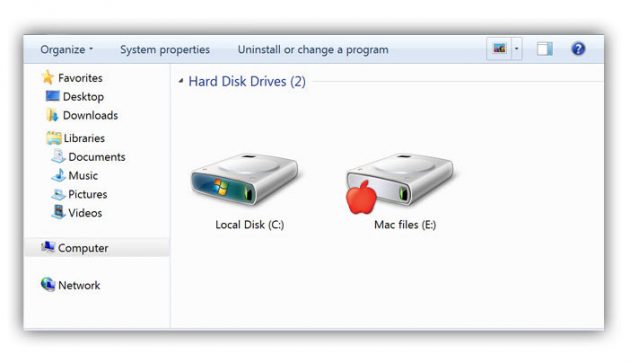
Чаще всего при работе с Apple, пользователи форматируют жесткие диски под Mac OS Journaled. Если после этого попытаться подключить такой диск к Windows, он не будет обнаружен системой.
Дабы избежать этой неприятности, вы можете воспользоваться программами MacDrive или TransMac. MacDrive отличается тесной интеграцией с Проводником и требует полной установки в систему, в то время как TransMac — более простое решение, не требующее установки, которое особенно пригодится в том случае, если вы не хотите оставлять «следов» на PC-компьютерах.
Скриншоты программ:
If you connect a drive formatted in Mac to a Windows PC, you’ll be prompted to format it before use. That is to say, you are not allowed to view anything saved on it before formatting. But the question is: if you click Format disk, your data will be ruined. This post from MiniTool will introduce several useful ways to help you with that; please read carefully.
Can You Read Mac Drive on Windows
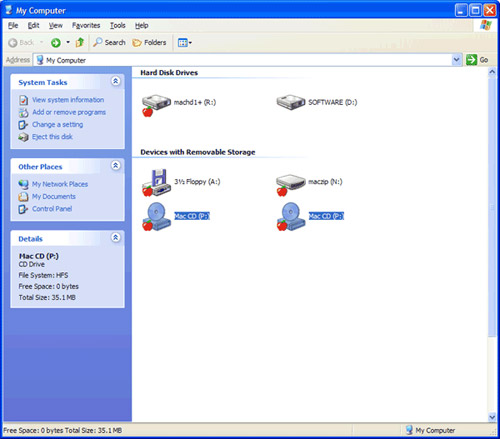
Many people doubt that whether they can read Mac drive on Windows. Some took action: they removed the drive from Mac and connected it to a Windows PC properly. But after connecting the Mac-formatted drive to Windows, a prompt window will pop up automatically on the screen, saying that they need to format the disk before use.
Don’t Format the Drive
You should click Cancel instead of Format disk when seeing this prompt. Why? That is simply because the formatting action will damage your data saved on that drive. Is there any other way to read a Mac-formatted drive on Windows? Sure, it is; some effective ways used by other users will be shown to you later on this page.
What Does Formatting a Hard Drive Do
Some users said they clicked on the Format disk button by mistake when seeing the prompt window mentioned above; they were wondering if there’s any way to help them recover a formatted hard drive. Luckily, the answer is yes.
What does disk formatting mean?
Formatting a hard disk/drive refers to delete all the file & folders save on a drive and set a certain file system for it. The formatting action is performed to prepare a data storage device (including hard disk drive, solid-state drive, USB flash drive, and SD card) for initial use. Two of the most obvious results of formatting a hard disk are: deleting data and changing file system.
Besides, there are also other benefits of disk formatting:
- Get more space on disk.
- Solve disk problems caused by soft failure.
- Improve disk/system performance greatly.
- And so on.
Do you know how to improve Windows 10 performance effectively?
Recover Formatted Hard Drive
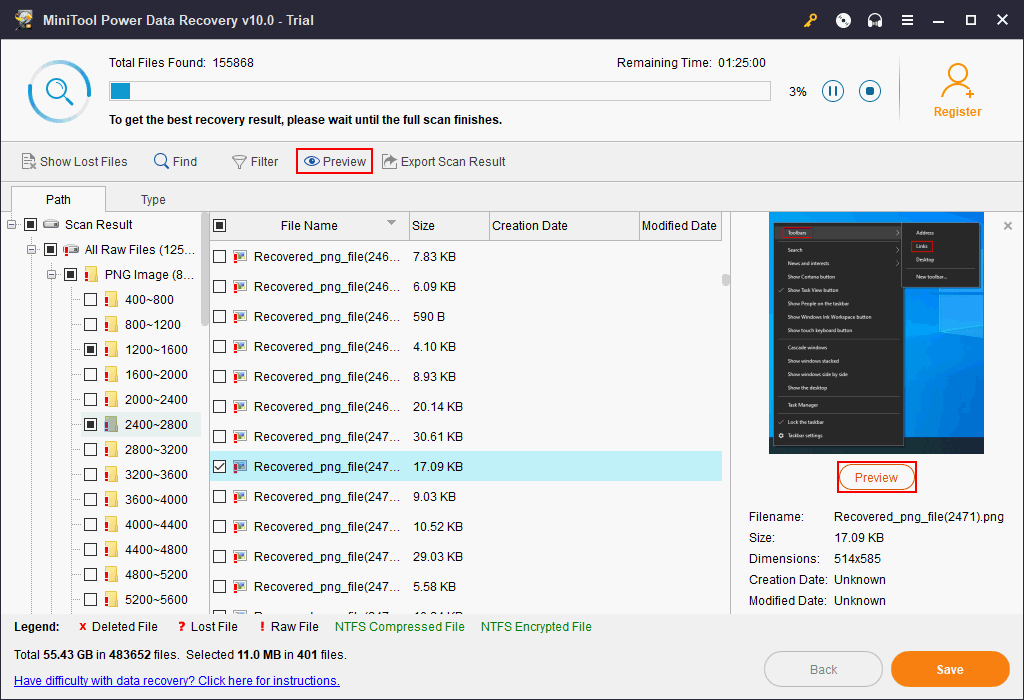
The first and the most important thing to do after formatting a hard drive is to recover precious data from hard drive. MiniTool Power Data Recovery can be a good data recovery assistant: it’s clean, safe, and professional. Please free download the trial edition to experience this data recovery tool first before you decide to buy it; after that, double click on the setup program to finish installing the software on your Windows computer, on which the Mac hard drives are formatted.
MiniTool Power Data Recovery TrialClick to Download100%Clean & Safe
Follow this guide to recover data from Mac formatted external hard drives:
- Click Start now at the end of installation to launch MiniTool Power Data Recovery. You can also open it by double clicking on the software icon.
- Wait for a few seconds until the disk loading process is finished automatically.
- Select Devices from the top of the software pane.
- Choose the formatted Mac drive under it.
- Double click on the target drive directly or click on the Scan button.
- The full scan will be started at once; more and more files and folders will be found during the scan. Please make sure the Mac hard drive is always connected to your computer.
- Browse the found items carefully to decide which files are needed and which are not; add a checkmark into the square box in from of all the files you want to recover. If you can’t confirm, go to view the content before recovery by clicking Preview.
- Click on the Save button in the lower right corner.
- Select a storage path in the pop-up window to store the files waiting to be recovered; please make sure it has enough free space left. (You shouldn’t select the original Mac-formatted drive as the storage location in order to avoid secondary damage.)
- Click on the OK button in the same window to confirm your selection.
- Then, wait until all the files saved on Mac hard drive have been recovered successfully to appointed place. A prompt window will show up to inform you of the recovery result.
MiniTool Power Data Recovery is also a great tool for recovering formatted SD card or broken/corrupted USB stick.
Although the formatting action cannot be canceled once it’s done, there are ways to make up for the damage it has done to your data. You can recover files easily from a formatted disk or damaged/corrupted/broken/dead drive with the help of a professional tool.Click to Tweet
After the data recovery process has been completed, you may transfer back the recovered files to the formatted disk as long as you can confirm that you’ve got back all the files you need.
[SOLVED] How To Recover Deleted Files On Mac | Complete Guide!
What about Windows 10 read Mac drive? Please read the following sections.
Can a Mac external drive be read on a PC?
A lot of people are wondering whether they can read Mac drive on Windows 10 with freeware. In fact, there is both free and paid software to help people read Mac drive on PC easily, without formatting the disk. I’ll introduce some of the useful software you can use on Windows 10 to read files and folders from Mac-formatted drive.
How to fix when some files are not showing in external hard drive?
Note: Choice 1 ~ 3 is suitable for reading HFS & HFS+; choice 4 ~ 5 is used to read APFS on Windows.
Choice 1: HFSExplorer
HFSExplorer is completely free; it’s a basic application designed to help users read Mac-formatted hard disks and disk images. HFSExplorer gives support to various file systems: HFS (the Standard file system on Mac), HFS+ (the Extended file system on Mac OS), HFSX (the Extended Mac OS file system with case sensitive file names), etc.
What Does HFSExplorer Allow You to Do
- Browse volumes on Mac by using a graphical file system browser.
- Check the volume related information.
- Extract files you need (copy files to Windows hard disk free).
- Mount & read disk images like .dmg and .sparsebundle.
- Create disk images from the volume on Mac.
The partition schemes including Master Boot Record, GUID Partition Table, and Apple Partition Map are supported by HFSExplorer.
Attention!
You need to install Java first if you don’t have it on your PC since it’s required (Sun’s Java SE runtime environment version 5.0 or greater in which OpenJDK works fine).
HFSExplorer: Launch error
No Java runtime environment found. HFSExplorer cannot function without Java.
Press “OK” to open up http://www.java.com where you can download a Java runtime environment for your system.
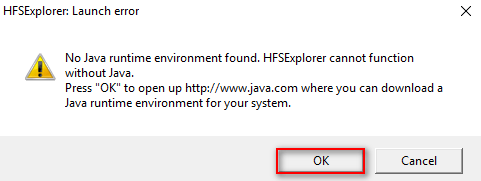
You should just click OK as prompted to download & install proper runtime environment when seeing the window above.
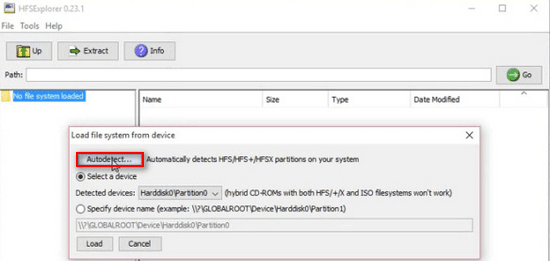
How to Use HFSExplorer to Read Mac Hard Drive on Windows
HFSExplorer is a good tool to help you read your Mac-formatted drive on your Windows PC.
- Connect the Mac-formatted drive to Windows 10 PC.
- Run HFSExplorer as administrator.
- Select File from the menu bar.
- Choose Load file system from device
- Click Autodetect to load the connected hard drive.
- Choose the files & folders you want to view in the HFS+ drive.
- Click Extract in the graphical window.
- Select a folder as the destination.
- Expand the folder to read Mac drive files on a Windows 10 PC.
Attention:
- HFS/HFS+/HSFX partitions can all be detected by using HFSExplorer.
- You can also Select a device or Specify device name manually in step 5.
If the connected external hard drive is not showing up on PC, you can’t detect it in step 5. You must make it appear in Windows first.
Is there any other hard drive reader for Windows? Of course, yes; please move on.
Choice 2: Apple HFS+ Drivers
Another way to access HFS + files in Windows 10 for free is installing Apple HFS + drivers.
Tip: The Apple HFS + drivers only give you read access to the files in Mac-formatted drives.
Steps to Read Mac Drives on PC with Apple HFS + Drivers
First, you should make sure you don’t have Paragon or MacDrive (the hard drive readers I will talk about later) on your Windows computer. If you do, please remove them now.
Second, you should download the correct Windows driver package to your local drive.
Third, you should configure your Windows as follow.
- Go to the default download path (Downloads folder) to extract the downloaded zip file.
- Find AppleHFS.sys and AppleMNT.sys files.
- Copy them by pressing Ctrl + C (you can also do it by right clicking & choosing Copy).
- Go to this path: C:\Windows\System32\drivers.
- Copy them by pressing Ctrl + V (you can also right click on any blank area & choose Paste).
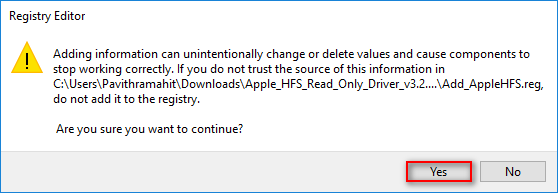
- Navigate to the downloaded folder to find Add_AppleHFS.reg file.
- Open the .reg file to bring up a Registry Editor prompt window.
- Click on the Yes button and then click OK.
- Restart your computer to make changes take effect.
Fourth, you should connect the Mac-formatted drive to your PC -> open File Explorer (also called Windows Explorer) -> locate that drive under This PC -> access files you want.
Tip: You may find the File Explorer has stopped working or not responding when trying to open it; please don’t be nervous since this problem can be fixed.
Choice 3: HFS+ for Windows
Though the Paragon HFS+ for Windows is a paid hard driver reader, you’ll love it after using.
What Can Paragon HFS+ for Windows Do for You
- The speed is fast and the performance is stable.
- The Mac file systems are integrated into Windows File Explorer.
- It provides full read and write access to Mac drives formatted with HFS, HFS +, and HFSX (just like other drives in Windows).
- It allows Windows programs to read from or write to the Mac-formatted drive on Windows.
- There are additional features that worth the cost.
How Much Does It Cost
The Paragon HFS+ for Windows is sold on the official website for $19.95 with a single seat license; $49.95 with one license worked on 3 PCs.
If you don’t want to spend money in reading Mac drive on Windows, you should download the trial edition; it is free for use for 10 days. You can access, copy files from or to the Mac drive during this period; it’s enough.
Choice 4: MacDrive
If your Mac drive is formatted with APFS (Apple File System), you won’t be able to read Mac hard drive on Windows because there are no free apps designed for it. But you have many choices of paid applications to access & edit Mac drive files on Windows; MacDrive is a popular one designed by Mediafour.
Merits of MacDrive
- It is used to help users read data from and write data to Mac disks from Windows directly.
- You can read both APFS and HFS+ drives in File Explorer.
- It allows you to create and partition Mac disks on your Windows.
- A graphical interface is offered for Mac-formatted drives verification, format, and repair.
- It’s a trusted solution which can date back to 1996.
The only drawback of MacDrive seems to be the selling price is higher than some similar tools. You need to pay $49.99 for the Standard version or $69.99 for the Pro version.
Is it worth the price? Yes, if you have such needs; it also includes unique features like support for Mac-formatted RAID disks.
Choice 5: Paragon APFS for Windows
Paragon also designed an APFS for Windows app for reading APFS Mac drive on Windows; it is considered as one of the main competitors of MacDrive.
Features of Paragon APFS for Windows
- It provides read and write access to Mac drives formatted with APFS.
- It also allows you to access and edit compressed and cloned files (you can only access the encrypted volumes without making any changes).
- It gives support to auto-mounting at start-up; the partition tools of MacDrive are not included in this app.
The biggest disadvantage of Paragon APFS for Windows when compared to MacDrive is the HFS+ support. The biggest advantage of Paragon APFS for Windows over MacDrive is the price – it costs only $49.95 for one license worked on 3 PCs.
Of course, there are many other tools available for you to read Mac drives on Windows (10/8/7, etc.).
[2021] Top Windows 10 Boot Repair Tools You Should Know!
Choice 6: Format Drive to exFAT
You can format your Mac hard drive to exFAT, which supports both Windows and Mac OS X. In this way, you can get full read and write access to exFAT drives on Windows without any additional third-party software.
The only thing you need to worry is that the data on Mac drives will be removed. So you need to turn to MiniTool Power Data Recovery as mentioned in part 1 to recover the files you need after formatting.
How to format a hard drive? Basically, there are three ways.
- Right click on the drive in File Explorer -> choose Format.
- Open Disk Management -> right click on the target drive -> choose Format.
- Format Partition with MiniTool Partition Wizard – a professional disk manager.
Though you’ll be asked to format the Mac hard disk first when you connect it to a Windows PC, there are still useful ways to help you view the content without formatting – using the hard drive reader. Some of the best freeware to read Mac drive on PC are introduced here to help more people with the problem.Click to Tweet
Final Thoughts
Though you can’t access a Mac-formatted drive on a Windows computer directly, there are useful ways and tools to help you read Mac drive on Windows easily. Please just follow the steps mentioned above and choose the tool depending on your needs.