
Windows 11/10 includes a feature known as Memory Compression. It makes better use of available memory on all systems by reducing physical memory utilization. Furthermore, it improves the speed of writing to and reading from disk when this feature is enabled on your computer.
Memory compression helps improve the overall user experience; however, additional CPU resources may be required during compressing and decompressing the data in RAM, which may slow CPU processing on some systems.
Memory Compression is faster than a traditional paging file, but it uses more CPU resources. If you notice your PC is slow, you should try enabling and disabling Memory Compression.
How to View Amount of Compressed Memory in Windows 11/10?
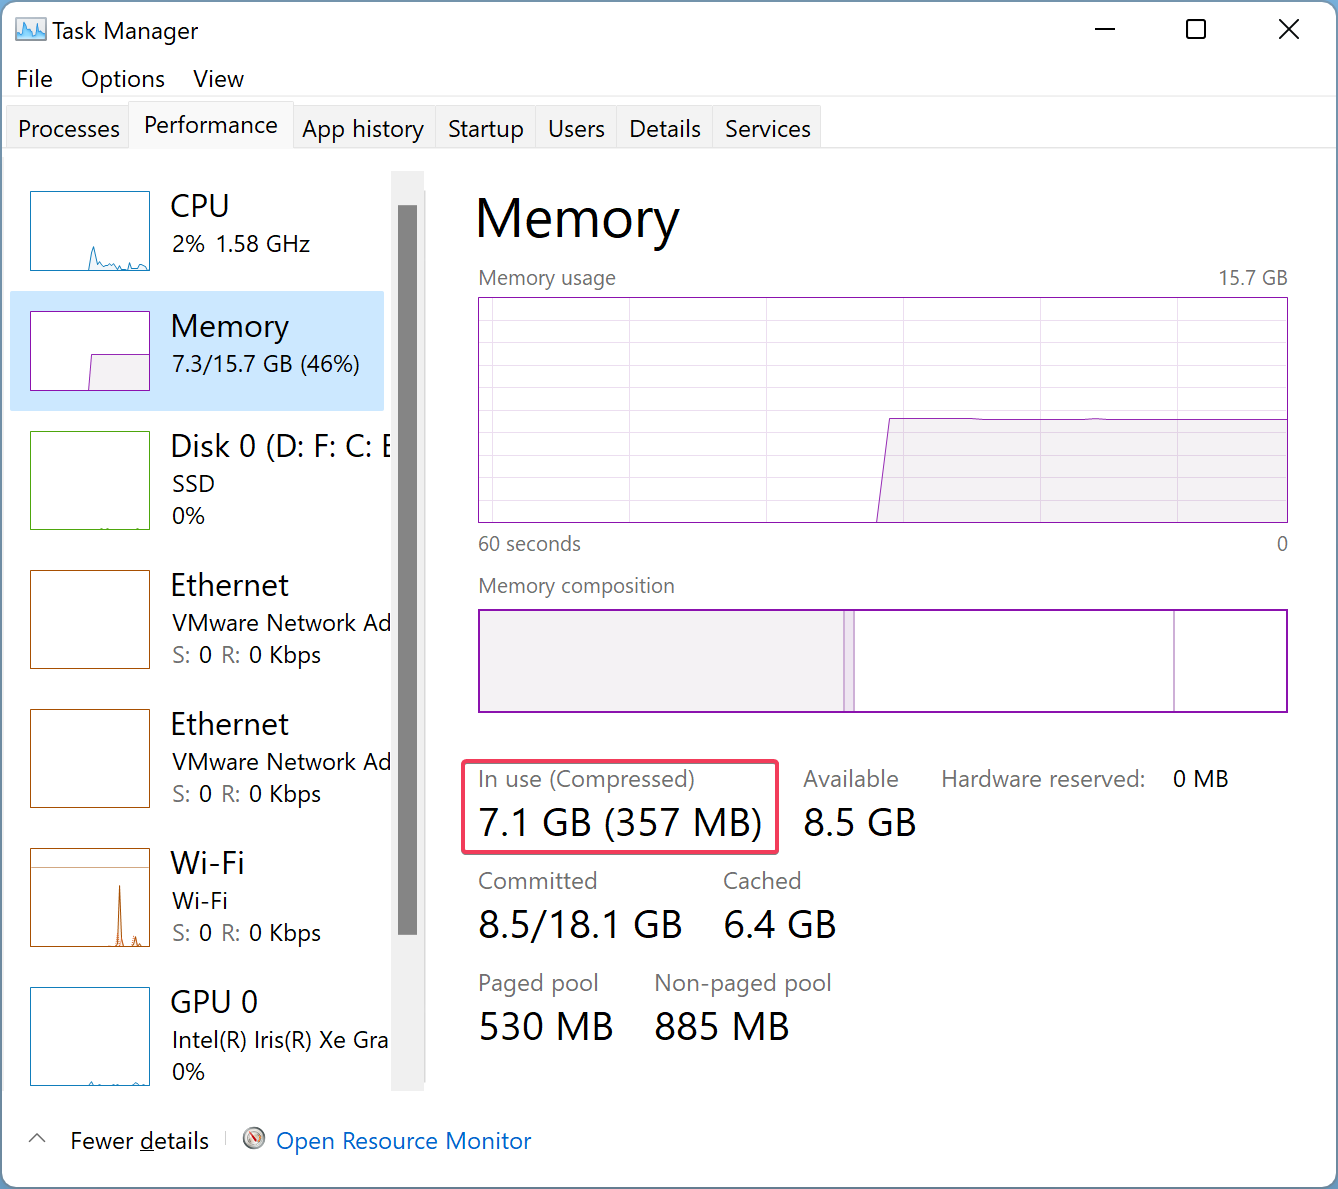
Open the Task Manager by pressing Ctrl + Shift + Esc and navigate to the Performance tab. Click Memory in the left sidebar, and on the right sidebar, you can see how much memory is compressed.
How to See if Memory Compression is Enabled or Disabled?
To view if Memory Compression is enabled or disabled on your Windows 11/10, do the following:-
Step 1. First, open Windows PowerShell with elevated rights.
Step 2. Then, on the prompt of Windows PowerShell, type the following and hit Enter from the keyboard:-
Get-MMAgent
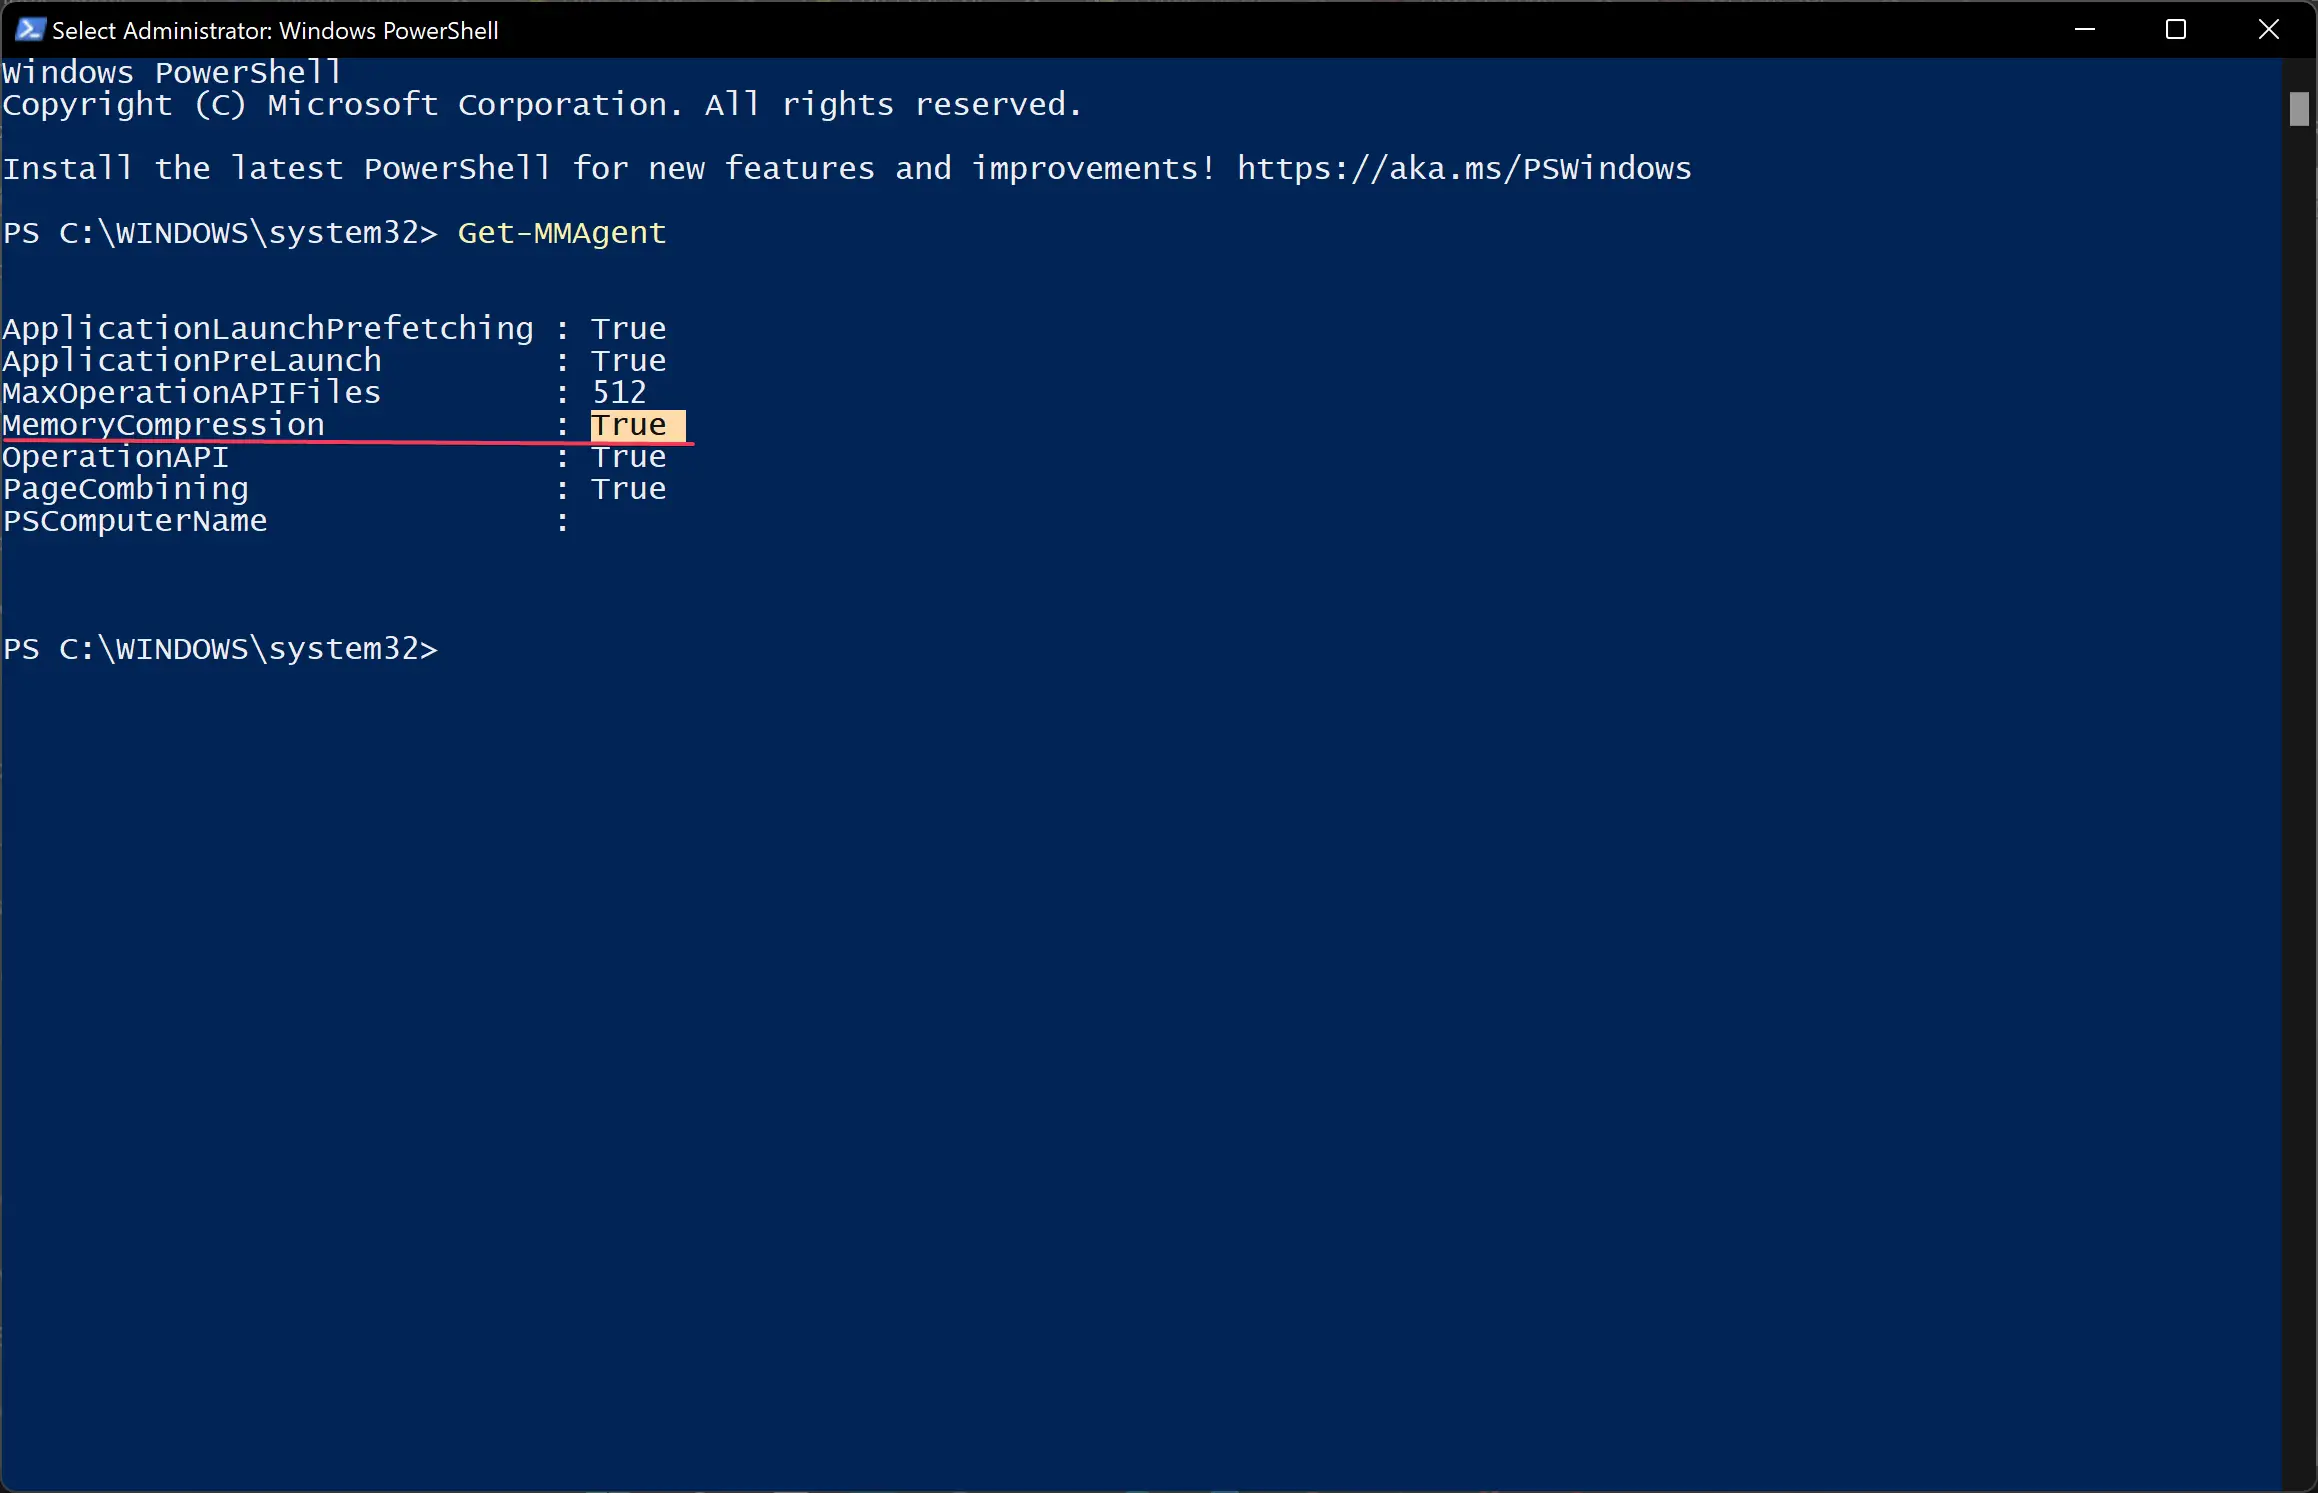
Besides the MemoryCompression field, you can see True for enabled or False for disabled.
How to Turn on Memory Compression in Windows 11/10?
Memory compression features may help low-end systems with little system memory. It compresses the system’s memory by reducing the number of read/write requests and frees up RAM without enacting traditional paging.
To enable Memory Compression in Windows 11/10, do the following steps:-
Step 1. First, open Windows PowerShell with elevated rights.
Step 2. Then, on the prompt of Windows PowerShell, type the following and hit Enter from the keyboard:-
Enable-MMAgent -mc
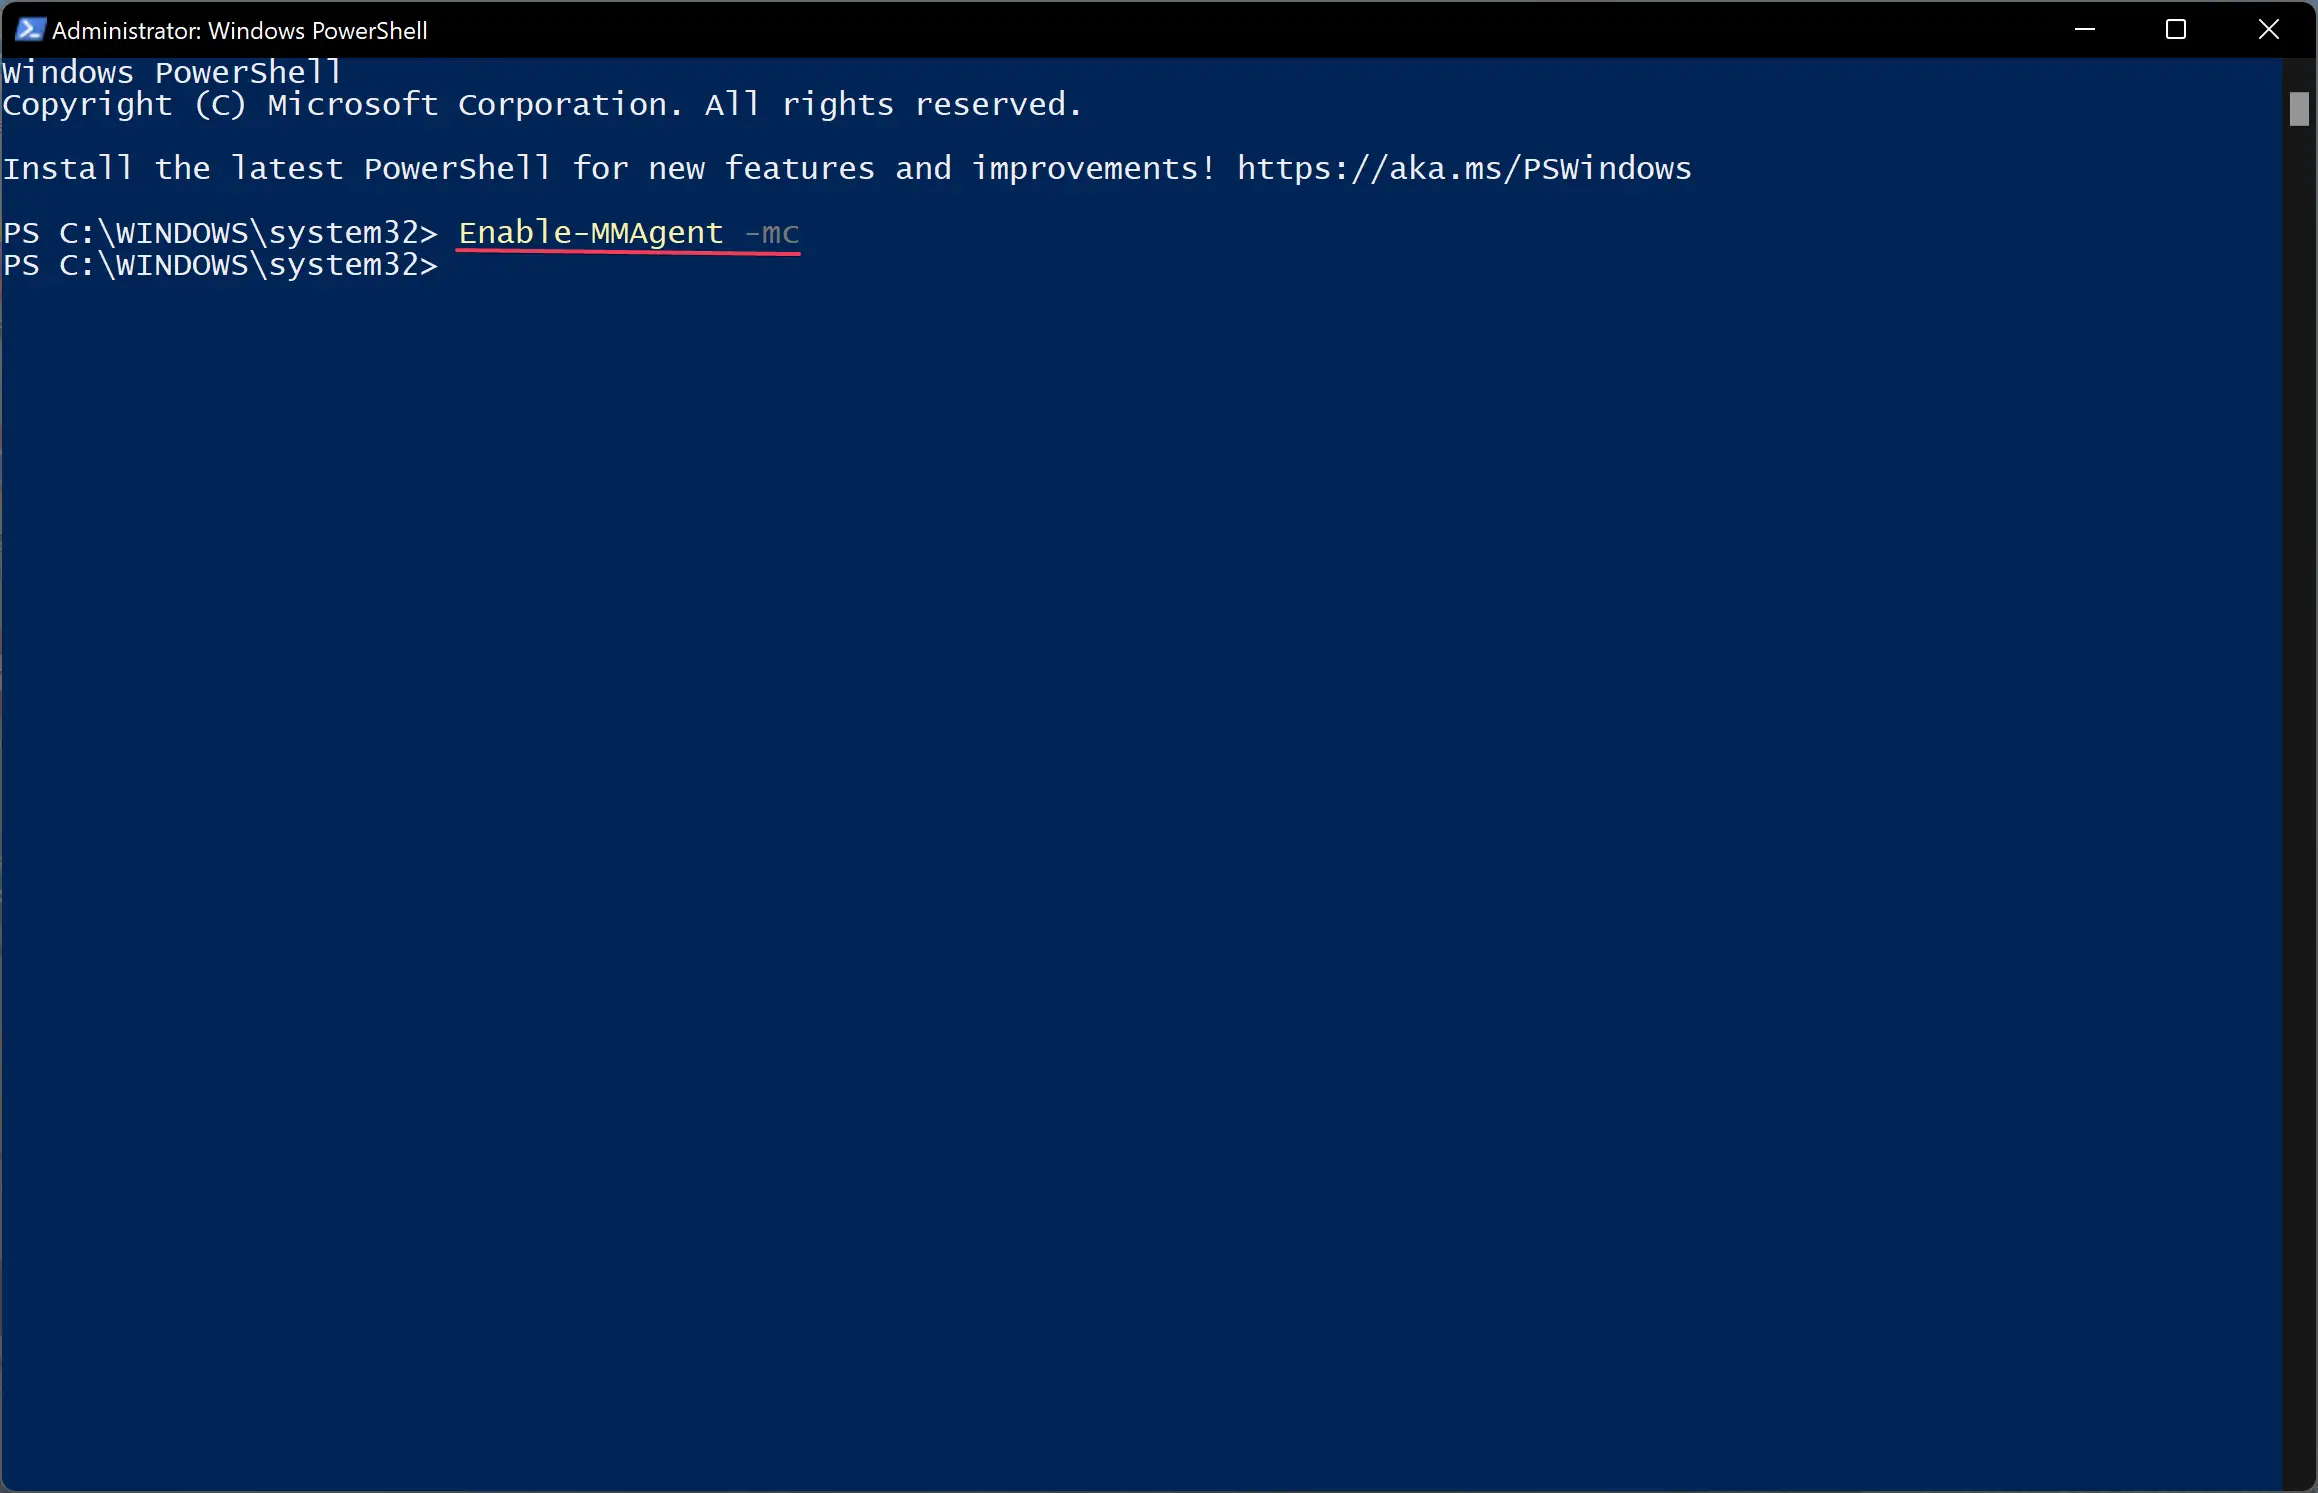
Step 3. Reboot your computer to apply the changes.
How to Turn off Memory Compression in Windows 11/10?
To disable Memory Compression in Windows 11/10, do the following recommended steps:-
Step 1. First, open Windows PowerShell with elevated rights.
Step 2. Then, on the prompt of Windows PowerShell, type the following and hit Enter from the keyboard:-
Disable-MMAgent -mc
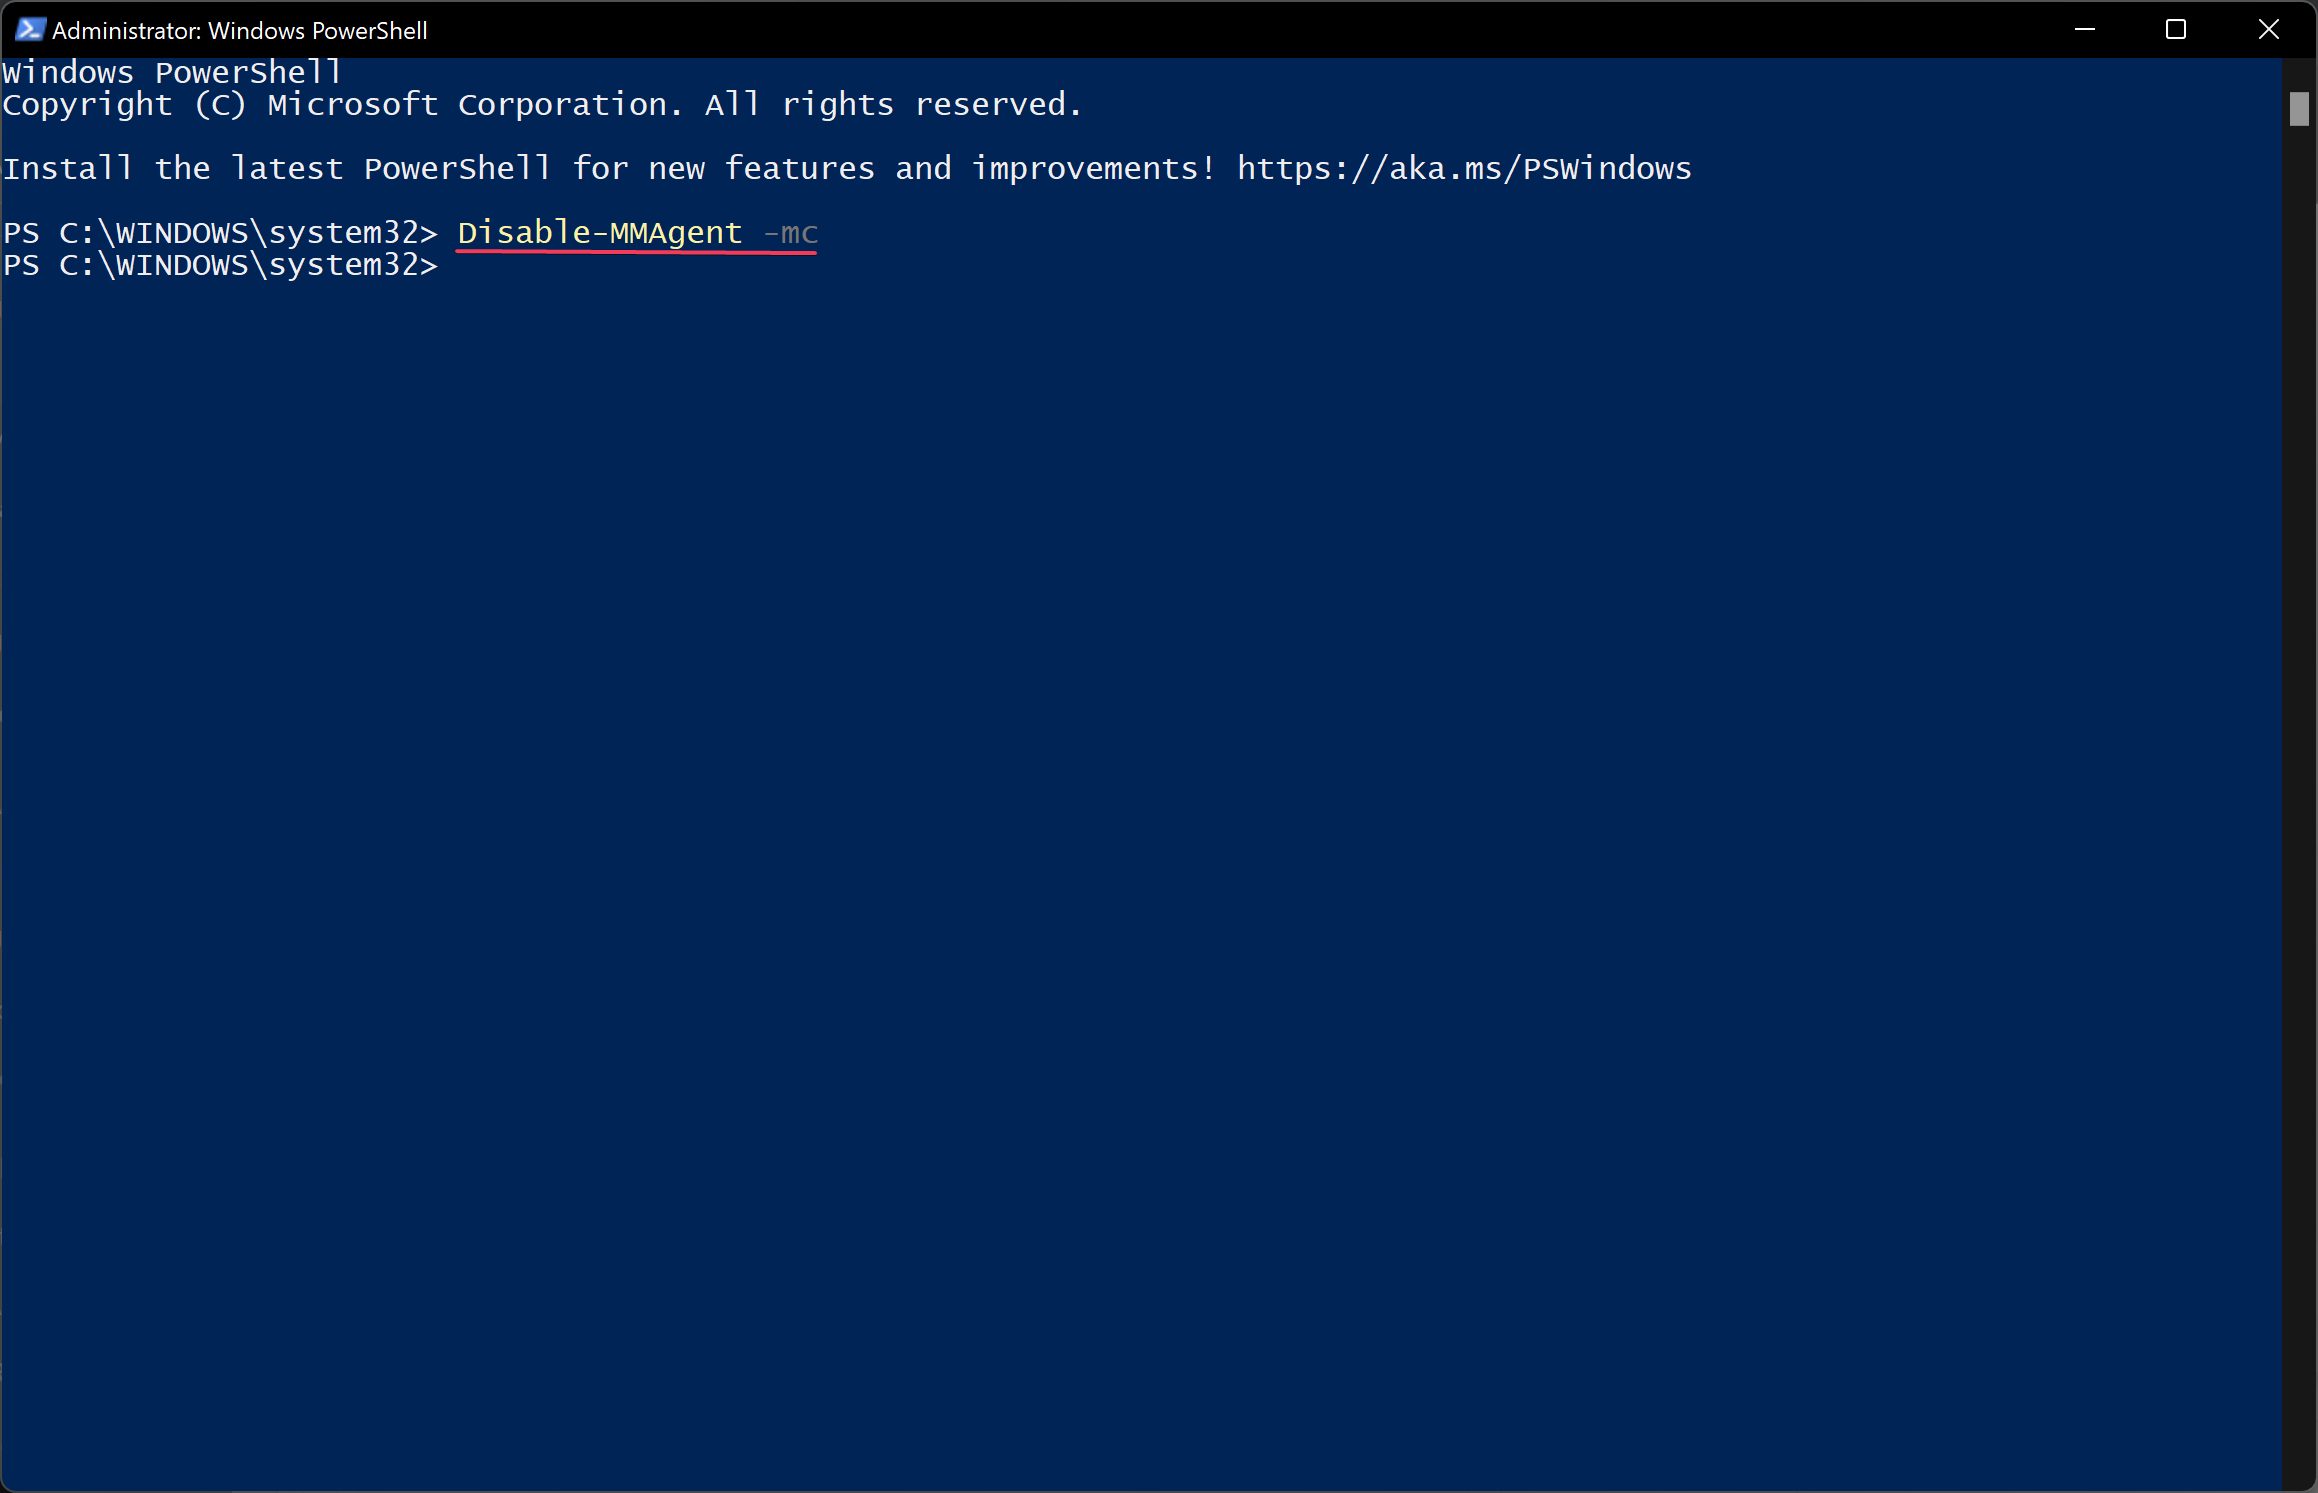
Step 3. Finally, restart your computer to apply the changes.
Conclusion
In conclusion, Memory Compression is a useful feature available in Windows 11/10 that helps reduce physical memory utilization and improves disk read/write speed, thereby enhancing the overall user experience. Although it may use additional CPU resources for compressing and decompressing data in RAM, which can slow CPU processing on some systems, it is still faster than traditional paging files. Users can view the amount of compressed memory, check whether Memory Compression is enabled or disabled, and turn it on or off using Windows PowerShell with elevated rights. If you have a low-end system with limited memory, enabling Memory Compression may help improve performance. However, if you experience slow performance, you can try disabling Memory Compression to see if it makes a difference.
Windows 11 keeps compressing files in the C: drive? How do I stop Windows from automatically compressing files? This problem usually happens when your PC is running out of disk space. In this tutorial we’ll show you 4 methods to disable file compression in Windows 11 / 10.
Method 1: Disable File Compression Using Group Policy
Open Local Group Policy Editor and browse to: Computer Configuration\Administrative Templates\System\Filesystem\NTFS. On the right pane, double-click the policy “Do not allow compression on all NTFS volumes“.
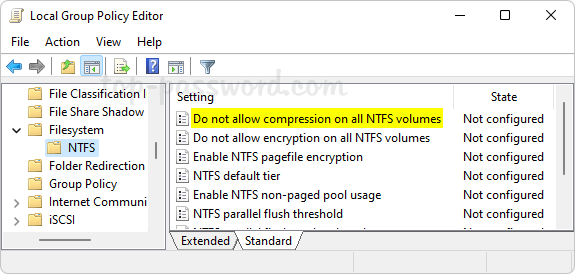
Select the Enabled option. Click Apply and then OK.
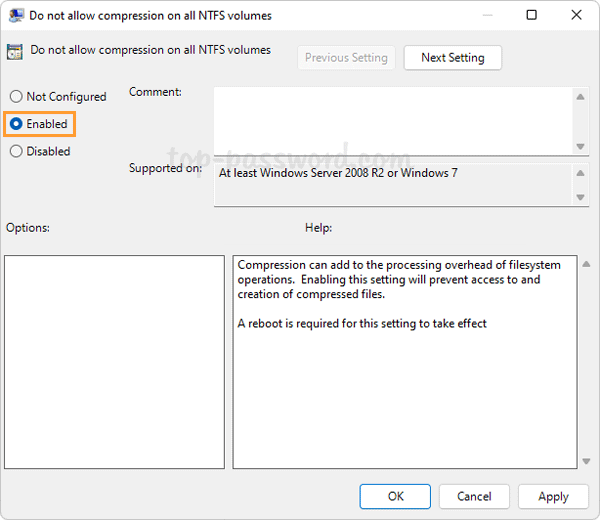
Reboot your computer to make the changes take effect. The next time you try to enable file compression, you’ll get the error message “Compression is disabled for this volume“.
Method 2: Disable File Compression Using Registry Editor
Open Registry Editor and navigate to: HKEY_LOCAL_MACHINE\SYSTEM\CurrentControlSet\Policies. In the right pane, right-click the blank area and select New -> DWORD (32-bit) Value.
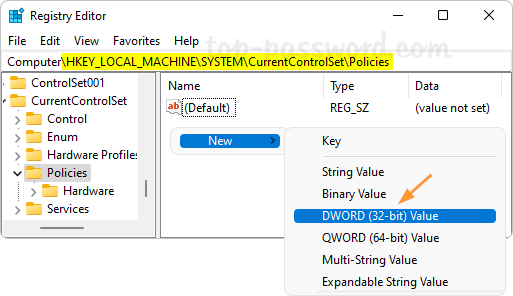
Name the newly-created DWORD NtfsDisableCompression, and then change its value data to 1 for turning off automatic file compression.
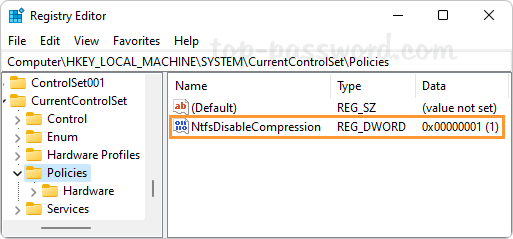
Close Registry Editor and restart your computer to apply the changes.
Method 3: Disable File Compression Using Command Prompt
Open the Command Prompt as administrator and then run this command to disable file compression:
fsutil behavior set disablecompression 1
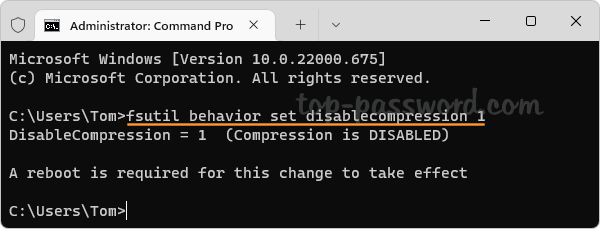
A reboot is required for this change to take effect. Whenever you need to enable file compression again, execute the following command:
fsutil behavior set disablecompression 0
Method 4: Uncompress Your Files in File Explorer
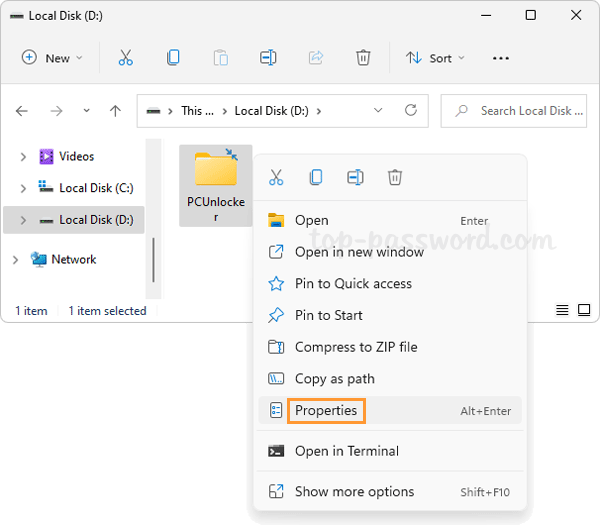
Right-click a compressed folder or file in File Explorer, and then select Properties from the context menu.
Under the General tab, click the Advanced button.
In the Advanced Attributes dialog, uncheck the box which says “Compress content to save disk space“. Click OK.
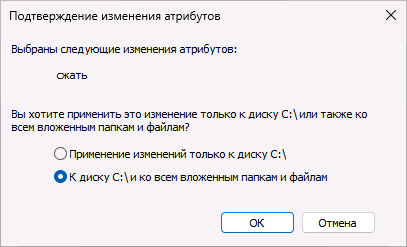
When you’re back to the Properties dialog, click Apply. A pop-up will appear, and you can choose “Apply changes to this folder, subfolders and files” and click OK.
After uncompressing, two blue arrows will no longer show up in the icons of your folders or files.
- Previous Post: 2 Methods to Change Screenshot Location in Windows 11
- Next Post: 2 Methods: Always Show Scrollbars in Windows 11
Если вы когда-либо заглядывали в свойства жесткого диска или SSD в Windows или предыдущих версиях ОС, при этом диск имел файловую систему NTFS, с большой вероятностью вы видели возможность поставить отметку «Сжать этот диск для экономии места». Пользователи часто спрашивают о том, что будет, если включить эту опцию.
Далее в статье подробно о том, что делает параметр «Сжать этот диск для экономии места», на что влияет и про другие возможности сжатия данных, которые присутствуют в Windows 11 и Windows 10.
Сжать этот диск для экономии места — прозрачное сжатие файлов на диске средствами NTFS
Включив отметку «Сжать этот диск для экономии места», подтвердив применение атрибутов и подождав некоторое время, вы включите встроенную функцию сжатия файлов драйвером файловой системы NTFS. Первоначальное сжатие может занять продолжительное время.
После применения атрибутов файлы на диске будут сжиматься и распаковываться «на лету» — то есть с точки зрения пользователя какого-либо изменения в поведении не произойдёт, кроме появления «стрелок» у значков папок и файлов, обозначающих сжатие.
Несмотря на то, что для компрессии и распаковки используются ресурсы процессора, используемый алгоритм LZNT1 как правило почти не сказывается на производительности современной системы.
Насколько сильно влияет сжатие NTFS на размер свободного места на диске? Для большинства двоичных файлов — не слишком значительно. Выше был приведен скриншот для системного диска только что установленной Windows 11 без сжатия, а ниже вы можете увидеть результат сжатия:
Сжатие средствами NTFS можно включить не только для диска в его свойствах, но и для папки:

Достаточно зайти в свойства папки, нажать кнопку «Другие» в разделе «Атрибуты» вкладки «Общие» и включить опцию «Сжимать содержимое для экономии места на диске».
Для большинства пользователей включение опции «Сжать этот диск для экономии места» не принесёт каких-либо заметных выгод на современных компьютерах с достаточно объёмными HDD и SSD. Впрочем, вреда в большинстве случаев тоже нет, но потенциально можно допустить более проблематичное восстановление данных при необходимости.
Другие возможности сжатия данных в Windows 11 и Windows 10
В Windows последних версий присутствует ещё одна функция, предназначенная для сжатия файлов операционной системы — CompactOS. Эта функция:
- Была создана для устройств с малым объемом системного диска (планшеты, нетбуки и аналогичные).
- Обеспечивает большую степень сжатия, чем средства файловой системы. Пример
- Применяется к файлам операционной системы.
- Использует другой алгоритм сжатия (XPRESS4K) и позволяет выбрать другой алгоритм для исполняемых файлов.
- Потенциально может в большей степени влиять на производительность системы при работе, чем сжатие NTFS, но обычно это влияние не критично.
Для настройки CompactOS можно использовать командную строку, запущенную от имени Администратора и инструмент compact.exe. В отдельных случаях при недостатке места на диске сжатие может быть предложено во встроенной утилите «Очистка диска». Несколько примеров команд, а также скриншоты изменения свободного места на диске на той же системе, с которой проводились эксперименты ранее в этой статье:
В случае, если вы не испытываете недостатка в месте на системном диске, включать CompactOS не имеет смысла, а если ваше устройство оснащено миниатюрным SSD или eMMC, не исключено, что функция уже включена. Более подробно о функции я ранее писал в материале про сжатие CompactOS в Windows.
Microsoft Windows 11/10 has a default file compression system that automatically compresses the files or folders that are not used for a long time and when the drive is out of space.
When the files or folders are compressed on Windows 11/10, you will see two blue arrows on the files and folders, which indicates the specific files or folders are compressed. Usually, the system automatically compresses the files and folders to reduce the size.
However, if you have enough drive space on your system, you can disable the automatic NTFS file compression process.
In this post, I will show you four effective and proven methods to disable the automated file compressing on your Windows 11/10 computer.
Let’s get started.
Follow our guide on how to Disable Accidental Drag and Drop in Windows 11
In Windows 11/10, the automatic files or folders compression process is useful if your system drive space is out of space. The NTFS file compression process is a minimal program that does not impact your system performance.
But, if you don’t need to compress your files or folders automatically, you can disable the NTFS file compression process to stop the compression of your files or folders. Follow the steps below to turn off the file compression process.
Here are the steps to disable file compression on Windows 11/10:
1. Use File Explorer
The first, most effective, and easiest way to turn off automatic file compression on your Windows 11/10 is using the properties window through file explorer. You can decompress your files, folders, or an entire drive using this approach.
Here are the steps to disable file compression using Windows File Explorer:
2. Use Command Prompt
Using the Command Prompt is another tested method to disable the NTFS file compression. Applying a single command in the command prompt, you can quickly shut down the automatic file compression system on your Windows 11/10.
Here are the steps to disable file compression using the Command Prompt:
Also related: How to Unblock Websites on Windows 11
3. Use Local Group Policy Editor
Using the Local Group Policy Editor, you can also disable the automatic NTFS file compression process on your Windows 11/110. By enabling a policy in Group Policy Editor, the automatic file compression process is disabled permanently.
Here are the steps to disable file compression using the Group Policy Editor:
4. Use Registry Editor
The last but not least method to disable the automatic file compression on your Windows 11/10 PC is modifying or creating a registry value using the Registry Editor.
Here are the steps to disable file compression using the Registry Editor:
Also read, Schedule Windows 11 to Wake from Sleep Automatically
How to Enable NTFS File Compression on Windows 11/10
Enabling the automatic NTFS file compression on Windows 11/10 is similar to disabling the file compression process.
If you need to enable the automatic NTFS file compression system after disabling it, then you can do it whenever you need. Follow the steps below to turn on the file compression on Windows 11/10.
Here are the steps to enable the file compression on Windows 11/10:
1. Use Command Prompt
The first method to enable the NTFS file compression on Windows 11/10 is executing a command in the Command Prompt.
Here are the steps to enable the file compression using the Command Prompt:
2. Use File Explorer
Using the Windows File Explorer, you can enable the file compression on your Windows 11/10. Follow the steps below to do it.
Here are the steps to enable file compression using Windows File Explorer:
Related content you should read: Remove Bloatware From Windows 11/10
3. Use Registry Editor
Registry Editor is another tested way to enable the NTFS file compression on your Windows 11/10 computer.
Here are the steps to enable the file compression using the Registry Editor:
4. Use Local Group Policy Editor
The last but not least effective method to turn on the file compression is modifying a policy in the Local Group Policy Editor. You can easily enable file compression using the Local Group Policy Editor.
Here are the steps to enable the file compression using the Group Policy Editor:
Read more on how to Fix Update Error Code 0x80004005 in Windows 11
Is File Compression the Same as a ZIP archive?
The Windows in-built file compression feature differs from other third-party ZIP archives tools. The major difference between these two file compressions processes is functionality.
Usually, a ZIP archiver is used to compress the files or folders to reduce the overall file size, and the file is compressed until the files are extracted. Compressing the files or folders means creating a specific compressed file archive.
You can move the compressed files to another drive or external USB drive without decompressing the files. Until you decompress the files, it remains compressed.
On the other hand, when you compress files using the Windows default file compressing tool, the files or folders are only compressed on that particular drive. But, when you copy or move the compressed files to another drive, the files are no longer compressed.
Frequently Asked Questions (FAQs)
Why does Windows 11 keep compressing my files?
Windows 11 keeps compressing your files and folders due to the lower space of your drive. When the system drive space is full, the system automatically compresses different files and folders that have not been used for a long time to reduce the file size and save the drive space.
Why is my computer automatically compressing files?
Your computer automatically compresses files to reduce the file size to save drive space. The Windows system automatically compresses files or folders if your system drive runs out of space.
Should I enable file and folder compression in Windows 11?
Yes, you can enable the file and folder compression in Windows 11 whenever you need. Also, you can disable the Windows default file and folder compression.
Why do my folder icons have two blue arrows?
Your folder icons have two blue arrows because your folder is compressed. The two blue arrows indicate that the file or folder is NTFS compressed.
How do I get rid of double blue arrows on icons?
Disable the Windows default file compression tool using the File Explorer, Command prompt, or Registry Editor to get rid of double blue arrows on icons.
Final Thoughts
The Windows built-in file compressing process, also known as NTFS file compression, allows users to compress files and folders on an NTFS drive. This tool helps to reduce the file size to save drive space when your drive is full.
Following the four effective approaches to disable the automatic file compression I described in this post, you can easily disable the NTFS file compression system within minutes. Here, I describe different ways to enable the Windows default file compression tool.
That’s all for now, folks. I hope this post is helpful and insightful as well. Follow our other articles to know more about different topics.
See you in the next one.
На чтение 2 мин Опубликовано Обновлено
Содержание
- Введение
- Шаги для отключения сжатия диска
- Заключение
- Почему важно отключить сжатие диска
Введение
Сжатие диска может быть полезной функцией, которая позволяет сэкономить место на жестком диске. Однако, некоторым пользователям Windows 11 может потребоваться отключить сжатие диска из-за различных причин. В этой статье мы расскажем, как можно отключить сжатие диска в Windows 11.
Шаги для отключения сжатия диска
-
Нажмите на кнопку «Пуск» в левом нижнем углу экрана и выберите «Настройки».
-
В окне «Настройки» выберите «Система».
-
На панели слева выберите «Хранение».
-
В разделе «Состояние диска» найдите диск, на котором хотите отключить сжатие, и нажмите на него.
-
В открывшемся окне выберите «Параметры» в разделе «Сжатие».
-
Снимите флажок с опции «Сжимать новый контент автоматически».
Заключение
Отключение сжатия диска в Windows 11 может быть полезным действием для пользователей, которым не требуется сэкономить место на жестком диске. Следуя указанным выше шагам, вы сможете легко отключить сжатие диска и освободить больше места для хранения своих файлов.
Почему важно отключить сжатие диска
Во-первых, отключение сжатия диска может помочь улучшить производительность вашего компьютера. Когда операционная система сжимает файлы, это требует дополнительных ресурсов процессора и памяти. Если у вас уже и так недостаточно ресурсов, то отключение сжатия диска может уменьшить нагрузку на систему и ускорить ее работу.
Во-вторых, если вы работаете с большими файлами, такими как видео или аудио, то отключение сжатия диска может помочь снизить нагрузку на процессор и ускорить процесс обработки этих файлов. Это особенно актуально при работе с профессиональным мультимедийным контентом, где любая задержка может быть неприемлемой.
В-третьих, отключение сжатия диска также может быть полезно для сохранения качества файлов. При сжатии файлы теряют некоторую информацию, что может привести к ухудшению исходного качества. Если качество файлов играет важную роль, например, при обработке фотографий или видео, то отключение сжатия диска может быть необходимым, чтобы сохранить высокое качество и детализацию.
Наконец, отключение сжатия диска может быть полезным, если вы часто работаете с файлами, склонными к повреждениям. Сжатие файлов может сделать процесс восстановления данных после повреждения более сложным и времякроющим. Отключив сжатие диска, вы можете облегчить процесс восстановления данных и снизить риск потери информации.
Поэтому, если у вас возникают проблемы с производительностью компьютера, работой с большими файлами или вы просто хотите сохранить высокое качество ваших файлов, стоит рассмотреть отключение сжатия диска в Windows 11.