
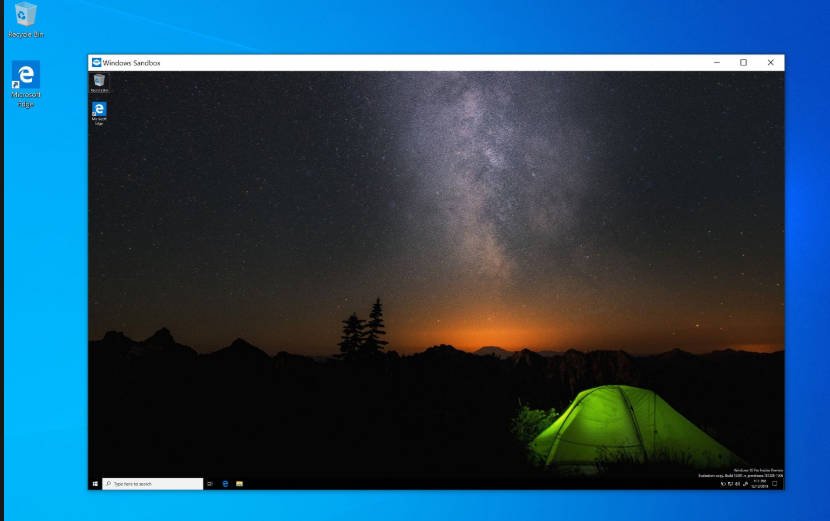
Do you want to test some third-party apps using Windows 10 Sandbox? Don’t worry in this guide you will learn how to enable or disable Windows 10 Sandbox feature.
Windows Sandbox is one of those features all developers, as well as enthusiasts, have been waiting for. It is finally included in the Windows 10 Operating System from the build 1903, and if your Windows 10 laptop or desktop supports virtualization, then you can use it. You have to make sure that the virtualization feature is enabled on your system first.

Sandbox can be used for many things. One of the benefits of using the Sandbox feature is to test third party software without letting it harm your files or programs. Using Sandbox is more secure than testing such applications directly on the host operating system because if the application contains any malicious code, it will affect the files and applications present on the system. This can lead to virus infections, file corruption, and other harm that the malware can cause to your system. You can also test an unstable application once you enable the Sandbox feature in Windows 10.
But how do you use it? How do you enable or disable the Sandbox feature in Windows 10?
Table of Contents
Let’s have a look at all the possible methods you can implement to enable as well as disable the Windows 10 Sandbox feature. But first, you need to have virtualization enabled on your system. Once you make sure that your hardware supports virtualization (you can check on the manufacturer’s website), enter UEFI or BIOS settings.
There would be an option to enable or disable the Virtualization in CPU settings. Different manufacturer UEFI or BIOS interfaces are different, and hence the setting might be in different places. Once the virtualization is enabled, reboot the Windows 10 PC.
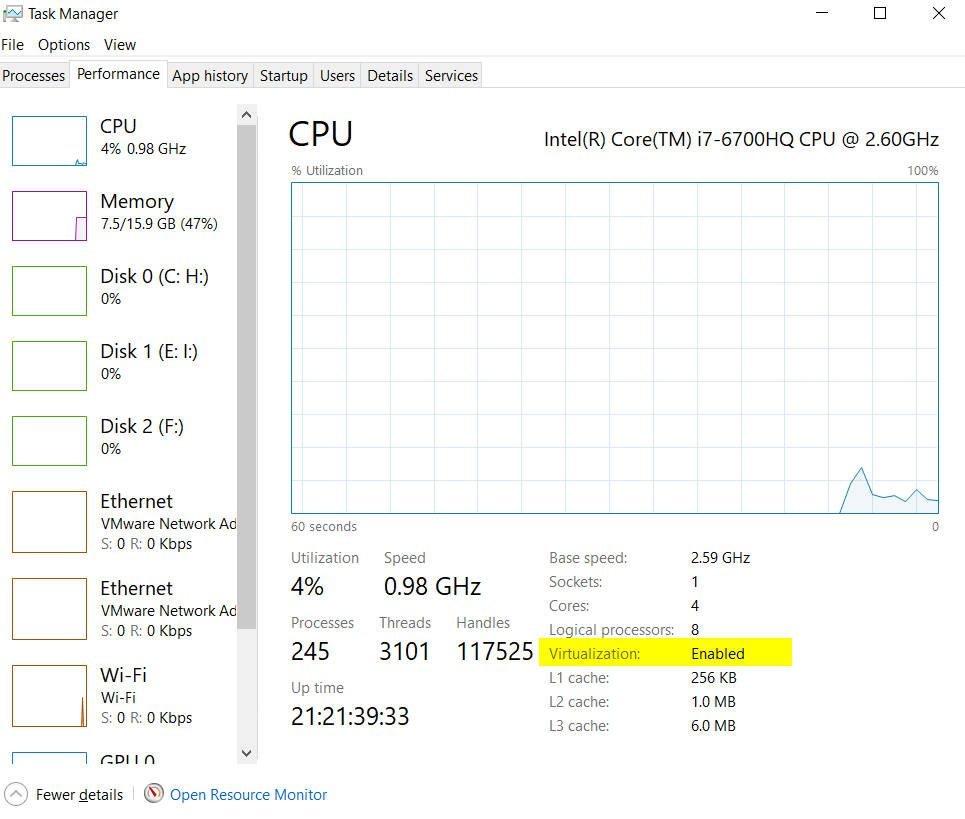
Open the Task Manager. To do so, use the Windows Key Combination Shortcut Ctrl + Shift + Esc. You can also right-click on the empty aread on the taskbar and then choose the Task Manager.
Open the CPU tab. In the information provided, you will be able to see if the virtualization feature is enabled or not.

Once virtualization is enabled, you can go ahead and enable the Windows Sandbox feature. Here are some methods that will be useful for the same.
Method 1: Enable or Disable Sandbox using Control Panel
Windows 10 Sandbox can be enabled or disabled through the built-in Control Panel. To do so,
1. Press Windows Key + S to open search. Type “Control Panel”, click on Control Panel from the search results.
2. Click on Programs.

3. Now click on the Turn Windows Features on or off under Programs & Features.

4. Now under the Windows Features list, scroll down and find Windows Sandbox. Make sure to checkmark the box next to Windows Sandbox.

5. Click on OK, and Reboot your PC to save settings.
6. Once the system restarts, launch Sandbox from the Windows 10 Start Menu.
Method 2: Enable or Disable Sandbox using Command Prompt/Powershell
You can also enable or disable Windows Sandbox feature from the Command Prompt using useful yet straight forward commands.
1. Open the elevated Command Prompt. using any one of the methods given listed here.

2. Type this command in the command prompt and press Enter to execute it.
Dism /online /Enable-Feature /FeatureName:”Containers-DisposableClientVM” -All

3. You can then use this command to disable the Windows Sandbox using the same procedure.
Dism /online /Disable-Feature /FeatureName:”Containers-DisposableClientVM”

4. You can then use the Windows Sandbox application once you restart your PC.
This is all about the methods you can use to enable or disable Sandbox feature on Windows 10. It comes with Windows 10 with May 2019 update (Build 1903 and newer) as an optional feature that you can enable or disable it according to your needs.
To copy files to & fro from the Sandbox and the host Windows 10 operating system, you can use the general copy and paste shortcuts like Ctrl + C & Ctrl + V. You can also use the right-click context menu copy & paste commands. Once the Sandbox is opened, you can copy the installers of the programs you want to test to the Sandbox and launch it there. Pretty good, isn’t it?
Windows 10 comes with a lightweight, isolated environment feature that is only available for Windows 10 Pro and Windows 10 Enterprise starting with version 1903 (build 18305). This isolated environment feature is called “Windows Sandbox.”
The Sandbox is just like a virtual machine that uses Microsoft’s hypervisor and hardware virtualization to run a separate kernel and isolate a Windows Sandbox session from the host. Basically, this tiny application of Windows 10 (around 100MB in size) installs and runs untrusted classic applications isolated from the main installation.
According to Microsoft, Windows Sandbox is efficient because it uses an integrated kernel scheduler, smart memory management, and virtual graphics, and it’s disposable. The best part of the Windows Sandbox is that the sandbox gets deleted once you finish using the app. This means that every time you run the Windows Sandbox feature, you’ll start with a clean install of Windows 10.
In simple words, running Windows Sandbox is just like running another copy of Windows 10 on a virtual machine. The only difference is that the feature is built-in to Windows 10, and changes are not saved when you exit the Sandbox.
However, the feature is currently available in Pro and Enterprise editions of Windows 10 only. This means that PC users running Windows 10 Home Edition will have to use third-party sandbox software like Sandboxie to get the sandbox environment.
With the default settings, the Windows Sandbox feature remains turned off. If you wish to enable the feature or you would like to disable the feature after using it for a while, you can do so through Windows Features.
This post will help you to enable and disable the Windows Sandbox feature on Windows 10.
How to turn on the ‘Windows Sandbox’ feature on Windows 10?
Windows Sandbox features present in version 1903 and later in Windows 10 Pro and Enterprise editions only for your information. To run the Windows Sandbox feature requires at least 4 GB of RAM, 1 GB of free disk space, and virtualization capabilities enabled in BIOS. Please refer to the computer manual or contact the motherboard and processor manufacturer to check if your system supports virtualization.
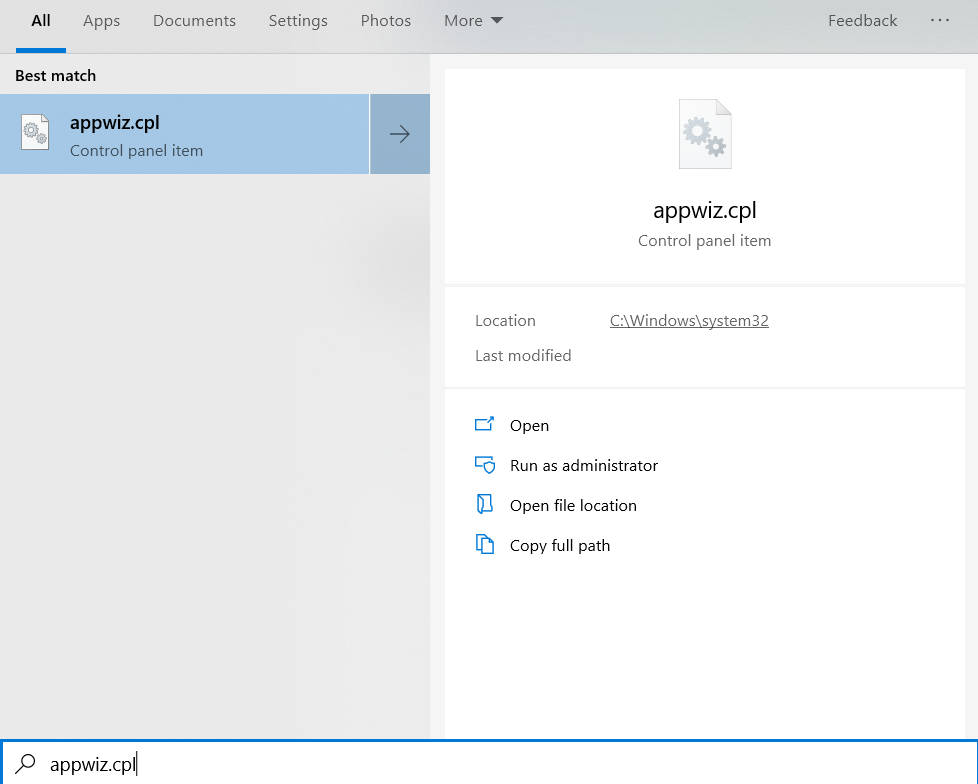
Step 1. Click on the Start button and type Appwiz.cpl.
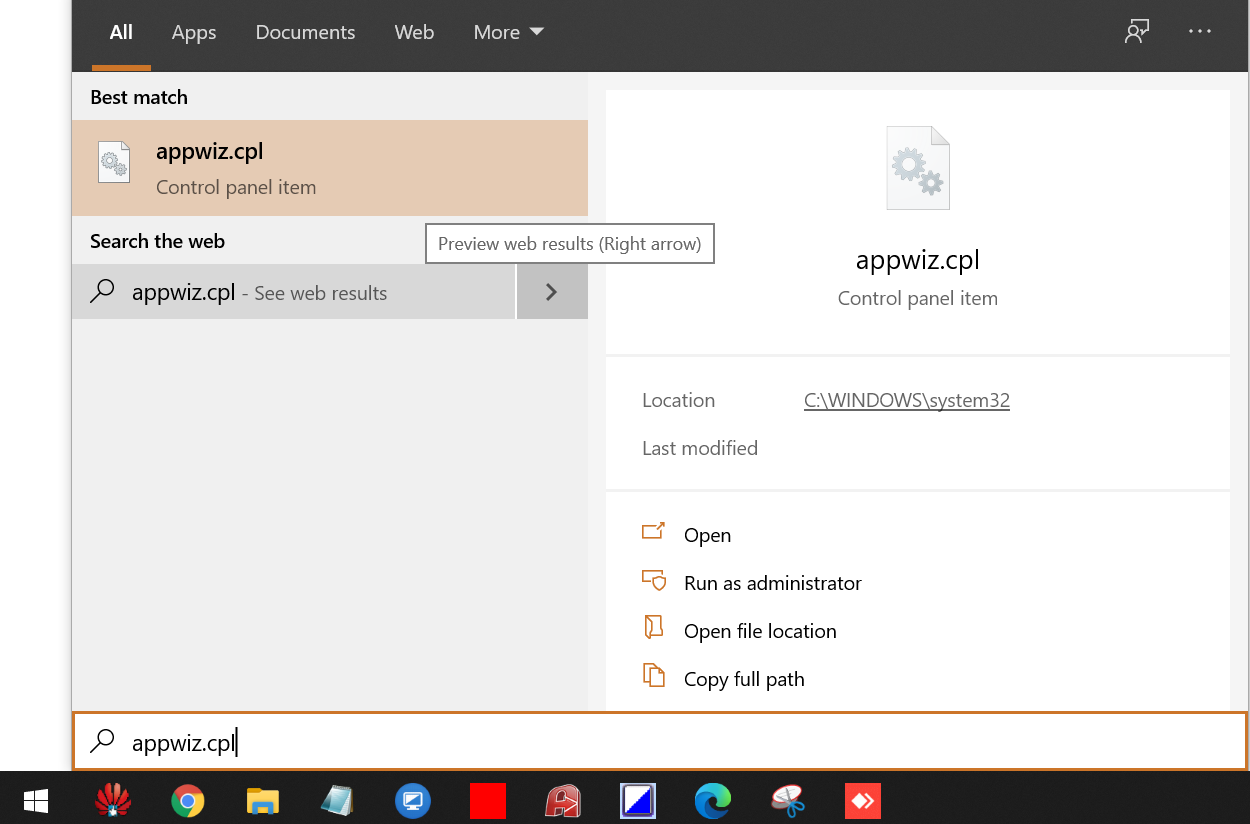
Step 2. From the available search results, click on the Appwiz.cpl to open the “Programs and Features” window.
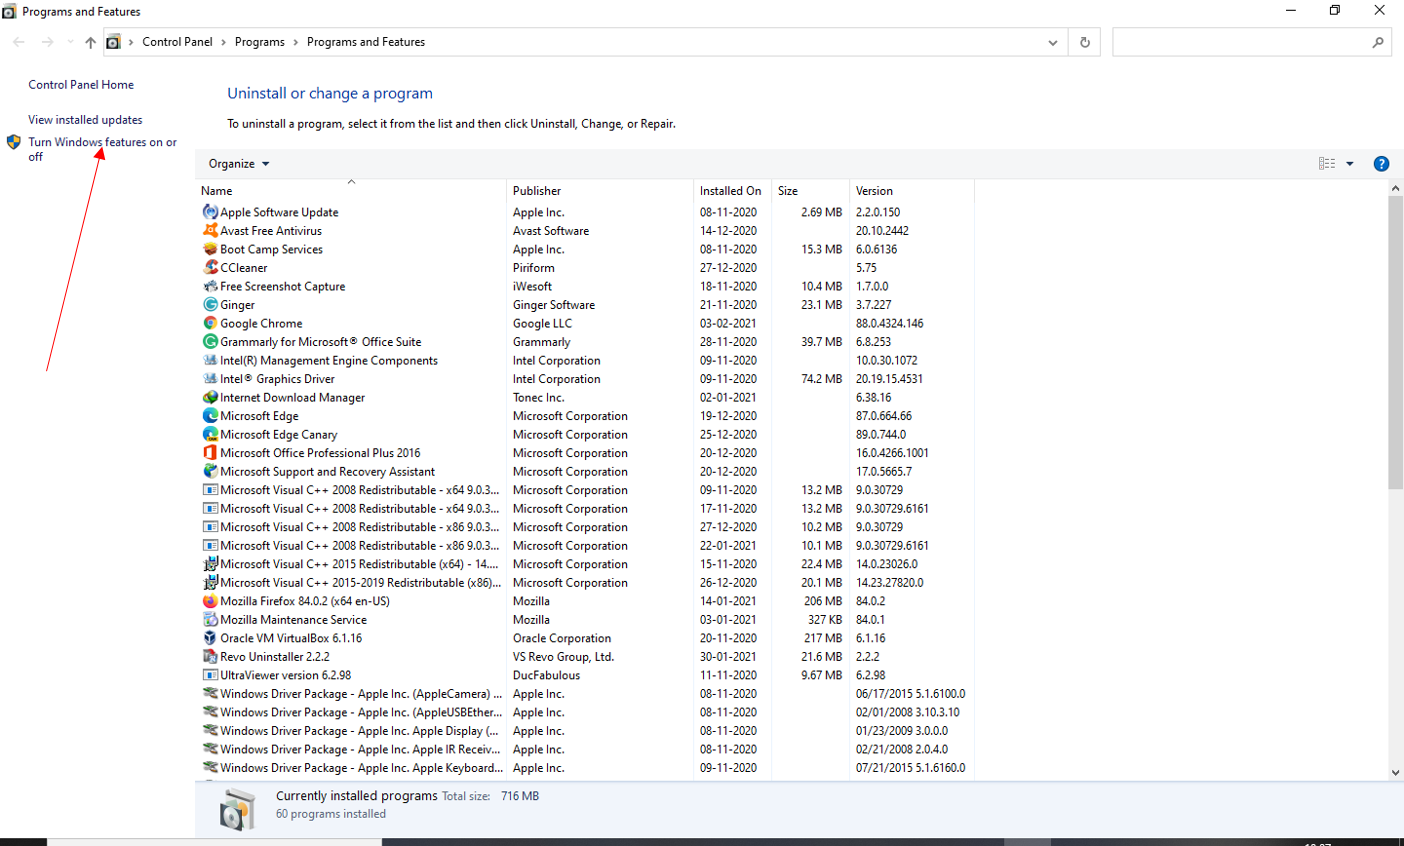
Step 3. From the left side pane, click on “Turn Windows features on or off,” as shown in the above image.
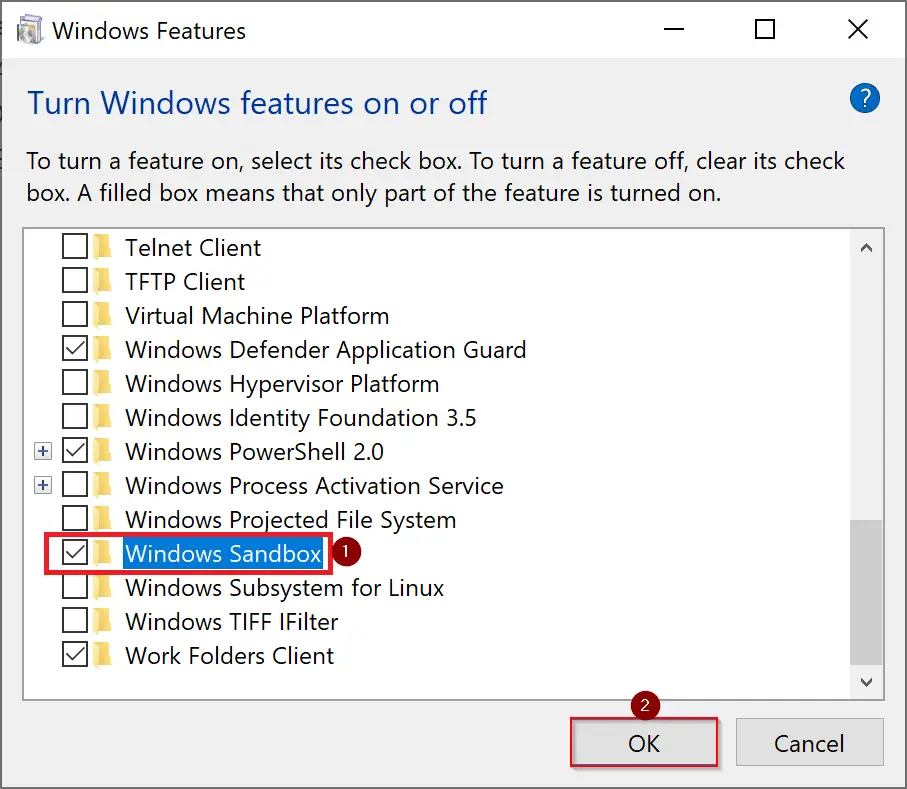
Step 4. “Windows Features” window is opened. Checkmark on “Windows Sandbox” and click the OK button.
Step 5. On the next upcoming window, click on the “Restart now” button to restart your PC.
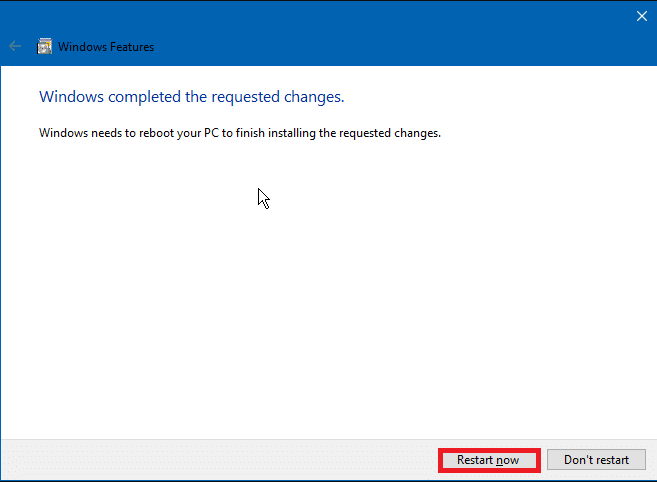
Once you have completed the above steps, your Windows 10 PC will successfully enable the “Windows Sandbox” feature.
To turn off the “Windows Sandbox” feature on Windows 10 PC, repeat the above steps. In step 4, uncheck the Windows Sandbox.
That’s all!
Also Read:
How to Enable Windows Sandbox Feature in Windows 10 Home Edition?
Microsoft has recently launched the Windows Sandbox feature starting with Windows 10 Build 18305 or later. It is a new lightweight desktop app available for Windows 10 Pro and Enterprise users. We are all afraid to download and install an executable file on our System. This is because, if anything goes wrong, we might need to clean and install Windows 10.
The same is the case for Microsoft, as they often encounter such troubles. This is why they have developed Windows Sandbox. This is an isolated Desktop application where you can run any executable file without fearing data loss or system corruption. Whatever file you install here, remains always here and thus won’t affect your host ever. All the applications and their data are lost the moment you close Windows Sandbox.

Recommended: How to fix Windows sandbox issue on Windows 10
Here we discuss different ways to Enable or Disable Windows Sandbox in Windows 10 –
- Enable or Disable Windows Sandbox using the Control panel
- Turn On or Off Windows Sandbox using PowerShell
- Enable or Disable Windows Sandbox using Command Prompt
- How to start Windows sandbox in Windows 10
Note: You must be signed in as an administrator to turn on or off and use Windows Sandbox.
To turn on or off the Windows sandbox on your system, make sure that the virtualization option is enabled in your UEFI/BIOS Settings. Follow these steps to enable this option-
- Press the Ctrl+Alt+Del shortcut and select Task Manager.
- Tap the performance tab and check if the Virtualization option is enabled on the current page. (See snapshot)

- Once confirmed, follow the below procedure to Enable or Disable Windows Sandbox on Windows 10 PC.
1] Enable or Disable Windows Sandbox using the Control panel
To enable or disable Windows Sandbox using the Control Panel, use the following instructions:
- Open the Control Panel.
- Now on the visible Window, select Program > Programs & features.
- On the left pane, click on the link – Turn Windows features on or off.

- Henceforth locate Windows Sandbox from the list under the opened window.
- Thereafter activate or deactivate the checkbox to enable or disable this option respectively.
- Tap the OK button and restart your PC to apply the changes.
2] Enable or Disable Windows Sandbox using PowerShell
To enable or disable Windows Sandbox using the Windows PowerShell, you can use the below steps:
- Run PowerShell as an administrator.
- If the UAC prompt appears up, hit Yes to permit the access.
- On the elevated PowerShell window, copy and paste the below code and hit Enter at the end.
- To enable Windows Sandbox type this code –
Enable-WindowsOptionalFeature –FeatureName "Containers-DisposableClientVM" -All -Online
- To disable Windows Sandbox type the below command-
Disable-WindowsOptionalFeature –FeatureName "Containers-DisposableClientVM" -Online
- If the prompt asks you to restart the system after the competition of the task, click Y to authorize the same.
- Once the task is finished, check whether the sandbox is on either enable or disable mode as per your choice.
3] Enable or Disable Windows Sandbox using Command Prompt
- Go to Cortana and type cmd. Right-click on Command Prompt and select Run as administrator option.
- Hit Yes on the UAC prompt, to authorize the access.
- Type the below code on the elevated command prompt and press Enter to run the command.
- To enable the Sandbox feature on Windows, copy/ paste the below code-
Dism /online /Enable-Feature /FeatureName:"Containers-DisposableClientVM" -All
- To disable the Sandbox feature on Windows, run this command –
Dism /online /Disable-Feature /FeatureName:"Containers-DisposableClientVM"
- If the prompt asks to reboot your PC after the task is finished, hit Y to proceed ahead.
4] How to start Windows sandbox in Windows 10
When the Windows sandbox in Windows 10 is enabled on your System, you can start this by following these steps:
Step-1: Go to Start and type Windows Sandbox. Once found, select the same.
Step-2: Tap Yes on the UAC to access the prompt.
Step-3: Now copy (Ctrl+C) an executable file from the host.
Step-4: Thereafter paste (Ctrl+V) the selected file on the window desktop of Sandbox.
Step-5: Open and run the executable file in the Windows Sandbox. Succeeding after that follow the onscreen instructions. Windows Sandbox will run perfectly normally.
Once you have performed all the steps mentioned above, close the Windows sandbox application and hit OK to confirm the changes.
Thus, all the contents of the sandbox will be discarded and deleted.
Minimum system requirements
To use Windows Sandbox without any issue, your system should meet the minimum hardware requirements. They are as follows-
- The System should be running on Windows 10 Pro or Enterprise Insider build 18305 or later.
- The architect must be AMD64 (64-bit) with a minimum of 2 CPU cores (4 cores with hyperthreading).
- Virtualization capabilities should be enabled in BIOS.
- At least 4GB of RAM (8GB recommended) and 1 GB of the hard disk.
SSD is normally recommended as ROM for Windows Sandbox.
That would be all!
Windows Sandbox is a new feature in Windows 10 that helps users run unreliable applications in a virtual environment. This feature allows you to safely run unknown applications in isolation. A Windows sandbox program can in no way affect the Windows host or operating system and data. When you close the Sandbox, Windows 10 automatically deletes the application and its data from your PC. The Windows sandbox is like running another copy of Windows 10 on the virtual machine of your Windows 10 PC. But the only difference is that the feature is built into Windows 10 and the changes are not saved when you exit the sandbox. This feature is currently available only in the Pro and Enterprise editions of Windows 10. With the default settings, the Windows Sandbox feature is disabled. If you want to enable the Windows sandbox, or disable, after some use, you can do this in the “Windows Components” section.
The Windows Sandbox feature is present in 18305 (version 1903) and later builds only for Windows 10. A minimum of 4 GB of RAM, 1 GB of free disk space, and virtualization capabilities included in the BIOS are required.
Enable BIOS Virtualization
First, you need to make sure that virtualization is enabled. To do this, open the task manager by pressing the Ctrl + Shift + Esc key combination. Next, go to the “Performance” tab and in the bottom right column “Virtualization” should be Enabled.
Related post :How to clear the DNS cache on a Windows computer
If your virtualization is disabled, then go into the BIOS and enable it. In my case, I went to the BIOS and went through the Advanced> CPU Configuration> Intel Virtualization Technology and Enabled options.
Enable or disable the Windows 10 sandbox
Press the Win + R key combination and enter Appwiz.cpl to open the programs and components. Next left click on “Turn Windows features on or off.”
Related post : Error VIDEO_SCHEDULER_INTERNAL_ERROR in Windows 10
Look here for the entry Windows Sandbox. To enable the “Sandbox” feature, select “Windows Sandbox” and click the “OK” button. If necessary, restart the computer. To disable the sandbox, uncheck the box next to it and click OK.

Related post : How to extract files from corrupted zip archives
Защитник Windows — это встроенное решение для обеспечения безопасности в Windows 10. Функция дополнительной защиты — «Песочница» доступна в Windows 10 версии 1703 и выше, но по умолчанию она отключена.
Microsoft описывает эту функцию следующим образом:
Запуск Защитника Windows в виртуализированной среде гарантирует, что даже в маловероятном случае взлома, злоумышленники будут ограничены изолированной средой и не смогут нанести ущерб остальной части системы.
Данная мера является частью длительной стратегии Microsoft по обеспечению защиты от атак с помощью инновационных механизмов безопасности. Защитник Windows и остальные компоненты Advanced Threat Protection Защитника Windows теперь получили интеграцию с другими компонентами безопасности из Microsoft 365 для создания единой системы Microsoft Threat Protection.
Антивирус Защитник Windows — стал первым продуктом безопасности, поддерживающим данную возможность.
На данный момент нет других антивирусных приложений, которые работают в режиме песочницы. Поместив, Защитник Windows в «песочницу», Microsoft усложнила злоумышленникам задачу доступа к критически важным модулям системы, поскольку изолированные приложения не могут взаимодействовать с остальной частью Windows 10 и имеют крайне ограниченный доступ к ресурсам памяти и файловой системе.
Чтобы включить песочницу для Защитника Windows, выполните следующие действия.
- Откройте Командную строку или PowerShell от имени Администратора.
- Введите или скопируйте и вставьте следующую команду:
setx /M MP_FORCE_USE_SANDBOX 1

- Перезапустите Ваше устройство.
Теперь функция «песочницы» включена.
Замечания:
Команда setx представляет собой консольный инструмент, который может использоваться для установки или отмены переменных пользовательской и системной среды. В общем случае синтаксис выглядит следующим образом:
setx variable_name variable_value — установить переменные среды для текущего пользователя.
setx /M variable_name variable_value — установить переменные среды для всех пользователей (в рамках всей системы).
Используйте setx /? в PowerShell, чтобы узнать больше об этом инструменте.
Как отключить «песочницу» для Защитника Windows.
- Чтобы отключить средство дополнительной защиты Защитника Windows выполните команду:
setx /M MP_FORCE_USE_SANDBOX 0
- Перезагрузите компьютер.
Или в качестве альтернативы:
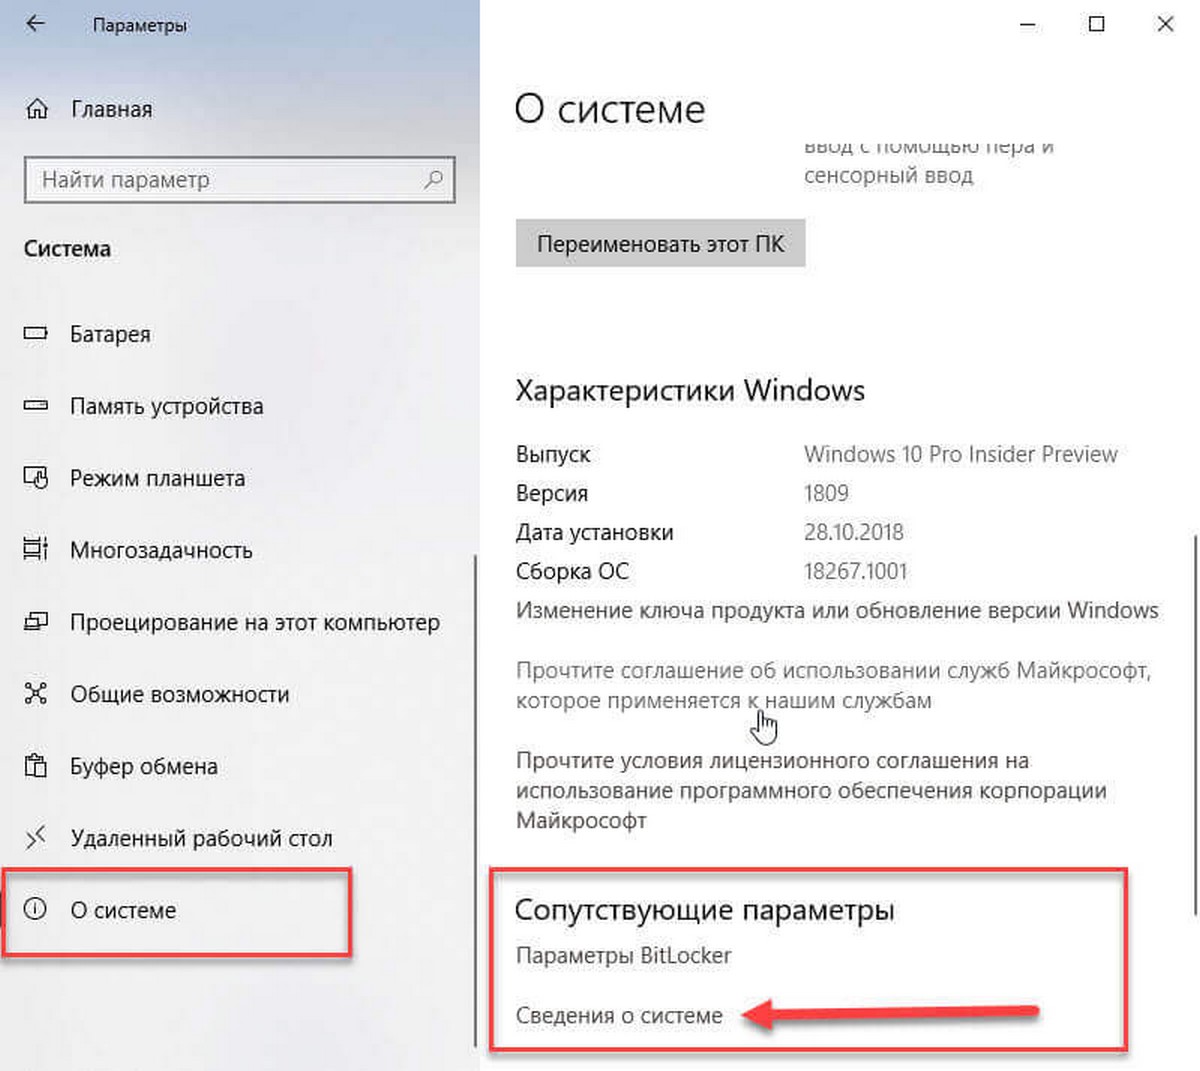
- Откройте приложение «Параметры» перейдите в группу настроек «Система» → «О системе»
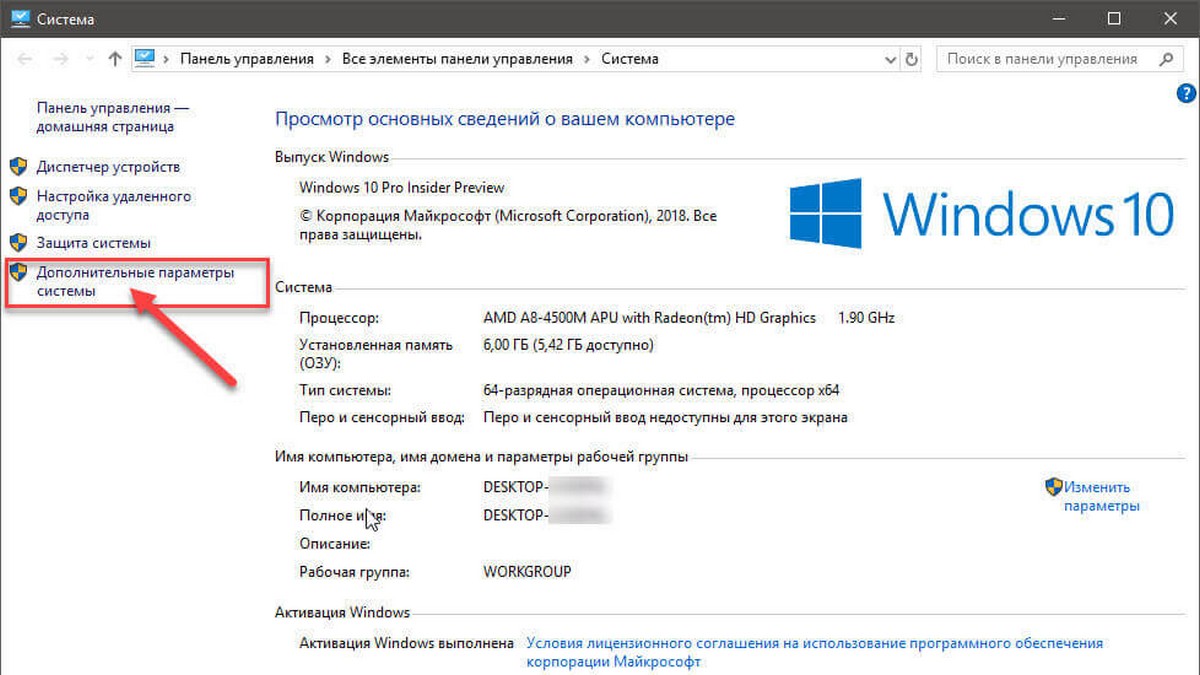
- В разделе «Сопутствующие параметры» нажмите ссылку «Сведения о системе».
- В открывшемся окне с лева нажмите ссылку «Дополнительные параметры системы»
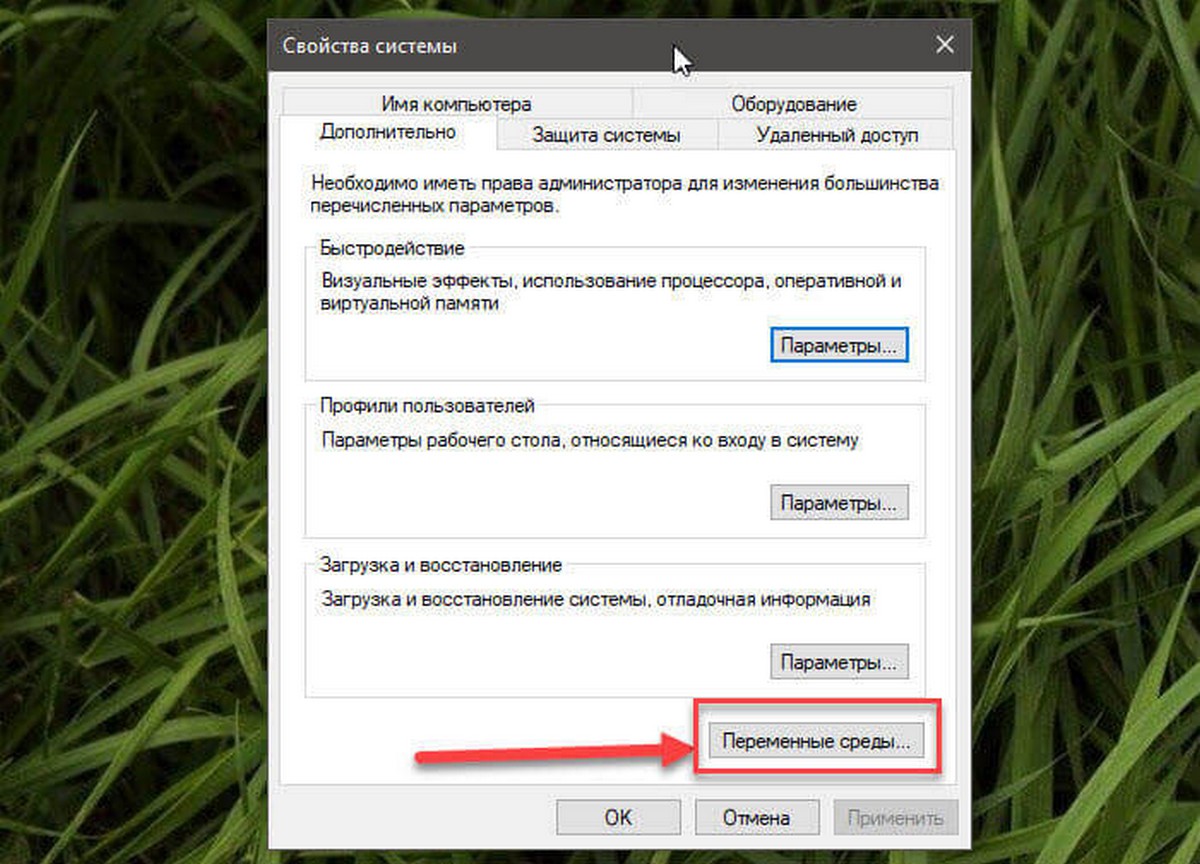
- В следующем диалоговом окне в нижней части вкладки «Дополнительно», вы увидите кнопку «Переменные среды …» . Нажмите на нее.
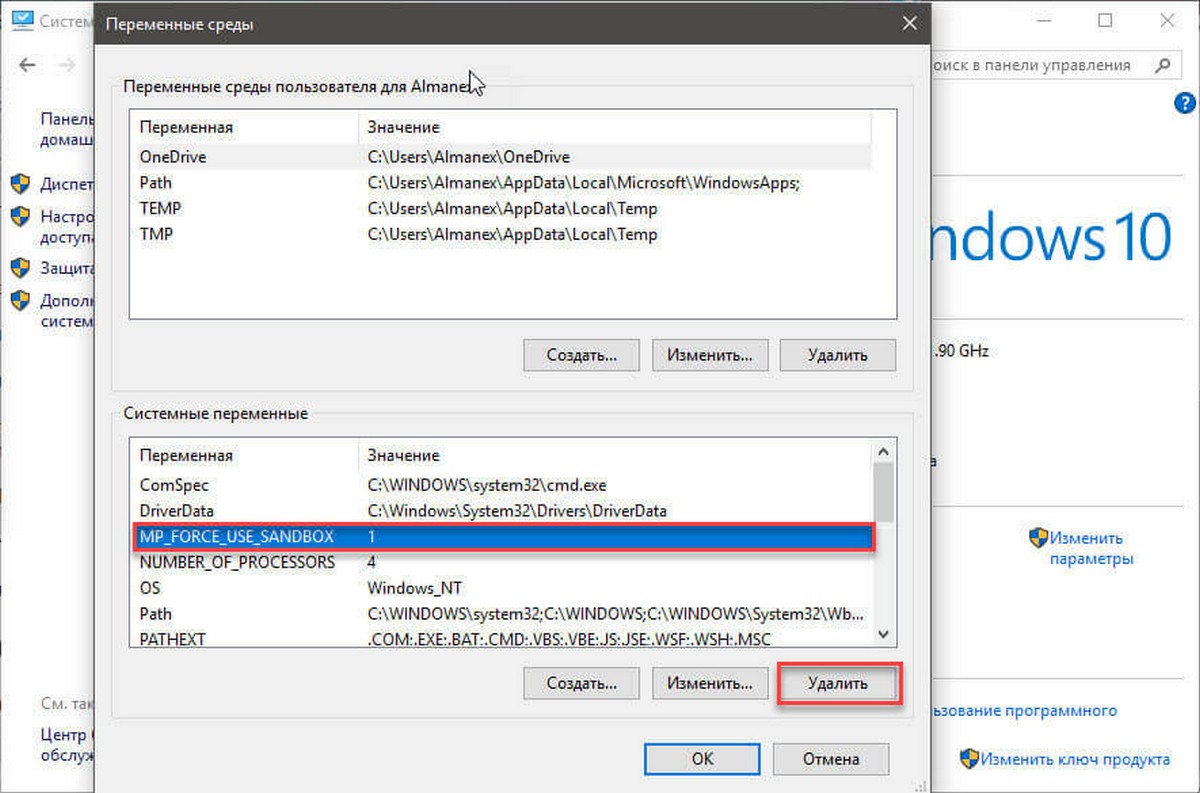
- В разделе «Системные переменные» удалите переменную:
MP_FORCE_USE_SANDBOX.
- Перезагрузите ОС.
Все!