
Слышу себя, говоря в микрофон — причины и решение
Некоторые пользователи могут столкнуться с тем, что звук с микрофона слышен в наушниках или колонках, особенно это заметно при общении, но возможно и в других ситуациях.
В этой инструкции подробно о том, что делать, если вы слышите себя в микрофоне на наушниках с микрофоном или без, колонках и в других ситуациях. Описанные решения подойдут для Windows 11, Windows 10 и предыдущих версий системы.
Прослушивать с данного устройства в свойствах микрофона
Первое, что следует сделать, если вы слышите себя с микрофона — проверить, не включена ли опция «Прослушивать с данного устройства» в параметрах микрофона и отключить её при необходимости. Универсальный способ сделать это для всех актуальных версий Windows состоит из следующих шагов:
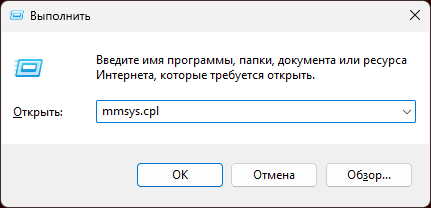
- Нажмите клавиши Win+R на клавиатуре (Win — клавиша с эмблемой Windows), введите mmsys.cpl в окно «Выполнить» и нажмите Enter.

- В открывшемся окне перейдите на вкладку «Запись», выберите микрофон по умолчанию и нажмите кнопку «Свойства».

- Перейдите на вкладку «Прослушать», снимите отметку «Прослушивать с данного устройства» и нажмите «Ок».

- Если на вкладке «Запись» несколько микрофонов, причем в качестве «Устройство по умолчанию» и «Устройство связи по умолчанию» установлены разные микрофоны, проделайте, отключите прослушивание для каждого из них.


Отключение прослушивания с устройства никак не повлияет на работу микрофона: программы и собеседники продолжат слышать звук с него, но он не будет дублироваться в ваших наушниках или колонках.
Помимо описанного способа попасть в соответствующие настройки устройств записи, вы можете использовать один из дополнительных методов:
- Перейти в Параметры — Система — Звук и нажать по пункту «Дополнительные параметры звука».
- Открыть панель управления, а затем — пункт «Звук» (в виде «Значки») или «Оборудование и звук» — «Управление звуковыми устройствами» (в виде «Категория»).
Громкость в колонках у собеседника
Если вы слышите себя с микрофона только когда общаетесь с кем-то: в сети, мессенджере или другой программе, причина может заключаться в сочетании следующих факторов:
- Ваш собеседник (или один из них, если их несколько) использует колонки в качестве устройства воспроизведения звука, а не наушники.
- Громкость колонок и/или их расположение относительно микрофона собеседника таковы, что микрофон «улавливает» и ретранслирует звук с колонок обратно.
В такой ситуации вы будете слышать себя с небольшой задержкой и с отличающейся громкостью: своего рода эхо.
Возможные решения ограничиваются обращением к собеседнику. Вы можете попросить его:
- Использовать наушники
- Уменьшить громкость колонок
- Если это возможно — изменить взаимное расположение колонок и микрофона таким образом, чтобы микрофон улавливал меньше звука, воспроизводимого на колонках
Надеюсь, один из предложенных способов сработает и звук с микрофона, воспроизводимый в наушниках или на динамиках не будет вам мешать.
In the trend of work from home culture, everybody needs a computer with audio/video calling software to interact with their colleagues and friends. But sometimes, it happens to some Windows 11 users that their voice is not reaching the recipient.
There may be a chance that your Microphone is somehow disabled. Don’t panic because there is no big issue with this. You can simply enable or disable the Microphone in Windows 11 settings as needed.
Microsoft adds more features in Windows 11 than Windows 10 because now you can manually give or revoke microphone permission from specific apps and microphone devices. You just need to follow up on our simple guide to learn how to turn on / off microphone access in Windows 11.
Also Read- How to Fix Low Microphone Volume Issue in Windows 11
Steps to Turn On or Turn Off Microphone in Windows 11
Let’s start with the basic and all-in-one method to enable or disable Microphone access in Windows 11. let’s dive into it.
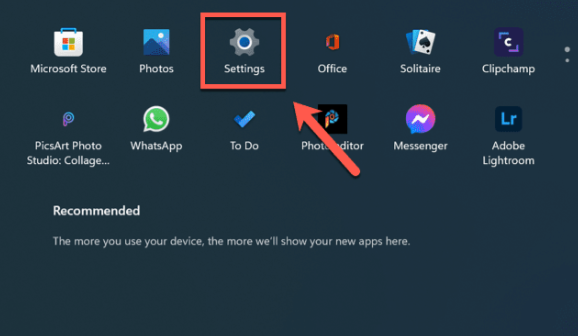
- Click on the start menu and tap on Settings. Either way, you can press Windows + I to open windows 11 settings.

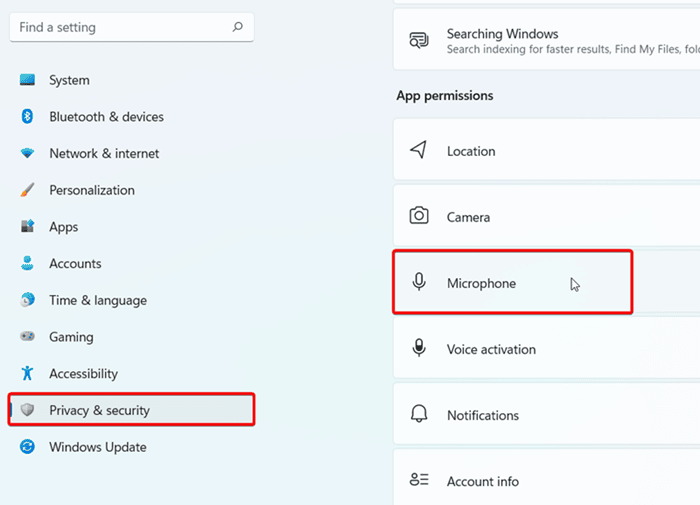
- Now in settings, go to Privacy & Security located on the left menu bar.
- Scroll down to the App Permissions section to see the Microphone Tab; click on it.

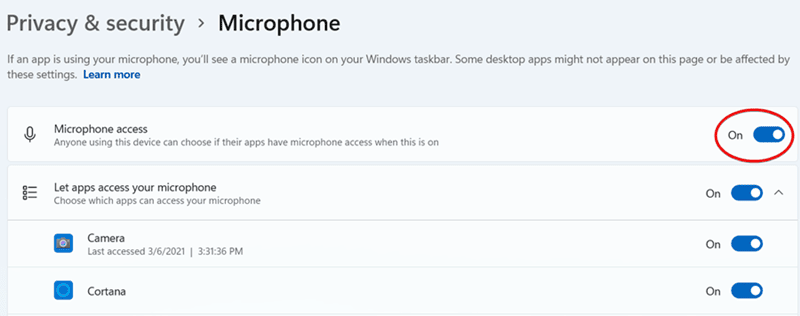
- There is a toggle option for Turn On / Off microphone. Toggle according to your need. This is the broad option to enable or disable microphone access in windows 11.


How to Enable or Disable Microphone Access for Specific Apps
Windows 11 also offer a feature to give or revoke microphone access to specific apps. You can use this to prevent any of the apps from getting your audio so that you can disable it specifically.
- Follow the above steps till reaching the toggle option of the Microphone (Turn On/Off).
- Below that toggle option, you can see Microsoft apps and a third-party apps that you can manually enable or disable microphone access.

- In front of these apps, you can see an individual toggle option to control the microphone access.

Enable or Disable Microphone Using Sound Settings
Here is another way to open microphone permissions via sound settings. It is just like the basic one we previously discussed. Using this, you can control the microphone hardware and control permissions.
- Press Windows + I to open the Settings app.
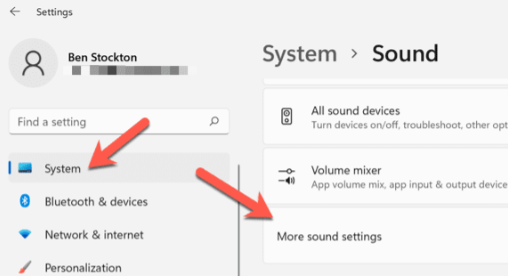
- In the settings, windows tap on System on the left menu.

- On the right side, you can see the Sound tab, click on it. Now scroll down to the Input section.

- Click on Microphone > Properties.

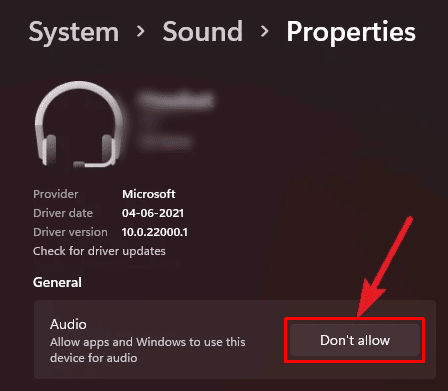
- In the General section, you can see Allow option in front of the audio tab. (If already enable you can see Don’t allow in front of the audio section)


From Editor’s Desk
At the end of the article, I hope you will know how to control your microphone access in the Windows 11 operating system. It is now easy and simple to enable or disable microphone permission for specific apps and devices. Suppose you face any problems regarding this article. Let us know in the comment section.
Download Windows Speedup Tool to fix errors and make PC run faster
If you are looking to turn off or disable your Mic or Microphone in Windows 11/10, then this post will show you how to do it easily. Many people these days, prefer to disable the Mic and the Webcam for privacy and security reasons, as they can get hacked and the hackers would be able to hear everything you say or see everything you do in from of your laptop.
To disable the microphone in Windows 11 or Windows 10, you have to access the Device Manager or Settings.
1] Mute the mic using Device Manager

- Right-click on the Start Button to open the WinX Menu.
- Here select Device Manager. This interface lets you easily manage your devices and the device drivers.
- Now expand the Audio inputs and outputs section
- You will see your Microphone listed there.
- Right-click on it and select Disable.
When you do that, you will see a dialog box stating:
Disabling this device will cause it to stop functioning. Do you really want to disable it?
Click on Yes, and your computer’s Mic will be disabled.
To enable it back, follow the same procedure, and select Enable.
2] Via Settings
Windows 10
- Open Settings
- Click on System
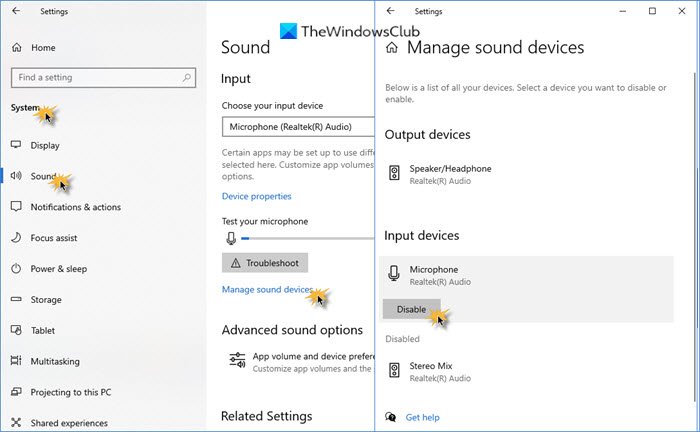
- Select Sound section
- Under Input, click on Manage sound devices
- Select Microphone
- Click on the Disable button.
Windows 11
- Open Settings
- Click on System
- Select Sound
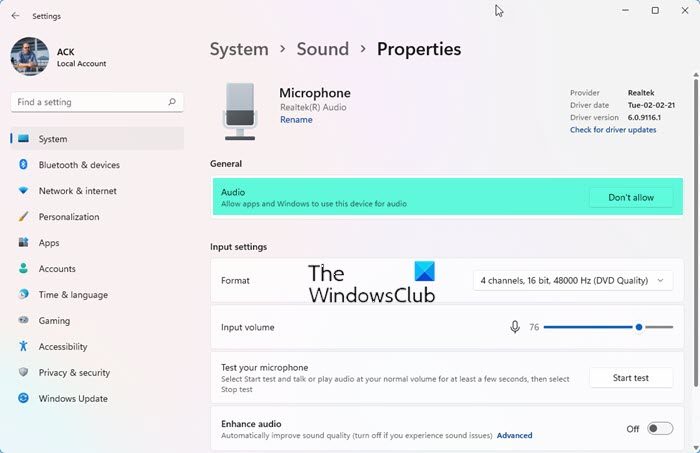
- Under Input, click on Microphone
- Click on the Don’t allow button against Audio.
These days, using Remote Access Technology (RAT), hackers can compromise your system and watch you, monitor your activities, and even record your actions, using your own webcam or microphone!
TIP: MicSwitch lets you mute the Microphone with a shortcut in Windows 11/10.
If you are one, who never uses the mic or webcam and who fears being watched or heard, you may want to disable the webcam and the Mic. You can of course always enable it again anytime in the future, should the need arise.
Anand Khanse is the Admin of TheWindowsClub.com, a 10-year Microsoft MVP (2006-16) & a Windows Insider MVP (2016-2022). Please read the entire post & the comments first, create a System Restore Point before making any changes to your system & be careful about any 3rd-party offers while installing freeware.
Reader Interactions
It is essential to have access to a microphone of a high quality on a Windows PC, as the proliferation of applications such as Zoom has demonstrated. It’s possible that you’ll need it for work, but it’s also a good idea to keep your microphone on hand in case of an unexpected emergency. What should you do, though, if the volume control on your microphone isn’t working properly?
If you can consistently hear your own voice coming through your microphone, it’s possible that the settings on your mic are incorrect. If you want to know how to stop hearing yourself on Windows 11, there should be a simple solution to this problem.
Read Also: How to Unzip Files on Windows 11
How to Stop Hearing Yourself on a Mic on Windows 11
You should be able to avoid hearing yourself on your microphone if you are using Windows 11 and you may accomplish this by removing the microphone monitoring feature.
This will prevent the microphone input from being played back through your speakers or headphones for the vast majority of users.
To prevent Windows 11 from playing back your own voice when you use a microphone:
1. Launch the Settings menu by opening the Start menu.
2. To access the sound menu, select System under Settings.
3. Choose the option for More sound adjustments.
4. To begin recording, open the Sound window, then choose your microphone from the drop-down menu.
5. Click the Properties button.
6. On the Listen tab, you should uncheck the item that says Listen to this device.
7. To save your changes, click the OK button.
FAQs
Why can I hear my own voice when I talk?
There is a good chance that while you read the first sentence of this paragraph, you are hearing your own voice inside your head. One of the reasons why we are able to “hear” our inner voice is because, according to a recent study, the system that is used for processing internal speech is similar to the system that is used for processing external speech.
Why can I hear myself on my headset?
Sidetone is an acoustic signal that is picked up by the microphone of your headset and is then played back in real time through the speaker or speakers of the headset in the capacity of controlled feedback. To put it another way, it seems as though the headset is picking up an echo of your own voice.
What causes a mic to echo?
When the volume is turned up to an unacceptable level, there is a possibility that the microphone will pick up sounds that are being produced by the speakers. This results in an effect that is comparable to an infinite echo that continues to resonate into infinity.
Why does my headset echo on PC?
Echoes are most commonly caused on computers via the audio feedback that occurs between the microphones and the speakers. What is this, exactly? Feedback in audio is a cyclical process. For instance, if you are playing a video game with a group of people, you can hear echoes if your headset mic picks up audio from your headset speakers.
Многие владельцы ноутбуков переживают о том, что злоумышленники посредством различных лазеек могут получить доступ к их микрофонам или даже веб-камерам. В сети предостаточно примеров, как хакеры этим пользуются в своих целях, но бежать в кладовку за изолентой не стоит — есть программные методы, позволяющие обезопасить себя от сторонней слежки буквально за несколько минут. Для этого не нужен специальный софт, определённые навыки или опыт — достаточно выполнять действия по инструкции.
Как отключить веб-камеру в Windows 10 и 11
В большинстве ноутбуков рядом с веб-камерой имеется светодиодный индикатор, сигнализирующий о том, что камера передаёт видео. Если вы не пользуетесь каким-либо софтом и сами камеру не запускали, то, вероятно, это сделал кто-то за вас. Самое время эту возможность обрубить:
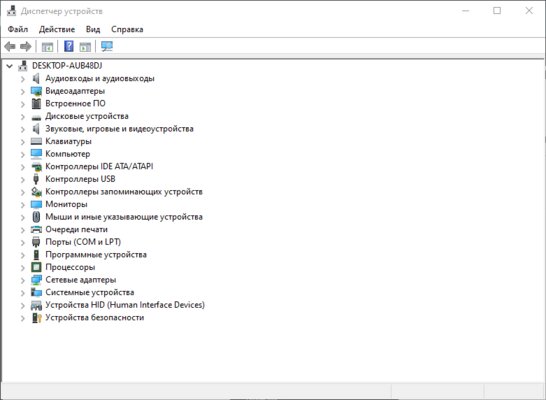
- нажимаем правой клавишей мыши по меню «Пуск»;
- выбираем пункт «Диспетчер устройств»;

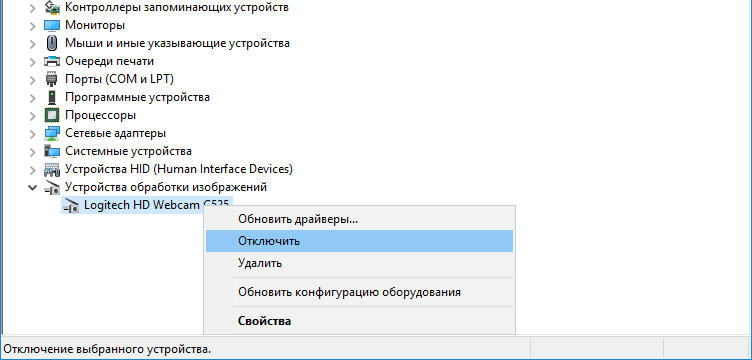
- в конце списка кликаем по пункту «Устройства обработки изображений»;

- нажимаем правой клавишей мыши на веб-камеру и в выпадающем пункте выбираем «Отключить».

Как отключить микрофон в Windows 10 и 11
К сожалению, индикатора работы микрофона в ноутбуках не предусмотрено, так что определить «прослушку» гораздо сложнее. С другой стороны, процесс отключения микрофона такой же простой, как и в случае с веб-камерой:
- нажимаем правой клавишей мыши по меню «Пуск»;
- выбираем пункт «Диспетчер устройств»;
- в самом начале списка кликаем по пункту «Аудиовыходы и аудиовходы»;

- нажимаем правой клавишей мыши на микрофон и в выпадающем пункте выбираем «Отключить устройство».

После этого переживать о том, что сторонние пользователи «слушают» вас через микрофон, больше не придётся.
Как отключить микрофон и веб-камеру через BIOS
Впрочем, кому-то может показаться, что двух предыдущих пунктов недостаточно. Всё же устройства хоть и отключены, но делается это через операционную систему, а значит, злоумышленники в теории смогут каким-то образом обратно включить периферийные устройства. Более надёжным способом является вариант отключения микрофона и веб-камеры через BIOS:
- перезагрузите систему и перейдите в BIOS (Del или F2 на клавиатуре);
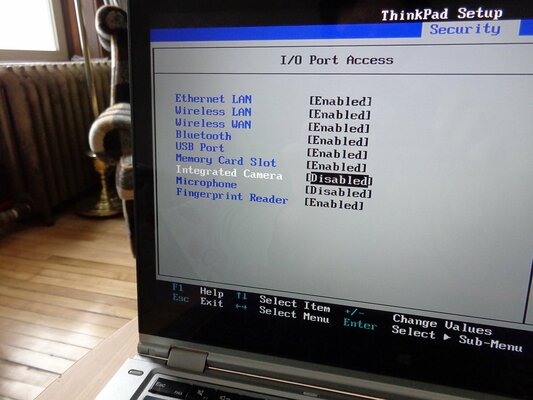
- в BIOS найдите вкладку Security или Advanced;
- найдите пункты Camera и Microphone и переключите их на Disable;

- выйдите из BIOS, сохранив изменения в системе.
Стоит сразу отметить, что каждый BIOS имеет свой дизайн, расположение элементов управления и логику взаимодействия с компонентами системы. На новых моделях с большой долей вероятности микрофон и веб-камера отключаются в пункте Advanced, но проще будет воспользоваться гайдом к BIOS вашего ноутбука с официального сайта.