
-
Home
-
News
- How to Enable or Disable Sandbox in Windows 11? (3 Ways)
By Vera | Follow |
Last Updated
Windows Sandbox is a useful feature that offers you a safe environment to run apps in Windows 11 without fear of harming your computer. How can you enable or disable Sandbox in Windows 11? MiniTool will show you three ways to do this task and let’s see them.
Windows 11 Sandbox
Windows Sandbox was first introduced in Windows 10 19H1 and now it is also a part of Windows 11. It is designed to create a secure environment to isolate running apps from the main systems, without accessing files, Windows registry, and critical parts of the main Windows system. That is, programs installed in Windows Sandbox keep “sandboxed” and run separately from the host machine.
This feature is fairly helpful, especially when you download an executable file or an app from risky sources and install it in Sandbox. This won’t damage your PC.
Windows Sandbox is temporary. When you close this tool, all the apps, files, and settings will be deleted. The system will restore to its original and clean state next time you run Sandbox.
To use Windows Sandbox, you need to enable it on your PC. Well then, how to enable Sandbox in Windows 11? Try the methods below.
3 Ways to Enable Sandbox Windows 11
Enable Windows 11 Sandbox in Settings via Windows Features
Here is what you should do:
1. Press Win + R keys on the keyboard to get the Run dialogue, type exe to the text box and press Enter to open the Windows Features interface. Alternatively, you can search for Turn Windows features on or off to the search box and click the result to open Windows Features.
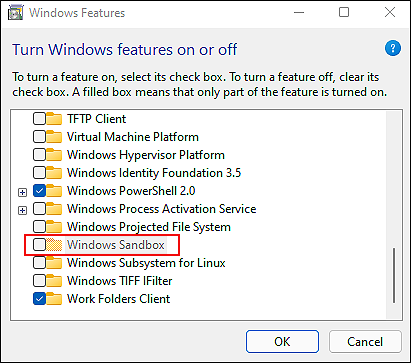
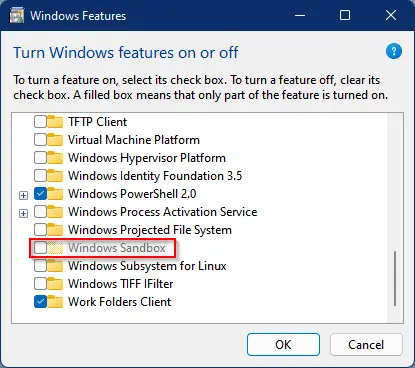
2. Locate Windows Sandbox and then tick the box of this feature and click OK.
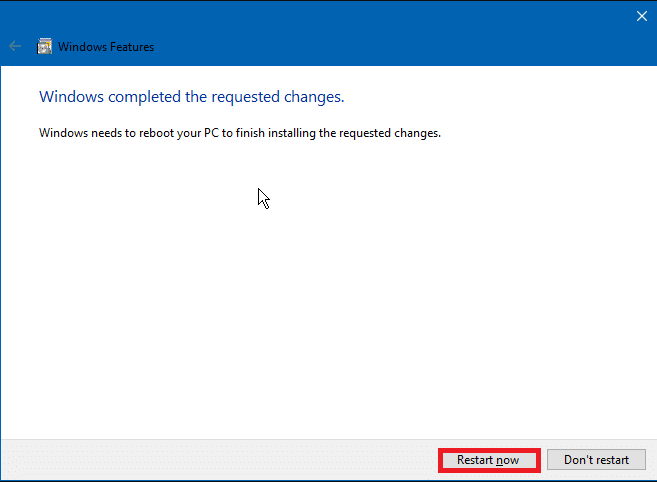
3. Click Restart now to finish installing the requested change.
Tip: Sometimes you find the option for Windows Sandbox is grey. To fix this issue, you can refer to this related article – Here Is a Simple Solution to Windows 10 Sandbox Is Greyed out!
To disable Windows Sandbox in Windows 11, uncheck the option – Windows Sandbox in the Windows Features window.
Enable Sandbox Windows 11 via PowerShell
You can also follow these steps below to turn on Sandbox using PowerShell.
1. Right-click on the start icon and choose Windows PowerShell (Admin) to run this command tool with admin rights.
2. To enable Sandbox, type Enable-WindowsOptionalFeature -Online -FeatureName “Containers-DisposableClientVM” –All and press Enter. To disable Sandbox Windows 11, type Disable-WindowsOptionalFeature -Online -FeatureName “Containers-DisposableClientVM” –Online and press Enter.
Enable Sandbox Windows 11 via Command Prompt
In addition, you can use another command tool – Command Prompt to turn on Sandbox in Windows 11. Follow the guide below:
1. Launch Command Prompt (CMD) in Windows 11 with admin privileges.
2. Type Dism /online /Enable-Feature /FeatureName:”Containers-DisposableClientVM” –All in the CMD window and press Enter to enable Windows Sandbox.
If you need to disable Sandbox, use this command – Dism /online /Disable-Feature /FeatureName:”Containers-DisposableClientVM” and press Enter.
Final Words
That’s all the information about how to enable or disable Sandbox in Windows 11.
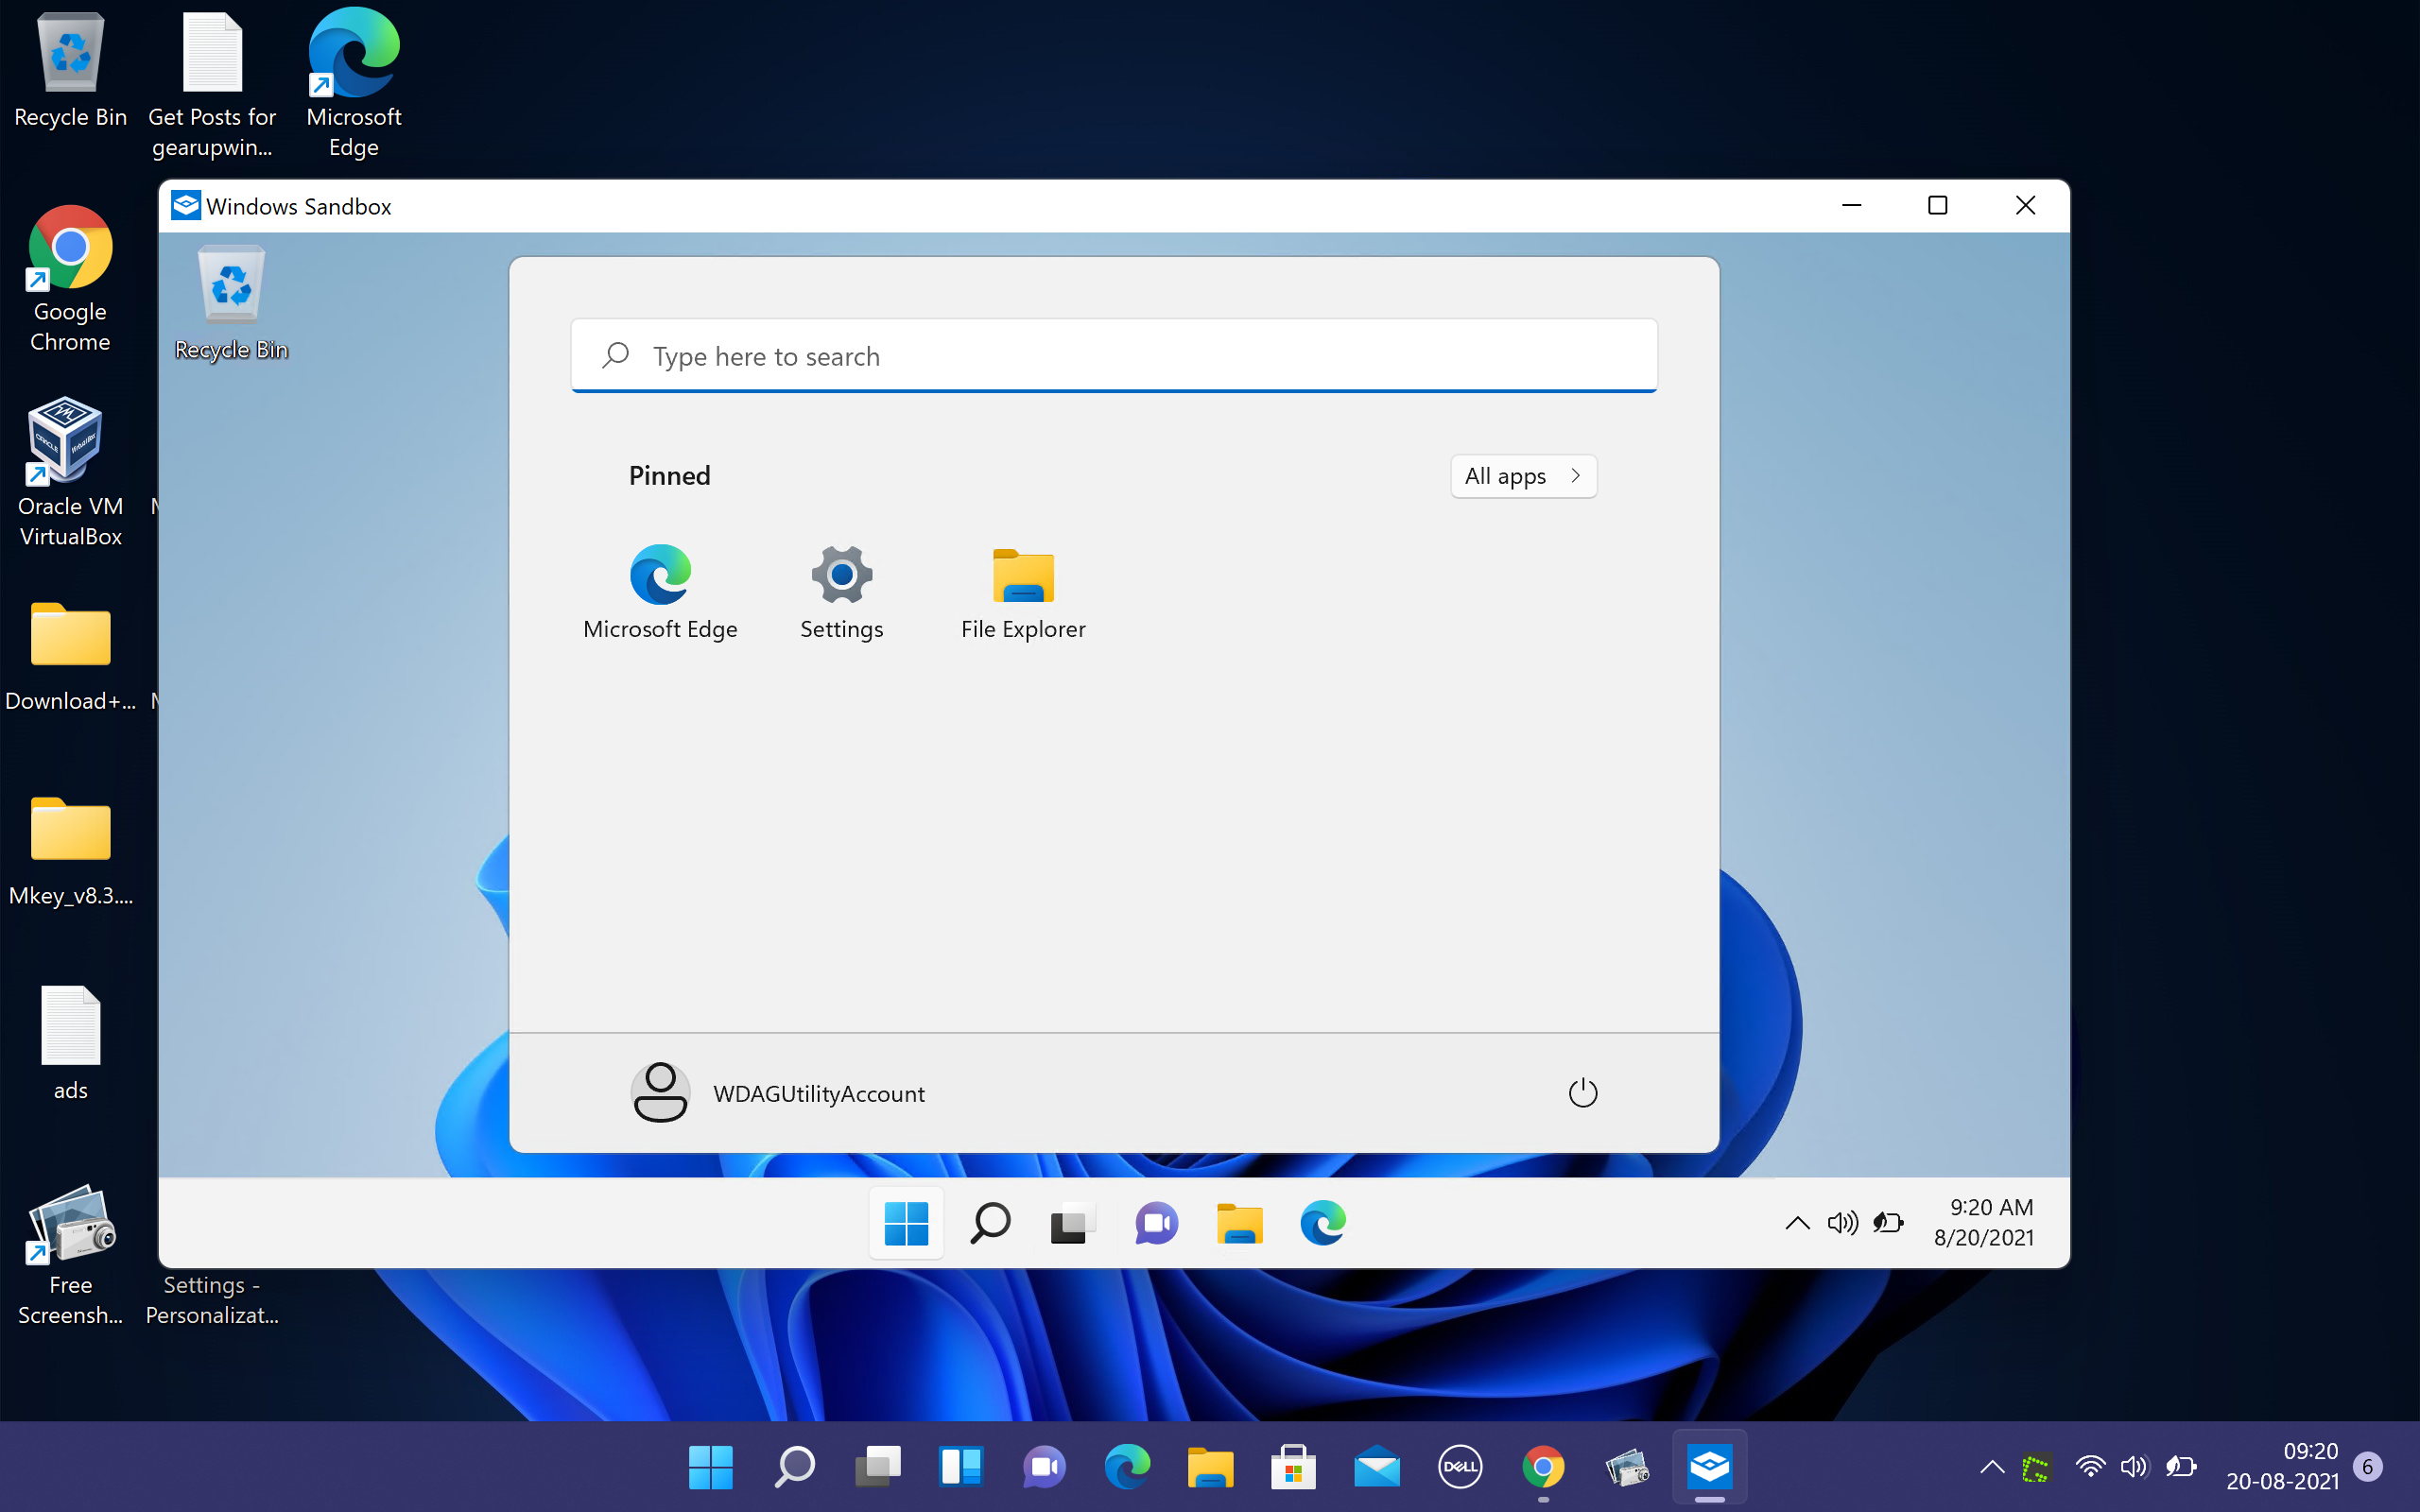
After enabling Windows Sandbox, it is easy to run it, just the same as run other programs or apps. Go to find Windows Sandbox from the search menu and select it to open it. If a prompt appears to ask for an administrator’s permission, click Yes. Drag and drop files or apps to Sandbox when needed. After exiting this tool, any changes you have made will be deleted.
About The Author
Position: Columnist
Vera is an editor of the MiniTool Team since 2016 who has more than 7 years’ writing experiences in the field of technical articles. Her articles mainly focus on disk & partition management, PC data recovery, video conversion, as well as PC backup & restore, helping users to solve some errors and issues when using their computers. In her spare times, she likes shopping, playing games and reading some articles.
Windows Sandbox is a nice tool by Microsoft that lets you test new applications on its interface. When you are 100% sure about the application’s usability and have no bugs associated with it, you may install that on your host system. If you find this tool interesting, let’s learn how to enable or disable Sandbox on Windows 11 PC.
There are several other virtualization apps that let you perform similar tasks on their interfaces. For example, Hyper-V is a good alternative to this Windows Sandbox and is as trustworthy as it is. Well, Sandbox lets its users test new apps in an isolated environment and purge all the accumulated data as soon as you close it. That’s the reason why everyone loves testing new apps over Sandbox in Windows 11.
Note: Windows Sandbox is available only for users running Windows 11 editions Pro, Enterprise, or Education. So, if you are a Windows 11 Home edition user, you better continue using the other virtualization apps.
This guide presents three ways using which one can easily turn On Sandbox on his/her computer. These methods are as follows –
- Through Windows Features dialog
- Using Terminal (Admin)
- Via Command Prompt
Now that you know about all three different ways, let’s explore how to enable Sandbox on your PC in detail –
1] Through Windows Features Dialog
The most effective way to enable Windows Sandbox is through the Settings app. All you require is to open Windows Features, look for Windows Sandbox, and enable it from there. Follow the below instructions to turn On Sandbox on your Windows 11 PC –
- Launch Windows Search by pressing Win + S.
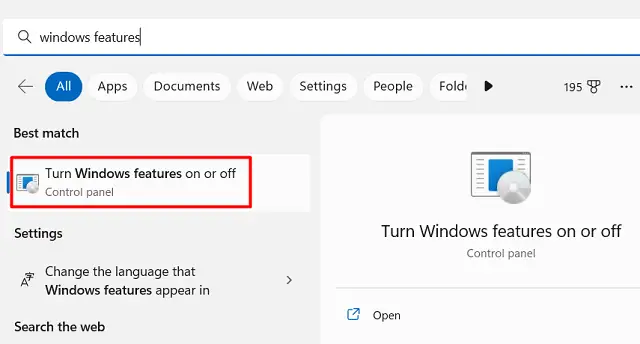
- Type “Windows features” in the text field, and click on the top result.
- On the upcoming window, scroll down to Windows Sandbox.

- Tick the box next to it and hit OK.
Wait for the system to detect files and install the required DI to enable Windows Sandbox. As soon as the dependencies are installed on your computer, you are all good to launch Sandbox on your PC.
Windows Sandbox Failed to start, Error 0x80070015 Fix
2] Using Windows PowerShell (Admin)
If Sandbox is not turning ON through Windows Features for some reason, you may enable it directly by running a single-line command on Windows PowerShell. This method is also helpful if the Sandbox option is greyed out on your computer. Here’s what you need to do to enable Sandbox on your PC –
- Press Win + X to launch the Power Menu. Select Terminal (Admin) from here.
- When the UAC window prompts, hit Yes to authorize opening the terminal.
- The terminal will default land into Windows PowerShell (Admin).
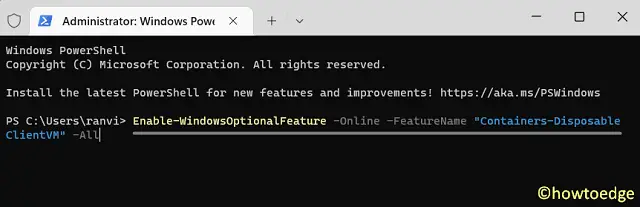
- Copy/paste the below code on it and press Enter –
Enable-WindowsOptionalFeature -Online -FeatureName "Containers-DisposableClientVM" -All
- Wait for this command to run successfully. Once this is over, the terminal will prompt you to restart your PC.
- Type Y and press Enter to reboot your computer.
Sign back into your device again and check Sandbox must be enabled on your Windows 11 PC.
3] Via Command Prompt
Just like PowerShell, users may enable Sandbox on Windows 11 by running the DISM code on Command Prompt. For this, you need to launch CMD as administrator first and execute a single-line command. The detailed steps are provided below –
- Press Win + R to launch the Run dialog.
- Type CMD on it and press Ctrl + Shift + Enter keys simultaneously.
- The UAC window will prompt next, hit Yes to authorize opening it.
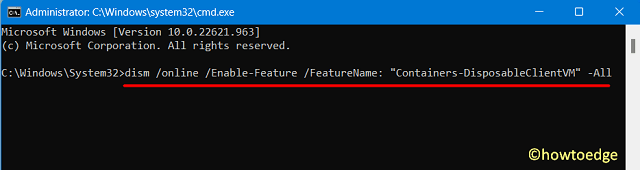
- On the elevated console, copy/paste the below command, and press Enter.
dism /online /Enable-Feature /FeatureName: "Containers-DisposableClientVM" -All
Wait for this command to run successfully on your computer. As soon as this is over, restart your PC. From the next login, check if you can start Windows Sandbox on your PC.
How to Fix Sandbox Issues in Windows 11/10
How to Use Windows Sandbox on Windows 11
Now that you have enabled Windows Sandbox, let’s learn the steps to use it on your Windows 11 PC –
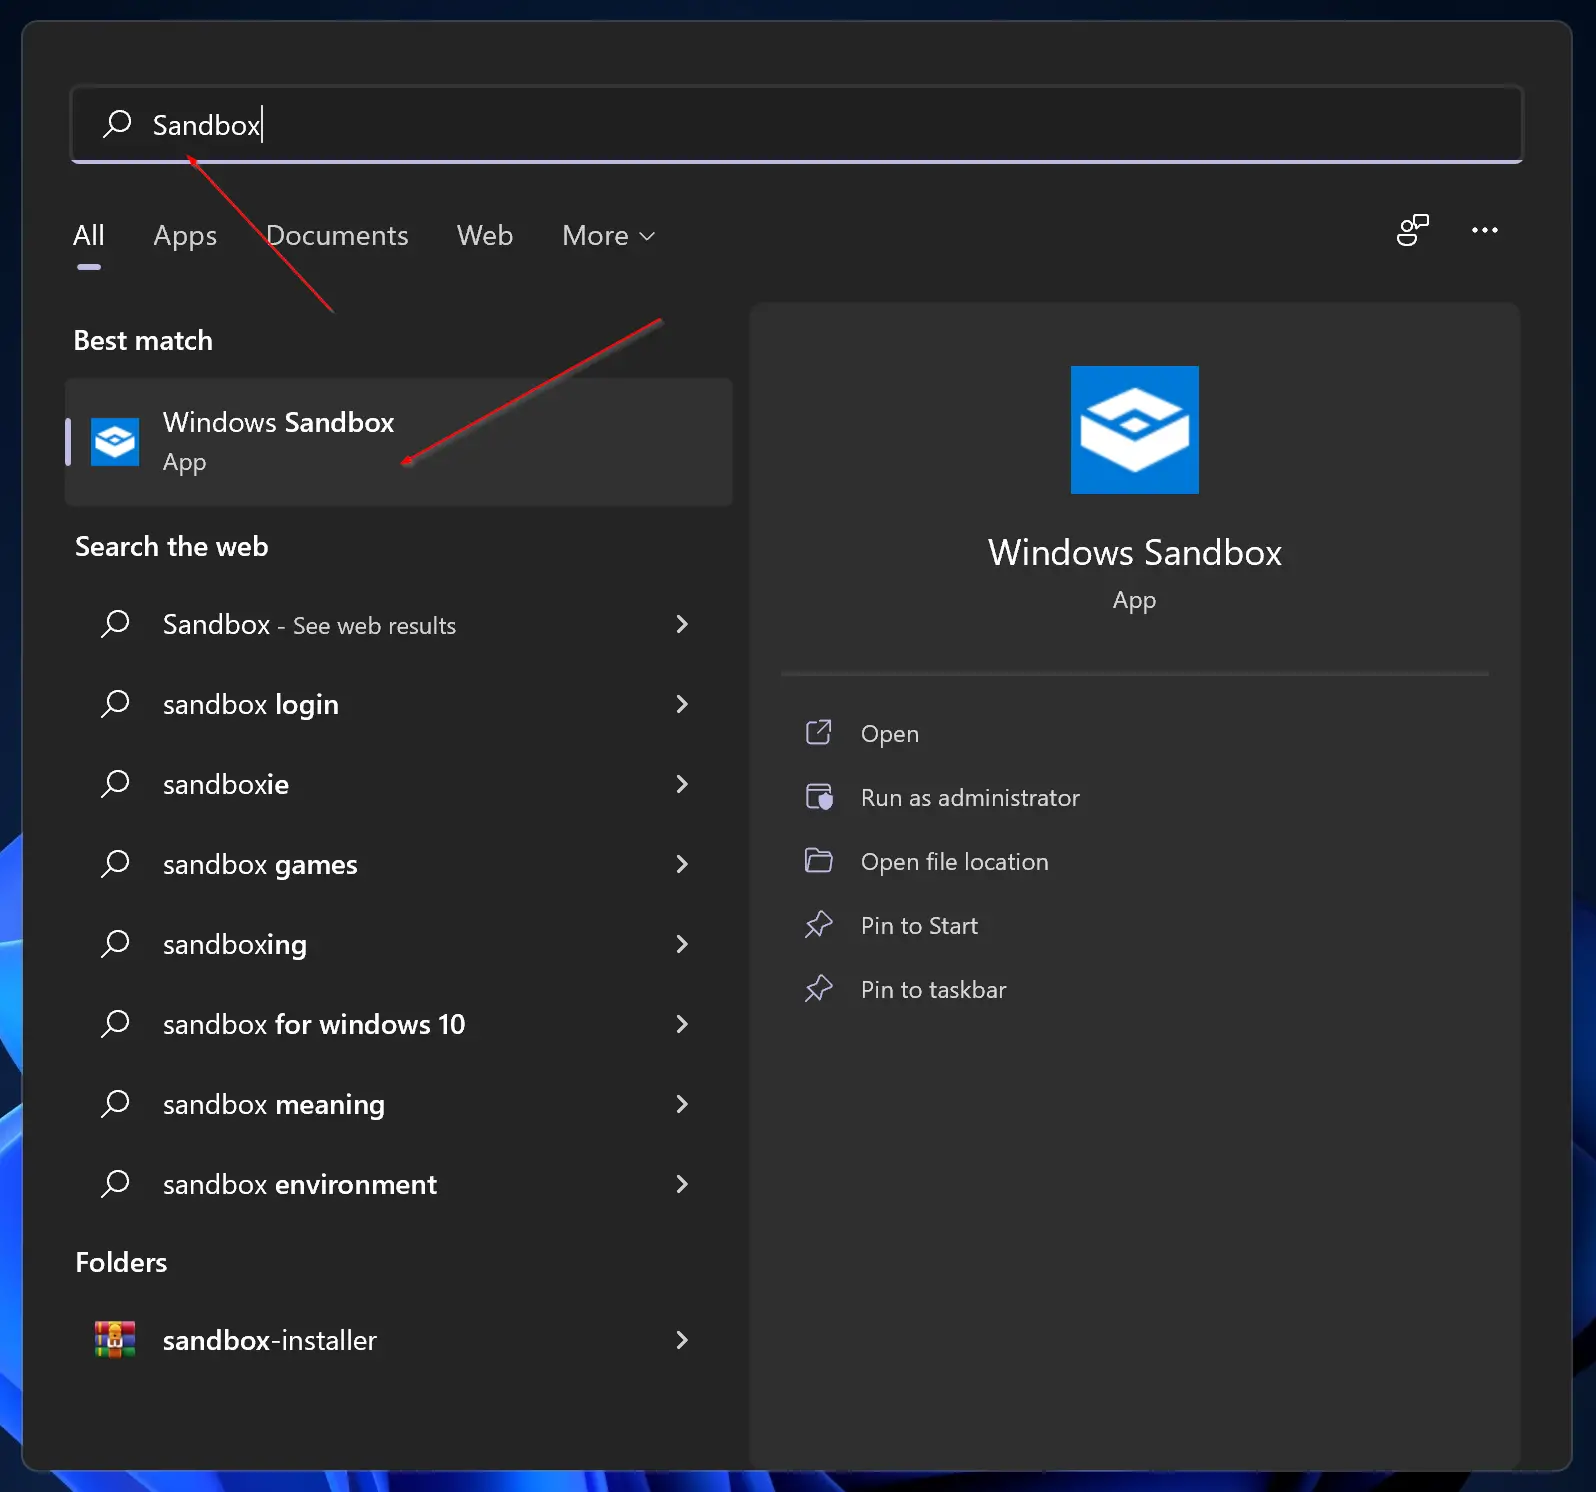
- Press Win + S, and type Sandbox in the text field.
- Click on the top result to launch Windows Sandbox.
- You may now copy files from your system to here or simply download the new apps online.
- Since the operations performed inside it remains here, you need not worry about new apps affecting your system.
- After you test an application inside the Sandbox, close it. A confirmation window might prompt, hit OK to confirm closing Sandbox.
The moment you exit the Sandbox environment, the files or settings used will be lost forever. So, whenever you launch Sandbox, you enter a clean and isolated environment very different from its previous one.
What does Sandbox offer for Windows users?
Windows Sandbox is basically a virtualization app and it provided an environment where one can test new applications in a completely isolated environment. Whatever apps you install on this tool will remain here and would not affect the original apps running on your computer in any way.
You can think of Windows Sandbox as a virtual machine that comes from Microsoft. So, you need not worry about any data leakage, privacy, or other things. Being a superfast and lightweight application, Sandbox distinctively offers its users a slight edge over using third-party VMs.
If you are a Windows 11 Home edition user, you can’t enable this tool on your computer. As a result of this, you can’t test your installed app. Worry not, as you can always go for third-party apps readily available online. A few examples include Shade Sandbox, Sandboxie Plus, and others.
How do I disable Windows Sandbox on Windows 11?
If for some reason, you don’t want to keep using this Sandbox feature and want to turn it off, follow these steps –
- Launch Control Panel first.
- Click Programs > Turn Windows features on or off. See the Snapshot below –

- Windows Features will launch next on the display screen.
- Scroll down and locate Windows Sandbox.
- When found, uncheck the box left of it, and hit OK.

That’s it, you have successfully disabled Sandbox on Windows 11. Restart your PC to delete the installed dependencies on your computer. Sign back into your device again and search for Windows Sandbox. You will not find the trace of this application installed on your Windows 11 PC.
Minimum system requirements to enable Sandbox on Windows 11
You may turn On Windows Sandbox only when your system meets the below requirements –
- Windows 11 Edition: Pro, Enterprise, or Education
- RAM: 8 GB recommended, but Sandbox can run efficiently on 4GB memory
- 64-bit Processor with Second Level Address Translation (SLAT)
- CPU support for VM Monitor Mode Extension (VT-c on Intel CPUs)
Note: Sandbox is an optional feature on Windows 11. That’s the reason why it comes disabled on new Windows 11 PCs.
Wondering how to enable or disable Windows sandbox in Windows 11?
If you have always been keen on trying and testing new software programs (including those with questionable sources), Windows Sandbox is something you should know about.
A Sandbox is a virtual machine that runs a separate kernel to isolate Windows Sandbox sessions from the host. This is accomplished using Microsoft’s hypervisor and hardware virtualization. Simply put, the purpose of this is to allow you to run applications and check risky websites that you might not normally want to use in your regular Windows environment.
In the event that any malware or other dangerous content appears, it remains in the Sandbox, keeping the rest of Windows safe. As soon as you are finished using the application, you can simply close the Sandbox, and all is gone and forgotten without any lasting effects.
In this guide, we will walk you through the steps of enabling and disabling Sandbox in Windows 11 in detail. The steps are quite simple, and should not take much of your time.
Let’s get right into it!
The simplest method to enable/disable Windows Sandbox in Windows 11 is by modifying the Windows Features dialogue.
Windows comes with a number of optional features (such as Sandbox) that you can enable through the Windows Features dialogue. You can also disable the features that are enabled by default in Windows here.
Here is what you need to do:
- Type Turn Windows features on or off in the search bar and hit Open.
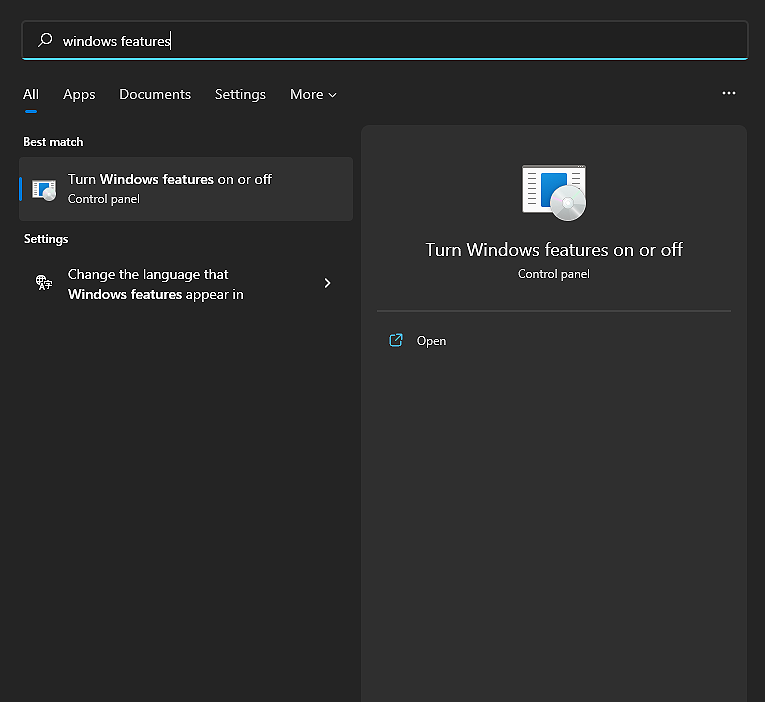
- Inside the newly launched window, locate Windows Sandbox and uncheck the box associated with it.
- Click on OK to save the changes and close the window.
This should make the desired changes in no time.
2. Enable or Disable Windows Sandbox in PowerShell.
The Windows PowerShell Framework provides a command-line shell and an associated scripting language for automating tasks. It automates a number of tedious or time-consuming administrative tasks, as well as helps with finding, filtering, and exporting information about the computers on a network.
Here is how you can use Windows Powershell to make the desired changes:
- Press Windows + R keys simultaneously on your keyboard to open a Run dialogue box.
- Inside the text field of the dialogue box, type ‘powershell‘ and press Ctrl + Shift + Enter keys together to launch elevated PowerShell.
- Once you are inside the Powershell window, copy and paste one of the commands mentioned below according to your preferences. Hit Enter to execute it.
Enable Windows Sandbox

Enable-WindowsOptionalFeature -Online -FeatureName "Containers-DisposableClientVM" -All

Disable Windows Sandbox - default

Disable-WindowsOptionalFeature -Online -FeatureName "Containers-DisposableClientVM" -Online
- Once the command is executed, restart your PC.
Once you restart your PC, the Windows Sandbox should be enabled/disabled.
3. Try Using CleanMyPC.
In the event that you have attempted the steps described in this guide and are still unable to achieve the desired result, your system may be corrupt.
In order to proceed with this guide, you should thoroughly clean your computer. Cleaning your computer will remove any viruses and corruption errors. A good PC cleaner can be very helpful in this case since manual cleaning can be quite time-consuming.
In case you’ve never used a PC cleaner before, we recommend CleanMyPC.

CleanMyPC allows you to fix all kinds of PC issues in a quick and efficient manner. The program includes many tools, such as a Multi-Uninstaller, a Speed Booster, and a Registry Cleaner, which allow you to fix the majority of problems with your system and enhance its performance.
Install CleanMyPC now to get your PC back up and running like new!
Try CleanMyPC Now!
4. Enable or Disable Windows Sandbox in Command Prompt.
Quite similar to Windows Powershell, the Command Prompt is a command-line interpreter present in Windows operating systems. In this method, we will execute relevant commands in the Command Prompt to enable/disable Windows Sandbox.
Here is what you need to do:
- Press Windows + R keys simultaneously on your keyboard to open a Run dialogue box.
- Inside the text field of the dialogue box, type ‘cmd‘ and press Ctrl + Shift + Enter keys together to launch elevated Command Prompt.
- Once you are inside the Command Prompt window, copy and paste one of the commands mentioned below according to your preferences. Hit Enter to execute it.
Enable Windows Sandbox

Dism /online /Enable-Feature /FeatureName:"Containers-DisposableClientVM" -All

Disable Windows Sandbox - default

Dism /online /Disable-Feature /FeatureName:"Containers-DisposableClientVM"

Hopefully, the steps mentioned above will enable/disable Sandbox without any issues.
This wraps up our guide on enabling and disabling the Windows Sandbox in Windows 11. We hope that one of the methods mentioned in this guide did the trick for you. If you have any questions regarding the methods listed above, please let us know in the comment section below.
If this guide helped you, please share it. 🙂
-
Zainab Falak is a staff writer for Saint and an expert in Microsoft Windows, having authored more than 200 posts. She has a Bachelors in Actuarial Sciences and her passion for computers extends to exploring various aspects, from UI customization to the Windows registry and exploring error codes. Twitter
LinkedIn
View all posts

This tutorial will show you how to enable or disable the Windows Sandbox feature for all users in Windows 11 Pro, Enterprise, or Education.
Windows Sandbox provides a lightweight desktop environment to safely run applications in isolation. Software installed inside the Windows Sandbox environment remains «sandboxed» and runs separately from the host machine.
A sandbox is temporary. When it’s closed, all the software and files and the state are deleted. You get a brand-new instance of the sandbox every time you open the application.
Software and applications installed on the host aren’t directly available in the sandbox. If you need specific applications available inside the Windows Sandbox environment, they must be explicitly installed within the environment.
Windows Sandbox has the following properties:
- Part of Windows: Everything required for this feature is included in Windows 10 Pro and Enterprise. There’s no need to download a VHD.
- Pristine: Every time Windows Sandbox runs, it’s as clean as a brand-new installation of Windows.
- Disposable: Nothing persists on the device. Everything is discarded when the user closes the application.
- Secure: Uses hardware-based virtualization for kernel isolation. It relies on the Microsoft hypervisor to run a separate kernel that isolates Windows Sandbox from the host.
- Efficient: Uses the integrated kernel scheduler, smart memory management, and virtual GPU.
Using Windows Sandbox
- To start Windows Sandbox (if enabled), open the Start menu, enter Windows Sandbox and then select it.
- When prompted by UAC, click/tap on Yes.
- Copy (Ctrl+C) an executable file from the host.
- Paste (Ctrl+V) the executable file in the window of Windows Sandbox (on the Windows desktop).
- Run the executable in the Windows Sandbox; if it is an installer go ahead and install it.
- Run the application in the Windows Sandbox and use it as you normally do.
- When you’re done experimenting, you can simply close the Windows Sandbox application, and click/tap on OK to confirm. All sandbox content will be discarded and permanently deleted.
Starting with Windows 11 build 22483, Windows Sandbox now works on ARM64 PCs.
Starting with Windows 11 build 26100.2161 (24H2), Microsoft adds the Windows Sandbox Client Preview. It includes:
- Runtime clipboard redirection
- Audio and video input control
- The sharing of folders with the host at runtime
To access these, select the ellipses (…) at the upper right on the app. This preview also includes a version of command-line support. (The commands might change over time). To learn more, use the wsb.exe–help command. You can find new updates for this app in the Microsoft Store. This might not be available to all users because it will roll out gradually.
Reference;
You must be signed in as an administrator to enable or disable and use Windows Sandbox.
It is required to have Virtualization enabled in your UEFI/BIOS settings to enable Windows Sandbox. You can confirm if Virtualization is enabled in Task Manager (Ctrl+Shift+Esc).
Contents
- Option One: Enable or Disable Windows Sandbox in Windows Features
- Option Two: Enable or Disable Windows Sandbox in Elevated PowerShell
- Option Three: Enable or Disable Windows Sandbox in Elevated Command Prompt
EXAMPLE: Windows Sandbox


Option One
Enable or Disable Windows Sandbox in Windows Features
1 Open Windows Features (OptionalFeatures.exe).
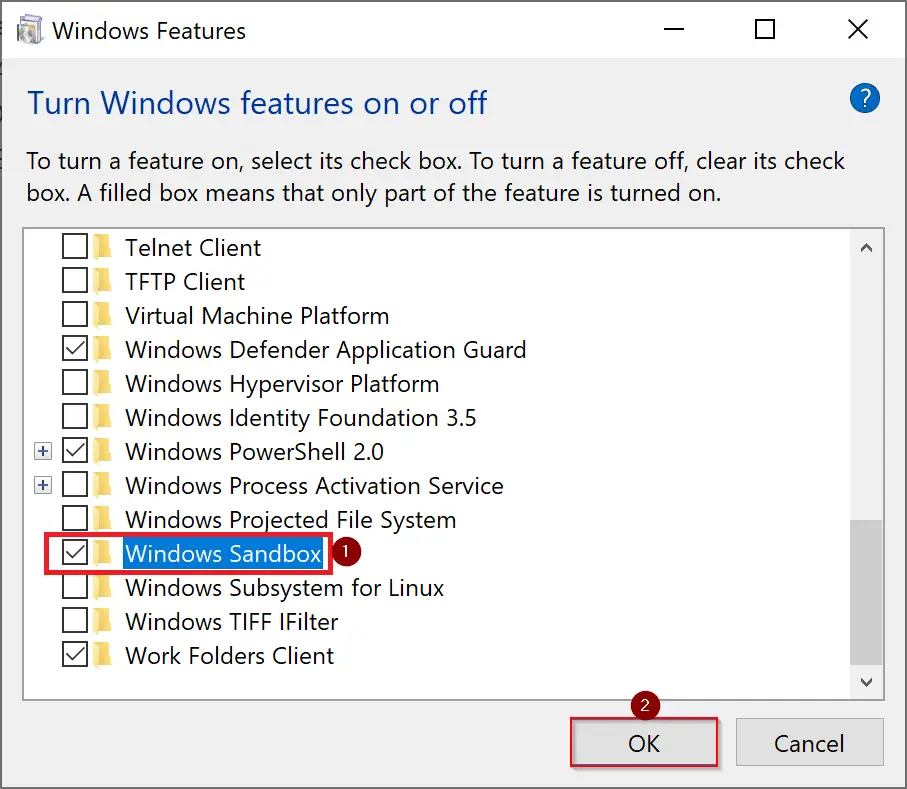
2 Check (enable) or uncheck (disable — default) Windows Sandbox for what you want, and click/tap on OK. (see screenshot below)

3 Click/tap on Close when completed. (see screenshot below)
Click/tap on Restart now if prompted to restart the computer to apply.

Option Two
Enable or Disable Windows Sandbox in PowerShell
1 Open Windows Terminal (Admin), and select Windows PowerShell.
2 Copy and paste the command below you want to use into the elevated PowerShell, and press Enter. (see screenshots below)
If prompted to restart the computer when completed, type Y when ready to restart.
(Enable Windows Sandbox)
Enable-WindowsOptionalFeature -Online -FeatureName "Containers-DisposableClientVM" -All

OR
(Disable Windows Sandbox — default)
Disable-WindowsOptionalFeature -Online -FeatureName "Containers-DisposableClientVM"

Option Three
Enable or Disable Windows Sandbox in Command Prompt
1 Open an elevated Windows Terminal, and select Command Prompt.
2 Copy and paste the command below you want to use into the elevated command prompt, and press Enter. (see screenshots below)
If prompted to restart the computer when completed, type Y when ready to restart.
(Enable Windows Sandbox)
Dism /online /Enable-Feature /FeatureName:"Containers-DisposableClientVM" -All

OR
(Disable Windows Sandbox — default)
Dism /online /Disable-Feature /FeatureName:"Containers-DisposableClientVM"

That’s it,
Shawn Brink
Related Tutorials
- Share Host Folder with Windows Sandbox in Windows 11
- Enable or Disable Share Host Folders with Windows Sandbox in Windows 11
- Enable or Disable Audio Input in Windows Sandbox in Windows 11
- Enable or Disable Clipboard Sharing with Windows Sandbox in Windows 11
- Enable or Disable Networking in Windows Sandbox in Windows 11
- Enable or Disable Printer Sharing with Windows Sandbox in Windows 11
- Enable or Disable vGPU Sharing for Windows Sandbox in Windows 11
- Enable or Disable Video Input in Windows Sandbox in Windows 11
Windows Sandbox feature was first introduced on Windows 10 and is still part of Windows 11. This is a handy isolated environment feature. It is just like a virtual machine that uses Microsoft’s hypervisor and hardware virtualization to run a separate kernel to isolate a Windows Sandbox session from the host. It is around 100MB and installs and runs untrusted classic applications isolated from the main installation.
“Isolated” means that the application you will run on Sandbox will not have access to files, Registry, and other resources of your primary Windows OS. Once you close the Sandbox, it will automatically erase all the data from its application.
Also Refer: How to Install Windows 11 on VirtualBox Virtual Machine?
Microsoft Windows Sandbox is efficient as it uses an integrated kernel scheduler, smart memory management, and virtual graphics, and it’s disposable. The best part of the Windows Sandbox is that every data gets deleted once you close this app. This means every time you run the Windows Sandbox feature, you’ll start with a clean install of Windows 11. It is a handy feature if you want to download and run software from an untrusted source.
In short, we can say, running Windows Sandbox is just like running another copy of your Windows 11 on a virtual machine. The only difference is that Sandbox is built-in to Windows 11, and changes are not saved when you exit it. On the other hand, if you use a third-party virtual machine, Oracle VirtualBox, your data remains stored on your virtual PC, and you can access them when you start your virtual machine.
By default, the Windows Sandbox feature remains turned Off, and to use it, you need to enable it. Once you install or turn on the Sandbox feature, you can access this application. This gearupwindows article will guide you on enabling and disabling the Windows Sandbox feature on Windows 11.
How to Enable or Disable Windows Sandbox on Windows 11 using Windows Features Dialog?
Follow these steps to turn on or off Windows Sandbox on Windows 11 with Windows Features:-
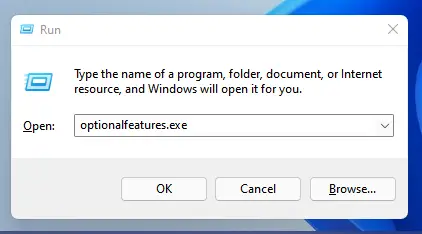
Step 1. Press Windows + R keys simultaneously to bring the Run dialog box.
Step 2. In the Run box, type the following and hit Enter from the keyboard to call up the Windows Features dialog box:-
optionalfeatures.exe
Step 3. Scroll down and check the Windows Sandbox option, and then click the OK button.
Step 4. Now, click on the Restart now button.
Your computer will reboot to install and enable the Windows Sandbox feature on Windows 11. If you want to turn off the Sandbox functionality on your PC, repeat the above steps, and in step 3, uncheck the option “Windows Sandbox.” Click OK to reboot your PC and remove or disable the Sandbox feature.
If Windows Sandbox is greyed out on your PC or you cannot select it, either your PC does not support Hardware Virtualization or is not enabled on BIOS/UEFI.
To access the Windows Sandbox, click on the Start button and type Sandbox. From the search result, click on Windows Sandbox to launch it. Furthermore, one should note that the Sandbox feature is not available in home editions of Windows 11. It is exclusively available for Pro and Enterprise editions.
Now, Windows Sandbox will open, where you can download and execute suspicious applications. It does not harm the host PC as it runs in a separate environment. After closing the Sandbox application, all the data will be erased automatically.
How to Turn On or Off Windows Sandbox on Windows 11 using PowerShell or Command Prompt?
To enable or disable Windows Sandbox on Windows 11 through PowerShell or Command Prompt, do these steps:-
Step 1. Open an elevated Windows PowerShell or Command Prompt.
Step 2. In the administrative PowerShell window, type the following and press Enter:-
Enable-WindowsOptionalFeature -Online -FeatureName "Containers-DisposableClientVM" -All
If you use Command Prompt, use the following command instead:-
dism /online /Enable-Feature /FeatureName:"Containers-DisposableClientVM" -All
Step 3. When prompted, type Y to restart your PC.
Step 4. If you need to uninstall Windows Sandbox, run the following command in an elevated PowerShell window:-
Disable-WindowsOptionalFeature -Online -FeatureName "Containers-DisposableClientVM"
and for Command Prompt, use the command to disable & uninstall Windows Sandbox from your PC:-
dism /online /Disable-Feature /FeatureName:"Containers-DisposableClientVM"
Conclusion
To sum up, Windows Sandbox is an essential feature of Windows 10 and Windows 11 that provides a secure and isolated environment to run untrusted software or applications. It uses Microsoft’s hypervisor and hardware virtualization to create a separate kernel, keeping Sandbox sessions isolated from the host. With a size of around 100MB, Sandbox installs and runs untrusted classic applications without accessing files, registry, or other resources of the primary Windows OS. Additionally, Sandbox is disposable, meaning that all data is automatically erased when you close the Sandbox application.
To enable or disable the Windows Sandbox feature, you can use the Windows Features dialog box, PowerShell, or Command Prompt. It is important to note that the Sandbox feature is not available in the home editions of Windows 11 and is exclusively available for Pro and Enterprise editions.
Overall, Windows Sandbox is a useful feature that enhances the security of your PC and enables you to run untrusted applications safely. It is a great tool for developers, IT professionals, and users who want to test or experiment with software without risking their primary Windows installation.
Also Read: How to Enable Windows Sandbox Feature in Windows 11/10 Home Edition?