
Last Updated :
21 Dec, 2023
In Windows 10, you have to go through a lock screen in order to reach your desktop. This might be helpful for people whose devices are shared by many, but if it’s a personal device, then it may feel unnecessary. Many people don’t like this but are not aware of the fact that the lock screen in Windows 10 can be removed.
If you are in that category, here are the steps that you need to follow to remove your lock screen.
Disable Lock Screen in Windows 10
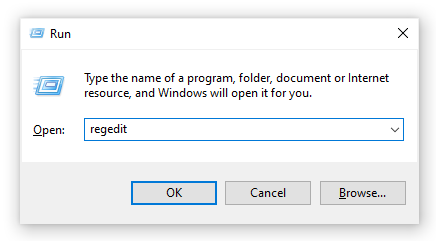
Step 1: Press Windows + R to open Run. Then, type regedit in the box to open Registry Editor.

Step 2: Navigate to HKEY_LOCAL_MACHINE\SOFTWARE\Policies\Microsoft\Windows by double-clicking each directory.
Step 3: On the right-side pane, right-click on the blank space and then hover on New. A dropdown will appear. Click on the Key that appears on the list.

Step 4: A folder will appear on the left-side pane. Rename the folder to Personalization.
Step 5: Then right-click again on the right-side pane, hover on New, and then click on DWORD (32-bit) Value.

Step 6: A new key will appear. Rename the key to NoLockScreen. Remember, the name of the key is case-sensitive.

Step 7: Now, double-click on the key. A window will appear. In the Value data box, you will see the value 0. Change it to 1. Then, click on OK to save your changes.

Congratulations, you have successfully made the necessary changes to disable the lock screen on your device. Now, reboot your device to check if your lock screen has been removed. If the operation is successful, you will be able to log in to your desktop without any lock screen authentication.
На компьютерах без сенсорного дисплея он только мешает.
Экран блокировки появляется, когда вы включаете свой компьютер или выводите его из спящего режима. На нём отображаются дата и время, события календаря, счётчик непрочитанных сообщений и другие нужные (или не очень) данные.
И, вместо того чтобы нажать на кнопку включения и сразу приступить к работе, приходится делать лишний щелчок, чтобы экран блокировки исчез. А ещё Microsoft время от времени проводит с ним сомнительные эксперименты.

К счастью, экран блокировки можно легко выключить. Делается это так.
Откройте редактор реестра. Для этого введите в «Пуск» команду regedit и щёлкните появившийся пункт. Или нажмите Win + R, наберите regedit и кликните OK.

В редакторе реестра, последовательно открывая папки, доберитесь до раздела:
HKEY_LOCAL_MACHINE \ SOFTWARE \ Policies \ Microsoft \ Windows \ Personalization
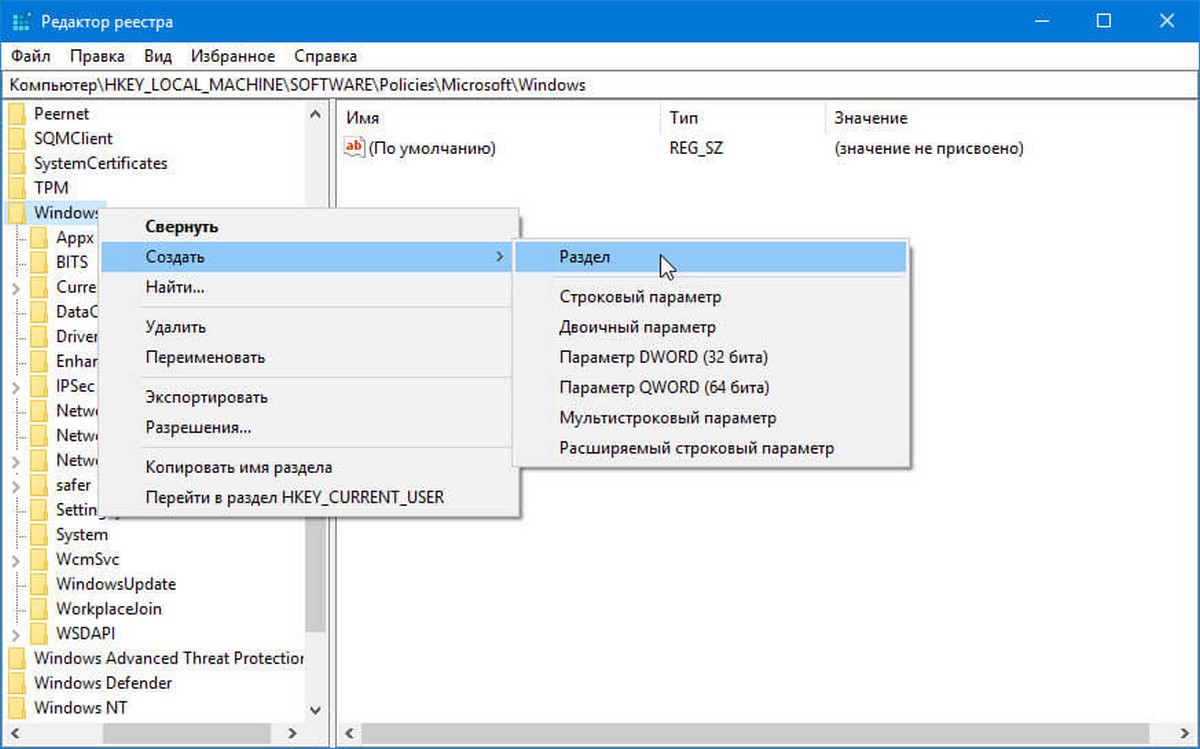
Если его у вас нет, щёлкните правой кнопкой мыши в Windows, выберите «Создать» → «Раздел» и дайте ему название Personalization.

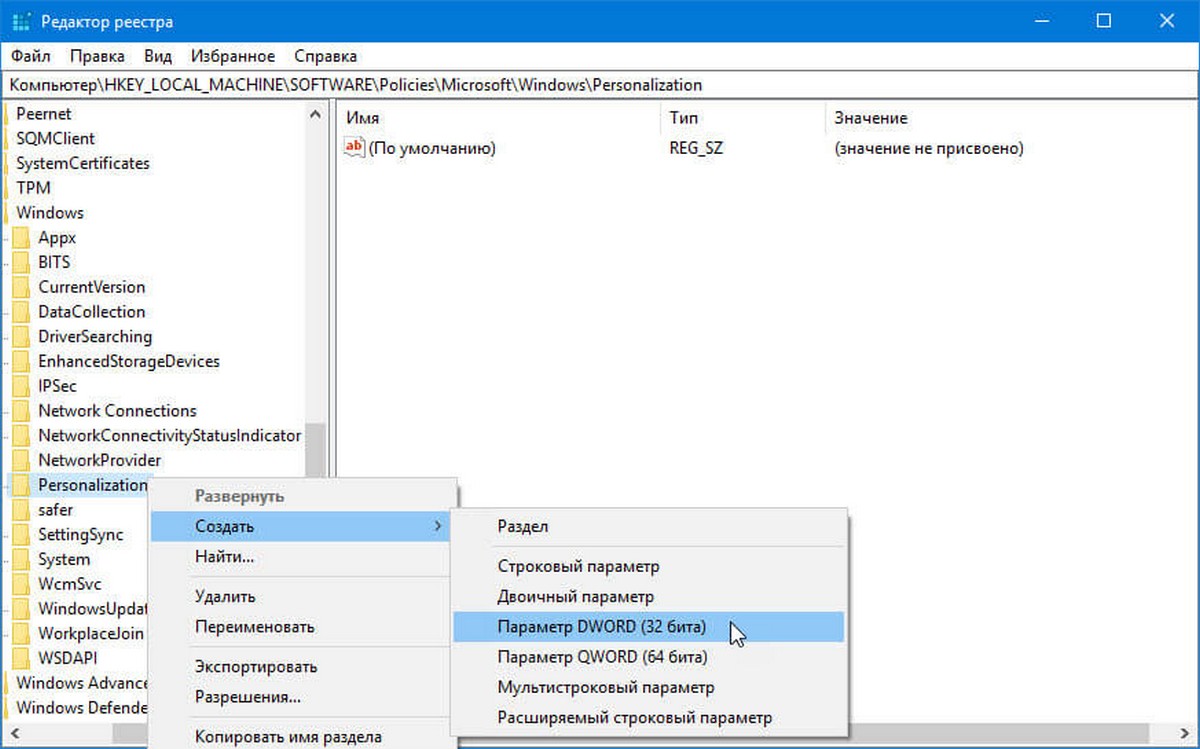
Теперь щёлкните правой кнопкой в разделе Personalization и выберите «Создать» → «Параметр DWORD (32 бита)». Назовите его NoLockScreen.
 и назовите его NoLockScreen")
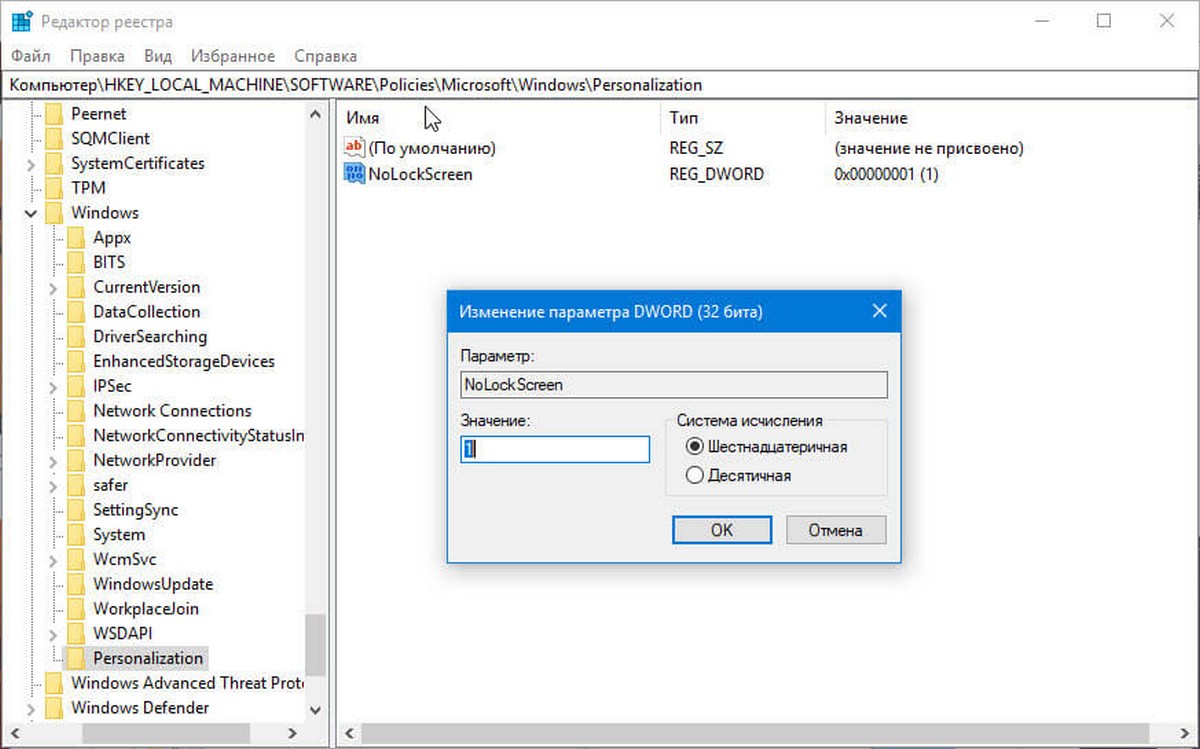
Откройте элемент и присвойте значение «1», затем нажмите OK. Закройте реестр.

Больше раздражающий экран блокировки появляться не будет. А если захотите вернуть его, просто удалите параметр NoLockScreen из реестра.
При нахождении на экране блокировки в Windows 11/10 экран автоматически выключается через 30 секунд или 1 минуту. Если вам требуется изменить это время или сделать так, чтобы экран не выключался, нужного параметры вы не найдёте, но возможность настройки существует.
В этой инструкции подробно о том, как добавить возможность настройки времени выключения экрана на экране блокировки в Windows 11 и Windows 10 в параметры электропитания и настроить этот промежуток времени.
Как добавить настройку времени отключения монитора в параметры схемы электропитания
В Windows 11 и Windows 10 предусмотрен параметр для настройки выключения экрана на экране блокировки, но он скрыт по умолчанию.
Соответственно, первое, что потребуется сделать — добавить опцию настройки времени отключения экрана на при заблокированной Windows в параметры электропитания, для этого придётся прибегнуть к использованию редактора реестра. Шаги будут следующими:
- Запустите редактор реестра. Для этого нажмите клавиши Win+R, либо нажмите правой кнопкой мыши по кнопке «Пуск» и выберите пункт «Выполнить». Введите regedit и нажмите Enter.
- Перейдите к разделу реестра
HKEY_LOCAL_MACHINE\SYSTEM\CurrentControlSet\Control\Power\PowerSettings\7516b95f-f776-4464-8c53-06167f40cc99\8EC4B3A5-6868-48c2-BE75-4F3044BE88A7
- В правой панели редактора реестра дважды нажмите по параметру с именем Attributes, замените его значение с 1 на 2 и примените настройки.

- Закройте редактор реестра.

Следующий шаг — настройка времени до выключения экрана на экране блокировки, для этого:
- Зайдите в Панель управления и откройте пункт «Электропитание», либо нажмите клавиши Win+R на клавиатуре, введите powercfg.cpl и нажмите Enter.
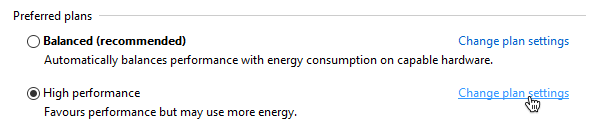
- Нажмите «Настройка схемы электропитания» справа от используемой схемы.

- В следующем окне нажмите «Изменить дополнительные параметры питания».
- Перейдите в раздел «Экран» и настройте нужные параметры в подразделе «Время ожидания до отключения экрана блокировки консоли». Время задается в минутах, если указать 0, выключение экрана выполняться не будет.

- Примените сделанные настройки


Учитывайте, что работать настройка будет только после уже выполненного входа в Windows 11/10 (т.е. когда мы заблокировали систему после входа или она заблокировалась сама), но не, например, после перезагрузки компьютера ещё до входа.
Изменение времени отключения экрана при блокировке Windows 10 с помощью powercfg.exe
Еще один способ изменить это же поведение — использовать утилиту командной строки для установки времени отключения экрана.
В командной строке от имени администратора выполните следующие команды (в зависимости от задачи):
-
powercfg.exe /setacvalueindex SCHEME_CURRENT SUB_VIDEO VIDEOCONLOCK время_в_секундах
(при питании от сети)

-
powercfg.exe /setdcvalueindex SCHEME_CURRENT SUB_VIDEO VIDEOCONLOCK время_в_секундах
(при питании от батареи)

Надеюсь, найдутся читатели, для которых информация из инструкции будет востребована.
Rick Akura
By default, Windows 10 turns off the on-screen display after a minute when the PC is locked. Learn how to disable the lock screen timeout on Windows 10.
By default, Windows 10 lock screen automatically turns off after you’ve been inactive for over a minute. This is called a timeout, and it’s implemented to save power and battery life, however, some users may be looking to spend more or even less time with the lock screen active
This is something that can be changed quite easily and quickly. All you have to do is read our article and follow the steps described below. You’ll be able to modify or disable the lock screen timeout within minutes!

What is the lock screen timeout?
In Windows 10, the lock screen has become quite advanced and a lot more useful as well. It displays the current time and date, all available local users, and even gives you the option to use Cortana and other Windows utilities. You may also choose to restart or shut down your device straight from the lock screen itself.
With more functionality, more people are looking to extend the amount of time the lock screen remains visible even while the computer is inactive. This can be used to have access to Cortana, display the time and date with the beautiful background images, or simply liven up the atmosphere instead of showing a black screen.
To be able to achieve this, you need to configure the lock screen timeout. By doing that, you’re able to give instructions to Windows 10 to not turn your screen off. It’ll stay shown even if the device is on the lock screen and doesn’t receive input for an extended amount of time.
Guide to change or disable the lock screen timeout
There are multiple ways to go about changing or disabling the lock screen timeout in Windows 10. All of these steps are easy to follow, however, some of them require a bit more time than the others. Do what feels good for you — you can always return to our article and try something else in the future.
Tip: All of these methods can be performed by anybody, as our guides are easy to follow and don’t require any previous Windows 10 experience. If you know anyone who’s experiencing issues with their system, don’t forget to recommend us!
Now, let’s start learning about disabling or modifying the lock screen timeout using a Windows 10 operating system.
Method 1: Manually make changes to the Registry and modify the lock screen timeout
The very first thing we recommend trying is making changes to the Registry. Here’s where you can find Windows’ more advanced settings, often not available elsewhere.
While the Registry seems intimidating at first, it’s actually quite simple to navigate. All you have to keep in mind is to not make any un-instructed changes. A poorly configured Registry may lead to errors on your device!
Warning: Before beginning this guide, we recommend creating a backup of your Registry. If you’re not sure how to create and import Registry backups, watch “Registry Backup, Restore, Import And Export” from Windows Ninja.
Let’s get started!
-
Press the Windows + R keys on your keyboard at the same time to bring up the Run application. Here, simply type in “Regedit” and click OK.

- Navigate the Registry Editor using the arrow icons next to each folder name on the left-side panel. Navigate to the following registry key: HKEYLOCAL_MACHINE\SYSTEM\CurrentControlSet\Control\Power\PowerSettings\7516b95f-f776-4464-8c53-06167f40cc99\8EC4B3A5-6868-48c2-BE75-4F3044BE88A7
- Double-click on the “Attributes” key seen in the right side of the window.
-
Change the value data to 2, then click the OK button. Make sure not to make any other changes!
- Now, you should be able to see the lock screen timeout option when making changes to your Power Options (jump to Method 4).
Method 2: Download the automatic Registry changes
Not confident in using the Registry yourself? No problem! You can simply apply a one-click solution to make the modifications automatically without having to worry about messing something up.
- Click here to download the “Lock Screen Timeout Hacks” file from HowTo Geek. This is a .zip file, meaning that you might need to download an application such as WinRAR or 7-Zip to access the contents.
-
Open the file you just downloaded.
-
Locate “Add Lock Screen Timeout Setting to Power Options” and double-click on it to launch it.
- Now, you should be able to see the lock screen timeout option when making changes to your Power Options (jump to Method 4).

Method 3: Enter a command using Command Prompt to change the lock screen timeout
Another powerful tool used to make more advanced changes and personalization to your device is the Command Prompt. It allows you to directly give commands to your computer via a code language. We can use this to make changes to the Power Options, allowing you to modify the lock screen timeout.
-
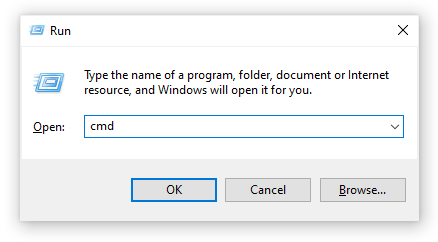
Press the Windows + R keys on your keyboard to open up the Run utility. Type in “cmd” and press Ctrl + Shift + Enter to launch the Command Prompt with administrative permissions.
- When the Command Prompt launches, input the following command and press Enter: powercfg.exe /SETACVALUEINDEX SCHEME_CURRENT SUB_VIDEO VIDEOCONLOCK 60.
Make sure to change “60” to the amount of time you want your lock screen to stay active for. This time is in seconds, meaning that by leaving it default, you’ll have 60 seconds before the lock screen goes into a timeout.
- Next, input the following command and press Enter once again: powercfg.exe /SETACTIVE SCHEME_CURRENT
- Close the Command Prompt. You should be able to notice that the lock screen timeout has changed.
Method 4: Use the Power Options to change the lock screen timeout
After enabling the setting with either Method 1 or Method 2, you’ll be able to use the Power Options to modify the lock screen timeout. This is what you need to do:
-
Press the Windows + R keys using your keyboard to bring up the Run utility, then type in “control” and click the OK button. This is going to open the Control Panel.
-
Make sure that your view mode is set to Category. This will allow you to see grouped settings, making navigation easier.
-
Next, click on the Hardware and Sound heading.
-
You should see another list of groups full of different settings. What you need to click on is the Power Options menu.
-
Click on the “Change plan settings” link next to whichever plan you’re using. There’s no need to change your actual plan — all we’ll do is simply modify it.
-
Click on the “Change advanced power settings” link at the bottom of the page. A new window should pop up.
- Scroll down until you see Display, then click on the plus icon to expand the section.
-
Change “Console lock display off timeout” to the number of minutes you want before your lock screen goes into a timeout. If you don’t see this setting, make sure to follow the steps in either Method 1 or Method 2.
- Click the Apply button, then close the window by clicking OK.
- You should be able to see that your lock screen timeout has been increased or decreased.

We hope that this article was able to help you learn how you can change the lock screen time out, or disable it entirely. Get more control over your device and enjoy your lock screen active for exactly as much time as you want it to!
Are you interested in learning more about Windows 10? Do you need help fixing any other Windows 10 errors and issues? You can browse our dedicated blog section and find articles about everything related to Microsoft’s groundbreaking operating system. Click here to proceed.
Экран блокировки был впервые представлен в Windows 8. Это функция безопасности, которая показывает красивое изображение, когда ваш компьютер заблокирован. По умолчанию на экране блокировки отображаются уведомления установленных приложений.
Экран блокировки появляется при включении компьютера или когда он автоматически блокируется в течение длительного периода бездействия. Вы увидите экран блокировки, прежде чем вы сможете ввести данные для входа в систему. Чтобы продолжить, вы должны перетащить его в верх, используя сенсорный экран, клавиатуру или с помощью мыши.
Если вы хотите отключить экран блокировки в Windows 10, используйте способы, описанные ниже:
Отключить экран блокировки с помощью PowerShell или Командной строки.
Шаг 1: Откройте PowerShell или Командную строку от имени Администратора.
Шаг 2: Скопируйте и вставьте следующую команду:
reg add "HKLM\SOFTWARE\Policies\Microsoft\Windows\Personalization" /v NoLockScreen /t REG_DWORD /f /d 1
Шаг 3: Нажмите клавишу Enter и перезапустите компьютер.

Все вы только что выключили показ экрана блокировки!
Если для локальной учетной записи вы не используете пароль, для входа в систему вам все равно надо нажать кнопку «Вход», чтобы избежать этого, выполните по очереди команды:
reg add "HKLM\SOFTWARE\Policies\Microsoft\Power\PowerSettings\0e796bdb-100d-47d6-a2d5-f7d2daa51f51" /v ACSettingIndex /t REG_DWORD /f /d 0
reg add "HKLM\SOFTWARE\Policies\Microsoft\Power\PowerSettings\0e796bdb-100d-47d6-a2d5-f7d2daa51f51" /v DCSettingIndex /t REG_DWORD /f /d 0
Отключить Экран блокировки с помощью редактора реестра
Шаг 1: Откройте редактор реестра. (см. как)
Шаг 2: Перейдите в следующий раздел:
HKEY_LOCAL_MACHINE\SOFTWARE\Policies\Microsoft\Windows
Шаг 3: Создайте новый раздел с именем «Personalization».
Шаг 4: В разделе «Personalization» создайте новый параметр DWORD(32 бита) с именем «NoLockScreen».
Шаг 5: Установите значение для параметра «NoLockScreen» равным 1.
Шаг 6: Перезагрузите систему.
Если вы позже решите, что вам нужно вернуть экран блокировки, вы можете удалить раздел «Personalization» или изменить значение параметра «NoLockScreen» равным 0.
Чтобы сэкономить ваше время я подготовил готовые .Reg файлы включения и выключения экрана блокировки. Загрузите и распакуйте архив blokirovka-ekrana.zip. Запустите файл otklyuchit-blokirovku-ekrana.reg для того чтобы отключить экран блокировки, чтобы вернуть настройки по умолчанию запустите файл vkluchit-blokirovku-ekrana.reg.
Отключить Экран блокировки с помощью редактора групповых политик.
Шаг 1: Откройте редактор локальной групповой политики, для этого вы можете использовать командную строку, диалоговое окно Выполнить или Поиск на панели задач. (см. как.)
Шаг 2: Перейдите по следующему пути:
Конфигурация компьютера\Административные шаблоны\Панель управления\Персонализация
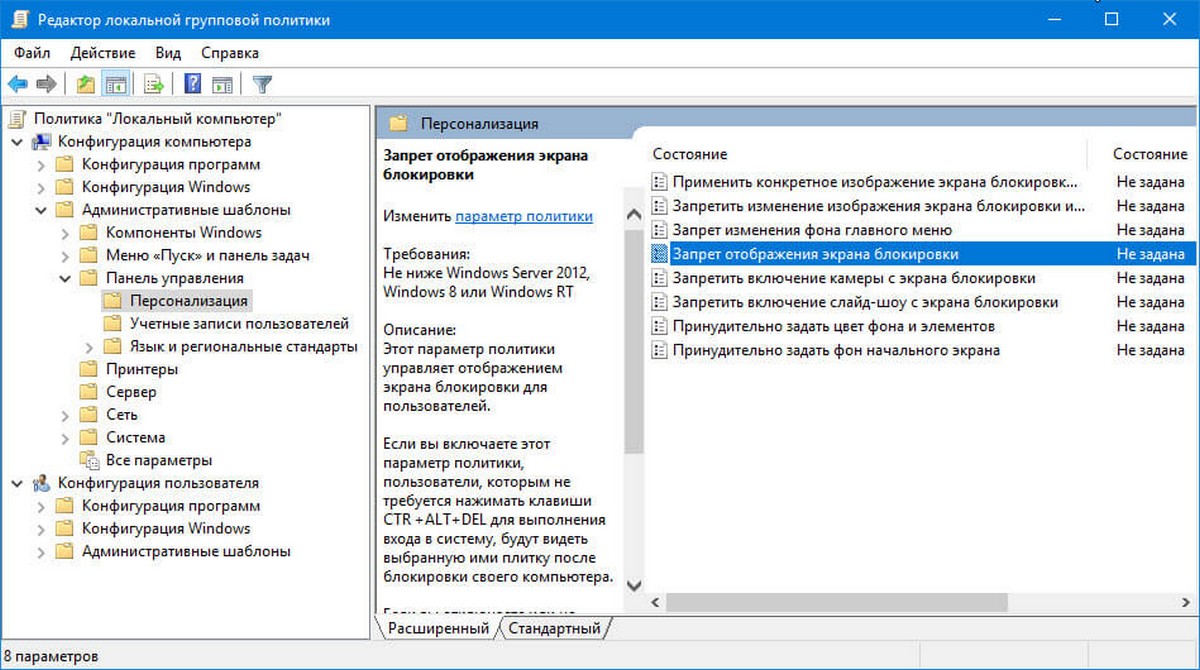
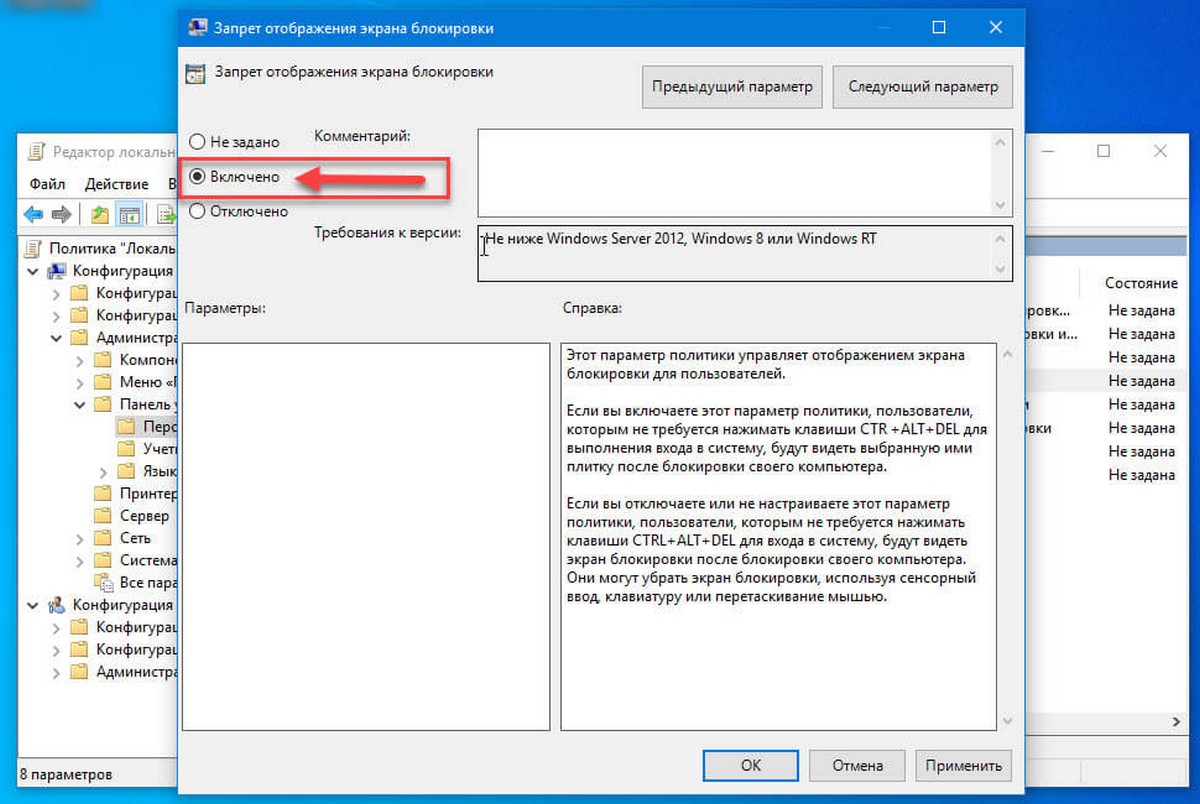
Шаг 3: В разделе «Персонализация» в правой части окна, откройте «Запрет отображения экрана блокировки». Этот параметр политики управляет отображением экрана блокировки для всех пользователей.
Если вы включаете этот параметр политики, пользователи, не будут экран блокировки своего компьютера.
Шаг 4: Измените параметр на «Включено» и нажмите «ОК».
Шаг 5: Перезагрузите ваше устройство.
Теперь вы не будете видеть экран блокировки, при включении и перезагрузке ПК. Вы будете сразу попадать на экран входа в систему.
Отключить Экран блокировки с помощью утилит.
Для отключения блокировки экрана существует множество бесплатных утилит например: «Ultimate Windows Tweaker 4», «LogonController Patch» и Др. С их помощью вы можете отключить экран блокировки в Windows 10. Но, мы, рекомендуем использовать способы описанные выше.
Все!
Рекомендуем:
- Автоматический вход в Windows 10 без ввода пароля.
- Как отключить запрос пароля во время выхода из режима сна.