
Игровая панель в Windows 10 — встроенное средство системы, позволяющие выполнять запись видео с экрана в играх (и программах) или создавать скриншоты. Чуть более подробно писал об этом в обзоре Лучшие программы для записи видео с экрана.
Возможность записи экрана только средствами системы — это хорошо, однако некоторые пользователи сталкиваются с тем, что игровая панель появляется там, где не нужно и мешает работе с программами. В этой очень короткой инструкции — о том, как отключить игровую панель Windows 10, чтобы она не появлялась. Примечание: вы можете полностью удалить эту панель, подробно в статье: Как удалить Xbox Game Bar.
Отключение игровой панели в приложении Xbox Windows 10
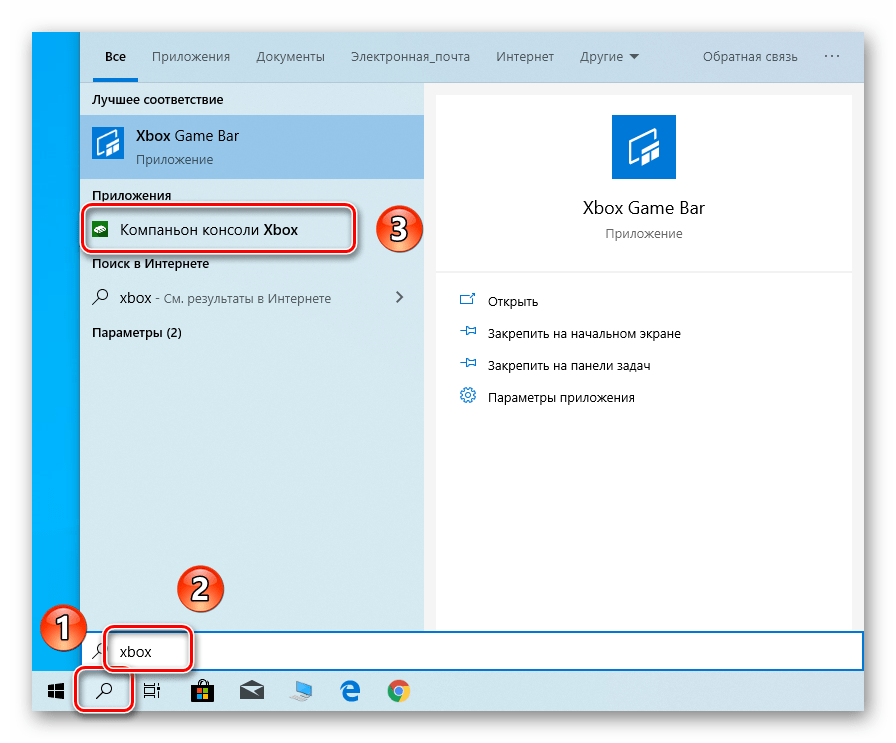
Параметры встроенной записи экрана Windows 10, и, соответственно, игровой панели, находятся в приложении Xbox. Чтобы открыть его, вы можете ввести название приложения в поиске на панели задач.
Дальнейшие шаги по отключению (которые позволят отключить панель полностью, если требуется «частичное» отключение, это описано далее в руководстве) будут выглядеть следующим образом:
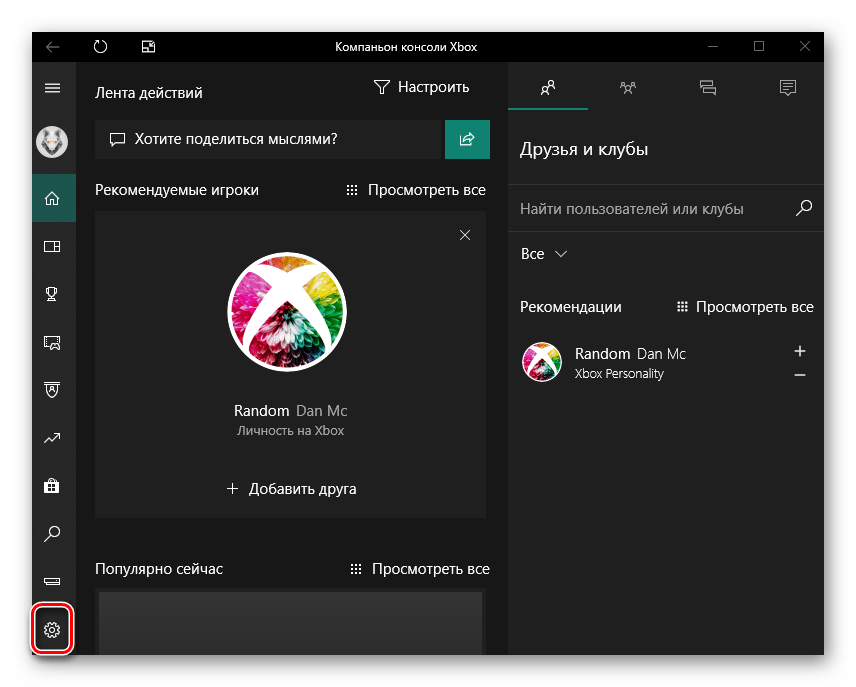
- Зайдите в параметры приложения (изображение шестеренки справа внизу).

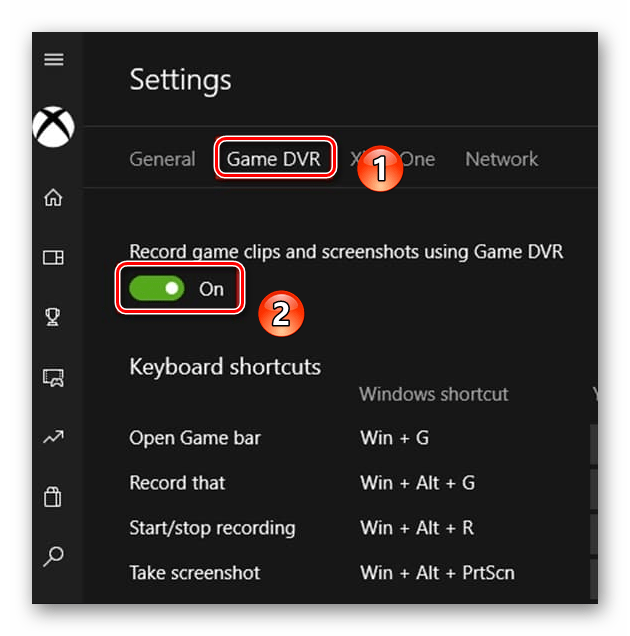
- Откройте вкладку «DVR для игр».
- Отключите параметр «Создавать игровые клипы и снимки экрана с помощью DVR»


После этого можно закрыть приложение Xbox, игровая панель больше появляться не будет, нельзя будет ее вызывать и клавишами Win+G.
Помимо полного отключения игровой панели, вы можете настроить ее поведение таким образом, чтобы она была не столь навязчива:
- Если в игровой панели нажать по кнопке настроек, то можно отключить ее появление при запуске игры в полноэкранном режиме, а также отображение подсказок.

- При появлении сообщения «Чтобы открыть игровую панель, намжите Win+G» вы можете поставить отметку «Больше не показывать это».

И еще один способ отключить игровую панель и DVR для игр в Windows 10 — использование редактора реестра. В реестре есть два значения, отвечающие за работу этой функции:
- AppCaptureEnabled в разделе HKEY_CURRENT_USER\ SOFTWARE\ Microsoft\ Windows\ CurrentVersion\ GameDVR

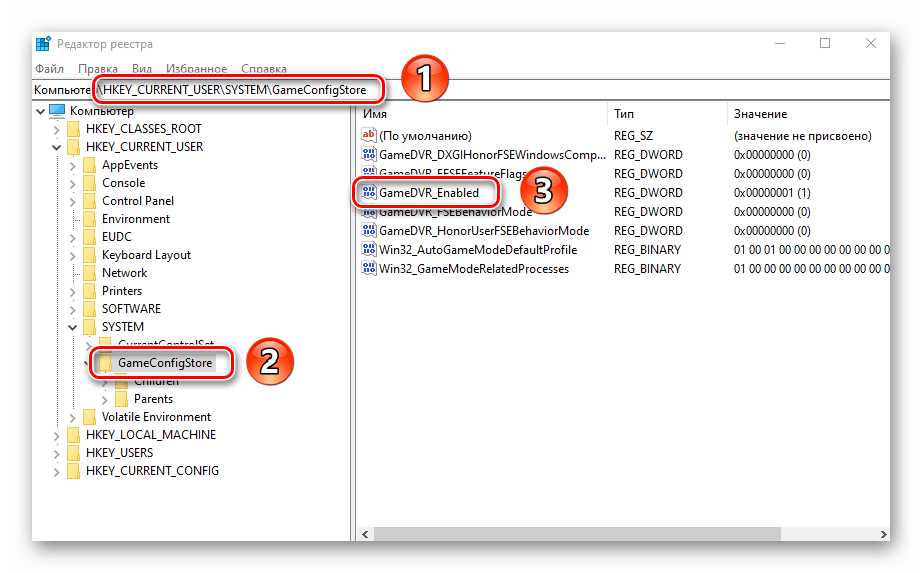
- GameDVR_Enabled в разделе HKEY_CURRENT_USER\ System\ GameConfigStore

Если требуется отключить игровую панель, измените значения на 0 (ноль) и, соответственно, на единицу для ее включения.
На этом всё, но если что-то не работает или же срабатывает не так, как ожидается — пишите, будем разбираться.
Download Article
Get rid of the Xbox Game Bar overlay, temporarily or for good
Download Article
- Disabling Game Bar in Windows 11
- Disabling Game Bar in Windows 10
- Deleting Xbox Game Bar Permanently
- Should I turn off Game Bar?
- Game Mode Won’t Turn Off (Quick Fix)
- Video
|
|
|
|
|
Is Game Bar popping up when you plug your controller into your PC or play certain games? If you don’t want to use the Xbox Game Bar to screen record or access Xbox social gaming features, it may be more of a nuisance than an asset. Fortunately, you can disable the Game Bar and even completely uninstall it. Read on for simple step-by-step instructions on disabling Xbox Game Bar and turning off Game Mode on Windows 10 & 11, plus troubleshooting tips.
Disabling Game Bar: Quick Steps
In Windows 10, open Settings, select Gaming, and toggle off the «Game Bar» switch. In Windows 11, go to Settings > System Components, open Game Bar’s Advanced options, and select Never from the «Background component permissions» menu.
-

You can get there quickly by pressing Windows key + i, or by clicking Settings in the Windows menu.
-
It’s at the top-left corner.
Advertisement
-
You’ll need to scroll down a little bit on the right panel to find it.
-
-
You’ll see this below the «Component permissions» section. «Power optimized (recommend)» is usually selected by default.
-
This prevents Game Bar from running in the background and responding to the Windows key + G keyboard shortcut.
-
If Game Bar still pops up when you plug in a controller, you can disable that, too. Here’s how:
- Click Gaming in the left panel of the Settings window.
- Click Game Bar.
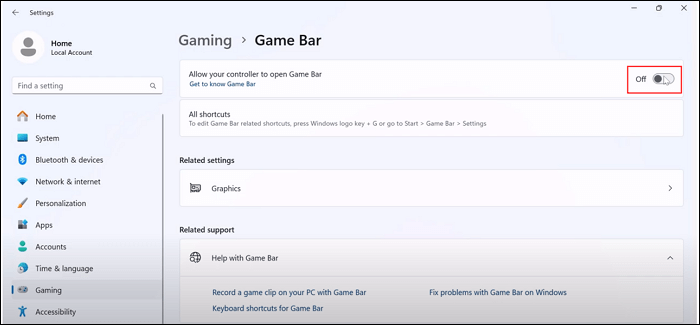
- Toggle off the switch next to «Allow your controller to open Game Bar.»
- At this point, Game Bar features that could get in the way should now stay out of your sight. However, you may still see some annoying pop-ups when you play certain games or plug in a controller. The only fix is to delete Game Bar permanently—jump down to Deleting Xbox Game Bar Permanently to learn how.
-
If you don’t want Windows to disable background apps when you’re gaming, you can turn this feature off:
- Click the back button to return to the Gaming menu, or click the Gaming tab in the left panel.
- Click Game Mode
- Click the «Game Mode» switch to turn the feature off.
- If Game Mode won’t turn off, jump down to our quick fix.


Advertisement
-
You can get there quickly by pressing Windows key + i, or by clicking Settings in the Windows menu.
- This method will disable Game Bar and prevent it from opening when you use keyboard shortcuts or a gaming controller.
-
This option has an Xbox logo.
-
The switch is at the top of the right panel.
- Game Bar is now disabled. If you want to go a step further and permanently uninstall it, jump down to Deleting Xbox Game Bar Permanently.
- If you want Game Bar back, you can return to this screen and select Power optimized (recommended) from the menu.
-
If you don’t want Windows to disable background apps when you’re gaming, you can click the «Game Mode» switch to turn the feature off.[1]
- If Game Mode won’t turn off, jump down to our quick fix.


Advertisement
-
If you want to remove Game Bar permanently on Windows 10 or 11, you’ll first need to remove the preinstalled package in PowerShell, and then add a few registry keys if Game Bar errors still pop up. To open PowerShell as an administrator:
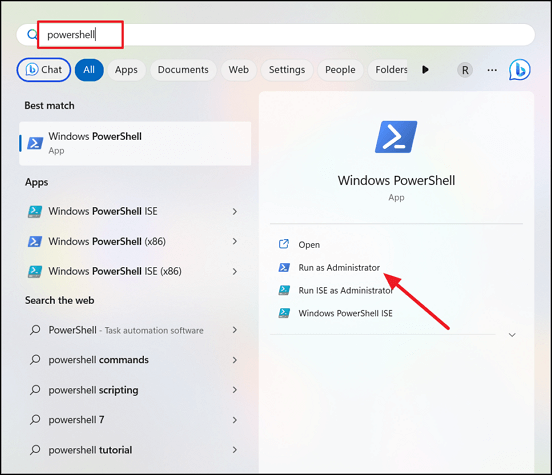
- Type powershell into the Windows search bar.
- Right-click Windows PowerShell.
- Select Run as administrator…
- Click Yes.
-
Paste this line into PowerShell and press Enter:[2]
- Get-AppxPackage Microsoft.XboxGamingOverlay | Remove-AppxPackage
-
If you still see notifications that say «You’ll need a new app to open this ms-gamingoverlay» when you try to play certain games, you’ll also need to add some registry keys to remove Game Bar permanently. You can do this from PowerShell by pasting these two lines, pressing Enter after each.
- reg add HKEY_CURRENT_USER\SOFTWARE\Microsoft\Windows\CurrentVersion\GameDVR /f /t REG_DWORD /v "AppCaptureEnabled" /d 0
- reg add HKEY_CURRENT_USER\System\GameConfigStore /f /t REG_DWORD /v "GameDVR_Enabled" /d 0
- The Game Bar should now be removed. If you want it back, you can reinstall it from the Microsoft Store.


Advertisement
-
Most people don’t need to turn off Game Bar, and can even benefit from features like accessing audio settings and performance stats without Alt-Tabbing out of your game.[3]
There are also plenty of Xbox social features, and the ability to screen-record gameplay with a quick keyboard shortcut.[4]
-
If your PC feels slow, disabling background apps like Game Bar can help speed things up. Also, if you have a high-end graphics card with similar software and overlays (such as NVIDIA Shadowplay or GeForce Experience), having both Game Bar and that software running could be rough on your CPU.


Advertisement
-
This notification usually pops up when you’re using a TV as a monitor. In this case, try switching to a different HDMI port on the TV. If that doesn’t work, go into your TV’s HDMI settings, look in the menus for «Game Mode,» and turn it off.

Ask a Question
200 characters left
Include your email address to get a message when this question is answered.
Submit
Advertisement
Video
Thanks for submitting a tip for review!
About This Article
Thanks to all authors for creating a page that has been read 38,466 times.
Did this article help you?
Is it annoying every time you want to Steam record or take screenshots with your Xbox controller, it is not Steam, but the Windows game bar does it? Do you know how to remove the Microsoft gaming service if you don’t use it? Read this article and get stepwise instructions on how to disable Xbox game bar in Windows 11 and 10.
How to Permanently Turn off Xbox Game Bar?
Game players often complain that Xbox Game Bar screen recording conflicts with Steam gameplay. Some users may find they have no need for this game bar and would like to uninstall it on their laptops and desktops.
However, when pressing the Xbox controller, some users may find that the MS-gaming overlay popup appears again even if they have already turned off the Windows game bar from Windows settings.
So, how to disable Xbox Game Bar in Windows 11 and Windows 10? Here are two ways for you:
- For Windows 11 users, there are two options: 1. Go to Settings to prevent Xbox Game Bar from running in the background. 2. Uninstall Windows Game Bar from PowerShell to permanently remove this feature from your PC.
- For Windows 10 users, turn off the game bar function from the Settings. This can prevent gaming controllers from launching the Windows 10 screen recorder.
Let’s continue to read if you want to delve into more details.
Share this post on your social media to help more users!
How to Disable Xbox Game Bar Windows 11
Users can get rid of Xbox Game Bar on Windows 11 via Settings. This will stop the game bar from running in the background. If you want to disable the MS-gaming service completely, you need to uninstall it from your PC.
Remove Xbox Game Bar via Settings
To turn off the Microsoft game bar from Settings, follow the steps below.
Step 1. Click the Windows button and tap Settings.
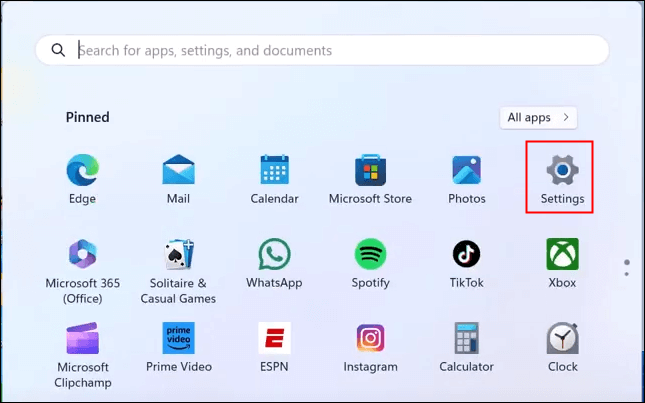
Step 2. Under Settings, go to System > System components > Game Bar.
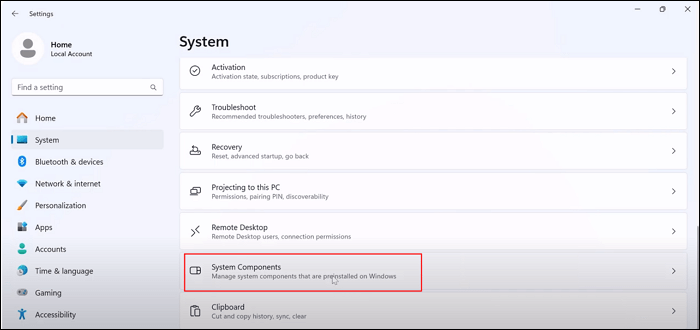
Step 3. Click the … next to Game Bar and select Advanced options.

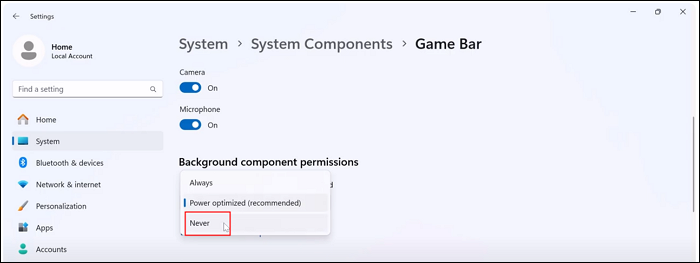
Step 4. Go to Background apps permissions. Click the dropdown menu and select Never.
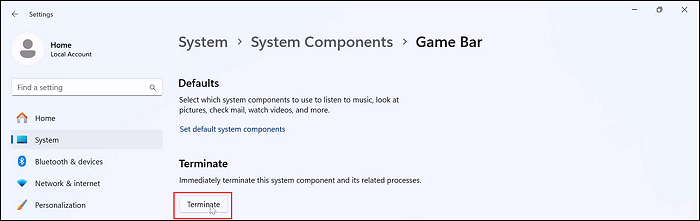
Step 5. Scroll down to find Terminate. Click the Terminate button to stop the game bar app.
Step 6. On the left Settings panel, click Gaming. Go to Game Bar and toggle off Allow your controller to open Game Bar.
Now, the Xbox game bar is being disabled and will not run in the background. Even if you mistakenly launch the game overlay from the controller, it will not pop up.
Uninstall Game Bar Completely from PowerShell
However, you may find when you press the Win + G hotkeys, the game bar still shows up. That is because the method above only disables the Windows game bar. The default game screen recorder is still installed on your PC.
If you want to remove the game bar permanently, you need to uninstall it from the PowerShell. To uninstall Xbox game bar in Windows 11 and 10:
Step 1. Click the Windows button, type powershell, and select Run as administrator.
Step 2. Enter the command: Get-AppxPackage Microsoft.XboxGamingOverlay | Remove-AppxPackage. Hit Enter.

Step 3. Wait for the progress bar to finish, check if the Xbox bar is disabled, and close the PowerShell window.
- Notice: To reinstall the Xbox Game Bar, you need to download and install it from the Microsoft Store.
Share this post on your social media to help more users!
How to Disable Xbox Game Bar Windows 10
Windows 10 users can disable the service from Settings. Using PowerShell to disable Xbox Game Bar is only applicable to Windows 11.
Steps on how to remove game bar from Windows 10 are different from that of Windows 11. Check for more details:
Step 1. Press the Windows + I keys together to launch Settings.
Step 2. Under the Gaming tab, go to Xbox Game Bar and toggle off Enable Game Bar for things like….

Step 3. Toggle off Open Xbox Game Bar using this button on a controller. This prevents your Xbox Series controllers from launching the game bar.
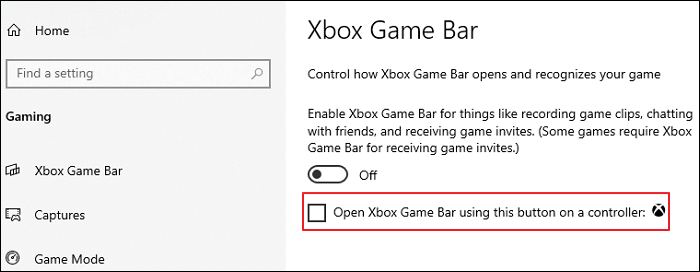
- Notice: To enable the Xbox overlay and widgets, toggle on these options.
Bonus: What Is the Best Xbox Game Bar Alternative
Although Windows Game Bar requires no installation, you can see some issues over the internet, like Xbox Game Bar can’t record and prevents Steam from recording itself. To overcome limitations such as incorrect screen ratio, screen recording without audio, and recordings that are too large, you can try its best free alternative, the Windows screen recorder EaseUS RecExperts.
⭐What makes it stand out:
- Record Xbox Series X gameplay for more than 1 hour.
- Record multiple windows without interrupting.
- Record the game with your face.
- Extract audio from Mov and transcribe audio to text.
- Trim or edit the video.
Let’s see how to record gameplay with EaseUS RecExperts.
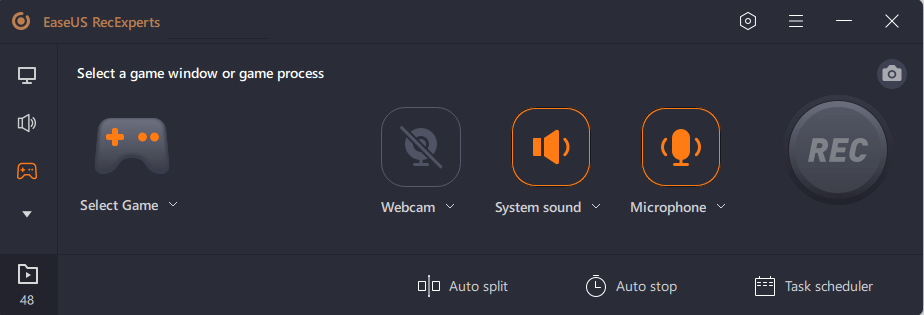
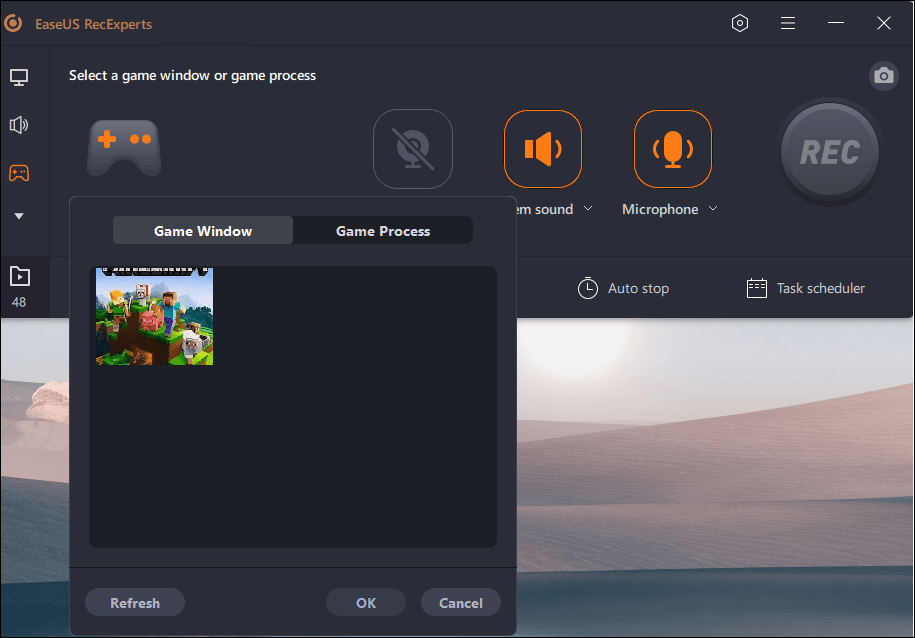
Step 1. Start the gameplay you want to record and launch EaseUS game recorder. Next, select the Game mode.
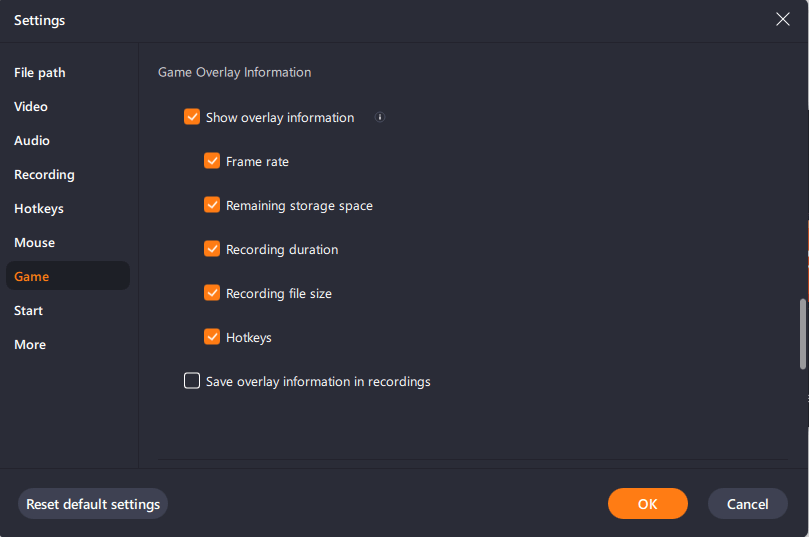
Step 2. Click the nut icon to open the Settings window, and then click on «Video» to adjust the frame rate (from 1 to 144), video quality, format, etc.
In addition, you can click on the «Game» button to change some game overlay options. Once done, click «OK».
Step 3. Go back to the Game mode interface and click «Select Game» to choose the gameplay you want to capture. Next, click REC to start your game recording.
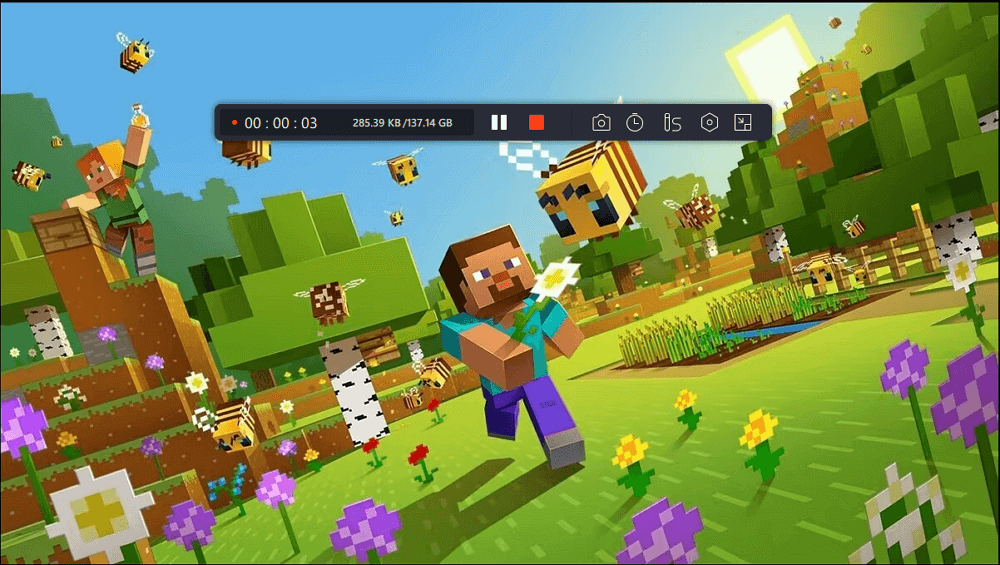
Step 4. You will see a small bar showing the time of your record. If needed, you can take screenshots in recording, or set the specific time to stop the recording by clicking the «Clock» icon on the toolbar.
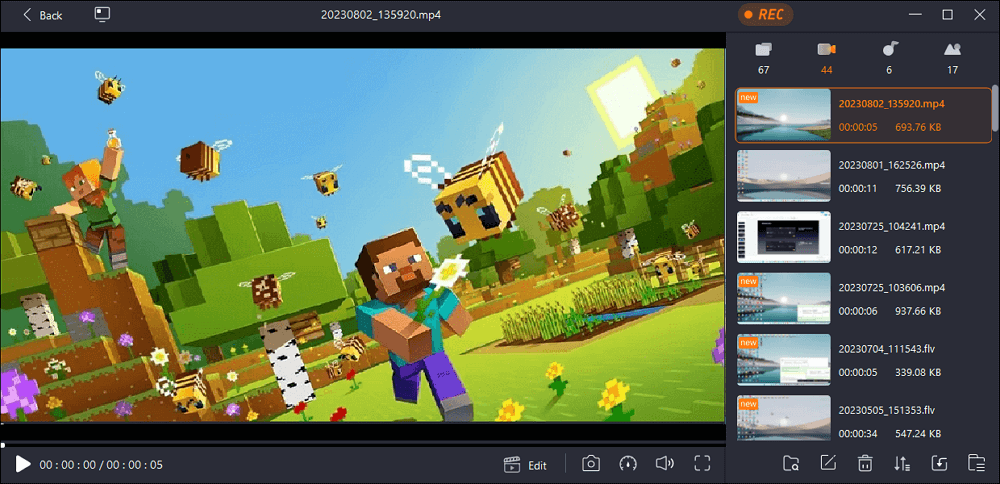
Step 5. Once done, you can watch and edit the recorded footage with the built-in video editor. On the recorded video, you can trim the recordings as you want.
Final Words
Using the methods above, it can be easy to disable Xbox Game Bar on your Windows 11 and 10 computers. You can turn off the MS overlay or remove it completely.
If you are looking for a simpler screen recording utility, try EaseUS RecExperts. With several clicks, you can record single or multiple screens of your gameplay. Download and give it a shot.
Disable Xbox Game Bar Overlay FAQs
Check more frequently asked questions on how to disable the Xbox Game Bar.
1. How to turn off Game Mode?
To turn off Game Mode:
Step 1. Press the Windows + I keys together to launch Windows Settings.
Step 2. Go to Gaming > Game Mode > toggle off Game Mode.
Step 3. Close Settings.
2. Should I enable or disable Xbox game bar?
If you don’t use the Xbox game bar, we suggest turning off this feature to free up resources.
3. Does game bar slow down PC?
Windows Game Bar doesn’t slow down your PCs. Compared with other overlays like Nvidia’s Shadowplay, it has less of an effect on your PC’s performance.
4. How did Xbox game bar get on my computer?
Xbox Game Bar is a built-in screen recording tool in Windows 10 and 11. It helps you record videos and take screenshots while you are playing games or watching other videos. To initiate it, you can press the Win + G shortcut.
Share this post on your social media to help more users!
Все способы:
- Отключение Xbox DVR в ОС Windows 10
- Способ 1: Фирменное ПО Xbox
- Способ 2: «Редактор реестра»
- Способ 3: Системные «Параметры»
- Вопросы и ответы: 0
Во всех редакциях операционной системы Windows 10 по умолчанию присутствует функция DVR. Она работает в фоновом режиме и регулярно потребляет ресурсы компьютера. При необходимости можно отключить ее для повышения быстродействия ПК или ноутбука. Из данной статьи вы узнаете о том, как это сделать.
Отключение Xbox DVR в ОС Windows 10
Отметим, что аббревиатура DVR расшифровывается как Digital Video Recording. Из названия понятно, что она позволяет производить запись с экрана и делать скриншоты. Кроме того, с помощью нее можно записывать игровой процесс в фоне. Если вы решили отключить ее, тогда используйте один из описанных далее методов.
Способ 1: Фирменное ПО Xbox
Сразу хотим обратить внимание на тот факт, что данный способ не подойдет пользователям, которые используют последнюю сборку Windows 10 1909. Дело в том, что необходимые опции попросту были перенесены из одного места в другое, а приложение «Xbox» и вовсе переработано и переименовано. В таком случае просто используйте другой способ.
- Кликните по кнопке поиска на панели задач. В текстовое поле открывшегося окна пропишите слово
xbox. Выше появятся результаты поиска, которые соответствую запросу. Выберите из списка приложение под названием «Компаньон консоли Xbox». - Если вами используется локальная учетная запись Windows, тогда необходимо будет войти в ПО с помощью аккаунта Microsoft. Вы явно не пропустите кнопку входа. Если аккаунт отсутствует, его следует создать.
Читайте также: Регистрируем учетную запись Windows Live
В результате действий откроется окно «Компаньон консоли Xbox». В нем перейдите в раздел «Настройки», кликнув в левом вертикальном меню по кнопке с изображением шестеренки.
- Далее перейдите во вкладку «DVR для игр» или же «Game DVR» в английской версии. Для отключения функции измените положение переключателя из состояния «Вкл» в режим «Выкл».
- Теперь можно закрыть все открытые ранее окна и перезагрузить систему, так как Xbox DVR отключен.
Способ 2: «Редактор реестра»
Среди всех возможностей утилиты «Редактор реестра» присутствует также и способ отключить функцию Xbox DVR. Будьте внимательны, выполняя все дальнейшие действия — допустив ошибку и изменив другие ключи реестра, вы можете навредить системе. Сам же способ реализуется следующим образом:
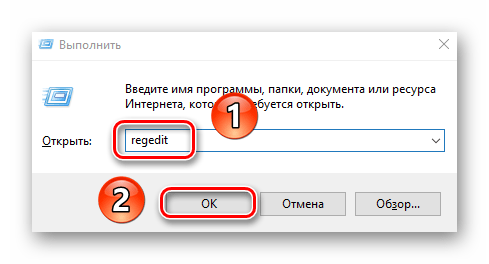
- Зажмите одновременно клавиши «Windows» и «R» для открытия оснастки «Выполнить». В текстовое поле данного окна пропишите команду
regedit, после чего в нем же нажмите «OK».
Читайте также: Как открыть «Редактор реестра» в Виндовс 10
- В результате откроется окно «Редактора реестра». В нем, используя древовидную структуру папок с левой стороны, перейдите в директорию «GameConfigStore». Она находится по следующему пути:
HKEY_CURRENT_USER\SystemВнутри указанной папки найдите файл под названием «GameDVR_Enabled». Откройте его, нажав два раза ЛКМ на этому наименованию.
- В окне изменения параметров ключа пропишите цифру «0» в поле «Значение». Сохраните внесенные изменения, нажав кнопку «OK».
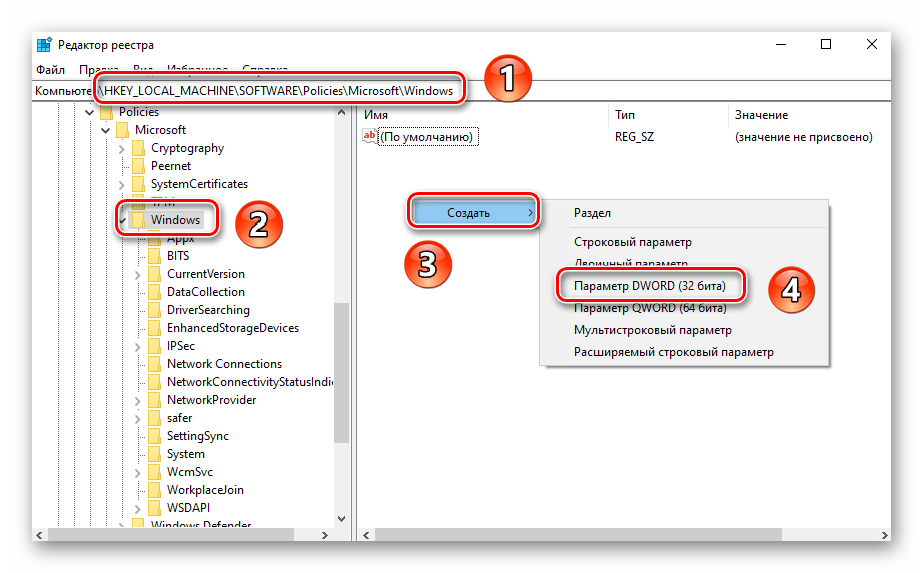
- Далее вам нужно попасть в еще одну директорию реестра — папку «Windows», которая расположена по указанному ниже пути:
HKEY_LOCAL_MACHINE\SOFTWARE\Policies\MicrosoftВнутри этой директории необходимо создать новый ключ. Для этого в правой области окна нажмите ПКМ, а затем поочередно выберите из контекстного меню строки «Создать» и «Параметр DWORD (32 бита)».
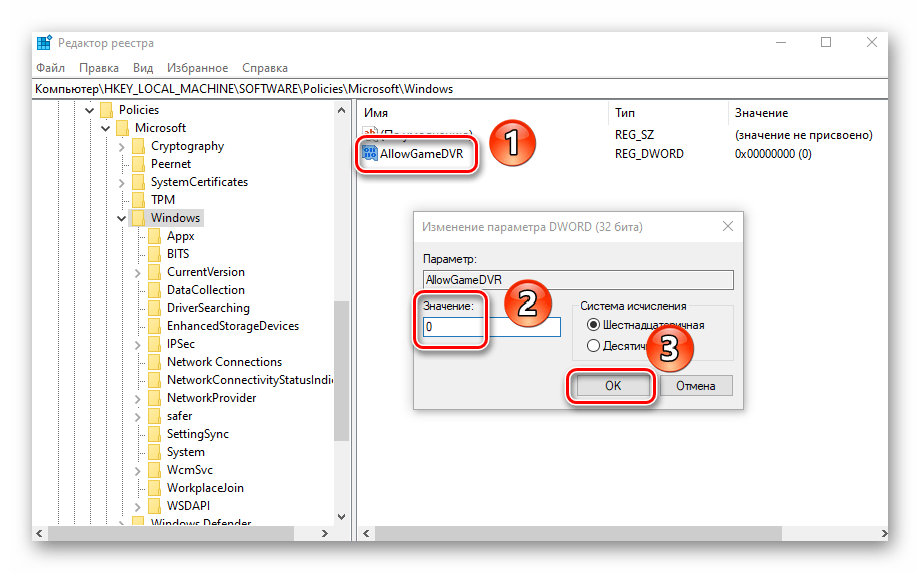
- Созданному ключу нужно присвоить название «AllowGameDVR». Затем откройте его и в текстовое поле «Значение» пропишите число «0». В завершении кликните «OK».
- После этого перезагрузите систему для того, чтобы все внесенные изменения вступили в силу.
Способ 3: Системные «Параметры»
Отключить функцию DVR можно также посредством стандартных настроек Windows 10. Для этого существует даже специальный раздел. От вас потребуется следующее:
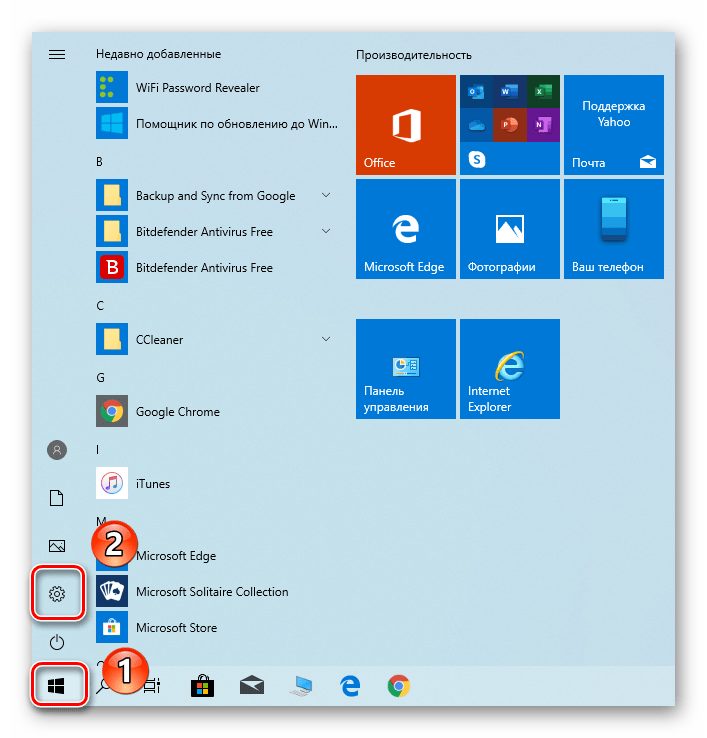
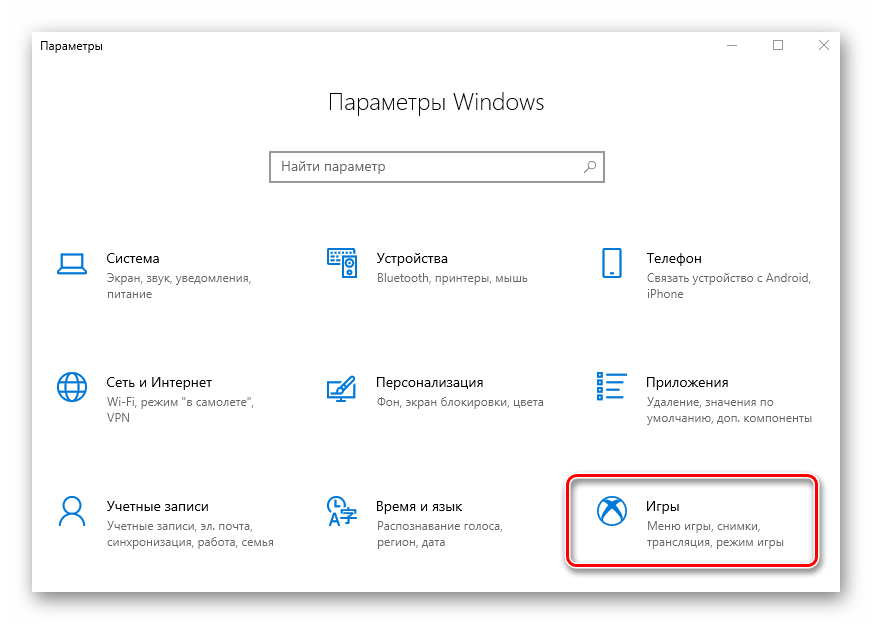
- Кликните по кнопке «Пуск» ЛКМ. Из открывшегося меню откройте окно «Параметры». Для этого нажмите одноименную кнопку в виде шестеренки.
- В открывшемся окне кликните по разделу под названием «Игры».
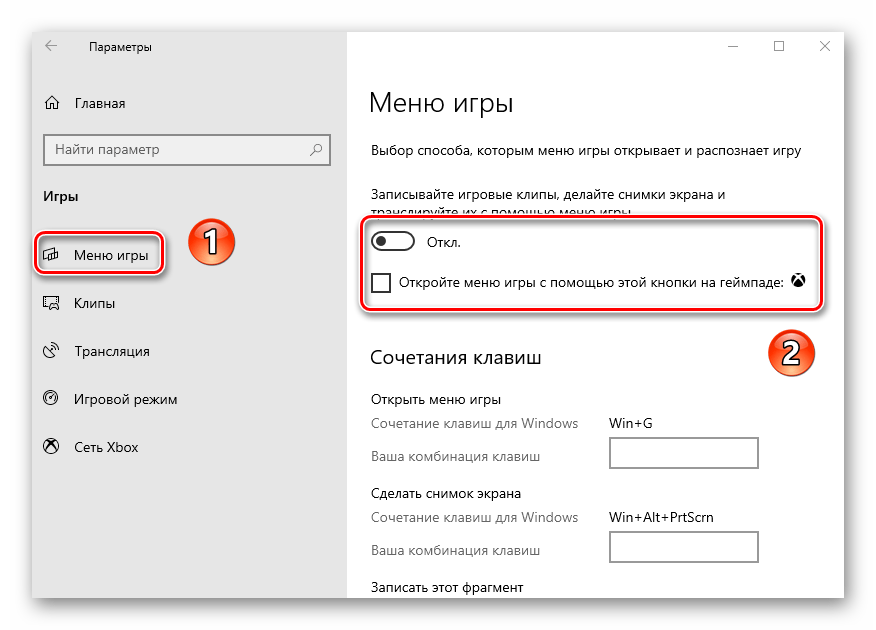
- Вы сразу же окажетесь в нужной вкладке «Меню игры». В ней установите переключатель, который отмечен на скриншоте ниже, в положение «Откл». Если вы используете геймпад, снимите также галочку напротив строки ниже переключателя.
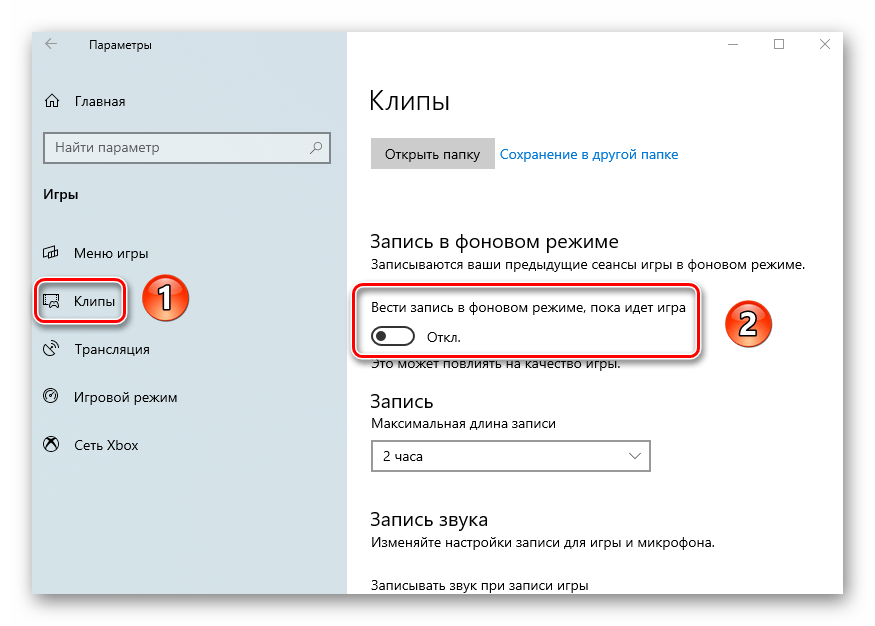
- Далее рекомендуем отключить функцию записи в фоновом режиме. Для этого в разделе «Игры» перейдите в следующую вкладку «Клипы». В ней измените положение переключателя под указанной строкой в состояние «Откл».
- В завершении закройте все окна и перезапустите компьютер или ноутбук, после чего DVR будет окончательно отключен.
Использовав один из описанных в статье методов, вы без проблем сможете отключить функцию Xbox DVR, тем самым сэкономив системные ресурсы. В качестве заключения мы хотели бы напомнить, что существуют и другие методы увеличения производительности системы Windows 10 — о них мы рассказывали во всех подробностях в отдельном руководстве.
Подробнее: Увеличение производительности компьютера на Windows 10
Наша группа в TelegramПолезные советы и помощь
Readers help support Windows Report. We may get a commission if you buy through our links.
Read our disclosure page to find out how can you help Windows Report sustain the editorial team. Read more
Windows 10 is great for gaming, but sometimes you might encounter Xbox Gaming Overlay while playing your favorite games. This is a built-in Windows 10 feature, but some users are so distracted by it that they want to remove it.
In this article, we’ll show you how to properly remove Xbox Gaming Overlay on your Windows 10 PC.
How do I remove Xbox Gaming Overlay on Windows 10?
1. Disable Game Bar
The fastest way to get rid of Xbox Gaming Overlay is to disable the Game bar feature. You can do that by following these steps:
- Open the Settings app. You can do that quickly with Windows Key + I shortcut.
- Head over to the Gaming section.

- Select Game bar from the menu on the left and disable Record game clips, screenshots and broadcasting using Game bar option.


After doing that, the Xbox Gaming Overlay should be disabled on your PC.
If you’re having trouble opening the Setting app, take a look at this article to solve the issue.
2. Delete the Xbox Gaming Overlay app
If you want to completely remove Xbox Gaming Overlay from your PC, you need to remove its app. This is fairly simple to do, and you can do it by following these steps:
- Press Windows Key + S and enter powershell. Select Run as Administrator.

- When PowerShell opens paste the following command and press Enter:
- get-appxpackage *Microsoft.XboxGamingOverlay* | remove-appxpackage
- After doing that, close the PowerShell and the Gaming Overlay app should be completely removed.

Note: Few users reported that certain games won’t run properly if you remove the Gaming Overlay app. If this happens, you’ll need to install Xbox Game Bar again from the Microsoft Store.
There you go, these are the two ways you can get rid of Xbox Gaming Overlay on your PC. The first method will only disable the Game Bar feature, and it won’t break any games.
The other method will remove the actual app from your PC which may lead to issues with certain games, but that can be easily remedied.
If you have any other questions or suggestions, don’t hesitate to reach in the comments section below.
Milan Stanojevic
Windows Toubleshooting Expert
Milan has been enthusiastic about technology ever since his childhood days, and this led him to take interest in all PC-related technologies. He’s a PC enthusiast and he spends most of his time learning about computers and technology.
Before joining WindowsReport, he worked as a front-end web developer. Now, he’s one of the Troubleshooting experts in our worldwide team, specializing in Windows errors & software issues.