
Всем привет. В этой публикации мы с вами рассмотрим такой вопрос: как отключить гибернацию в Windows 10. Друзья, режим гибернации – это один из режимов энергосбережения операционной системы от Microsoft. В целом он менее эффективен, чем спящий режим, но на базе гибернации работает технология быстрого запуска Windows 10, это раз. Два: в режим гибернации переходят ноутбуки по истечении 3-х часов нахождения в спящем режиме. Так зачем же отключать этот режим? Разные причины есть для этого, основная – файл гибернации hiberfil.sys занимает много места на диске С. Ниже мы рассмотрим, как отключить гибернацию и этим избавиться от её увесистого файла на диске С. И также, друзья, я вам предложу альтернативу отключению гибернации, дабы сохранить быстрый запуск «Десятки».
Как отключить гибернацию в Windows 10
Зачем отключать гибернацию
Итак, друзья, гибернация Windows 10. Что это за технология, чем отличается от других режимов энергосбережения системы, можете почитать в статьях «Как включить гибернацию в Windows 10» и «Спящий режим Windows 10». Здесь лишь вкратце отмечу, что гибернация – это такой режим энергосбережения, который сохраняет пользовательский сеанс работы на жёстком диске, полностью выключает компьютер, а при возобновлении его работы подтягивает сеанс с жёсткого диска. Как упоминалось, режим гибернации сам включается на ноутбуках, если они более 3-х часов находятся в спящем режиме. И на базе гибернации работает технология быстрого запуска Windows 10, о ней детально можете почитать в статье «Как включить быстрый запуск в Windows 10». Так что гибернация незримо присутствует в работе вашего компьютерного устройства, вне зависимости от того, пользуетесь вы ею осознанно или нет. И зачем же её отключать?
Например, если вы хотите погружать компьютер в спящий режим, в том числе с помощью таймера, с использованием системных возможностей. Есть, друзья, такая команда:
rundll32.exe powrprof.dll,SetSuspendState 0,1,0
Её также можно использовать с таймером:
timeout /t 3600
rundll32.exe powrprof.dll,SetSuspendState 0,1,0
Где вместо 3600 вы можете подставить своё число секунд отсрочки ухода компьютера в спящий режим. Эти команды можно использовать с помощью командной строки, также с первой можно создать ярлык запуска, а вторую можно оформить в батник. Но обе эти команды будут погружать компьютер в гибернацию. А если её отключить, тогда компьютер будет погружаться в спящий режим.
Но, конечно же, более существенной является иная причина отключения гибернации – если её файл hiberfil.sys занимает чрезмерно много места на диске С.
Что такое файл hiberfil.sys
Друзья, место на жёстком диске, куда гибернация сохраняет данные пользовательского сеанса работы для восстановления в дальнейшем – это файл hiberfil.sys. Он расположен в корне диска С, это скрытый системный файл, он создаётся сам по умолчанию. И он существует, даже если вы сами ни разу не погружали компьютер в гибернацию. Увидеть этот файл мы можем в проводнике Windows 10 или стороннем файловом менеджере при условии отображения скрытых системных файлов. Как отобразить такие в проводнике «Десятки», пошагово указано ниже на снимке.
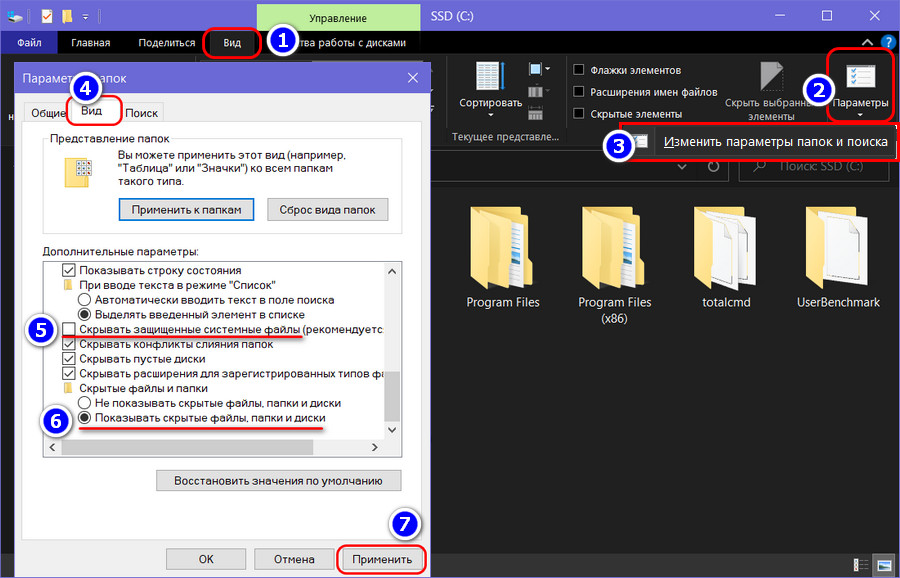
Настраиваем так проводник и отправляемся в корень диска С. Там в числе скрытых системных файлов мы и увидим hiberfil.sys. В моём случае он весит немного, лишь 3.18 Гб.
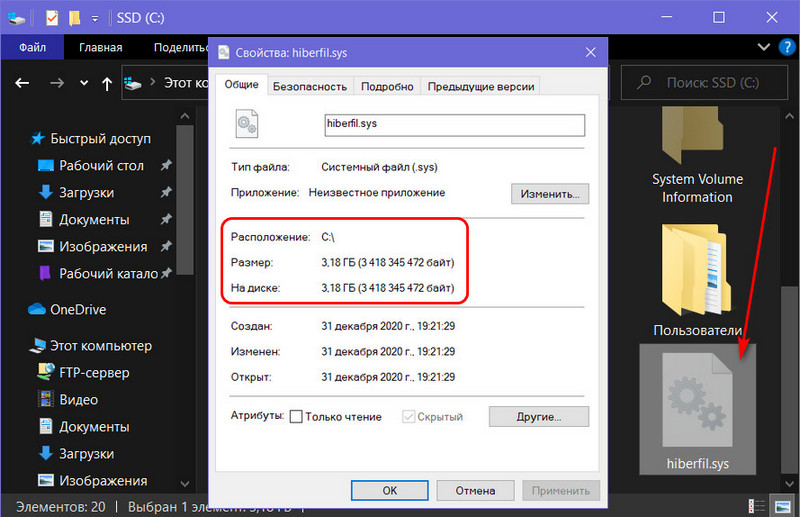
Но в других случаях его вес может быть гораздо больше. Вес файла hiberfil.sys, друзья, обычно составляет 30-70% от объёма «оперативки» компьютерного устройства. Чем большим объёмом данных оперирует гибернация при сохранении нашего пользовательского сеанса работы, тем, соответственно, размер этого файла больше. Ну и своим весом этот файл может захламлять диск С, особенно если размеры последнего оставляют желать лучшего.
Можно ли удалить файл hiberfil.sys? Да, друзья, если вам не нужна гибернация. Она непосредственно и работающая на её базе технология быстрого запуска «Десятки». Обычным способом, конечно, файл hiberfil.sys вы никак не удалите. Чтобы удалить, необходимо отключить гибернацию.
Как отключить гибернацию вWindows 10
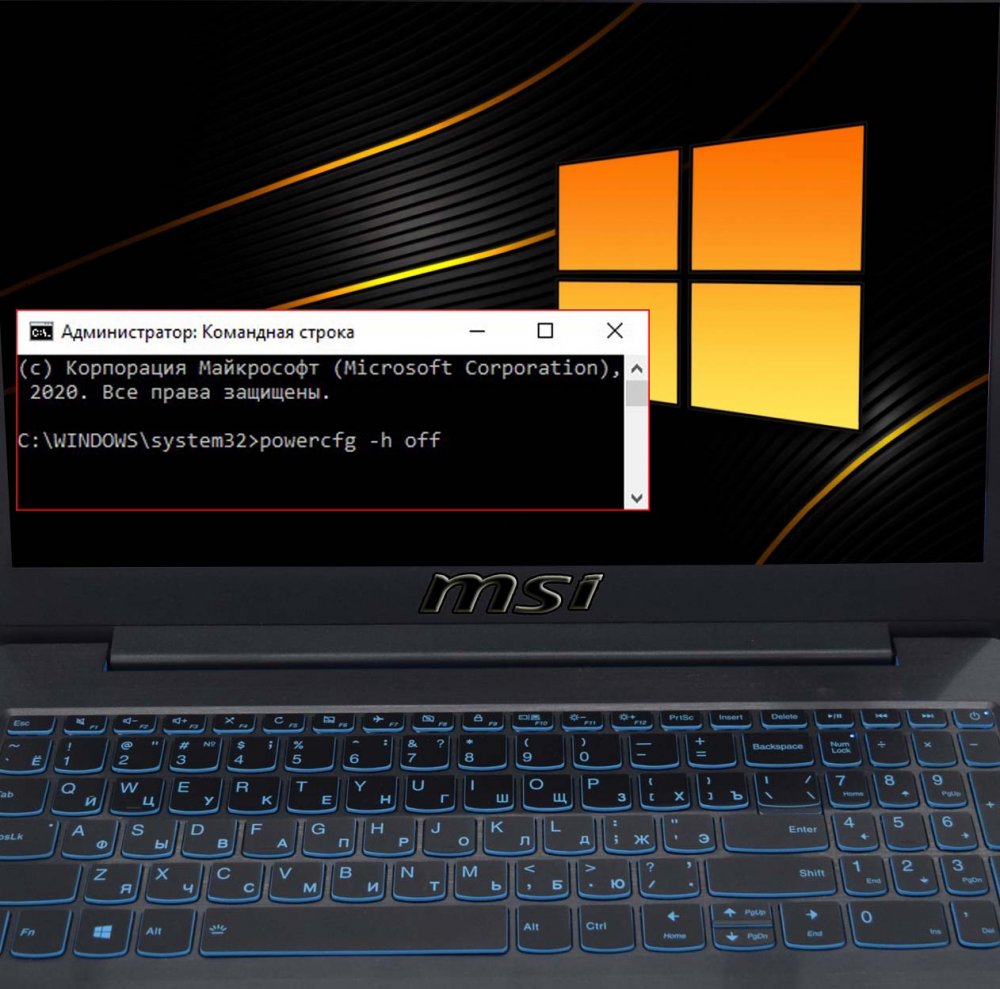
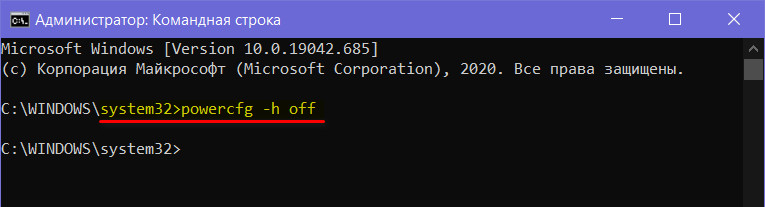
Чтобы отключить гибернацию, запускаем от имени администратора командную строку и вводим:
powercfg -h off
Всё: гибернация отключена, и файл hiberfil.sys должен сам удалиться с диска С. Если впредь вам когда-то понадобится этот режим энергосбережения, включается он также через командную строку, запущенную от администратора. Команда для включения гибернации:
powercfg -h on
Как уменьшить размер файла hiberfil.sys
Друзья, если же вы хотите сохранить работу технологии быстрого запуска операционной системы, тогда рассмотрите альтернативу отключению гибернации – уменьшение размера файла hiberfil.sys. Но важно: будет сохранён только быстрый запуск, гибернация как режим энергосбережения работать не будет. И она, соответственно, не подстрахует ваш ноутбук, если у него в спящем режиме разрядится батарея. Благо, страшного в этом ничего нет: Windows 10 просто аварийно завершит работу, но вам нужно взять за правило перед погружением ноутбука в сон сохранять файлы, над которыми вы проводите работу. Как же уменьшить размер файла гибернации? Запускаем командную строку от имени администратора, вводим:
powercfg /h /type reduced
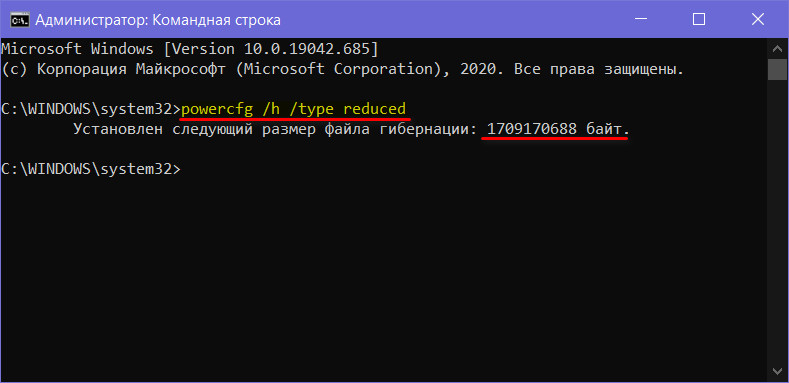
После нажатия Enter увидим уменьшенный размер файла hiberfil.sys. Если помните, друзья, у меня он весил 3.18 Гб, а сейчас сжался, как видим на снимке выше, до 1709170688 байт, т.е. до 1.7 Гб. Ну и, соответственно, у меня высвободилось почти 1,5 Гб места на диске С. Если в дальнейшем вы захотите вернуть полноценную работу режима гибернации Windows 10, снова от имени администратора запускайте командную строку и вводите:
powercfg /h /type full
If you are not using it, you can disable hibernation mode on your Windows 11/10 computer and delete Hiberfil.sys file to recover a good amount of storage space.
What is Hibernation Mode?
The Hibernate Mode in Windows computers is designed to save battery life by shutting down almost all programs, while still being able to spring back to life at the press of a button (Power button).
When Hibernate Mode is enabled on a Windows computer, it offloads all open apps and documents to a file named as hiberfil.sys, it closes all power consuming activities and goes into a state of deep sleep mode.
When you press the Power button (even much later on), the computer instantly loads back your activity from hiberfil.sys file, which allows you to resume working from the same point that you had stopped, without the need to re-launch Apps and re-open the files.
Advertisement
Is it Safe to Disable Hibernation & Delete Hiberfil.sys?
While Hibernation helps in saving battery life and time, it can be safely disabled, without having any adverse impact on the performance of your computer.
In-fact, you may find the need to disable hibernation mode, if you come across the issue of the computer remaining active in background or not going into Hibernation mode due to certain drivers not working well in hibernation mode.
Also, disabling hibernation mode allows you to recover storage space by deleting the storage space occupied by hiberfil.sys on your computer.
Where is Hiberfil.sys Located on Windows 11/10 computer?
The default location of Hiberfil.sys file in Windows 11/10 is at root folder of the local drive (C:) on your computer.

Being a system file, Windows operating system keeps hiberfil.sys hidden, in order to prevent the possibility of this file being deleted by the user.
However, you can take a look at the amount of storage space occupied by hiberfil.sys, by enabling the option to Show Hidden System Files on your computer.
What is the Difference Between Hibernate and Sleep Mode?
When a computer goes into Hibernate mode, it offloads all open apps and documents to hiberfil.sys file, which is located on the Local Hard Disk of the computer.
This allows the computer to save maximum battery life by ceasing all its power consuming activities and remaining truly switched off, without any power requirements.
In the case of sleep mode, Windows moves open apps and documents to the computer’s Random Access Memory (RAM) and remains active in background using a small amount of power.
This makes sleep mode ideal for taking short breaks from the computer, while Hibernation mode is more suited for taking extended breaks from the computer.
1. Disable Hibernation Using PowerShell
If you are not using Hibernation mode, you can switch OFF Hibernation mode on your device by using PowerShell or Command Prompt.
Advertisement
1. Open Windows PowerShell as Admin > type powercfg -h off and press the enter key on the keyboard of your computer.

2. Once the Command is executed, Hibernate Mode will be disabled and “hiberfil.sys” file should be removed from the hard disk, when you restart the computer.
2. Disable Hibernation Using Advanced Power Settings
Another way to disable Hibernation on a Windows computer is by going to Advanced Power Settings
1. Right-click on the Start button and click on Run. In the Run Command window, type Powercfg.cpl and click on OK.
2. From the Power Options screen, go to Change Plan Settings > Change Advanced Power Settings.
3. On Advanced Power Settings screen, expand the Sleep entry > expand Hibernate After entry and set both On Battery and Plugged in to Never.

This will ensure that your computer never goes into Hiberantion mode, while using battery and also when it is plugged-in to a direct power source.
3. Disable Hibernattion By Using Registry
Another way to enable or disable Hibernatation mode on a Windows 10/11 is by using Registry Editor.
1. Right-click on the Start button and click on Run. In the Run Command Window, type regedit and click on OK.
2. On Registry Editor screen, navigate to HKEY_LOCAL_MACHINE\System\CurrentControlSet\Control\ Power and double-click on HibernateEnabled DWORD in the right-pane.

3. On the next screen, you can disable Hibernate Mode by changing Value Data to 0.
4. Click on OK to close the registry editor and save the changes on your computer.
How to Manually Delete Hiberfil and Recover Storage Space
You can check whether or not hiberfil.sys file has been removed from the computer and manually remove this file from your computer by following the steps below.
1. Open the File Explorer on your computer.
2. On File Explorer window, click on This PC in the left-pane and double-click on your Local Drive (C:) in the right pane.

3. If you are using Windows 10, click on the File Tab and select Change Folders and Search options in the menu that appears.

If you are using Windows 11, click on 3-dots icon in the top-menu and select Options.

4. On Folder Options screen, switch to View tab > select Show hidden files, folders, drives option and uncheck Hide protected operating system files (Recommended) option.
5. Click on Apply and OK to save the changes
6. After this, go to This PC > Local drive (C:) > right-click on hiberfil.sys and select the Delete option in the menu that appears.
Note: Do not delete Pagefile.sys, without knowing the implications of deleting this system file on your computer. In this regard, you can refer to this guide: How to Delete, Resize & Restore Pagefile.sys in Windows 11/10.
Quick Tips
- Hibernation might be unnecessary if you only temporarily put your PC to sleep. Disabling it simplifies your power options.
- Hibernation uses a large file (hiberfil.sys) to store your system state. Disabling it frees up that space for other uses.
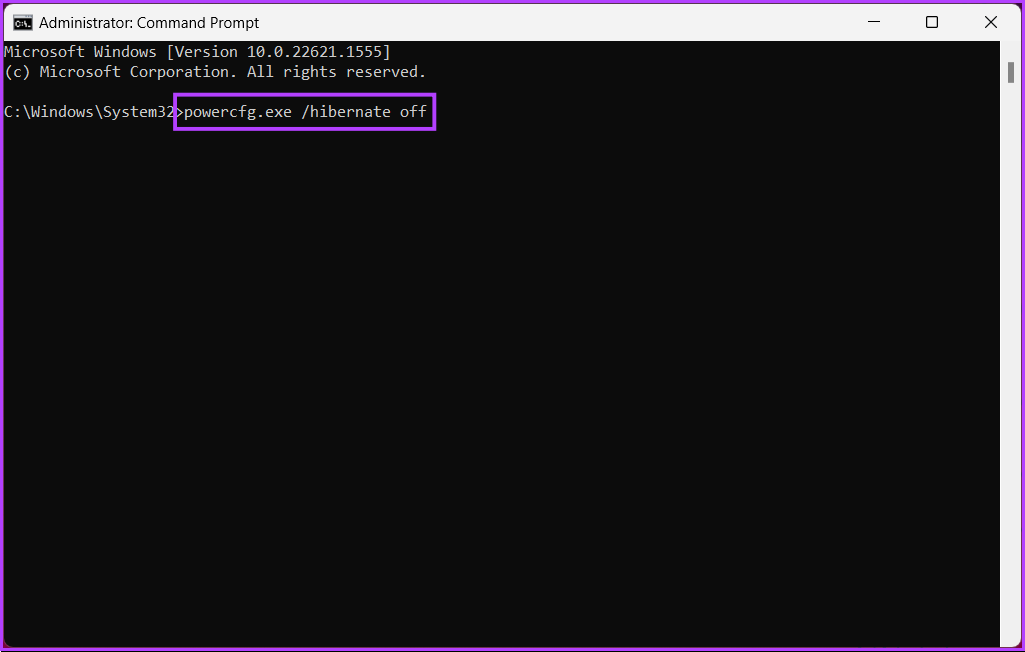
- Launch Command Prompt > type powercfg.exe /hibernate off > hit Enter to disable hibernation quickly.
Note: The methods and steps below are demonstrated on Windows 11; however, you can follow the same on Windows 10.
Method 1: Using the Control Panel
Step 1: Press the Windows key on your keyboard, type Control Panel, and click Open.
Step 2: Select System and Security.
Step 3: Under Power Options, choose Change what the power buttons do.

Step 4: Click on Change settings that are currently unavailable.

Step 5: In the Shut-down settings, uncheck the Hibernate option and click Save changes.

Method 2: Using the Command Prompt
Note: This method doesn’t work on Virtual Machines.
Step 1: Press the Windows key on your keyboard, type Command Prompt, and click Run as administrator.
Step 2: Type the below command and press Enter.
powercfg.exe /hibernate off
Method 3: Using the Windows Registry
Because we will be using Registry Editor, we strongly advise backing up the Windows Registry before proceeding with the steps below.
Step 1: Press the Windows key on your keyboard, type Registry Editor, and click Run as administrator. In the prompt, select Yes.
Step 2: In the top address bar, enter the mentioned address.
HKEY_LOCAL_MACHINE\SYSTEM\CurrentControlSet\Control\Power
Note: You can manually navigate to the section too.
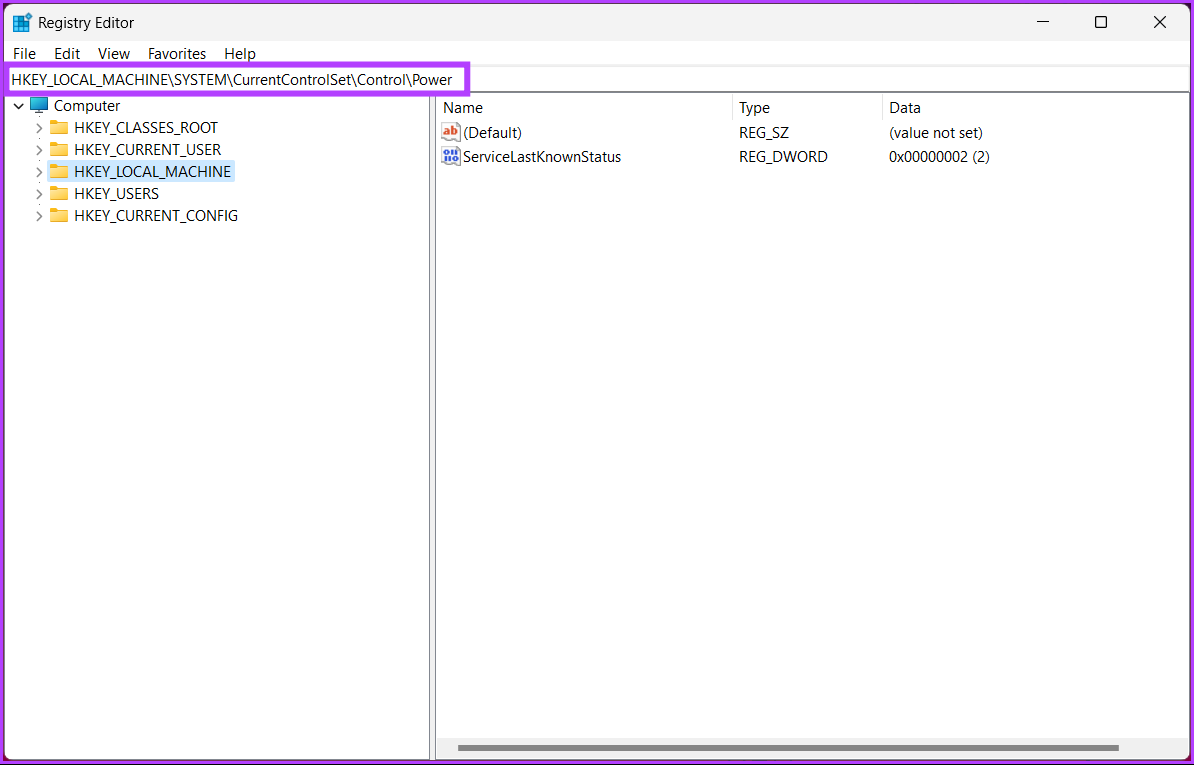
Step 3: Double-click HibernateEnabled.

Step 4: Under ‘Edit DWORD (32-bit) Value’, type 0 in the Value Data field and press OK.
Note: Type 1 to enable the hibernation option on Windows.

Finally, restart the system to implement the changes. And that’s it! When the system boots back up, Windows’ hibernation mode will be disabled.
If you don’t want to disable hibernation from the registry, go with the Group Policy editor; check out the next method.
Method 4: Using Windows Group Policy
Group Policy Editor is only available in the Windows 11 Pro and Enterprise versions. You cannot use this method using Windows 11 Home Edition.
Step 1: Press the Windows keys on your keyboard, type gpedit, and click Open.
Step 2: In the left pane, under Local Computer Policy, select Computer Configuration.
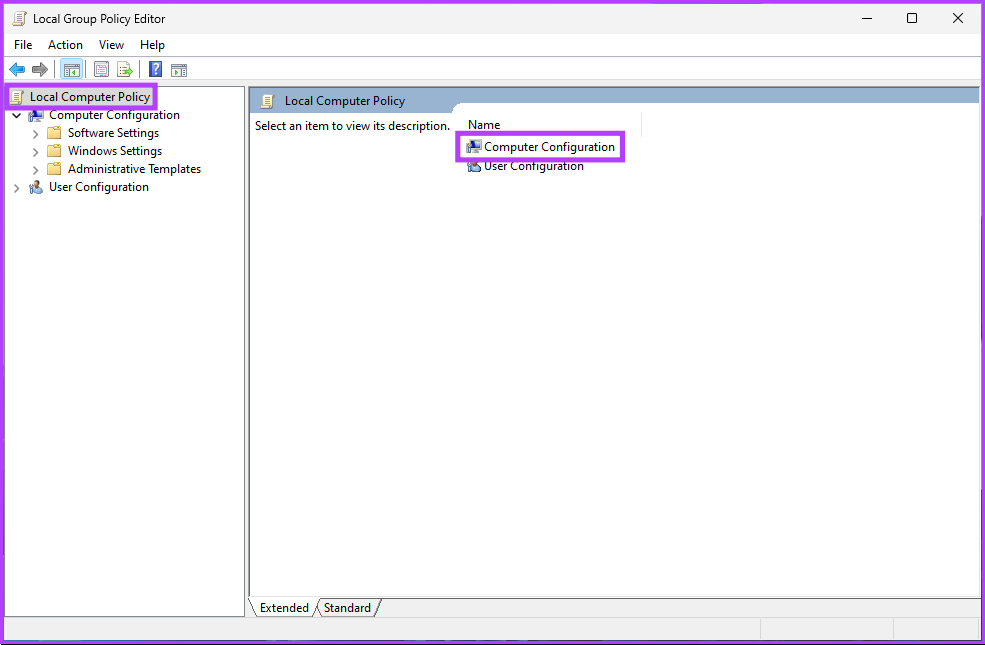
Step 3: In the right pane, double-click on Administrative Templates.
Step 4: Select the Windows Components option.

Step 5: Under the Windows Components option, locate and click on File Explorer.
Step 6: Navigate to the Show hibernate in the power options menu.
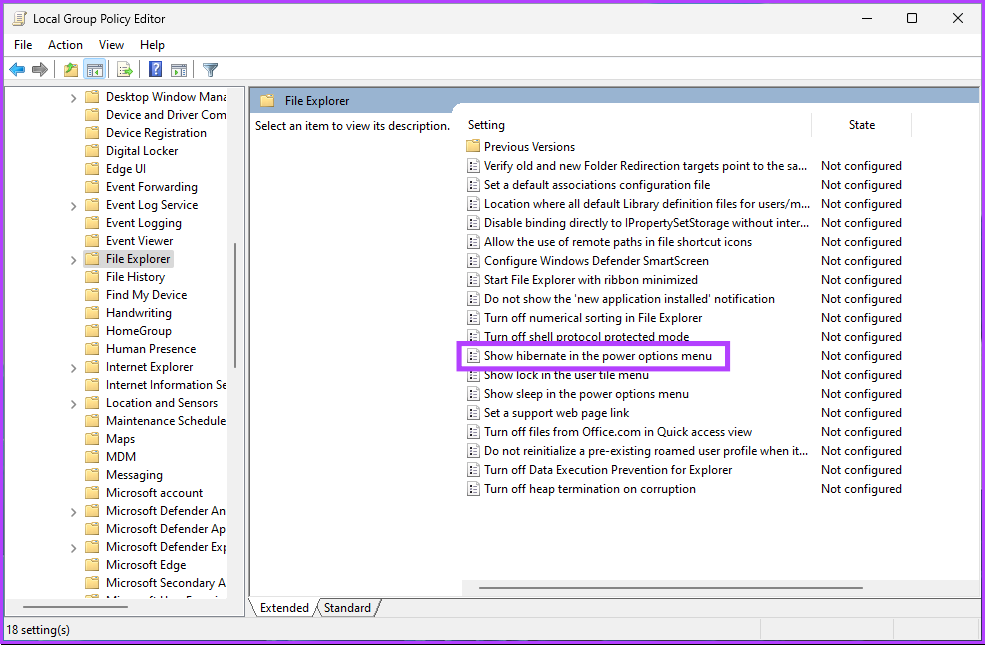
Step 7: In the ‘Show hibernate in the power options menu’ window, select Disabled. Finally, click on Apply > OK.

There you go. Now, all you need to do is reboot Windows. And once it boots back up, it will disable the hibernation mode. If you want to roll back, select the Enable option and click Apply followed by OK under the ‘Show hibernate in the power options menu’ window.
If you are running short of disk space because of hibernation, you can delete the hibernation file on Windows and free up some space.
FAQs
1. Why is hibernate disabled in Windows 11 on default?
This is because hibernation requires a certain amount of disk space to store the contents of the RAM when the computer goes into hibernation mode. Some devices may not have enough disk space to support hibernation, which is why hibernation mode is disabled by default on certain devices.
2. What is the difference between sleep and hibernation?
Sleep and hibernate are two power-saving modes on Windows. However, they differ in how they save the system state. When you put your computer to sleep, it goes into a low-power state. This means the computer’s state is saved in RAM, and the hardware components are put into low-power mode.
When you put your computer into hibernation, it saves the current system state to the hard drive and then powers off. The next time you turn on your computer, it will restore the previous system state from the hard drive and start-up as if you restarted it. This can be useful when saving power or resuming your work later.
Was this helpful?
Thanks for your feedback!
The article above may contain affiliate links which help support Guiding Tech. The content remains unbiased and authentic and will never affect our editorial integrity.
Today’s computers offer a range of energy-saving options. These features are especially useful for laptops, which often run on battery power instead of being plugged in. One of the most well-known features for saving power and battery is Hibernate mode (also called Suspend to disk), which powers off your computer. Before the operating system shuts down, it stores your current user session to the hard disk so that you can continue exactly where you left off when your computer wakes up from hibernation.
Microsoft systems such as Windows 7, 8, or 10 store this memory content to the hiberfil.sys file, which can use several GBs of space depending on the software, system version and type of device you’re using. Windows creates this system memory file even if you never use Hibernate mode or Sleep mode, which also uses the hibernation method. We’ll explain how to delete the hiberfil.sys file and prevent the automatic creation of a new hiberfil.sys file if you don’t use the hibernation feature in Windows.
What is hiberfil.sys?
hiberfil.sys is a system file in Windows operating systems that contains the current memory contents of the machine state and is used by the “Sleep” and “Hibernate” power-saving options. The file is created and managed by the Windows operating system itself and can be several gigabytes in size (in Windows 10, it usually ranges from three to five gigabytes). The hiberfil.sys file is used to restore the user session when the system boots up after hibernation or sleep mode.
Hybrid sleep is a combination of Sleep and Hibernate mode where only certain system components such as hard drives are shut down.
Windows places the hibernation file in the source directory of the system partition itself, typically in the root directory of C:\. However, hiberfil.sys is a hidden and protected operating system file, so you won’t see it by default. If you want to change this setting, for example to view the size of the file, do the following:
- Go to the View tab and select the Hidden items checkbox.
- Click Options, and then click Change folder and search options.
- In the dialog box that appears, go to the View tab and uncheck Hide protected operating system files (Recommended).

How to delete and disable the hiberfil.sys file
Although hiberfil.sys is a hidden and protected system file, you can safely delete it if you don’t want to use the power-saving options in Windows. That’s because the hibernation file has no effect on the general functions of the operating system. However, you can’t use the standard delete method (right-click and “Delete”) because Windows actively uses this file. When you try to do this, you’ll get a message saying that the hiberfil.sys file is open in another program.
The solution is to disable Hibernate mode. Windows will then automatically delete hiberfil.sys as a result. We’ll now explain exactly how to do this in Windows 7, 8 and 10.
you need administrator privileges to disable hiberfil.sys.
How to the disable hiberfil.sys in Windows 10
There are two ways to disable the hibernation file that stores your session to the hard disk: Either disable the service using Command Prompt or change the registry entry for hiberfil.sys. In both cases, you have to have the necessary access privileges because the hibernation file is a system file, as mentioned above.
Deleting hiberfil.sys via PowerShell in Windows 10:
To turn off caching in the system file via PowerShell, all you need to do is a run a command. But first you need to run PowerShell as an administrator by choosing the keyboard shortcut [Windows] + [X] or right-clicking the Windows icon and choosing Windows PowerShell (Admin) Windows PowerShell:

Once you’ve launched PowerShell (you may need to enter a password), type in the following CMD command to disable the hiberfil.sys file:

Press Enter to confirm your entry. Hibernate mode will be disabled and the hiberfil.sys file will be automatically deleted.
You can also use the powercfg command if you want to re-enable Hibernate mode later. All you have to do is change the “off” parameter to “on”
Deleting hiberfil.sys via the registry in Windows 10:
You shouldn’t disable the hiberfil.sys file via the registry unless you have experience using the registry database. Incorrect entries or changes to the entries can easily cause Windows 10 to stop working properly.
The Windows Registry Editor is the best way to modify the registry. Open it by pressing Windows + R and typing regedit in the Run dialog box. To learn more about the Windows Registry Editor, see our article on regedit.
The service is relatively easy to turn off using this method. First, open the “HibernateEnabled”registry entry, which is located at:
\HKEY_LOCAL_MACHINE\SYSTEM\CurrentControlSet\Control\PowerDouble-click the above entry and set the value in the Value data field to 0 to disable Hibernate mode and delete the hiberfil.sys file:

Deleting hiberfil.sys in Windows 7 and 8: Step-by-step guide
You can also remove the hibernation file from your system if you’re using Windows 7 and 8. Just like in Windows 10, you can choose between Command Prompt and the registry database. The procedure is almost the same as in Windows 10.
Deleting hiberfil.sys using Command Prompt in Windows 7 and 8:
Although the command to disable hiberfil.sys is the same in all versions of Windows, the steps for opening Command Prompt are different depending on the version you’re using. Unlike Windows 10, Windows 7 and Windows 8 don’t have a Quick Access Menu, so this option for launching Command Prompt isn’t available. Instead, open the Windows Start menu and use the built-in search feature. Simply type the following in the search bar:
Windows will show Command Prompt as a best match. Right-click to select it and choose Run as administrator. Enter the CMD command above and choose Enter to disable caching for Hibernate mode and to delete hiberfil.sys:
Deleting hiberfil.sys via the registry in Windows 7 and 8:
Just like in Windows 10, you start from the Start menu if you want to disable hiberfil.sys via the registry. But instead of using the search bar, use the Run function. If it’s not visible in your Start menu, you can unhide it as follows:
- Right-click the task bar.
- Select Properties.
- Go to the Start Menu tab and click Customize.
- Select Run command and click OK. Chose Apply to save the change.
Open the “Run” dialog and enter the command for launching the Registry Editor:

Now open the directory for the registry entry of Windows Hibernate mode:
\HKEY_LOCAL_MACHINE\SYSTEM\CurrentControlSet\Control\PowerThen click HibernateEnabled and set the value of this key to 0 to remove the hiberfil.sys file. If the key doesn’t exist, create it manually: Right-click in the window on the right and select “New” and then DWORD value. Enter “HibernateEnabled” as the key name:

Was this article helpful?