
Если вы нашли эту статью по прямому поиску в Интернете, вы наверняка уже знаете, что такое DLNA и вас по большей части волнует лишь вопрос настройки DLNA-сервера на Windows 10. Об этом ниже, а для новичков небольшой теоретический урок.
Что такое DLNA
DLNA – это аббревиатура от Digital Living Network Alliance. Под этим термином подразумевается специальный софтверный протокол, с помощью которого совместимые устройства могут подключаться к медиабиблиотеке вашего компьютера. Это очень полезная технология, избавляющая вас от необходимости переносить файлы на другие устройства для воспроизведения. К примеру, у вас на компьютере хранится библиотека фильмов, но вы хотите посмотреть какой-то из них на телевизоре или планшете. Вместо того, чтобы копировать фильм на флешку, диск или переносить его по проводу на планшет, просто подключитесь к компьютеру через DLNA-протокол. После этого медиаконтент (фото, видео или музыка) будет стримиться по сети на высокой скорости и без задержек. Для получения доступа к медиабиблиотеке DLNA использует технологию UPnP (Universal Plug and Play), за счет чего обеспечивается совместимость с сотнями самых разнообразных устройств без необходимости в сложном дополнительном софте или драйверах.
Как настроить DLNA на Windows 10
Windows 10 включает в себя все необходимое для настройки DLNA. Вы можете сделать свой ПК DLNA-сервером или клиентом для подключения к другому компьютеру-серверу. Хорошая новость в том, что все это настраивается и работает без необходимости что-то дополнительно скачивать. В принципе существует много различных DLNA-серверов, но для простого использования среднестатистическому пользователю хватит и основных возможностей Windows 10.
Для настройки DLNA на Windows 10 вам понадобится классическая Панель управления. Кстати, эта инструкция подходит не только для Windows 10, но и для предыдущих операционных систем, вроде Windows 8.1 или Windows 7.
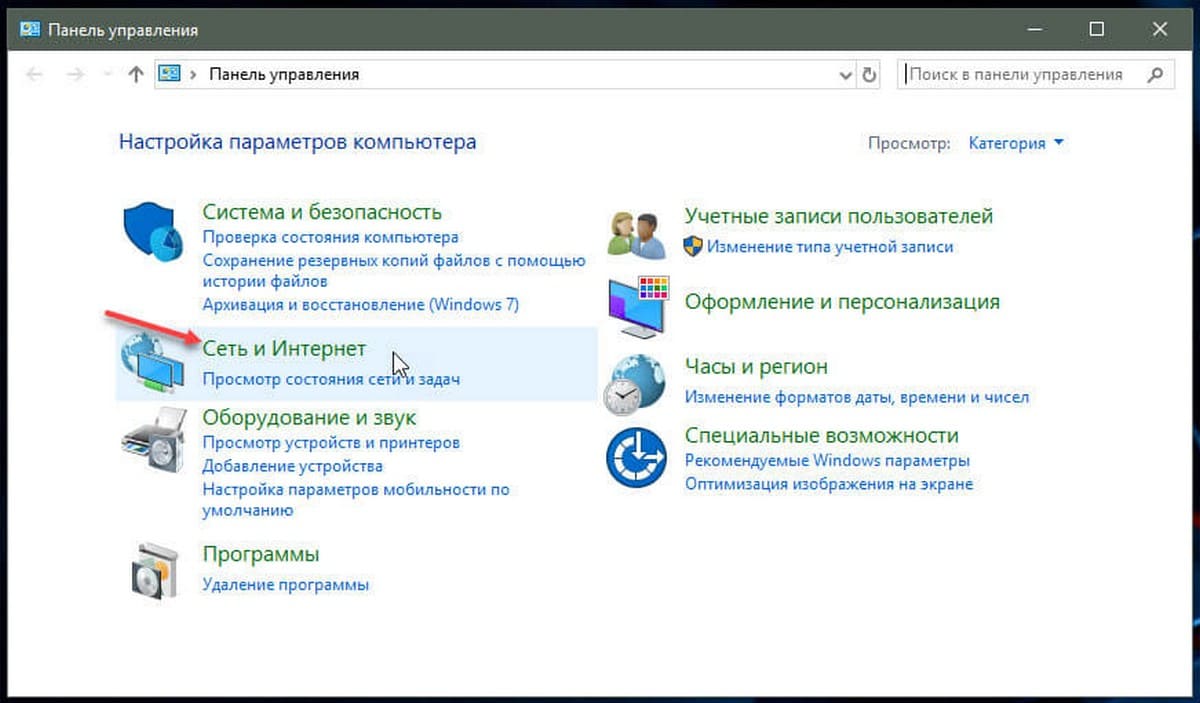
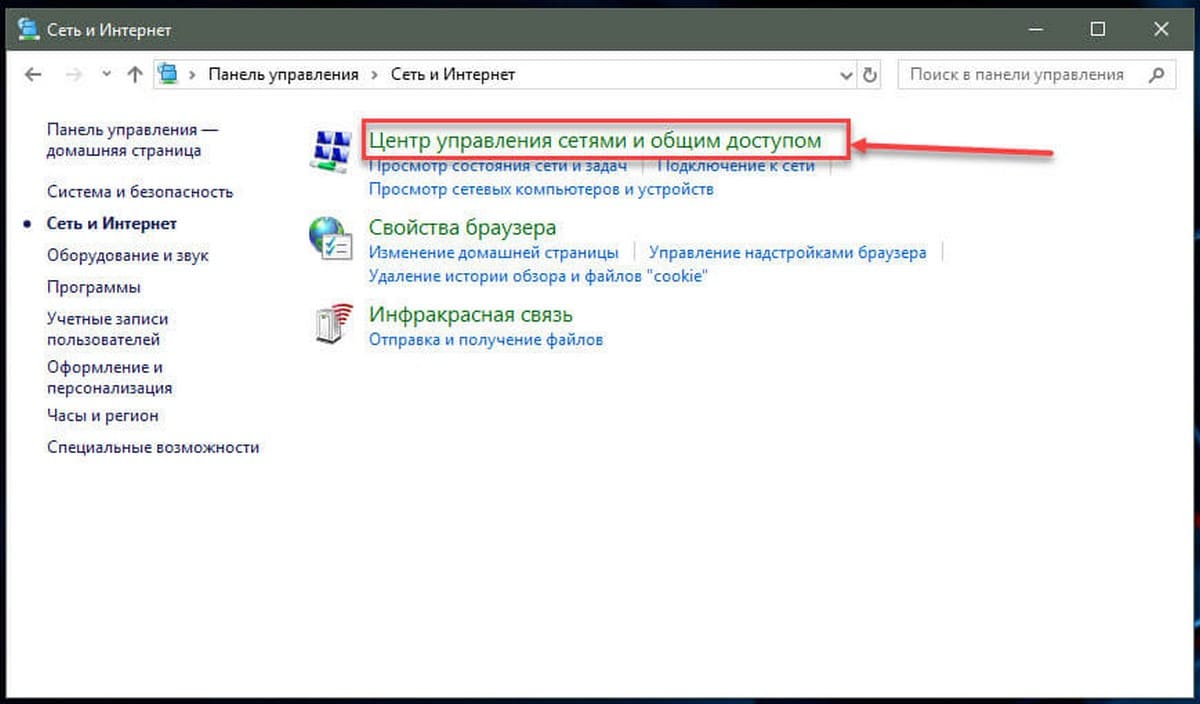
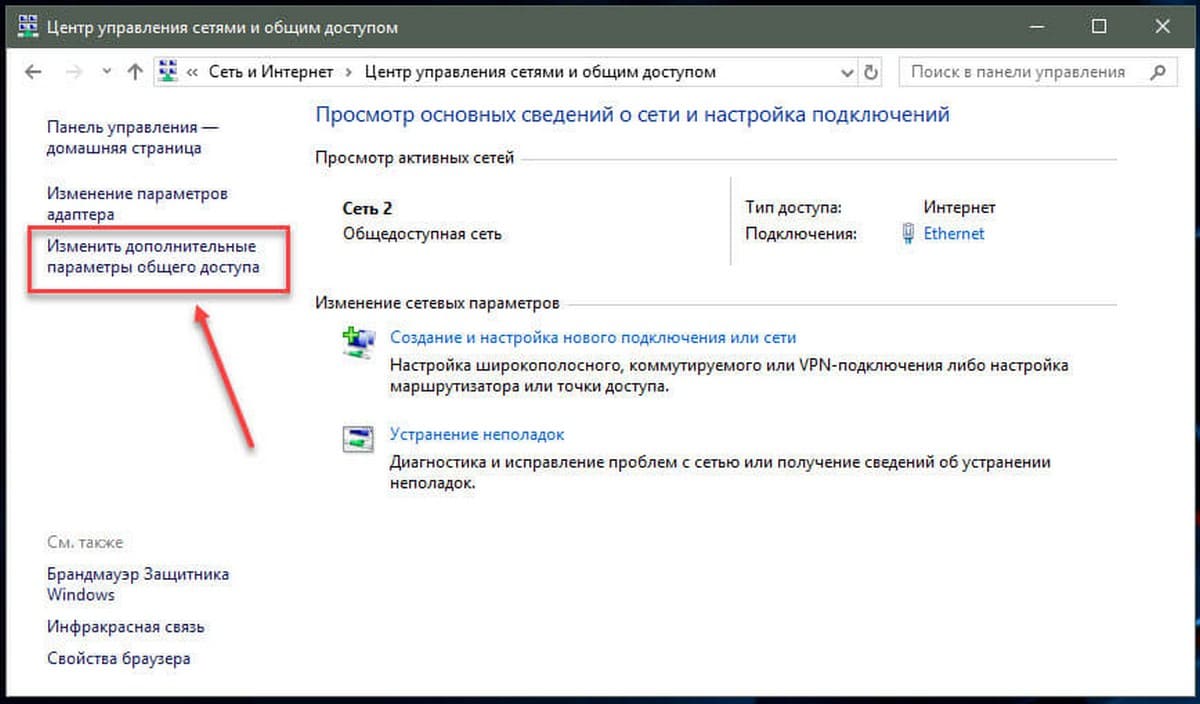
- Нажмите Win + R и введите control. После этого откроется окно Панели управления. Найдите раздел Центр управления сетями и общим доступом.
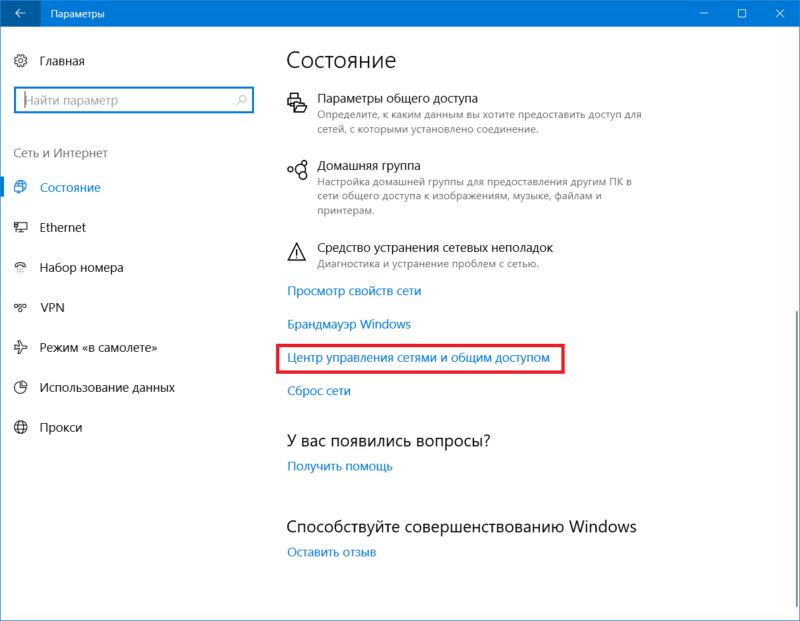
- Кстати, открыть Центр управления сетями и общим доступом можно также из Параметров Windows. Нажмите Win + I и перейдите в раздел Сеть и Интернет – Состояние. Опуститесь немного ниже и щелкните Центр управления сетями и общим доступом.

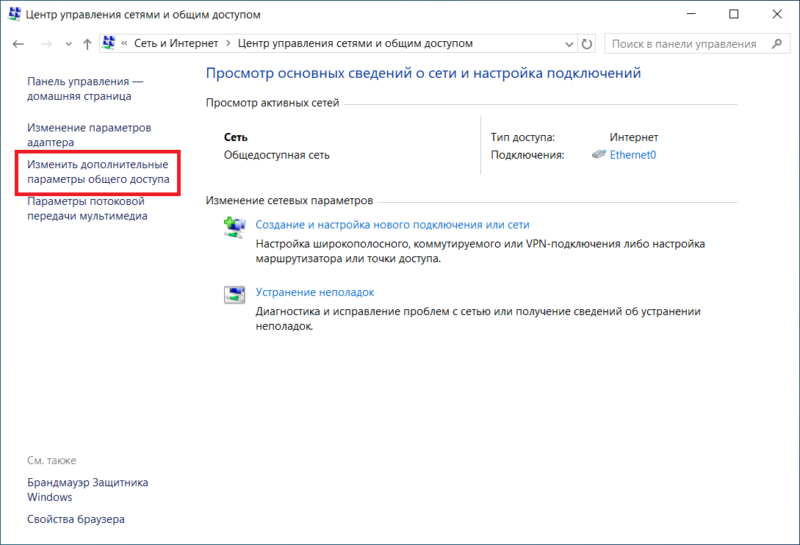
- Теперь вам надо нажать на ссылку Изменить дополнительные параметры общего доступа.

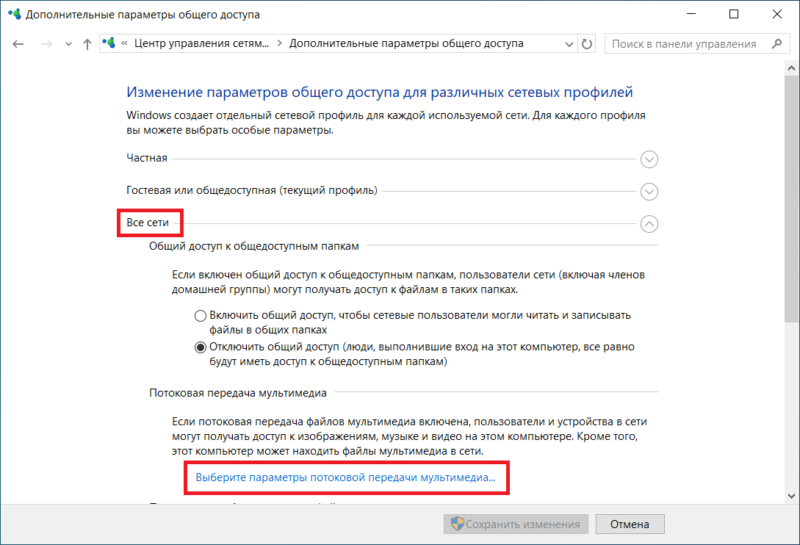
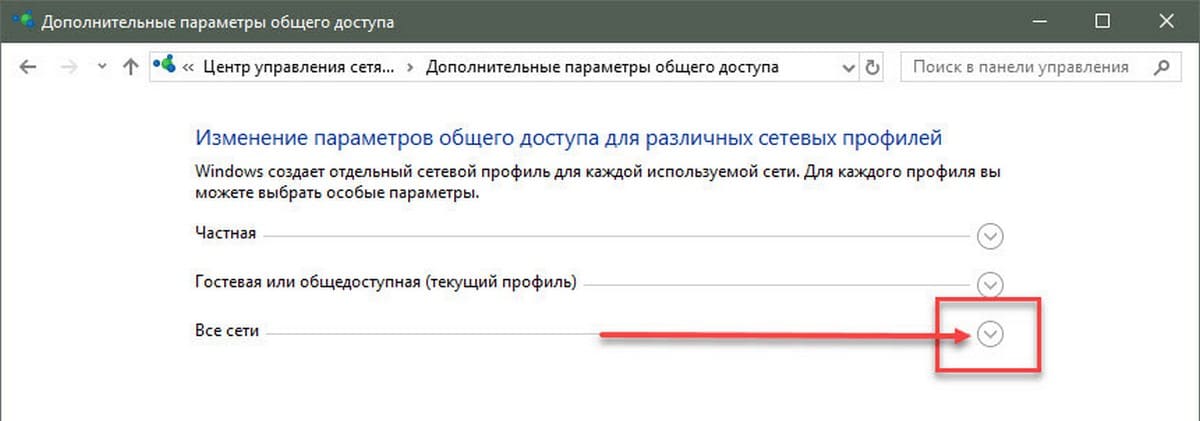
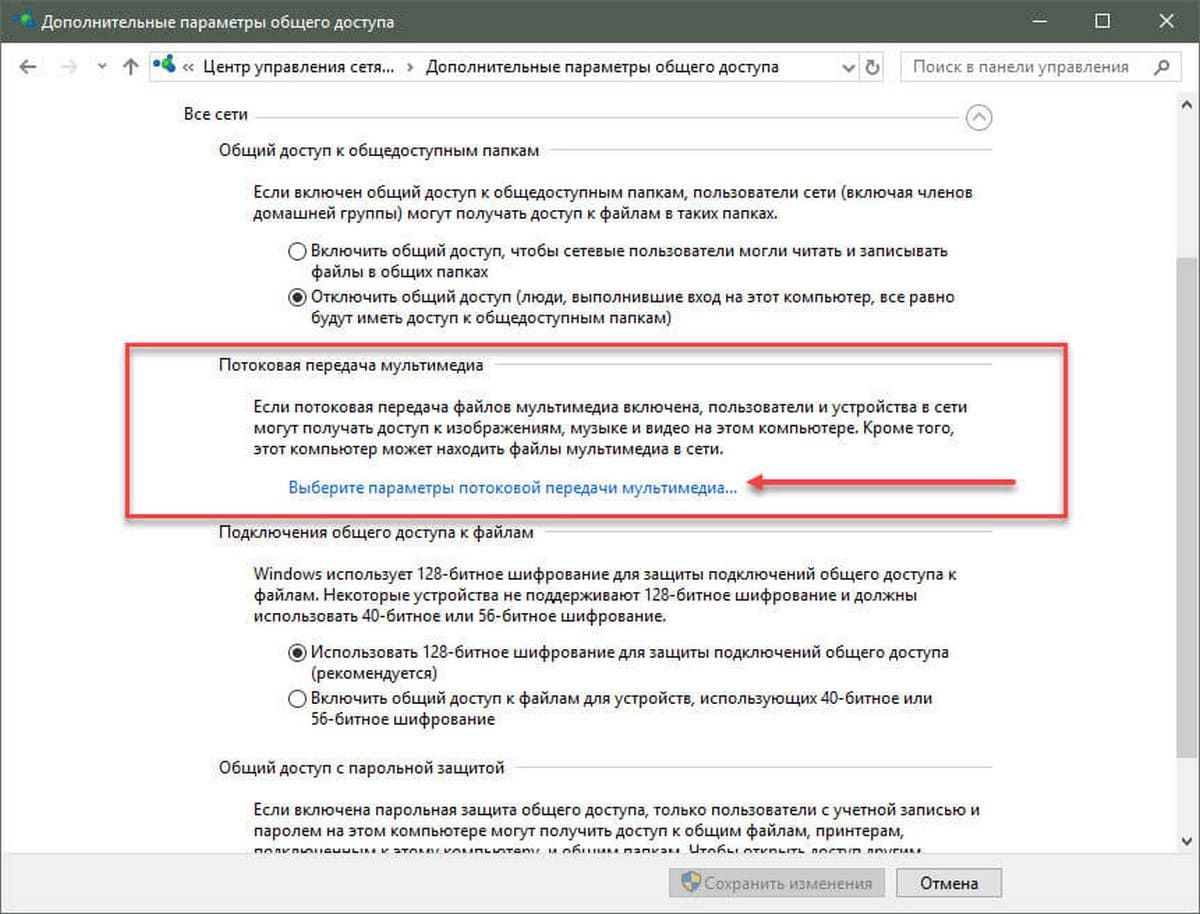
- На новом окне разверните пункт Все сети. Затем нажмите Выберите параметры потоковой передачи мультимедиа.
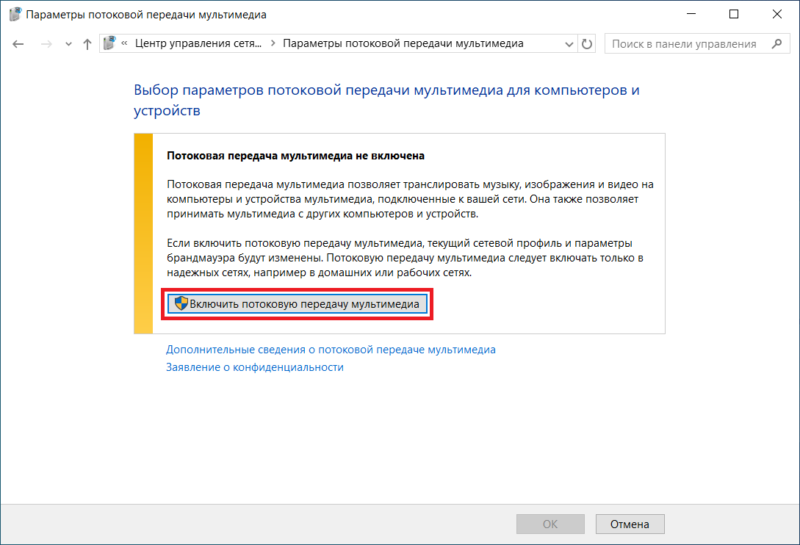
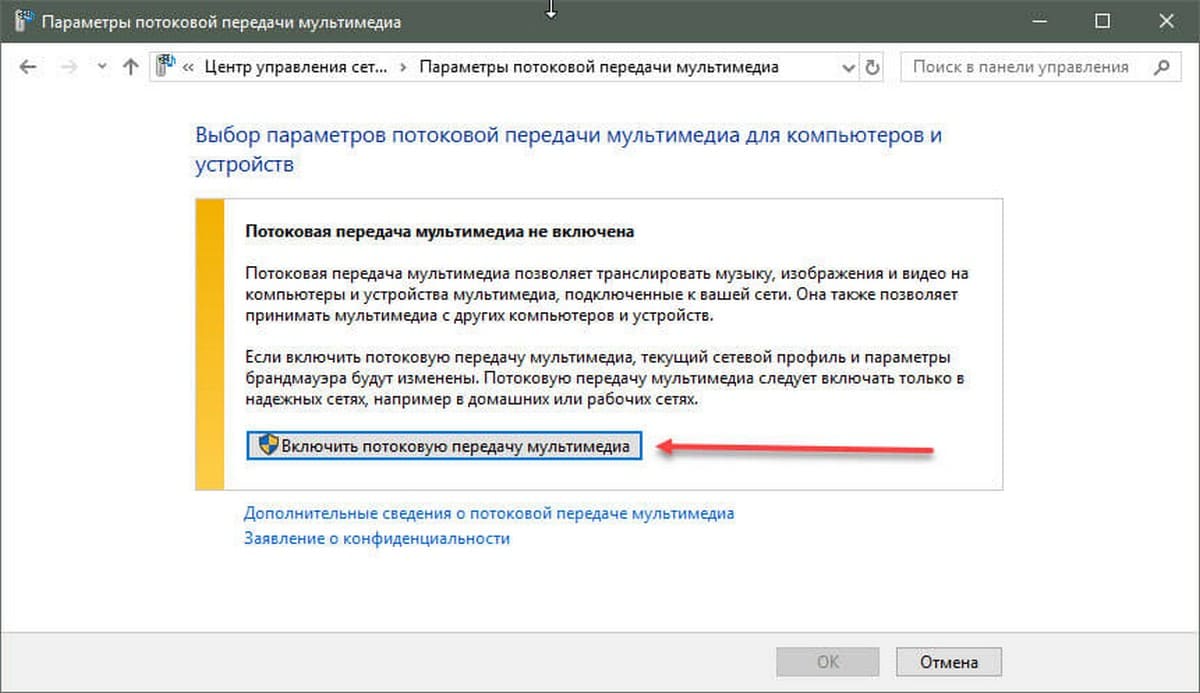
- Откроется новое окно, на котором щелкните Включить потоковую передачу мультимедиа.
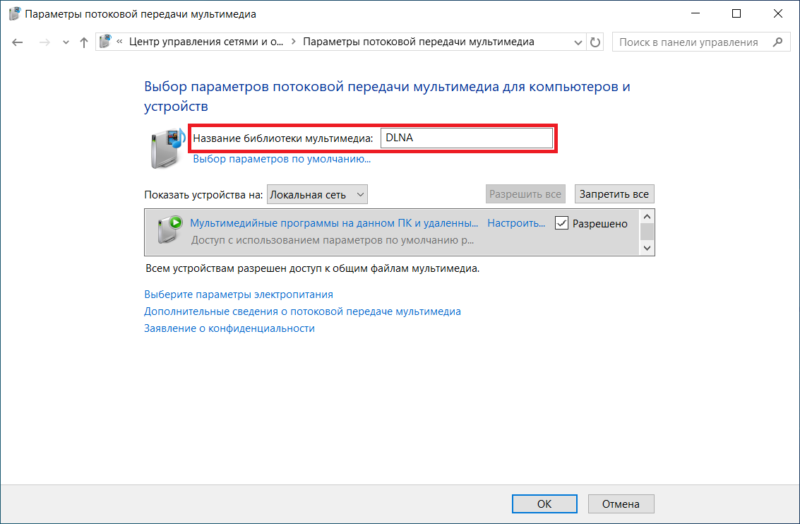
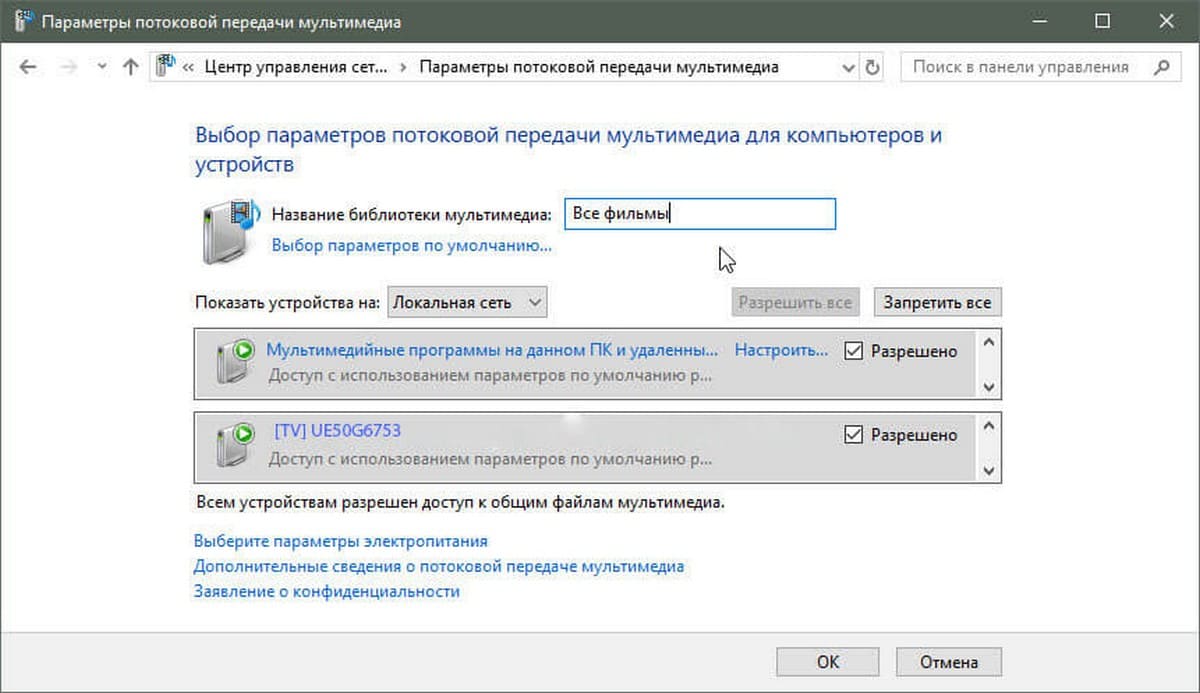
- На следующем окне введите название своей библиотеки в поле Название библиотеки мультимедиа. Это упростит вам подключение на устройстве для воспроизведения. В списке Показать устройства на выберите, какие устройства смогут подключаться к медиабиблиотеке.

- Нажмите Ок, после чего настройка DLNA на Windows 10 будет завершена.
По умолчанию Windows открывает доступ по протоколу DLNA только файлам и папкам в стандартных библиотеках, расположенных на диску С. Так как мало кто хранит свои медиафайлы на системном диске, есть смысл включить в библиотеку файлы и папки с ваших медиадисков или других разделов. Делается это следующим образом:
Найдите папку, которую вы хотите включить в медиабиблиотеку. Щелкните по ней правой кнопкой мыши и выберите Добавить в библиотеку. В зависимости от типа содержимого, выберите Видео, Изображения или Музыка. После этого весь контент выбранной вами папки, включая вложенные папки, будет доступен для подключенных устройств.
Как подключиться к DLNA-серверу на Windows 10
Когда все настроено и готово, остается только подключить конечное устройство, на котором вы будете воспроизводить контент. Это уже зависит от того, какую операционную системы или приложение вы используете для подключения.
Если вы хотите подключиться к DLNA-серверу с другого компьютера, убедитесь, что оба устройства находятся в одной сети. Затем откройте Проводник и щелкните на кнопку Сеть в левой панели. Откроется список доступных устройств мультимедиа. Выберите в нем ваш сервер, после чего откроется Windows Media Player с доступом к вашей медиабиблиоетке. Из него же вы сможете воспроизводить видео, музыку или просматривать фотографии. Сделано все максимально просто и удобно, поэтому даже у самых далеких пользователей не должны возникнуть проблемы с подключением.
Как отключить DLNA в Windows 10
- Если вы решили отключить медиастриминг, откройте Центр управления сетями и общим доступом, и нажмите на ссылку Изменить дополнительные параметры общего доступа.
- На новом окне разверните пункт Все сети, а затем щелкните Выберите параметры потоковой передачи мультимедиа.
- На новом окне Запретить все.
После этого подключенные устройства не смогут получить доступ к вашей медиабиблиотеке.

This tutorial will show you how to turn on or off DLNA media streaming for your account or all users in Windows 10 and Windows 11.
DLNA media streaming allows you to share media from your account’s personal Music, Pictures, PlayLists, and Videos folders to other users (same computer), computers, and DLNA supported devices on your network. It also allows you to receive media from other computers and DLNA supported devices.
If you turn on media streaming, your current network profile and firewall settings will be modified. You should only turn on media streaming on networks that you trust, such as home or work networks.
Contents
- Option One: Turn On DLNA Media Streaming for Current User
- Option Two: Turn Off DLNA Media Streaming for Current User
- Option Three: Enable or Disable DLNA Media Streaming for All Users in Local Group Policy Editor
- Option Four: Enable or Disable DLNA Media Streaming for All Users using REG file
EXAMPLE: Your shared media library displayed as a media server device on another allowed Windows PC in File Explorer > This PC


Option One
Turn On DLNA Media Streaming for Current User
1 Open the Control Panel (icons view), and click/tap on the Network and Sharing Center icon.
2 Click/tap on the Media streaming options link on the left side of Network and Sharing Center. (see screenshot below)

3 Click/tap on Turn on media streaming. (see screenshot below)

4 Type a name you want for your media library in the Name your media library box.
This will be the name of the media server shown on devices you allowed to share you media library with.
If you have a local account, your media library name will be the same as your account name by default.
If you have a Microsoft account, your media library name will be the same as the email address used for your Microsoft account.

5 You can now change the following if wanted: (see screenshots below)
- Customize media streaming settings for devices.
- Allow or block available devices access to your shared media on your Local network and/or All networks.


6 Click/tap on OK when finished. (see screenshot below)

Option Two
Turn Off DLNA Media Streaming for Current User
1 Open the Control Panel (icons view), and click/tap on the Network and Sharing Center icon.
2 Click/tap on the Media streaming options link on the left side of Network and Sharing Center. (see screenshot below)
3 Click/tap on Block All, and click/tap on OK. (see screenshot below)
4 You can now close the Network and Sharing Center if you like.
Option Three
Enable or Disable DLNA Media Streaming for All Users in Local Group Policy Editor
You must be signed in as an administrator to use this option.
The Local Group Policy Editor is only available in the Windows 10/11 Pro, Enterprise, and Education editions.
All editions can use Option Four to configure the same policy.
1 Open the Local Group Policy Editor (gpedit.msc).
2 Navigate to the policy location below in the left pane of the Local Group Policy Editor. (see screenshot below)
Computer Configuration > Administrative Templates > Windows Components > Windows Media Player

3 In the right pane of Windows Media Player in the Local Group Policy Editor, double click/tap on the Prevent Media Sharing policy to edit it. (see screenshot above)
4 Do step 5 (enable) or step 6 (disable) below for what you want.
5 Enable DLNA Media Streaming for All Users
This is the default setting to allow users to use Option One to turn on media streaming.
A) Select (dot) Not Configured. (see screenshot below)
B) Click/tap on OK, and go to step 7.

6 Disable DLNA Media Streaming for All Users
This will disable and prevent users from using Option One to turn on media streaming.

A) Select (dot) Enabled. (see screenshot below)
B) Click/tap on OK, and go to step 7.
7 Close the Local Group Policy Editor.
Option Four
Enable or Disable DLNA Media Streaming for All Users using REG file
You must be signed in as an administrator to use this option.
1 Do step 2 (enable) or step 3 (disable) below for what you would like to do.
2 Enable DLNA Media Streaming for All Users
This is the default setting to allow users to use Option One to turn on media streaming..
A) Click/tap on the Download button below to download the file below, and go to step 4 below.
Default_user_choice_turn_on_DLNA_media_sharing.reg
(Contents of REG file for reference)
Code:
Windows Registry Editor Version 5.00

[HKEY_LOCAL_MACHINE\SOFTWARE\Policies\Microsoft\WindowsMediaPlayer]
"PreventLibrarySharing"=-
3 Disable DLNA Media Streaming for All Users
This will disable and prevent users from using Option One to turn on media streaming.
A) Click/tap on the Download button below to download the file below, and go to step 4 below.
Disable_DLNA_media_sharing_for_all_users.reg
(Contents of REG file for reference)
Code:
Windows Registry Editor Version 5.00

[HKEY_LOCAL_MACHINE\SOFTWARE\Policies\Microsoft\WindowsMediaPlayer]
"PreventLibrarySharing"=dword:00000001
4 Save the REG file to your desktop.
5 Double click/tap on the downloaded REG file to merge it.
6 When prompted, click/tap on Run, Yes (UAC), Yes, and OK to approve the merge.
7 You can now delete the downloaded REG file if you like.
That’s it,
Shawn Brink
Related Tutorials
- Install or Uninstall Windows Media Player Legacy app in Windows 11
- Allow or Block DLNA Media Streaming Devices in Windows 10 and Windows 11
- Add or Remove Media Server in Windows 11 File Explorer
- Customize DLNA Media Streaming Settings in Windows 10 and Windows 11
- Remove DLNA Media Streaming Device from List in Windows 10 and Windows 11
- Download and Install Media Feature Pack for Windows 11 N Editions
- Connect to Wireless Display with Miracast in Windows 11
- Change DLNA Media Server Name in Windows 10 and Windows 11
-
Disable_DLNA_media_sharing_for_all_users.reg
Disable_DLNA_media_sharing_for_all_users.reg
662 bytes
· Views: 540
-
Default_user_choice_turn_on_DLNA_media_sharing.reg
Default_user_choice_turn_on_DLNA_media_sharing.reg
636 bytes
· Views: 843
DLNA — это специальный программный протокол, который позволяет устройствам, таким как телевизоры и медиа-боксы которые находятся в одной сети, обнаруживать мультимедийный контент, хранящийся на вашем компьютере. Это очень полезно, так как позволяет просматривать коллекцию фильмов и другого медиа, хранящегося в одном месте, с помощью различных устройств. С помощью нескольких кликов мыши вы можете включить встроенный DLNA-сервер в Windows 10 и начать потоковое воспроизведение ваших медиа файлов.
Подробно: DLNA (Digital Living Network Alliance) — это некоммерческая организация по совместным стандартам, которая определяет руководящие принципы совместимости, позволяющие совместно использовать цифровые носители между мультимедийными устройствами. DLNA использует Universal Plug and Play (UPnP) для управления, обнаружения и контроля мультимедиа. UPnP определяет тип устройства, поддерживаемого DLNA («сервер», «рендеринг», «контроллер») и механизмы доступа к медиа через сеть.
Windows 10 включает все, что вам нужно для использования DLNA из коробки: клиент DLNA, (хороший) мультимедийный проигрыватель и DLNA-сервер.
Чтобы включить DLNA Server в Windows 10 , выполните следующие действия.
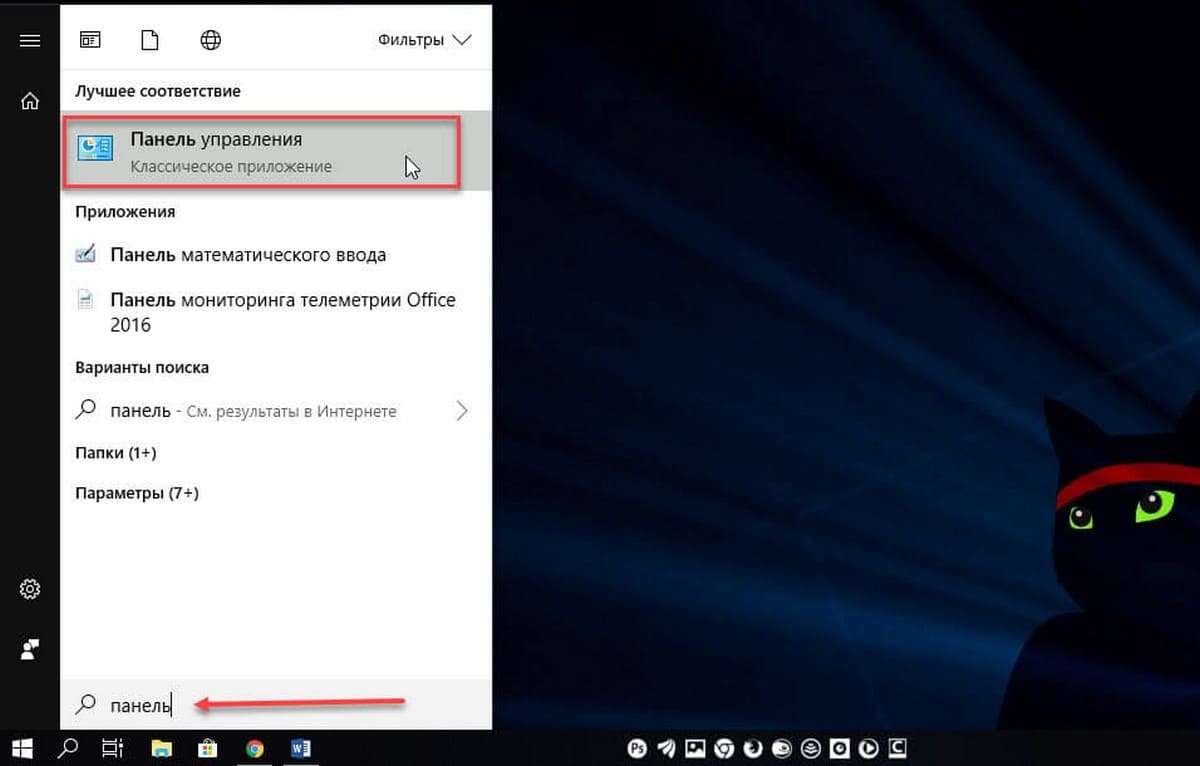
- Откройте классическую Панель управления. Для этого просто откройте меню «Пуск» и начните набирать слово Панель, в отображаемых результатах выберите «Панель управления».
- Перейдите в Панель управления \ Сеть и Интернет \ Центр управления сетями и общим доступом.
- Слева нажмите ссылку «Изменить дополнительные параметры общего доступа».
- В открывшимся окне, разверните раздел «Все Сети».
- Нажмите ссылку- Выберите параметры потоковой передачи мультимедиа… в разделе «Потоковая передача мультимедиа».
- На следующей странице нажмите кнопку Включить потоковую передачу мультимедиа.
- Присвойте имя, для сетевой мультимедийной библиотеки и выберите устройства, которые смогут получать к ней доступ.
Все. Как только вы закончите, ваши личные папки, такие как Музыка, Изображения, Фото и Видео, автоматически станут видимыми для любого потокового устройства с поддержкой UPnP.
Например, я могу просматривать и воспроизводить файлы с помощью своего ТВ с программным обеспечением DLNA для Android.
Встроенный сервер DLNA можно отключить в любое время. Вот как.
Отключить встроенный DLNA-сервер.
Кроме того, вы можете остановить службу, для этого выполните следующие действия:
Нажмите клавиши Win + R, чтобы открыть диалоговое окно Выполнить.
Введите: services.msc и нажмите Enter.
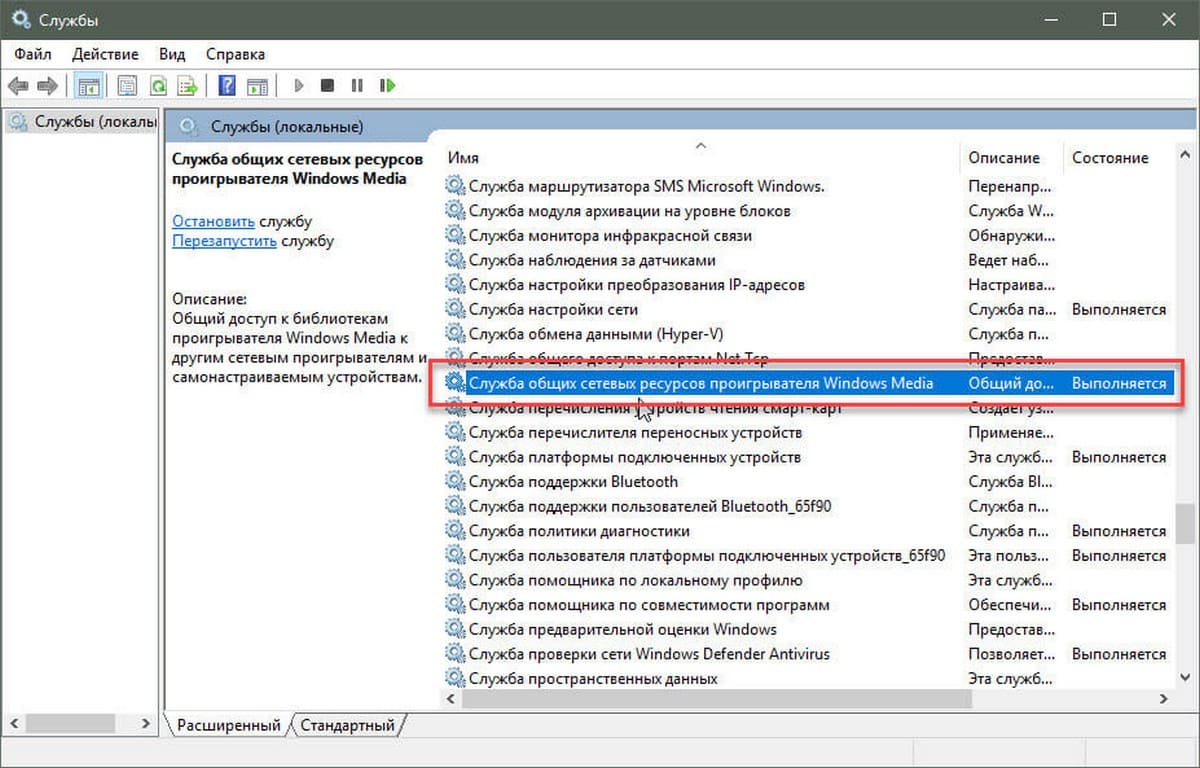
В окне «Службы» найдите службу с именем — Служба общих сетевых ресурсов проигрывателя Windows Media.
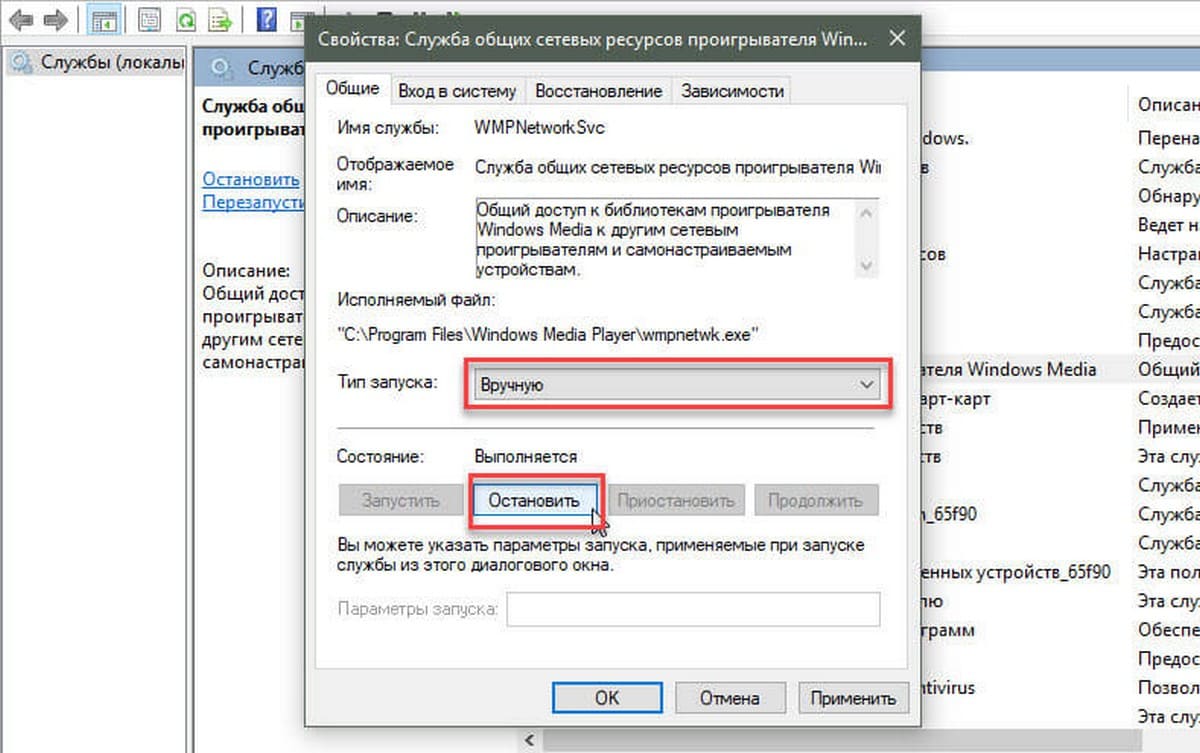
Дважды кликните на ней и установите Тип запуска\ Вручную, теперь нажмите кнопку «Остановить» и «Применить».
Вот и все.
-
Home
-
News
- Full Guide – How to Enable DLNA Server on Windows 10
By Tina |
Last Updated
What is DLNA? How to enable DLNA Server on your computer? How to perform DLNA Windows setup? This post from MiniTool shows how to enable DLNA server. In addition, you can visit MiniTool to find more Windows tips and solutions.
What Is DLNA?
DLNA, whose full name is Digital Living Network Alliance, is a special software protocol that allows some specific devices such as TVs or media boxes on your network to discover media content stored on your computer. This feature would be very useful because it allows you to browse your media collection stored in one place with various devices.
The DLNA feature also makes it easy for you to set up a device to stream videos, photos, and music with other DLNA supported devices on the network.
However, do you know how to enable DLNA Server or how to perform DLNA Windows setup? If you do not know, keep on your reading and we will show you the guidelines to enable DLNA media server.
How to Enable DLNA Server in Windows 10?
In this section, we will show you how to enable this Windows media Server.
Now, here is the tutorial.
1. Open Control Panel.
2. Then click Network and Internet.
3. In the pop-up window, click Network and Sharing Center to continue.
4. Then click Change advanced sharing settings on the left panel.
5. Next, expand the All networks section.
6. Then click Choose media streaming options.

7. On the next page, click Turn on media streaming.

8. Then name your network multimedia library and choose devices which will be read to it.
Once all steps are finished, your personal folders such as Music, Pictures, and videos will automatically become visible to any streaming devices with UPnP support.
If you want to stream videos, music or pictures files, just add them to the Videos, Music or Picture libraries. There is no need for you to move the files to the current library folder. Instead, you can choose to add folders to the libraries and then add the files to the created folder.
Besides the DLNA server to stream videos, pictures or music, you can use the third-party DLNA. There are a lot of media servers on the market, which may allow you to stream more files. For example, the Universal Media Server would be a good choice.
From the above information, you have known how to enable DLNA Server on your computer. However, if you do not want to use the DLNA media server any more, do you know how to disable it?
So, in the following section, we will show you how to disable the DLNA media server on your computer.
How to Disable DLNA Server on Windows 10?
At this section, we will show you how to disable the DLNA media server.
Now, here is the tutorial.
- Press Windows key and R key together to open Run dialog.
- Then type services.msc in the box and click OK to continue.
- In the Services window, scroll down to find Windows Media Player Network Sharing Service.
- Then double-click it.
- In the pop-up window, change its Startup type to Disabled and stop the service.
- At last, click Apply and OK to save the changes.

After all steps are finished, the DLNA Server has been disabled.
Final Words
After reading this post, you have known how to enable or disable the DLNA Server on your computer. If you have any different ideas for DLNA Windows setup, you can share it in the comment zone.
About The Author
Position: Columnist
Tina is a technology enthusiast and joined MiniTool in 2018. As an editor of MiniTool, she is keeping on sharing computer tips and providing reliable solutions, especially specializing in Windows and files backup and restore. Besides, she is expanding her knowledge and skills in data recovery, disk space optimizations, etc. On her spare time, Tina likes to watch movies, go shopping or chat with friends and enjoy her life.