
Проводник Windows: отключить быстрый доступ в Windows 10
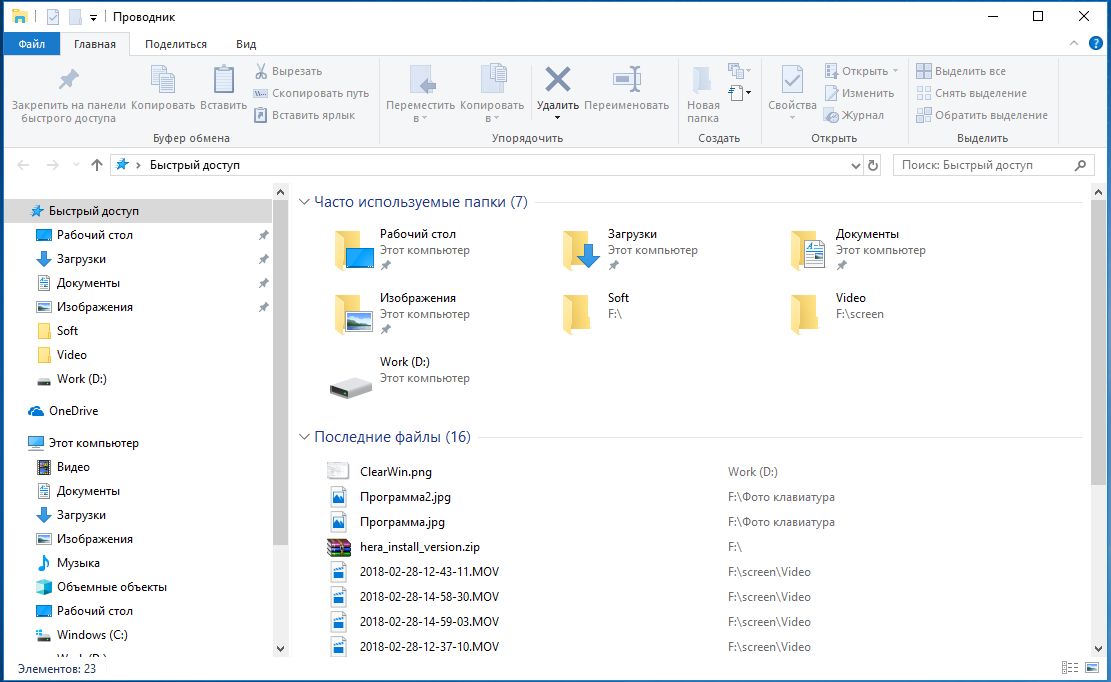
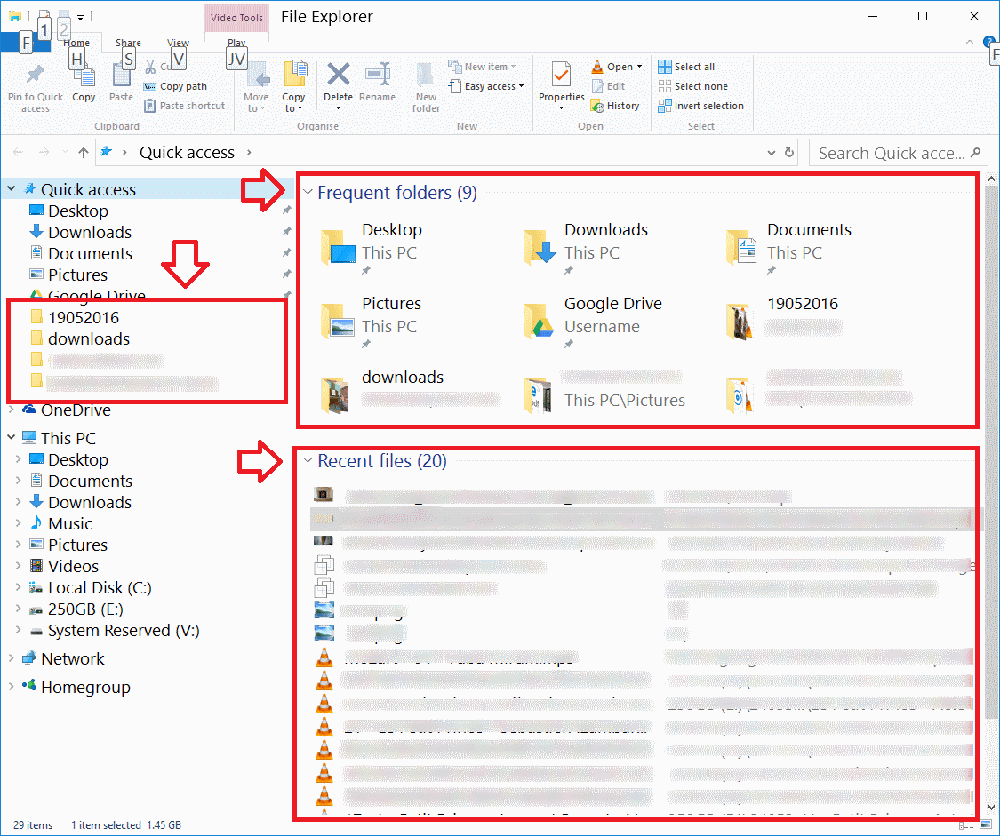
Новый быстрый доступ в Windows 10 состоит из трех частей: наиболее часто используемых папок, вручную закрепленных документов и последних файлов. Если вы хотите сохранить свои закрепленные папки, то можете скрыть только две новые категории:
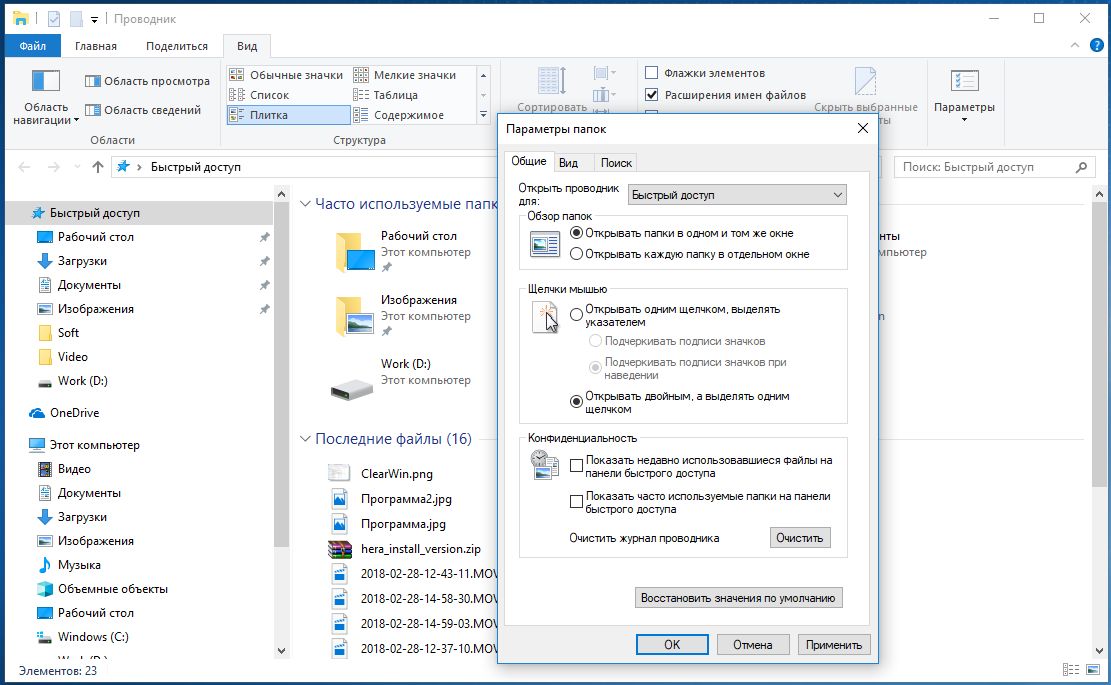
Запустите Проводник Windows 10 с помощью комбинации клавиш [Win + E]. Вверху перейдите на вкладку «Вид» и нажмите «Параметры». В разделе «Конфиденциальность» снимите флажок «Показать недавно используемые файлы на панели быстрого доступа» и «Показать часто используемые папки на панели быстрого доступа». Наконец, сохраните настройки с помощью «ОК».
Полностью удалить быстрый доступ через реестр
Если вы также хотите удалить свои закрепленные папки, вам нужно глубже войти в систему:
Во-первых, настройте Проводник так, чтобы он запускался с папки «Мой компьютер», а на с «Быстрого доступа». В противном случае позже появится сообщение об ошибке. Теперь нажмите комбинацию клавиш [Win + R] и введите команду «regedit».
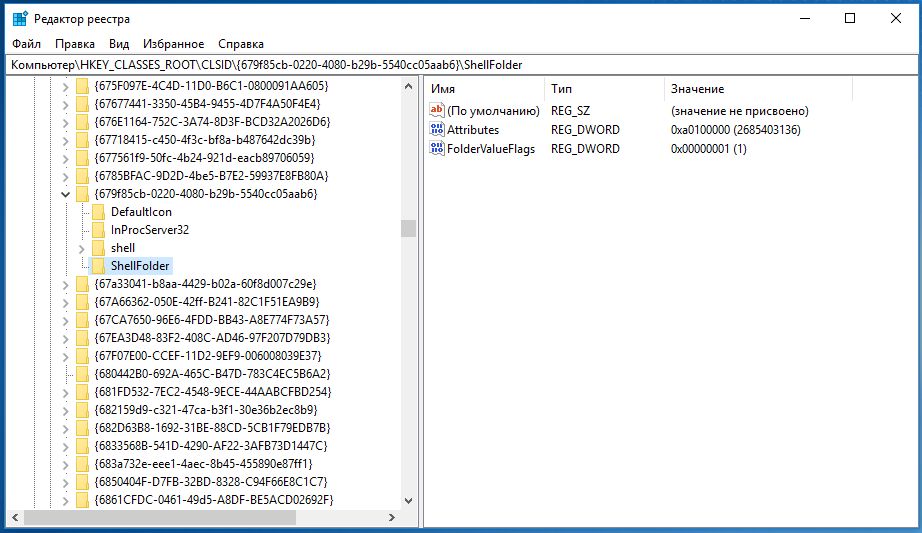
Подтвердите запрос управления учетной записью пользователя с помощью «Да». В редакторе реестра перейдите к пути «HKEY_CLASSES_ROOT\CLSID\{679f85cb-0220-4080-b29b-5540cc05aab6}\ShellFolder». Если ключ ShellFolder не существует, щелкните правой кнопкой мыши на предыдущей папке и выберите «Создать»> «Ключ». В качестве имени введите «ShellFolder».
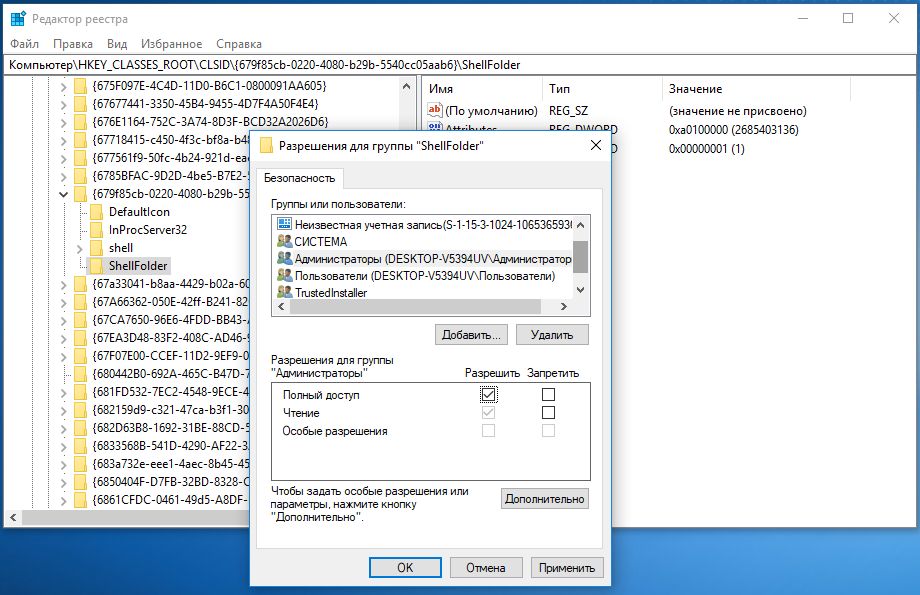
Щелкните правой кнопкой мыши на ключ ShellFolder и выберите «Разрешения». В приведенном выше списке нажмите «Администратор» и ниже активируйте «Полный доступ». Повторите этот шаг для записи «Пользователь». Сохраните настройки с помощью «ОК». В нашем случае система отказала нам в доступе, т.к. запись «Attributes» (см. ниже) у нас уже существует.
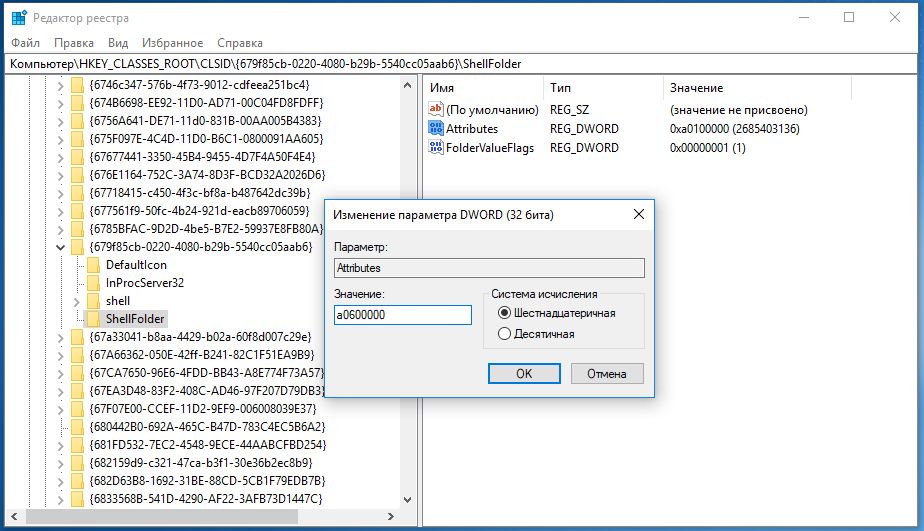
Теперь щелкните правой кнопкой мыши на пустой области в правой части и выберите «Создать»> «Значение DWORD (32-бит)». Введите «Attributes» в качестве имени и «a0600000» в качестве значения. Если эта запись уже существует, просто дважды щелкните ее и измените значение.
Затем запустите диспетчер задач с комбинацией клавиш [Ctrl] + [Shift] + [Esc].
Здесь вы найдете пункт «Проводник Windows». Нажмите «Перезагрузить» в нижнем правом углу. Быстрый доступ исчез.
Читайте также:
- Как открывать новые папки в Проводнике Windows 10 в отдельном окне
- Как включить отображение размера папок в Проводнике Windows
Фото: компании-производители
Windows 10 shows you the frequently accessed folders and recent files in the Quick access view when you open File Explorer. While this feature can be useful if you need quick access to your frequent resources, it might also be an annoyance if you are using a shared computer, and you do not want other people to see what you are doing on the same computer. These lists can be cleared manually or hidden permanently. Read on to learn how to it is done:
NOTE: This guide covers Windows 10. If you do not know the version of Windows that you have, read What version of Windows do I have installed?.
How to clear the Recent files and Frequent folders in File Explorer
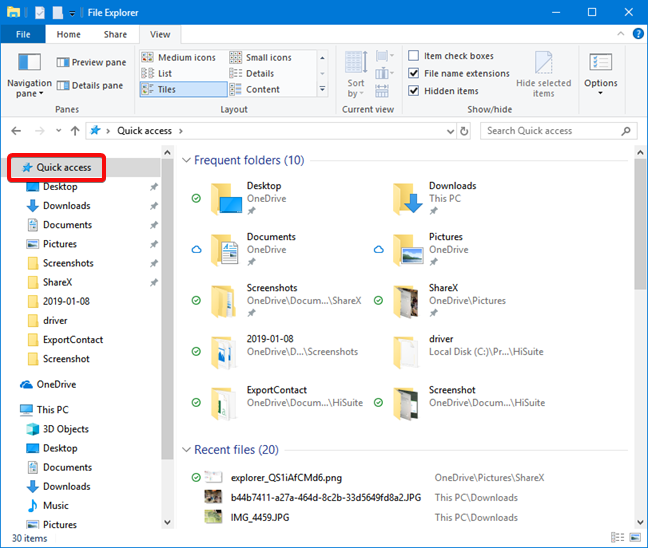
By default, the Quick access section in the navigation panel on the left side of File Explorer, always displays the recent files that you have used and the frequent folders that you open when working on your Windows 10 PC.
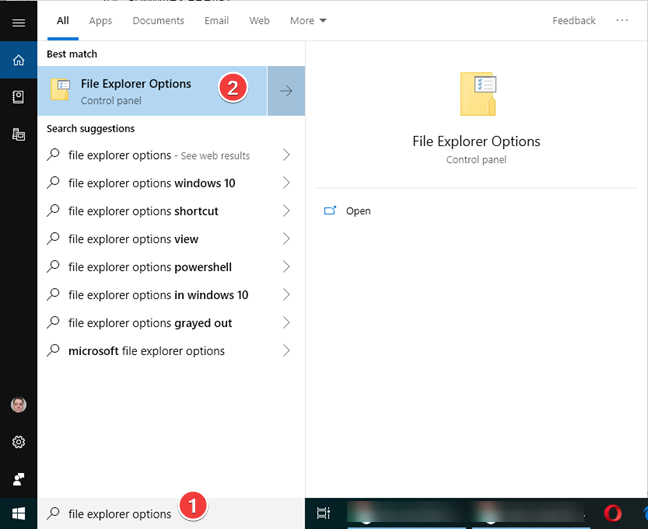
You may want to clear the recent files in Windows 10 and the list of frequent folders, as a temporary choice. You can do that, but, then Windows 10 starts to build up the lists again, based on your usage of File Explorer. If you want to do this, you clear these lists from File Explorer Options (or Folder Options). One easy way to open this window is to search using «file explorer options» in the search box near the Start Menu. Click or tap File Explorer Options in the list of search results.
For all the ways to open File Explorer Options, read 8 ways to open the Folder Options window, in Windows (all versions).
In the File Explorer Options window, on the General tab, identify the Privacy section. Click or tap the Clear button, and then OK to close the window.
The recently used files and frequently used folders lists are cleared. If you have a File Explorer window open, the clearing is visible right away. Otherwise, you see the effect the next time you open the Quick access view in File Explorer. The clearing does not affect the files and folders pinned to Quick access. The only way to eliminate them from the Quick access view is to unpin them. Read this article if you want to learn how to view, pin and unpin items to Quick access.
How to hide Recent files and Frequent folders in File Explorer
If you need to get rid of the lists with recent files and frequent folders, you may be better served by hiding these lists altogether. Once you hide them, they never show up again, and you do not need to worry about clearing the lists all the time.
Just like the clearing, the hiding is done from File Explorer Options (or Folder Options). In the General tab, look for the Privacy section. Uncheck the «Show recently used files in Quick access» and «Show frequently used folders in Quick access» and press OK to close the window.
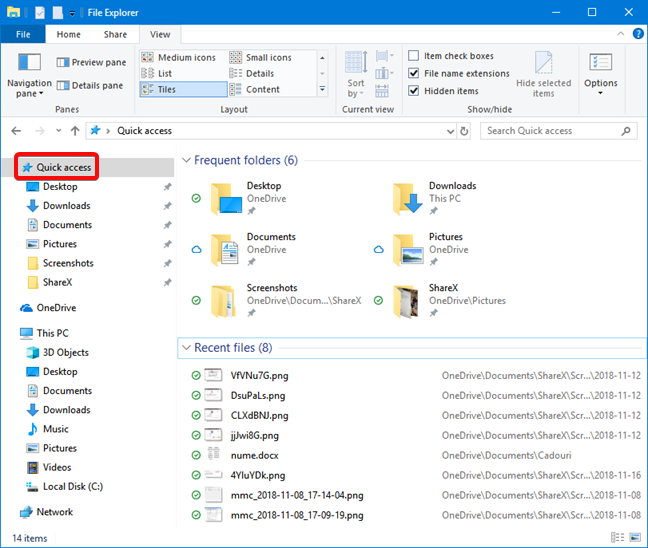
The effect is immediate in File Explorer.
How to clear individual items from Recent files or Frequent folders
You can also eliminate individual items from Quick access, without clearing all your recent files or frequently used folders. If you want to retain the majority of the lists and get rid of a couple of items only, then you do not need to clear the entire list. However, those items may show up again in the future, if you use them again. Here is how it is done:
First, open File Explorer, and open the Quick access view by clicking or tapping on it.
Identify the file or folder that you want to delete from the list of recent files of frequent folders, and right-click or tap and hold on it. Choose «Remove from Quick access» in the menu that opens.
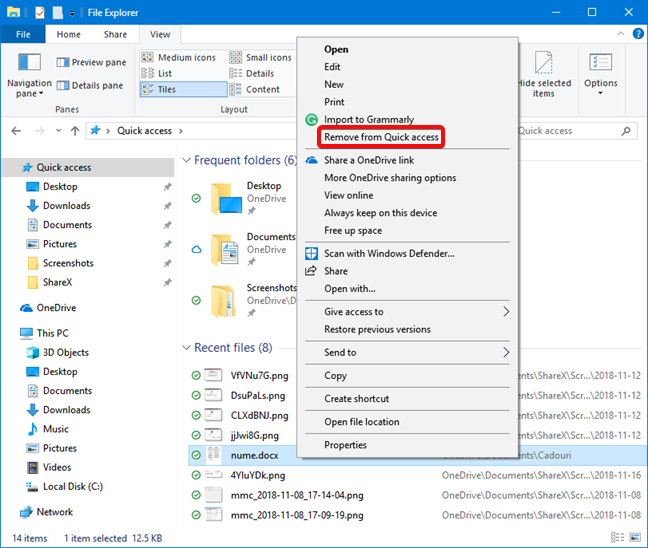
The file or folder is eliminated from the list immediately.
Do you have any concerns regarding privacy when using files and folders in Windows 10?
Now that you know how to hide recent files and frequently used folders from File Explorer, you should be able to make better use of this option and configure it according to your preferences. Before closing this tutorial, tell us your reason for clearing recent files and frequent folders, from File Explorer. Are you concerned about your privacy or there is another reason for this choice?
When you open files or folders Windows 10 keeps a history so it can list your ‘Recent Items’ (recently opened files) and ‘Frequent Folders’ (folders you use a lot).
These are listed under ‘Quick Access’ in File Explorer– which happens to be the default folder when you open the File Explorer, as well listing the ‘Frequent Folders’ in the navigation pane.
There are two options available for manging these lists — manually clearing the history (leaving the history still working), completely disabling the feature, and if you have Windows 10 Pro you can completely disable it using the registry editor.
Method 1: Manually clear the Recent Items and Frequent Folders history
To manually clear the history
- Press the Windows button + R on your keyboard — this will open the Run window
- Copy in the following path and click ‘OK’
-
%AppData%\Microsoft\Windows\Recent
- Now select all and delete all items — remember to empty the Recycling Bin if you don’t want this history to be easily restored.
Method 2: Disable the Recent Items list
This is the process Windows 10 Home users will need to use.
Note: It will only disable the ‘Recent files’ list — NOT ‘Frequent folders’.
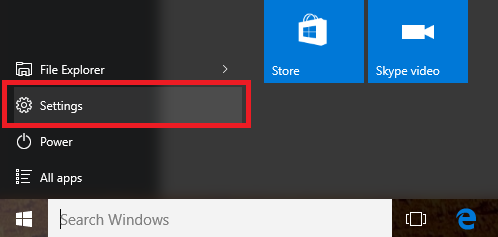
- Click on the Windows Start button then open ‘Settings’ (the cog icon)
-

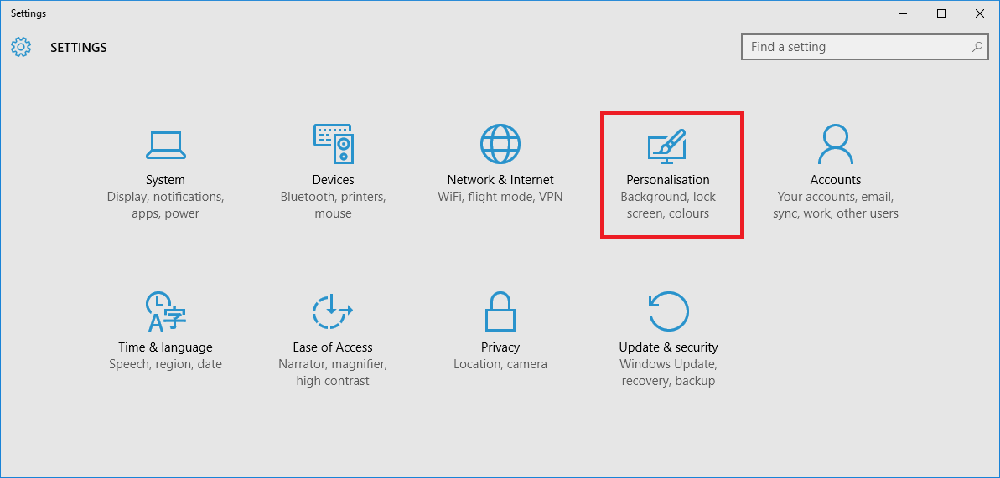
- Click on ‘Personalisation’
-

- Click on ‘Start’ in the left hand menu
- Scroll to the bottom of the list of settings and turn ‘Show recently opened items in Jump Lists on Start or the taskbar’ to ‘Off’
-
- You can now close the window

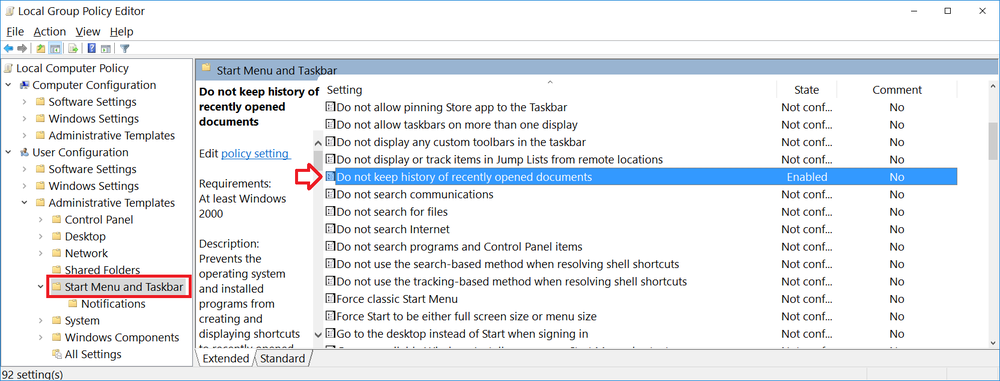
Method 3: Disable the Recent Items and Frquent Folders list using the Registry Editor
Note: this will only work for Windows 10 Pro — the registry editor is not built into Home edition.
- Press the Windows button + R on your keyboard — this will open the Run window
- Copy in the following command and click ‘OK’
-
gpedit.msc
- Navigate to the following path
- UserConfiguration -> Administrative Templates -> Start Menu and taskbar
- In the list of settings, find ‘Do not keep history of recently opened documents’
- Double click to edit and change to ‘Enabled’
-

This article explains how to turn off recent files in File Explorer on Windows 11.
For those who share their computer with others or use it publicly, disabling recent files is a key step in maintaining your privacy. It prevents others from seeing what you have been working on, ensuring your personal and professional information remains secure.
Disabling this feature can help reduce clutter in your Start Menu and File Explorer, making it easier to find the files you are looking for without distractions
Disable recent files in File Explorer
As mentioned, you can disable recent files and folders in File Explorer on Windows 10.
Here’s how to do it
First, open File Explorer.
When File Explorer opens, click the View tab, then Options, as shown in the image below.
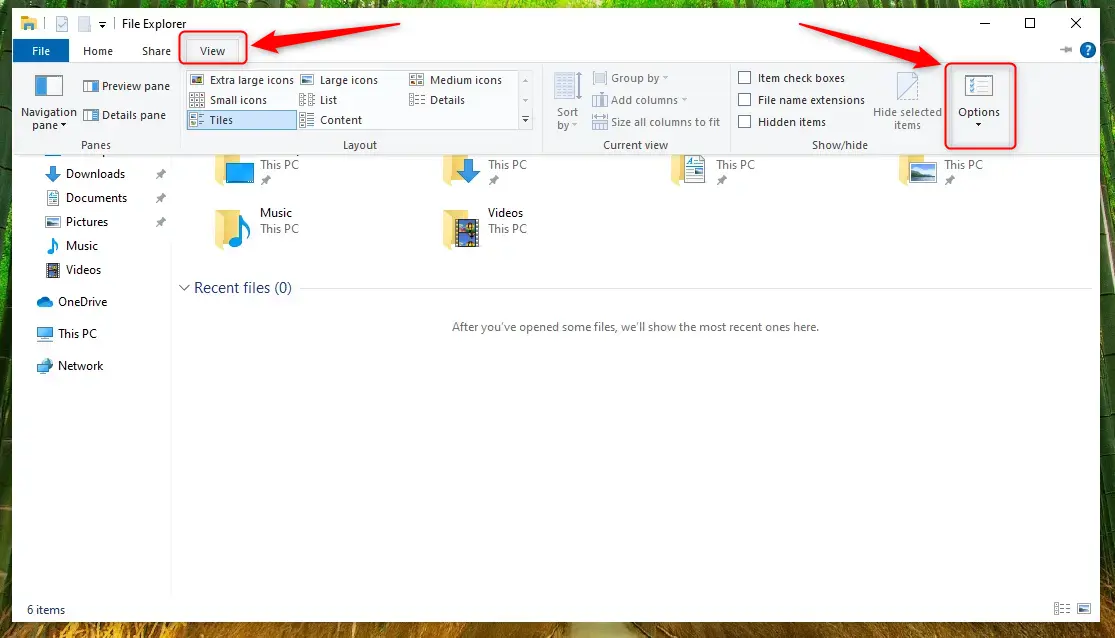
On the ‘Folder Options‘ window, select the ‘General‘ tab. Under the ‘Privacy‘ section, uncheck box items:
- Show recently used files in Quick access
- Show frequently used folders in Quick access
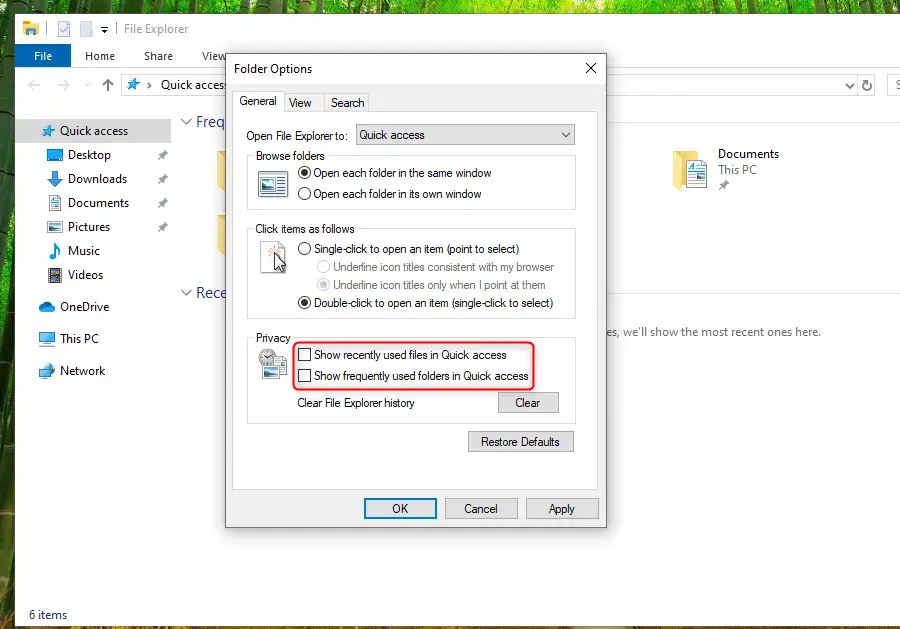
While there, also click the Clear button to delete the File Explorer history of existing listings.
Click the OK button to save your changes.
That’s it!
Conclusion
Disabling recent files in File Explorer on Windows 11 can significantly enhance your privacy and streamline your user experience. Here are the key takeaways:
- Prevents unauthorized access to your recent documents and folders.
- Helps maintain your personal and professional information confidentiality.
- Reduces clutter in File Explorer and the Start Menu for easier navigation.
- Simple steps enable you to customize your File Explorer settings effectively.
By following the outlined procedures, you can ensure a more secure and organized workspace on your Windows 11 device.
Как отключить отображение часто используемых файлов и папок в панели быстрого доступа «Проводника»
Windows 10 знает, какие файлы и папки используются в компьютере чаще других.
Операционная система, чтобы упростить жизнь пользователю, начинает отображать их в панели быстрого доступа «Проводника», а также первыми предлагает их названия в его адресной строке. Пользователь может в любой момент удалить эти элементы вручную, но мы предлагаем альтернативный вариант – запретить системе показывать их в блоке быстрого доступа. Что для этого нужно сделать:
- В «Проводнике» вызовите меню «Файл» – «Параметры» – «Общие»;
- Снимите галочки с обоих пунктов в блоке «Конфиденциальность».
- Нажмите кнопку очистки журнала «Проводника».
Все, теперь «Проводник» выглядит так, как и после установки Windows версии 10. Если у вас есть другие проблемы или компьютерные вопросы по домашней или офисной технике, задайте их специалистам IT-Relax.