

In this post we’ll learn the steps to disable firewall in Windows Server 2012 R2. Security was always an area of concern for Microsoft Operating Systems, therefore Microsoft enhanced the security for all the new Operating Systems by enabling Firewall. It is enabled by default when you install the Windows Server 2012 R2. You would not be able to ping the computer on which firewall is enabled.
We would not recommend to disable the firewall for security reason but if you are using hardware firewall at organizational level and don’t want Software firewall to be enabled then follow the steps given below to disable Windows firewall on 2012 R2, you can follow the same steps for Windows Server 2008, Windows 8, etc.
Domain Controller Vs Member Server Vs Client
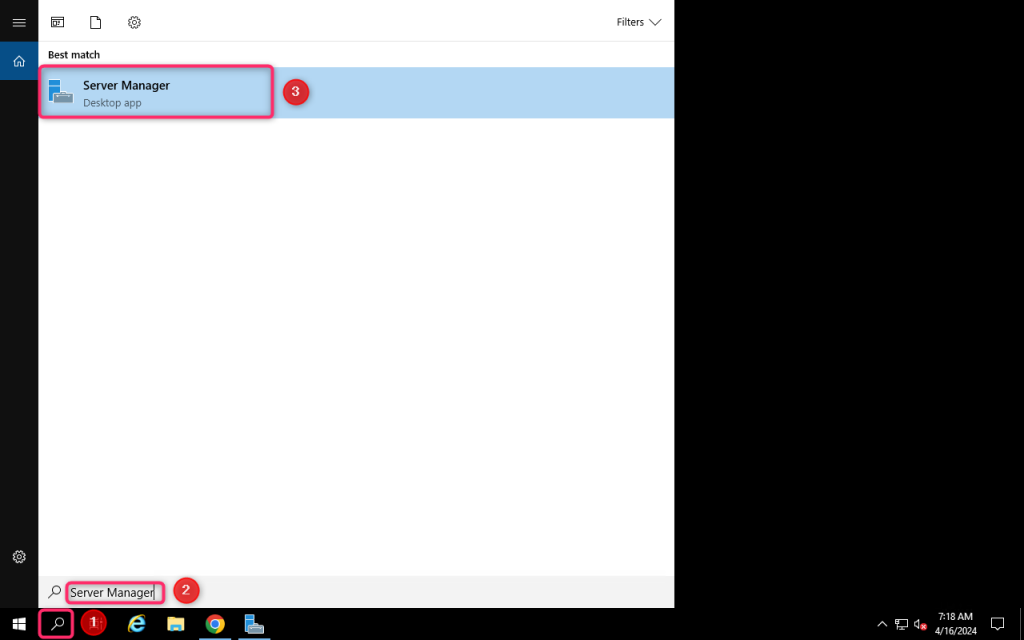
1. Click start menu and click on the icon of Server Manager.
2. It opens the server manager then, click on “tools”.
What is FSMO Roles and Steps To Transfer FSMO Roles
3. Select the option “Windows Firewall with Advanced Security” from the given options.

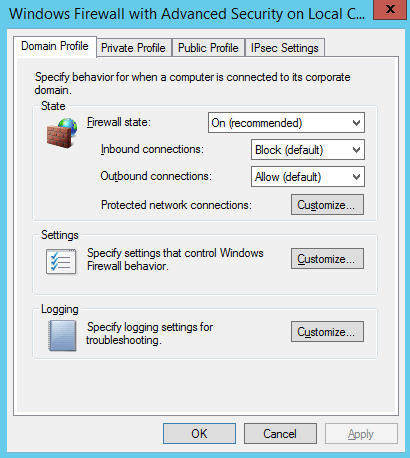
4. In Advanced Security window we can see Domain Profile, Private Profile and Public Profile, we have to disable all three of them. Click on “Windows Profile Properties”.
a) Domain Profile: It is used for the domain environment.
b) Private Profile: It is used for the network at home or at work where you know and trust the people.
c) Public Profile: It is primarily for the networks at public places e.g. airports, coffee shops, etc.

5. To disable the domain profile, drop down the firewall state and select “off”.
6. To disable the private profile, click drop-down and select “off”.

7. To disable the public profile, click drop-down and select “off”.

8. Here you can verify that all profiles are disabled. However, if you don’t want to disable all the profiles then you can even create inbound and outbound firewall rules. We’ll talk about those options in upcoming articles. We can even use Group Policy to apply firewall settings.

9. As we are done with the steps, now you can open a command prompt and try to ping the server and check if communication is working or not.
Hope you understood all the steps that we have listed on this article to disable Windows Server Firewall on 2012 R2. Feel free to leave your suggestions and comments in the below mentioned comment section. Besides that please confirm if you are using Hardware Firewall or Software Firewall in your Organization.
This tutorial explains how you can turn of the Windows Firewall on Windows Server 2012 R2
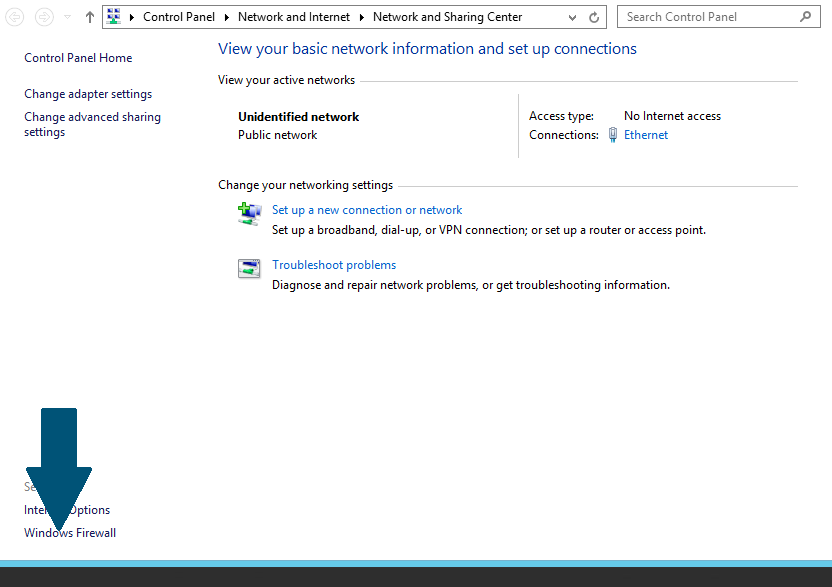
Step 1:On a task bar, locate a computer icon and right click it. Scroll to Open Network and Sharing Center and click it.

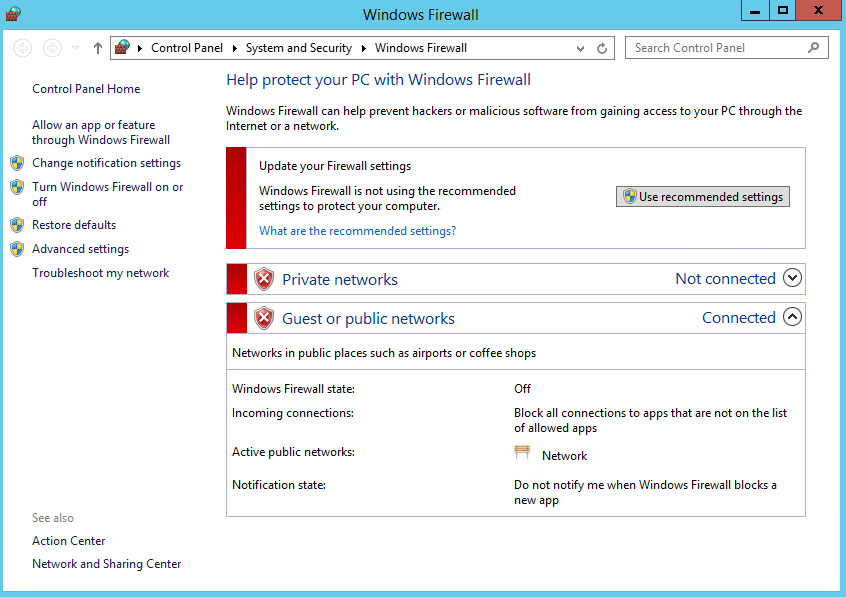
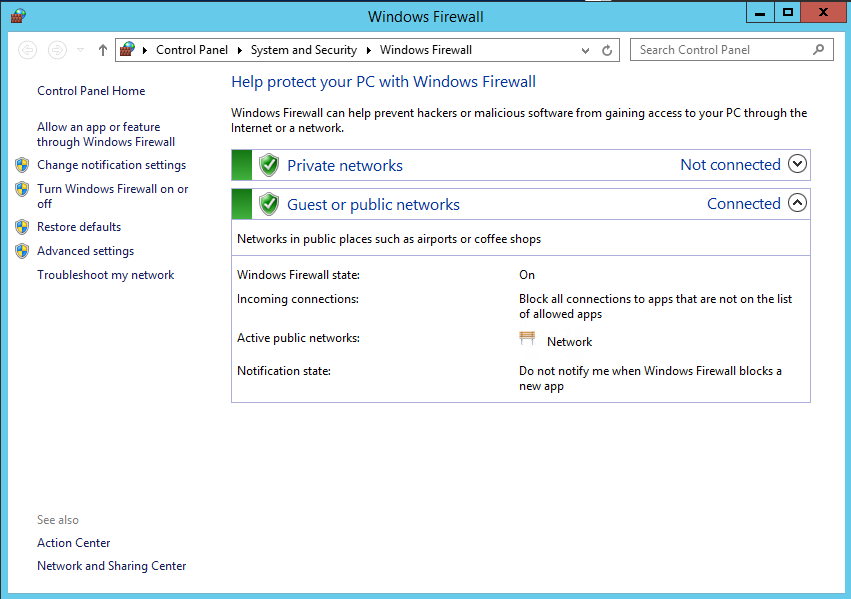
Step 2: Click Windows Firewall
Step 3: Click Turn Windows Firewall on or off

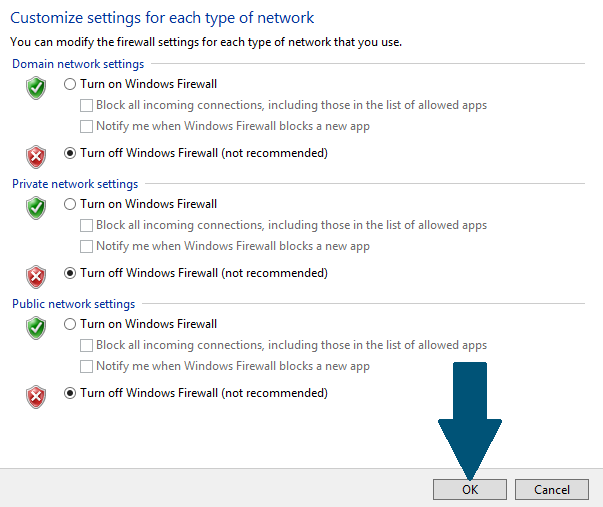
Step 4: Choose Turn off Windows Firewall from Domain network settings, Private network settings and Public network settings and click OK to finish turning off firewall
In this article, we will learn that how we can disable the firewall in windows server although disabling a firewall is not a good option until and unless you are in an organization that is using hardware firewall all over the organization and you are working as a network administrator so you have decided to disable the software firewall.
Windows firewall with advanced security is a host-based firewall which means that it is located between the boundary of internal and external network and it can provide the variety of services. By default, the firewall is enabled in windows server so let’s begin with the procedure, the first log into the windows server as in this case we will disable the firewall in windows server 2012 R2.
Open the server manager either from the taskbar or search it by pressing the windows button. Once server manager is opened click on tools.

Scroll down and click on “windows firewall with advanced security” and it will open up a new window console.


As there are three types of profile showing up in windows firewall with advanced security so we will have to disable all of them. Click on windows profile properties in overview tab. It will open up a new windows console.

Domain Profile tab is automatically selected and it is that profile which is used for a domain environment. Click on the drop down option against firewall state and select off.

Click apply and select the “Private Profile” tab as the private profile is used for a network where you work or you can trust.

Click on drop-down option against firewall state and select off.

Click apply and select the last “Public Profile” tab as its name is suggesting this profile is used for the networks at public places.

Click on drop-down option against firewall state and select off.

Click apply and then press “Ok” to close the window and this is how we can disable the firewall on windows server.
Muhammad Imran Habib
Imran is a technology evangelist with 8 years of experience working with some of the Industry leading companies. Imran’s expertise includes On-Prem/Virtual Infrastructure deployments, IT Solutions for SMEs, End User Computing Support.
If you want to disable/enable Firewall in Windows server, there are 2 basic methods to do it. Please follow the method that is easier for you
Method 1. Via Server Manager
1.1 Disable Windows Firewall via Server Manager
If you want to disable Windows Firewall, please follow the following steps in 1.1
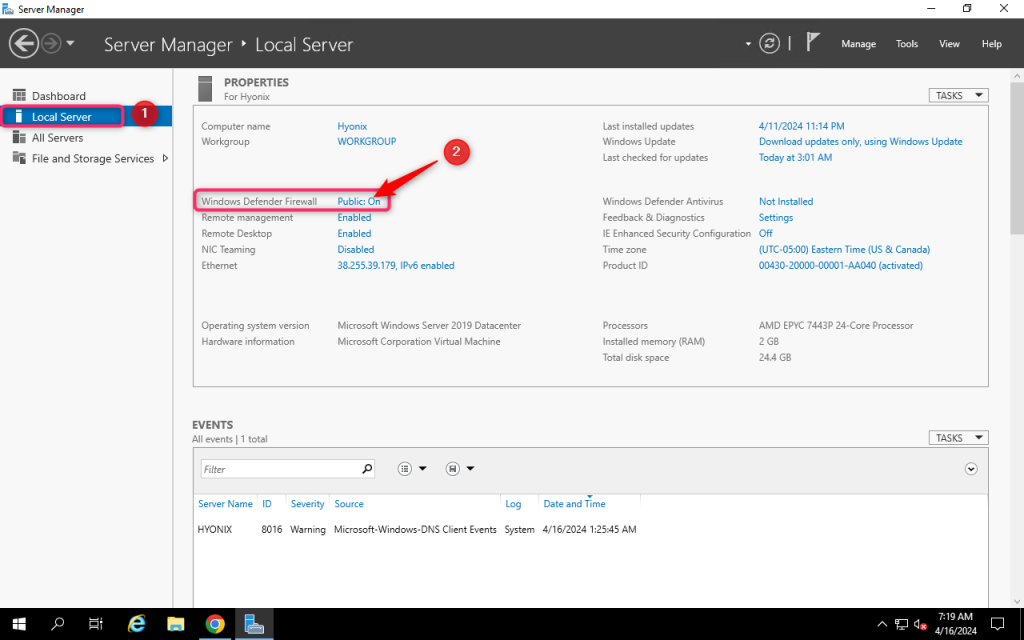
Step 1: Login to your Windows server, search and open Server Manager
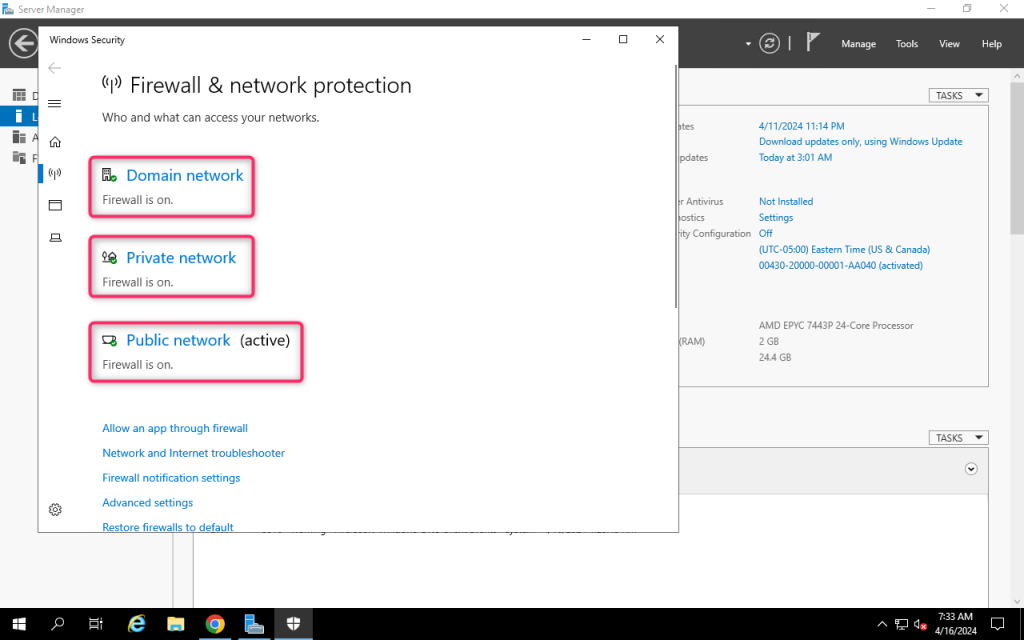
Step 2: Navigate to Local Server tab and Click on Public: On from Windows Defender Firewall
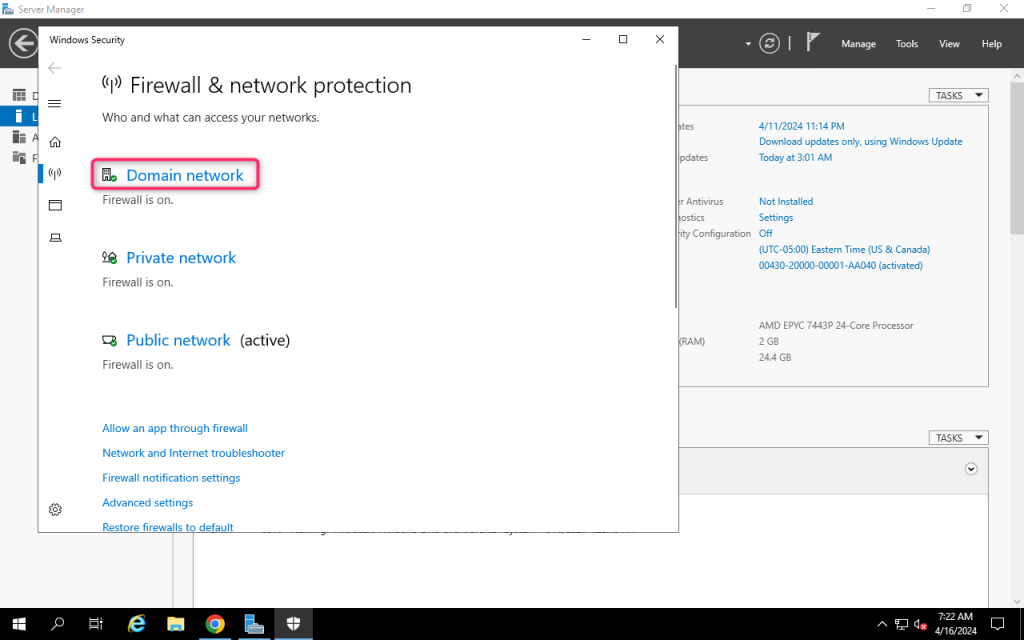
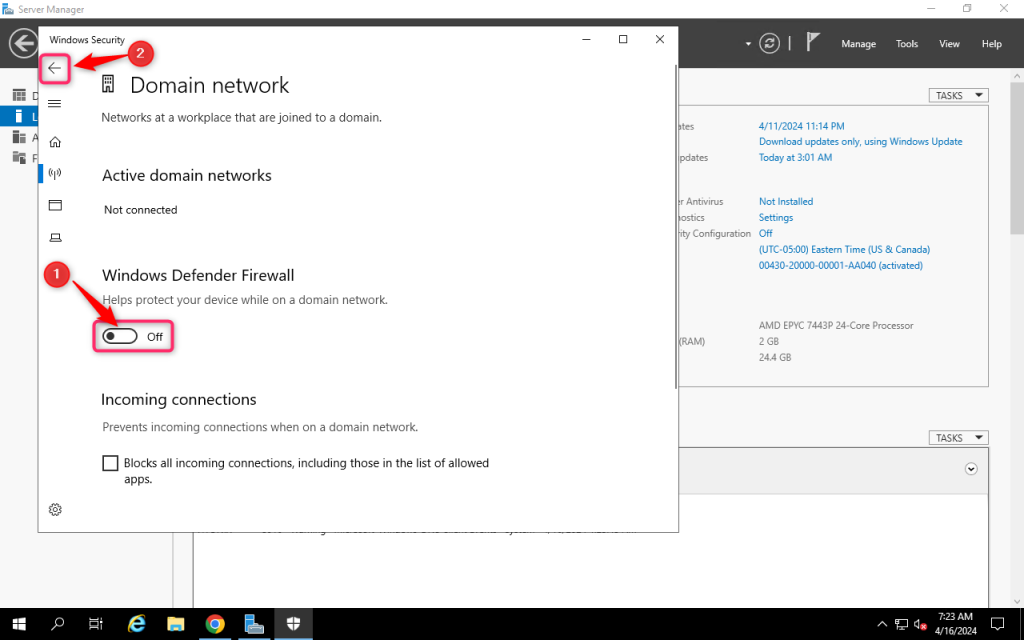
Step 3: Click on Domain Network, turn off Windows Defender Firewall, then go back
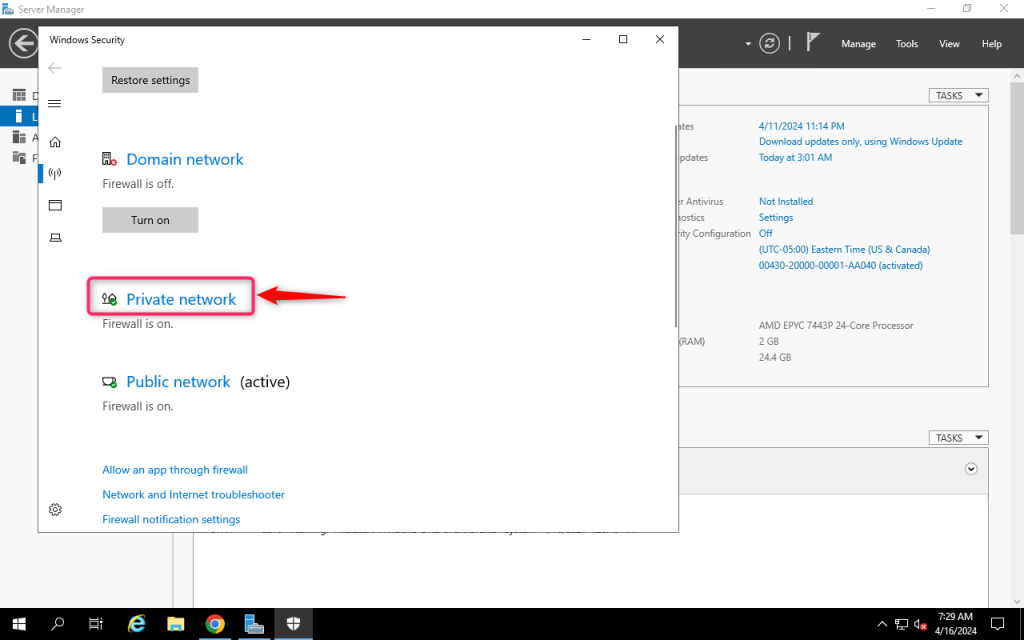
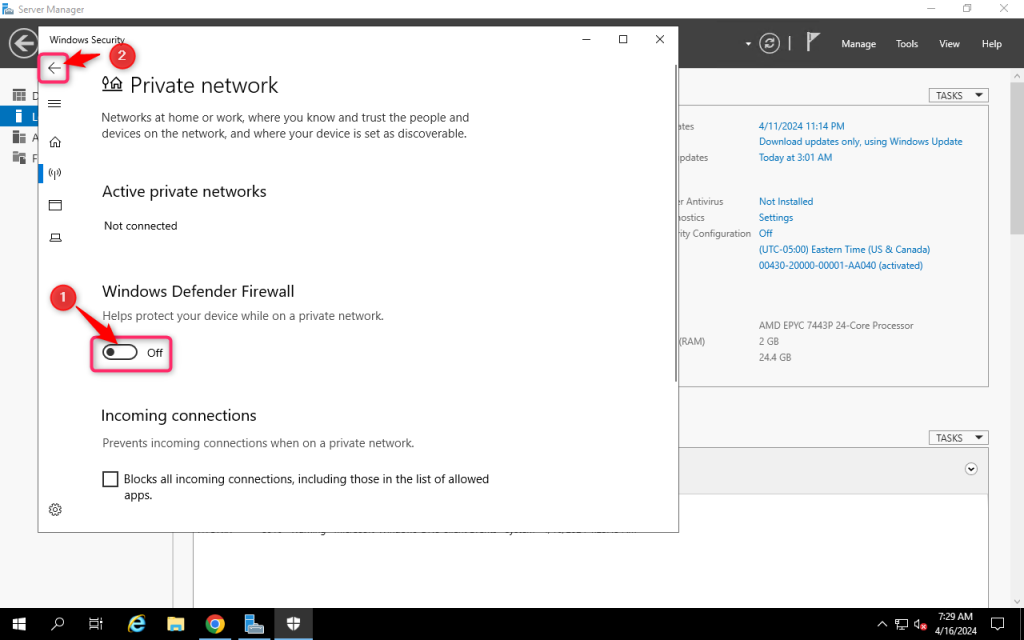
Step 4: Click on Private Network, turn off Windows Defender Firewall, then go back
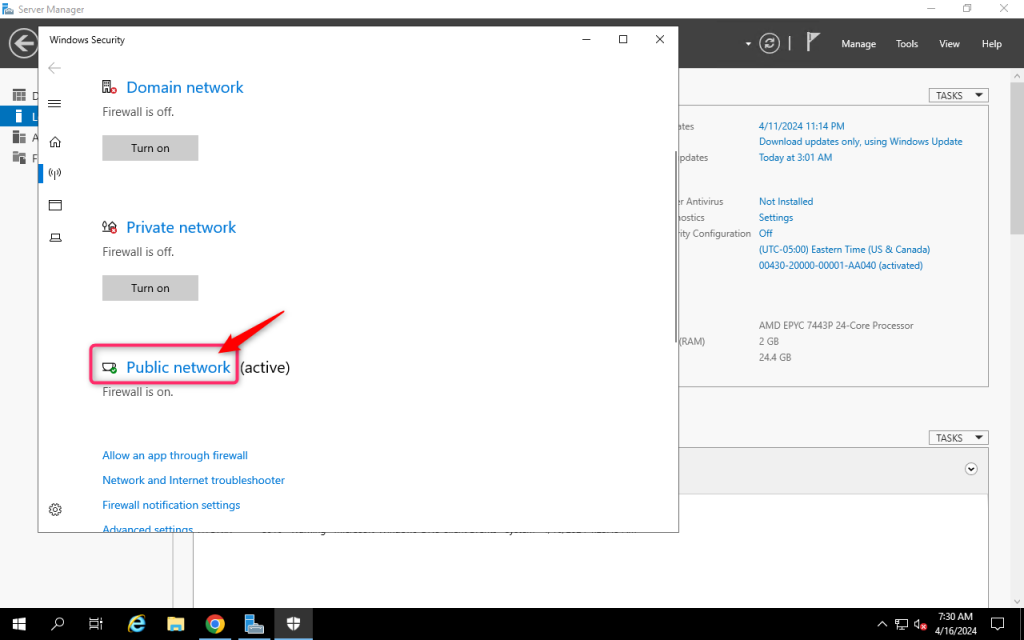
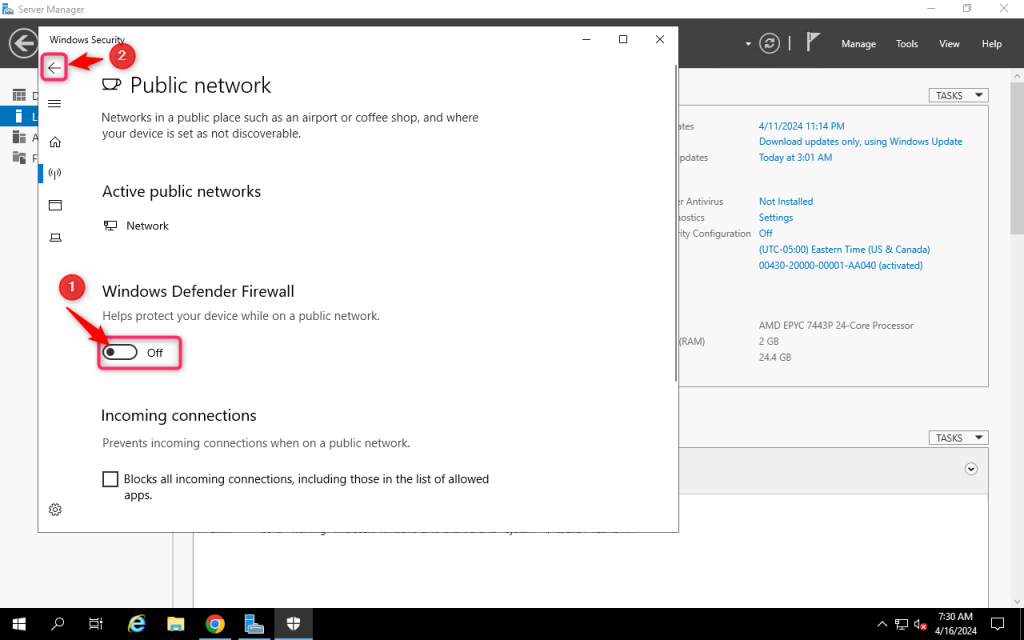
Step 5: Click on Public Network, turn off Windows Defender Firewall, then go back
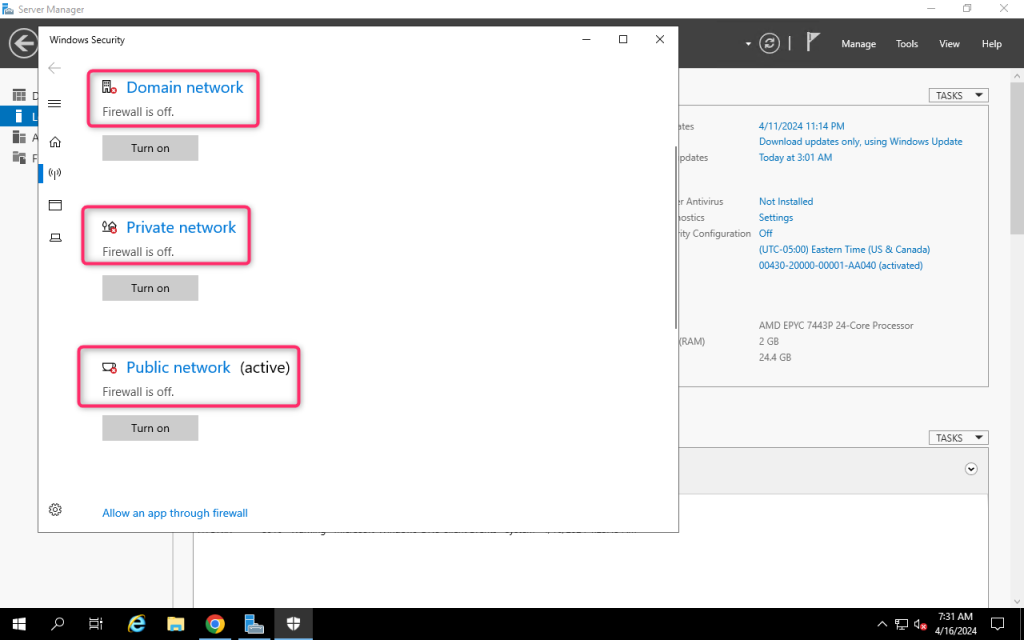
Your server Windows Firewall (Domain Network, Private Network, Public network) is now disabled
1.2 Enable Windows Firewall via Server Manager
If you want to enable Windows Firewall, please do the same when disabling Windows Firewall as above but instead of disabling it, please enable it
Method 2. Via PowerShell
2.1 Disable Windows Firewall via PowerShell
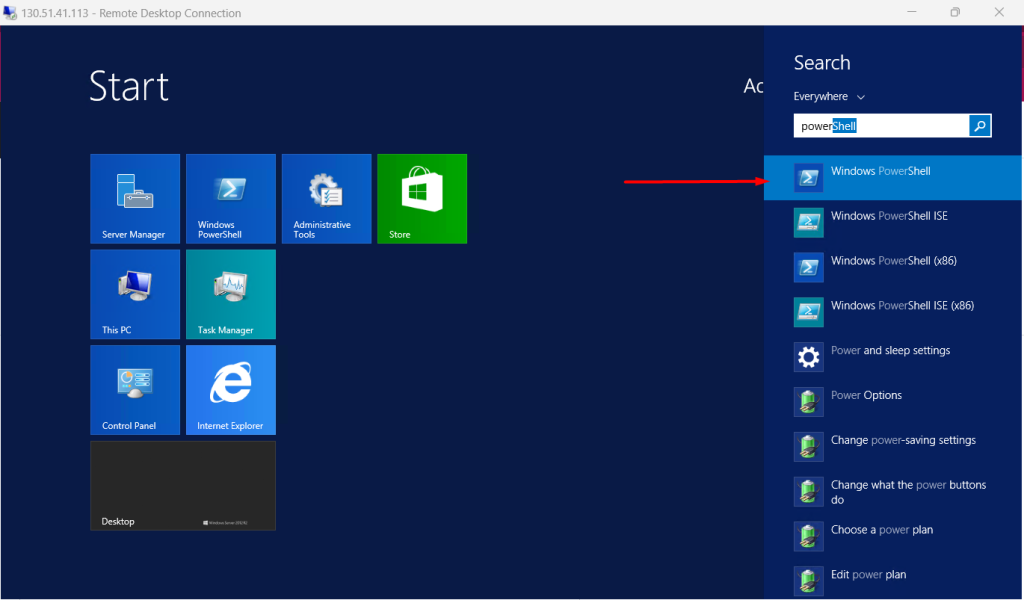
Step 1: Login to your Windows server and open Windows PowerShell
Step 2: If you want to DISABLE Firewall, please run the following command:
Set-NetFirewallProfile -Profile Domain,Public,Private -Enabled false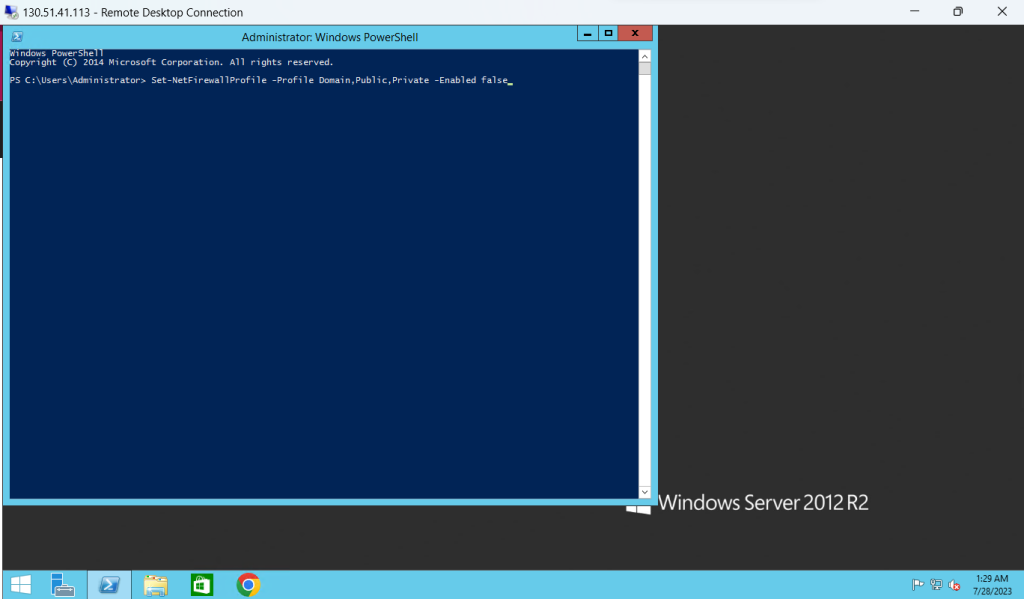
Then hit enter, you will see Firewall is now disabled
2.2 Enable Windows Firewall via PowerShell
Step 1: Open Windows PowerShell
Step 2: If you want to ENABLE Firewall, please run the following command:
Set-NetFirewallProfile -Profile Domain,Public,Private -Enabled true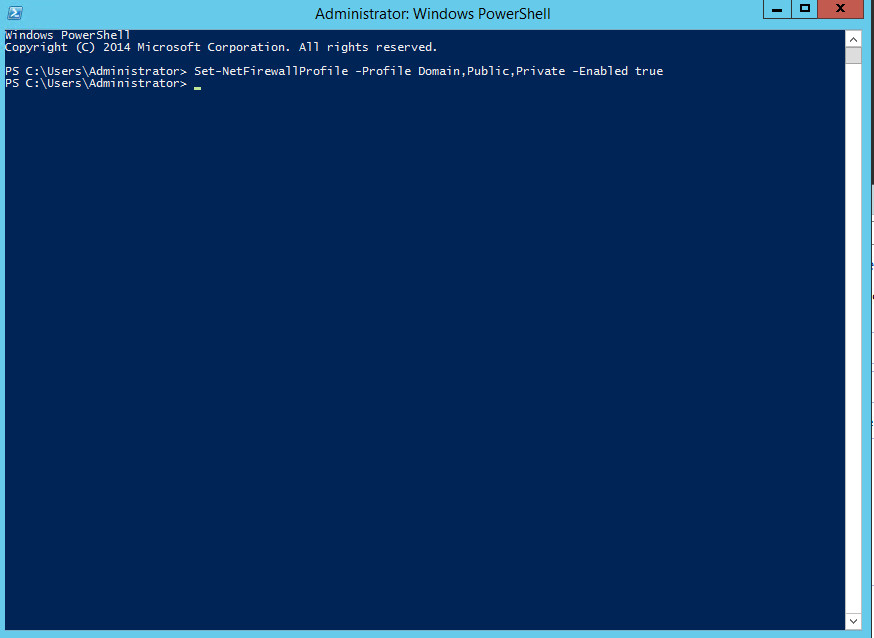
Then hit enter, you will see Firewall is now Enabled
In Windows Server 2012 or Windows Server 2012 R2, we can disable Windows Firewall by PowerShell. By default, all profiles of Windows Firewall are «Enabled«.
To disable Windows Firewall in one of the profiles, we can perform «Set-NetFirewallProfile -Enabled false — Name Public -PassThru» to disable firewall in «Public» profile.
To disable Windows Firewall in all profiles, we can perform «Get-NetFirewallProfile | Set-NetFirewallProfile -Enabled false -PassThru«.
For more information:
This posting is provided “AS IS” with no warranties, and confers no rights!