
Windows 11 comes with a new design language, and I really like most of the visual changes. But the annoying language switcher present in the Windows 11 Taskbar ruins the whole minimal look for me. That’s why I prefer to hide the Taskbar in Windows 11 or use the TaskbarXI app to get a macOS-like Dock in Windows 11. Now, if you are also annoyed by this little UI change and want to simply remove the language switcher from the Taskbar on Windows 11, follow our tutorial below.
To remove the language switcher option from the Taskbar on Windows 11, you need to follow a few simple steps. We have added multiple methods below in case the initial method does not work. Here is how to go about it.
Ensure You Have Just One Primary Language
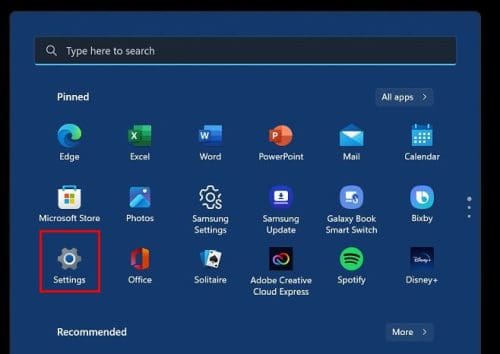
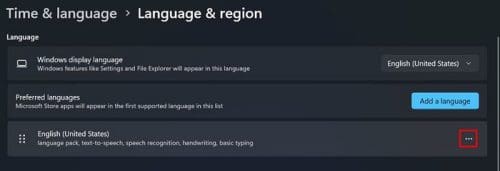
1. First, make sure that only one language is added to your Windows 11 PC. Press the “Windows + I” keyboard shortcut on Windows 11 to open Settings. Here, move to “Time and language” and open “Language and region“.
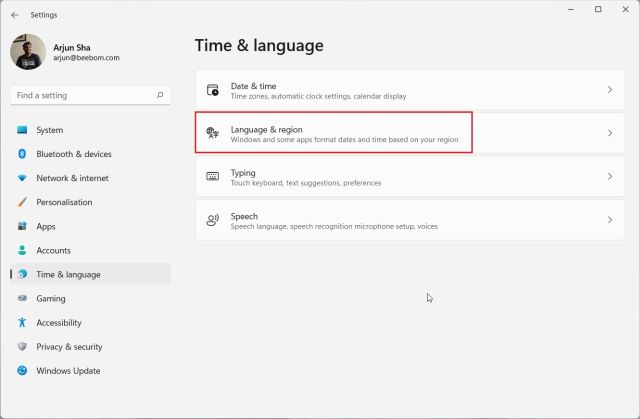
2. Here, make sure your primary language is only available. If you have more than one language, click on the 3-dot menu and remove it. This will disable the language switcher on Windows 11’s Taskbar.

Change Typing and Language Bar Settings
1. If the above method does not work, move back to the “Time and language” menu and open “Typing“.

2. Next, click on “Advanced keyboard settings“.

3. After that, enable the checkbox for “Use the desktop language bar when it is available“. This will remove the language switcher from the Taskbar on Windows 11, but you need to change one more setting to disable the floating language bar.

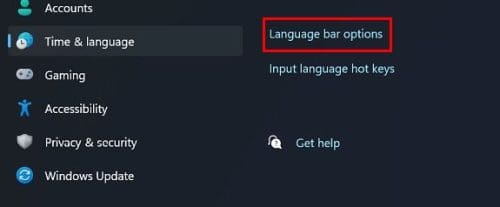
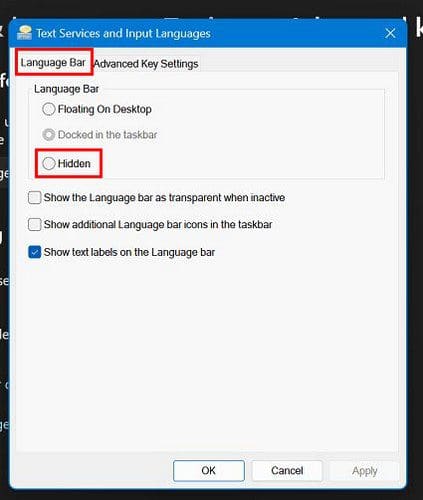
4. Right below, you will find “Language bar options“. Click on it to open the mini window. Here, choose “Hidden” and click on “OK”. Finally, the language switcher will be gone from the Taskbar on Windows 11.

Get Rid of the Language Option in Windows 11 Taskbar
So this is how you can remove the language selection option from the Windows 11 Taskbar. Generally, keeping just one language fixes the issue, but if it’s not working, the desktop language bar will surely remove the annoying language option from the Taskbar. Anyway, that’s pretty much it for this tutorial. Furthermore, if you want to customize the Taskbar in Windows 11, head over to our linked tutorial. Apart from that, you can also change the lock screen clock format in Windows 11 and set Windows 11 Taskbar icons to “Never combine”. Finally, if you have any questions, let us know in the comments section below.
The language switcher icon makes it easier for you to switch languages from the taskbar. But maybe it’s cluttering up the taskbar, and you would rather not see it there. Whatever the reason for not wanting it there, you’ll be happy to know that removing it is easy and does not require downloading any additional software.
How to Eliminate the Language Switcher from the Taskbar in Windows 11
Some users want to remove the language switcher from the taskbar because they prefer to access it by pressing the Windows and Space keys or by clicking on the system tray icon. If these are your preferred choices and you want to remove the language switcher, here are the steps to follow.
Click on the Windows key and go to Settings.
Click on Time and language, followed by the Typing settings page.

As long as you’re here, you can enable or disable other options, such as:

- Show text suggestions when typing on the physical keyboard
- Multilingual text suggestions
- Autocorrect misspelled words
- Typing insight
But let’s move on to Advanced keyboard settings and then disable Use the desktop language bar. When you’re on the next page, look for and check an option called Use the desktop language bar when it’s available.

Right below this last option, click on the option that says Language bar options.
Make sure you’re on the Language Bar tab when the window appears. There will also be a section called Language Bar; click to enable the option called Hidden.
Don’t forget to click on the OK button to save your changes. If you’re looking to remove a language you previously installed, you can remove it by going to:
- Settings (Win + I key)
- Time and Language
- Language and region
- Click on the three dots to the right of the language you want to remove
- Click on the remove option
Conclusion
If you only type in one language, then having the language switcher icon on your desktop might make things look cluttered. If you ever want to make it re-appear, you can uncheck the hidden option you enabled in the first place. Do you think the option should be removed permanently? Let me know in the comments below, and don’t forget to share the article with others on social media.
-
Home
-
Partition Manager
- How to Remove Language Switcher Icon from Taskbar in Windows 11?
By Vega | Follow |
Last Updated
The language switcher icon always appears on the taskbar. Don’t want to see that? In this article from MiniTool Partition Wizard, we show you how to remove language switcher icon from taskbar in Windows 11.
Why Remove Language Switcher Icon from Taskbar in Windows 11?
Windows 11 has a lot of UI changes. Among them, the biggest change is the taskbar. The icons have become centralized, and the changes in the Start menu and the adjustment of the notification bar are more obvious.
Although most of these changes will be welcome, there are still some components that may be classified as unnecessary by some users. One of them is to add a language switcher in the taskbar itself.
The language switcher icon takes up a lot of space on the taskbar. If screen space is at a premium, deleting the language switcher icon on the taskbar will save some space.
If you only deal with one language, using language switcher icon to permanently place it on the taskbar will not be very useful for you. So, you can easily remove language switcher icon from taskbar in Windows 11. In this guide, we will show you how to do that with ease.
Note: If you have installed multiple languages, you can use the language switcher icon or the Win + Space shortcuts to quickly switch between languages.
How to Remove Language Switcher Icon from Taskbar in Windows 11?
To remove the language switcher icon from the Windows 11 taskbar, follow these steps:
Step 1: Press Windows + I on the keyboard to open Settings. Select Time & language from the sidebar on the left and click it.
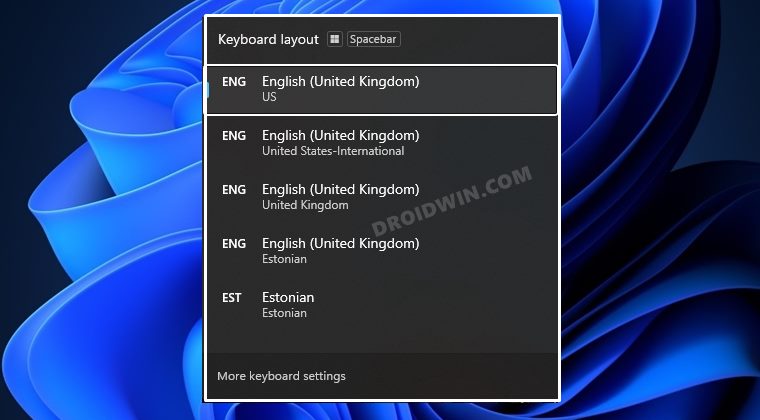
Note: You can also access the Time & Language settings shown below by clicking the language switcher button in the taskbar to get the pop-up window, and then clicking More keyboard settings.
Step 2: Click the Typing option on the right.
Step 3: Select the Advanced keyboard settings option.
Step 4: In the Switch input methods section, select the Use desktop language bar when it’s available option.
Step 5: Click on Language bar options at the bottom.
Step 6: Select Hidden under Language Bar. Then click the OK button.
After that, you will see the language switcher icon does not appear in taskbar in Windows 11.
Bonus: How to Remove Keyboard Language from Taskbar?
All languages or keyboard layouts you add or install in Windows 11 can be accessed using the language switcher icon in the lower right corner of the taskbar. If you don’t use certain languages and want to delete the keyboard language, you can follow the steps below:
- Use Win + I hotkey to open the Settings in Windows 11.
- Navigate to the Time & language > Language and region.
- Click the three horizontal dots available for the installed languages.
- Click the Remove.
Bottom Line
Now we have reached the end of this article. In this article, we introduce to you how to remove language switcher icon from taskbar in Windows 11. Do you have any questions about this content? If you have any questions, please leave them in the comment zone and we will try to answer them as soon as possible.
About The Author
Position: Columnist
Vega joined MiniTool as an editor after graduation. She enjoys helping people with computer problems, including disk management, data recovery, and more. She is constantly expanding her knowledge in related fields. And she will continue to bring more easy-to-understand professional articles to help people solve various problems on the PC. In her daily life, Vega enjoys hanging out with friends, shopping online and listening to music. She is someone who knows how to enjoy life.
Как в Windows 11 убрать всплывающее окно переключение раскладки клавиатуры, чтобы оно не появлялась постоянно?
-
Вопрос задан
-
4591 просмотр
Пригласить эксперта
Используй программу Punto Switcher от Яндекса. Будет сама переключать.
Вариантов 2:
1. Скачать отсюда пропатченную библиотеку и положить её в папку C:\Windows\System32.
2. Скачать специальный патч и запустить его самостоятельно. Для запуска нужен Python.
В новых версиях версиях вроде исправят данную ошибку.
Войдите, чтобы написать ответ
-
Показать ещё
Загружается…
Минуточку внимания
In this guide, we will show you the steps to stop Windows 11 from automatically adding keyboard layout. Windows has bought in quite a few new features to its latest OS build this time around. But at the same time, it has also carried forward some of its weird behavior from its predecessor. One of them is the random addition of a new keyboard layout as and when it is deemed fit. For many, the keyboard layout menu is already filled with 6-7 languages and regions, although they haven’t explicitly added a single one.
So what is the reason for this issue? Well, it usually seems to happen when the language/keyboard combination is non-native. For example, if you have added a UK display language but with the French keyboard layout, then there’s a high chance of this issue. With that said, there do exist a few workarounds that have been known to stop Windows 11 from automatically adding keyboard layout. And this guide shall make you aware of just that. Follow along.
Table of Contents
Do note that there’s no universal fix as such. You will have to try out each of the below-mentioned workarounds and then check which one spells out success for you. So with that in mind, let’s get started.
FIX 1: Tweak the Welcome Screen and New User Account Setting
- Use the Windows+I shortcut keys to open the Settings menu,
- Then select Time and Language from the left menu and go to the Typing section.
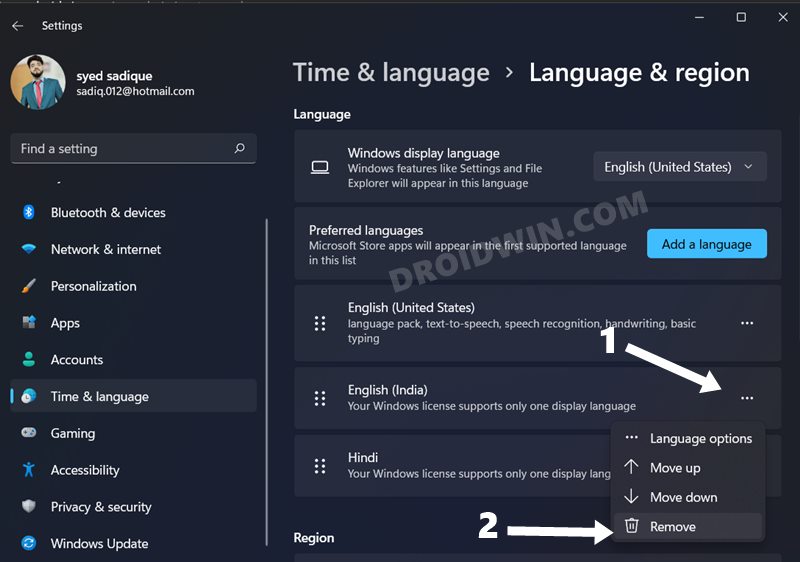
- After that, go to the Language and Region section.
- Then click on the three dots icon next to the language that you wish to remove and select Remove.

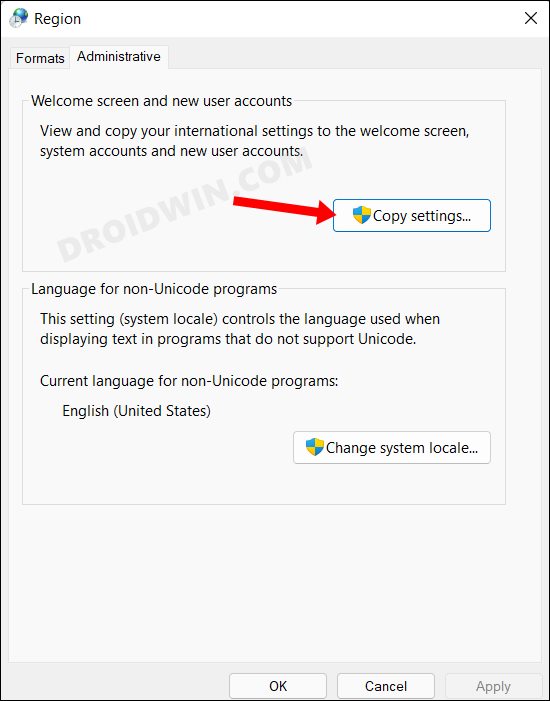
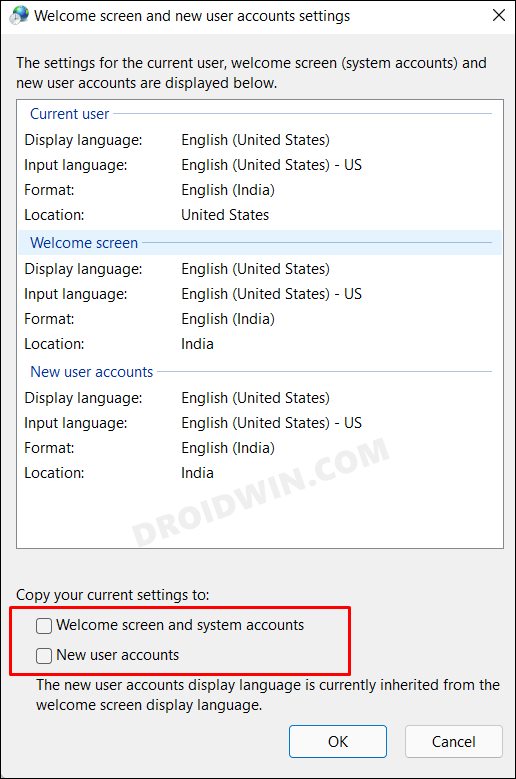
- Once done, launch Control Panel from the Start Menu, change its View By Type to Large icons and go to Regions.
- After that, go to the Administrative tab and click on the Copy Settings button.

- Verify that the current user/welcome screen and new user account are only showing the languages of your choice. If that is not the case, change it from the Language and Region section, as explained above.
- If that’s all well and good, then checkmark the following two options: Welcome Screen and System Account and New User Accounts.

- Finally, click OK to save the changes and then check if manages to stop Windows 11 from automatically adding keyboard layout.
FIX 2: Modify the Language Registry Value
- Use the Windows+R shortcut to open Run. Then type in the below command and hit Enter to open Registry Editor
regedit
- Now copy-paste the below location in the address bar and hit Enter:
Computer\HKEY_LOCAL_MACHINE\SYSTEM\CurrentControlSet\Control\Keyboard Layouts

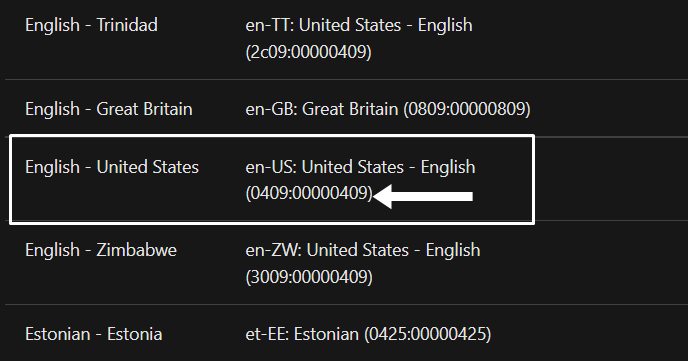
- You will now see a list of folders with numerical values. These are actually the names of language. To get hold of their actual names, check out this list from Microsoft and refer to the numerical value after the colon (:) for the language that you wish to remove from the keyboard layout menu.
- For example, if you wish to remove the US English language, then the value is (0409:00000409). And the value after colon is 00000409.

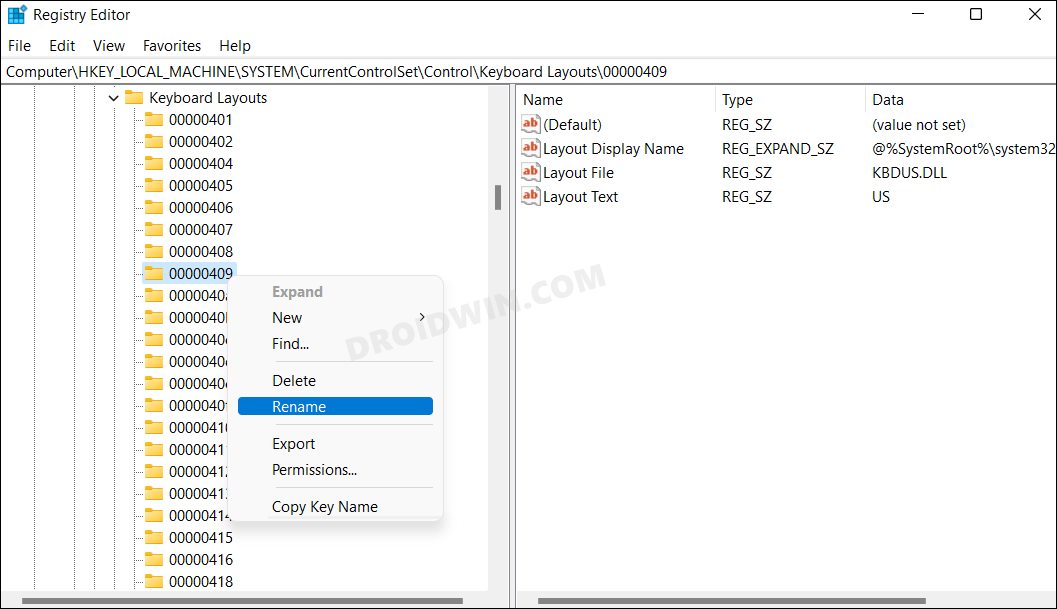
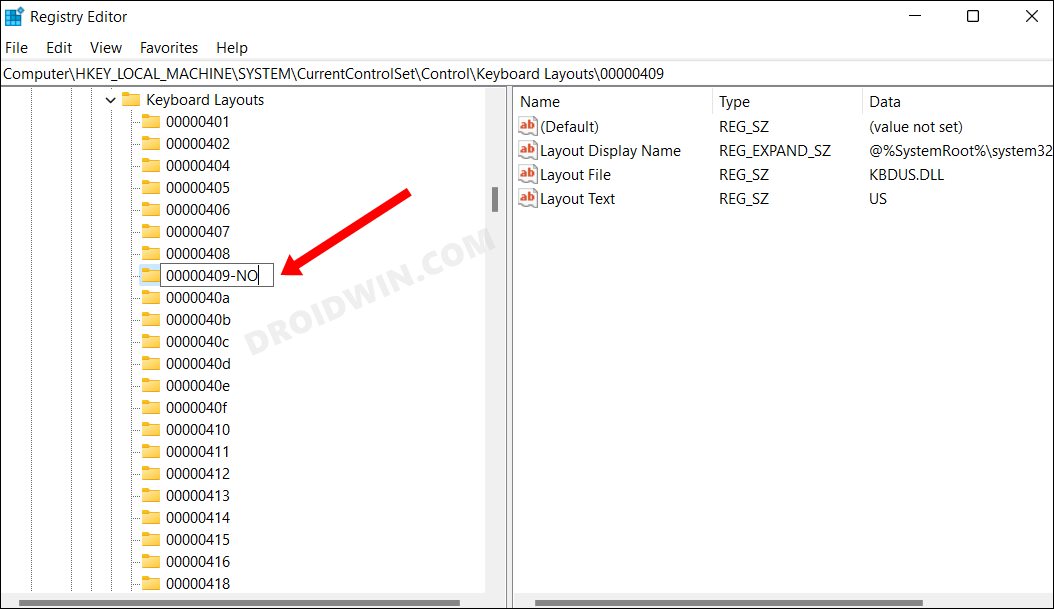
- Now check the same value under the Registry Editor, right-click on it, and select Rename.

- Then add -NO to the end of its name and save it. Windows will no longer be able to identify this language and hence wouldn’t show it under keyboard layout.

- As a result, this should now stop Windows 11 from automatically adding keyboard layout, and hence the issue stands rectified.

FIX 3: Add the IgnoreRemoteKeyboardLayout Registry
- Head over to the Start Menu and launch Registry Editor.
- Then copy-paste the below location in its address bar and hit Enter:
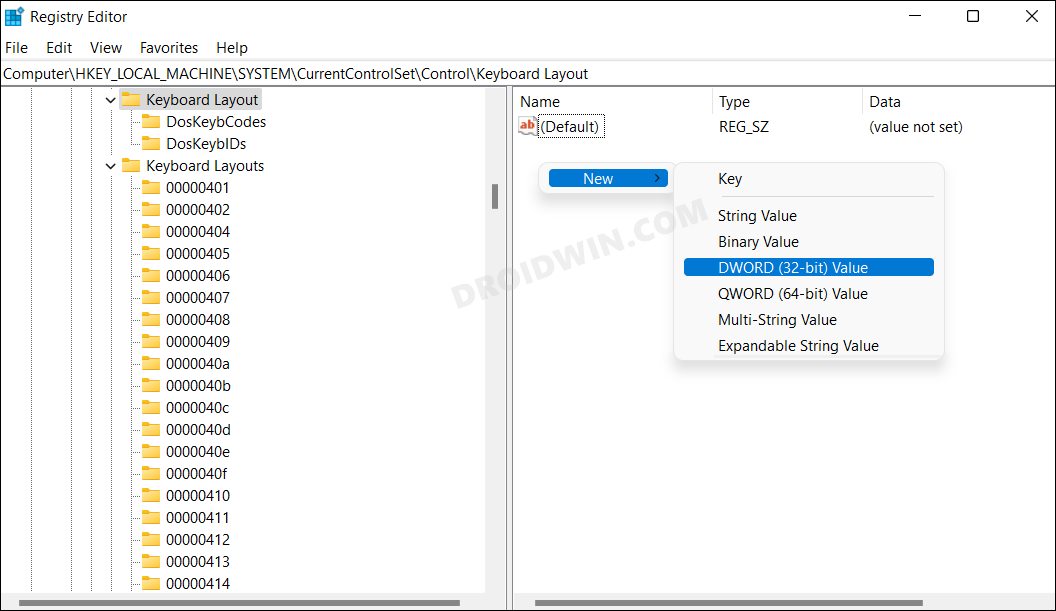
Computer\HKEY_LOCAL_MACHINE\SYSTEM\CurrentControlSet\Control\Keyboard Layout
- Now right-click in an empty place on the right-hand side and select New > DWORD (32-bit) Value.

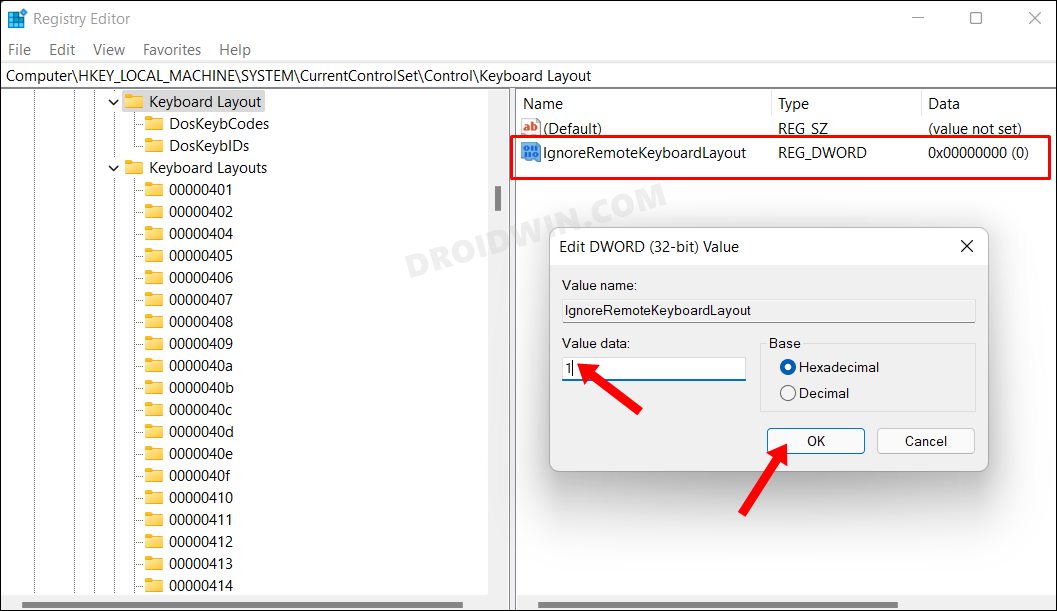
- Name it IgnoreRemoteKeyboardLayout and double-click to open it. Then type in 1 in the Value data field and hit OK to save it.

- Finally, restart your PC and then check if it is able to stop Windows 11 from automatically adding keyboard layout.
FIX 4: Delete Preload Registry
- Launch Registry Editor and head over to the below location:
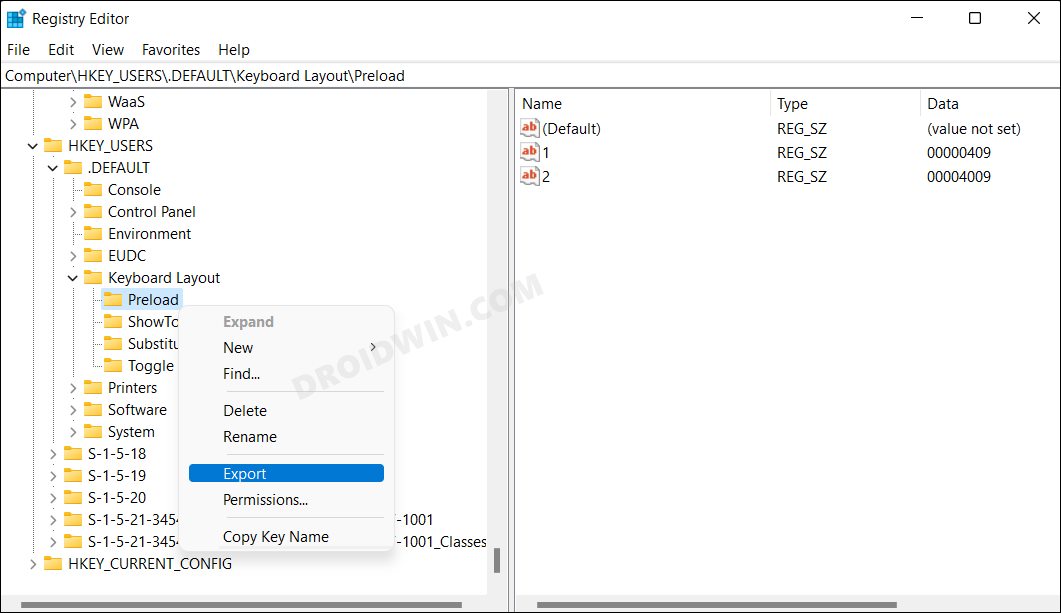
Computer\HKEY_USERS\.DEFAULT\Keyboard Layout\Preload
- Now let’s first take a backup of this preload folder. So right-click on it, select Export, and choose the desired location to save it.

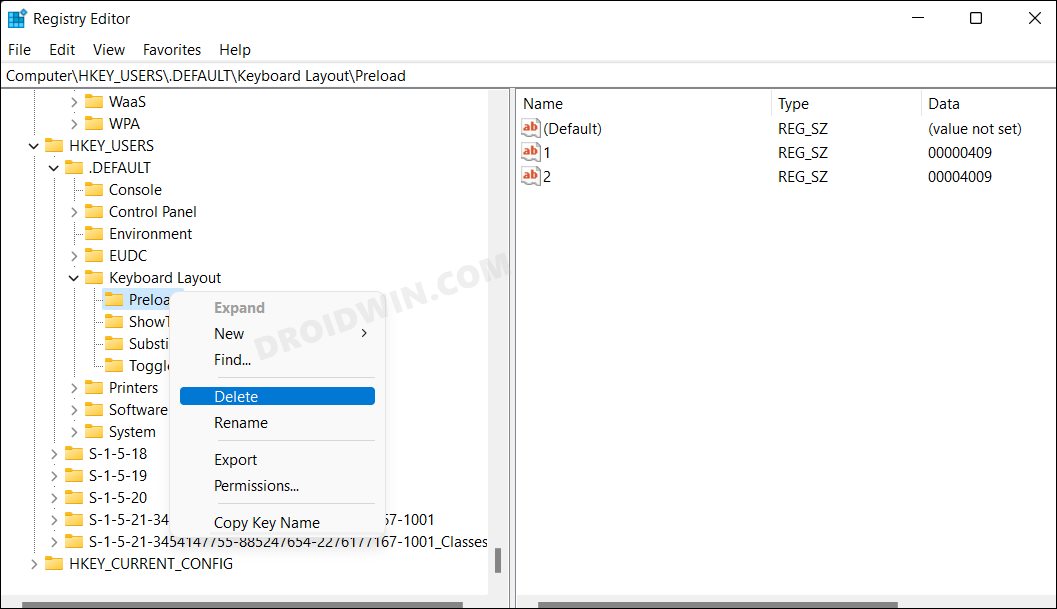
- Once done, right-click on Preloader and select Delete. Then click YES in the confirmation dialog box.
- Finally, restart your PC and verify if it manages to stop Windows 11 from automatically adding keyboard layout.
If at any point in time, you wish to restore the backup, then click on File > Import and select the Preload file. For the location, it will be Computer\HKEY_USERS\.DEFAULT\Keyboard Layout\
FIX 5: Override Microsoft Automatic Language settings
Head over to the Start Menu and launch PowerShell as an administrator. Then copy-paste the below command (one at a time) and hit Enter. Do note that this is a temporary workaround and you will have to execute this command every time whenever the issue arises. It is due to this temporary nature that we decided to list it at the end of this guide.
Set-WinCultureFromLanguageListOptOut -OptOut 1
Set-WinUILanguageOverride -Language en-US
Set-WinDefaultInputMethodOverride -InputTip "0426:00040426"
Set-Culture lv-LV
So with this, we round off the guide on how you could stop Windows 11 from automatically adding keyboard layout. we have listed five different methods for the same. Do let us know in the comments section which one spelled out success for you. Likewise, all your queries are welcomed in the comments below.
- How to Remove Language Switcher from Taskbar in Windows 11
- How to Remove Language Switcher from Taskbar in Windows 11
- Windows 11 Taskbar Not Working: How to Fix
- Drag and Drop for Taskbar in Windows 11: Officially Removed?!