
Все способы:
- Способ 1: Редактирование реестра
- Способ 2: Изменение локальной групповой политики
- Способ 3: Переименование каталога
- Способ 4: Использование Winaero Tweaker
- Вопросы и ответы: 1
Способ 1: Редактирование реестра
Экран блокировки появляется при включении Windows 11 до самого экрана входа, где пользователь обычно вводит пароль или PIN-код. На этом экране отображается заставка, время и информация от выбранных приложений. Однако нужен он далеко не всегда и только может мешать быстрой авторизации. Чтобы его убрать, используются разные методы деактивации экрана блокировки, и самый простой из которых заключается в редактировании реестра.
- Откройте меню «Пуск», отыщите классическое приложение «Редактор реестра» через поиск, затем запустите его.
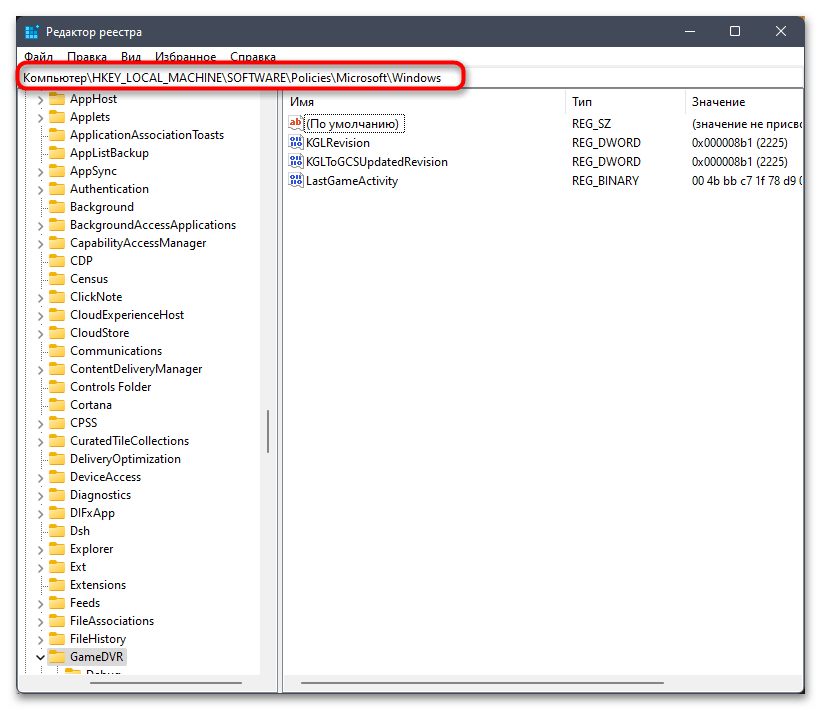
- В самом реестре перейдите по пути
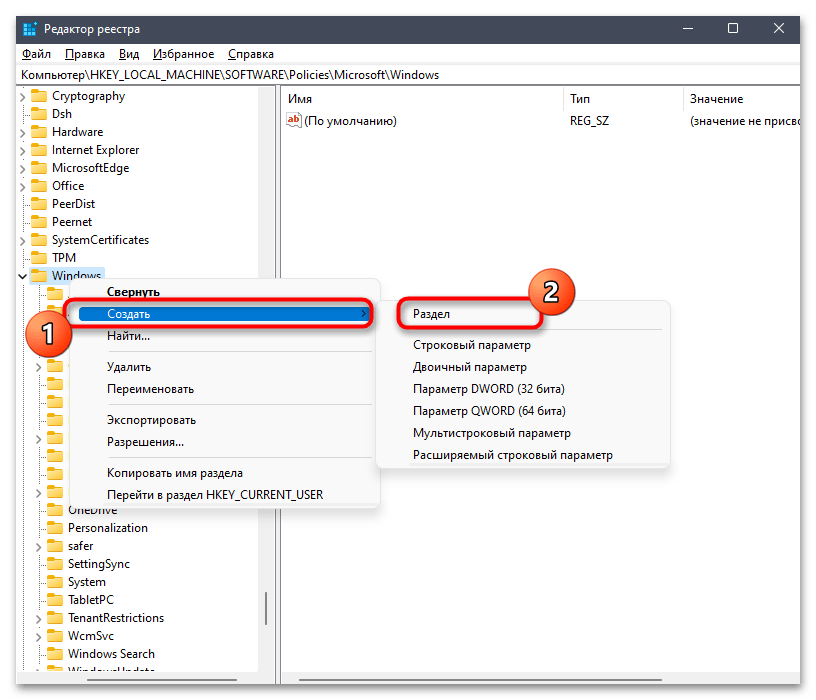
Компьютер\HKEY_LOCAL_MACHINE\SOFTWARE\Policies\Microsoft\Windows. Можете просто даже вставить данный путь в адресную строку сверху. - Если в папке «Windows» отсутствует каталог с названием «Personalization», его понадобится предварительно создать. Для этого кликните ПКМ по «Windows», наведите курсор на «Создать» и выберите пункт «Раздел».
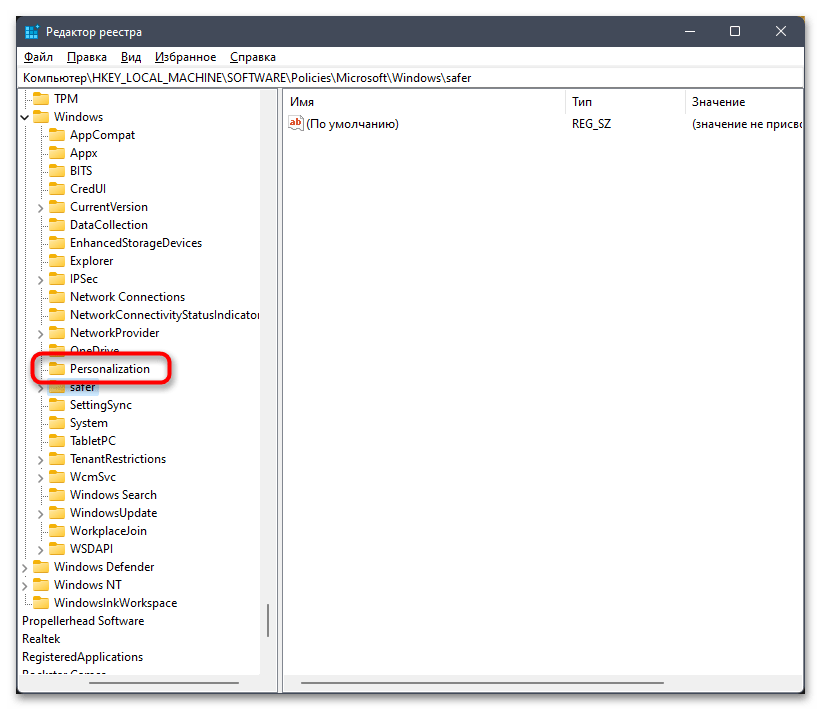
- Задайте для этого раздела название «Personalization» и выделите его левой кнопкой мыши, чтобы перейти.
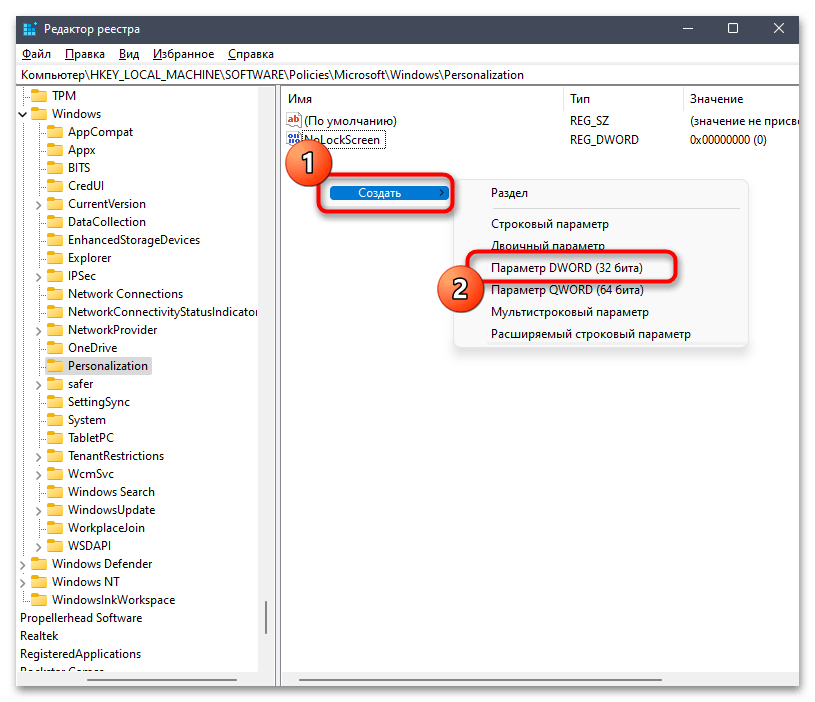
- В этом разделе пока нет нужного параметра, который бы отключил экран блокировки, поэтому понадобится создать его. Щелкните по пустому месту ПКМ, наведите курсор на «Создать» и выберите пункт «Параметр DWORD (32 бита)».
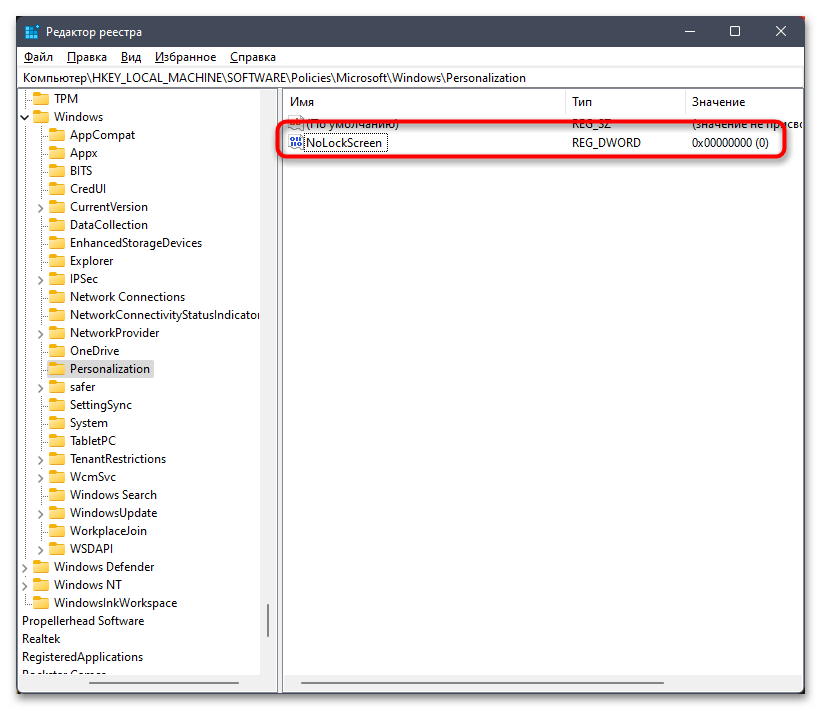
- Установите для него название «NoLockScreen».
- Дважды щелкните по данному параметру, чтобы открыть его «Свойства». По умолчанию значение будет установлено как «0», но его нужно поменять на «1», чтобы отключить экран блокировки. Сохраните изменения и перезагрузите компьютер, чтобы они вступили в силу.

Способ 2: Изменение локальной групповой политики
Следующая инструкция позволяет добиться такого же результата, но немного другим путем. Для этого нужно обратиться к «Редактору локальной групповой политики», однако доступен он только в Windows 11 Pro и Enterprise. Если у вас установлена другая редакция, обратитесь к одному из других методов этого материала.
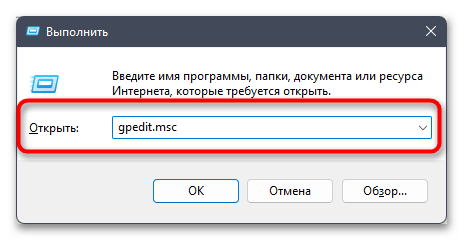
- Если «Редактор локальной групповой политики» у вас доступен, приступайте к его запуску. Для этого откройте утилиту «Выполнить», используя стандартное сочетание клавиш Win + R. Введите команду
gpedit.mscи нажмите Enter для ее подтверждения. - В новом окне выберите раздел «Конфигурация компьютера» и перейдите в «Административные шаблоны».
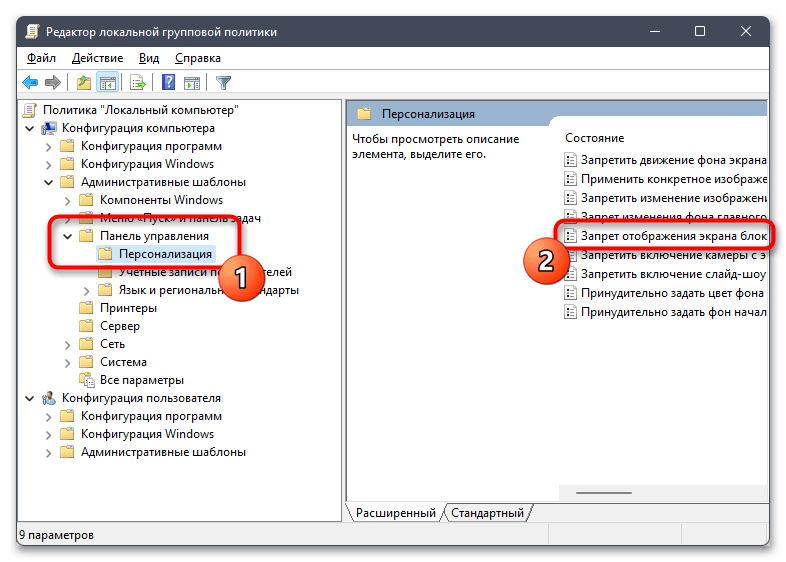
- Откройте папку «Панель управления», в ней выберите «Персонализация», справа найдите список политик и дважды щелкните по «Запрет отображения экрана блокировки».
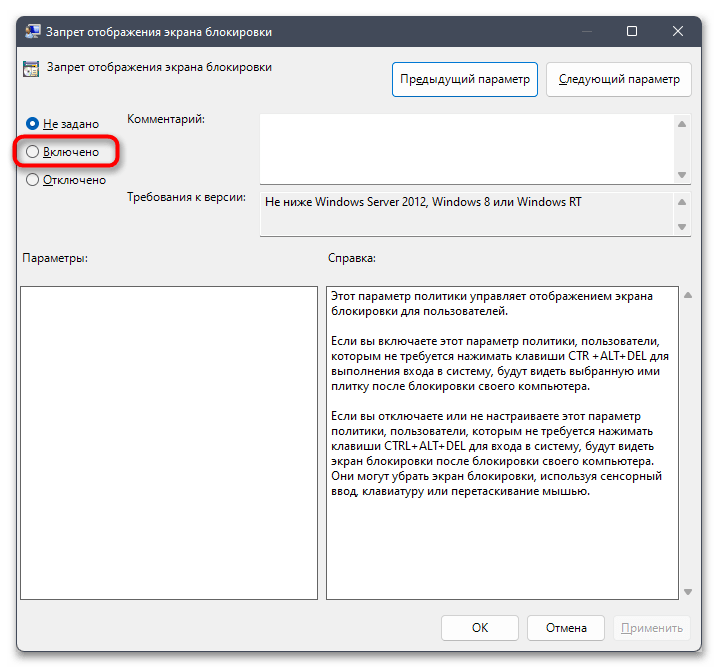
- Для этой политики установите значение «Включено», затем примените изменения. Отправьте компьютер на перезагрузку и проверьте, не будет ли отображаться экран блокировки при следующем включении.

Способ 3: Переименование каталога
В Windows 11 есть директория, в которой хранятся связанные с экраном блокировки файлы. К ним операционная система и обращается при запуске, позволяя отображаться заставке и дополнительным данным. Если эту папку переименовать, ОС не сможет найти путь к файлам и показать экран блокировки, поэтому он будет пропущен.
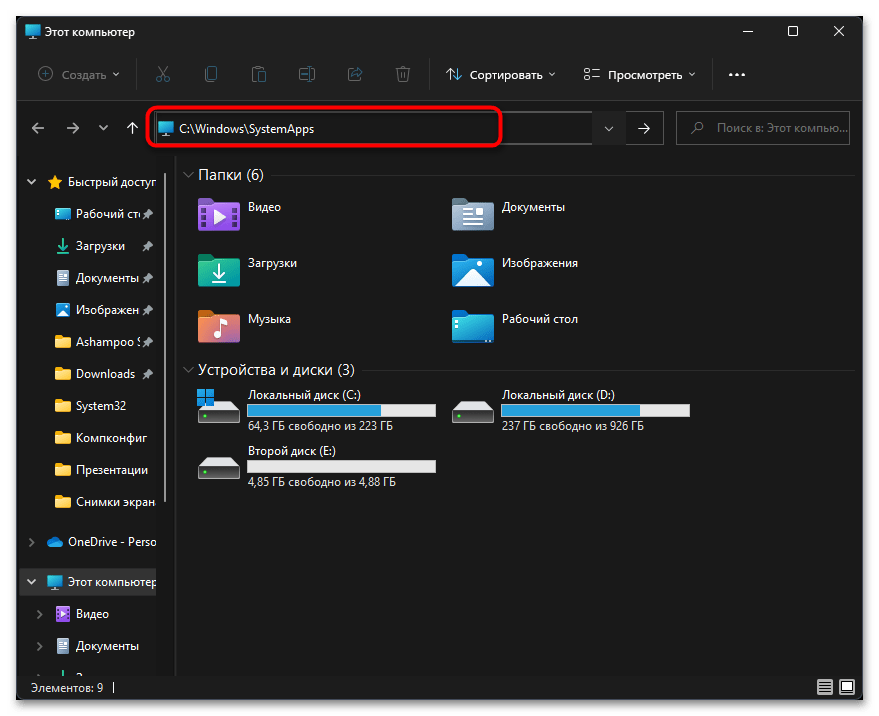
- Для выполнения задачи понадобится открыть «Проводник» и перейти в нем по пути
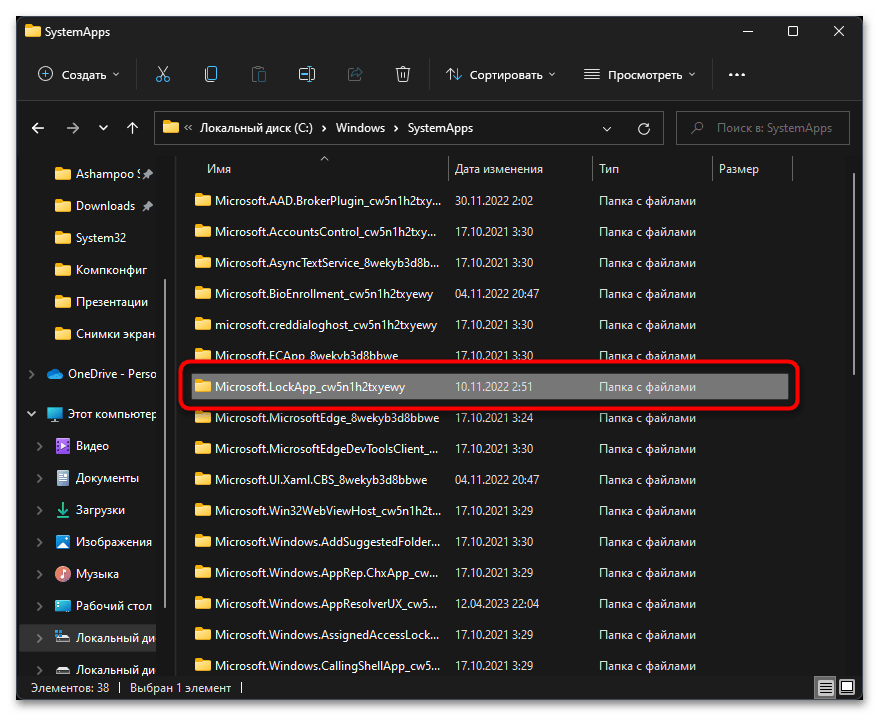
C:\Windows\SystemApps. - В нем найдите каталог с названием «Microsoft.LockApp_cw5n1h2txyewy» и щелкните по нему правой кнопкой мыши.
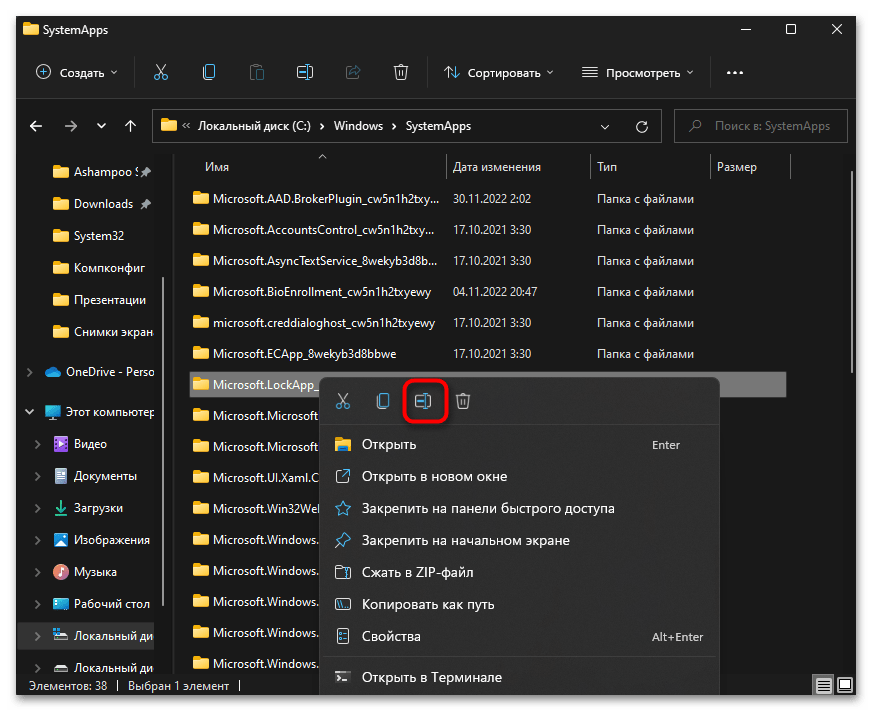
- Из контекстного меню выберите пункт, отвечающий за переименование папки.
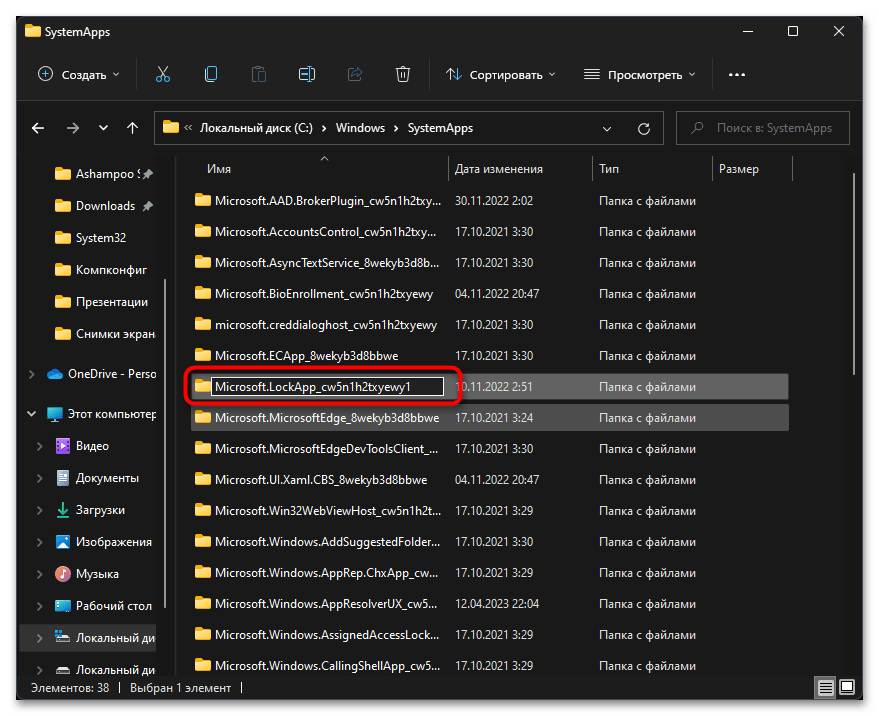
- Добавьте в конце любую букву или цифру, чего уже будет достаточно для переименования. На этом выполнение рассматриваемого способа завершено.
Способ 4: Использование Winaero Tweaker
Программное обеспечение Winaero Tweaker призвано упростить пользователю процесс детальной настройки операционной системы и даже позволяет изменять те параметры, которые по умолчанию недоступны. В рамках этого метода мы не будем разбирать всю функциональность данного софта, а только обратимся к одному из его инструментов, который и позволит отключить экран блокировки.
Скачать Winaero Tweaker с официального сайта
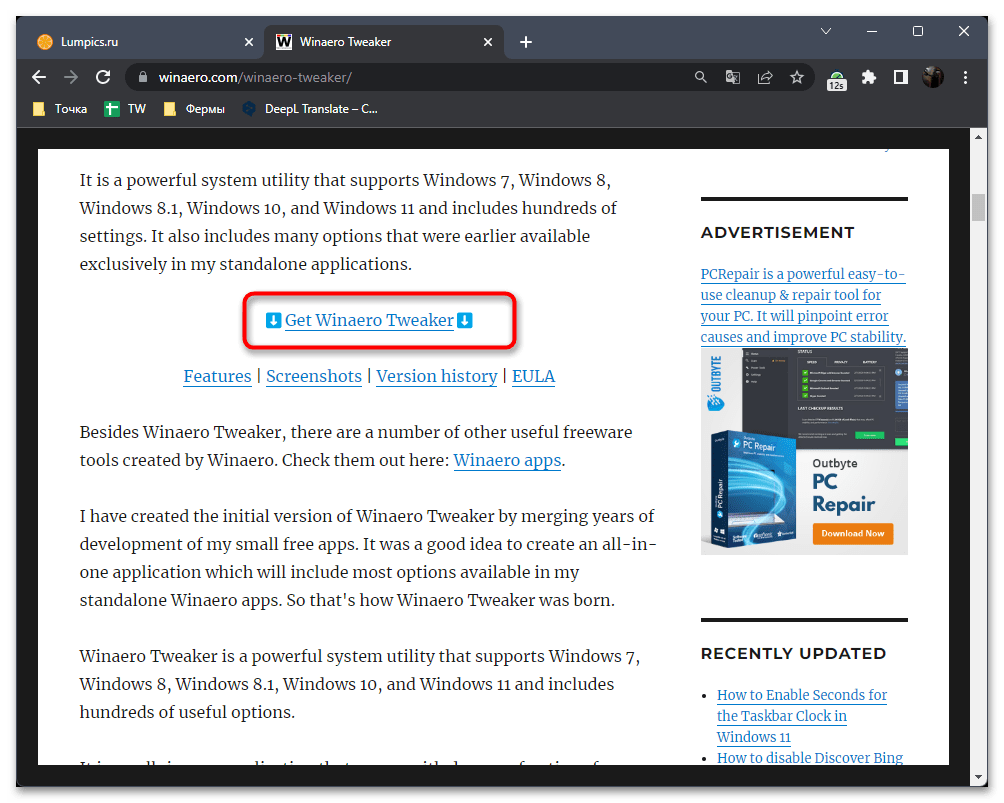
- Перейдите по ссылке выше и загрузите бесплатную версию Winaero Tweaker с официального сайта.
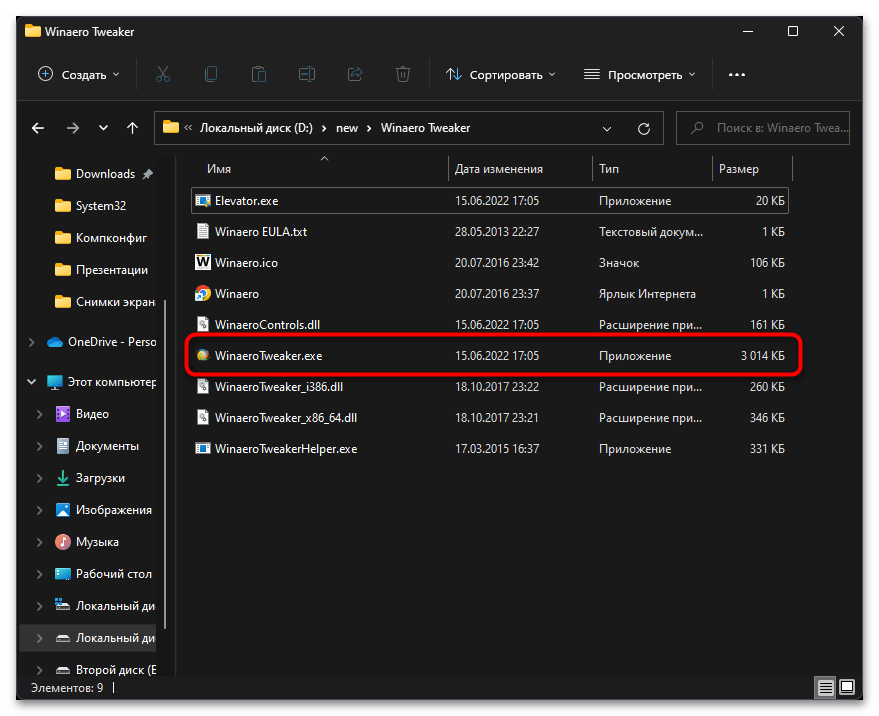
- Распакуйте полученный архив и используйте файл «WinaeroTweaker.exe» для запуска программы. Ее предварительная установка не требуется.
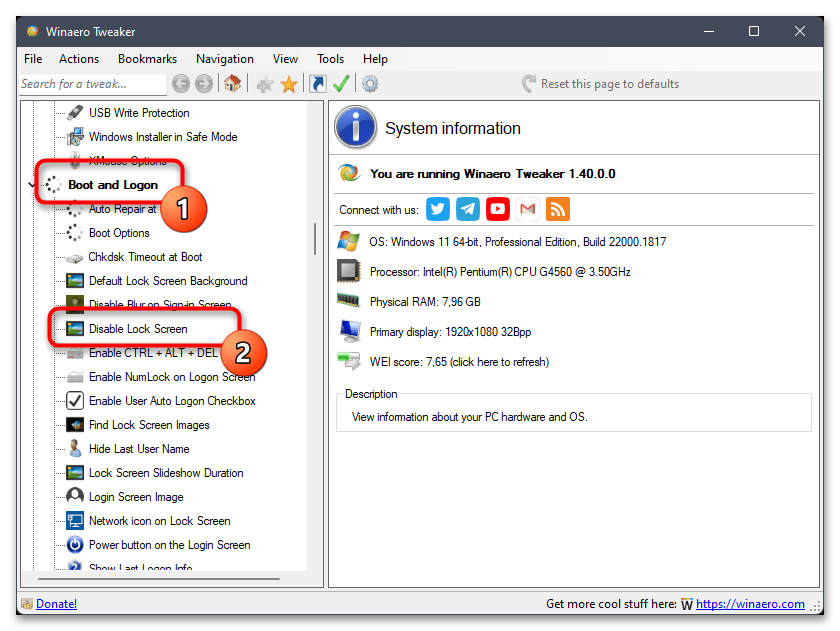
- Найдите раздел «Boot and Logon», а в нем параметр с названием «Disable Lock Screen», после чего выделите его левой кнопкой мыши.
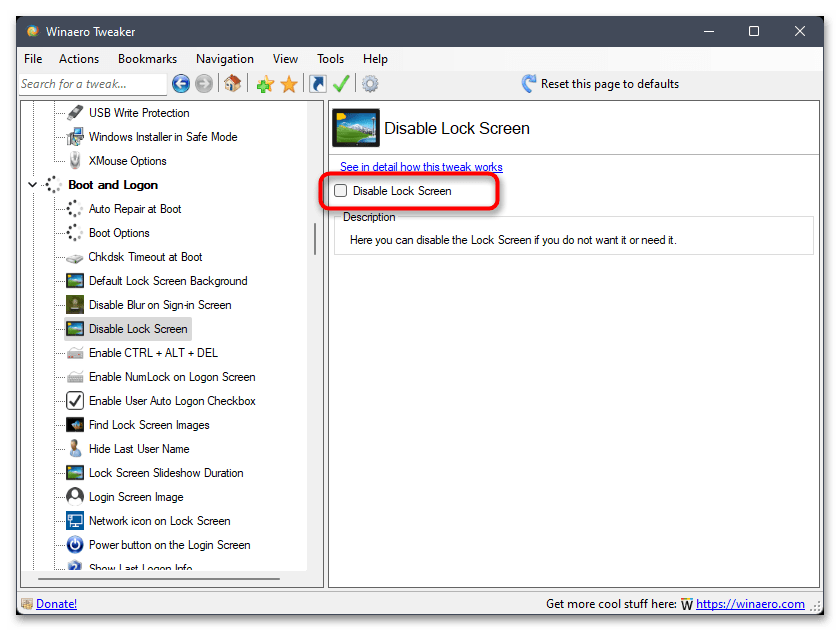
- В блоке справа поставьте галочку возле пункта «Disable Lock Screen». На экране должно появится предложение о перезагрузке ПК, которое нужно подтвердить для завершения настройки.
Наша группа в TelegramПолезные советы и помощь
При включении компьютера или ноутбука с Windows 11 первое, что вас встречает после загрузки — экран блокировки, в зависимости от настроек — с выбранным вами фоном или фотографиями от Майкрософт, а уже после нажатия какой-либо клавиши или кнопки мыши — экран выбора пользователя и ввода пароля. При желании экран блокировки можно убрать.
В этой пошаговой инструкции подробно о способах отключить экран блокировки в Windows 11. Учитывайте, что это не уберет ввод пароля или ПИН-кода, если вам требуется именно это, используйте отдельную инструкцию: Как убрать пароль и ПИН-код при входе в Windows 11.
Отключение экрана блокировки в редакторе реестра

Первый способ убрать экран блокировки Windows 11 — использовать редактор реестра. Для этого выполните следующие шаги:
- Нажмите правой кнопкой мыши по кнопке «Пуск», выберите пункт «Выполнить», введите regedit в диалоговое окно «Выполнить» и нажмите клавишу Enter.
- В открывшемся редакторе реестра перейдите к разделу
HKEY_LOCAL_MACHINE\SOFTWARE\Policies\Microsoft\Windows
- Если в этом разделе есть подраздел Personalization, выберите его, иначе нажмите правой кнопкой мыши по выбранному разделу «Windows», выберите «Создать» — «Раздел» и создайте новый раздел с именем Personalization, а затем перейдите к нему.
- При выбранном разделе Personalization нажмите правой кнопкой мыши в правой панели редактора реестра и создайте новый параметр DWORD (32-бит, несмотря на x64 систему) и укажите имя NoLockScreen для него.
- Дважды нажмите по вновь созданному параметру и измените его значение на 1.

- Примените сделанные настройки и перезапустите проводник (это можно сделать в диспетчере задач) или перезагрузите компьютер.

Вместо ручного редактирования реестра, вы можете создать reg-файл со следующим кодом и «запустить» его, подтвердив импорт данных в реестр:
Windows Registry Editor Version 5.00

[HKEY_LOCAL_MACHINE\SOFTWARE\Policies\Microsoft\Windows\Personalization]
"NoLockScreen"=dword:00000001
В результате экран блокировки будет отключен и, при следующем включении или после перезагрузки вы будете сразу попадать на экран выбора пользователя и ввода пароля или ПИН-кода.
В редакторе локальной групповой политики
Этот способ отключения экрана блокировки подойдет только для Профессиональной и Корпоративной редакций Windows 11, шаги будут следующими:
- Нажмите клавиши Win+R на клавиатуре, введите gpedit.msc и нажмите Enter.
- В редакторе локальной групповой политики перейдите к разделу «Конфигурация компьютера» — «Административные шаблоны» — «Панель управления» — «Персонализация».
- Дважды нажмите по параметру «Запрет отображения экрана блокировки».

- Установите «Включено» для параметра (именно это значение отключит экран блокировки) и примените сделанные настройки.


Результат тот же, что и в предыдущем случае — экран блокировки не будет отображаться при включении или перезагрузке компьютера.
Сторонние программы для настройки Windows
Многие сторонние утилиты для настройки Windows также позволяют выключить экран блокировки. Среди них:
В завершение статьи одно примечание: если в вашей системе включена функция «Безопасный вход в систему», требующая нажимать Ctrl+Alt+Delete при входе в систему, экран блокировки не может быть отключен. Саму опцию можно настроить в Win+R — netplwiz на вкладке «Дополнительно».
Readers help support Windows Report. We may get a commission if you buy through our links.
Read our disclosure page to find out how can you help Windows Report sustain the editorial team. Read more
Windows 11, like other platforms in its series, has a lock screen you’ll see just before logging into your user account.
That lock screen displays the time, date, one app status icon, and a magnifying glass icon. Clicking on the magnifying glass icon brings up the login text box and screen.
The lock screen also has a Windows + L keyboard shortcut. Pressing that hotkey returns you to a lock screen, from where you’ll need to click and then log back into Windows.
Do I need to have the lock screen enabled on my Windows 11 PC?
Although the lock screen displays date/time info and an app status icon, it’s hardly a necessity. Some users might prefer to disable it so they don’t need to click to reach the login screen.
There isn’t an option in Settings that turns off the lock screen, but you can still disable it with the methods below.
Has the lock screen changed in any way in Windows 11?
Microsoft has made some relatively minor changes to Windows 11’s lock screen. It has a new default Windows 11 background wallpaper for one thing. However, you can change that wallpaper via Settings.
You’ll also notice the date/time info has changed position on Windows 11’s lock screen. Now it displays that info at the top center of the screen instead of the bottom left corner. The clock time text also has a bolder font type.
However, those are only small changes Microsoft has applied to the lock screen. There isn’t that much difference between the lock screens in Windows 11 and 10.
So, it’s unlikely users who didn’t want Windows 10’s lock screen enabled will want to keep it after upgrading to 11.
How can I turn off the lock screen in Windows 11?
1. Edit the Registry
- Right-click the taskbar button for the Start menu and select Run.
- To open the Registry Editor, input the following text and press Enter:
regedit
- Next, open this registry location:
HKEY_LOCAL_MACHINE\SOFTWARE\Policies\Microsoft\Windows - Right-click Windows on the left side of the Registry Editor and select New > Key.
- Type Personalization in the key’s text box.
- Right-click the Personalization key and select the New > DWORD (32-bit) value options.
- Enter NoLockScreen to be the DWORD’s title.
- Double-click NoLockScreen to open an Edit DWORD window for it.
- Input 1 within the Value data text box, and click OK to apply.

- Open the Start menu, select Power, and click Restart.


2. Use the Group Policy Editor
-
1. Bring up the Run dialog (it has a Windows + R keyboard shortcut).
-
2. Open Group Policy Editor by entering this command and clicking OK:
gpedit.msc -
3. Next, click Computer Configuration and Administrative Templates.
-
4. Select Control Panel > Personalization to open the policy setting shown directly below.
-
5. Double-click the Do not display the lockscreen policy.
-
6. Then select the Enabled radio button.

-
7. Press the Apply and OK buttons to save the setting.


A great tool you can use to turn off Windows 11’s lock screen is none other than the Group Policy Editor. It is built-in on your PC and can be safely used to tweak any PC options you want to.
NOTE
Windows 11 Home edition doesn’t include the Group Policy Editor. However, you can enable Group Policy Editor in the Home edition as outlined within our How to enable Gpedit.exe in Windows 11 guide.
- How to customize the lock screen in Windows 11
- How to access Advanced System Settings in Windows 11
- How to Find the Refresh Button on Windows 11
- How to make Windows 11 faster and more responsive
3. Disable the lock screen with Winaero Tweaker
- Open the Winaero Tweaker page, and click the Download Winaero Tweaker link there.

- Press the File Explorer button on the taskbar.
- Open the folder the Winaero Tweaker downloaded to, and double-click the winaerotweaker file to open it.
- Press the Extract all button that’s on the command bar.
- Click the Show extracted files when complete checkbox shown directly below to select that option.

- Select Extract to do so.
- Double-click WinaeroTweaker-1.33.0.0-setup to open the setup wizard and install the software.

- Open the Winaero Tweaker window, and double-click the Boot and Logon category.

- Select the Disable Lock Screen option on the left of the window.
- Then click the Disable Lock Screen checkbox on the right.


- How to customize the lock screen in Windows 11
- Lock screen not working in Windows 11? Here’s how to fix it
- Windows 11’s lock screen Spotlight not working? Try these fixes
- Windows 11’s lock screen slideshow not working? Try these fixes
Can I disable the Windows login screen as well?
Not exactly, but you can bypass the login screen by configuring Windows to automatically sign in for you. Then you won’t ever need to manually log in to Windows.
To do so, you’ll first need to edit the registry and deselect the User must enter a user name and password to use this computer as follows.
- Open Registry Editor as covered within the first two steps of method one.
- Go to this registry key location:
HKEY_LOCAL_MACHINE\SOFTWARE\Microsoft\Windows NT\CurrentVersion\PasswordLess\Device - Double-click the DevicePasswordLessBuildVersion DWORD for the Device key.
- Then erase the current value from the data box, and enter 0 to replace it.
- Click OK to confirm.
- Thereafter, close the Registry Editor.
- Open the Run dialog.
- Enter this Run command and click OK:
netplwiz
- Deselect the Users must enter a username and password to use this computer checkbox.
- Press the Apply button to save the new settings, and click OK to close the window.


You can also disable the lock screen on Windows Server with different methods. Our how-to Disable Lock Screen on Windows Server guide provides full details on how you can do so.
So, that’s how you can disable the lock screen in Windows 11 with three different methods. It’s relatively straightforward to enable that screen by editing the registry as outlined above. You can also set up a System Restore point beforehand just in case.
If you prefer not to edit the registry, however, you can disable the lock screen with Winaero Tweaker instead. That’s a great freeware customization app with which you can customize Windows 11/10 in many ways. So, it’s worth checking out Winaero for much more than just disabling the lock screen.
We hope you managed to successfully turn off Windows 11’s lock screen using our methods. Write to us in the comments section below if you have any thoughts you want to share with us.
Matthew Adams
Windows Hardware Expert
Matthew is a freelancer who has produced a variety of articles on various topics related to technology. His main focus is the Windows OS and all the things surrounding it.
He is passionate about the tech world, always staying up-to-date with the latest and greatest. With an analytical view, he likes problem-solving, focusing on errors and their causes.
In his free time, he likes to read and write about history and tries to always develop new skills.
The Windows 11 lock screen features beautiful photos from around the world and transitions into the sign-in screen with the press of a button. But while it’s visually appealing, it adds an extra step to the login process many users wish to avoid.
In this tutorial, we’ll cover different ways to disable the lock screen in Windows 11 so that your PC opens on the login screen.

Why Disable Your Lock Screen?
The main reason to disable the lock screen is to speed up the sign-in process.
The Windows lock screen displays a background image, the date and time, and app notifications. While this is useful for many users, it doesn’t appeal to everyone. After removing the lock screen, Windows will take you straight to the login screen, where you can use any sign-in option to enter your computer.
Unfortunately, disabling the lock screen isn’t as straightforward as other customization processes when using Windows 11 Home, but it is still possible. Here’s what you need to do:
Disable the Lock Screen Using the Registry Editor
You can disable the lock screen using the registry settings. However, before editing your registry settings, you should export a copy of your registry. This will help you revert to your previous registry settings in case of an error or file corruption.
- Press the Windows key + R to launch the Run command box.
- Type regedit in the text input box and press Enter to launch Registry Editor.

- In the navigation box up top, paste the following path and press enter: Computer\HKEY_LOCAL_MACHINE\SOFTWARE\Policies\Microsoft\Windows

- In the left-hand panel and right-click the Windows folder. Select New > Key and name it Personalization.

- Right-click the Personalization Key and select New > DWORD (32-bit) Value. Name it as NoLockScreen.

- Double-click on the NoLockScreen value in the right pane and set the Value Data to 1. Keep the base hexadecimal.

- Click on OK to apply changes and Restart your system. You won’t see the lock screen when your computer boots up.
- To bring back the lock screen, launch the Registry Editor again and paste the following into the address bar up top. Computer\HKEY_LOCAL_MACHINE\SOFTWARE\Policies\Microsoft\Windows\Personalization. Set the NoLockScreen key value to 0.
Disable the Lock Screen Using the Local Group Policy Editor
If you have Windows 11 Pro, you can use the Local Group Policy Editor to disable the lock screen.
- Use the keyboard shortcut Windows + R to launch the Run command box on your system.
- Type gpedit.msc and press Enter key to open the Group Policy Editor.

- Navigate to Computer Configuration on the left-hand side. Then go to Administrative Templates > Control Panel > Personalization. Under personalization options, Double-click the Do not display the lock screen option.

- In the new window, change the lock screen policy by clicking from the enabled option to the disabled option. Click on the Apply button and then the OK button to finalize the changes.

- Restart your system to initiate the changes. When your computer reboots, the lock screen should not appear.
Disable the Lock Screen Using Winaero Tweaker
Winaero Tweaker is a free app that allows you to customize Windows further than the Windows settings permit. However, we recommend using any registry editors with extreme care, as it’s easy to break your Windows operating system by implementing the wrong changes.
You can use it to disable the Windows lock screen as follows:
- Go to the Winaero website. Download and install the app.
- In the menu on the left-hand side, go to the Boot and Logon option.
- Under the Boot and Logon section, find the Disable Lock Screen option. Click on the Disable Lock Screen checkbox.

- Restart your system to apply the changes. You will notice that the lock screen doesn’t appear anymore.
Use Ultimate Windows Tweaker
Ultimate Windows Tweaker is an alternative to Winaero Tweaker. It makes it easy to disable the lock screen; however, it is wise to create a system restore point before you do to avoid causing the operating system to malfunction.
- Visit the Ultimate Windows Tweaker website. Download the app.
- Extract the Ultimate Windows Tweaker archive to a new folder.
- Right-click the UltimateWindowsTweaker.exe file, and select Run as administrator.
- Select Customization and check Disable Lock Screen checkbox. Then, select the Apply Tweaks button and close the program.

- Log out or restart your computer. The lock screen should not appear.
Lock Screen Begone
Using one of the above methods, you should be able to disable your lock screen and navigate straight to the login screen when you start your computer. If the registry editor or local group policy editor is too cumbersome, apps such as Winaero Tweaker and Ultimate Windows Tweaker make it easy to disable the lock screen.
Related Posts
- How to Fix a “This file does not have an app associated with it” Error on Windows
- How to Add OneDrive to Windows File Explorer
- How to Fix an Update Error 0x800705b4 on Windows
- How to Resolve “A JavaScript error occured in the main process” Error on Windows
- How to Fix the Network Discovery Is Turned Off Error on Windows