
Иногда после установки новых версий драйверов оборудования — видеокарты, системных устройств, звуковой платы, вы можете столкнуться с тем, что оно начинает работать неправильно. В этом случае одна из первых вещей, которые следует попробовать — откатить установленный драйвер.
В этой инструкции об общем способе отката драйверов устройств в Windows 10, а также некоторая дополнительная информация на тему отката драйвера NVIDIA GeForce к предыдущей версии, т.к. на эту тему вопросы задаются чаще других. Также может быть полезным: Как запретить обновление драйверов Windows 10.
Откат драйвера устройства с помощью диспетчера устройств
В Windows 10, как и в предыдущих версиях ОС предусмотрен встроенный метод отката драйверов устройств к их предыдущим версиям при необходимости. Выполнить необходимые действия можно в диспетчере устройств:
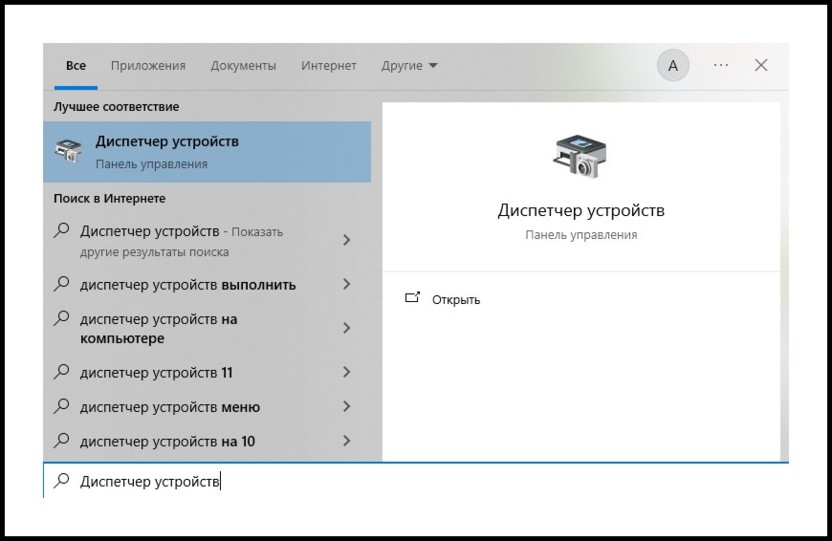
- Откройте диспетчер устройств: для этого можно нажать правой кнопкой мыши по кнопке «Пуск» и выбрать соответствующий пункт меню, либо нажать клавиши Win+R, ввести devmgmt.msc и нажать Enter.
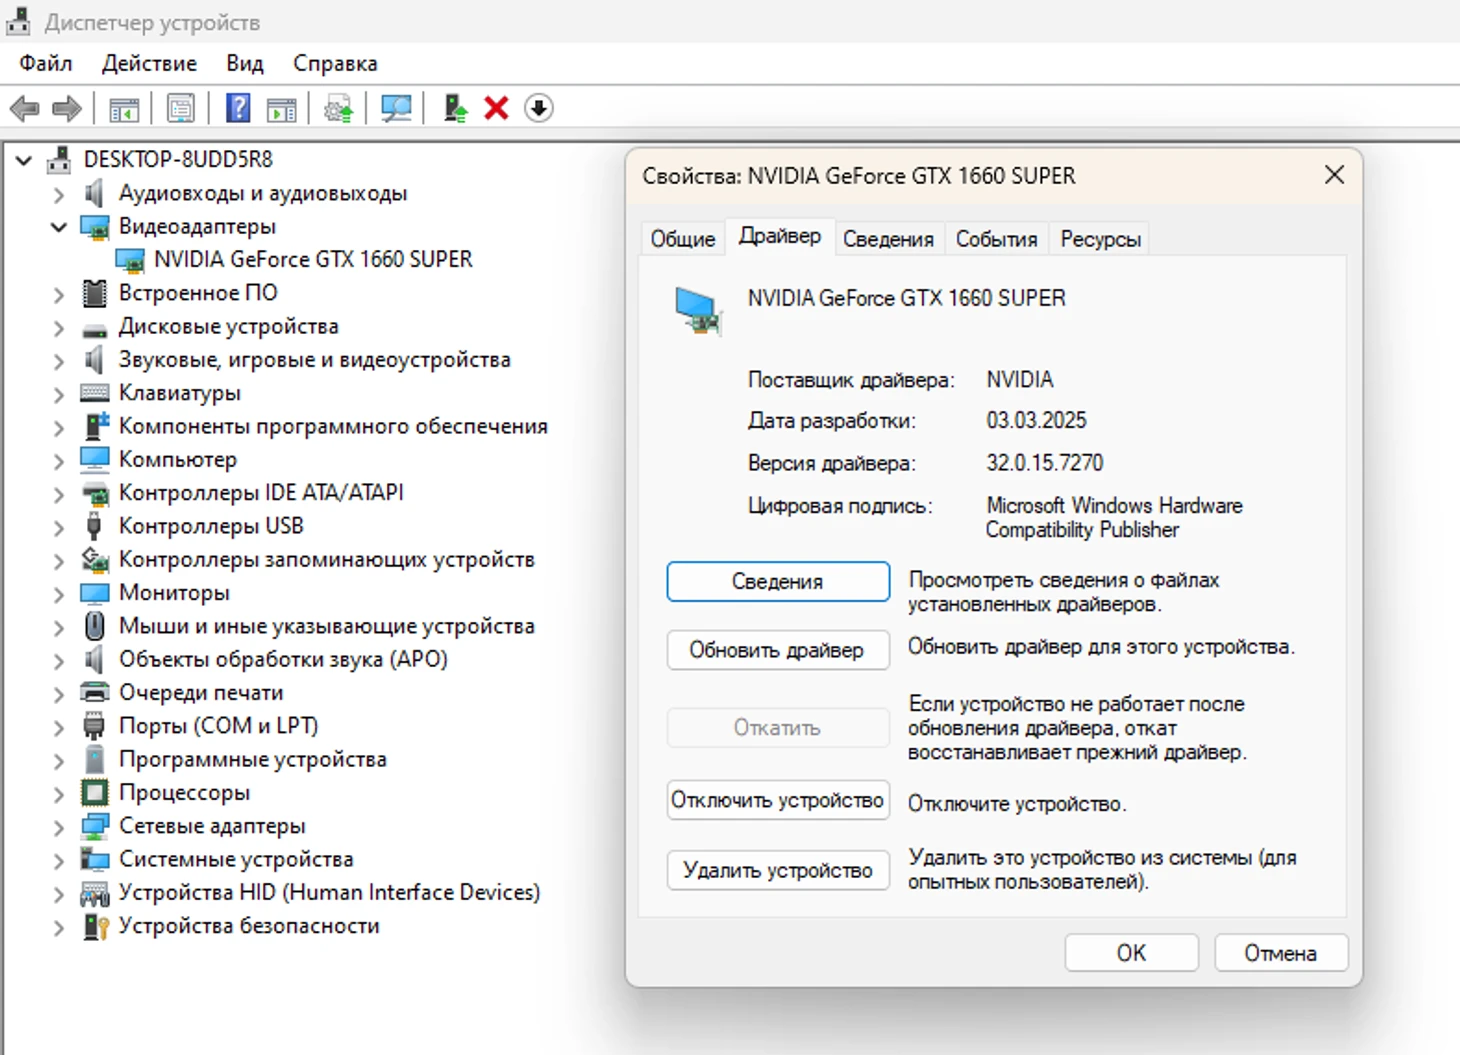
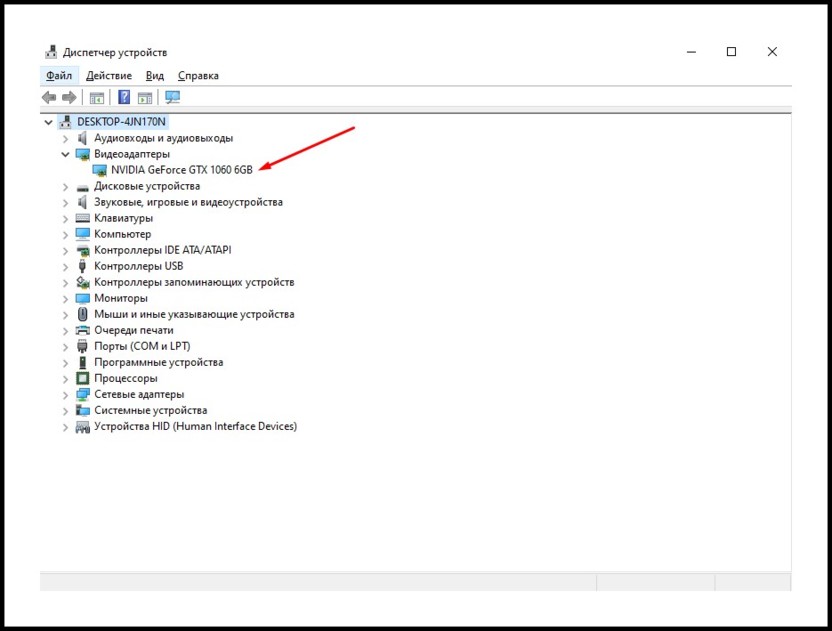
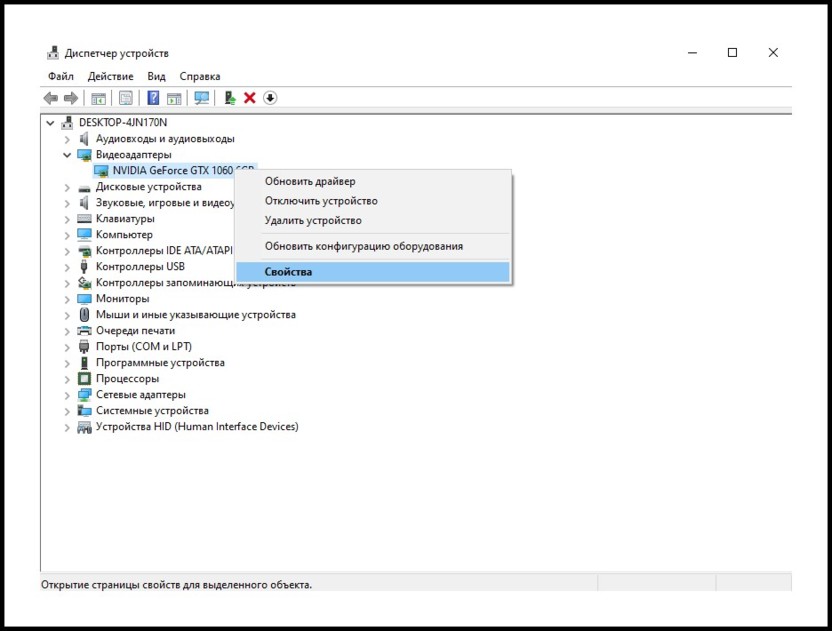
- В диспетчере устройств найдите нужное вам устройство, нажмите по нему правой кнопкой мыши и выберите пункт «Свойства».

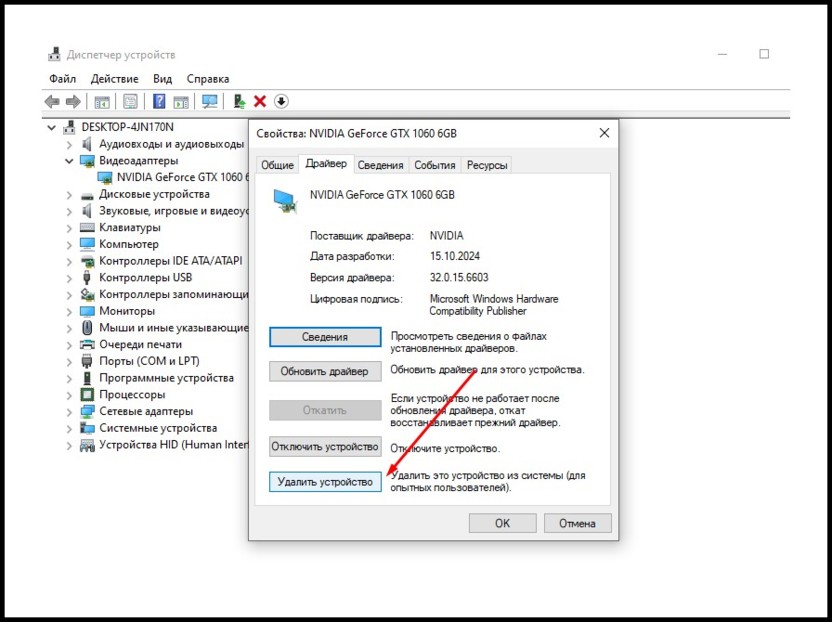
- Перейдите на вкладку «Драйвер» и проверьте, активна ли кнопка «Откатить». Если да — нажмите её.

- Последняя версия Windows 10 может спросить вас, почему вы хотите откатить драйвер. После ответа, нажмите «Да».

- Сразу после этого драйвер устройства будет удален, а вместо него — установлен предыдущая версия драйвера (а в некоторых случаях универсальный системный драйвер).


Иногда, после описываемых действий также требуется выполнить перезагрузку компьютера, чтобы старый драйвер был задействован в качестве используемого устройства (об этом появится соответствующее уведомление).
Установка предыдущей версии драйвера вручную
Иногда, кнопка «Откатить» в свойствах драйвера не активна. В этом случае вы можете поступить слегка иначе:
- Найти и скачать драйвер нужной вам версии, в идеале — с официального сайта производителя материнской платы, ноутбука или оборудования.
- Выбрать устройство в диспетчере устройств, нажать по нему правой кнопкой мыши и выбрать пункт «Удалить устройство». В следующем окне отметить пункт «Удалить программы драйверов для этого устройства».
- По завершении удаления устройства запустить скачанный ранее установщик нужной версии драйвера и произвести установку.
Некоторые дополнительные сведения об откате драйвера NVIDIA GeForce
Если вам требуется откатить драйвер NVIDIA GeForce, а с помощью диспетчера устройств это сделать не представляется возможным, рекомендую иметь в виду такой путь:
- Загляните в папку C:\ProgramData\NVIDIA Corporation\Downloader — в этом расположении, во вложенных папках вы с большой вероятностью обнаружите установщики старых версий драйверов и их не придется откуда-то скачивать. Перенесите нужный установщик в другое, удобное вам, расположение.
- Удалите драйверы NVIDIA с помощью DDU.
- Установите требуемую версию драйверов.
На этом всё. Если что-то не получается, задавайте вопросы в комментариях, я постараюсь помочь.
Два простых способа.
Иногда новые драйверы видеокарты вызывают проблемы: снижение производительности, сбои в играх или нестабильную работу системы. В таких случаях полезно откатить драйвер до предыдущей стабильной версии. Как это можно сделать?
Средствами Windows
Способ одинаковый для видеочипов от любого производителя.
-
Кликните правой кнопкой мыши по кнопке «Пуск» на панели задач;
-
В появившемся меню выберите «Диспетчер устройств»;
-
В разделе «Видеоадаптеры» найдите свою видеокарту;
-
Щелкните по ней правой кнопкой и выберите «Свойства»;
-
Перейдите во вкладку «Драйвер» и нажмите «Откатить драйвер».
Если кнопка активна, Windows вернет предыдущую версию. Если кнопка серая – откат недоступен и нужно воспользоваться вторым способом.
Вручную
Метод немного различается для видеокарт AMD и Nvidia.
AMD:
-
Скачайте подходящую версию драйвера вручную с сайта AMD;
-
Запустите загруженный файл;
-
Выберите пункт «Чистая установка» и дождитесь завершения работы программы.

Nvidia:
-
Скачайте подходящую версию драйвера вручную с сайта Nvidia;
-
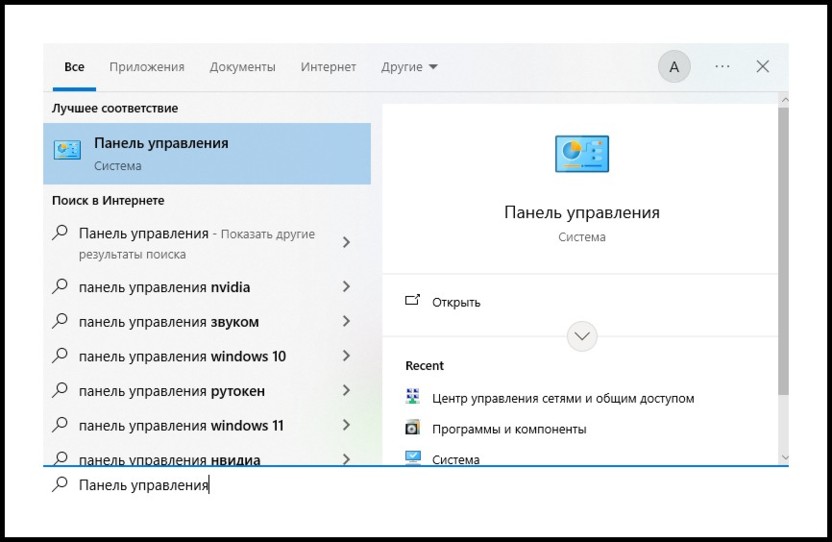
Откройте «Панель управления»;
-
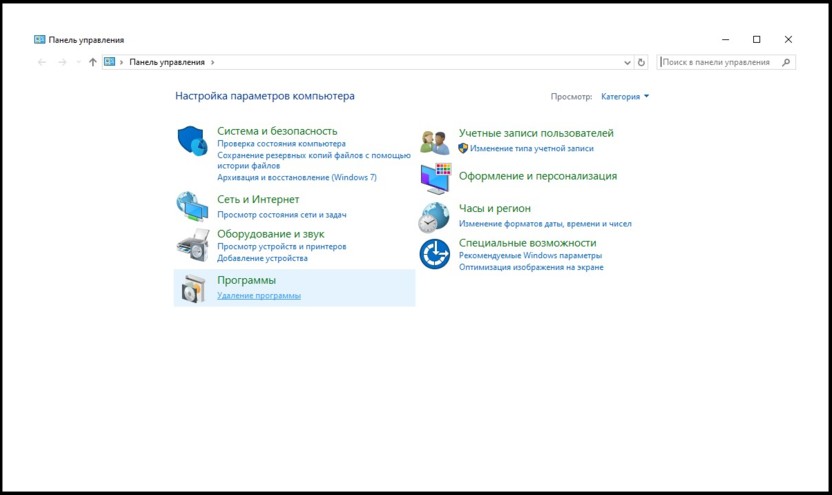
Перейдите на вкладку «Программы», далее «Программы и компоненты»;

-
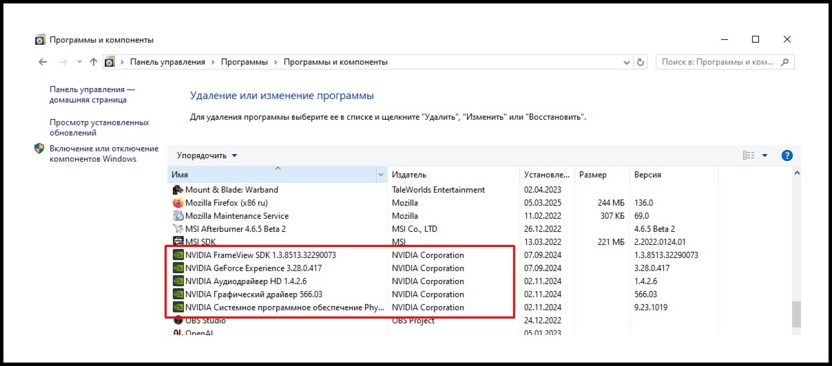
Выберите в списке и удалите драйвера вашей видеокарты;
-
Запустите скачанный ранее драйвер и дождитесь завершения установки.
* * *
Последние версии драйверов Nvidia приводят к черному экрану
Как обновить драйверы на видеокарте?
Все про железо, софт, консоли и людей, с этим связанных

Knowing how to roll back AMD drivers is important for those who are using an AMD machine. Graphic drivers are essential software components.
However, there are times when updating them can cause serious performance issues. A driver rollback is one of the best methods to fix bugs and issues with a new driver update. We garnered some insights from our tech enthusiasts and we’ve shared them below.
Contents
- How To Revert AMD Drivers
- – Using Your Windows Device Manager
- – Manually Downloading Your AMD Driver
- – Manually Downloading From the Manufacturer’s Website
- – Using Third-Party Installer Applications
- – Using AMD’s Autodetect Tool
- – Using AMD’s Product Selector Tool
- How To Update Your AMD Drivers
- – Using AMD’s Radeon Software
- – Update Your AMD Drivers Using Device Manager
- – Carry Out a Windows Update
- Conclusion
There are three main ways to roll back graphic drivers, including using the options integrated into your Windows machine, manual downloads, and using third-party apps.
Graphic card updates are sometimes unstable and may come with bugs and performance issues, such as frequent game crashes and blank screens.
If you’ve determined that the recent update is the cause of the issue your computer is facing, rolling back to the previous version might be your best option.
Here are the simple steps to follow to revert AMD drivers to old version on Windows.
– Using Your Windows Device Manager
The easiest way to access your device manager is by using the search bar beside the start menu. You can also get to your device manager through your file explorer. Simply open your file explorer, right-click on “This PC,” select “Manage,” and select “Device Manager.”
Once you’re in your device manager, look for display adapters and expand the options. You’ll see your graphics driver listed as AMD Radeon Driver. Right-click on it and select “Properties” from the subsequent options. There’ll be five different tabs in the next window. Select the driver tab and click on “Roll Back Driver.”
The Roll Back Driver Is Disabled. What Do I Do?
This doesn’t call for alarm. If the roll-back driver option has been disabled, it means that your Windows machine isn’t able to find a suitable driver to roll back to. Users in this scenario should move to the step below.
– Manually Downloading Your AMD Driver
You can manually roll back Radeon drivers by downloading the working version before the most recent update on AMD’s official driver support and download page. Once you find the right driver, move to the steps below.
- Firstly, ensure that you note down the driver date and version number of the current driver
- Go to your Windows device manager using the steps outlined above
- Expand Display adapters and right-click on “Graphics Card Driver.” Instead of choosing “Roll Back Driver,” this time, you’ll select “Update Driver.”
- Choose “Browse my computer for driver software” from the next options. Use the browse button to find the folder your manually downloaded driver is located. Select the driver and click “Open.”
Your Windows computer will immediately begin installing the driver. Once it’s done, go back to the Driver tab and compare the version number and date to the one you noted down. If both components are changed, that means your installation is complete. If not, you may need to retry the entire process.
– Manually Downloading From the Manufacturer’s Website
Your device manufacturer is likely going to have different versions of the graphics card driver on their website. You can roll back GPU drivers by checking your manufacturer’s support website. The software versions will be listed as current and previous or other versions.
Check under the latter to find the ideal driver version you want to roll back to. Download it and follow the steps we’ve outlined above for a complete installation.
– Using Third-Party Installer Applications
If you’re manually rolling back GPU drivers via third-party software, you must uninstall the current driver completely before installing your preferred version. This process will ensure that there are no complications during the new installation.

There are many reliable third-party software that will remove all residual files, data, and other leftovers. Also, these apps can be used to install the driver you’re rolling back to.
Some third-party uninstallers can even provide you with your driver’s program information, such as links to the manufacturer’s website, registry entries, and program properties.
– Using AMD’s Autodetect Tool
The AMD Driver Autodetect Tool detects your Windows operating system and your driver type and version. Once detected, this tool will provide you with the option to download compatible driver versions.
This auto-detect tool is great as it can be used to download graphics and chipset drivers. However, it’s not able to detect all AMD drivers. This is where the Product Selector tool comes in.
– Using AMD’s Product Selector Tool
AMD’s Product Selector tool allows you to update or roll back any driver by giving you the option to choose your Radeon graphics product and the compatible drivers that are available. Unlike the Autodetect tool that runs automatically, the Product Selector provides you with a list of products to choose from.
You’ll have the opportunity to choose from multiple categories, including graphics, processors, chipsets, processors with graphics, professional graphics, and embedded. The category you choose will depend on your machine and the type of driver you want to roll back.
Once you select the category, you’ll be provided with a list of products that are available for that category. Make your selections and click on “Submit.” You’ll then be taken to AMD’s support page where you’ll see a list of drivers and Windows supported by the product you chose.
Note that only updated versions will be on this page. To revert your AMD driver to an older version, select the Previous Version link under the drivers’ section. This link will provide you with multiple drivers you can roll back to.
If you can’t find the right driver package for your machine in the Previous Version section, that means your software was either custom-made or pre-installed by your computer’s manufacturer.
When you make your driver selection, you’ll be prompted to select your operating system. You’ll be provided with optional and recommended drivers for the product category and OS you have chosen. You should download the drivers in the “Recommended” section as they’ve passed AMD’s quality assessments and offer better stability. Optional drivers, on the other hand, support new game titles but may offer some instability or bugs.
Click on “Download” once you’ve made your selection and your computer will automatically start downloading the driver package.
How To Update Your AMD Drivers
You may need to update your AMD drivers to a newer version after you’ve used the older version for a while. AMD offers bug fixes and better security to newer driver versions.
The buggy version you downloaded can become stable and even improve the performance of your machine in a couple of months.
Therefore, do not consider rolling back to previous driver models as a permanent solution. Always ensure that your drivers are up to date as the newer versions tend to offer better performance and security when all bugs have been fixed.
– Using AMD’s Radeon Software
The AMD Radeon software serves as a hub of drivers for your computer. You’ll get a host of drivers for your computer when you download this software.
However, you’ll need to uninstall any Radeon Software on your PC before installing a newer or older version. This will help eliminate the chances of conflicts when carrying out an installation.
Uninstalling the Radeon Software
Go to your system’s control panel. The control panel is in the start menu on Windows 7. You’ll need to right-click the start menu on Windows 10 and 8 and select the control panel from the menu.
Once you’re in the control panel, go to the Programs and Features menu and select AMD software. Click on “Uninstall” and the removal process will begin.
Note that your PC may experience some phenomena, such as blank or blinking screens and high fan speed. These phenomena are normal during software removal and the removal process can take up to 10 minutes.
Restart your computer after the software has been successfully uninstalled to complete the removal process. Once your PC is back on, you can proceed to download the Radeon software version you want to update or roll back to.
– Update Your AMD Drivers Using Device Manager
Just as you can roll back drivers with the Windows device manager, you can also update drivers using the same method. Simply open your device manager, expand your display adapters, right-click on your AMD driver and choose “Update driver.”
Choose search automatically in the subsequent options. Your system will start searching for newer versions of your driver. If there’s a new drive available for your computer model, Windows will download and install it automatically. You may need to restart your PC after the installation.
– Carry Out a Windows Update
Go to your system settings, click on “Updates & Security,” and select “Windows Update.” Your computer will search online for any available updates and provide you with a download prompt. Once the updates have been downloaded and installed, you’ll be prompted to restart your PC.
Conclusion
Rolling back GPU drivers isn’t as difficult as some may believe. Here is a quick recap of what we’ve discussed so far:
- Rolling back drivers to a previous version can resolve issues with a recent update.
- Note down your driver’s version number so you can find and install the correct previous version.
- The AMD Autodetect tool automatically scans your PC for your OS, chipset, and graphics processor type.
- AMD’s Product Selector Tool provides you with different categories and products to choose from.
- When you use the AMD product selector tool, you’ll be taken to the official website to confirm your OS and download the compatible driver.
- Always download the recommended driver on AMD’s support website.
- Optional drivers aren’t stable yet, but they support current game titles.
- Make sure that you completely uninstall previous drivers before downloading new ones.
- You can use third-party software for uninstalling and installing new drivers.
- If you’re using the Radeon Software, completely uninstall the previous software version on your computer before downloading a new one.
- You can update your AMD drivers via Windows Update and device manager.
Follow our guidelines above and you’ll be able to revert AMD drivers to the old version. The methods above are simple and will only take a few minutes. Resolve your blank screen, performance issues, and other bugs easily.
Once you downgrade your drivers, wait for a while before upgrading them. The company would have fixed the bugs and performance issues and you can continue enjoying using your PC.
Реклама. АО «ТаймВэб». erid: 2W5zFH7LCAL
Программное обеспечение регулярно обновляется, и это касается в том числе драйверов видеокарт. Несмотря на то, что такие обновления жизненно необходимы, они могут повлечь за собой определённые риски, ведь жизнь, даже информационная, бывает несправедливой по отношению к нам, обычным юзерам. Например, существует вероятность не заметить критическую ошибку в давно проверенных процессах, что повлечет факап, а за ним печаль и, возможно, боль.
При обновлении своего драгоценного оборудования вы можете столкнуться с проблемами, такими как нерабочие версии драйверов или необходимость удаления ненужных данных. Это может произойти с видеокартами любого производителя – как дешевыми, так и топовыми.
В этом руководстве я расскажу, как удалить или обновить программное обеспечение вашего графического адаптера, независимо от того, кто его изготовил. Просто, быстро, а главное – совершенно бесплатно, без регистрации и СМС. Итак…
Как это сделать…
Тестировалось на Windows 10 Version 22H2
Через «Панель управления»
Хотите избавиться от драйверов видеокарты? Что ж, нет проблем, ломать – не строить, хе-хе! Зайдите в «Панель управления» и выберите «Удаление программ». Внимательно просмотрите список установленных приложений и поочередно удалите все пункты, которые связаны с вашей видеокартой. Но будьте внимательны: Windows хитрая штука и может автоматически скачать и установить драйверы заново из Windows Update.
Комьюнити теперь в Телеграм
Подпишитесь и будьте в курсе последних IT-новостей
Подписаться
Через «Диспетчер устройств»
Тут чуть сложнее. Откройте «Диспетчер устройств» через поиск Windows (или сочетанием клавиш Win+R и команды devmgmt.msc) и найдите раздел «Видеоадаптеры». Убедитесь, что отображаются скрытые устройства (меню «Вид»). Чтобы удалить видеокарту, кликните на неё правой кнопкой и выберите «Удалить». Альтернативный способ: дважды кликните по названию видеокарты, перейдите во вкладку «Драйвер» и нажмите кнопку удаления драйвера.
К слову, если вы хотите просто перейти на новую, более стабильную версию, то можете точно также просто нажать «Обновить драйвер».
При помощи Display Driver Uninstaller
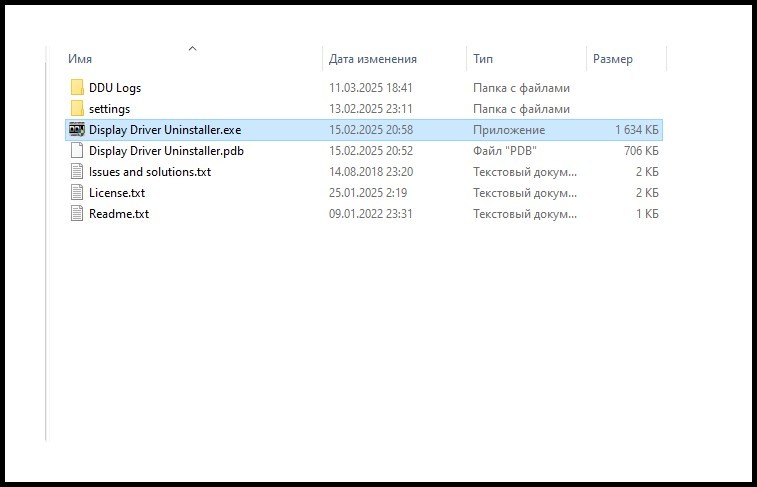
Можно воспользоваться специальной утилитой – это вариант для самых смелых ребят. Если вы решили для себя идти до конца, то загрузите программку с официального сайта. Она обеспечивает полное удаление информации о видеокарте, в отличие от предыдущих методов.

Распаковываем скачанный архив в любое удобное место и запускаем от имени администратора файл Display Driver Uninstaller.
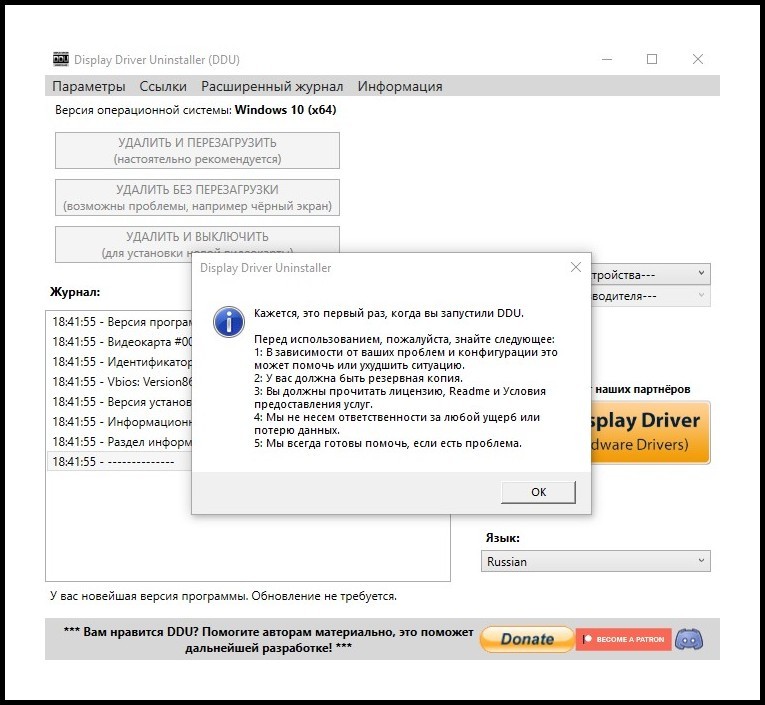
Внимательно читаем инструкцию, взвешивая все риски. Рекомендуется запускать программу в безопасном режиме.
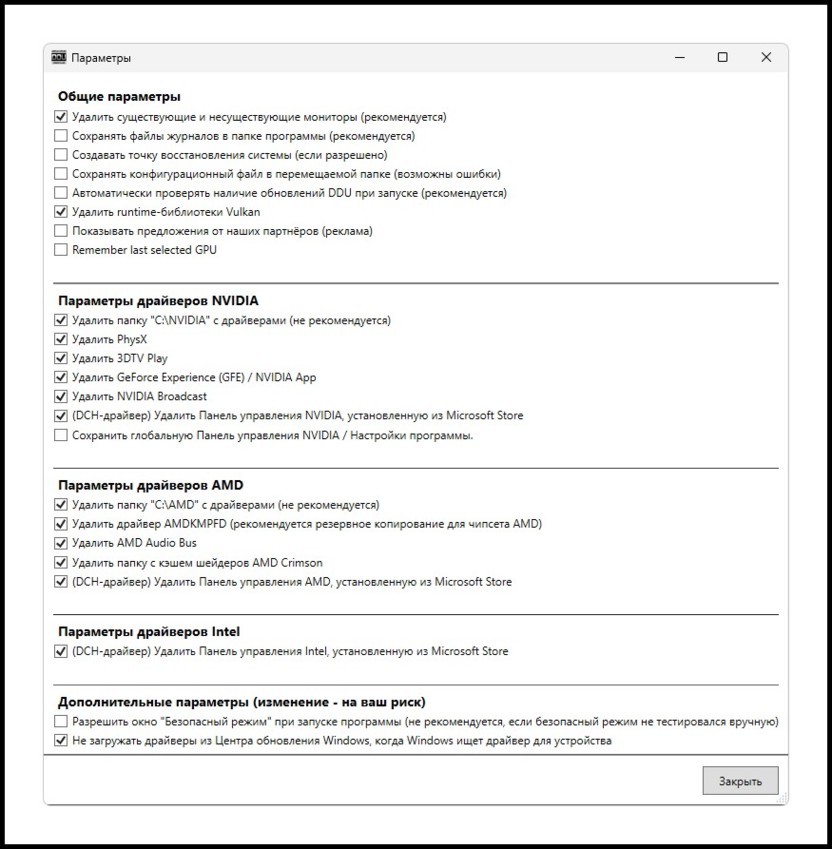
Базовые настройки можно проигнорировать, отметив лишь те параметры, которые показаны на картинке ниже. Это позволит не только полностью удалить драйвера видеокарты из операционной системы, но и предотвратит автоматическую установку устаревших версий, что Windows так любит подтягивать в фоновом режиме, которые только тормозят компьютер. А еще не будет кучи точек восстановления, захламляющих жесткий диск. Ну, а если хотите, настраивайте все сами. Описания там подробные, разберетесь без проблем и затруднений.
Закрываем окно конфигурации, выбираем производителя видеокарты и смело нажимаем удалить.
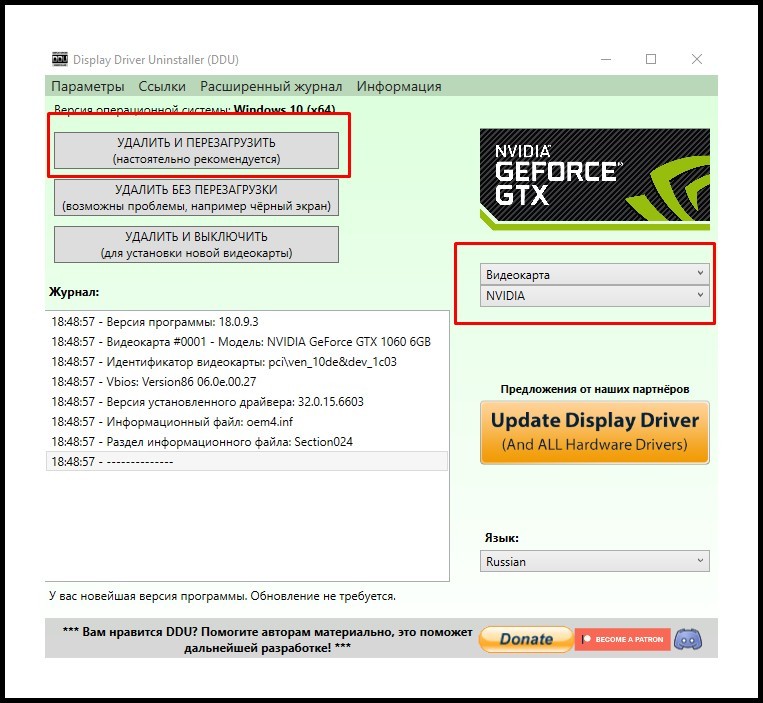
Всё – вы великолепны. Остается только установить видеодрайвер и выполнить его настройку. Ну и кофейку выпить перед этим делом…
Так мы переходим к обновлению видеодрайвера.
Как откатить драйвер (установка драйверов старых версий)
Процесс, подобно удалению, достаточно прост благодаря наличию встроенных и сторонних инструментов. Главное – точно выполнять каждый шаг.
Через официальный сайт производителя
Удалив программное обеспечение для графического адаптера, вы можете открыть любой из официальных сайтов представленных ниже производителей, чтобы загрузить нужную вам версию. Скачайте её и соблюдайте указания установщика, не ошибетесь. Вот три наиболее популярных варианта:
- NVIDIA;
- AMD;
- Intel (необходим зарубежный IP-адрес).
Если графическая система не была удалена, процесс отличается только необходимостью подтвердить замену версии.
Ещё один способ…
Попробуйте приложить подорожник к компьютеру, возможно, драйвера установятся (шутка, вероятно не смешная).
In this fast-paced technological era, software updates are essential for ensuring optimal performance and security for our devices. However, sometimes these updates may introduce unforeseen issues or compatibility conflicts. If you are an AMD Radeon user experiencing difficulties with the latest software update, this quick guide will walk you through the process of rolling back the software to a previous version, allowing you to regain stability and ensure a seamless gaming or graphic experience.
Understanding The Need For Rolling Back AMD Radeon Software
AMD Radeon Software is a vital component of your system that manages the graphics capabilities of your AMD Radeon GPU. However, sometimes you may find that the latest version of the software is causing issues or compatibility problems with your system. In such cases, rolling back to a previous version can help resolve these issues.
There are several reasons why you might need to roll back AMD Radeon Software. It could be that the latest update is causing instability, crashes, or performance issues in certain applications or games. Compatibility problems with certain hardware configurations or conflicts with other software on your system could also arise.
By understanding the need for rolling back AMD Radeon Software, you can regain stability and performance on your system. This guide will walk you through the necessary steps to safely roll back to a previous version of the software, ensuring a smooth experience without any hiccups. Let’s dive in and prepare your system for the rollback process.
Preparing Your System For The Rollback Process
Before initiating the rollback process of AMD Radeon Software, it is crucial to prepare your system to ensure a smooth transition. Firstly, create a backup of all essential files and data to avoid any potential data loss during the rollback process.
Next, disconnect your system from the internet to prevent any interference during the rollback process. This will ensure that the installation of the previous driver version proceeds without any interruptions. Additionally, disabling any background applications and antivirus software can help prevent conflicts and interruptions during the rollback.
Make sure you have downloaded the correct previous driver version from the official AMD website. It is crucial to choose the appropriate driver version to ensure compatibility with your system’s hardware and software configuration.
Finally, familiarize yourself with the rollback process by reading the documentation provided by AMD. Understanding the steps involved will help you navigate through the process smoothly and troubleshoot any unexpected issues that may arise.
By taking these preparatory steps, you will ensure a hassle-free rollback process and minimize the risk of encountering any complications.
Identifying The Correct Driver Version To Roll Back To
When rolling back AMD Radeon Software, it is crucial to identify the correct driver version to ensure a successful rollback process. Installing an incompatible driver version can cause system errors and instability.
To identify the correct driver version, you need to consider certain factors. Firstly, determine the reason for rolling back the software. If you recently encountered issues or errors after updating the driver, it is recommended to revert to the previous version.
Secondly, visit the official AMD website or the manufacturer’s website to find the available driver versions. Look for the driver release notes or the driver download page, which usually lists the previous driver versions.
Pay attention to the date and version number of each driver to determine the correct one. If possible, read the driver release notes to understand the improvements, bug fixes, or known issues associated with each version.
Once you have identified the appropriate driver version, proceed with the rollback process, ensuring compatibility and stability with your system.
Uninstalling The Current AMD Radeon Software
Uninstalling the current AMD Radeon Software is an essential step to successfully roll back the software. To uninstall the software, follow these steps:
1. Open the Control Panel on your computer by typing “Control Panel” in the search bar and selecting the relevant option.
2. In the Control Panel, click on “Programs” or “Programs and Features,” depending on your version of Windows.
3. Look for the AMD Radeon Software in the list of installed programs and select it.
4. Click on the “Uninstall” or “Change/Remove” button.
5. Follow the prompts to complete the uninstallation process. It may take a few minutes to remove the software entirely.
6. Restart your computer to finalize the uninstallation.
After the computer restarts, the previous AMD Radeon Software should be completely removed from your system. It is essential to complete this step before proceeding to the next subheading to ensure a clean rollback of the software.
5. Removing Any Remaining Driver Files And Registries
When rolling back AMD Radeon Software, it is essential to remove any remaining driver files and registries from your system to ensure a clean installation of the previous driver version.
To begin, navigate to the Control Panel on your Windows operating system and select “Programs and Features” or “Add or Remove Programs.” Look for any AMD Radeon Software entries and uninstall them.
Next, open File Explorer and navigate to the AMD folder, typically located at “C:Program FilesAMD” or “C:Program Files (x86)AMD.” Delete any remaining files or folders related to the current driver version.
To remove the remaining driver registries, open the Run dialog (Windows + R) and type “regedit” before pressing Enter. This will open the Registry Editor. Navigate to “HKEY_LOCAL_MACHINESoftwareAMD” and “HKEY_CURRENT_USERSoftwareAMD” and delete any keys or values associated with the current driver version.
It is crucial to exercise caution while manipulating the registry, as deleting the wrong entry can cause system instability. Therefore, it is recommended to create a backup before making any changes.
By thoroughly removing any remaining driver files and registries, you ensure a clean and successful rollback of AMD Radeon Software.
Downloading And Installing The Previous AMD Radeon Driver
After uninstalling the current AMD Radeon software and removing any remaining driver files and registries, it’s time to download and install the previous version of the AMD Radeon driver. Here’s a step-by-step guide on how to do it:
1. Visit the official AMD website: Go to the AMD website and navigate to the “Support & Drivers” section.
2. Select your graphics card model: Use the dropdown menus or search bar to select your exact graphics card model.
3. Choose the previous driver version: Look for the list of available driver versions for your graphics card. Locate the previous driver version that you want to roll back to and click on the download button next to it.
4. Install the driver: Once the driver file is downloaded, locate the file on your computer and double-click on it to start the installation process. Follow the on-screen instructions and prompts.
5. Restart your system: After the installation is complete, it is recommended to restart your computer to ensure that the changes take effect.
By following these steps, you will have successfully downloaded and installed the previous AMD Radeon driver, effectively rolling back the software.
Verifying The Successful Rollback Of AMD Radeon Software
After successfully installing the previous version of AMD Radeon driver, it is crucial to verify that the rollback process was completed without any issues. Verifying the successful rollback ensures that your system is running on the desired driver version and that any compatibility or performance issues have been resolved.
To verify the rollback of AMD Radeon software, follow these steps:
1. Open the AMD Radeon Settings application on your computer.
2. Click on the “System” tab.
3. In the drop-down menu, select “Software”.
4. Check the “Driver Version” displayed on the screen. It should match the previous driver version you installed.
5. Ensure that all the settings and options in the AMD Radeon Settings application are functioning as expected.
6. Test your system’s performance in various applications and games to ensure stability and compatibility.
If the driver version and functionality match your expectations, the rollback process has been successful. However, if you encounter any issues or inconsistencies, it is recommended to repeat the rollback process or seek further assistance from AMD support. Remember to periodically check for driver updates and install them to ensure optimal performance and compatibility with your hardware.
Troubleshooting Common Issues During The Rollback Process
During the rollback process of AMD Radeon software, you may encounter some common issues that can hinder the successful completion of the rollback. This section aims to provide solutions to these issues, ensuring a smooth and error-free rollback process.
1. Error Messages: If you receive error messages during the rollback, make sure to note down the exact message and search for it online. AMD community forums and support websites often provide solutions for specific error codes.
2. Compatibility Issues: Sometimes, the previous AMD Radeon driver might not be compatible with your system’s hardware or operating system. In this case, visit the official AMD website and check for driver compatibility with your specific graphics card model and operating system version.
3. Driver Update Tools: If you use any third-party driver update tools, they might interfere with the rollback process. Disable or uninstall these tools before attempting to roll back the AMD Radeon software.
4. System Instability: If your system becomes unstable after the rollback, try performing a clean installation of the previous driver version. Use a program such as Display Driver Uninstaller (DDU) to completely remove all traces of the current driver before reinstalling the previous version.
By addressing these common issues and following the troubleshooting steps, you can overcome any obstacles you may encounter during the rollback of AMD Radeon software.
Frequently Asked Questions
1. How can I roll back the AMD Radeon Software on my computer?
To roll back the AMD Radeon Software on your computer, you can follow these steps:
- Open the AMD Radeon Settings app on your computer.
- In the top right corner, click on the gear icon to access the settings.
- Select the “System” tab from the menu on the left side.
- Scroll down until you find the “Software” section.
- Click on the “Switchable Graphics” button.
- In the “Switchable Graphics” section, click on the “Current Installed Driver” dropdown menu.
- Choose the previous version of the driver that you want to roll back to.
- Click on “Apply” to save the changes and roll back to the selected driver.
2. Why would I need to roll back the AMD Radeon Software?
There can be various reasons why you may need to roll back the AMD Radeon Software, including:
- Compatibility issues with certain games or applications.
- Performance problems or instability caused by the latest driver update.
- Introducing new bugs or glitches that were not present in the previous driver version.
- Preference for an older driver version that was working well with specific software.
3. Will rolling back the AMD Radeon Software delete any of my files or settings?
No, rolling back the AMD Radeon Software will not delete any of your personal files or settings. It only reverts the graphics driver back to a previous version. Your files and settings will remain intact on your computer. However, it is always recommended to create a backup of important data before making any significant changes to your system, just to be on the safe side.
Final Thoughts
In conclusion, rolling back AMD Radeon software can be a simple and effective solution for resolving issues that users may encounter. By following the step-by-step guide outlined above, individuals can easily revert their software version to a previous one, ensuring stability and improved performance. Furthermore, the availability of the software’s built-in feature, the AMD Cleanup Utility, provides an additional tool to thoroughly remove any remnants from previous installations. With this comprehensive guide, users can confidently troubleshoot and rectify any software-related problems they may face with their AMD Radeon graphics cards.