
Давайте обсудим вопрос организации иконок на рабочем столе. Хочется сказать: «покажи мне свой десктоп, и я скажу, как ты работаешь». Вынесу вверх главную мысль: Рабочий стол предлагается использовать для организации текущей работы над документами. Что на столе — то в сознании, в фокусе. Поэтому важно иметь структуру этого фокуса и важно вовремя убирать из фокуса лишнее.
Часто можно наблюдать следующие стратегии поведения при использовании рабочего стола:
- заполнить стол значками до предела, периодически «удалять неиспользуемые»
- оставить на столе корзину и красивую картинку, удалять со стола всё, регулярно чистить корзину
- расположить на столе часто используемые ярлыки и некоторые рабочие документы
UPD: Пока в комментах побеждает вариант неиспользуемого стола.
Всё это — варианты нормы, единственный недостаток — рабочий стол не помогает в организации работ. Это примерно как обвинить кота, что он не приносит тапочки. Но ведь мог бы и приносить!!! Достаточно правильно расчертить дорожки.

Сначала я подумал, что я гений и заработаю миллионы на этой идее, но потом решил вбить в поисковик «Organizing desktop wallpaper». Нафантазированная яхта и девушки-поклонницы исчезли, но стало ясно, что, во-первых, желание вполне адекватное, а во-вторых уже есть готовые варианты, чтобы взять и использовать. Т.е. хотя бы тапочки. Картинка выше взята из статьи How to Design and Create a Clean, Organized Desktop.
Ниже будет список найденных статей и вариантов, а также я расскажу о своей идее и тех задачах, которые она должна решать:
- Способствовать организации хранения документов
- Помогать в управлении работами
- Управлять рабочим столом с течением времени
Сама идея проста и понятна: картинка на рабочем столе должна помогать «правильно» располагать ярлыки и управлять их жизнью.
Кто умеет рисовать — предлагайте свой варианты в комментах, я добавлю их в статью, а то мне медведь на руки наступил.
Обзор заинтересовавших вариантов:
Organize your Desktop with a Simple Wallpaper
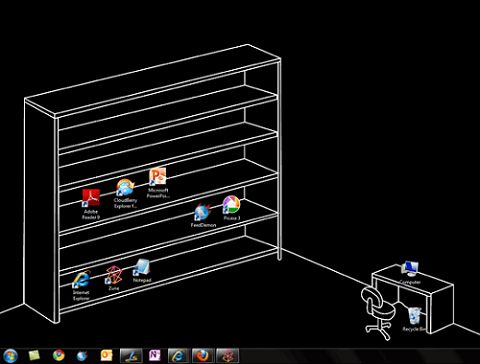
У меня тоже первой была идея найти картинку, куда иконки бы вписывались органично. Либо интерьер с полками, либо какой-то конвейер. Стимпанковский. Но задачи поставлены сильнее, поэтому ищем дальше.
How to Organize your Desktop to Boost Productivity

Эта идея проста и понятна, но никак не помогает решить поставленные выше задачи. Иконок много, процесс работы над ними никак не поддержан.
Give Your Desktop A Productivity Boost With These Built-in Organisation Wallpapers

Раскрыта идея использовать рабочий стол, как инструмент для работы, где объекты не просто лежат, а проходят свой путь. В статье ещё несколько готовых картинок. Есть ещё похожая статья с аналогичной организацией в виде дорожек: Organize Your Desktop — No, Not That One!
Organize your computer desktop

Это самая эстетически приятная из найденных и тоже содержит свою идею организации работ.
Правда, во всех этих подходах мне не нравится, что на стол всё ещё можно поместить кучу иконок.
О чистоте стола
Где-то тут надо вставить мысль о том, что в одной из практических систем наведения порядка в делах предлагается очень интересный способ: в конце каждого рабочего дня нужно прибраться на столе (физическом) и оставить его чистым. Не спешите спорить, подумайте, как это сделать:
- Мелкие записи перенести в ежедневник, органайзер и т.п.
- Документы положить в правильное место хранения (Лоток/папка «архив», «текущий проект», «черновики», «английский язык» и т.д.)
- Завершить начатое на бумажке и выкинуть её
Стол должен быть чист и приведен в порядок. А за ним — и сознание. Уходя домой, осознаёте, что дела доделаны. Попробуйте, работает.
Следующее соображение преследует две цели: на столе должен быть минимум необходимого и стол должен радовать взгляд. Поэтому мы положим на него красивую картинку. Как сейчас говорят, чтобы «отражал индивидуальность».
Предлагаемая концепция

- Рабочий стол используется для быстрого доступа к ключевым приложениям
- На рабочий стол помещаются объекты, с которыми ведется текущая работа
- Объекты перемещаются по столу в разные области в зависимости от текущего состояния работы над ними
- Рабочий стол используется для навигации по долгосрочному хранилищу
- На рабочем столе размещена картинка, определяющая отведённые места для документов и ярлыков.
Может быть предложен программный сервис, автоматизирующий обработку объектов на столе (автоархивация неиспользуемых ярлыков, авторасположение, контроль сроков и т.д.)
Ниже я опишу конкретную конфигурацию рабочего стола и некоторое обоснование этих идей. Впрочем, совершенно ясно, что подходы могут варьироваться и комбинироваться.
Итак, центральная часть стола отдана под картинку. Чтобы радовала взгляд и не давала захламлять стол.
Ярлыки запуска
Слева расположены постоянные ярлыки программ. В левом верхнем углу — Корзина. И я потом объясню почему. Если слева программ слишком много, то, во-первых задумайтесь, действительно ли они нужны каждый день, а во-вторых можете использовать два вертикальных столбца иконок. Наше решение масштабируемо.
Панель рабочих документов
Верхняя строка — самая важная. Она постоянно перед глазами, её удобнее всего использовать для текущей работы. Я предлагаю следующую структуру:
Левая треть — для временных файлов, их обработали, распечатали, дописали, отправили, скопипастили куда нужно — и отправили в корзину. Именно поэтому корзина тут же слева дня них и расположена.
Средняя треть — для текущих документов, над которыми сейчас идёт работа. По завершению они могут быть отправлены по назначению и переместиться в архив или в корзину.
Правая треть — для документов, которые задерживаются на столе для работы подольше.
Мне кажется, что современных широких мониторов как раз хватает на оптимальное для сознания количество текущих рабочих документов (задач). Но если есть необходимость, мы можем использовать два ряда и сверху.
Хранилище документов
Справа у нас будет инструмент организации долгосрочного хранения. Симметрично от Корзины в правом верхнем углу — папка «Архив» или «Склад». Туда по завершению работы над документом отправляется всё то, что жалко удалить, но лень классифицировать. Оставьте эту работу встроенным инструментам поиска по тегам и содержимому. Я до сих пор радуюсь каждый раз, когда переношу в такой архив очередной непонятный документ из текучки дел. Невозможно создать систему для всего, особенно если оно не очень нужно. Неструктурированный архив для барахла, индексация содержимого и поиск — вот легкий путь к освобождению стола и сознания. Я тут наступаю на горло песне про архив, потому что сказать хочется многое, но не всё же сразу.
Далее собственно инструмент структурирования хранилища. Нужно создать простую систему хранения файлов и вынести на стол ярлыки на ключевые точки в этой системе. То есть, полезные документы после обработки попадают не в общий архив-свалку, а в правильное место. И точки входа в такие места мы размещаем справа в ряд.
Динамика движения документов
Таким образом, динамика у нас такая: документы попадают в топ, растаскиваются в корзину влево, в архив вправо или в постоянное хранилище вправо и вниз. Появление новых объектов на столе вынуждает нас убирать со стола лишнее. Возьмите себе за правило — не иметь более 5-9 текущих документов, над которыми идёт активная работа. Остальное нужно завершать, отменять, делегировать, переносить в будущее. Да, это одна из идей — тайм-машина для файлов. Завершив работу над документом, положите его в правильное место (зелёные стрелки на рисунке выше).
Я ниже напишу про пример организации такого хранилища, а пока пара слов про оставшееся место.
TaskBar, логично завершающий симметричную картинку, поэтому я не размещаю снизу ярлыки. Однако, если мы говорим о масштабировании, то если у нас слева и сверху два ряда ярлыков, то два ряда могут быть и справа — например, для столбца постоянно необходимых документов — инструкций, схем, ссылок на проектные папки и т.д. И снизу может быть дополнительный ряд. Например, для игр и развлечений.
Вот, что получилось у меня:

Ну, и чтобы два раза не вставать, пара слов о структуре хранилища документов (папки My Documents). Мы здесь говорим об этом, потому что правая часть стола отведена под навигацию по хранилищу.
Структура хранилища
Mail — папка с локальным кэшем почтовой программы. В бекапе не нуждается. Переименую в Cache.
Music — папка с музыкой и видео для работы. Переименую в Media. В бекапе не нуждается.
Temp — папка для временных объектов при копировании и т.д.
SkyDrive — папка для всех документов, которые синхронизируются с облаком и домашним компом.
В SkyDrive лежат:
Office — офисные документы (командировки, инструкции, приказы и т.п.)
Personal — папка с личными файлами
Work — папка с рабочими файлами
Photos, Pictures — фотки, картинки
Public, Shared — папки, доступные в интернет для обмена через SkyDrive с другими людьми
Дальнейшее деление не имеет смысла описывать детально. В рабочей папке лежит архив проектов, текущие проекты, презентации и т.д. Главное — на рабочем столе есть ярлыки к ключевым точкам этой структуры. И к текущим активным проектам. Это позволяет без лишних усилий раскладывать документы в папки для долгосрочного хранения. Предлагайте в комментариях свои варианты организующих обоев и идеи их использования.
P.S. Нашёлся давний пост на Хабре на эту тему. Впрочем, там опять весь стол завален документами.
UPD: Многие рекомендуют Fences. Эта штука упоминается в статьях, но я хотел обсудить рабочий стол в чистом виде. Ещё раз хочу подчеркнуть мысль статьи: стол можно не использовать. Это всего лишь одно из приложений. Но раз уж оно есть в ДОПОЛНЕНИЕ к версионному контролю, к облачным папкам, к структуре документов (всё это можно заметить в статье), то почему бы не использовать стол как ЕЩЁ один инструмент, раз уж он всегда под рукой.
If you’re like most people, your computer is one of your most essential tools for getting things done. However, with so many windows open and apps running, it’s easy to become overwhelmed and distracted. That’s where arranging your Windows 11 desktop for productivity comes in handy.
In this article, we’ll walk you through the steps to optimize your Windows 11 desktop for maximum productivity. You’ll learn how to organize your desktop, customize your start menu, and use keyboard shortcuts to get more done in less time. So, let’s get started!

Understanding Your Desktop
Before we dive into the tips and tricks, it’s important to understand the different elements of your desktop. Windows 11’s desktop consists of the taskbar, the start menu, and the desktop itself.
- The taskbar is the bar at the bottom of your screen that displays your open apps and system notifications.
- The start menu is the menu that appears when you click on the Windows icon in the bottom left corner of your screen.
- The desktop is where you can place files and shortcuts for easy access.
These elements make up what you see when you first open your computer, and how you use them can greatly affect your productivity. If everything’s a mess, it affects how quickly you can work and how organized you feel. Let’s look at some ways to organize them for maximum efficiency.
Organizing Your Desktop
Picture yourself settling in for a productive day at work, armed with a strong cup of coffee and a clear plan to tackle a critical project. You power on your computer, only to be met with a cluttered desktop filled with folders, documents, and files, making it nearly impossible to locate the important file you need to turn in.
The state of your desktop is not only distracting but also hindering your productivity. To avoid this unnecessary stress and lost time, take a moment to declutter your digital workspace. A neat and organized desktop is more than just aesthetically pleasing; it sets the tone for a focused, efficient day, ultimately leading to a more productive and successful work life.
Luckily, there are a lot of different ways to organize your desktop. Let’s go over some of the most popular options:
- Make folders for your documents, shortcuts, and other files
- Organize the applications you use for work
- Take advantage of shortcuts for apps, websites, and even folders
- Use a custom productivity wallpaper for Windows 11
- Set custom desktop icons
- Use virtual desktops
- Use widgets
1. Create Folders for Organizing Your Documents
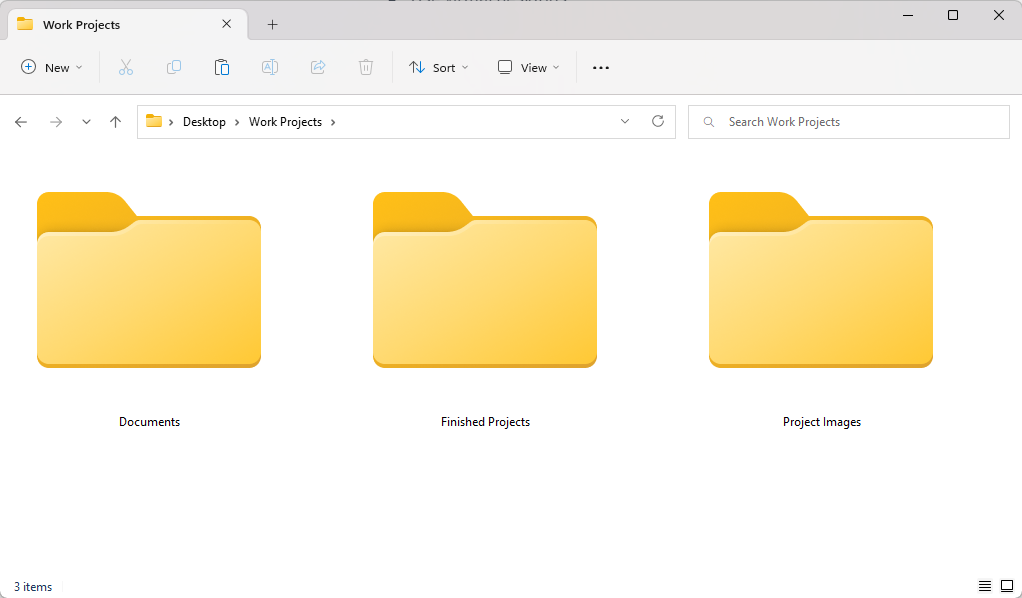
Staying organized is key to tackling tasks efficiently. One simple yet effective way to maintain organization is creating well-structured folders for all the files you constantly create, download, and save. This way, you won’t waste time searching through a cluttered desktop or digging through unrelated files.
When you create sensible folders like «Work Files» or «Projects,» you immediately know exactly where your work-related documents are. This not only saves precious time but also contributes to a streamlined workflow, allowing you to focus on what really matters — getting things done.
To create a folder, right-click on your desktop and select «New» > «Folder.» You can then drag and drop files and shortcuts into the folder. Step up the organization game and enjoy the convenience and productivity boost that comes from an orderly digital workspace.
2. Organize Your Applications
If you work with a variety of applications, you’ll want to make sure that they are easily accessible and organized. Create folders for the different types of apps you use and then place them into the appropriate folders. You could also create desktop shortcuts so that you can quickly access your most used apps.
When you install a new application, it might create its own shortcut on your desktop. More often than not, these shortcuts are unnecessary. To remove an unwanted shortcut from your Windows 11 desktop, simply right-click on it and choose the «Delete» option.

Don’t worry — this isn’t going to uninstall the software. It’s only to remove the app shortcut from your desktop.
3. Set Up Shortcuts for Frequent Tasks
Setting up shortcuts to frequently used tasks is a great way to reduce the time it takes to access them. You can easily create a shortcut by right-clicking on an application and selecting «Create Shortcut.» This will place a link on your desktop that you can then click on to open the application.
Shortcuts are useful for quickly accessing programs or applications that you use often, such as word processors and photo editors. They also come in handy when trying to access programs that are buried deep within your computer’s file structure.
Did you know? Windows 11 lets you set up shortcuts for websites, too! This way, you can hop online from your desktop and get to work on whatever project you need to do.
4. Set a Custom Wallpaper
If you like things to look great while also serving a good purpose, look into Windows 11 wallpapers for productivity. Many talented creators publish free and paid wallpapers with sections to place your most important shortcuts, as well as reminders of your goals and notes on tasks to complete.
These wallpapers are aesthetically pleasing, but they also provide an interactive way to stay organized that you won’t find anywhere else. Plus, with a few simple clicks, you can completely customize your Windows 11 desktop wallpaper to your liking!
Of course, you can make your own wallpaper too. All you have to do is pick an image you like, and draw some areas where you’ll place your shortcuts or notes.
5. Customize Your Desktop Icons
Did you know that Windows 11 allows you to set custom desktop icons? With this feature, you can make your desktop look just the way you want it to. You can even upload pictures yourself to give your desktop a personal touch! There’s really no limit when it comes to setting a new, customized icon for your desktop apps and files.
By searching the internet, you can find a lot of different Windows 11 icon packs such as Insignia (which even offers social media icons for your shortcuts) or the more playful In Pixelated Icon Set.
Found the perfect icon set for your new, optimized Windows 11 desktop? Let’s take a look at how you can change your current icons to your new ones. Here’s how to change desktop icons on Windows 11:
- Right-click on your desktop and select «Personalization» from the menu that appears.
- Click on «Themes» in the Personalization settings.
- Scroll down to «Desktop Icons Settings» and click on it.
- Choose a default icon from the list or click «Change Icon» to use a custom one.
- If you want to use a custom icon, click «Browse» and locate the icon pack you downloaded for Windows 11.
- Select your desired icon and click «OK«.
- Click «Apply» to save the changes to your desktop.
You can also change the size of your desktop icons to make them easier to see and work with. Right-click on your desktop and select «View» > «Large icons,» «Medium icons,» or «Small icons» to adjust the size.
6. Utilize Virtual Desktops
Virtual desktops in Windows 11 have become a game changer for individuals juggling multiple applications or projects simultaneously. Windows 11 provides an intuitive way to use virtual desktops. Click the «Task view» button on the taskbar and select «New desktop» to swiftly create an organized space for each project. Use the same button to move between different desktops.

Establishing a balanced and productive work-life environment is crucial for leading a stress-free and efficient professional life. Create separate desktop spaces: one for personal entertainment and leisure apps, and another dedicated solely to productivity-enhancing tasks.
This strategic separation helps minimize distractions caused by messaging apps, social media platforms, and video games. Completely immerse yourself in the task at hand while working. Once the work is complete, switch over to your personal desktop to unwind.
7. Take Advantage of Widgets

Widgets are a new addition to Windows 11, and they can help you stay organized and productive by providing quick access to important information. To access widgets, simply click on the Widgets button on the taskbar, or use the «Windows» + «W» shortcut. You’ll see a variety of options for displaying news, weather, and other useful information.
To customize your widgets, click the «Settings» button and select which widgets you would like to see. You can also organize your widgets using drag-and-drop.
Users can also place custom widgets directly on the Windows 11 desktop. While this is not a native feature, third-party apps like BeWidgets and Rainmeter offer this functionality.
Conclusion
In conclusion, arranging your Windows 11 desktop in a way that is conducive to task completion can help you maximize productivity. Utilizing virtual desktops for organization and customizing the start menu with shortcuts will save time navigating around applications and programs. Widgets are also an excellent addition, as they provide quick access to important information without having to search through multiple windows or folders.
With these tips in mind, you’ll be well on your way to creating a productive environment for yourself! We hope this article has been helpful in your journey to optimize your Windows 11 desktop for productivity.
One More Thing
We’re glad you’ve read this article.  Thank you for reading.
If you have a second, please share this article on your socials; someone else may benefit too.
Subscribe to our newsletter and be the first to read our future articles, reviews, and blog post right from your inbox. We also offer deals, promotions, and updates on our products and share them via email. You won’t miss one.
Related Articles
» Tips to Boost Your Productivity at Work
» 7 Steps to Become More Productive While Working From Home
» How Sleep Affects Your Work Day and Productivity
If you’re working through several different projects at once or need to constantly switch through tabs, having multiple desktops on your screen can make it easier to manage everything. Windows 11 comes with new updates that improve the appearance of multiple desktops for more hassle-free task management. Learn more about using multiple desktops so you can simplify the way you organize your screen.
What are the benefits to using multiple desktops?
Having multiple desktops allows you to separate your tasks into different places, which can be especially handy if you need to multitask. Designating a desktop for each project you’re working on can make it less overwhelming to look at your screen. Instead of sifting through a never-ending collection of browser tabs or clicking between tools and apps, you can simply switch desktops to keep everything in its own place.
Multiple desktops are also helpful with separating work matters from personal activities, like entertainment and games, to keep you focused when you need to work. Stowing your streaming and gaming apps away in another desktop keeps them out of sight and out of mind as you work, which helps to minimize distractions.
New features in Windows 11 desktops
Windows 11 features take multiple desktops to new heights with customization settings. With Windows 11, you can customize the backgrounds for each desktop and rename them based on their functions. Customizing your desktops can help you differentiate them with ease when you need to flip through your screens.
How to manage your desktops with Task View
You can create a new desktop in seconds with the Task View button on your taskbar. Task View can also be opened by pressing the Windows key+Tab. Once you open Task View, you’ll see a layout of your open applications and an option to create a new desktop at the top of the screen. To save even more time, you can bypass Task View and press Windows key+Ctrl+D to create a new desktop.
You can also use Task View to customize your desktops. Simply right-click your desktop in Task View to see your options for renaming and changing the background of each screen. To switch out your desktop, open Task View or press Windows key+Ctrl+right/left arrow key.
Using the Snap feature to organize your desktops
The Snap feature tool that takes your desktop organization a step further. With the Snap feature, you can put the apps you use most on one screen to optimize your desktop space. If you are constantly flipping between your messaging app and browser for work, you can snap them together and have them appear on the screen at the same time. To access Snap layouts, press Windows key+Z, and choose a predetermined Snap layout that best fits your needs.
Windows 11 makes it easy to keep the contents of your screen organized. Upgrade to Windows 11 today to enjoy the latest features.
Начнем рабочую неделю с наведения порядка на рабочем столе вашего ПК или ноутбука. Мы уже как-то рассказывали про функции Представление задач и Прикрепление, а сегодня поговорим о том, как расположить ворох иконок и файлов наилучшим образом на виртуальных рабочих столах, которые доступны в Windows 10.
Как же начать работу с виртуальными рабочими столами:
Чтобы создать новый виртуальный рабочий стол, жмем кнопку Представление задач (Task View) на панели задач Windows (или пользуемся комбинацией клавиш Windows + Tab), затем выбираем создание нового виртуального десктопа в правом нижнем углу экрана. Вы можете переключаться между виртуальными рабочими столами при помощи всё той же кнопки Представление задач, после чего остаётся лишь кликнуть иконку нужного рабочего стола.
Перемещение приложения с одного рабочего стола на другой:

Снова нажимаем кнопку Представление задач, кликаем правой кнопкой мыши на иконке приложения, которое нужно переместить. Выбираем соответствующую опцию, а затем виртуальный десктоп, который станет местом назначения.
Whether you are a student, a teacher, or a working professional, one problem you will commonly find is that the desktop screen on your Windows computer is cluttered with different icons and files. Even when all those files are important for your use case, the whole thing becomes very inefficient since finding the right one takes a lot of time. That’s why you need to try Windows desktop organizers.
Using desktop organizers organizes the desktop screen for you and makes the process easier. Hence, you don’t have to spend hours organizing your desktop screen repetitively. This article will share our top 5 picks from desktop organizer tools for Windows users (including free and paid). So, now you can keep your desktop screen sleek and organized.
Part 1. 5 Best Ways to Organize Windows Desktop
Windows desktop organization can be a critical factor affecting your productivity. It is because you won’t face many distractions on the desktop screen. If you want the perfect organizer, here are our top 5 picks for a better experience.
1. Stardock Fences — No. 1 Desktop Organizer for Windows 10/11
Although it is a paid app, it is the best on this list, and there is a free trial available for 30 days, so you can check if the experience is worth it for you or not. It packs many customization features that will improve your organized desktop. However, the best thing of all is the easy user experience. It makes hiding and showing your icon clusters simple with a double click.

Features:
- Over 10 apps included
- Early access to software and updates
- In-depth customization of GUI
Customer Rating:
4.5/5 with 12 votes on G2.
How to Organize Desktop on Windows 11/10 Using Fences?
- Place all the icons that you want to organize together in groups after downloading the software on your Windows. Drag the cursor over a group and click on the Fence creation option.
- Now edit the title of the fence you just created.
Repeat the same steps for all groups. Once you are done, you can try some customizations as well.
2. iTop Easy Desktop — The Easiest Windows Desktop Organization Tool
iTop Easy Desktop is a desktop organization tool with a modern user experience where you can enjoy straightforward desktop organization and many customizations. It helps you organize your desktop and adds the option of mouse move controls, hotkeys, gestures, etc., for quickly accessing the files and folders.
Additionally, it makes things easier for you with custom organization and the QuickStart option. With all the customization options, your desktop will look clean and attractive according to the theme.

Features:
- Quick hide features
- Custom Hotkeys
- Auto Icon Arrangement
Customer Rating:
2.8/5 with 4 votes on Microsoft Store.
How to Organize Desktop on Windows 11/10?
- Open iTop Easy Desktop and select QuickStart.
- Edit anything you want to customize from all options in the left menu and save.
3. SlideSlide
It is an advanced tool for organizing all the desktop elements. Apart from making collections of application icons, it also supports adding different boxes, icons, lists, etc., to your desktop. All of its organization and customization capabilities are backed with smart features, making it highly configurable and easy.
It packs innovative functionalities like dynamic containers that allow you to instantly access anything on your computer without looking in the files for its icon. Hence, with SlideSlide, you can efficiently use your time and space.

Features:
- Multiple customization options
- Floating notes
- App docking features
Customer Rating:
4.5/5 with 11 votes on CNET.
How to Organize Desktop on Windows 11/10?
- Use SlideSlide to create boxes on the desktop and add the existing icons in those boxes by dragging them in.
- You can edit the positioning of the boxes or desktop elements with the SlideSlide user interface elements.
- Go to customization settings to change appearance elements like style, color, buttons, etc.
4. ViPad
ViPad was launched earlier but is still compatible with the latest Windows versions, like Windows 10. If you want a straightforward approach to desktop organization, then it is the tool you must select. With tabs, all your apps will be organized with other relevant apps for a better user experience.

Features:
- Gesture support
- Change icon dimensions
- Tab mode for quick access
Customer Rating:
1/5 with 1 vote on Alternativeto
How to Organize Desktop on Windows 11/10?
- Create different tabs for arranging the apps depending on categories and clusters.
- Go to the customization option and change the app icon if needed.
- Change the icon’s appearance, like its dimensions, and customize different icon properties.
5. LaunchBar Commander
This dock system for Windows computers gives you multiple ways to access your programs and files. Since it is portable, you don’t need to install it, and it can run simply by downloading it to your computer. However, it is still packed with features regarding the organization and customization of your desktop. With this simple tool, you can change how icons are grouped on your screen and how you can access them.

Features:
- Smart retrieval feature for icons
- Multiple dock support
- Runtime drag and drop usage
Customer Rating:
3/5 with 1 vote on Alternativeto
How to Organize Desktop on Windows 11/10?
- Open the LaunchBar Commander window on your pc and customize the top dropdown menu elements. You can edit all the available details about them.
- Hover the cursor in the top section of the window, and your new dropdown menu will appear with all designated icons, folders, files, paths, etc.
Part 2. Which One Windows Desktop Organizer is Better?
| Tool | Key Features | Platform Support | Pricing | Ease of Usage | Customer Rating | Update Frequency |
| Stardock Fences | Over 10 apps, included Early access to software and updates, In-depth customization of GUI | Windows 10, 11 | Starting $19.99 | Simple and easy to use | 4.5 | Regular |
| ITop Easy Desktop | Quick hide feature, Custom Hotkeys, Auto Arrangement | Windows 10 and above | Free | Overwhelming experience | 2.8 | Regular |
| SlideSlide | Multiple customization options, Floating notes ,App docking features | Windows 10, 11, and more | Free | Simple interface, easy to use | 4.5 | Regular |
| ViPad | Gesture support, Change icon dimensions, Tab mode for quick access | Windows 10 and older | Free | Complex to use | 1 | Discontinued and not updated |
| LaunchBar Commander | Smart retrieval feature for icons, Multiple dock support, Runtime drag and drop usage | Windows 10, 11, and more | Free | Old-school interface | 3 | Last updated in 2020 |
Considering all the aspects mentioned above for the top 5 apps, we can say that Stardock Fences is the best choice for you among paid options. If you want a free usage experience, then go for SlideSlide. Both offer a good feature set, frequent updates for the latest Windows versions, an easy-to-use interface, and good online user ratings. However, if you don’t have any issues using paid software, go for Stardock Fences.
Part 3. Best Windows PDF File Organizer
Windows OS comes with an organizer tool for almost everything. You can find several third-party tools even when no option is available, like for desktop organization. However, users face a huge issue finding the best PDF file organizer. The built-in PDF organizing capabilities are not up to the mark. That’s why UPDF brings the best PDF file organizer for all your needs. You can download UPDF via the below button to test all its features here.
Windows • macOS • iOS • Android 100% secure
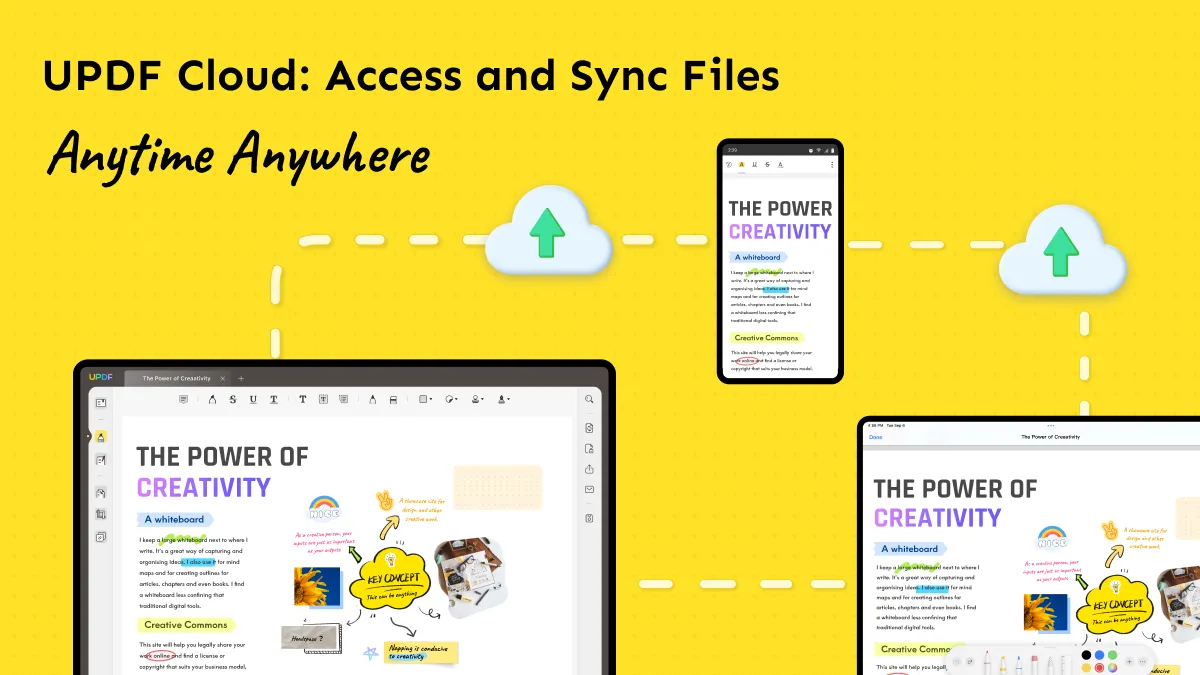
It also provides an online UPDF Cloud feature. So, whether you want to sync your PDF files with your other devices or want to share them with others, this tool will always benefit you. Previously you used to organize PDF files in folders, and no real-time visualization features were available like UPDF.
So, comparing the experience, you will enjoy some major benefits with UPDF.
- Real-time content syncing between all your devices
- Easy ways to share with others thanks to the Cloud storage
- Sharing with email, QR code, and other methods
- One app that can handle all your PDF managing and editing requirements.
With all these benefits, it makes the best choice for every user. Organizing your PDF files with UPDF Cloud is very easy, and here is how you can do it.
- Say that you have some PDF files on your iPhone. You can open options for those files and copy them to the UPDF cloud.
- Now head over to your computer, and you will see that file appear in the recently available files.
- Similarly, if you have some PDF files on your PC that you want to organize, use the upload button in the UPDF Cloud tab, and it will instantly upload to UPDF Cloud.
- All files stored in UPDF Cloud will not be lost as long as you do not delete them.
For a better viewing experience, you can change between list view and thumbnail view on UPDF Cloud.
To better understand UPDF, you can read the review article for UPDF from Big Media: wccftech. If you find UPDF helpful, consider upgrading to the pro version at a low price here!
Closing End
The Windows PC desktop screen is the most critical part of your computer when you consider productivity, effectiveness, and focus. You will look for the right icon, folder, or file if you have not organized things. Meanwhile, finding the required item will be instant if you have organized things. You need a Windows desktop organizer to organize all the desktop elements.
If you want to take your productivity to the next level, try a PDF organizer. UPDF is the best option among all PDF organizers since it comes with organizing, editing, and several other functionalities, including UPDF Cloud, which helps organize your files across different devices. Download UPDF via the below button to test all the features here.
Windows • macOS • iOS • Android 100% secure