
There are times when one or more processes start taking 100% CPU usage in Windows 10. This may lead to a slow system. One solution to this issue is to limit CPU usage for specific applications in Windows 10. We will discuss these in this article.
Table of Contents
Adjust program affinity
We can also customize each process within Windows 10 to utilize only specific CPU cores while leaving the others for the other processes to execute simultaneously. This can be used to optimize CPU utilization, but only if handled carefully.
Note that customizing process affinity is not always useful. Before messing around with them, you need to consider whether you have CPU cores that are mostly idle, or are you running an application which executes independent threads?
In a situation where one thread needs to be executed before the other, process affinity can be set for both to utilize the same core. However, software having independent threads can be split across multiple cores to increase its performance.
Another consideration to make is whether the threads are cache-intensive. Meaning, do they all rely on extensive cached data? If they do, then the execution of each thread is very much dependent on the availability of the cached data. Hence, it would be better to run each thread on a separate core to maximize cached data resources.
- Launch the Task Manager and go to the Details tab.
- Look for the process you wish to modify the affinity, and right-click it. Click on Set affinity in the Context Menu.
- From the Process affinity window, you can select the cores you wish the process to limit to, and uncheck the boxes next to the rest. By default, all processes utilize all cores.
As my computer only had 4 cores, it is displaying them as CPU 0, 1, 2, and 3.
But how will you know what cores are available? This can be checked through the Task Manager’s graphical representation of CPU resources.
Open the Task Manager and go to the Performance tab.
Click on CPU in the left pane, and then right-click the real-time graph on the right side. Expand Change graph to and select Logical processors.

The Task Manager will now display graphs for utilization of each core individually, which can be used to identify the less-used cores and assign them to specific threads.

Limit overall CPU utilization
Too many threads and processes often take up the processing cores within the CPU. Over-performance of the CPU can also be a cause for it to overheat, especially in an old and dusty environment.
To check how much CPU is being consumed at any given time, head over to the Task Manager.
Launch the Task Manager by right-clicking the Taskbar, and click Task Manager.
Switch to the Performance tab.
This tab gives a graphical as well as percentage representation of how much each compartment is being used up, including the CPU, memory, network, and disk. From here, you can determine whether the CPU is being overused.

Anything over 90% can be considered dangerous for the CPU and the hardware.
If you think that it is too much for the computer to take, you can set a cap on CPU utilization through the Settings, which essentially means that it will not allow CPU utilization above that threshold. This will not resolve system slowness but will address CPU overheating and indirectly affect its performance.
- Navigate to the following location:
Control Panel -> Hardware & Sound -> Power options -> Change plan settings -> Change advanced power settings - In the Power Options window, expand Processor power management, and then expand Maximum processor state.
- Now click on On battery and set the maximum threshold value for CPU utilization. Do the same for Plugged in to allow different maximum CPU utilization percentages for when the computer is running on battery (in case of laptops) and when it is running on direct power.

- Click on Apply and Ok when done.

You will now notice that the CPU utilization percentage will not go over the set value in Task Manager.
Useful tasks for further CPU optimization
End/Kill all non-essential applications, processes, and files
Any applications or services running in the background which are not required also take up space in the CPU while the user is performing time-critical tasks. This often causes delays in the tasks on high priority.
Let’s see how we can eliminate the unimportant tasks and processes.
End process utilizing maximum CPU
Processes such as system scans and antiviruses often take up a significant portion of the CPU when searching through the entire computer. They make performing other tasks simultaneously almost impossible.
The perfect solution to this would be to schedule such applications to run scans at times other than the active hours. However, if the process has already been executed, it can be eliminated through the Task Manager.
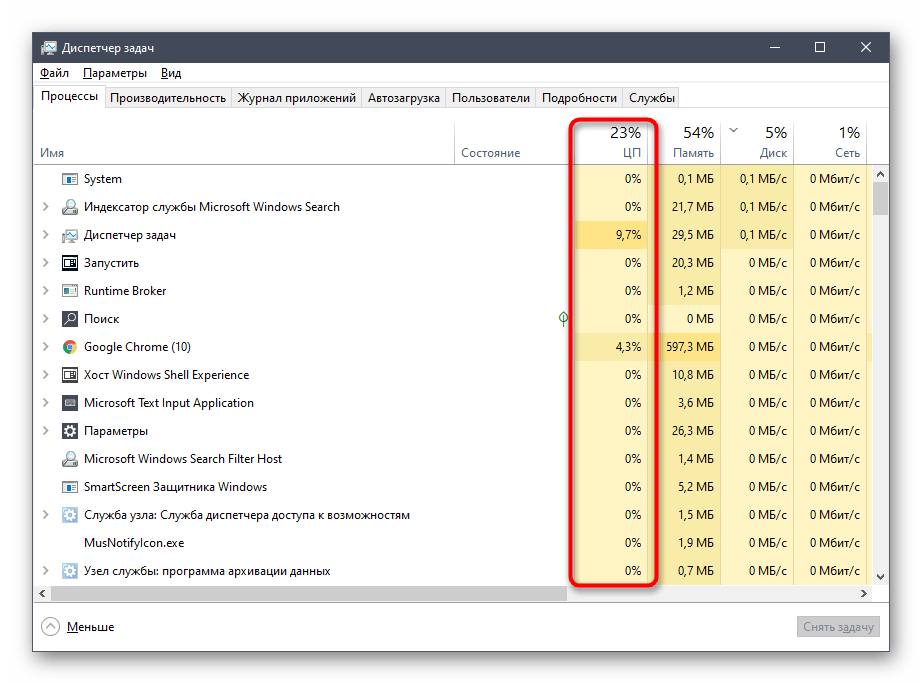
- Open Task Manager (Ctrl + Shift + Esc)
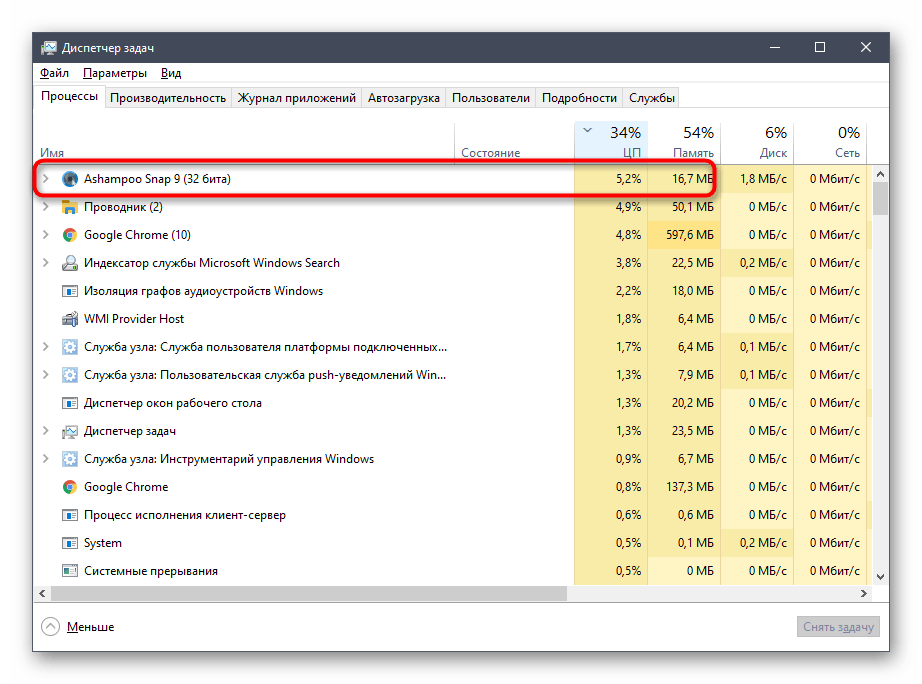
- Under the Processes tab, click on the CPU bar to arrange the tasks in descending order. This means the processes taking maximum CPU percentage would come on top.
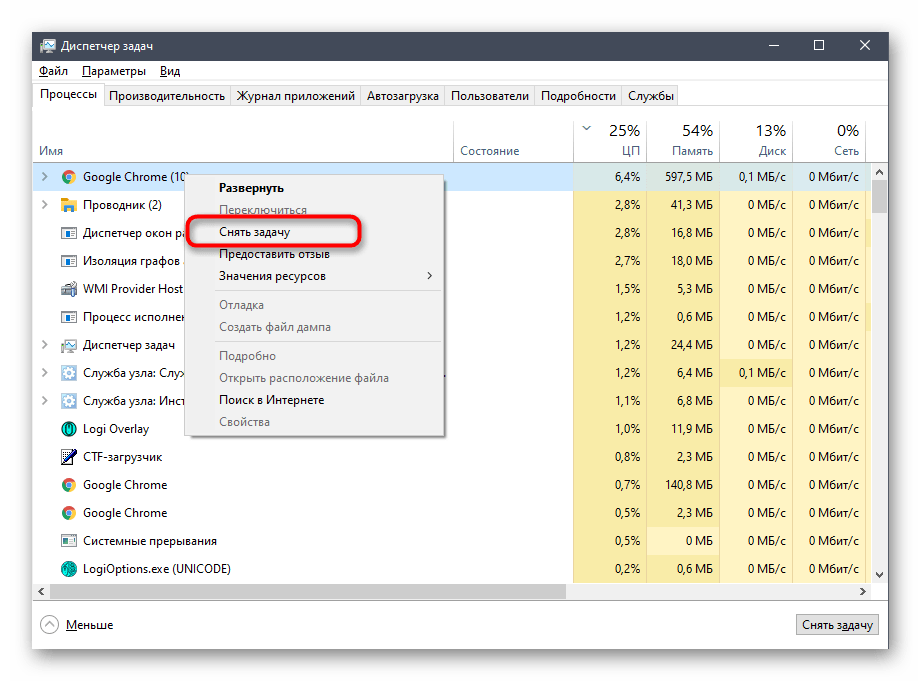
- From there, right-click on any task you do not need at the moment and click on End task.


This will free up space in the CPU for other important tasks.
Automatically adjust your Windows for maximum performance
Windows 10 comes with a built-in feature to disable all non-essential visual features instantaneously. This can be used to switch off all animations, window shadows, etc. Although small, these features take up some space in the CPU.
- Navigate to the following:
Start Menu -> Settings -> System -> About -> Advanced system settings - In the System Properties window, under the Advanced tab, click on Settings under Performance.

- In the Performance Options window, under the Visual Effects tab, select Adjust for best performance. Then click on Apply and Ok.

You may now notice that windows change instantaneously when switching between them, and no animations take place.
Disable auto-starting applications
Often there are some applications that start and popup as soon as you turn your computer on. Such applications significantly slow down the system boot-up process as they try to run during the start-up process and hold back other critical threads.
You can disable these applications from automatically starting, and can run them later if required.
Run the Task Manager and switch to the Startup tab.
You can see the applications that support automatic startup, and their current status in this tab. Click the applications that you want to disable and then click Disable at the bottom of the window.

Any non-essential application will now make room for other more-important processes to execute and utilize the processor.
Delete Pagefile
This step is not so much for the CPU, but rather for optimizing the system in general.
PageFiles are instantly-accessible cache files stored on the hard drive. Processes that execute on the RAM can now execute in the hard drive, saving time as well as RAM resources. These are dynamic files that can expand up to the size of the RAM itself. You can configure these to delete themselves from the hard drive each time you restart or shut down your computer.
Configuring these to auto-delete will make room for new files on the hard drive, and the old processes won’t execute anymore.
Since the process involves making changes to the System Registries, it is recommended to create a system restore point.
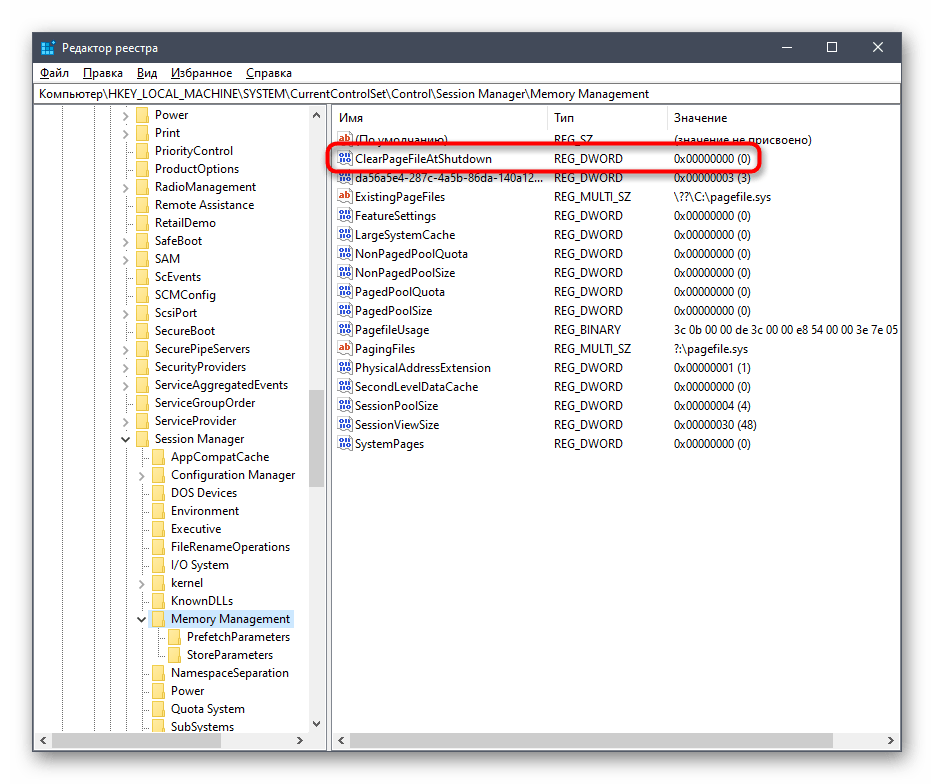
- Open the Registry Editor by typing in regedit in Run.
- Navigate to the following in the left pane:
HKEY_Local_Machine -> System -> CurrentControlSet -> Control -> Session Manager -> Memory Management - In the right pane, double-click ClearPageFileAtShutdown and set the Value Data to 1.

- Click Ok and then restart the computer for the changes to take effect.

Perform a general service of the hardware
Starting small, ensure that your computer’s hardware is clean. A buildup of dust and debris can cause improper air circulation through the hardware, which is important for it to function properly. It is true that the load on the CPU and other hardware causes the system to respond slowly, but so does the dust on the fans and heat sinks.
Dust is also sometimes the primary reason why systems often shut down completely without warning.
How have you used these tips to customize your operating system?
Experiencing high CPU usage can significantly slow down your computer, making even simple tasks frustrating. Whether you’re running demanding software, multitasking with numerous applications, or playing high-performance games, consistently high CPU usage can lead to overheating, lag, and system instability. Fortunately, there are several ways to bring down CPU usage and optimize your PC for better performance.
From managing startup programs to tweaking system settings, we’ll help you troubleshoot high CPU usage issues and show you how to optimize your system for smooth, lag-free performance. Whether you’re using your Windows PC for gaming, video editing, or just using it for day-to-day tasks, these steps can help you reduce CPU utilization under control and ensure your computer runs efficiently.
If you’ve been wondering, “Why is my CPU usage so high?” or “How do I reduce CPU usage on my computer?” or Why it’s showing CPU 100% Usage? you’re not alone. 100 CPU Utilization is a common issue faced by many users, especially when their systems are running multiple applications or processes in the background. In this guide, we’ll provide a complete list of fixes and strategies that you can use to resolve high CPU usage on both Windows and Mac devices.
Table of Content
- How to Lower CPU Usage on Windows
- Method 1: Close Unnecessary Programs in Windows
- Method 2: Disable Startup Programs
- Method 3: Update Your Drivers in Windows
- Method 4: Scan for Malware in Windows
- Method 5: Adjust Power Settings in Windows
- Method 6: Clean Out Your Computer
- Troubleshooting Tips

Main Reasons for High CPU Usage
High CPU usage can be caused by a variety of factors, including:
- Resource-intensive applications: Some software programs, such as games, video editing software, or resource-heavy websites, can use a significant amount of CPU power.
- Too many open programs: Running multiple programs simultaneously can lead to high CPU usage, especially if they are demanding programs.
- Outdated software: Outdated software can be inefficient and may cause high CPU usage.
- Malware or viruses: Malware can infect your computer and use up CPU resources.
- Hardware issues: A failing hard drive or overheating CPU can also cause high CPU usage.
How to Lower CPU Usage on Windows
High CPU usage on Windows can significantly degrade your system’s performance, leading to slowdowns, freezes, and overall sluggishness. This issue can stem from various factors, including resource-intensive applications, background processes, system processes, or even hardware limitations.
Method 1: Close Unnecessary Programs in Windows
One of the most direct ways to reduce CPU usage is to close applications that are not actively in use. Many programs, especially those running in the background, can consume significant CPU resources. By closing these programs, you can free up processing power and improve your system’s overall performance..
Step 1: Open Task Manager
- Shortcut: Press Ctrl + Shift + Esc or Ctrl + Alt + Del to open the Task Manager.
- Manual: Right-click on the Taskbar and select «Task Manager» or search for it in the Start menu.
Note: When you open the Task Manager, its pre-default showing Processes of Windows
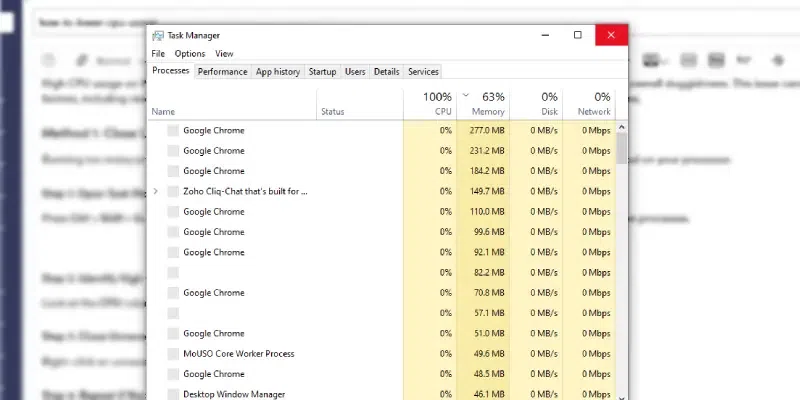
Step 2: Identify Resource-Intensive Programs
- In the Task Manager, switch to the «Processes» tab.
- Sort the processes by CPU usage to identify the top resource consumers.
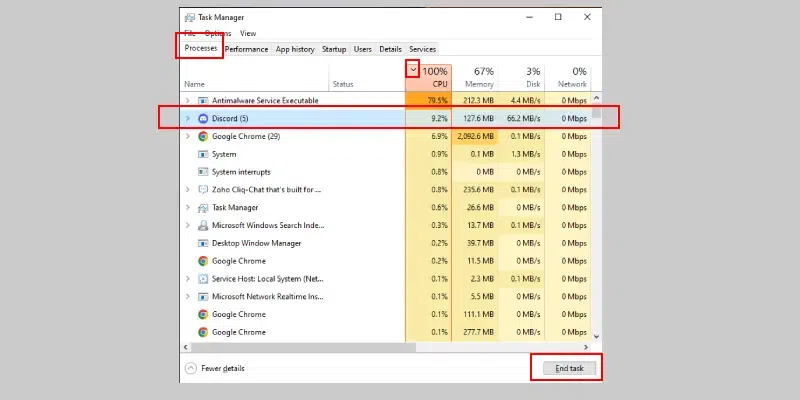
Step 3: Close Unnecessary Programs
- Right-click on the process you want to close and select «End task.»
- Be cautious when closing system processes, as this can lead to system instability.
Note: You can also directly End Task by Clicking the «End Task» button given in bottom right corner of the task manager.
Method 2: Disable Startup Programs
Many programs are configured to start automatically when your computer boots up. While some of these programs may be essential, others can significantly impact your system’s startup time and overall performance. By disabling unnecessary startup programs, you can reduce the initial load on your CPU and improve system responsiveness.
Step 1: Open Task Manager
- Shortcut: Press Ctrl + Shift + Esc or Ctrl + Alt + Del
- Manual: Right-click on the Taskbar and select «Task Manager» or search for it in the Start menu.
Step 2: Switch to the Startup Tab and Disable Unwanted Program
- Click on the «Startup» tab.
- Right-click on the program you want to disable and select «Disable.»
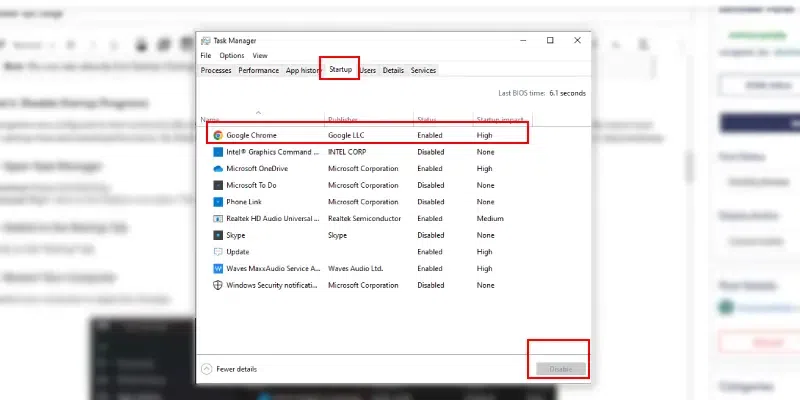
Note: By taking the help of Step 1 you can easily go to startup programms, then by RIght-clicking you can Disable it.
Alternate Method: Using Settings App (Windows 10/11)
Step 1: Open Settings and Click on Apps
- Press the Windows key + I or simply click on windows button and select settings.
- Click on «Apps.»
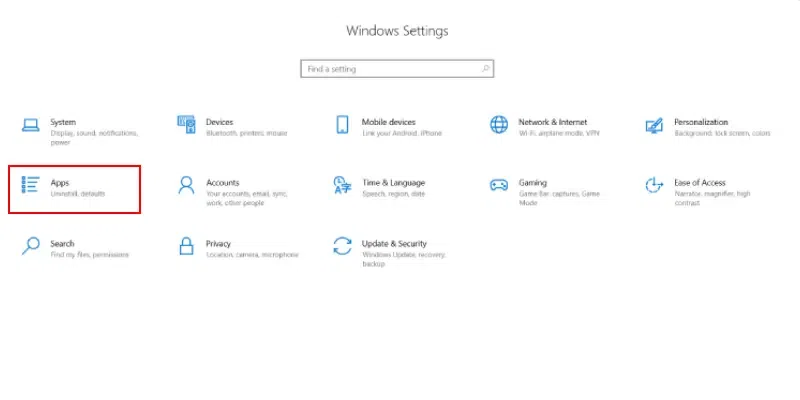
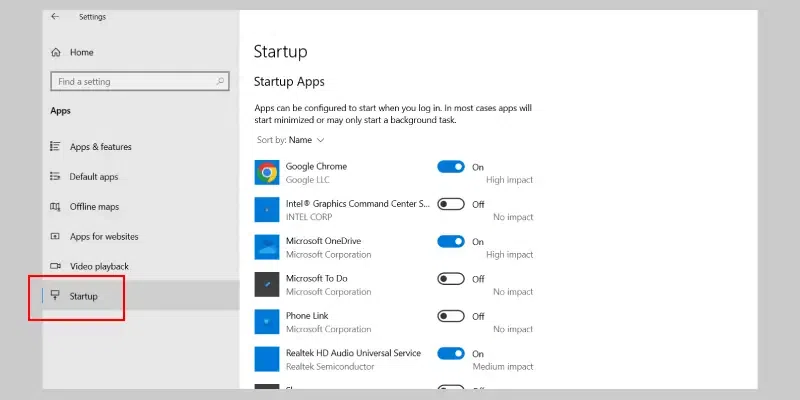
Step 2: Select Startup and Disable Unnecessary Programs
- Click on «Startup.»
- Toggle the switch to «Off» for the programs you want to disable.
Additional Tips:
- Be Cautious: Avoid disabling critical system programs, as this can lead to system instability.
- Review Startup Impact: Task Manager often shows the startup impact of each program. This can help you prioritize which programs to disable.
Method 3: Update Your Drivers in Windows
Outdated or corrupted device drivers can lead to various performance issues, including high CPU usage. Device drivers are software programs that allow your computer’s operating system to communicate with hardware devices like graphics cards, sound cards, and network adapters. Keeping your drivers up-to-date ensures optimal performance and compatibility.
In the below steps we will learn how to update windows «Using Windows Update» feature.
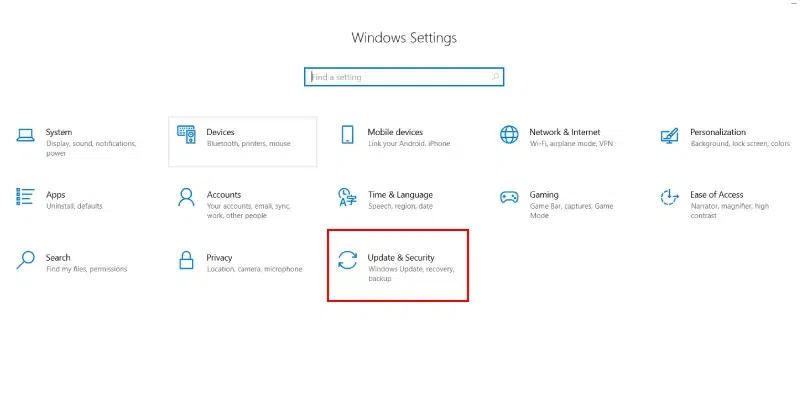
Step 1: Open Settings > Update & Security
- Press the Windows key + I.
- Click on «Update & Security.»
Step 2: Check for Updates
- Click on «Check for updates.»

Step 3: Install Updates
Windows Update will automatically download and install any available driver updates.
Note: Make sure to Restart the Computer to Successfully Install the Windows update.
Alternate Method: Another way is to Update Windows Drivers is by Using Device Manager
Step 1: Open Device Manager
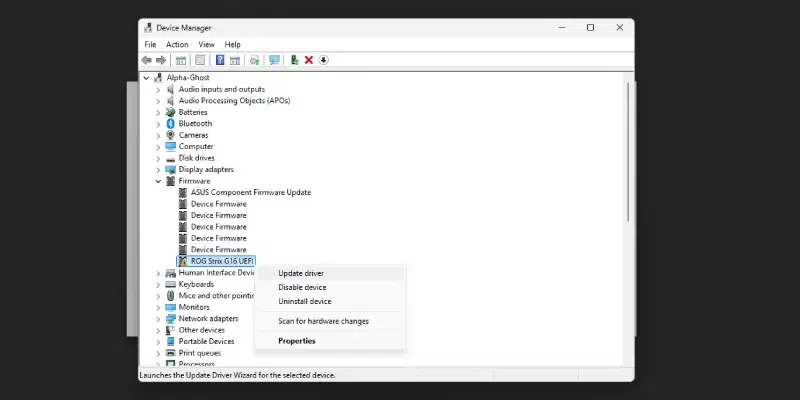
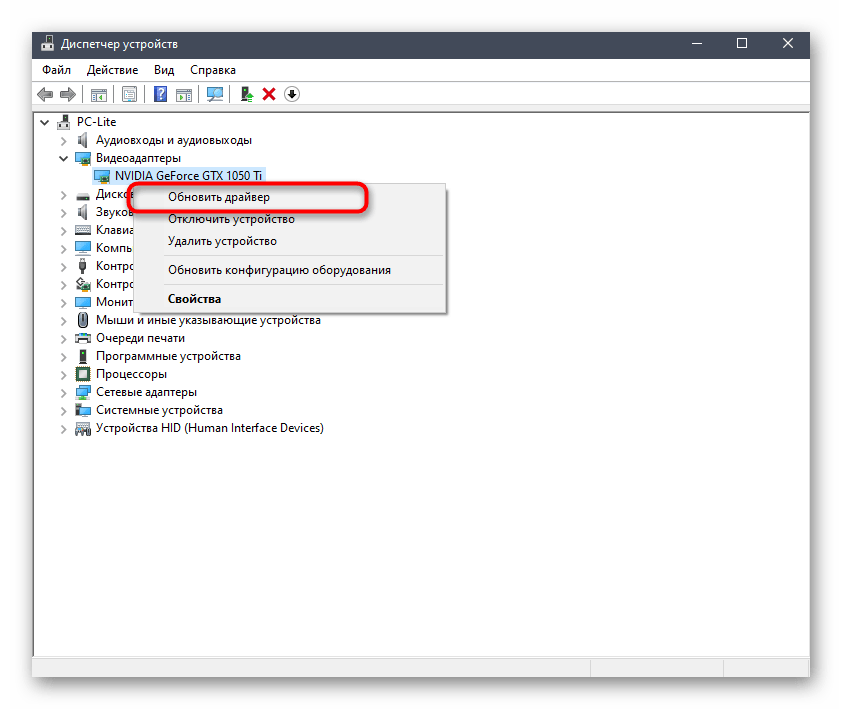
- Press the Windows key + X and select «Device Manager.»

Step 2: Select Driver and Update
- Expand categories like «Display adapters,» «Sound, video, and game controllers,» and «Network adapters.»
- Right-click on a device and select «Update driver.»
- Choose «Search automatically for drivers» to let Windows search for the latest drivers.
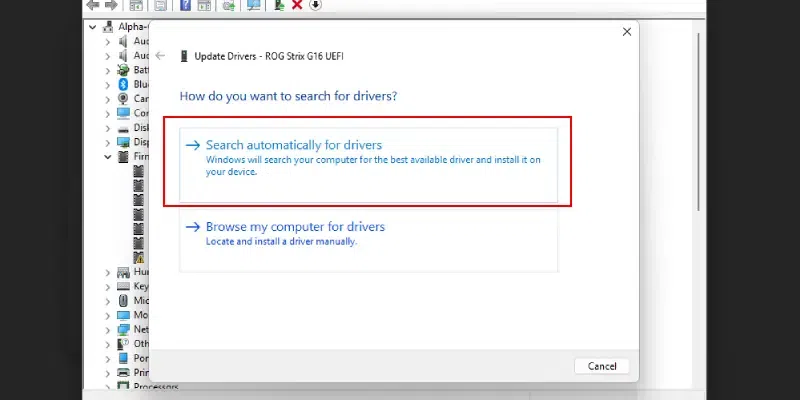
Step 3: Choose Update Option
Now you will be asked to choose the update type, here we have choosen Search Automatically for Drivers, this is the easiest way to update your driver or you can also browse from your computer if you have the driver file saved.
Additional Tips:
- Check Manufacturer’s Website: Sometimes, the latest drivers may not be available through Windows Update. You can check the manufacturer’s website for the latest drivers for your specific hardware.
- Use Driver Update Software: Third-party driver update software can automate the process of finding and installing driver updates. However, use reputable software to avoid potential security risks.
- Be Cautious with Third-Party Drivers: While third-party drivers can sometimes offer additional features or performance improvements, they can also cause stability issues. Only install third-party drivers from trusted sources.
Method 4: Scan for Malware in Windows
Malware, such as viruses, worms, and spyware, can consume significant CPU resources as they run in the background, performing malicious activities. These malicious programs can slow down your system, cause crashes, and even compromise your personal information.
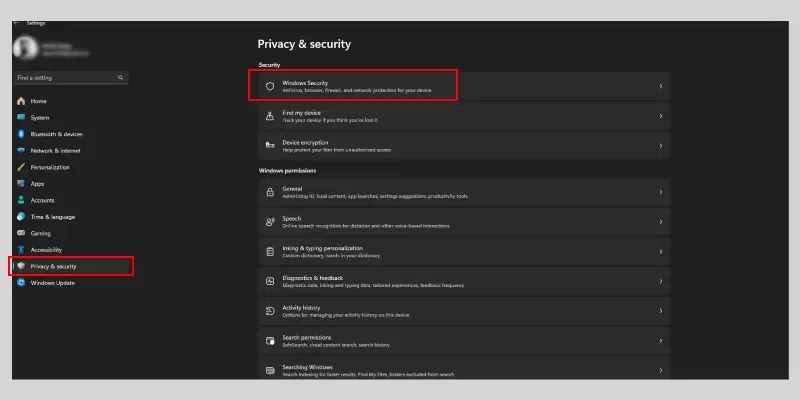
Step 1: Open Windows Security
- Windows 10: Search for «Windows Security» in the Start menu and open it.
- Windows 11: Search for «Windows Security» in the Start menu and open it.
Another Way: You can also go to settings and then search for Privacy & Security and then select Windows Security in both Windows 10 and Windows 11.
Step 2: Select Virus & Threat Protection and Run a Quick Scan
- Click on «Virus & threat protection.»
- Under «Current threats,» click on «Quick scan.»
- Wait for the scan to complete.
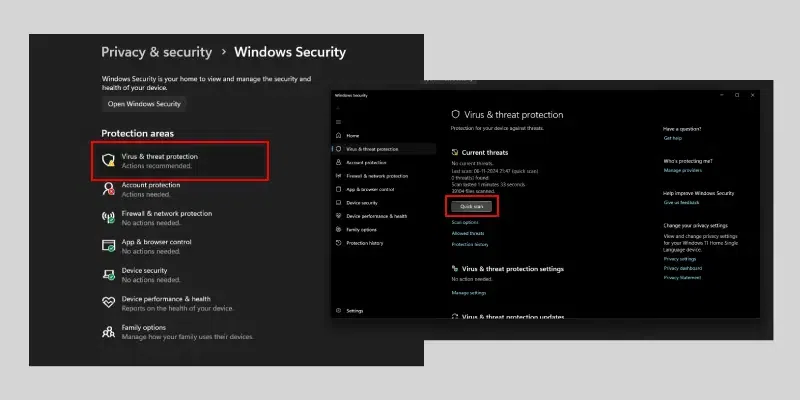
Optional: Run a Full Scan (for a more thorough check)
- In the same «Virus & threat protection» window, click on «Scan options.»
- Select «Full scan» and click «Scan now.»
- This might take longer, but it will scan your entire system.
Additional Tips:
- Keep Your Antivirus Updated: Ensure your antivirus software and its definitions are up-to-date.
- Be Cautious with Downloads: Avoid downloading files from untrusted sources.
- Use a Firewall: A firewall can help protect your system from unauthorized network access.
- Be Wary of Phishing Emails: Don’t click on suspicious links or open attachments from unknown senders.
Method 5: Adjust Power Settings in Windows
Your computer’s power settings can significantly impact CPU usage. Here’s how to adjust them on Windows 10 and 11
For Windows 10:
Step 1: Open Control Panel
Search for «Control Panel» in the Start menu and open it.
Step 2: Go to Power Options
Click on «Hardware and Sound,» then «Power Options.»
Step 3: Choose a Power Plan
Select a power plan that suits your needs:
- Balanced: A good balance between performance and power saving.
- Power saver: Prioritizes battery life over performance.
- High performance: Prioritizes performance over battery life.
Customize Power Plan Settings (Optional):
- Click on «Change plan settings» next to your selected plan.
- Adjust settings like screen brightness, sleep timeout, and power button action.
For Windows 11:
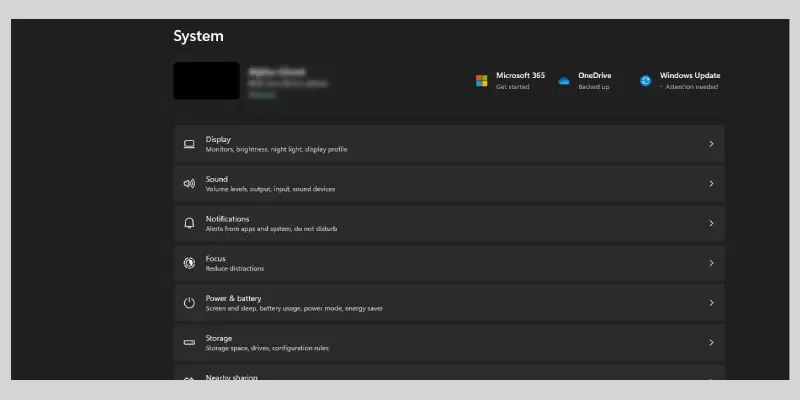
Step 1: Open Settings and Go to Systems
- Press the Windows key + I.
- Click on «System.»
Step 2: Select Power & battery
Click on «Power & battery.»
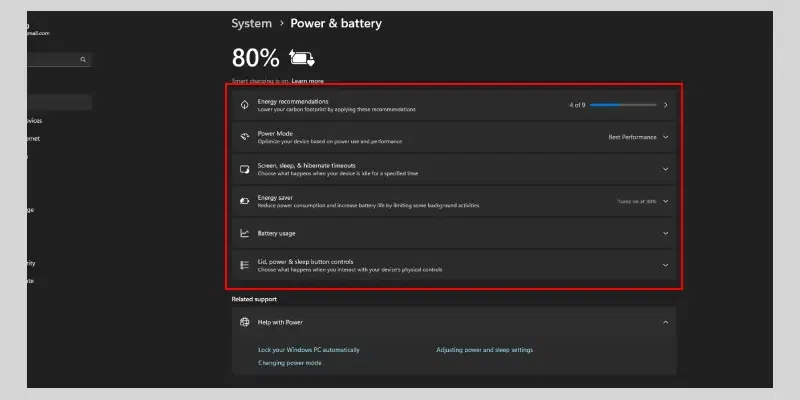
Step 3: Choose a Power Plan
Select a power plan that suits your needs:
- Balanced: A good balance between performance and power saving.
- Power saver: Prioritizes battery life over performance.
- High performance: Prioritizes performance over battery life.
Customize Power Plan Settings (Optional):
- Click on «Additional power settings» to access advanced power settings.
- Adjust settings like screen brightness, sleep timeout, and power button action.
Method 6: Clean Out Your Computer
Dust and debris inside your computer can cause it to overheat, leading to higher CPU usage as the system tries to cool down. A clean computer can run more efficiently, including lower CPU usage. Here’s how to clean your hardware:
Step 1: Clean the Interior
- Turn off and unplug your device: Ensure it’s completely powered off.
- Open the case carefully: Follow your device’s specific instructions to open it.
- Remove dust: Use compressed air to gently blow dust out of fans, heat sinks, and other components.
- Clean fans: If necessary, use a soft brush to clean fan blades.
- Check for obstructions: Ensure there are no obstructions blocking airflow.
Step 2: Clean the Exterior
- Power off and unplug your device.
- Wipe the exterior: Use a soft, lint-free cloth dampened with a gentle cleaning solution to wipe the screen, keyboard, and mouse.
- Clean the keyboard: Use compressed air to remove debris from the keyboard keys. For stubborn dirt, use a soft-bristled brush or a cleaning gel.
- Clean the mouse: Wipe the mouse with a damp cloth. For optical mice, clean the sensor lens with a soft cloth.
Additional Tips:
- Regular Cleaning: Clean your computer regularly to prevent dust buildup.
- Avoid Extreme Temperatures: Keep your computer away from heat sources and ensure proper ventilation.
- Use a Cooling Pad: A cooling pad can help reduce CPU temperature, especially for laptops.
Troubleshooting Tips
If you’ve tried the above steps and your CPU usage is still high, consider these additional tips:
- Check for system updates: Make sure your operating system is up-to-date.
- Check for system overload: Ensure that no heavy applications like video editors or games are running unless necessary.
- Reset your PC: As a last resort, you can reset your PC to its factory settings to resolve persistent issues.
Conclusion
Lowering CPU usage is very important for maintaining a smooth and fast computing experience. By following these simple methods, such as closing unnecessary programs, updating drivers, and scanning for malware, you can reduce the load on your processor. If these steps don’t work, you may need to check for hardware issues or consult with a professional. Keep your system clean, updated, and free from unnecessary processes to ensure optimal performance.
Все способы:
- Способ 1: Обновление драйверов комплектующих
- Способ 2: Установка системных обновлений
- Способ 3: Проверка ОС на наличие вирусов
- Способ 4: Очистка системы от ненужных файлов
- Способ 5: Отключение автозагрузки ненужных программ
- Способ 6: Включение очистки файла подкачки
- Способ 7: Отключение визуальных эффектов
- Способ 8: Дефрагментация жесткого диска
- Способ 9: Отключение системных уведомлений
- Способ 10: Сброс параметров плана электропитания
- Способ 11: Завершение ненужных задач
- Вопросы и ответы: 13
Процессор — одно из комплектующих компьютера, которое подвергается постоянной нагрузке во время работы операционной системы. Уровень загруженности ЦП напрямую зависит от количества выполняемых программ и корректности функционирования системных компонентов. Существует ряд рекомендаций, которые помогают разгрузить процессор в Windows 10, если это необходимо. Именно о них и пойдет речь в нашем сегодняшнем материале.
Способ 1: Обновление драйверов комплектующих
Для начала мы хотим пройтись по общим советам, помогающим держать ОС не только в актуальном состоянии, но и позволяют избегать появления различных конфликтов, которые могут негативно сказываться на загруженности центрального процессора. Первая такая рекомендация заключается в проверке обновлений для всех драйверов. Важно всегда иметь последние версии такого программного обеспечения, чтобы оно не конфликтовало с системными службами и другими компонентами. Узнать все об обновлении драйверов в Виндовс 10 можно в отдельном руководстве на нашем сайте далее.
Подробнее: Обновляем драйверы на Windows 10
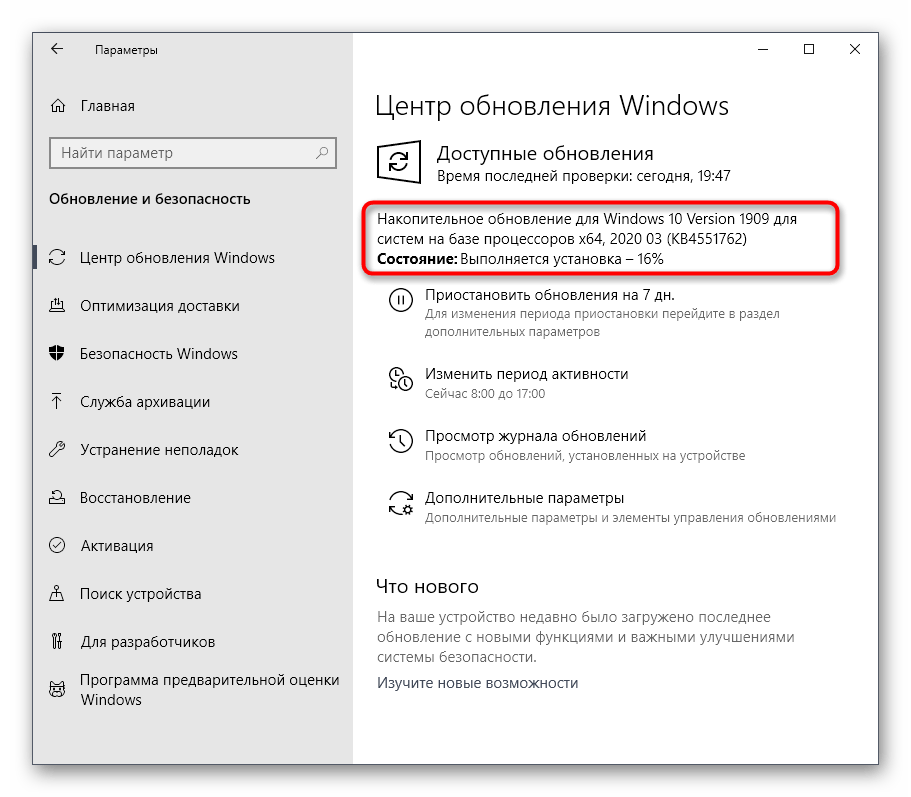
Способ 2: Установка системных обновлений
Да, сама служба Центра обновлений Windows может нагружать CPU, однако происходит это только в период активности. Например, сейчас идет загрузка последних обновлений или уведомления о надобности их инсталляции находятся в активном режиме, а также запущена задача, которая перезагрузит компьютер в определенное время. Вы можете самостоятельно оперативно проверять наличие апдейтов и по мере их появления производить быструю инсталляцию, чтобы поддерживать свое устройство в нормальном состоянии и избегать конфликтов с драйверами и другими компонентами.
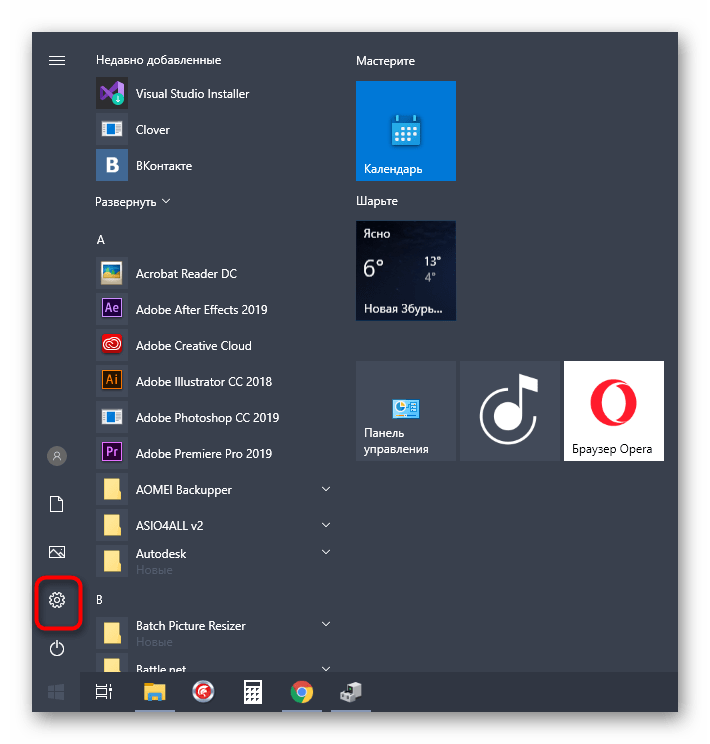
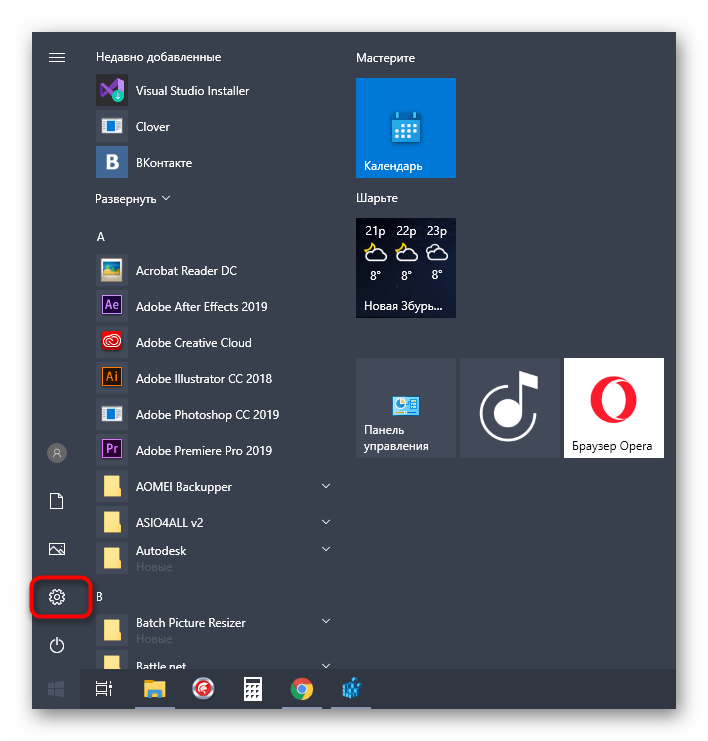
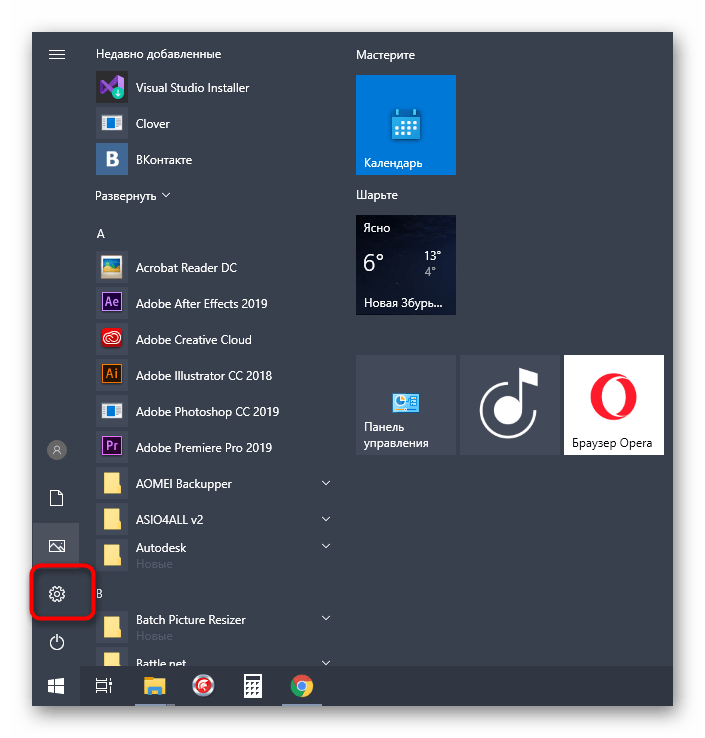
- Для этого откройте «Пуск» и перейдите в меню «Параметры».
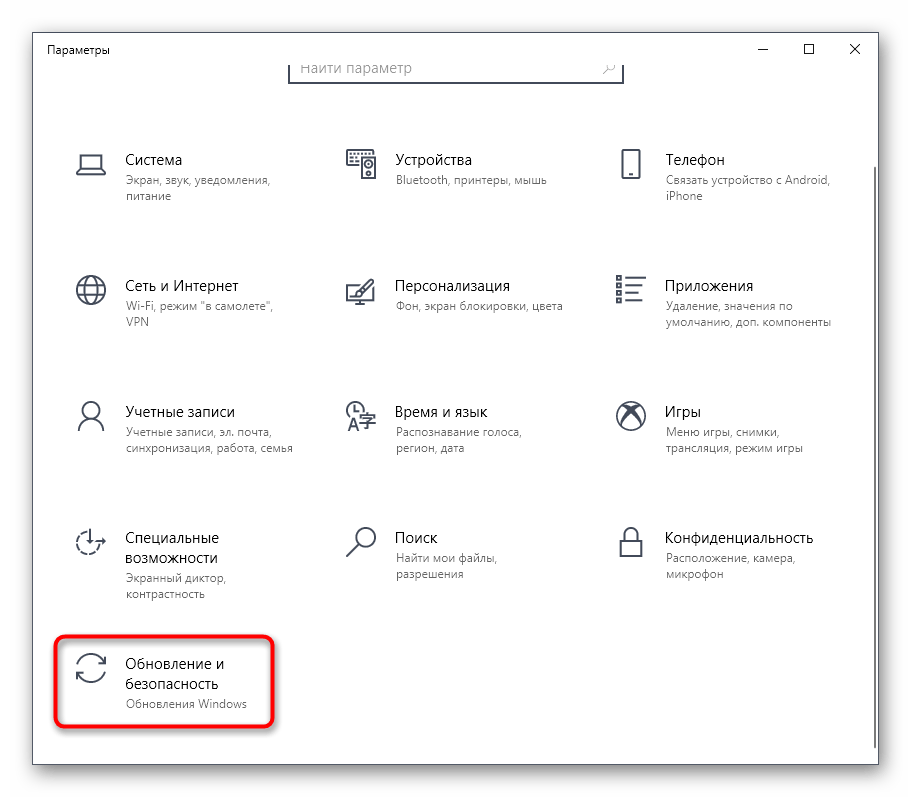
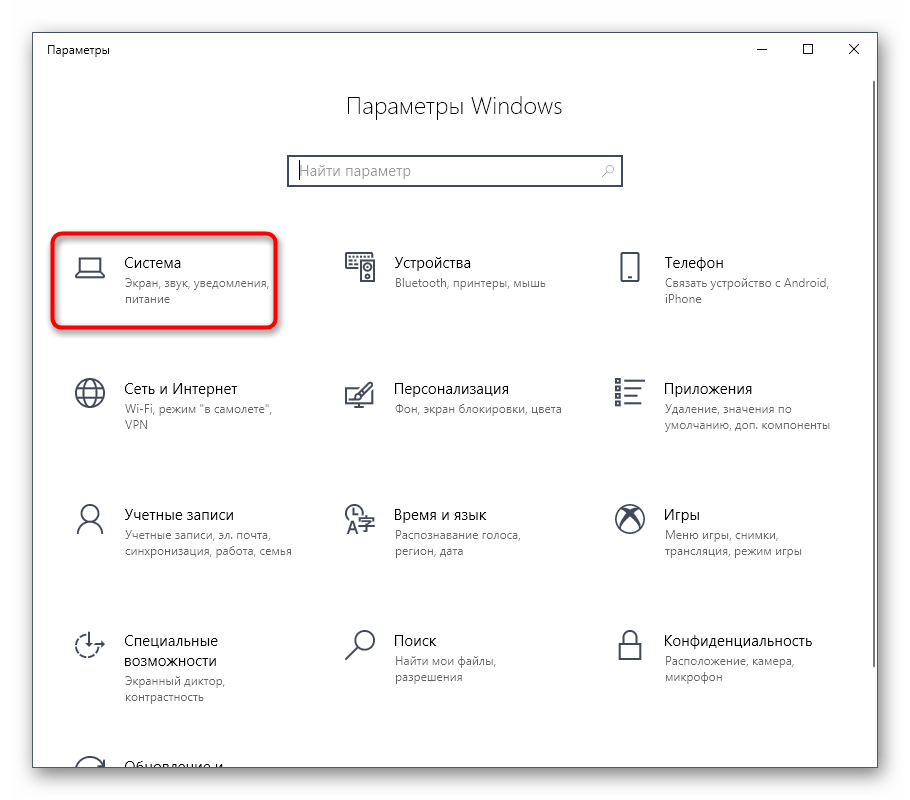
- Среди всех плиток вас интересует последняя, которая имеет название «Обновление и безопасность».
- Запустите поиск апдейтов и дождитесь окончания этой процедуры. Если обновления будут найдены, инсталлируйте их и перезагрузите компьютер, чтобы все изменения вступили в силу.
К сожалению, взаимодействие с Центром обновления Windows не всегда заканчивается успешно и во время установки или поиска апдейтов появляются какие-либо ошибки. В таких ситуациях пользователю предстоит решить их все самостоятельно. Разобраться в этом помогут специальные статьи на нашем сайте, ссылки на которые вы найдете ниже.
Подробнее:
Установка обновлений Windows 10
Устанавливаем обновления для Windows 10 вручную
Устранение проблем с установкой обновлений в Windows 10
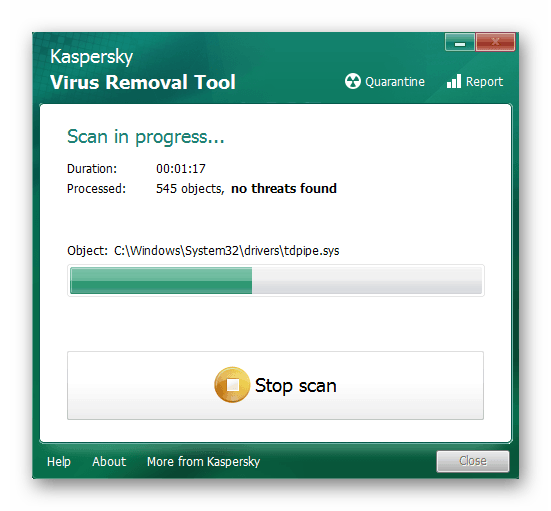
Способ 3: Проверка ОС на наличие вирусов
Предпоследний способ, связанный с общими рекомендациями, подразумевает проверку операционной системы на наличие вирусов. Дело в том, что большинство угроз запускаются в виде отдельных процессов и могут нагружать Виндовс. Сейчас очень популярны фоновые майнеры, которые за счет мощностей зараженного компьютера добывают для злоумышленников криптовалюты. Такие виды угроз больше всего оказывают негативное влияние на процессор, поэтому их важно вовремя обнаружить и удалить.
Подробнее: Борьба с компьютерными вирусами
Способ 4: Очистка системы от ненужных файлов
В завершение рассмотрения популярных методов поддержания системы в нормальном рабочем состоянии хотим отметить специальные сторонние и стандартные средства, позволяющие очистить Виндовс 10 от мусора. Произведение подобных действий позволяет избавиться от ненужных файлов, повысить быстродействие и немного снизить нагрузку на жесткий диск, оперативную память и процессор. Юзер сам вправе выбрать, задействовать ему стороннее средство или использовать встроенную в ОС функциональность для очистки мусора.
Подробнее: Освобождаем жесткий диск в Windows 10
Способ 5: Отключение автозагрузки ненужных программ
Некоторое программное обеспечение после установки на ПК автоматически добавляется в автозагрузку и функционирует в фоновом режиме при каждом запуске ОС. Иногда пользователи даже не знают об этом и не подозревают, что такие приложения нагружают комплектующие, находясь в активном состоянии, что относится и к процессору. Проверить это и отключить лишний софт можно буквально в несколько кликов.
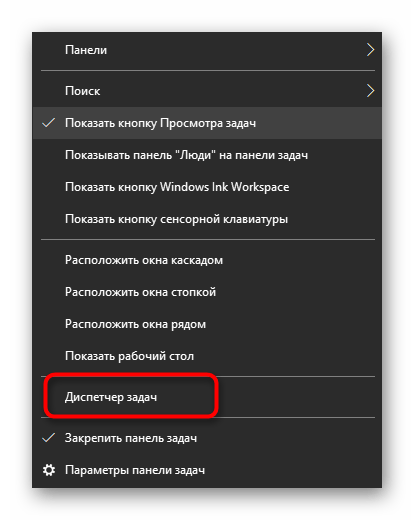
- Щелкните правой кнопкой мыши по пустому месту на панели задач и в контекстном меню выберите пункт «Диспетчер задач».
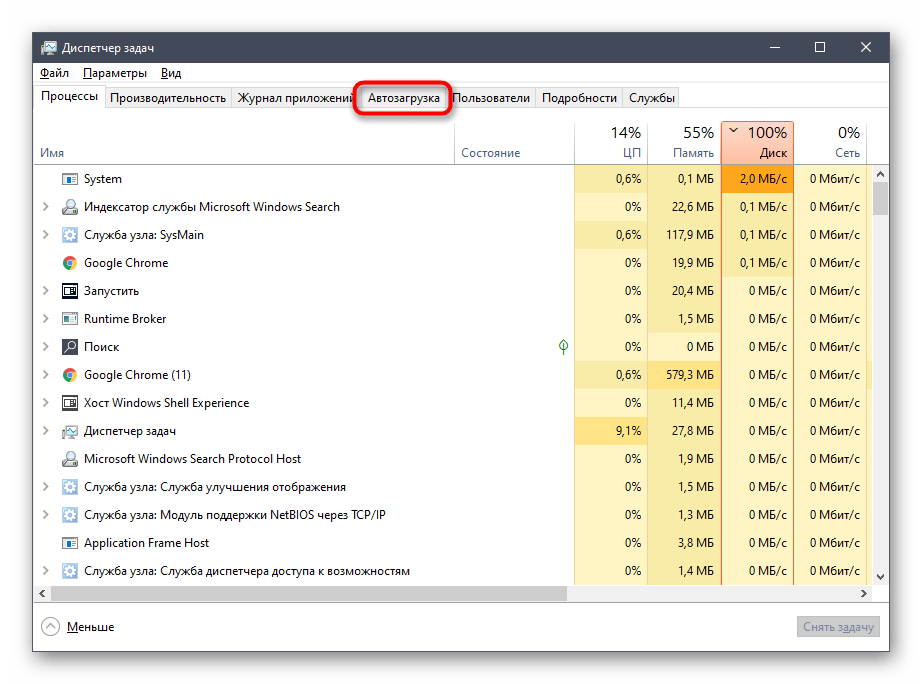
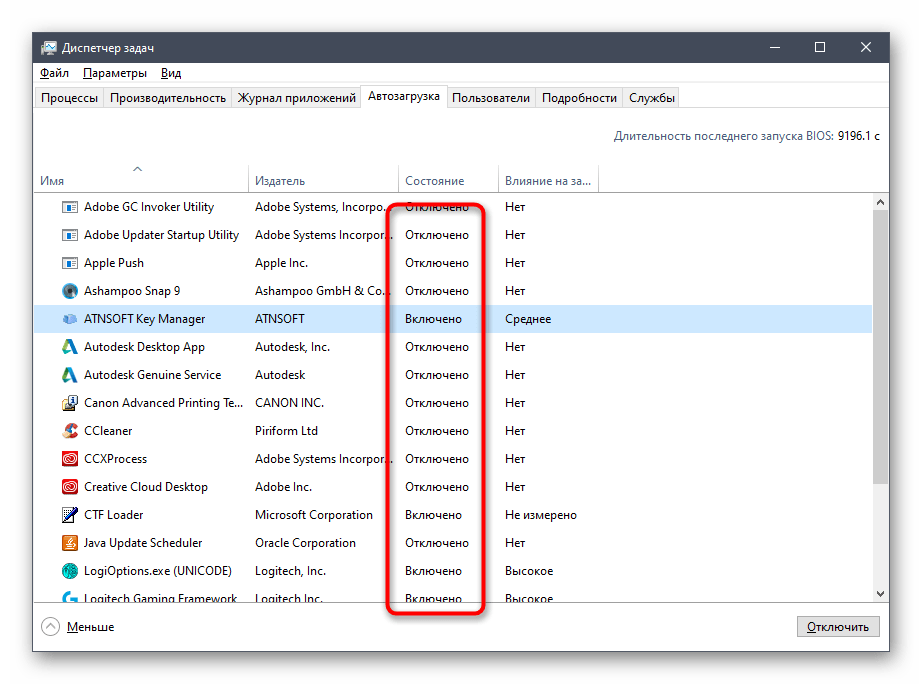
- Переместитесь на вкладку «Автозагрузка».
- Здесь посмотрите на состояние имеющихся процессов. Если что-то лишнее имеет значение «Включено», потребуется изменить настройку.
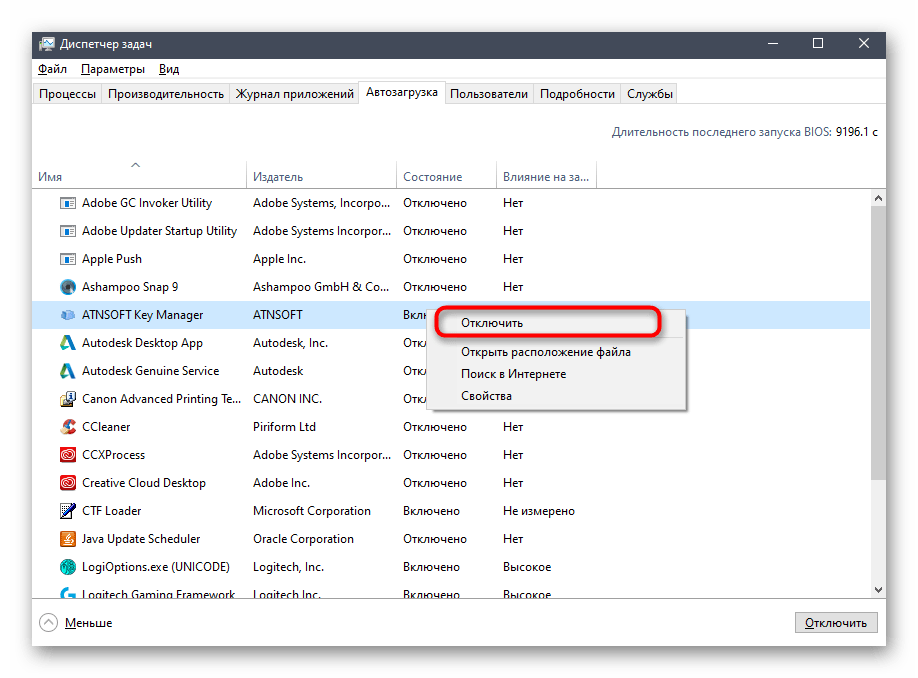
- Для этого нажмите по строке ПКМ и в контекстном меню выберите пункт «Отключить».
Произведите те же самые действия и с другими ненужными приложениями, а затем перезагрузите компьютер или просто завершите процессы программ, чтобы прекратить их функционирование и проверить, как это скажется на нагрузке CPU.
Способ 6: Включение очистки файла подкачки
Многие пользователи активируют на своем ПК файл подкачки, что добавляет Windows виртуальной памяти и позволяет ей быстрее работать. Однако в некоторых случаях этот файл наоборот оказывает негативное влияние на быстродействие, что особенно заметно на слабых сборках. Исправляется эта ситуация путем включения опции создания нового файла при каждом выключении ПК. Не будем вдаваться в подробности специфики этого решения, а сразу продемонстрируем соответствующую инструкцию.
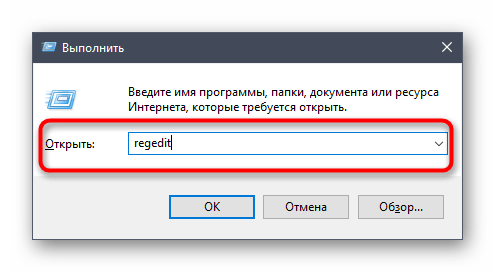
- Откройте утилиту «Выполнить», зажав комбинацию клавиш Win + R. В появившемся поле введите
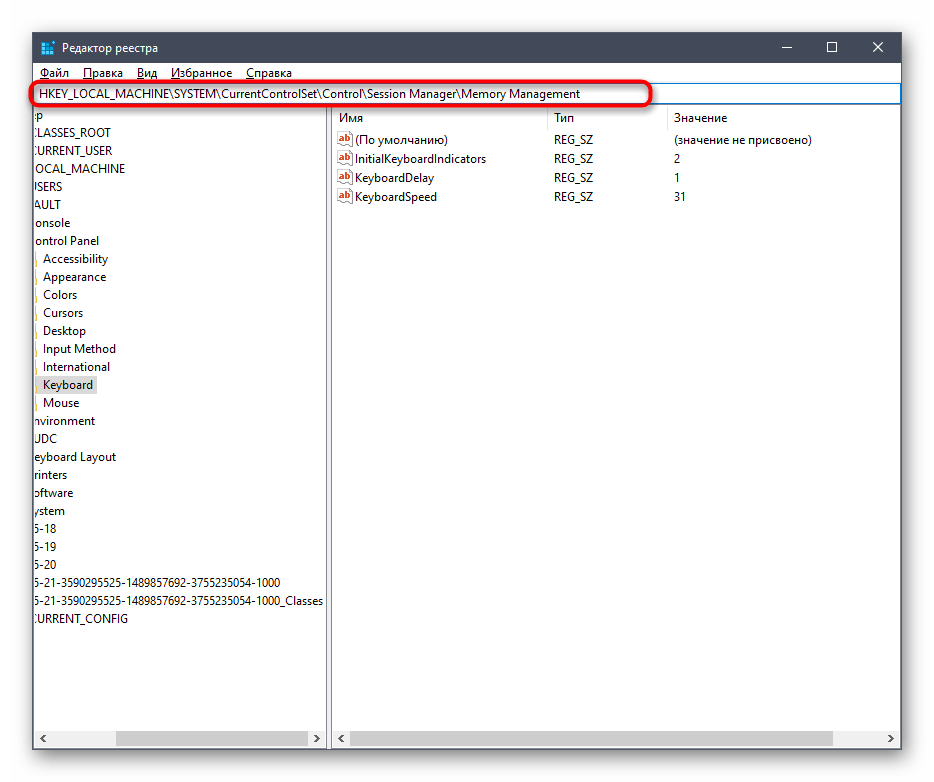
regeditи нажмите на Enter для активации команды. - Перейдите по пути
HKEY_LOCAL_MACHINE\SYSTEM\CurrentControlSet\Control\Session Manager\Memory Management, чтобы попасть к необходимому ключу реестра. - Отыщите там параметр с именем «ClearPageFileAtShutDown» и дважды кликните по нему ЛКМ, чтобы открыть окно свойств.
- Поменяйте значение на «1» и подтвердите изменение.
Все настройки, производимые в редакторе реестра, вступят в силу только после перезагрузки компьютера, поэтому сделайте это и проверяйте результаты. Что касается самого файла подкачки и действий, связанных с ним, то всю необходимую информацию вы найдете в отдельных материалах на нашем сайте далее.
Подробнее:
Включение файла подкачки на компьютере с Windows 10
Увеличение файла подкачки в Windows 10
Способы отключения файла подкачки в Windows 10
Способ 7: Отключение визуальных эффектов
Внешний вид Windows 10, несомненно, является преимуществом операционной системы и делает ее красивой. Однако обладателям слабых компьютеров такое количество анимаций и различной графики не принесет ничего хорошего, поскольку все эти эффекты нагружают комплектующие, включая процессор. Отключение всех или некоторых настроек позволит немного разгрузить CPU, поэтому вам следует выполнить такие действия:
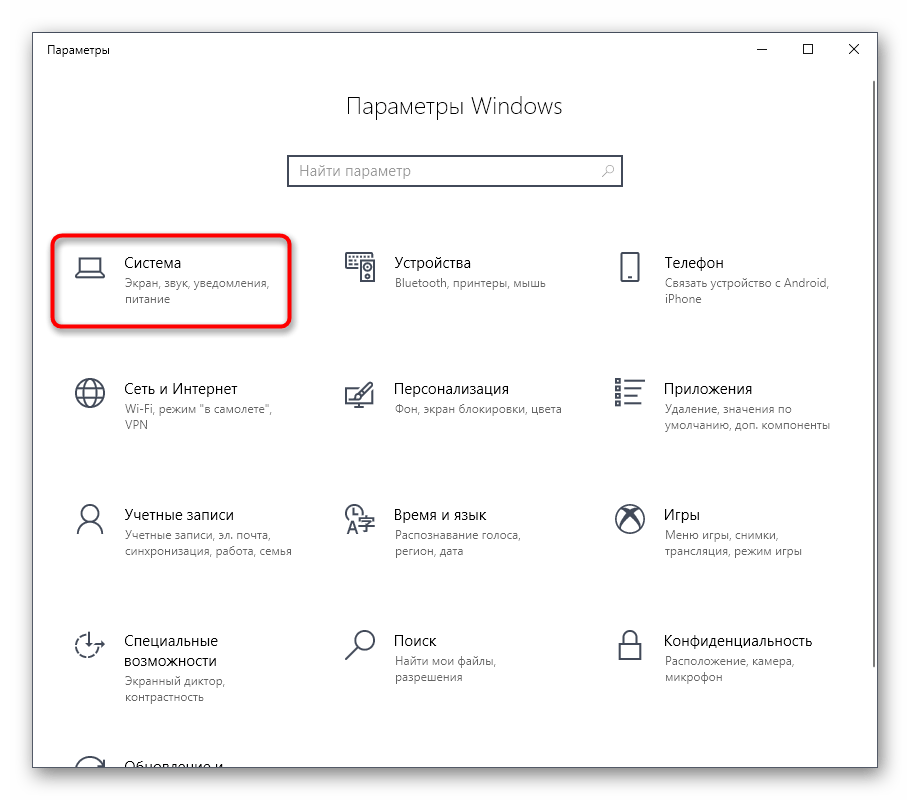
- Откройте «Пуск» и перейдите в «Параметры».
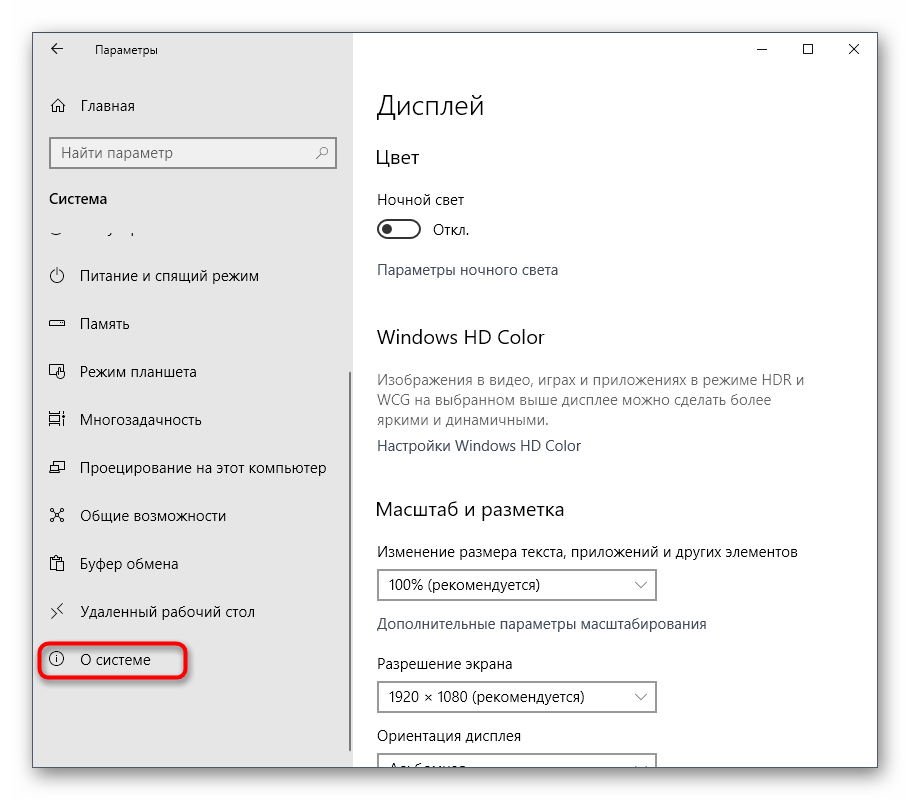
- Переместитесь к первому же разделу под названием «Система».
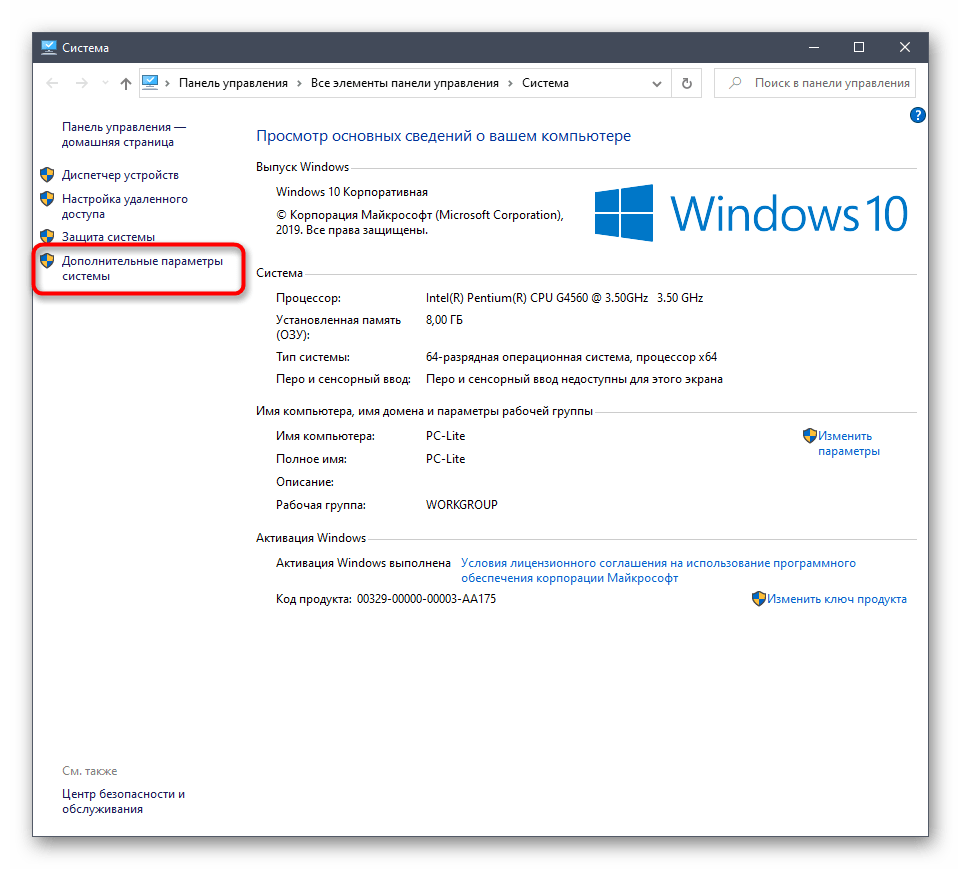
- Опуститесь вниз по списку левого меню и выберите «О системе».
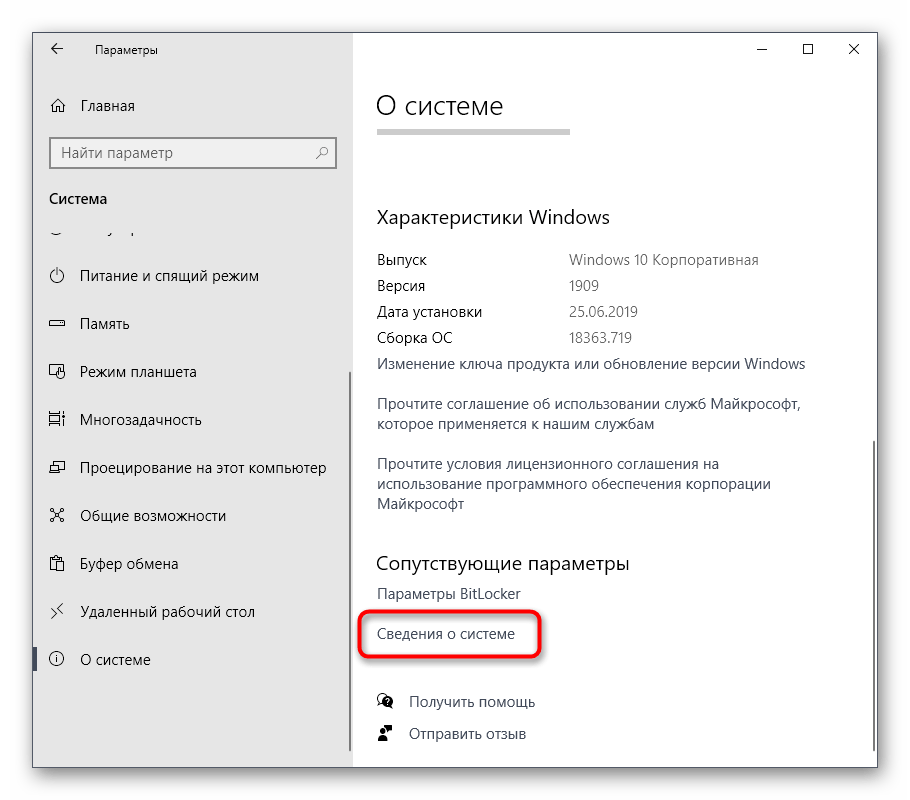
- Внизу окна отыщите строку «Сведения о системе» и кликните по ней.
- Отобразится отдельное окно Панели управления, где вас интересует кликабельная надпись «Дополнительные параметры системы».
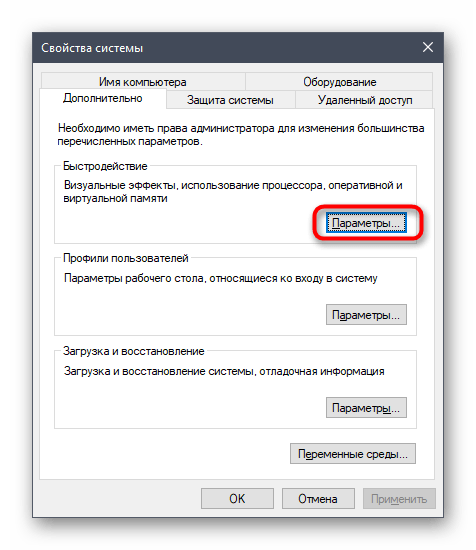
- После отображения свойств в категории «Быстродействие» нажмите на «Параметры».
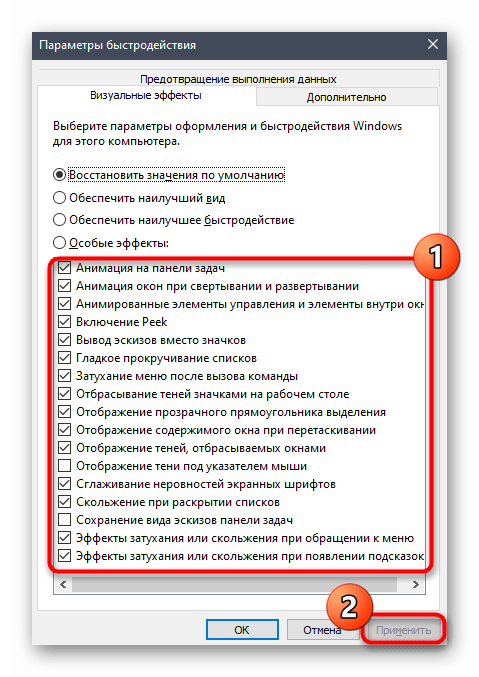
- Отметьте маркером пункт «Обеспечить наилучшее быстродействие», чтобы система автоматически отключила ненужные визуальные эффекты.
- Дополнительно вы можете самостоятельно решить, какие параметры отключать, снимая галочки с соответствующих пунктов. По завершении конфигурирования не забудьте применить изменения.


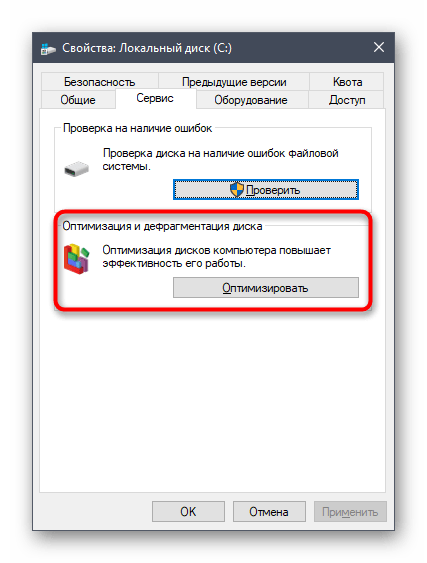
Способ 8: Дефрагментация жесткого диска
Со временем жесткий диск фрагментируется, что значительно замедляет общую скорость работы операционной системы. Однако сказывается такая проблема не только на самом носителе информации, но и на других комплектующих, поскольку данные не успевают обрабатываться с должной скоростью. Такая проблема решается путем дефрагментации носителя при помощи встроенных или сторонних инструментов.
Способ 9: Отключение системных уведомлений
Уведомления в Windows 10 могут приходить как от самой ОС, так и от сторонних приложений. Иногда их поступает огромное количество, и все это время служба, отвечающая за их отображение, функционирует в активном режиме. В большинстве случаев пользователь даже не заинтересован в данных сообщениях и никогда не читает их. Если вы относитесь к таким юзерам, мы советуем отключить уведомления, чтобы разгрузить ЦП.
- Откройте «Пуск» и переместитесь в меню «Параметры».
- Здесь выберите первый раздел «Система».
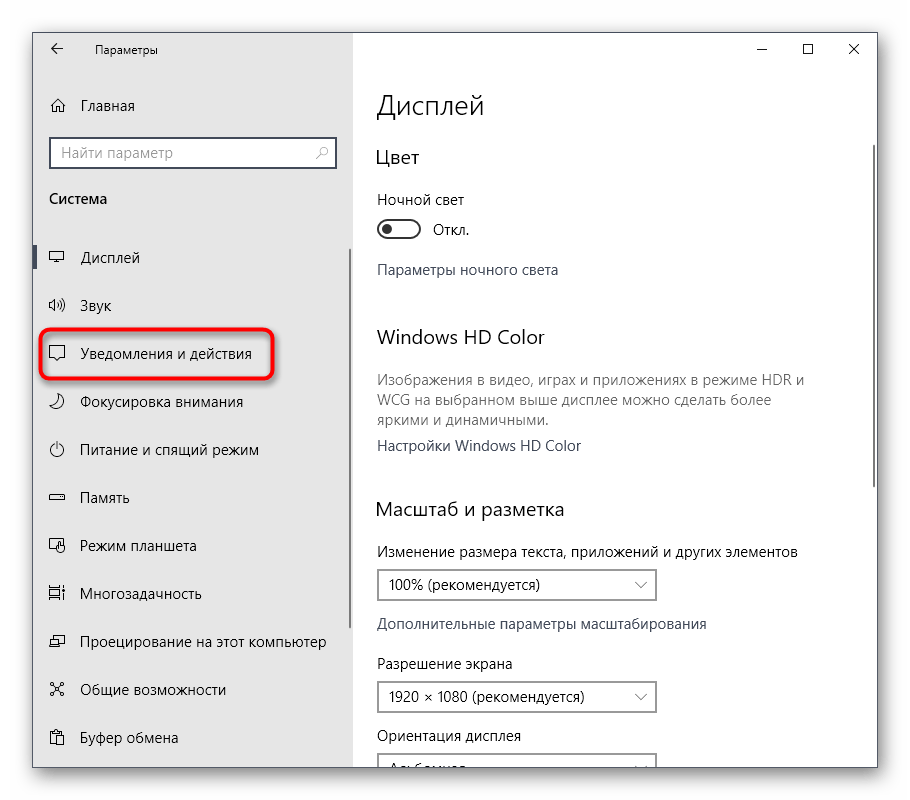
- Через левую панель перейдите в «Уведомления и действия».
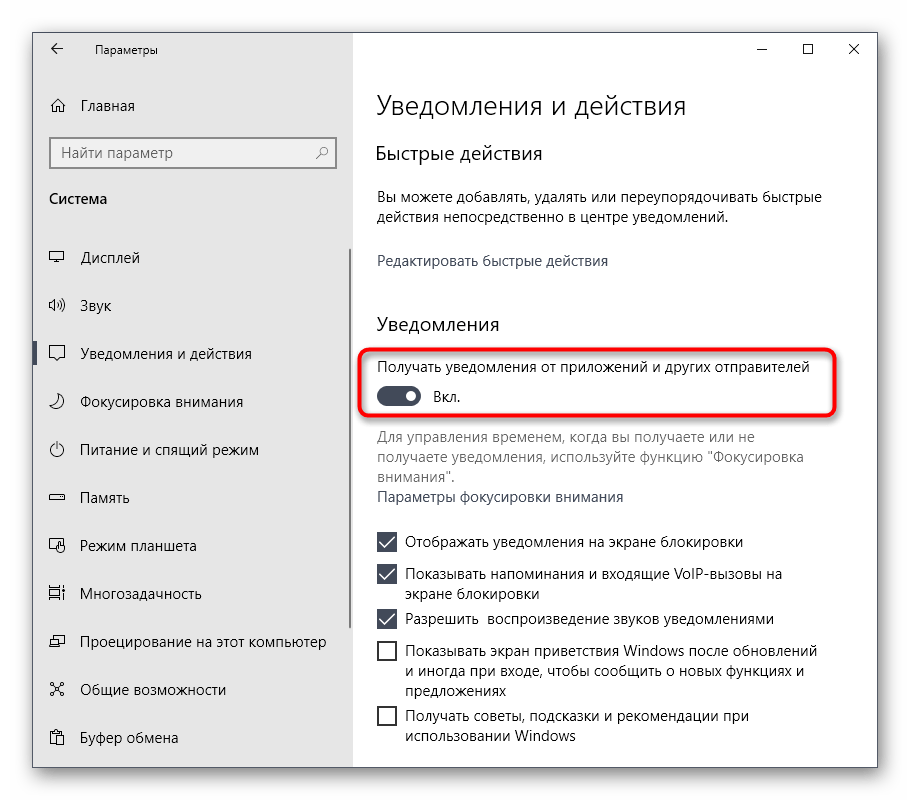
- Переместите ползунок «Получать уведомления от приложений и других отправителей», чтобы отключить эту опцию.
Способ 10: Сброс параметров плана электропитания
Иногда юзер самостоятельно изменяет параметры используемого плана электропитания или это происходит автоматически какими-то приложениями, что в последствии только отрицательно сказывается на быстродействии системы и повышает нагрузку на процессор. Вручную перебирать каждое значение — не лучшая затея, поэтому мы рекомендуем просто сбросить все до состояния по умолчанию, что происходит так:
- Снова перейдите в «Система» через «Параметры».
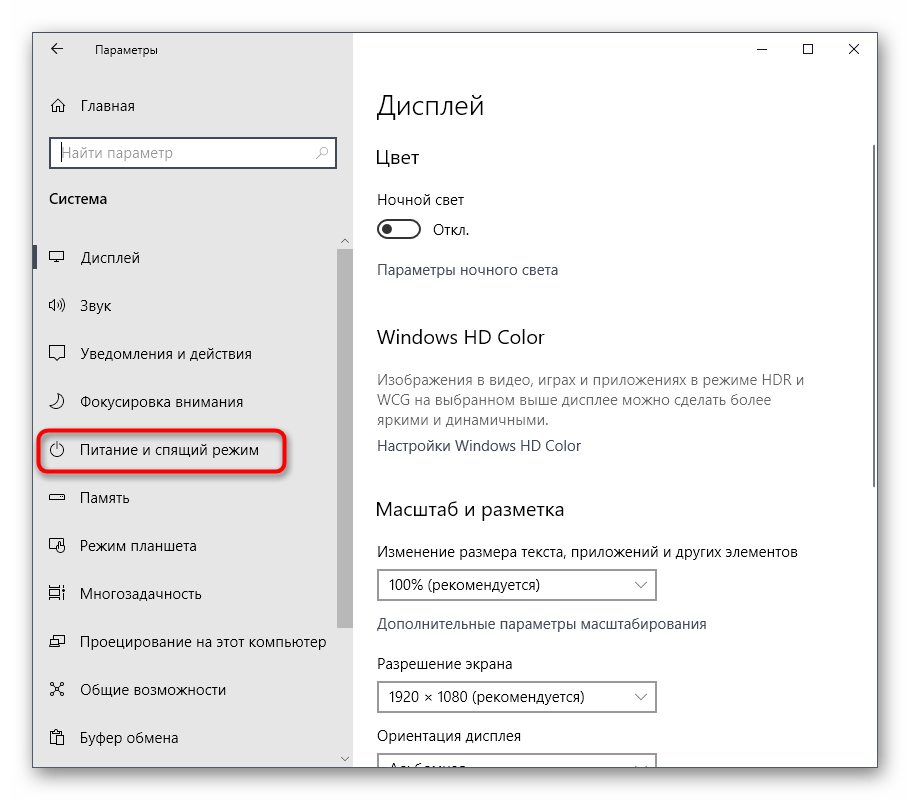
- На этот раз здесь выберите категорию «Питание и спящий режим».
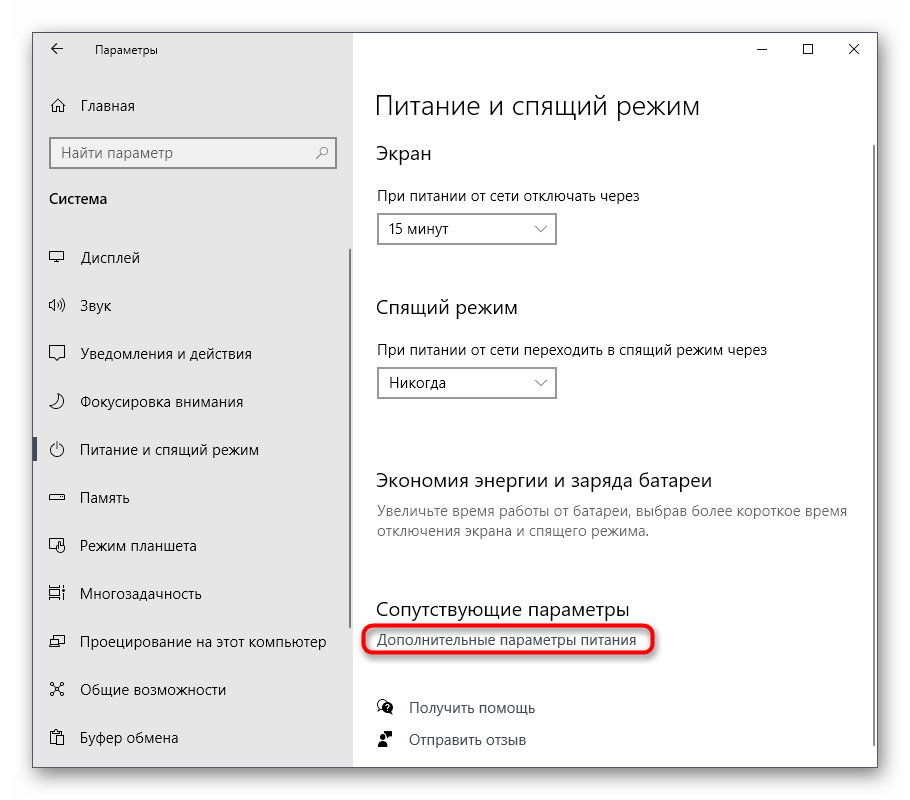
- Отыщите надпись «Дополнительные параметры питания» и кликните по ней.
- Перейдите к настройке используемой схемы.
- Щелкните по кликабельной надписи «Восстановить для схемы параметры по умолчанию».
- Подтвердите выполнение данного действия.


В будущем вы можете самостоятельно выставить те параметры электропитания, которые устанавливали сами, если они не оказывали негативного влияния на функционирование CPU.
Способ 11: Завершение ненужных задач
К ненужным задачам мы относим программы и различные утилиты, которые были вручную запущены пользователем, но по каким-то причинам сейчас не задействованы. Даже если такое ПО находится в свернутом состоянии, оно все равно нагружает систему и приводит к замедлению ее отклика. Вам следует самостоятельно отключить неиспользуемые процессы, и проще всего это сделать через окно Диспетчера задач.
- Щелкните ПКМ по пустому месту на панели задач и выберите пункт «Диспетчер задач».
- В первой же вкладке «Процессы» установите сортировку по нагрузке на процессор, чтобы посмотреть, какие из приложений нагружают его больше всего.
- Отыщите в списке лишний софт и кликните по строчке ПКМ.
- В появившемся контекстном меню выберите пункт «Снять задачу».

Произведите то же самое со всеми остальными лишними программами, а затем проверьте, насколько уменьшилась нагрузка на CPU после завершения их задач. Если это помогло, на будущее просто выключайте не используемые приложения, а не оставляйте их в свернутом состоянии.
В завершение сегодняшнего материала хотим отметить, что иногда юзеры сталкиваются с тем, что лишь один какой-то процесс сильно нагружает ЦП. Часто это является нормальным положением вещей, например, служба обновлений в этот момент загружает файлы или производится проверка системы встроенным Защитником. Однако иногда нагрузку оказывают совсем непонятные процессы.
Все описанные выше рекомендации можно применять как единично, проверяя действенность каждого метода, так и использовать их комплексно, чтобы максимально понизить нагрузку на рассматриваемое комплектующее.
Наша группа в TelegramПолезные советы и помощь
Встроенный антивирус Защитник Windows 10 — отличное антивирусное решение, но иногда, когда он запускается в фоновом режиме для сканирования по расписанию, может вызывать высокую нагрузку на процессор. Не все знают, но есть метод, позволяющий ограничить ресурсы процессора, которые может использовать встроенный антивирус.
В этой инструкции о том, как можно установить, какой процент нагрузки на процессор (CPU) может создавать Защитник Windows 10 как при автоматическом, так и при ручном сканировании. Также вы можете отключить защитник Windows, но я бы этого не рекомендовал. Также может быть интересным: Лучшие бесплатные антивирусы.
Установка ограничения нагрузки на CPU Защитником Windows
Для установки различных параметров работы Защитника Windows 10 вы можете использовать команду Set-MpPreference в Windows PowerShell, один из параметров которой позволяет установить и верхний предел нагрузки на процессор (по умолчанию этот лимит имеет значение 50%):
- Запустите PowerShell от имени администратора. Для этого можно использовать меню, открывающееся по правому клику на кнопке «Пуск».
- Введите команду
Set-MpPreference -ScanAvgCPULoadFactor НУЖНЫЙ_ПРОЦЕНТ
- После ввода команды и нажатия Enter настройки будут применены.


Обратите внимание: в качестве значения процента нагрузки на CPU могут быть использованы числа от 5 до 100. Также доступно значение 0, отключающее троттлинг процессора и позволяющее Защитнику использовать его с максимумом нагрузки.
Для чего может потребоваться установка этого параметра? Например, на некоторых системах с HDD, особенно на ноутбуках, в процессе фонового сканирования защитником Windows система может тормозить (а ноутбук ощутимо греться). Если снизить нагрузку, работа во время выполнения сканирования может стать более комфортной. Возможна и обратная ситуация, когда требуется ускорить процесс сканирования: в этом случае стоит увеличить допустимый процент нагрузки на процессор.
О дополнительных параметрах Защитника Windows 10, которые вы можете установить с помощью Set-MpPreference можно прочитать на официальном сайте Майкрософт (на английском): https://docs.microsoft.com/en-us/powershell/module/defender/set-mppreference
Как ограничить загруженность процессора?
Существуют ли способ на Windows 10 ограничить загруженность процессора? Допустим чтобы больше 80% не поднималась
-
Вопрос задан
-
14711 просмотров
Комментировать
Подписаться
1
Средний
Комментировать
Решения вопроса 1
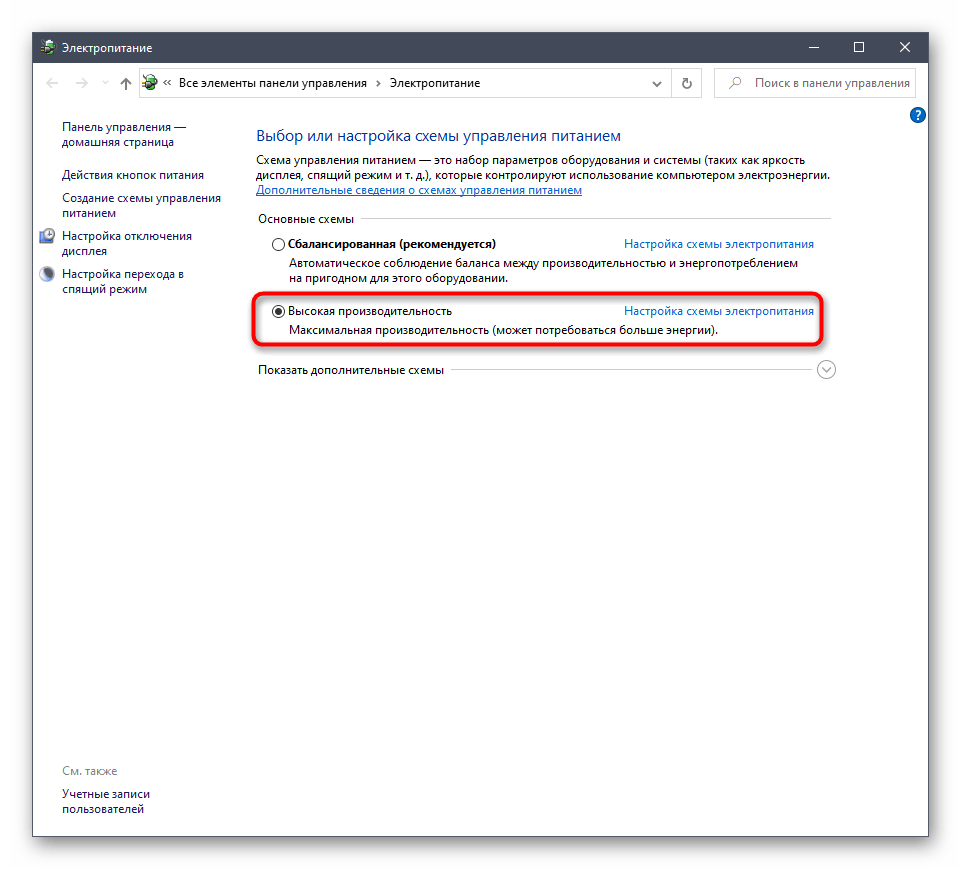
Панель управления\Оборудование и звук\Электропитание — Настройка схемы электропитания — Изменить дополнительные параметры питания — Управление питанием процессора.
Комментировать
Пригласить эксперта
Ваш ответ на вопрос
Войдите, чтобы написать ответ
Похожие вопросы
-
Показать ещё
Загружается…