
Все способы:
- Вариант 1: Отключение визуальных эффектов
- Вариант 2: Закрытие ненужных приложений
- Вариант 3: Использование утилиты RamMap
- Дополнительно: увеличение объема VRAM
- Вопросы и ответы: 1
Вариант 1: Отключение визуальных эффектов
Отключение анимационных и прочих эффектов интерфейса является одним из наиболее простых способов высвобождения дополнительной видеопамяти в Windows 10.
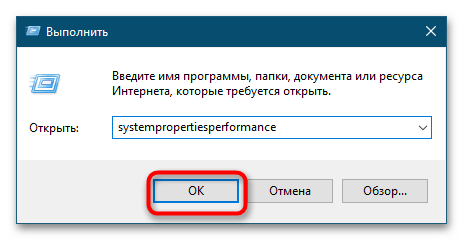
- Откройте нажатием Win + R диалоговое окошко «Выполнить», введите в него команду
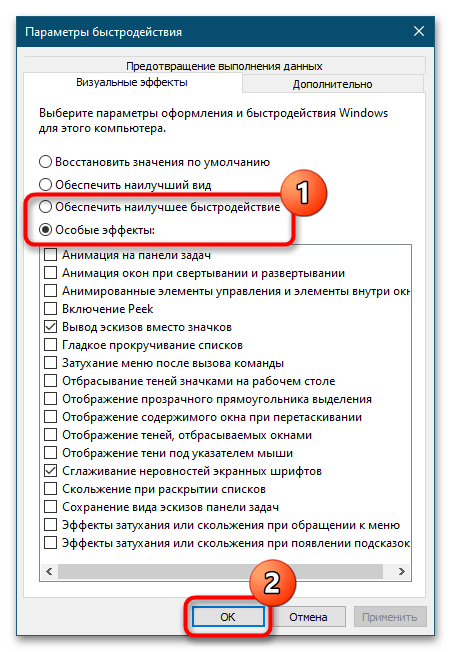
systempropertiesperformanceи нажмите клавишу ввода. - В открывшемся окне «Параметры быстродействия» на вкладке «Визуальные эффекты» активируйте опцию «Обеспечить наилучшее быстродействие» или «Особые эффекты». Последний вариант более гибкий, так как он позволяет отключать только определенные визуальные эффекты.
- Сохраните настройки.
Вариант 2: Закрытие ненужных приложений
Высвободить немного видеопамяти можно путем завершения работы неиспользуемых приложений, в том числе работающих в фоновом режиме. Закрыв окна таких программ, убедитесь, что их нет также в системном трее. Заодно проверьте систему на предмет запущенных процессов сторонних приложений в «Диспетчере задач».
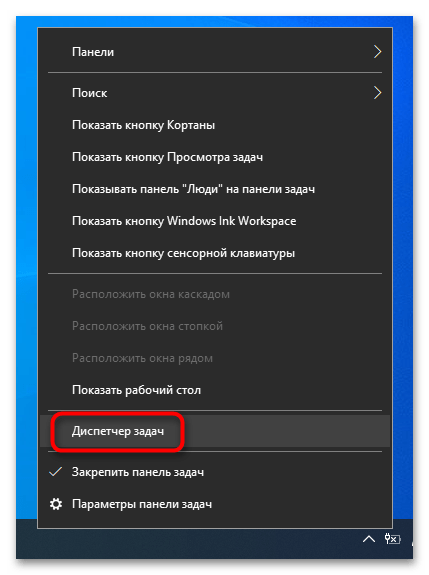
- Откройте «Диспетчер задач» из контекстного меню «Панели задач» или другим известным вам способом.
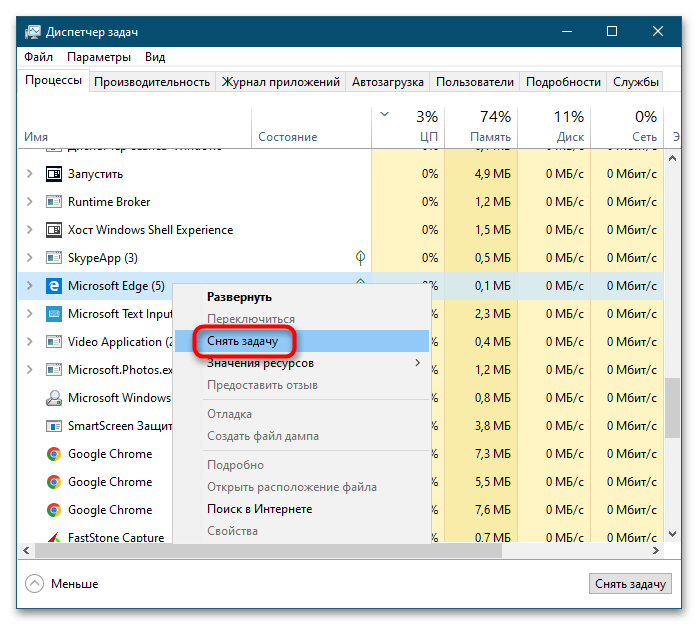
- Внимательно просмотрите список процессов в текущей вкладке. Если вдруг найдете процесс ненужного в данный момент стороннего приложения, нажмите по нему правой кнопкой мыши и выберите в меню пункт «Снять задачу».
Вариант 3: Использование утилиты RamMap
В качестве дополнительного решения можно попробовать воспользоваться бесплатной утилитой RamMap, разработанной компанией Sysinternals и предназначенной для анализа использования физической памяти.
Скачать RamMap с официального сайта
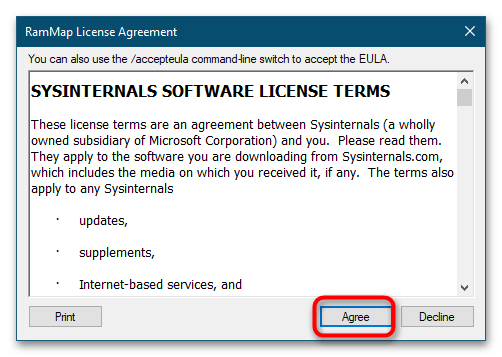
- Скачав архив с утилитой, распакуйте его в любое удобное расположение и запустите исполняемый файл RAMMap.exe от имени администратора. Примите соглашение нажатием кнопки «Agree».
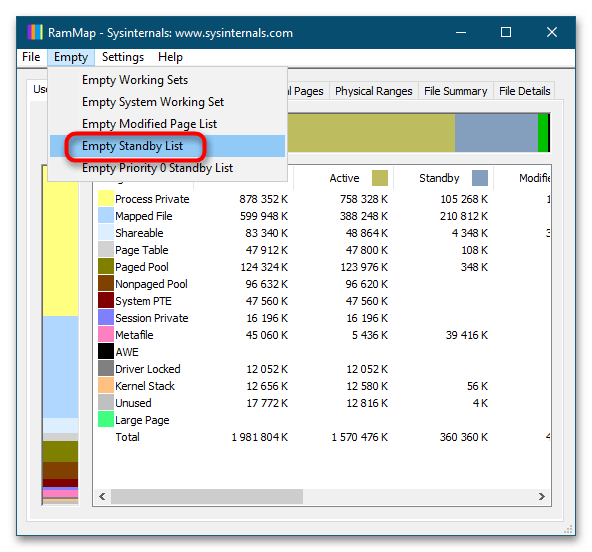
- Из меню «Empty» выберите опцию «Empty Standby List». Более жестким вариантом будет выбор опции «Empty Working Sets», выгружающей из памяти все запущенные приложения и процессы.
Дополнительно: увеличение объема VRAM
К сожалению, приведенные выше способы очистки видеопамяти с точки зрения оптимизации являются сомнительным решением. Если вы хотите перестать испытывать проблемы из-за недостатка видеопамяти, увеличьте выделяемый под нее объем ОЗУ в настройках BIOS. Для этого вам нужно найти в БИОС параметр «AGP Aperture Size» или «Shared Memory» и установить для него максимальное значение.
Подробнее: Как увеличить видеопамять
Наша группа в TelegramПолезные советы и помощь
Readers help support Windows Report. We may get a commission if you buy through our links.
Read our disclosure page to find out how can you help Windows Report sustain the editorial team. Read more
If your PC runs out of GPU memory, you’ll encounter performance issues, and this is why many want to know how to clear VRAM properly.
This isn’t as hard as you think, and in this guide, we’ll show you the best ways to do that.
How do I free up VRAM?
Before we start, be sure to keep all your software up to date to minimize the chance of bugs. Also, try reducing the game resolution and graphics quality as a workaround.
1. Adjust paging file settings for the game drive
- Open your File Explorer, then right-click This PC and open Properties.

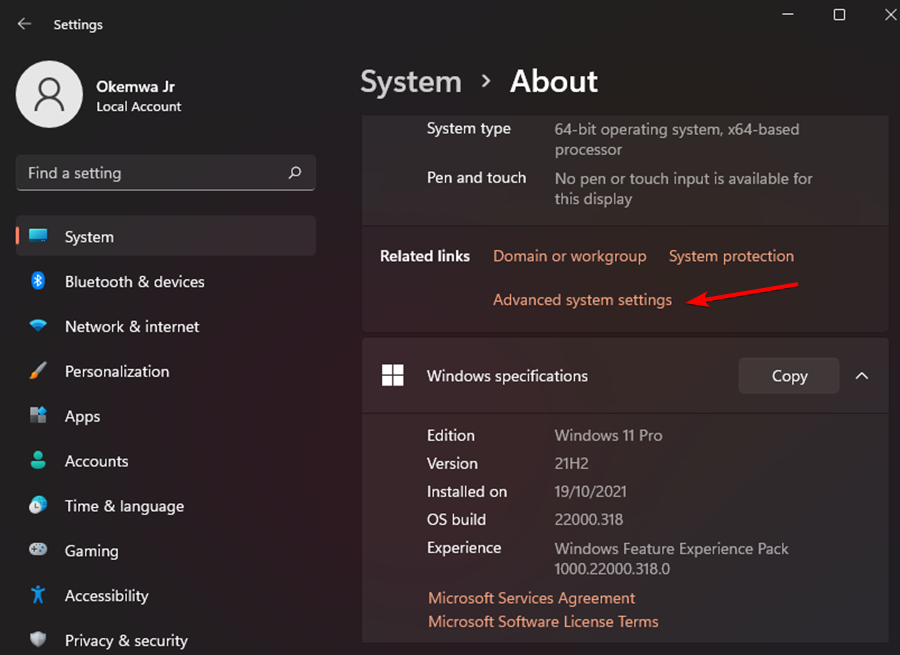
- Select Advanced system settings on the left pane.

- Click the Advanced tab and now click Settings under the Performance category.

- Open the Advanced tab in the Performance Options window that just opened. Under the Virtual Memory category, click Change.
- Select your system drive, and then select System managed size. Click Set.
- Now select the drive where you’ve installed the game on. Then, click No paging file. Click Set once again. Finally, click on OK.


2. Update the graphics driver
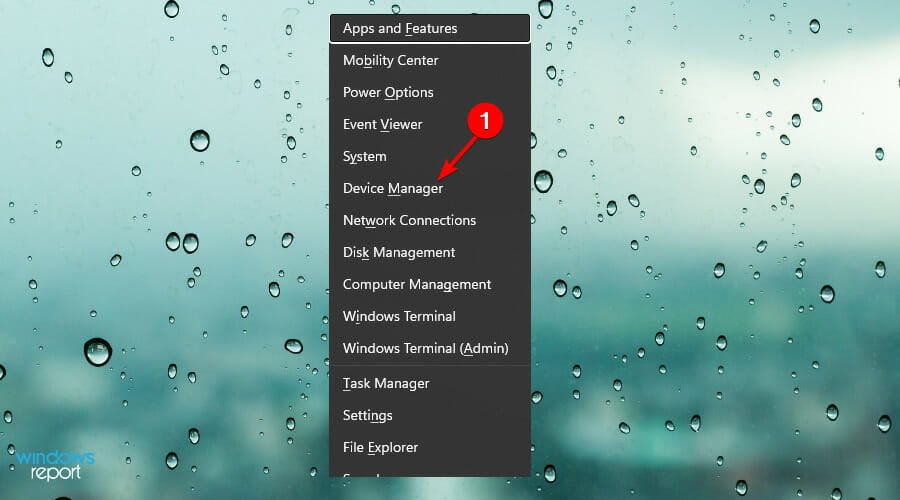
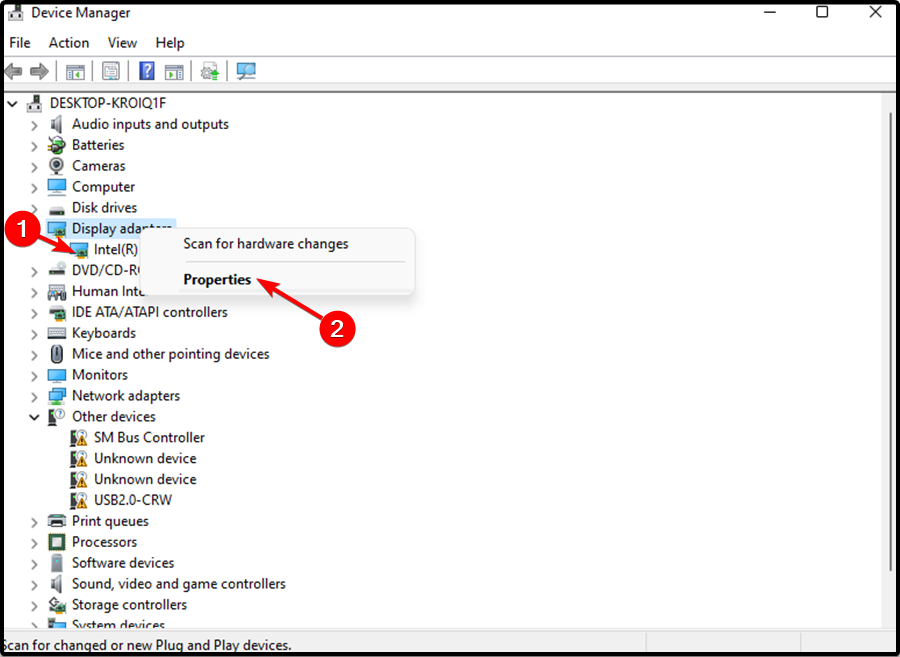
- Press the Windows + X key, then select Device Manager from the menu.
- Expand Display adapters and then right-click the listed graphics card to choose Properties.

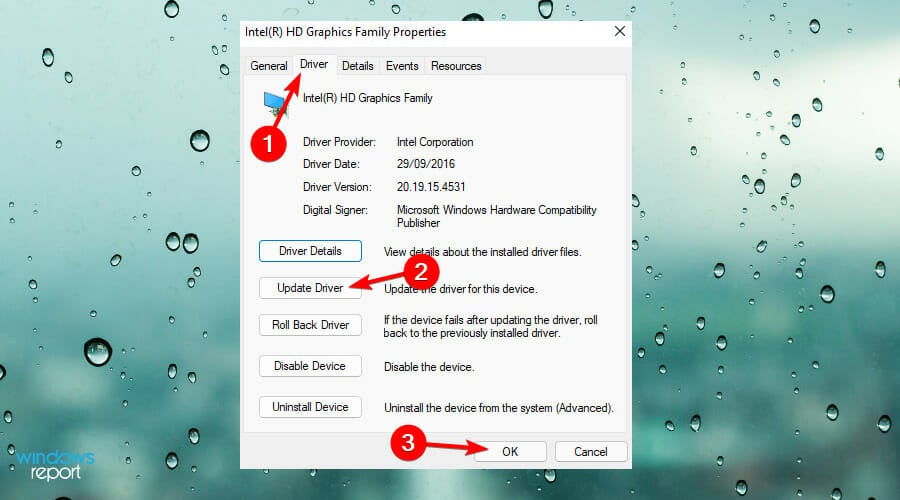
- Then, click on the Driver tab and then click Update Driver. Then, click on OK.
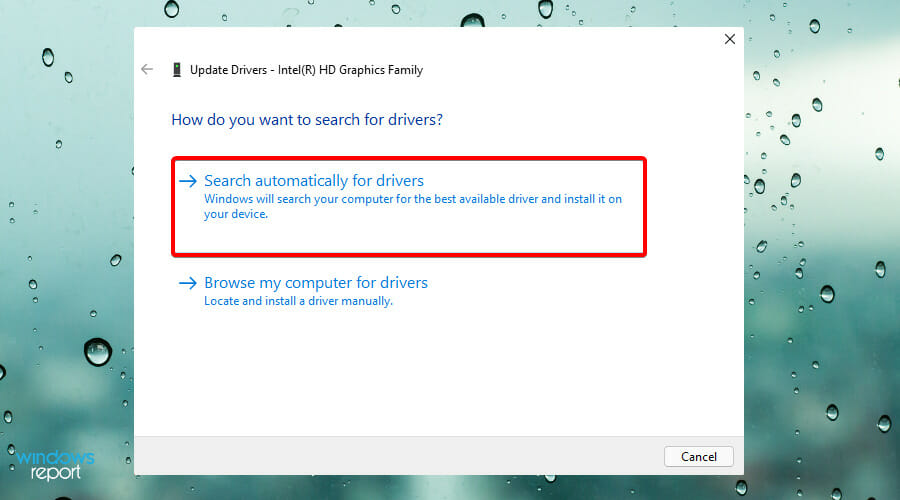
- Finally, click Search automatically for updated driver software. Then, follow through with the on-screen instructions to complete updating the driver.
Once you update your device, you will be able to protect it from malware and hardware failures and also prevent system crashes such as Your GPU memory is full, which is also caused by outdated driver problems.
If you don’t like Device Manager, we recommend you to use a dedicated program such as PC HelpSoft Driver Updater. Whenever you run this software, it scans your PC to detect outdated or missing drivers.
It will then present detailed reports. At a click of a button, you can select what drivers you want to update, install or repair.
⇒ Get PC HelpSoft Driver Updater
3. Use the 3GB switch
NOTE
Before executing this fix, you should note that it will reduce the operating system’s space. Also, it could even lead to more crashes.
- Search for Command Prompt in the Start menu, then right-click it, and select Run as administrator.

- Now, type in the following command and press Enter:
bcdedit /set IncreaseUserVa 3072
- Finally, restart your device.


For users with a 32-bit version of Windows, this fix will come in handy to correct the problem. As an alternative, you could also get the 64-bit version of Windows.
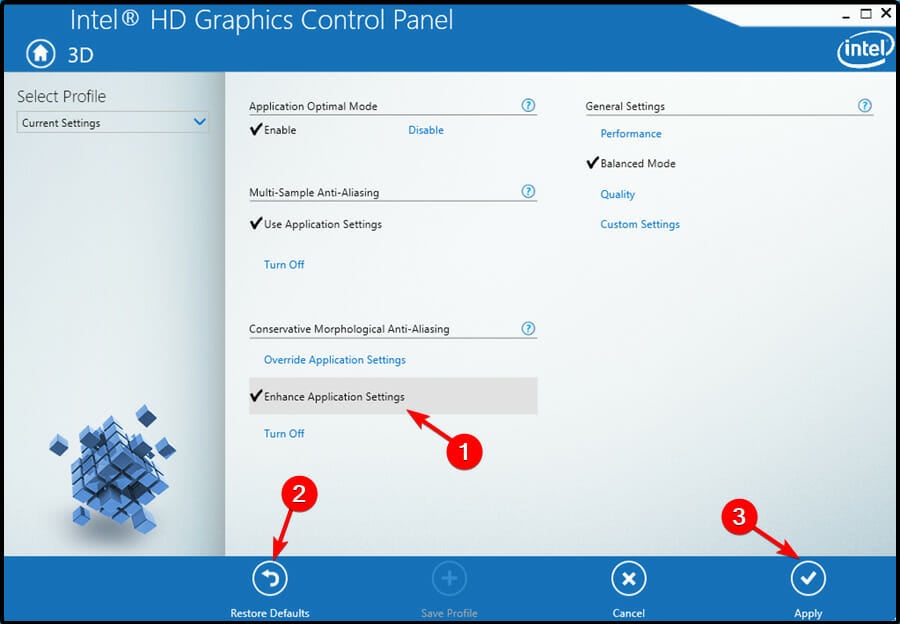
4. Tweak the graphics card settings
- Press Windows + R to open Run, type control panel in the text field, and click OK.

- Once the window appears, set the View by option as Large icons.

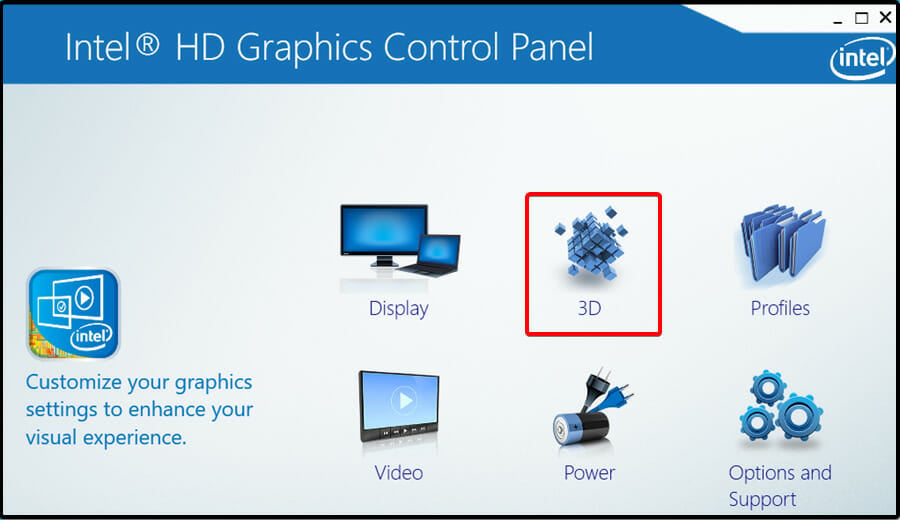
- Find Intel HD Graphics.

- Click the 3D option to open the 3D settings.

- Click on Enhance Application Settings, then select Restore Defaults. Finally, click the Apply button to save the changes.


5. Check for unnecessary background programs
- Press Ctrl + Alt + Delete simultaneously to open the Task Manager.
- Look at the Processes running, verify the amount of memory allocated to each, and make an informed decision on which programs should be terminated.


- Recent Windows 11 update lets you disable profanity filter in voice typing
- Microsoft wants Windows 10 users to upgrade to Windows 11 or Copilot + PCs
- Windows 11 KB5055627 update makes File Explorer more fluid
When a GPU runs out of memory, it struggles to display images properly. You might experience longer load times, noticeable lag in games, and a drop in FPS.
Flushing GPU memory can help, but it’s only safe to do so after saving your work, as premature deletion can lead to permanent data loss. Signs of a failing GPU include screen glitches and BSOD errors.
Now that you know how to clear VRAM, you can check our guide to learn how much VRAM you have. If the issue is still there, our guide on increasing VRAM on Windows 11 should be able to help you.
Did the above fixes help you resolve the issue with your graphics card? Share your thoughts with us in the comments section below.
Radu Tyrsina
Radu Tyrsina has been a Windows fan ever since he got his first PC, a Pentium III (a monster at that time).
For most of the kids of his age, the Internet was an amazing way to play and communicate with others, but he was deeply impressed by the flow of information and how easily you can find anything on the web.
Prior to founding Windows Report, this particular curiosity about digital content enabled him to grow a number of sites that helped hundreds of millions reach faster the answer they’re looking for.
Перейти к контенту
Объем видеопамяти определяет модель и тип видеокарты, установленной в ПК или ноутбуке. Часть памяти резервирует Windows, но ее можно освободить, увеличив производительность в играх или избавившись от окна с предупреждением «Количество видеопамяти меньше 64 КБ». Инструкции ниже работают на Windows 7 и выше.
Упрощаем интерфейс
Разгрузить видеокарту помогает переключение на максимальную производительность:
- В строку поиска рядом с «Пуск» введите «Панель параметров». На Виндовс 7 эта вкладка занесена в меню «Пуска».
- Справа сверху смените «Просмотр» с «Категории» на «Крупные значки».
- Проследуйте в «Система».
- В меню параметров слева, клацните по «Дополнительные параметры системы».
- Появится новое окно, где нужно выбрать вкладку «Дополнительно». В подразделе «Быстродействие» клацните по «Параметры».
- В «Визуальные эффекты» переключитесь на «Обеспечить наилучшее быстродействие». В открывшемся перечне снизу поставьте галочку напротив «Сглаживание неровностей экранных шрифтов» и тапайте по «Применить».
- После принятия изменений интерфейс упростится.

Этот способ актуален для пользователей только с интегрированной или дискретной видеокартой. На компьютерах и ноутбуках с двумя типами карточек, запуск игр автоматически происходит через дискретное решение.
Выбираем другую карту
Операционная система способна работать с погрешностями, из-за запуска игр, графических редакторов или профессионального софта, выбирает “перегруженную” встроенную графику, вместо внешней. Как это исправить:
- Тапните по ярлыку ПО правой кнопкой мыши.
- Наведите курсор на «Запустить с графическим процессором». Выставите «Высокопроизводительный процессор».
Если этот параметр отсутствует, установите/обновите драйвера дискретной видеокарты, посетив официальный сайт производителя. Альтернативный вариант — настройте используемый графический параметр в фирменной программе. Для примера приведем решение от Nvidia:
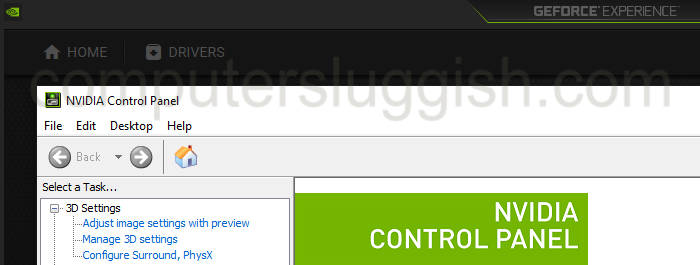
- Откройте панель управления от Нвидия: находится в меню пуск, на рабочем столе или списке скрытых значков во вкладке рядом с датой и временем.
- Перейдите в «Управление параметрами 3D», оттуда в «Программные настройки».
- В строке «Выберите программу для настройки» установите игру или софт. Во второй строке «Выберите предпочтительный графический процессор для этой программы» укажите дискретную карточку. Щелкните по «Применить снизу».
В последующем видеокарта от NVIDIA или AMD будет срабатывать автоматически.
Освобождаем виртуальную память
Если окно с предупреждением о недостатке памяти не исчезает, единственный способ очистить видеопамять на Виндовс — разгрузить виртуальную память:
- В поисковую строку рядом с «Пуск» введите secpol.msc и начните поиск, щелкнув по «Enter». Запустите файл с аналогичным названием двойным щелчком левой кнопки мышки.
- Перейдите во вкладку «Локальные политики», там выберите «Параметры безопасности». Среди документов найдите и откройте «Завершение работы: очистка страничного файла». Переключите на «Включен», щелкните «Применить».
Следующий шаг:
- Вызовите окно «Выполнить», одновременно нажав «Win+R». Запустите поиск msc.
- В окне разверните список под «Конфигурация компьютера» и откройте «Конфигурация Windows».
- Разверните «Параметры безопасности» в окне справа. Перейдите в «Локальные политики» и следом в «Параметры безопасности».
- Здесь аналогично откройте «Завершение работы: очистка страничного файла виртуальной памяти», поставьте галочку напротив «Включить», а затем жмите «Применить».
Этих настроек достаточно, чтобы очистить виртуальную память ПК.
Последнее действие:
- Снова запустите «Выполнить». Введите regedit, подтвердите доступ к реестру.
- Перемещайтесь между папками в следующем порядке:
- «HKEY_LOCAL_MACHINE»
- «SYSTEM»
- «CurrentControlSet»
- «Control»
- «Memory Management»
- В списке файлов справа найдите «ClearPageFileAtShutdown». Нажмите по нему правой кнопкой мыши, выберите «Изменить».
- Значение «0» поменяйте на «1», жмите «ОК».
Заключение
Очищают видеопамять на Windows штатными инструментами. Исключением выступает запуск специального ПО от производителя дискретных карточек.
Time to improve your GPU’s performance.
PC Guide is reader-supported. When you buy through links on our site, we may earn an affiliate commission. Read More
Table of Contents
- Quick Answer
- How to free up GPU memory
- Restart your PC
- Close graphics-intensive applications
- Change the graphics settings
- Update the GPU drivers
- Check for memory leaks
- Disable Hardware Acceleration
- Conclusion
If you want to learn how to clear GPU memory, then we’ve got all the answers right here.
High GPU memory usage can lead to different issues, including low performance, stuttering and lagging, increased heat, thermal throttling, and overall instability in the system. On top of that, this can also affect the lifespan of your graphics card. But how can you monitor your GPU’s memory and clear it up?
This is where we come in. In this guide, we’ll go over several methods through which you can quickly clear your GPU’s memory.
Quick Answer
Restarting your PC, closing graphic-intensive applications, changing the graphics settings, and updating the drivers are some ways that can help clear your GPU’s memory.
How to free up GPU memory
If you’re facing high GPU memory usage issues, you can try following these methods to free it up.
The best way to clear GPU memory is by restarting your computer. This will close all running processes, including those that are using GPU memory. This can help clear out any memory leaks or other issues that may be affecting GPU performance.
Another effective way to clear GPU memory is by closing graphics-intensive applications, such as games, video editing software, or graphic design software. We recommend using the Task Manager to quickly select and close these applications. Additionally, avoid leaving software open in the background while performing other tasks, as this unnecessarily burdens the GPU.
- Right-click on the Task Bar and select Task Manager.
- Select programs and click on ‘End Task.’

End task in Task Manager

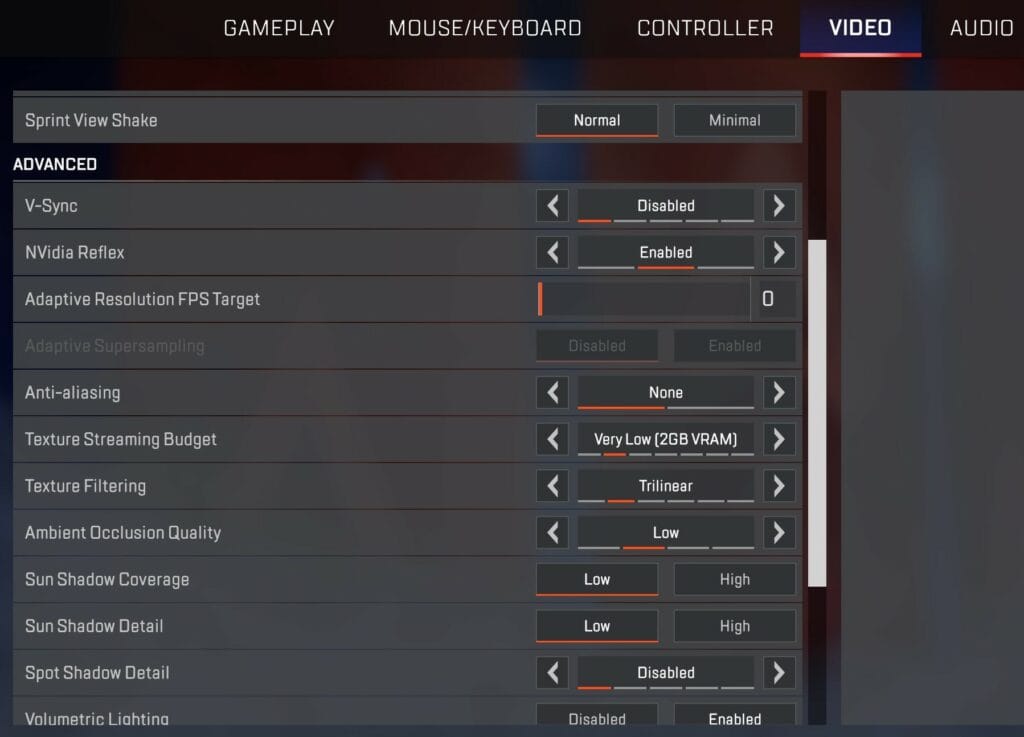
We understand that you want the best visuals in games, but this also takes a toll on the GPU. If you max out everything, the memory will get full. To resolve this, simply go back to the video and graphics settings of your game and lower them down. This can include lowering resolution, reducing texture quality, or disabling certain visual effects.
If you have tried everything but the GPU memory is still not properly cleared, then you may need to update your drivers. This is because new GPU driver updates often include performance improvements and bug fixes that can help optimize GPU memory usage. You can head over to the official website of Nvidia or AMD to download the latest update. Or, you can use the dedicated application of your GPU, such as the AMD Radeon Software or Nvidia GeForce Experience app.
In some instances, a specific application may be utilizing more memory than necessary due to a memory leak. This results in increased GPU memory consumption over time. If you suspect a memory leak, try closing and reopening the application, or check for any updates for the application that may fix the issue.
Hardware Accelerated GPU Scheduling can help with reducing the burden on the CPU, but it also puts a stress on the GPU. In some applications, such as web browsers or multimedia players, disabling hardware acceleration can help reduce GPU memory usage. So, keep the feature turned off until you really need it.
To disable Hardware Accelerated GPU Scheduling, follow these steps.
- Go to System settings.
- Click on Display.
- Go to Graphics settings and disable the feature from here.

Toggle button used to disable hardware Accelerated GPU Scheduling

Conclusion
Clearing GPU memory can help you out in many ways, as it can improve the overall performance by making the graphics card process graphics-intensive tasks more effective. On top of that, it ends up reducing stuttering, lag, and memory leak issues. High memory also ends up putting more stress on the GPU, which can result in overheating. So by clearing the memory, you can bring the temperature down.
In this guide, we will be taking a look at how to clear the NVIDIA cache on your PC or laptop. If you have an NVIDIA graphics card then it will have accumulated a load of cache files over the time that you have been using it.
And depending on how long that has been will depend on the size of your NVIDIA cache.
It doesn’t matter which Operating System you are running, for example, Windows Home, Pro, Enterprise, etc. You will still need to clear your NVIDIA cache just the same.
If you have been having graphical issues with a game or program within Windows, and you have an NVIDIA graphics card, then clearing its shader cache could help fix the problem that you are having.
It could also help fix any stuttering or latency issues that you are having in games on your PC.
Clearing the GPU cache files can also help with many problems that you may be having when trying to stream, record or edit using the nvenc encoder in programs such as OBS Studio, Bandicam, or Davinci Resolve, etc.
Even if you currently have the most powerful GPU, there could be an issue with one of the cache files that’s causing the issue.
So once you have removed the NVIDIA cache, the files will then be automatically regenerated over time.

If you are having issues with your AMD graphics card then you can also clear the AMD shader cache easily.
Is it safe to remove the NVIDIA cache?
Yes, it’s perfectly fine to remove the cache files within the NVIDIA DXCache folder, NVIDIA GLCache folder, and NV_Cache folder these files are created by your NVIDIA graphics card.
The NVIDIA cache files will be recreated when needed, but just like making other changes in Windows, it’s always a good idea to make a backup of any important documents on your PC.
Related: Manually update NVIDIA GPU driver
Can I delete files and folders inside NVIDIA Corporation Installer2 and what purpose does this folder serve?
The Installer2 folder which is located in “C:\Program Files\NVIDIA Corporation\Installer2” is used by the NVIDIA driver installer to store temporary files and installation data during the installation process.
So basically it helps in managing the installation and allows you to roll back or repair your NVIDIA driver if necessary.
So deleting the files or folders within this directory could cause issues with your NVIDIA driver so it is not recommended to delete any files in this folder.
The only files that are safe to remove are the files that are shown within this guide and those are the cache files as they are temporary files that will get replaced with new files when they are needed.
How to clear NVIDIA shader cache & cache files in Windows
Below are the steps to clear your NVIDIA cache on a Windows 10 or Windows 11 computer.
Method 1: Clear NVIDIA cache files using EGU
An easier way of clearing the NVIDIA cache files is to use our program called Easy Gamer Utility. This program has a one-click button that will clean all NVIDIA cache files.

First, you need to download Easy Gamer Utility
Once downloaded run the setup file of the program and launch it once installed
Select the Clean Tab and make sure you have Graphics selected
You will now see an option that says Clear NVIDIA cache files so click the Clean button

Method 2: Clear NVIDIA cache files in Windows
We can also clear clear the NVIDIA DXCache and NVIDIA GLCache using File Explorer in Windows.
1. Open up File Explorer > Type %localappdata% into the address bar and press enter
2. Find the NVIDIA folder and open it
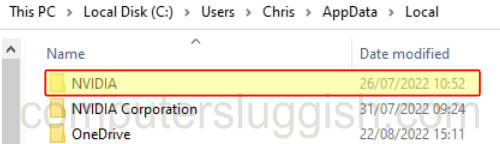
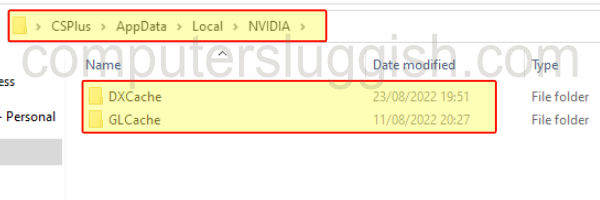
3. Open the DXCache folder first > Select all the items in this folder > Right-click and select Delete
4. Then go back and open the GLCache folder > Select all the items in this folder > Right-click and select Delete
Now you have removed the files from the DXCache and GLCache in the Nvidia folder, we can remove the cache files in the NV_Cache folder:
1. Open up File Explorer > Type %localappdata% into the address bar and press enter
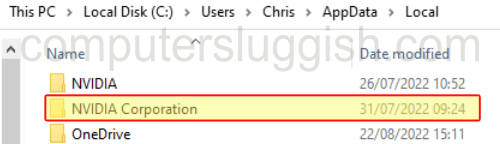
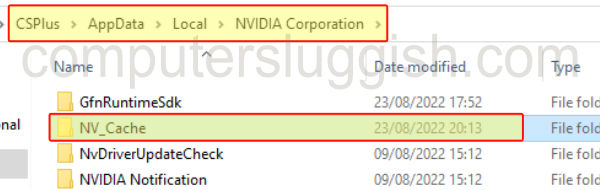
2. Now find the NVIDIA Corporation folder
3. Open the NV_Cache folder and Delete all the files in here
NVIDIA shader cache location
Just to summarize below is a list of the NVIDIA shader cache locations in Windows 10 and Windows 11. So it’s easier for you next time to clear your Nvidia driver cache.
- C:\Users\YOUR USERNAME\AppData\Local\NVIDIA\DXCache
- C:\Users\YOUR USERNAME\AppData\Local\NVIDIA\GLCache
- C:\Users\YOUR USERNAME\AppData\Local\NVIDIA Corporation\NV_Cache
Final thoughts
We hope the above guide helped you clear your NVIDIA shader cache files and it helped resolve the issue you were having with either your graphics or nvenc, or at least free up some decent space on your PC!
If you wanted to know how to clear your GPU cache, then you can see how easy it is to do.
If you enjoyed this guide and found it helpful then we are sure you would like our other Windows guides.
Check out our YouTube video here on “Delete NVIDIA Cache To Fix Game Stutter & Performance Issues” if you are getting stuck.