
In this tutorial, you will learn how to download and install Netcat on Windows 11/10 /Server.
Netcat is a network security tool that administrators can use for a variety of network operations, such as checking open ports, transferring data over a network connection, and security assessments.
Downloading Netcat for Windows
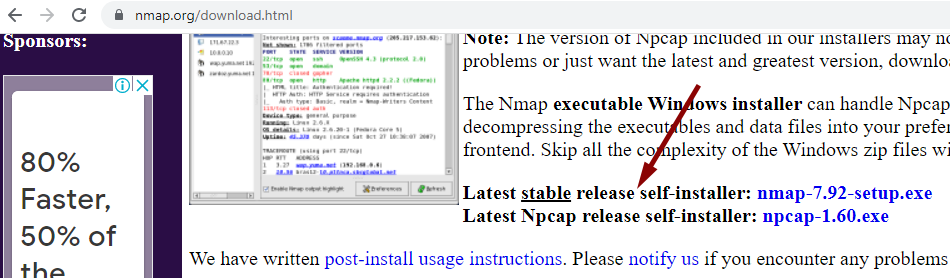
For Windows, you should install the Netcat (Ncat) package that comes with Nmap, which you can download from This link.
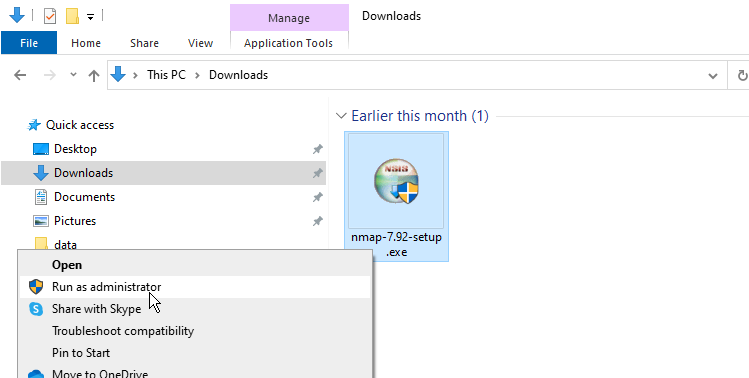
After the download is finished, right-click the setup and select Run as administrator to begin the installation.
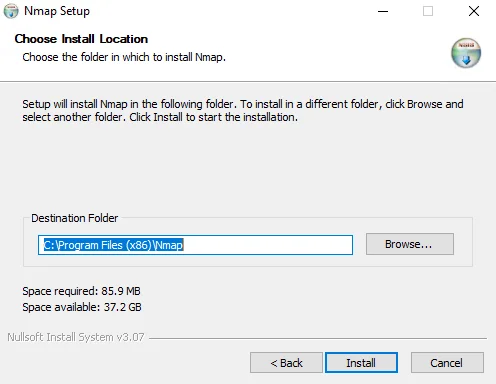
When selecting components to install, choose all packages that come with the Nmap installer.
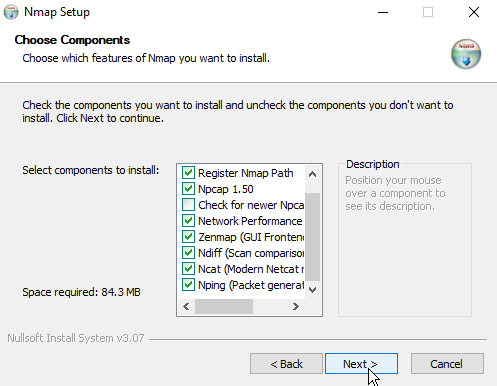
Before continuing, ensure that the Ncat and the Register Nmap Path options are selected, as shown in the above screenshot.
Ncat Command
The name of the Netcat command-line tool is called ncat, which you can run from either Windows Terminal, CMD, or PowerShell.
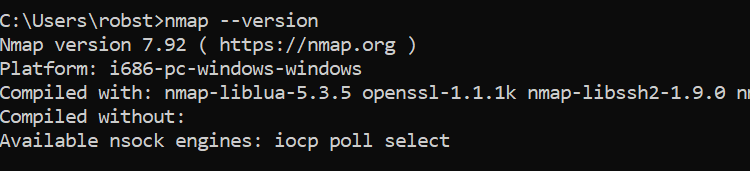
To check the Netcat version installed on your Windows PC, open a command prompt and execute the following command:
ncat --version
To display the help page, run the following command:
ncat -h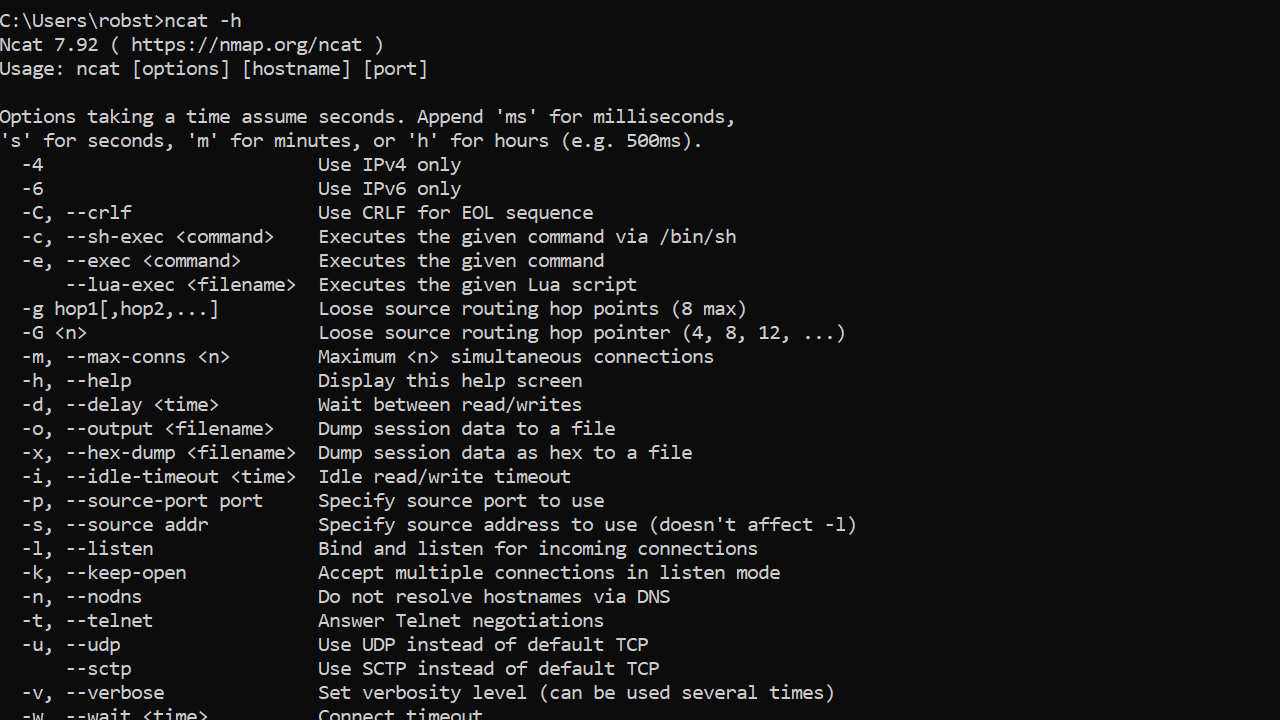
Apart from ncat, the nmap command also will be available from the command prompt.
And that’s it. Now you have a working installation of Netcat on your Windows computer. You can use this guide to install Netcat on Windows 10, 11, or Server.
Table of Contents
Netcat is a versatile network security tool that can be used by administrators for various network operations, including checking open ports, transferring data over a network connection, and performing security assessments.
In this tutorial, we will demonstrate how to download and install Netcat on Windows 11, 10, or Server.
Method 1: Install Netcat for Windows with Nmap
2️⃣ After the download is finished, right-click the setup and select Run as administrator then follow the installation wizard with default options.
3️⃣ Once done, open your Windows Terminal or CMD or PowerShell and run the ncat –version command to check the installed Netcat version:
PS C:\> ncat --version
Ncat: Version 7.80 ( https://nmap.org/ncat )
Method 2: Install Netcat using Package Manager
#Install using Windows Package Manager
winget install Insecure.Nmap

#Install using Chocolatey Package Manage
choco install nmap -y
Note
Note: Windows Package Manager is a native tool from Microsoft. But it works on new versions of Windows. If you stay on the old versions of Windows, the Chocolatey is the best option.
More information of the Nmap can be found using the below command.
PS C:\> winget show Insecure.Nmap

Found Nmap [Insecure.Nmap]
Version: 7.80
Publisher: Nmap Project
Publisher Url: https://nmap.org
Author: Nmap Project
Moniker: nmap
Homepage: https://nmap.org
License: Modified GNU GPLv2
License Url: https://nmap.org/book/man-legal.html
Privacy Url: https://insecure.org/privacy.html
Tags:
  network
  scan
  security
Installer:
  Installer Type: nullsoft
  Installer Url: https://nmap.org/dist/nmap-7.80-setup.exe
  Installer SHA256: 3b4d726bd366e7439367fa78a186dfa9b641d3b2ad354fd915581b6567480f94
For example, below is output when installing Nmap with Windows Package Manager:
PS C:\> winget install Insecure.Nmap

Found Nmap [Insecure.Nmap] Version 7.80
This application is licensed to you by its owner.
Microsoft is not responsible for, nor does it grant any licenses to, third-party packages.
Downloading https://nmap.org/dist/nmap-7.80-setup.exe
  ██████████████████████████████  25.6 MB / 25.6 MB
Successfully verified installer hash
Starting package install...
Successfully installed
How To Use Netcat Command
If you want to check the Netcat is really working or not. You can check if a port is opening on a remote or local machine. For example, we check the port 80 and 443 on a web server.
PS C:\> ncat -v -n 10.10.5.88 80
Ncat: Version 7.80 ( https://nmap.org/ncat )
Ncat: Connected to 10.10.5.88:80.

PS C:\> ncat -v -n 10.10.5.88 443
Ncat: Version 7.80 ( https://nmap.org/ncat )
Ncat: No connection could be made because the target machine actively refused it. .
Another example of Netcat. We’ll check if an UDP port is opened on a remote host. By default, Netcat checks the TCP only, show we need to -u to use UDP instead of TCP.
PS C:\> ncat -v -n -u 103.1xx0.2xx.2xx 5060

Ncat: Version 7.80 ( https://nmap.org/ncat )
Ncat: Connected to 103.1xx0.2xx.2xx:5060.
Netcat is a supper powerful tool for network admins. You can get more useful Netcat commands can be found in the help page using the command below:
PS C:\> ncat --help

Ncat 7.80 ( https://nmap.org/ncat )
Usage: ncat [options] [hostname] [port]

Options taking a time assume seconds. Append 'ms' for milliseconds,
's' for seconds, 'm' for minutes, or 'h' for hours (e.g. 500ms).
  -4                         Use IPv4 only
  -6                         Use IPv6 only
  -C, --crlf                 Use CRLF for EOL sequence
  -c, --sh-exec <command>    Executes the given command via /bin/sh
  -e, --exec <command>       Executes the given command
      --lua-exec <filename>  Executes the given Lua script
  -g hop1[,hop2,...]         Loose source routing hop points (8 max)
  -G <n>                     Loose source routing hop pointer (4, 8, 12, ...)
  -m, --max-conns <n>        Maximum <n> simultaneous connections
  -h, --help                 Display this help screen
  -d, --delay <time>         Wait between read/writes
  -o, --output <filename>    Dump session data to a file
  -x, --hex-dump <filename>  Dump session data as hex to a file
  -i, --idle-timeout <time>  Idle read/write timeout
  -p, --source-port port     Specify source port to use
  -s, --source addr          Specify source address to use (doesn't affect -l)
  -l, --listen               Bind and listen for incoming connections
  -k, --keep-open            Accept multiple connections in listen mode
  -n, --nodns                Do not resolve hostnames via DNS
  -t, --telnet               Answer Telnet negotiations
  -u, --udp                  Use UDP instead of default TCP
      --sctp                 Use SCTP instead of default TCP
  -v, --verbose              Set verbosity level (can be used several times)
  -w, --wait <time>          Connect timeout
  -z                         Zero-I/O mode, report connection status only
      --append-output        Append rather than clobber specified output files
      --send-only            Only send data, ignoring received; quit on EOF
      --recv-only            Only receive data, never send anything
      --no-shutdown          Continue half-duplex when receiving EOF on stdin
      --allow                Allow only given hosts to connect to Ncat
      --allowfile            A file of hosts allowed to connect to Ncat
      --deny                 Deny given hosts from connecting to Ncat
      --denyfile             A file of hosts denied from connecting to Ncat
      --broker               Enable Ncat's connection brokering mode
      --chat                 Start a simple Ncat chat server
      --proxy <addr[:port]>  Specify address of host to proxy through
      --proxy-type <type>    Specify proxy type ("http", "socks4", "socks5")
      --proxy-auth <auth>    Authenticate with HTTP or SOCKS proxy server
      --proxy-dns <type>     Specify where to resolve proxy destination
      --ssl                  Connect or listen with SSL
      --ssl-cert             Specify SSL certificate file (PEM) for listening
      --ssl-key              Specify SSL private key (PEM) for listening
      --ssl-verify           Verify trust and domain name of certificates
      --ssl-trustfile        PEM file containing trusted SSL certificates
      --ssl-ciphers          Cipherlist containing SSL ciphers to use
      --ssl-alpn             ALPN protocol list to use.
      --version              Display Ncat's version information and exit

See the ncat(1) manpage for full options, descriptions and usage examples
Not a reader? Watch this related video tutorial:
Netcat (nc) — это простая, но мощная утилита, которая позволяет проверять сетевые соединения, сканировать порты и передавать данные через TCP/UDP.
Как установить netcat (nc) на Linux
Ubuntu / Debian
Чтобы установить netcat, выполните команду:
sudo apt update && sudo apt install netcatCentOS / RHEL / Fedora
Для этих дистрибутивов netcat доступен в пакете nmap-ncat:
sudo yum install nmap-ncatArch / Manjaro
В этих системах netcat можно установить с помощью pacman:
sudo pacman -S netcatКак установить netcat (nc) на macOS
На macOS утилита nc уже установлена по умолчанию. Если необходимо переустановить:
brew install netcatКак установить netcat (nc) на Windows
На Windows netcat по умолчанию отсутствует. Вместо него можно использовать ncat (аналог от Nmap):
- Загрузите Nmap с официального сайта: https://nmap.org/download.html
- Установите Nmap, включая
Ncat - Используйте команду
ncatвместоnc:ncat -zv example.com 443
Как проверить установку
После установки выполните команду:
nc -hЕсли nc установлен, появится справка с доступными параметрами.
Netcat command is often referred to as the Swiss Army Knife of network tools and can help you monitor, test, and send information over network connections. This article will teach you How to Download and Install Netcat on Windows PCs. If you intend to Windows VPS servers, you can check the packages offered on our website.
Table of Contents
Introduction to Netcat
Netcat is a command-line utility that reads and writes data over network connections using the TCP or UDP protocols. It is built as a secure back-end tool and is available for Linux, macOS, Windows, and BSD. You can use Netcat to debug and monitor network connections, scan open ports, transfer data over the network connections, and security assessments. This utility allows you to send files from a client to a server and back directly with other programs and scripts.
Downloading Netcat on Windows
In this step, you will learn how to download Netcat on your Windows. To do this, follow the steps below.
You need to download the Netcat package that comes with Nmap. So first, navigate to the Nmap official website and go to the Downloads >> Windows path:
Now choose the latest stable release self-installer and click on nmap-7.93-setup.exe to start the download:
Wait for the download to complete.
Now go to the Downloads folder and right-click on the downloaded file. Then click on Run as administrator.
The following screen will appear which allows you to choose components to install. You should choose all the components that come with the Nmap installer and especially choose the Ncat and Register Nmap Path. After making your selection, click Next:
Now click on Browse and choose your install location. Once you make your selection, click on Install:
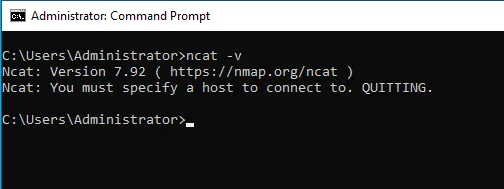
In this step, open your Windows Terminal or CMD or PowerShell and run the following command to check the installed Netcat version:
ncat -vDisplay the help page using the command below:
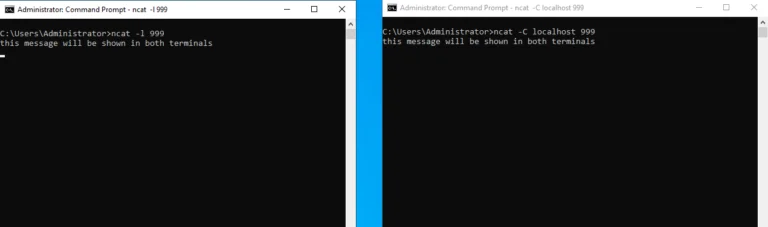
ncat -hIf you want to check the Netcat is really working or not, open two terminal windows and run the command below on the first window:
ncat -l <any-port>And run the following command on the second window:
ncat -C localhost <choosen-port>Lastly, you will see you can chat between the windows.
That’s it!
Conclusion
In this article, we introduced you to Netcat and taught you how to download and install it on Windows PCs. I hope this tutorial was useful for you and helps you to install Netcat on Windows PCs. If you encounter any problem while downloading or installing Netcat, you can contact us in the comments section.
Netcat — утилита, предназначенная для мониторинга сети. Является частью очень популярной Nmap.
Windows
Первоначально, вам необходимо подключиться к серверу с правами администратора. После этого, загрузите файл-инсталлятор nmap. Откройте его, отметьте необходимые пункты. Когда перед вами появится страница выбора компонентов, отметьте ncat, начните установку (скриншот ниже).

Откройте cmd, определите версию установленной утилиты ncat:
ncat -v
Работа с Netcat
Откройте два экземпляра cmd. В первом запустите ncat -l <port>. Во втором введите команду:
ncat -C localhost <port>
Nmap Linux
Войдите с правами администратора.
Для начала, обновите все системные файлы и пакеты:
apt-get update; apt install -y netcat
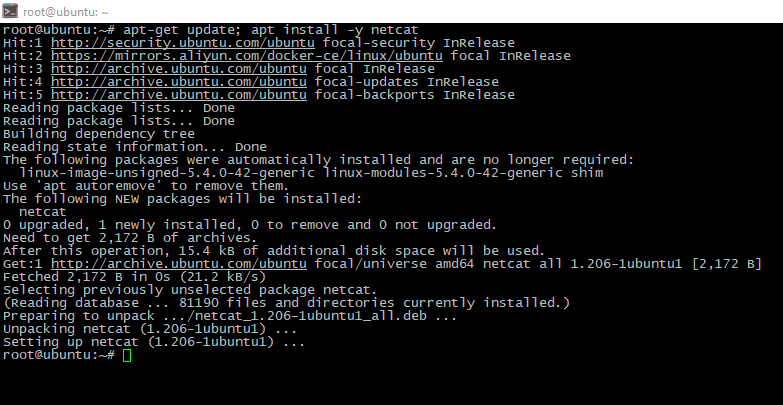
По аналогии с Windows, команды те же, проверьте версию и начните использование утилиты.