
Windows Media Player builds various types of caches to smoothly play your media files and improve your streaming experience. If you’re experiencing slow and sluggishness while playing music and videos, clearing the corrupted cache contents might help.
-

-
-

-
Click on the Devices tab.
-
-


-

-
-
-
-
C:\Users\Your_User_Name\AppData\Local\Microsoft\Media Player
-


-
-
-
-
Click on the Privacy tab.
-
-
-
Click on OK.


-
-
-
-
Click on the Privacy tab.
-
-
Click on OK.


Ask a Question
200 characters left
Include your email address to get a message when this question is answered.
Submit
About this article
Thanks to all authors for creating a page that has been read 1,608 times.
Is this article up to date?
Applies ToWindows 11 Windows 10 Windows 8.1 Windows Media Player
Медиаплеер Windows — это встроенный мультимедийный проигрыватель, который поставляется с Windows. Хотя это надежное и широко используемое приложение, пользователи могут время от времени сталкиваться с ошибками и проблемами. Эта статья содержит рекомендации по устранению распространенных ошибок Медиаплеер Windows.
В следующем списке перечислены коды ошибок и возможные причины, связанные с ошибками Медиаплеер Windows.
|
Код ошибки |
Причина |
|---|---|
|
0xC00D11xx |
Эти ошибки обычно возникают при возникновении проблемы со звуковыми или видеокодеками. Например, C00D11B1 является распространенной ошибкой, связанной с кодеком. Чтобы устранить эту проблему, см. инструкции по исправлению устаревших или поврежденных кодеков. |
|
0xC00D0BC2, 0xC00D36FA, 0xC00D10B3 & 0xC00D1059 |
Эта ошибка может возникать при возникновении проблемы с воспроизведением файлов мультимедиа. Чтобы устранить эту проблему, см. статью Устранение проблем с воспроизведением с Медиаплеер Windows. |
|
0xC00D0FEA |
Эта ошибка указывает на проблемы с воспроизведением или загрузкой файла мультимедиа, часто из-за сетевого подключения или проблем с сервером, на котором размещено содержимое мультимедиа. |
|
0xC00D11CD |
Эта ошибка часто связана с проблемами во время установки или обновления Медиаплеер Windows. Чтобы устранить эту проблему, см. статью Устранение неполадок с приложением Медиаплеер Windows. |
|
0xC00D1163 |
Эта ошибка может возникать при возникновении проблем с управлением цифровыми правами (DRM) для защищенного содержимого. |
Если вы не уверены в коде ошибки, ознакомьтесь с приведенными ниже типами ошибок и инструкциями по ее устранению.
Если возникают ошибки с определенным типом файла, возможно, у вас есть отсутствующий или устаревший кодек. Чтобы устранить эту проблему, выполните
-
Проверьте свойства файла: Убедитесь, что на вашем компьютере есть правильные кодеки для воспроизведения файлов мультимедиа. Чтобы проверка формат файла и данные кодека, щелкните файл мультимедиа правой кнопкой мыши, выберите Свойства и перейдите на вкладку Сведения.
-
Установка или обновление кодеков: Скачайте и установите пакет кодека, который включает необходимый кодек. Популярные пакеты кодека включают пакет кодека K-Lite и объединенный пакет codec community (CCCP).
Совет: Посетите официальный веб-сайт производителя Codec, указанный в сообщении об ошибке, и скачайте последнюю версию.
При использовании Медиаплеер Windows могут возникнуть проблемы с воспроизведением, такие как заикание, замораживание, пропуск, отставание или отсутствие звука. Эти проблемы могут повлиять на весь файл или только на определенные его части. Чтобы устранить эту проблему, выполните
-
Проверьте совместимость файлов. Убедитесь, что файл мультимедиа, который вы пытаетесь воспроизвести, совместим с Медиаплеер Windows.
Примечание: Часто поддерживаемые форматы включают MP3, WAV, WMA, AVI и WMV.
-
Проверьте наличие устаревших или поврежденных кодеков: Возможно, у вас есть отсутствующий или устаревший кодек. Дополнительные сведения проверка требования к формату файлов и кодеку.
-
Получите последние обновления Windows: Убедитесь, что используется последняя версия Windows. Чтобы просмотреть доступные обновления, выберите Проверить наличие обновлений Windows или Запустить > Параметры > Обновить & Безопасность > клиентский компонент Центра обновления Windows > Проверить наличие обновлений.
-
Сброс Медиаплеер Windows библиотеки. Поврежденные файлы библиотеки могут вызвать проблемы с воспроизведением. Может помочь сброс библиотеки Медиаплеер Windows.
-
Откройте Медиаплеер Windows и нажмите клавиши CTRL+M, чтобы открыть меню.
-
Выберите Средства > Дополнительные > Восстановление библиотеки мультимедиа.
-
-
Очистите кэш Медиаплеер Windows: Очистка кэша может устранить проблемы с воспроизведением.
-
Откройте Медиаплеер Windows и нажмите клавиши CTRL+M, чтобы открыть меню.
-
Выберите Сервис > Параметры > Конфиденциальность.
-
В разделе Журнал выберите Очистить журнал и нажмите кнопку ОК.
-
Нужна дополнительная помощь?
Нужны дополнительные параметры?
Изучите преимущества подписки, просмотрите учебные курсы, узнайте, как защитить свое устройство и т. д.
- Home
- General
- How to clear the Windows Media Player Cache
Written by Allen White on . Posted in General, Windows 7, Windows XP
Problem
In media player if you have allot of music,video or any other media it can quickly build up a huge cache reserve on your system. If this becomes corrupt it may be necessary to delete the cache ad let it build up again. Here is a step by step guide on how to clear media players cache.
Resolution
1) Double click my computer from the desktop or access it via the start menu
2) Go to C:\documents and settings\all users\application data\microsoft\media index
3) Delete the file named wmplibrary_v_0_12.db
4) You can also search for the file with the search feature incase its located in multiple locations
Tags: Media Player
Allen White
Allen is an IT Consultant and holds the following accreditations. MCSA, MCSE, MCTS, MCITP, CCA, CCSP, VCP 4,5, 6 and HP ASE, AIS — Network Infrastructure.
Search
Microsoft upgraded the old Groove Music to something called the new Media Player in Windows 11. It can do a pretty good job in playing songs and videos of most formats, but it also remembers what you watched or listened to and has a list of history shown right on the Home of the player. Well, some people might not like this because of different reasons. If you’re bothered about this, in this guide, we’ll show you how to clear the “Recent Media” history using four different methods.
Also see: How to Disable Recent Files and Frequent Folders in Windows 11
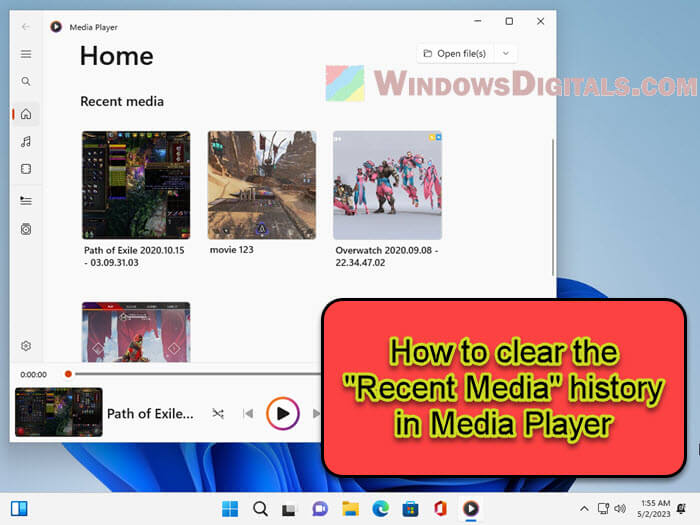
Method 1: Deleting the MediaPlayer.db-wal file and setting it to read-only
This first trick is like saying “no more” to the Media Player for keeping tabs on your watchlist. You’ll delete a file named MediaPlayer.db-wal and then make it so the player can’t write to it anymore. This means your secret watching habits will stay secret.
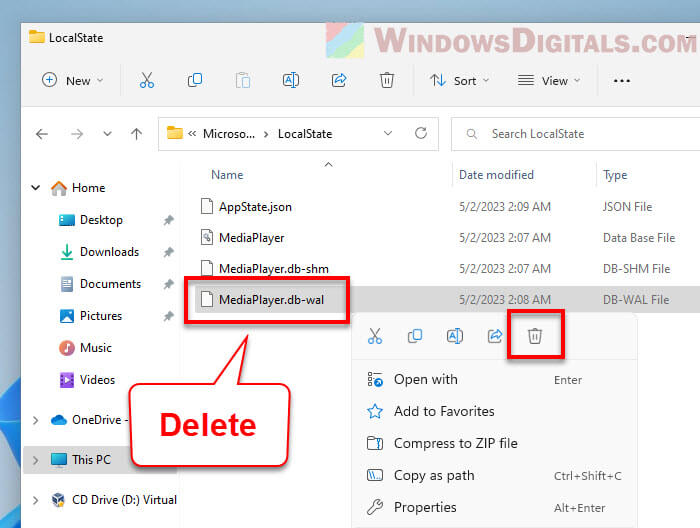
- Open File Explorer and paste this in the top:
%localappdata%\Packages\Microsoft.ZuneMusic_8wekyb3d8bbwe\LocalState - Find and delete the
MediaPlayer.db-walfile.
- Play any video or song in Media Player. It makes a new
MediaPlayer.db-walfile. - In Media Player, go to recent media and remove the file you just played.

- Back to the
MediaPlayer.db-walfile, right-click it, hit Properties. - Tick the Read-only box, then hit Apply and OK.

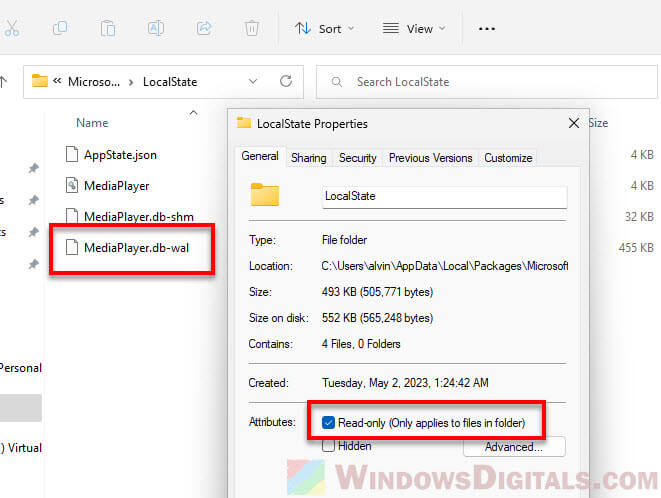
Now, the Media Player can’t remember any new stuff you watch or listen to. Your privacy is safe.
Related resource: How to Clear Timeline Activity History in Windows 10 or 11
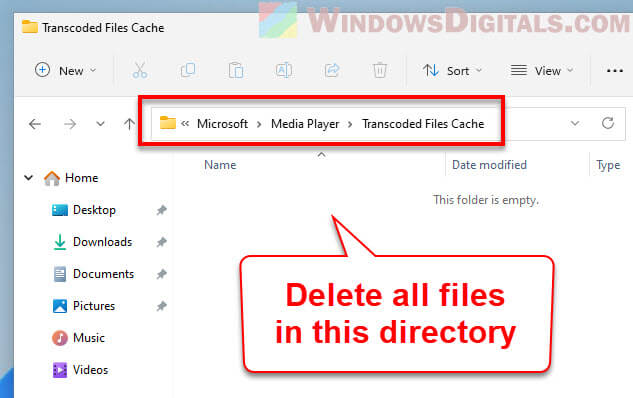
Method 2: Deleting files from the “Transcoded Files Cache” folder
If you don’t mind to do it manually, this next way lets you clean out the Media Player’s memory by yourself. You’ll go into a folder and delete some files.
- Head to this place in File Explorer:
C:\Users\username\AppData\Local\Microsoft\Media Player\Transcoded Files Cache. Swap “username” with your own. - Delete all files there to forget the recent stuff.

Tip: Make a shortcut to this folder on your desktop so you can clear things out fast next time.
Useful tip: How to Add Subtitles to Video in Windows 11
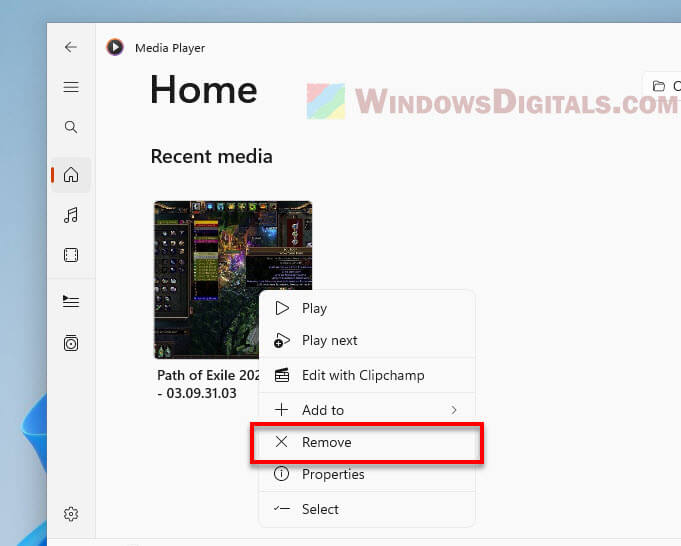
Method 3: Removing videos from the Media Player’s Home tab
If you just want to pick and choose what to forget, this way’s for you. You can delete certain things right from Media Player.
- Open the Windows 11 Media Player.
- Click on Home on the right.
- Hover over a video thumbnail. You’ll see a checkbox.
- Tick the box for any video you want to forget, or hit Ctrl + A to select all.
- At the top, hit Remove to clear them out.

This is great when you want to keep some stuff but ditch the rest.
Related issue: Windows 11 Media Player Closes Immediately After Opening
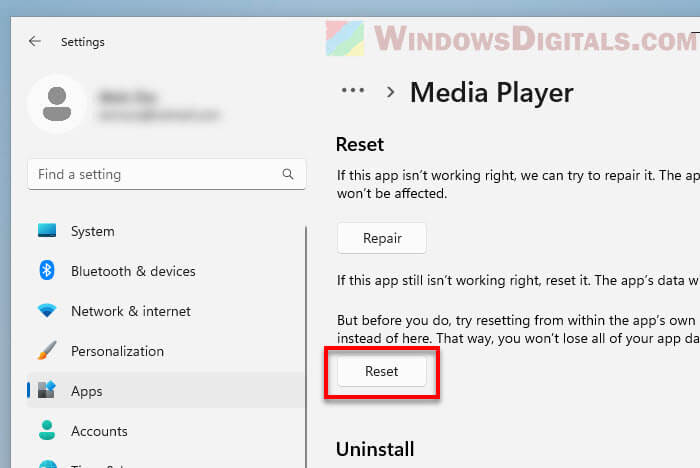
Method 4: Resetting the Media Player app
Resetting the Media Player is like hitting the big red button. It wipes everything clean – your history and any changes you made to the app. Use this when you really want to start fresh.
- Hit Search in the taskbar, type Media Player, and right-click the app from the results.
- Choose App Settings.
- Scroll to Reset and press the button. You’ll see a warning about deleting app data and going back to square one.

- Hit Reset again if you’re sure.
After this, your Media Player will be like new, with no memory of past plays.
Here’s what I think
The new Windows 11 Media Player is cool, but it’s a bit too nosy with your watch history. It might keep things you really don’t want it to store. If ever in doubt, the steps above can help you clear the video watched history and keep things private. And if this player isn’t quite your cup of tea, there are always other better options out there like VLC or KMPlayer.
How to clear Windows Media Player Cache
Reading Time: < 1 minute
To delete Windows Media Player cache:
1) Double click my computer from the desktop or access it via the start menu
2) Access C:\documents and settings\all users\application data\microsoft\media index
3) Delete the file named wmplibrary_v_0_12.db
4) You could also search for the file name via the search feature incase its located in multiple locations
May be different for Windows Vista and newer operating systems
How useful was this post?
Click on a star to rate it!
As you found this post useful…
Follow us on social media!
2 thoughts on “How to clear Windows Media Player Cache”
-
Pingback: Timothy
-
Miller
Learn something new everyday thanks to people like you
Leave a Reply
This site uses Akismet to reduce spam. Learn how your comment data is processed.