
Want to update your Oracle VM VirtualBox? This guide will show you the step-by-step steps on how to update it to the latest version. You can then create new virtual machines using the newest technology in Windows 10 and 11.
Also, whether you are an experienced IT professional or a home user, if you stay up to date, you will have access to the latest stuff. For example, the latest VirtualBox version offers system stability and excellent performance. So, I recommend you upgrade to make sure your software is up to date. This way, you can increase the performance of your guest OSes. Let’s get started!
How to Update VirtualBox to Latest Version (7.0) on Windows 11 & 10
Oracle VM VirtualBox lets you run different operating systems on your computer. You can use it to run Windows, Linux, or macOS as virtual machines. You can also create and use several virtual machines on one PC.
If you use a computer at home or work with IT, you might have installed VirtualBox before. You can get it for free and start using it right away.
Oracle VM VirtualBox is a program that Oracle keeps updating. You should install these updates to keep the program stable. This makes the virtual systems run better and more reliably.
When a new update for this software comes out, it’s a good idea to install it. So, of course, this process helps keep your virtual systems stable.
To upgrade VirtualBox, you can choose one of two different methods:
- You can remove it from your system and do a clean install after downloading its new edition.
- After running it, you can download and upgrade the new edition of the program with the Check for Updates option.
After upgrading VirtualBox to the latest one, you must also update the Extension Pack software to get more performance from guest machines.
How to Update Oracle Virtualization Software
Regardless of the version of VirtualBox installed on your computer, you can apply the steps in this article to install the new version on your PC.
Step 1
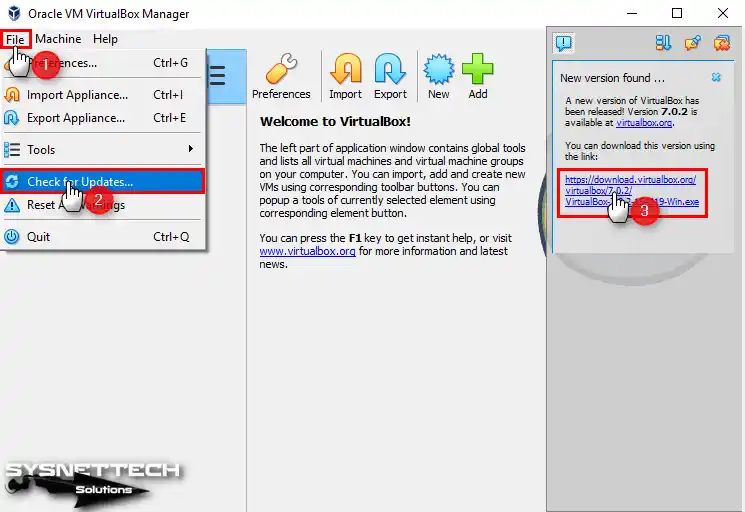
After you open your virtualization software, click “Check for Updates” in the File menu. If there’s a new version, click the link in the info window to download it.
Step 2
Please wait while you download the current version of VirtualBox to your computer.

Step 3
Now, close the Oracle virtualization program before starting the setup file. Go to where you downloaded the file, and run it as an administrator. Finally, Click “Run” to start the setup on your host PC.

Step 4
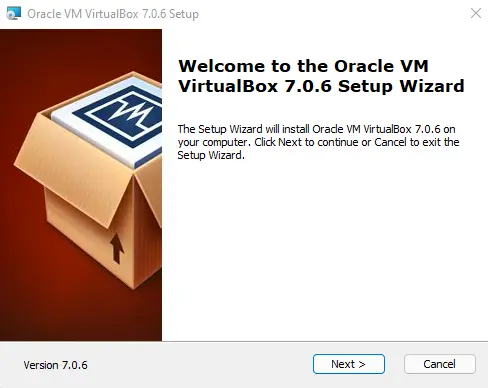
Hit Next when the Oracle VM setup wizard opens.

Step 5
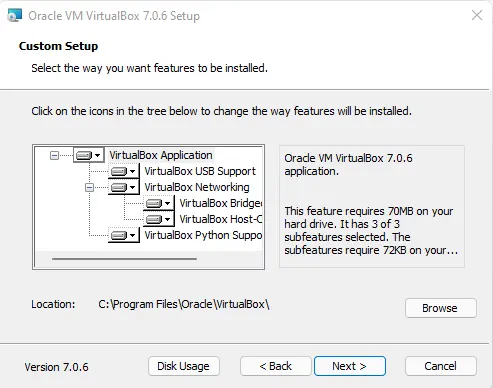
In the custom installation window, if there are any components you do not desire to install, you can adjust them accordingly. Hit Next if you’re going to install all the software’s features.

Step 6
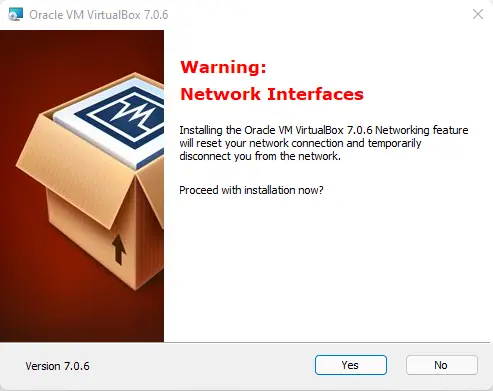
In the “Warning: Network Interfaces” window, it is reported that your network connection will be temporarily interrupted. If an Internet program is not running or you are not downloading any files, press the Yes button.

Step 7
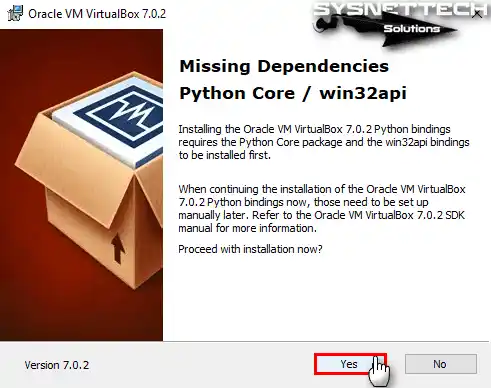
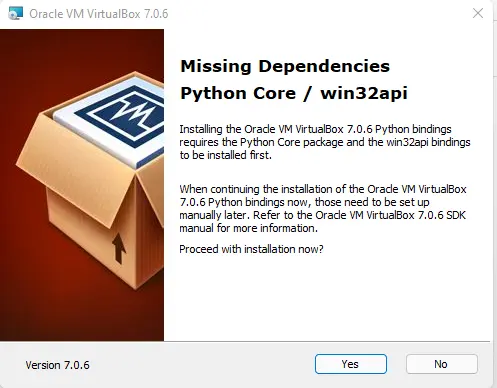
Choose Yes to manually configure the Python Core / Win32api requirements later.
Step 8
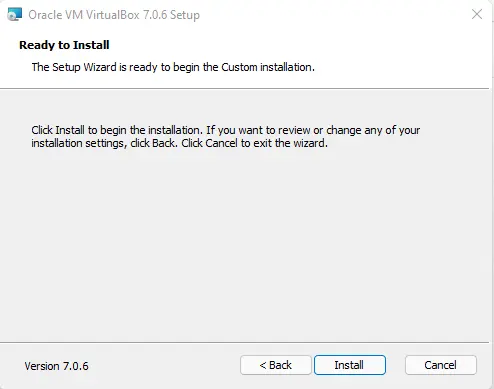
After making the necessary settings, press the Install button to start the installation.

Step 9
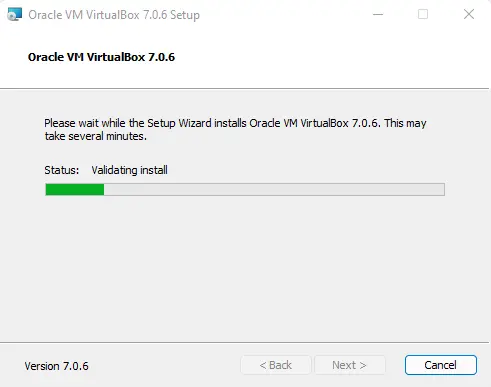
Wait while VirtualBox is updating to the latest release.

Step 10
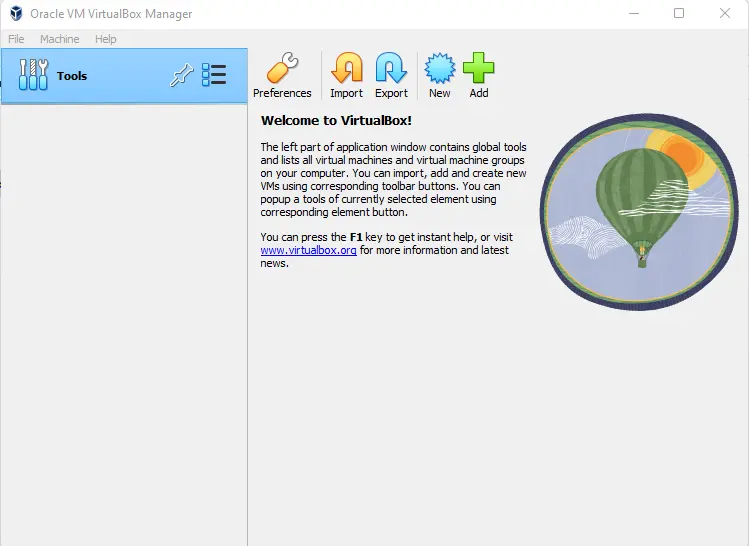
After the update, run the Oracle VM software.

How to Update Extension Pack
After upgrading Oracle VM VirtualBox on Windows 10, you should also install the latest version of the Extension Pack software to ensure that your guest systems work more stable and perform.
Step 1
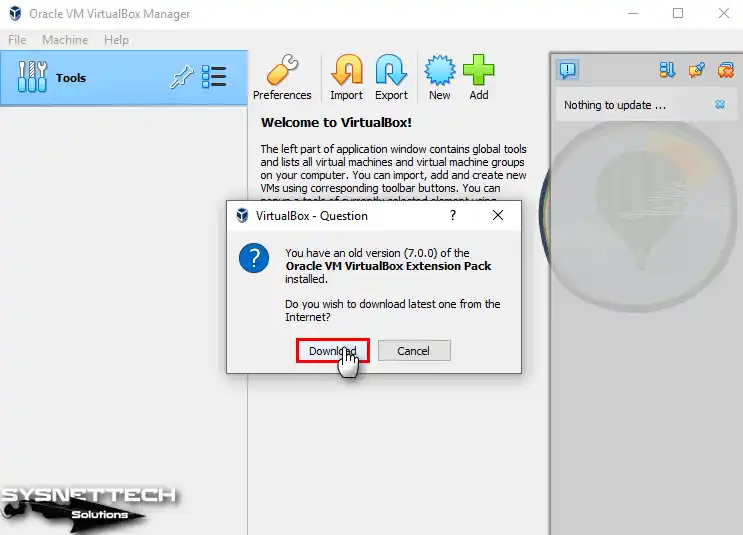
The following window informs you that you have an old add-on package version. Hit Download to confirm the download in the information window reporting the file size of this tool.
Step 2
After confirming the download, wait while the VirtualBox Extension Pack is downloaded.

Step 3
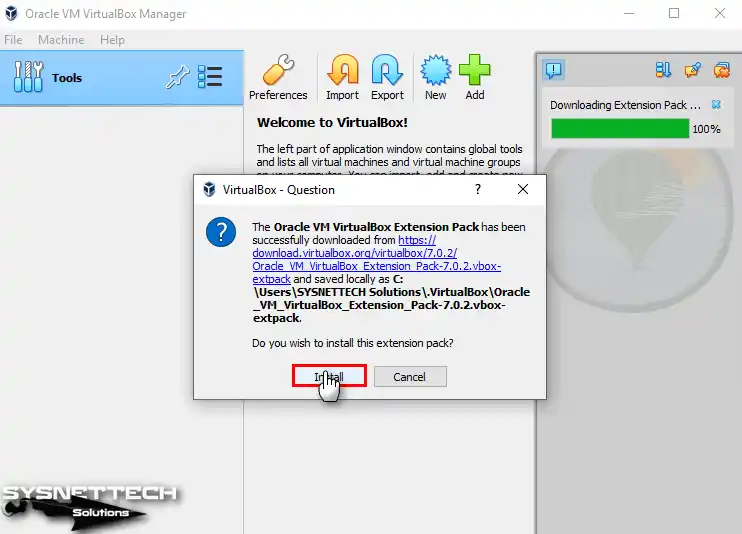
After downloading the new expansion pack version, press Install to start the installation.
Step 4
Click Upgrade to integrate the new version in the window that states that an older package is installed.

Step 5
Please view the full text of the expansion pack’s license agreement and continue with I Agree.

Step 6
After installing the required package for guest OSes, delete the downloaded and old packages from your system, as you will no longer need the old and new virtual machine driver packages.

Step 7
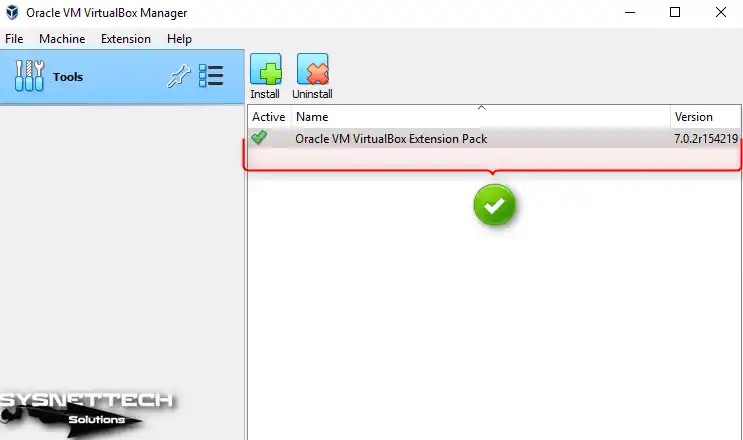
Finally, to check the new version of the add-on package, open File / Tools / Extension Pack Manager from the tool menu and control the version listed on the right.
Step 8
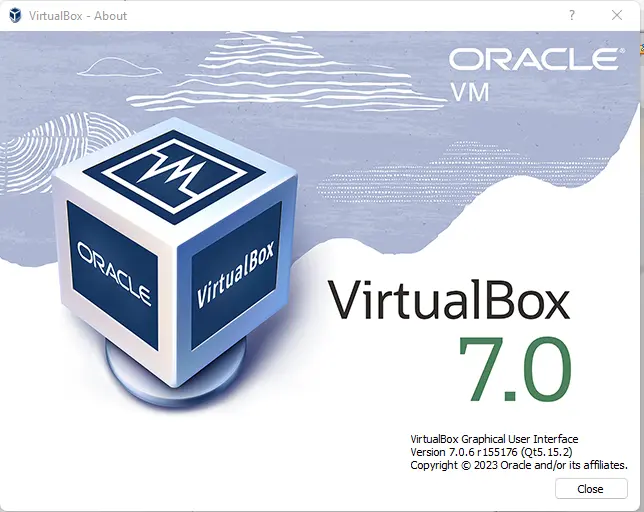
You can check the new version of your Oracle virtualization by clicking Help / About from the tool menu.

Video
Installing Old Versions
Conclusion
In short, I highly recommend keeping your VirtualBox App up to date. This will both increase OS performance and support your system stability. It will also, of course, ensure that you have the latest features and use them.
In conclusion, with the steps I have given you in this article, you can easily update VirtualBox and the Extension Pack. Thus, you will have a smooth virtualization experience. All of these steps are pretty simple for both home and IT users.
VirtualBox is a reliable virtualization solution that is recommended for running virtual machines (VMs) on servers, desktops and laptops. As time marches forward, new versions of VirtualBox are released periodically. The advantages to using the latest VirtualBox version are that it includes improvements, bug fixes and allows you to work with a higher security level as well as receiving a higher degree of performance. New features are usually added with major version releases (for example, v.6.0.0 comparing to version 5.x.x).
What should you do when you want to update your VirtualBox to the latest version, but your older version is configured and fine-tuned? The good news is that your configuration is preserved when you update VirtualBox. This blog post explores how to update VirtualBox on Windows and Mac OS X while preserving the existing configuration of VirtualBox and virtual machines.
How to Update VirtualBox on Windows
As you may recall, in the previous blog post VirtualBox 5.2 was installed. Open your VirtualBox and check its version by going to Help > About VirtualBox. In the current example, the installed VirtualBox version is 5.2.16 as you can see on the screenshot below, and the newest available version is 6.0.8.

You can go to File > Check for Updates to check and see if any updates are available. This notification pop-up window usually appears automatically after launching VirtualBox when a minor update is available (for example update from v.5.2.16 to v.5.2.30). Click the download link displayed in the window below if you wish to download that version for an update. The installer that is downloaded can be used as an updater.
If you want to download the latest version and perform a major version update, go to the official VirtualBox site and download the latest VirtualBox installer for your platform (Windows in this case). VirtualBox 6 contains a set of new features including VM export to Oracle Cloud, high-resolution support, GUI improvements, better 3D graphics support, etc. Be aware that VirtualBox 6 supports only 64-bit host operating systems. If you have a 32-bit host operating system, you should use VirtualBox 5 or install the 64-bit host OS in order to install the newest VirtualBox 6 version.

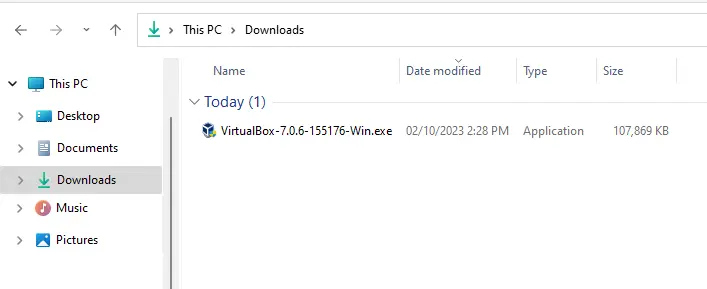
Save the installer file (VirtualBox-6.0.8-130520-Win.exe in this case) to a custom location.

Close your existing VirtualBox instance, and shutdown VMs that are running. Right click the executable installer file and hit Run as Administrator. The Welcome screen of the installation wizard should appear.
Go to the second screen, and check the installation path and the components to install/update. The installation path must be the same as that of your old VirtualBox version which is going to be updated. Generally, the process of updating VirtualBox is similar to the process of installing VirtualBox for the first time.

On the next step of the VirtualBox setup wizard, tick the necessary checkboxes to create shortcuts and register file associations.

Accept the warning about network interfaces that will be temporarily disconnected during the next installation/updating step. This warning allows you to avoid unexpected interruption of the network connection during installation. Hit Yes when you are ready to proceed without any concern that, for example, a critical downloading process could be aborted.

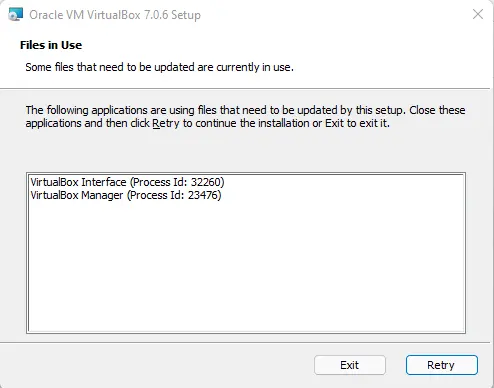
If you have not closed your VirtualBox application yet, the updater will ask you to do so before you can continue, as some files that are in use by a running VirtualBox instance need to be updated. The application name and process Id are displayed in the warning message. After closing a running VirtualBox instance, click Retry to resume the VirtualBox update.

The next question is asked by Windows Security for installing Oracle Universal Serial Bus device driver. Tick the check box “Always trust software from Oracle Corporation” since Oracle is a trusted software manufacturer, and hit Install.

Finally, on the Installation Complete screen, tick the check box “Start Oracle VM VirtualBox 6.0.8 after installation” and hit Finish.
After opening the VirtualBox that has been updated, you can see some visual changes in the GUI (graphical user interface), though the traditional concept is preserved. All configured VMs and VirtualBox settings are kept after updating.

If you have installed VirtualBox Extension Pack, VirtualBox will ask you to update the Extension Pack. Read about Extension Pack installation in one of our upcoming blog posts about VirtualBox. At this point, the VirtualBox update on Windows is complete. In the next section, see how to update VirtualBox on Mac.
How to Update VirtualBox on Mac
The process of updating VirtualBox on macOS X is similar to those required for updating VirtualBox on Windows. Let’s check the version of VirtualBox that is already installed on Mac. To open VirtualBox, go to VirtualBox > About VirtualBox.

Observe that the current version of installed VirtualBox is 5.2.30. From here, you can go to VirtualBox > Check for Updates and check whether there any recommended updates.

Visit the official site and download the newest VirtualBox installer to be used to update an existing VirtualBox version on macOS. Save the DMG installation VirtualBox image (VirtualBox-6.0.8-130520-OSX.dmg in this case) to the custom folder.

Shut down all VMs and close the window of your old VirtualBox version. Open the DMG image and double click on the VirtualBox.pkg icon to run the VirtualBox package installer. The VirtualBox installation/update wizard is opened after that.

On the first screen of the wizard, click Continue and confirm that you trust this installer.

Note: In macOS Mojave (macOS 10.14), you may need to open System Preferences, then go to Security & Privacy where in the General tab of the window, click the lock icon to unblock the application installer. Enter the administrator password, and then click Allow. Launch the VirtualBox installer again to update VirtualBox on macOS.
To update VirtualBox on macOS, keep the location of VirtualBox the same as it was before. The installer will overwrite old files. Type your password to confirm the installation and continue to the next step.

Wait until files have been copied to the appropriate directories of your macOS system. In the end of the update process, the installer asks you what you want to do – move the installer file to the Trash or keep the file. Select the option that is better for you and close the installer window.

Now you can open your updated VirtualBox on macOS. Open Launchpad and click the VirtualBox icon.

As you can see, all VMs created previously are in the place and the configuration of VirtualBox is preserved. Click VirtualBox > About VirtualBox to make sure that you have the latest VirtualBox version on your Mac now.

Conclusion
As you can see, updating VirtualBox is an easy process. The first part of the blog post explains how to update VirtualBox on Windows and after reading the second part you know how to update VirtualBox on Mac. Thanks to the multiplatform nature of VirtualBox, the procedure of its update is similar for all supported platforms and the best feature is that all your tuned VMs and VirtualBox configuration are completely preserved after the update. Try updating VirtualBox on your machine to get the latest fixes and features.
In this article, we will explain how to update VirtualBox 6 to VirtualBox 7 on a Windows 11 system. The VirtualBox 7 version was officially released on October 10, 2022. Read about this major VirtualBox update with numerous updates and fixes. VirtualBox 6 will still be supported until December 2023.
Update VirtualBox
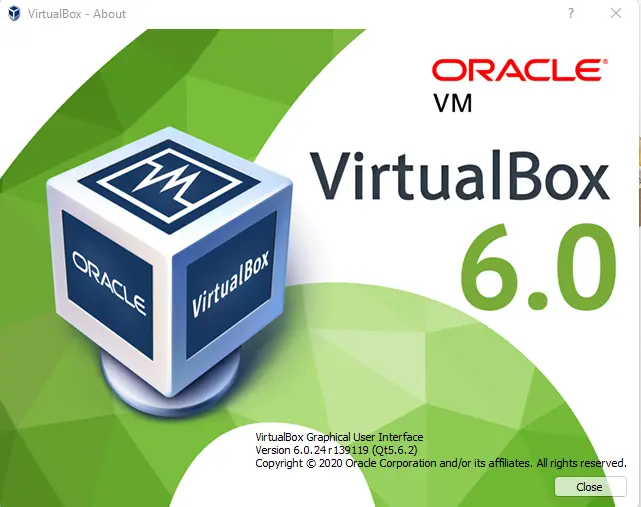
As you may remember, in the previous article, VirtualBox 6 was installed. Run your VirtualBox extension and then check its version by going to the Help tab and About VirtualBox. In the current instance, the installed VirtualBox version is 6.0, as you can see in the screenshot below, and the upgradeable VirtualBox version is 7.0.
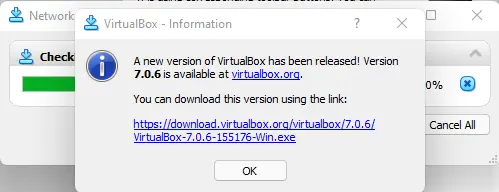
You can click on the File tab and check for Updates to see if any new versions of VirtualBox are available. This notification window usually appears automatically after opening VirtualBox when a small update is available (for example, update 7.0.6). Click on the download VirtualBox this version of VirtualBox using the link displayed in the window below if you need to download the latest version of VirtualBox.
If you need to download the latest version and perform a major VirtualBox update, then visit the VirtualBox official site and download the latest version of the VirtualBox installer for your platform (in this case, Windows). VirtualBox 7.0 contains a set of new features, including VM export, high-resolution support, better 3D graphics support, GUI improvements, etc. Keep in mind that VirtualBox 7.0 supports 64-bit host operating systems. If you are using a 32-bit host operating system, you must use VirtualBox 32-bit or install the x64 host operating system in order to install the VirtualBox 7.0 version.

VirtualBox Installation
Once the VirtualBox 7.0 download is done, shut down the virtual machines that are running, and then close the VirtualBox instance. Right-click on the VirtualBox 7.0 installer file and then hit Run as Administrator.
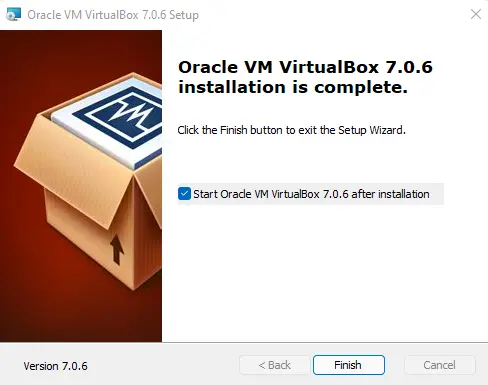
Welcome to the VirtualBox 7.0.6 setup wizard. Choose next.
Update VirtualBox’s custom setup; choose next.
Accept the “warning network interfaces” that will be temporarily disconnected during the VirtualBox installation. Click Yes when you are ready to go to the next screen. For instance, a critical downloading process could be aborted.
Click yes
Hit Install.
If you haven’t closed the VirtualBox application yet, the VirtualBox updater will ask you to do so, so you have to close the application before you can continue. The software name and process are displayed in the warning message window. After closing a running VirtualBox process, choose Retry to resume the VirtualBox update.
Updating VirtualBox
Finally, on the Installation Complete screen, tick the box “Start Oracle VM VirtualBox 7.0.6 after installation” and then click Finish.
After upgrading VirtualBox, you can see some visual changes in the graphical user interface. All configured virtual machines and VirtualBox settings are kept after updating.
About VirtualBox
Refer to the Oracle Document to learn more about upgrading VirtualBox.
Jamilhttp://jamiltech.com
A Professional Technology Blog Writer | An energetic professional with more than 20+ years of rich experience in Technology, Planning, Designing, Installation, and Networking.
This article shows you how to update or upgrade to the latest version of the freely distributed Oracle VM VirtualBox that allows you to run and use virtual machines on the Windows 10 operating system.
Oracle VM VirtualBox is free virtualization software that can be installed on Windows and other operating systems. You can create virtual machines and run one or more guest operating systems on your physical computer’s operating system.
When the VirtualBox virtualization program running on your Windows 10 system releases a new version, you must update both the software version and the Extension Pack software.
Follow this video tutorial or the steps below to update Oracle VM VirtualBox to the latest version.
Step 1: Run Oracle VM VirtualBox and click File / Check for Updates.
Step 2: Wait while the new version is checked on the Internet.
Step 3: Click on the download link of the official website when the new version is available.
Step 4: Wait while VirtualBox is being downloaded from the Internet.
Step 5: After downloading the setup file, close your virtualization program and run the setup file as an administrator.
Step 6: Click Next to continue the installation process in the setup wizard.
Step 7: Configure the features you want to install in Custom Setup.
Step 8: Create shortcuts for the start menu and desktop.
Step 9: Click Yes to confirm temporarily disconnecting from the network in the Warning window.
Step 10: Click Install to start copying the files in the Ready to Install window.
Step 11: Run VirtualBox and click Download in the window, notifying the new version of the Extension Pack software.
Step 12: Click Install in the same window after downloading the Extension Pack.
Step 13: Click Upgrade in the window, stating that an older package version is installed.
Step 14: Accept the Extension Pack license agreement.
Step 15: Click OK when the installation is complete, and then click Delete to delete the downloaded packages.
How to Update VirtualBox
VirtualBox is a popular, open-source, and highly versatile virtualization software that allows users to create and manage virtual machines (VMs) on their local machines. With VirtualBox, users can run multiple operating systems side-by-side, including Windows, macOS, and Linux, on the same physical machine. In this article, we will guide you through the process of updating VirtualBox to the latest version.
Why Update VirtualBox?
Updating VirtualBox is essential to ensure that you have the latest security patches, bug fixes, and performance improvements. Here are some reasons why you should update VirtualBox:
- Improved Security: VirtualBox updates often include security patches that fix vulnerabilities in the software, making it more secure for your virtual machines.
- Performance Improvements: Updates can include performance improvements, such as faster disk I/O and better memory management, which can result in faster VMs and improved overall system performance.
- New Features: VirtualBox updates often include new features, such as improved networking, better support for multiple operating systems, and enhanced security features.
How to Update VirtualBox
Updating VirtualBox is a straightforward process that can be completed in a few steps. Here’s a step-by-step guide:
Step 1: Download the Latest Version of VirtualBox
To update VirtualBox, you need to download the latest version from the official website. Here’s how to do it:
- Go to the VirtualBox website and click on the «Downloads» tab.
- Select the version of VirtualBox that you want to update (e.g., 7.3.22).
- Click on the «Download» button to download the latest version.
Step 2: Install the Latest Version of VirtualBox
Once you have downloaded the latest version of VirtualBox, you need to install it on your system. Here’s how to do it:
- Run the installer and follow the prompts to install VirtualBox.
- Make sure to select the «Custom» installation option and choose the «Add» option to add the VirtualBox installation files to your system.
- Follow the prompts to complete the installation.
Step 3: Update the VirtualBox Package Manager
After installing VirtualBox, you need to update the package manager to ensure that you have the latest version of VirtualBox. Here’s how to do it:
- Run the following command in your terminal or command prompt:
sudo apt-get update - This command will update the package list and ensure that you have the latest version of VirtualBox.
Step 4: Update the VirtualBox Package
After updating the package manager, you need to update the VirtualBox package to ensure that you have the latest version of VirtualBox. Here’s how to do it:
- Run the following command in your terminal or command prompt:
sudo apt-get install -y virtualbox - This command will install the latest version of VirtualBox.
Step 5: Restart Your System
After updating VirtualBox, you need to restart your system to ensure that the changes take effect. Here’s how to do it:
- Run the following command in your terminal or command prompt:
sudo shutdown -r now - This command will restart your system and ensure that the changes take effect.
Troubleshooting Tips
Here are some troubleshooting tips to help you resolve any issues that you may encounter while updating VirtualBox:
- Check for Updates: Make sure that your system is up-to-date and that VirtualBox is installed and updated.
- Check for Conflicts: Check for any conflicts between VirtualBox and other virtualization software on your system.
- Check for Errors: Check for any errors that may be preventing the update from completing successfully.
Conclusion
Updating VirtualBox is a straightforward process that can be completed in a few steps. By following these steps, you can ensure that you have the latest version of VirtualBox and that your system is secure and performing optimally. Remember to check for updates, troubleshoot any issues that may arise, and ensure that your system is up-to-date before updating VirtualBox.
Table: VirtualBox Version History
| Version | Release Date | Description |
|---|---|---|
| 5.2.20 | 2020-02-20 | Bug Fixes and Performance Improvements |
| 5.2.19 | 2019-12-20 | Security Patch and Performance Improvements |
| 5.2.18 | 2019-10-20 | Bug Fixes and Performance Improvements |
| 5.2.17 | 2019-08-20 | Security Patch and Performance Improvements |
| 5.2.16 | 2019-06-20 | Bug Fixes and Performance Improvements |
| 5.2.15 | 2019-04-20 | Security Patch and Performance Improvements |
| 5.2.14 | 2019-02-20 | Bug Fixes and Performance Improvements |
| 5.2.13 | 2019-01-20 | Security Patch and Performance Improvements |
| 5.2.12 | 2018-11-20 | Bug Fixes and Performance Improvements |
| 5.2.11 | 2018-09-20 | Security Patch and Performance Improvements |
| 5.2.10 | 2018-07-20 | Bug Fixes and Performance Improvements |
| 5.2.9 | 2018-05-20 | Security Patch and Performance Improvements |
| 5.2.8 | 2018-03-20 | Bug Fixes and Performance Improvements |
| 5.2.7 | 2018-01-20 | Security Patch and Performance Improvements |
| 5.2.6 | 2017-11-20 | Bug Fixes and Performance Improvements |
| 5.2.5 | 2017-09-20 | Security Patch and Performance Improvements |
| 5.2.4 | 2017-07-20 | Bug Fixes and Performance Improvements |
| 5.2.3 | 2017-05-20 | Security Patch and Performance Improvements |
| 5.2.2 | 2017-03-20 | Bug Fixes and Performance Improvements |
| 5.2.1 | 2016-11-20 | Security Patch and Performance Improvements |
| 5.2.0 | 2016-09-20 | Bug Fixes and Performance Improvements |
Important Note: The above table is a summary of the major versions of VirtualBox and is not an exhaustive list of all updates.