
Java Runtime Environmen (JRE) достаточно широко используется для запуска различных корпоративных приложений, написанных на java. Однако некоторые программы требуют для запуска определенную версию Java и могут некорректно работать в других версиях. В этой статье мы рассмотрим, как разобраться, какие версии Java установлены на компьютерах пользователей в вашей сети, а также как удалить или обновить версию среды JRE с помощь PowerShell.
Содержание:
- Как узнать установленную версию Java в Windows?
- Как узнать версию Java из PowerShell?
- PowerShell: получить версию Java на удаленных компьютерах
- Скрипт PowerShell для удаления всех версий Java
- Как скачать установить Java JRE с помощью PowerShell?
Как узнать установленную версию Java в Windows?
Вы можете получить номер версии Java, установленной на вашем компьютере, если наберете ‘
java
’ в окне поиска Windows 10 и запустите апплет Java.
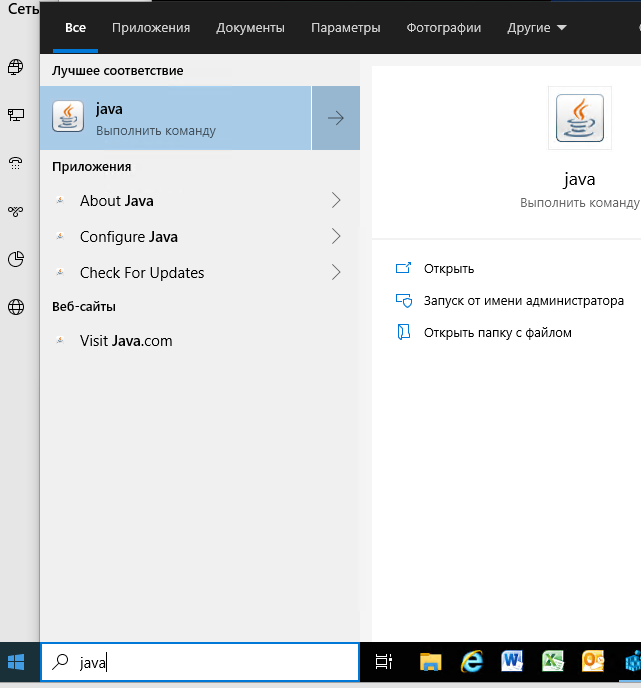
В открывшемся окне «About Java» указана текущая версия JRE. В моем случае это Java Version 8 Update 231 (build 1.8.0_231-b11). Обратите внимание на значение билда JRE. Во всех версиях Java в начале указана 1, затем номер мажорной версии JRE (у меня это 8), потом номер обновления.
Также вы можете узнать текущую версию Java в панели ‘Программы и компонентах Windows’ (Win+R ->
appwiz.cpl
).

Можно вывести текущую версию Java из командной строки. Запустите cmd.exe и выполните команду:
java -version
java version "1.8.0_231"
Java(TM) SE Runtime Environment (build 1.8.0_231-b11)
Java HotSpot(TM) Client VM (build 25.231-b11, mixed mode)

Как узнать версию Java из PowerShell?
Вы можете узнать версию Java на вашем компьютере с помощью PowerShell. Можно просто проверить версию исполняемого файла java.exe (путь к ней прописывается в переменные окружения при установке JRE SE на вашем компьютере). Выведем версию java файла:
Get-Command Java | Select-Object Version
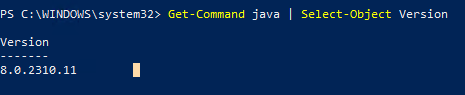
Можно вывести подробную информацию о версии, обновлении и релизе Java:
Get-Command java | Select-Object -ExpandProperty Version
Major Minor Build Revision
----- ----- ----- --------
8 0 2310 11
Если вам нужно получить строковое значение версии Java для использования в скриптах, используйте:
(Get-Command java | Select-Object -ExpandProperty Version).tostring()

Также вы можете узнать версию Java через WMI класс, который содержит список установленных программ в Windows:
Get-WmiObject -Class Win32_Product -Filter "Name like '%Java%'"
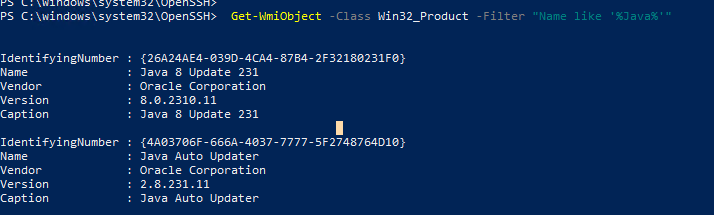
IdentifyingNumber : {26A24AE4-039D-4CA4-87B4-2F32180231F0}
Name : Java 8 Update 231
 Vendor : Oracle Corporation
Version : 8.0.2310.11
Caption : Java 8 Update 231
IdentifyingNumber : {4A03706F-666A-4037-7777-5F2748764D10}

Name : Java Auto Updater
Vendor : Oracle Corporation
Version : 2.8.231.11
Caption : Java Auto Updater
Полученные ID можно использовать в дальнейшем для корректного удаления JRE.
Если нужно вывести только версии Java, и нужно исключить Java Auto Updater, используйте команду:
Get-WmiObject -Class Win32_Product -Filter "Name like '%Java%' and not Name like '%Java Auto Updater%'" | Select -Expand Version
PowerShell: получить версию Java на удаленных компьютерах
Если вы хотите выполнить инвентаризацию версий Java, используемых на компьютерах или серверах в вашем домене, вы можете использовать следующий PowerShell скрипт. Данный скрипт может удаленно опросить сервера по списку указанному вручную, загрузить список из текстового файла. Также вы можете получить список серверов или компьютеров из AD с помощью командлета Get-ADComputer из модуля RSAT-AD-PowerShell.
# PowerShell скрипт для проверки верси Java SE (JRE) на удаленных компьютерах/серверах
# Проверить версию Java по списку компьютеров
# $computers = @(‘sever1,server2,server3’)
# Проверить версию Java по списоку серверов в текстовом файле
#$computers=Get-content C:\PS\ServerList.txt
# Получить версию Java на всех серверах домена
$computers = ((get-adcomputer -Filter { enabled -eq «true» -and OperatingSystem -Like ‘*Windows Server*’ }).name).tostring()
Get-WmiObject -Class Win32_Product -ComputerName $computers -Filter «Name like ‘%Java%’ and not Name like ‘%Java Auto Updater%’» | Select __Server, Version
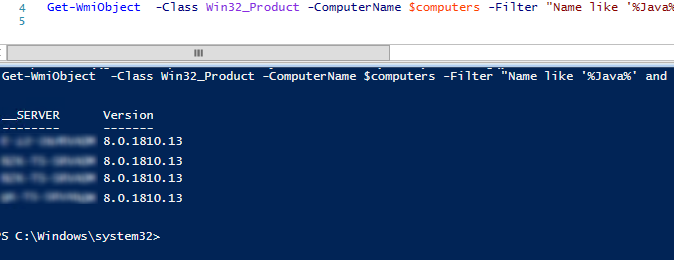
В результате у вас появится табличка со списком компьютеров/серверов и версией Java на них.
В моем случае при проверке версии Java на компьютерах я нашел 35 различных версий JRE!
Скрипт PowerShell для удаления всех версий Java
Почему вам может понадобится удалять предыдущие версии Java в Windows?
- Перед установкой новой версии Java желательно удалить все предыдущие версии. Как и во всех других продуктах в Java постоянно обновляется функционал, и исправляются критические уязвимости. Если у вас установлена старая версий Java, вы подвергаете компьютер риску заражения и эксплуатации известных и 0-day уязвимостей. В Java встроен механизм автоматического обновления, но по разным причинам администраторы могут отключать его на компьютерах домена.
- У вас нет коммерческой подписки на использование Java JRE. С 2019 года Oracle изменил лицензионную политику Java. Теперь, если вы хотите использовать старые версии Oracle JDK (Java SE), вам нужно приобретать платную подписку. Это касается всех выпусков Java JRE после 16 апреля 2019 года (начиная с Java 8 SE Update 211).
Для коммерческих версий Java SE предусматривается длительная поддержка (обновление выпускаются 5 лет после выпуска). Бесплатная версия Java — Open JDK (распространяется по GPL), однако вам придётся обновлять ее раз в полгода. Еще один недостаток Open JDK – пока отсутствуют нормальные средства установки для Windows. Приходится качать и устанавливать Open JDK вручную. Есть один приемлемые вариант с установкой Open JDK с помощью менеджера пакетов Chocolatey: choco install openjdk
Следующий PowerShell скрипт можно использовать для удаление всех установленных версий Java на компьютере
$jre_installed = Get-WmiObject -Class Win32_Product -Filter "Name like '%Java%'"
$jre_installed.Uninstall()
Однако рассмотренная выше команда удаления основана на WMI и не смотря на свою простоту, работает довольно медленно.
Вместо этого можно получить список установленных Java из реестра и удалить все найденные версии Java по GUID продукта, который генерируется при установке ПО через MSI.
#PowerShell скрипт для удаления всех версий Java SE (JRE) на компьютере
$uninstall32 = gci "HKLM:\SOFTWARE\Wow6432Node\Microsoft\Windows\CurrentVersion\Uninstall" | foreach { gp $_.PSPath } | ? { $_ -like "*Java*" } | select UninstallString
$uninstall64 = gci "HKLM:\SOFTWARE\Microsoft\Windows\CurrentVersion\Uninstall" | foreach { gp $_.PSPath } | ? { $_ -like "*Java*" } | select UninstallString
# Удаление 64 битных версий Java
if ($uninstall64) {
$uninstall64 = $uninstall64.UninstallString -Replace "msiexec.exe", "" -Replace "/I", "" -Replace "/X", ""
$uninstall64 = $uninstall64.Trim()
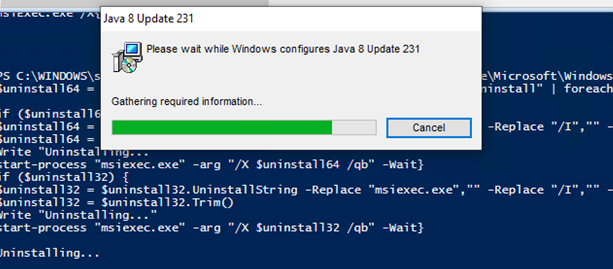
Write "Uninstalling..."
start-process "msiexec.exe" -arg "/X $uninstall64 /qb" -Wait
}
# Удаление 32 битных версий Java
if ($uninstall32) {
$uninstall32 = $uninstall32.UninstallString -Replace "msiexec.exe","" -Replace "/I","" -Replace "/X",""
$uninstall32 = $uninstall32.Trim()
Write "Uninstalling all Java SE versions..."
start-process "msiexec.exe" -arg "/X $uninstall32 /qb" -Wait
}
Как скачать установить Java JRE с помощью PowerShell?
Следующий PowerShell скрипт позволяет автоматически скачать последнюю версию дистрибутива Java (можно скачать офлайн или онлайн установщик) с официального сайта и установить его на компьютере пользователя. При этом мы подавляем требование перезагрузки и отключаем автоматическое обновлений Java.
#PowerShell скрипт для автоматической загрузки и установки последней версии  Java SE (JRE) на компьютере
[Net.ServicePointManager]::SecurityProtocol = [Net.SecurityProtocolType]::Tls12
# скачать онлайн установщик Java
$URL = (Invoke-WebRequest -UseBasicParsing https://www.java.com/en/download/manual.jsp).Content | % { [regex]::matches($_, '(?:<a title="Download Java software for Windows Online" href=")(.*)(?:">)').Groups[1].Value }
# скачать офлайн установщик Java
#$URL = (Invoke-WebRequest -UseBasicParsing https://www.java.com/en/download/manual.jsp).Content | % { [regex]::matches($_, '(?:<a title="Download Java software for Windows Offline" href=")(.*)(?:">)').Groups[1].Value }
Invoke-WebRequest -UseBasicParsing -OutFile jre8.exe $URL
Start-Process .\jre8.exe '/s REBOOT=0 SPONSORS=0 AUTO_UPDATE=0' -wait
echo $?

Первая строка в скрипте добавлена, чтобы переключиться на протокол TLS 1.2. Иначе при запуске у меня появлялась ошибка:
Invoke-WebRequest : Запрос был прерван: Не удалось создать защищенный канал SSL/TLS.

Скрипт автоматически загрузит установочный файл Java, сохранит его на диск в виде jre8.exe и установит среду JRE.
Java is one of the famous programming languages that is used to develop many web and desktop applications. You need Java installed on your computer to run specific applications or the developed Java program. Whatever the reason is, it is essential to know how to update Java on Windows 10 computers to stay updated with the latest security patches and features.
You also need to update Java to fix the application blocked by the Java Security issue. Java usually sends notifications regarding updates, and you can simply click on them to complete the update process. However, if you cannot see any update notifications, you can perform a Java update manually.
How to Check Java Version in Windows 10?
Before updating Java, it is essential to know what version of Java SE you are currently using. There are two ways to do this: use the Command Prompt terminal, and the other is to use the About Java application.
You can take help from any of the ways to get information regarding the Java Runtime Environment installed on your Windows computer.
1. Use Command Prompt
You can find out the JRE’s current version using command line arguments. This way is recommended for professionals who can get information from the build number.
Type cmd in the Start menu’s search box and open Command Prompt from the search results.
In the terminal window, type the below command and press Enter to execute it.
java -version
You can get the build information from the command output.
2. Use About Java
Another option to check the version is to use the About Java page.
Press Windows key + S and search for About Java. Then, double-click on About Java from the search results to open it.
Once the About Java app opens, you can find the required information.
You can know which update and version are installed on your computer. For example, as per the above screenshot, Java 8 is installed on the computer. This way of checking the version is straightforward and gives out information.
Once you know the version, you can update Java on Windows 10 accordingly.
Suppose you want to upgrade Java from 8 to 11. In that case, you need to uninstall the older version of Java and install the latest version by downloading Java SE from Oracle or Java official websites. You can keep two versions of Java on your computer, but it can create unwanted confusion for apps using Java. So, therefore our team of experts recommends you have only one version of Java installed on your computer.
If you just want to know how to update Java on Windows 10, you can follow the steps given below.
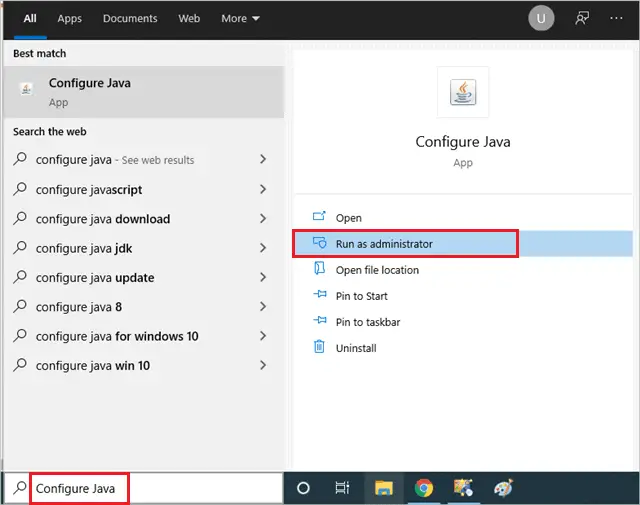
Search for Configure Java in the Start menu and click on Run as administrator for the same from the search results.
When the Java Control Panel opens, go to the Update tab. Next, click on the Update Now button to update Java with the most recent version.
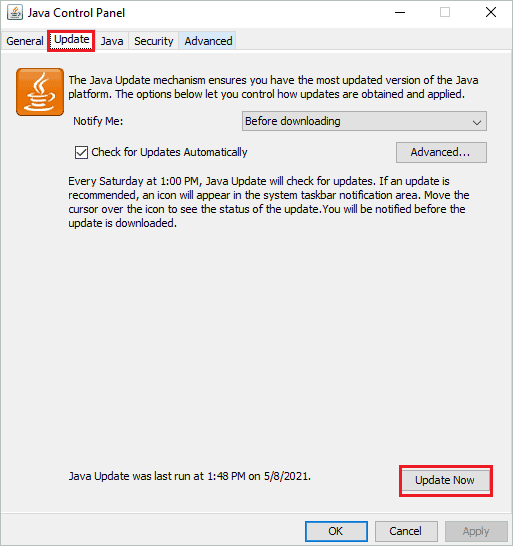
Now, follow the instructions on your screen to complete the Java update process.
Modify Update Settings of Java
You can modify the automatic update settings of Java to avoid manual updates. The changes are to be done in the Java Control Panel. So, open the Java Control Panel by searching for Configure Java in the Start menu, as shown above.
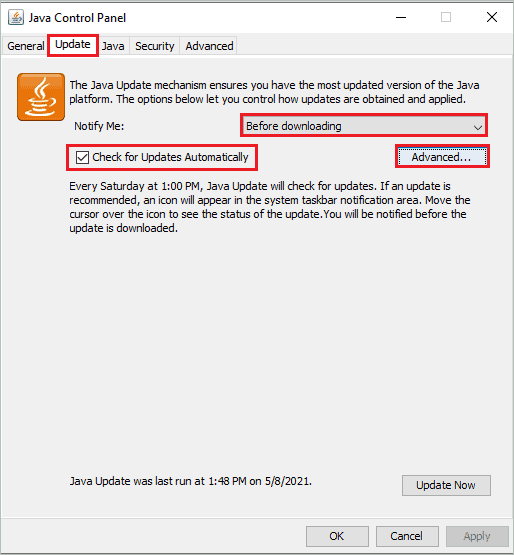
Navigate to the Update tab. You can change the Notify Me option to Before downloading or Before installing from the drop-down list, depending on when you want to be notified about the update.
Also, make sure the checkbox next to ‘Check for Updates Automatically’ is checked. Once the changes are made, click on Advanced.
In the Automatic Update Advanced Settings, you can change the Frequency to Daily, Weekly, or Monthly. Based on the selected frequency, Java updates will run based on the selected frequency.
You can also set the on which day of the week and what time Java Update will run. Once everything is modified as per your requirements, click OK to save the changes.
Close the Java Control Panel. Now, the Java updates on your computer will be performed automatically. In addition, you will receive the popup message whenever the update needs to be downloaded or installed based on your settings.
Conclusion
Some specific java-based applications downloaded from third-party sources cannot be used without Java. For example, Windows users have Java installed on their computers for development or application uses. However, many of us don’t update Java frequently, keeping us away from essential security patches and features.
You need to update Java frequently and configure it so that it checks for updates from time to time. With the above article, you will know how to update Java on Windows 10. In addition, you can learn how to check the Java version, update it, and modify the update-related settings.
Changing the Java version on Windows 10 Command Prompt can be a useful skill for Java developers and enthusiasts. Whether you need to switch to a different version for compatibility reasons or simply want to experiment with different Java versions, knowing how to change the Java version on Command Prompt can come in handy. This blog post will guide you through the process, providing detailed instructions and insights to help you successfully change Java versions on Windows 10.
Video Tutorial:
The Challenge of Changing Java Version on Windows 10 Command Prompt
Many new Java developers may struggle with changing the Java version on Command Prompt for the first time. The Command Prompt is a powerful tool that allows users to execute commands and interact with their computer’s operating system. However, understanding how to navigate and manipulate the Command Prompt to switch Java versions can be confusing.
Things You Should Prepare for
Before you begin changing the Java version on Windows 10 Command Prompt, there are a few things you should prepare:
1. Ensure that you have multiple Java versions installed on your Windows 10 computer. If you have only one version of Java installed, you may need to download and install additional versions from the official Java website.
2. Familiarize yourself with the Command Prompt interface. Understanding basic Command Prompt commands and navigation will make the process of changing Java versions easier.
3. Make note of the location of each Java installation on your computer. You will need this information when specifying the Java version in Command Prompt commands.
Now that you are prepared, let’s explore four different methods to change the Java version on Windows 10 Command Prompt.
Method 1. Changing Java Version Using “java” Command
To change the Java version using the «java» command, follow these steps:
1. Open Command Prompt by pressing the Windows key + R, typing «cmd,» and hitting Enter.
2. Type «java -version» in the Command Prompt and press Enter to check the currently installed Java version.
3. Locate the desired Java version’s installation directory on your computer.
4. In Command Prompt, type the following command to change the Java version:
«`
set PATH=«C:\path\to\desired\java\version\bin»;%PATH%
«`
Replace «C:\path\to\desired\java\version\bin» with the actual path to the desired Java version’s installation directory.
5. Now, type «java -version» again to verify that the Java version has been successfully changed.
Pros:
1. Quick and straightforward method
2. Does not require modifying environment variables
3. Can be easily reversed by closing the Command Prompt window
Cons:
1. Only temporary change for the current Command Prompt session
2. Not suitable for permanently setting the Java version
Method 2. Changing Java Version Using Environment Variables
To change the Java version using environment variables, follow these steps:
1. Right-click the Start button and select System.
2. In the System window, click on «Advanced system settings» on the left.
3. In the System Properties window, click on the «Environment Variables» button.
4. In the Environment Variables window, under «System variables,» locate the «Path» variable and click on «Edit.«
5. In the Edit Environment Variable window, click on «New» and enter the path to the desired Java version’s installation directory.
6. Click «OK» to save the changes.
7. Now, open Command Prompt and type «java -version» to verify that the Java version has been successfully changed.
Pros:
1. Allows for permanently setting the Java version
2. Changes apply to all Command Prompt sessions on the computer
3. Can easily switch between different Java versions by modifying the «Path» variable
Cons:
1. Requires modifying system environment variables, which may be intimidating for some users
2. Changing the «Path» variable incorrectly can cause system-wide issues
Method 3. Changing Java Version Using jEnv
To change the Java version using jEnv, follow these steps:
1. Download and install jEnv from the official jEnv GitHub repository.
2. Open Command Prompt and navigate to the directory where you installed jEnv.
3. In Command Prompt, type the following command to enable jEnv:
«`
jenv enable-plugin exports
«`
4. Next, add the desired Java version to jEnv using the following command:
«`
jenv add /path/to/desired/java/version
«`
Replace «/path/to/desired/java/version» with the actual path to the desired Java version’s installation directory.
5. Finally, set the global Java version using the following command:
«`
jenv global
«`
Replace «» with the desired Java version number.
6. Verify that the Java version has been successfully changed by typing «java -version» in Command Prompt.
Pros:
1. Provides a convenient way to manage multiple Java versions
2. Easy to switch between different Java versions using jEnv commands
3. Works independently of system environment variables
Cons:
1. Requires installing and configuring jEnv
2. May not be suitable for users who prefer native Command Prompt functionality
3. Additional learning curve for using jEnv commands effectively
Method 4. Changing Java Version Using SDKMAN!
To change the Java version using SDKMAN!, follow these steps:
1. Download and install SDKMAN! from the official SDKMAN! website.
2. Open Command Prompt and type the following command to verify the successful installation:
«`
sdk version
«`
3. Install the desired Java version using the following command:
«`
sdk install java
«`
Replace «» with the desired Java version number.
4. Set the installed Java version as the default using the following command:
«`
sdk default java
«`
Again, replace «» with the desired Java version number.
5. Verify that the Java version has been successfully changed by typing «java -version» in Command Prompt.
Pros:
1. Provides a convenient way to manage multiple Java versions
2. Easy installation and management of Java versions with SDKMAN! commands
3. Works independently of system environment variables
Cons:
1. Requires installing and configuring SDKMAN!
2. May not be suitable for users who prefer native Command Prompt functionality
3. Additional learning curve for using SDKMAN! commands effectively
Why Can’t I Change the Java Version?
There can be several reasons why you may be unable to change the Java version on Windows 10 Command Prompt. Here are a few common reasons and their fixes:
1. Reason: Incorrect Java installation path specified.
Fix: Ensure that the correct path to the desired Java version’s installation directory is provided in the Command Prompt commands.
2. Reason: Missing or outdated Java installations on your computer.
Fix: Download and install the desired Java version from the official Java website before attempting to change the Java version on Command Prompt.
3. Reason: Environmental variables not properly modified.
Fix: Check the modification of the «Path» variable or other relevant environment variables and ensure that they accurately reflect the desired Java version’s installation directory.
Additional Tips
Here are some additional tips to enhance your experience when changing the Java version on Windows 10 Command Prompt:
1. Double-check the Java version: Always verify that the Java version has been successfully changed by running the «java -version» command after following any of the methods described above.
2. Use symbolic links: If you frequently switch between different Java versions, consider creating symbolic links to the Java installations and managing them using batch files or scripts.
3. Document your changes: Keep track of the Java version changes you make on Command Prompt by documenting them in a text file or using version control software. This will help you revert any changes or troubleshoot if needed.
5 FAQs about Changing Java Version on Windows 10 Command Prompt
Q1: Can I have multiple Java versions installed on my Windows 10 computer?
A1: Yes, it is possible to have multiple Java versions installed on your Windows 10 computer. This allows you to switch between different Java versions based on your needs.
Q2: Can I permanently set a default Java version on Command Prompt?
A2: Yes, you can permanently set a default Java version on Command Prompt by modifying system environment variables or using third-party tools like jEnv or SDKMAN!.
Q3: Are there any risks involved in changing the Java version on Command Prompt?
A3: Changing the Java version on Command Prompt does not pose significant risks. However, modifying system environment variables incorrectly can cause system-wide issues. Always double-check your changes and follow the provided instructions carefully.
Q4: Can I change the Java version for specific applications only?
A4: Yes, it is possible to change the Java version for specific applications by modifying environment variables or using tools like jEnv or SDKMAN!. These methods allow you to specify different Java versions for different applications.
Q5: Is it necessary to restart my computer after changing the Java version on Command Prompt?
A5: No, you do not need to restart your computer after changing the Java version on Command Prompt. The changes take effect immediately within the Command Prompt session.
In Conclusion
Changing the Java version on Windows 10 Command Prompt is a valuable skill for Java developers and enthusiasts. By following the methods outlined in this blog post, you can seamlessly switch between different Java versions, ensuring compatibility and enabling flexibility in your development projects. Remember to double-check your changes and use additional tools like jEnv or SDKMAN! for a more streamlined Java version management experience. Happy coding!
Updating Java on Windows 10 is pretty straightforward. You need to download the latest Java version from the official website, install it, and remove the old version. Here’s a step-by-step guide to ensure your system runs smoothly with the latest Java.
Updating Java on your Windows 10 system will enhance performance and security. Follow these steps for a seamless update process.
Step 1: Visit the Official Java Website
First, go to the official Java website to download the latest version of Java.
Open your preferred web browser and type “Java Download” into the search bar. Click the link that leads to the official Oracle Java page. This ensures you are downloading from a trusted source.
Step 2: Download the Java Installer
Next, download the Java installer from the website.
Find the download link for the latest Java version suitable for Windows. Click on the “Download” button, and the installer will start downloading to your computer. Make sure to choose the correct version for your system (32-bit or 64-bit).
Step 3: Run the Installer
Now, run the downloaded installer to install the latest Java version.
Locate the downloaded file, usually found in your “Downloads” folder, and double-click it to start the installation process. Follow the on-screen instructions to complete the installation.
Step 4: Uninstall the Old Java Version
Then, uninstall the old Java version from your system.
Go to the Control Panel by typing “Control Panel” in the Windows search bar. Under “Programs,” click “Uninstall a program.” Find the old Java version, select it, and click “Uninstall.”
Step 5: Verify the Installation
Finally, verify that the new Java version is installed correctly.
Open Command Prompt by typing “cmd” in the Windows search bar and hitting Enter. Type “java -version” and press Enter. This command should display the updated Java version.
After completing these steps, your computer will be running the latest Java version, ensuring improved performance and security.
Tips for Updating Java Windows 10
- Always download Java from the official Oracle website to avoid malware.
- Make sure to uninstall the old Java version to free up space and avoid conflicts.
- Restart your computer after installation to ensure all changes take effect.
- Keep your Java updated regularly to benefit from security patches and improvements.
- Use a reliable internet connection to prevent interruptions during the download and installation process.
Frequently Asked Questions
What is Java used for?
Java is a programming language used for building various applications, from web apps to mobile apps and server-side applications. It’s known for its portability and versatility.
Do I need to update Java regularly?
Yes, updating Java regularly is crucial for security, performance improvements, and compatibility with new applications.
Can I have multiple versions of Java installed?
It’s possible but not recommended. Multiple Java versions can cause conflicts and take up unnecessary space on your system.
How do I check my current Java version?
Open Command Prompt and type “java -version.” This command displays the installed Java version.
What if I encounter an error during installation?
Ensure you have a stable internet connection, sufficient disk space, and administrative privileges. If issues persist, consult the Java Help Center on the official Oracle site for troubleshooting tips.
Summary
- Visit the Official Java Website.
- Download the Java Installer.
- Run the Installer.
- Uninstall the Old Java Version.
- Verify the Installation.
Conclusion
Updating Java on Windows 10 is essential for keeping your system secure and efficient. By following this guide, you can easily download, install, and verify the latest Java version. Regular updates not only protect your computer from vulnerabilities but also ensure compatibility with the latest software and applications.
Java plays a vital role in running many applications, from simple desktop tools to complex enterprise solutions. Keeping it updated is akin to maintaining your car; it ensures smooth performance and longevity.
For further reading, you can explore the Oracle Java Help Center or join online forums where tech enthusiasts share tips and tricks.
So, go ahead, update your Java, and experience a smoother, more secure computing experience.
Matthew Burleigh has been writing tech tutorials since 2008. His writing has appeared on dozens of different websites and been read over 50 million times.
After receiving his Bachelor’s and Master’s degrees in Computer Science he spent several years working in IT management for small businesses. However, he now works full time writing content online and creating websites.
His main writing topics include iPhones, Microsoft Office, Google Apps, Android, and Photoshop, but he has also written about many other tech topics as well.
Read his full bio here.
Java Runtime Environment (JRE) is widely used on user computers to run different enterprise Java apps . However, some apps require the specific Java version and may work incorrectly in other versions. In this article we will discuss how to check Java versions installed on computers in your network, and how to uninstall or update JRE using PowerShell.
Contents:
- How to Check Java Version in Windows?
- Check Java Version using PowerShell
- PowerShell – Check Java Version on Remote Computers
- PowerShell Script to Uninstall All Java Versions
- How to Download and Install Java JRE Using PowerShell?
How to Check Java Version in Windows?
You can get the version number of Java installed on your computer if you enter java in Windows 10 search box and run Java applet.
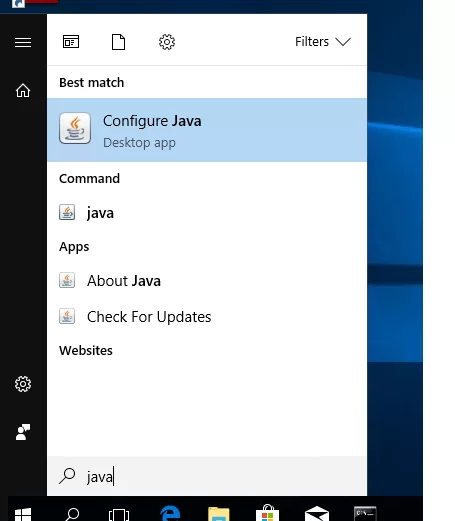
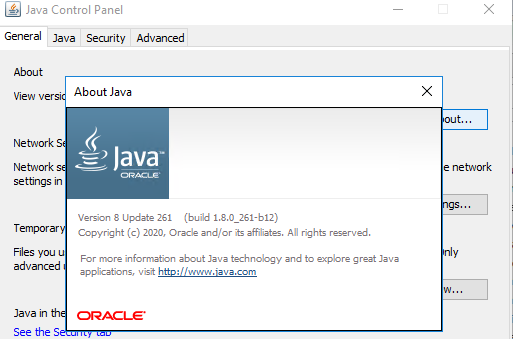
In About Java window, the current JRE version is specified. In my case, it is Java Version 8 Update 261 (build 1.8.0_261-b12). Note the value of the JRE build. All Java versions have 1 in the beginning followed by the number of major JRE version (it is 8 in my case) and the update number.
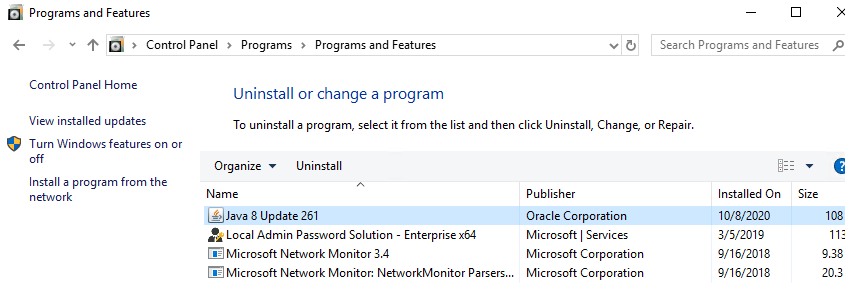
You can also check the current Java version in Windows Program and Features (Win+R -> appwiz.cpl).
You can display the current Java version in the command prompt. Run cmd.exe and run the command:
java -version
java version "1.8.0_261"
Java(TM) SE Runtime Environment (build 1.8.0_261-b12)
Java HotSpot(TM) Client VM (build 25.261-b12, mixed mode, sharing)

Check Java Version using PowerShell
You can check Java version installed on your computer using PowerShell. You can just check the version of the executable file java.exe (the path to it is set in the environment variables when JRE SE is installed on your computer). Display the java file version:
Get-Command Java | Select-Object Version

You can view detailed information about Java version, update and release number:
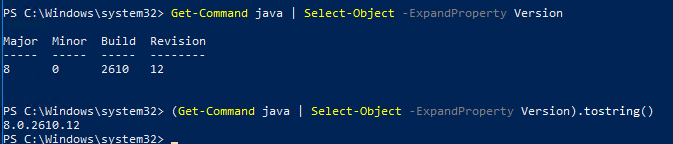
Get-Command java | Select-Object -ExpandProperty Version
Major Minor Build Revision
----- ----- ----- --------
8 0 2610 12
If you want to get a string value of your Java version to be used in scripts, use the command:
(Get-Command java | Select-Object -ExpandProperty Version).tostring()
You can also find out your Java version through the WMI class Win32_Product (contains the list of installed programs in Windows):
Get-WmiObject -Class Win32_Product -Filter "Name like '%Java%'"
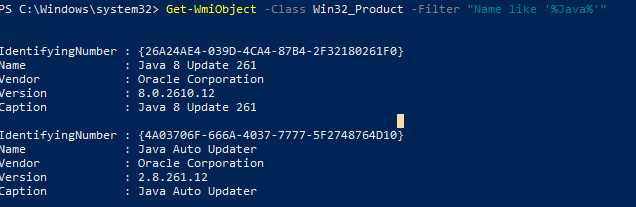
IdentifyingNumber : {26A24AE4-039D-4CA4-87B4-2F32180261F0}
Name : Java 8 Update 261
Vendor : Oracle Corporation
Version : 8.0.2610.12
Caption : Java 8 Update 261

IdentifyingNumber : {4A03706F-666A-4037-7777-5F2748764D10}
Name : Java Auto Updater
Vendor : Oracle Corporation
Version : 2.8.261.12
Caption : Java Auto Updater
The IDs may be used later to correctly uninstall JRE.
If you want to display only Java version without Java Auto Updater, use the following command:
Get-WmiObject -Class Win32_Product -Filter "Name like '%Java%' and not Name like '%Java Auto Updater%'" | Select -Expand Version
PowerShell – Check Java Version on Remote Computers
If you want to get Java versions used on all computers or servers in your domain, you can use the following PowerShell script. The script can get the information from all servers remotely according to the list you enter manually or from a text file. You can also get the list of servers or computers in AD using the Get-ADComputer cmdlet from the RSAT-AD-PowerShell module.
# PowerShell script to check Java SE (JRE) version on remote computers
 # To check Java version on the computers in the list
 # $computers = @('mun-sql01,mun-fs01,mun-sql02')
 # Check Java version against the list of servers in a text file
 #$computers=Get-content C:\PS\ServerList.txt
 # To get Java version on all Windows Servers in AD domain
 $computers = ((get-adcomputer -Filter { enabled -eq “true” -and OperatingSystem -Like ‘*Windows Server*’ }).name).tostring()
 Get-WmiObject  -Class Win32_Product -ComputerName $computers -Filter “Name like ‘%Java%’ and not Name like ‘%Java Auto Updater%'” | Select __Server, Version
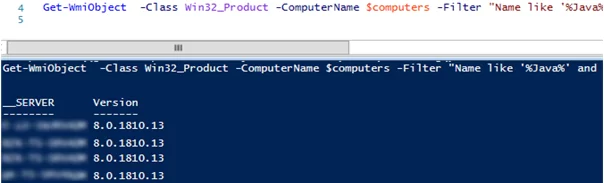
As a result, you will have a table with the list of computers/servers and Java versions installed on them.
In my case, when checking the Java version on domain computers, I found 24 different JRE versions!!!
PowerShell Script to Uninstall All Java Versions
Why may you need to uninstall previous Java versions in Windows?
- Before you install a new Java version, it is better to uninstall all previous versions. Like in other products, new features appear and critical exploits are constantly fixed in Java. If you have older versions of Java installed, your computer is subject to infection or exploitation of known or 0-day vulnerabilities. Java has a built-in autoupdate mechanism, but on different reasons administrators may disable it on domain computers.
- You have no paid Java JRE subscription. In 2019, Oracle changed Java licensing policy. If you want to use previous Oracle JDK (Java SE) versions, you must get a paid subscription. It refers to all Java JRE releases after April, 16, 2019 (from Java 8 SE Update 211).
Commercial Java SE versions have a long-time support (updates are released for 5 years since the release date). A free Java version is Open JDK (distributed under GPL), but you have to update it every six months. Another Open JDK disadvantage is that it doesn’t have a convenient installer for Windows. You must download and install Open JDK manually. There is a nice option to install Open JDK using the WinGet package manager:
winget install --id=ojdkbuild.openjdk.11.jdk -e
You can use the following PowerShell script to remove all installed Java versions on a local computer:
$jre_installed = Get-WmiObject -Class Win32_Product -Filter "Name like '%Java%'"
 $jre_installed.Uninstall()
However, the uninstall command above is based on WMI and works slowly.
Instead, you can get a list of installed Java versions from the registry and uninstall all of them by their product GUID generated when you install software via MSI.
 #PowerShell script to uninstall all Java SE (JRE) versions on a computer
 $uninstall32 = gci "HKLM:\SOFTWARE\Wow6432Node\Microsoft\Windows\CurrentVersion\Uninstall" | foreach { gp $_.PSPath } | ? { $_ -like "*Java*" } | select UninstallString
 $uninstall64 = gci "HKLM:\SOFTWARE\Microsoft\Windows\CurrentVersion\Uninstall" | foreach { gp $_.PSPath } | ? { $_ -like "*Java*" } | select UninstallString
 # Uninstall 64-bit Java versions
 if ($uninstall64) {
 $uninstall64 = $uninstall64.UninstallString -Replace "msiexec.exe", "" -Replace "/I", "" -Replace "/X", ""
 $uninstall64 = $uninstall64.Trim()
 Write "Uninstalling Java ..."
 start-process "msiexec.exe" -arg "/X $uninstall64 /qb" -Wait
 }
 # Uninstall 32-bit Java versions
 if ($uninstall32) {
 $uninstall32 = $uninstall32.UninstallString -Replace "msiexec.exe","" -Replace "/I","" -Replace "/X",""
 $uninstall32 = $uninstall32.Trim()
 Write "Uninstalling all Java SE versions..."
 start-process "msiexec.exe" -arg "/X $uninstall32 /qb" -Wait
 }

How to Download and Install Java JRE Using PowerShell?
The following PowerShell script automatically downloads the latest version of Java installer from the official website and installs it on a computer(you can download both online and offline installer). The install command suppress reboot request and disables automatic Java updates.
# PowerShell script to automatically download and install the latest Java SE (JRE) version
 [Net.ServicePointManager]::SecurityProtocol = [Net.SecurityProtocolType]::Tls12
 # Download an online Java installer
 $URL = (Invoke-WebRequest -UseBasicParsing https://www.java.com/en/download/manual.jsp).Content | % { [regex]::matches($_, '(?:<a title="Download Java software for Windows Online" href=")(.*)(?:">)').Groups[1].Value }
 # Download an offline Java installer
 #$URL = (Invoke-WebRequest -UseBasicParsing https://www.java.com/en/download/manual.jsp).Content | % { [regex]::matches($_, '(?:<a title="Download Java software for Windows Offline" href=")(.*)(?:">)').Groups[1].Value }
 Invoke-WebRequest -UseBasicParsing -OutFile jre8.exe $URL
 Start-Process .\jre8.exe '/s REBOOT=0 SPONSORS=0 AUTO_UPDATE=0' -wait
 echo $?
The first line in the script was added to use TLS 1.2. Otherwise, I had the following error:
Invoke-WebRequest: The request was aborted: Could not create SSL/TLS secure channel.
The script will automatically download a Java installation file, save it on a disk as jre8.exe and install.
Unfortunately, this method of getting the JRE setup file from the Oracle website stopped working just a few weeks ago. Now this webpage is generated by some .js script. And I cannot get the link to the java installer. Perhaps Oracle will change this soon.