
В Windows 10 каждое окно имеет цветную границу и тень. Вы можете изменить цвет границ окна и даже отключить тень, если хотите. В сборках Windows 10 version 1903 (19H1) цвет границы окна по умолчанию серый, как и тень, но вы можете включить цветные границы окна.
Как выбрать цвет границы окна
В апрельском обновлении и более ранних версиях Windows 10, система автоматически выбирает цвет окна, в зависимости от фона рабочего стола. Чтобы выбрать цвет границы пользовательского окна, откройте «Параметры» → «Персонализация» → «Цвета». В разделе «Выбор цвета элементов» отключите опцию «Автоматический выбор главного цвета фона» и выберите нужный цвет.
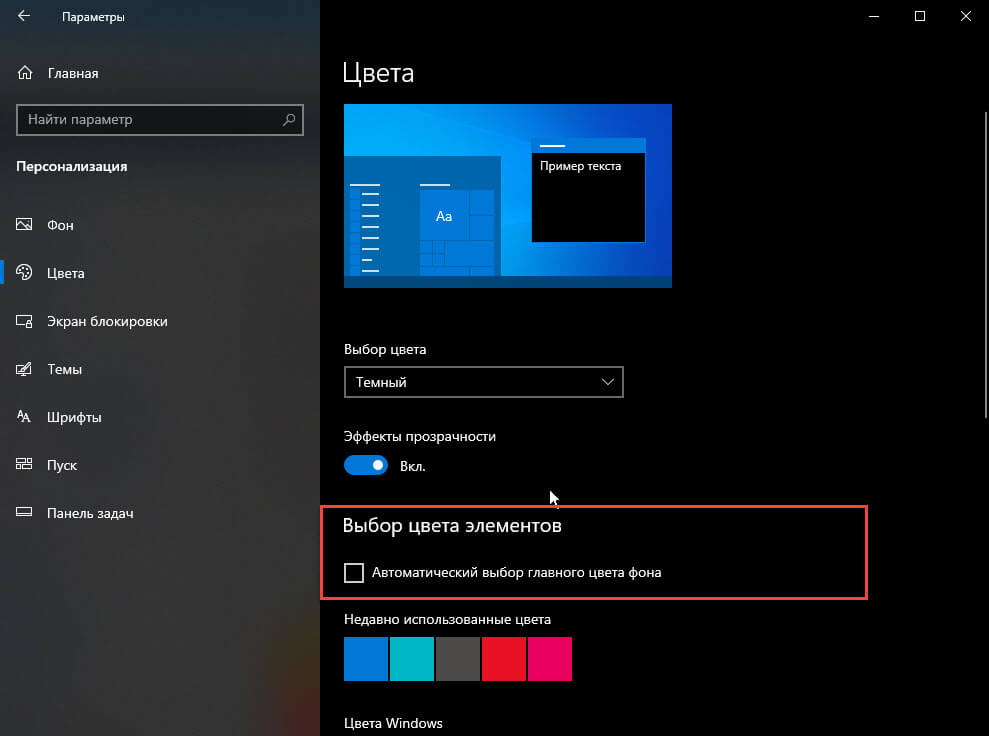
Система предлагает ряд готовых цветов, но вы можете кликнуть опцию «Дополнительный цвет» в нижней части списка, чтобы выбрать любой цвет, который вам нравится.
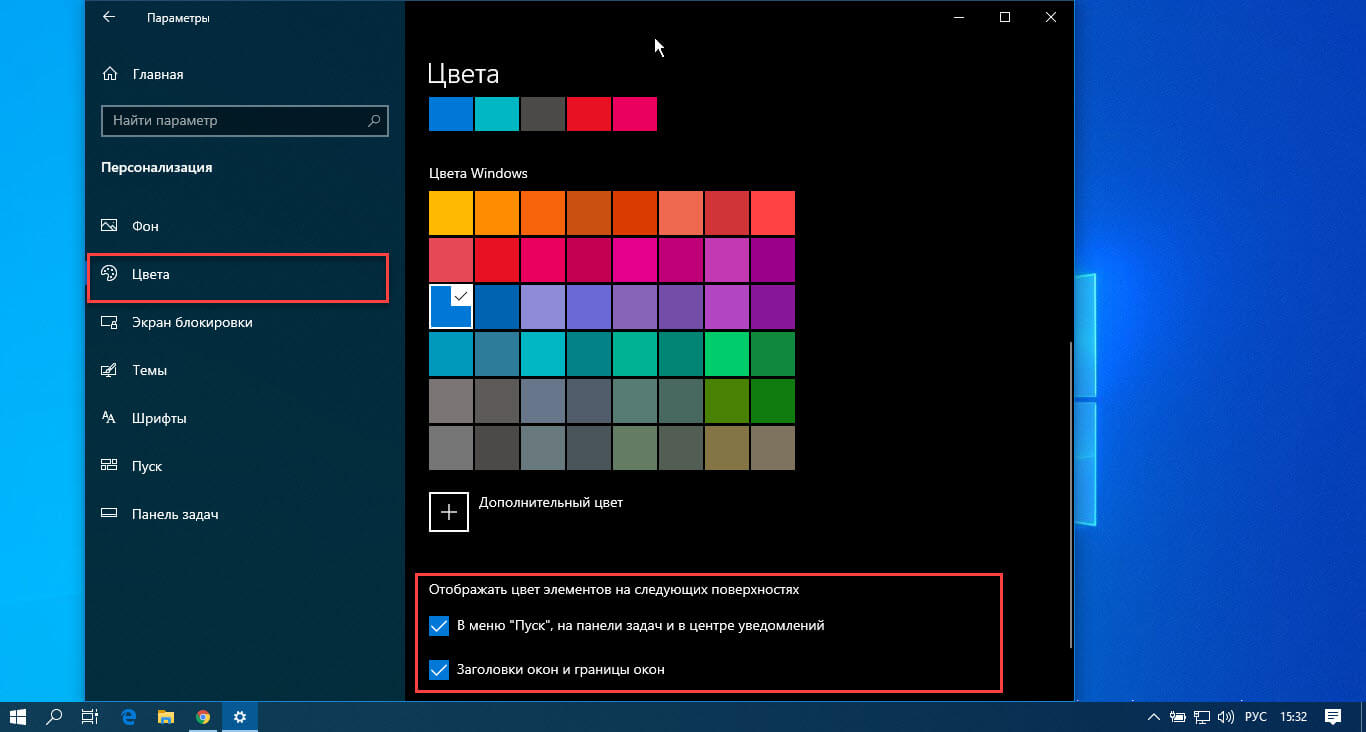
Обновление Windows 10 version 1903 (19H1), которое будет выпущено в этом году, использует по умолчанию серый цвет. Чтобы применить свой цвет акцента к границам окна, прокрутите вниз до раздела «Отображать цвет элементов на следующих поверхностях», а затем включите опцию «Заголовки окон и Границы окон».
Как отключить (или включить) тени окна.
Windows 10 создает тени для каждого окна по умолчанию. Однако вы можете отключить эту опцию, если хотите. Например — Windows 8 не использовала тени и имела чистый, плоский вид с цветными границами окон.
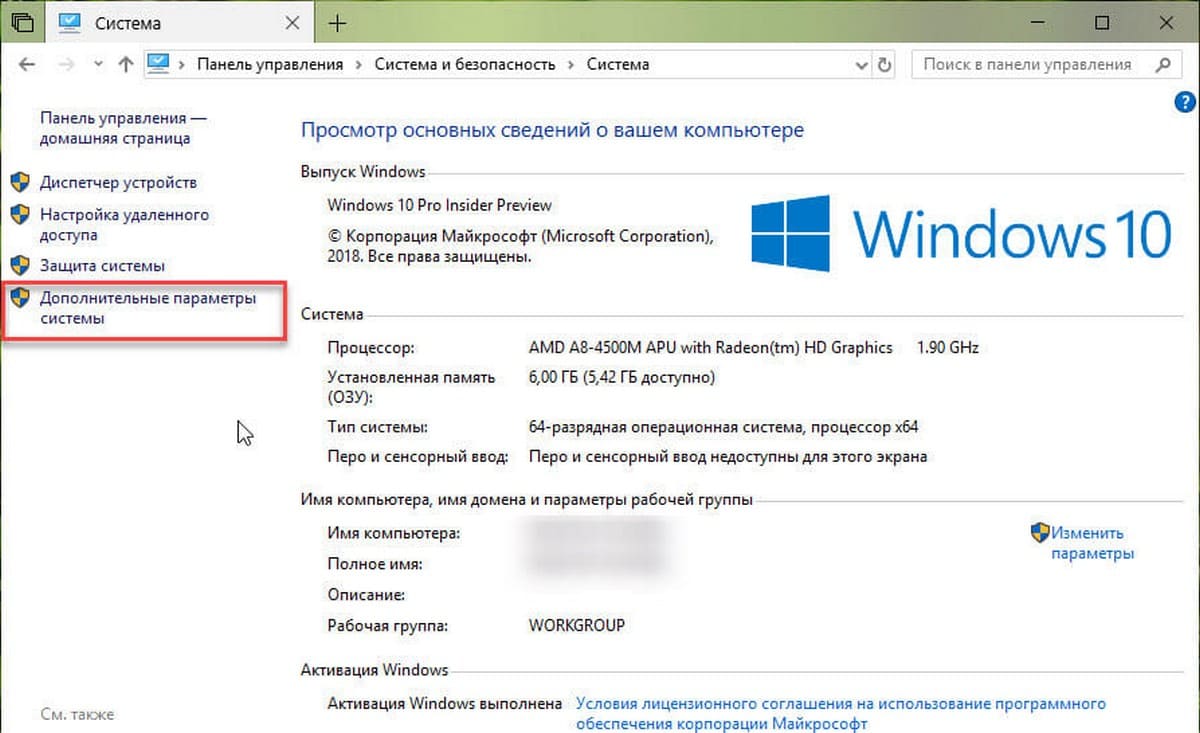
На момент написания статьи, данный параметр доступен в классическом окне системных настроек. Чтобы открыть его, откройте приложение «Параметры», перейдите в «Система» → «О Системе» и в разделе «Сопутствующие параметры» нажмите на ссылку «Сведения о системе».
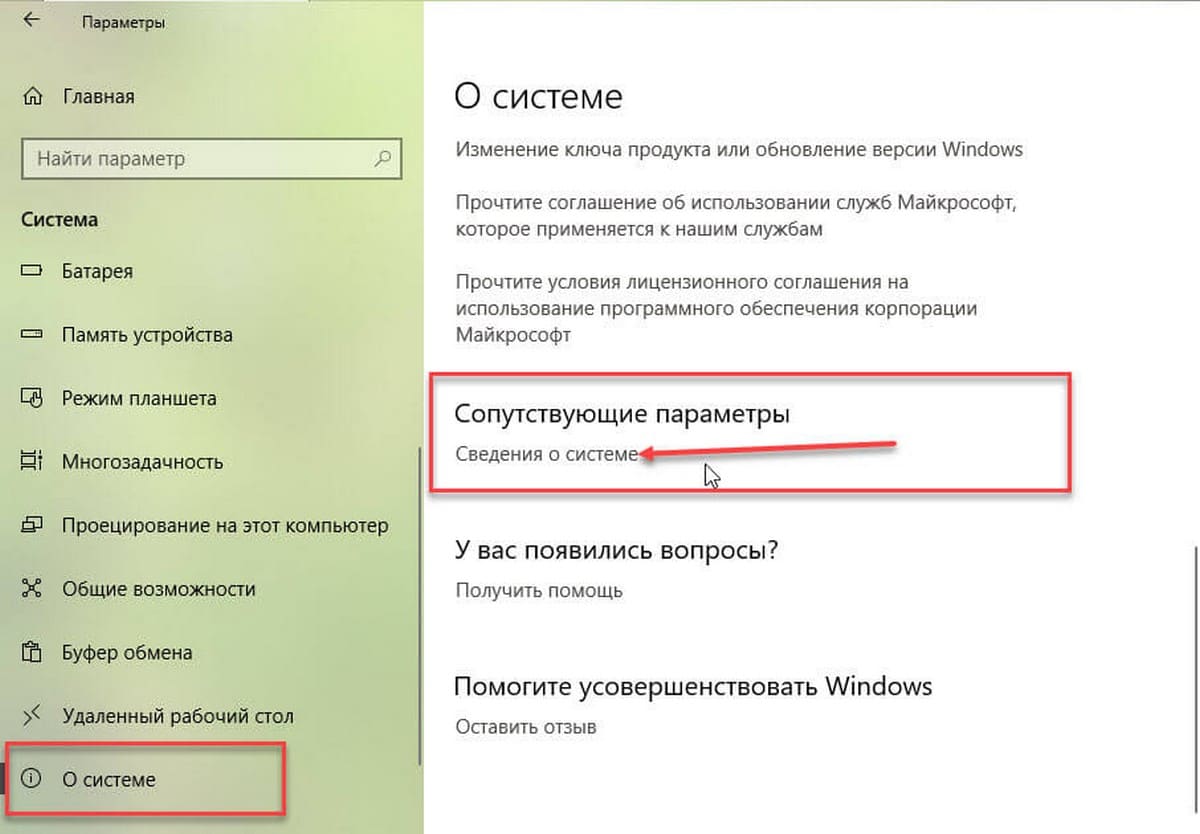
Вы также можете зайти в «Панель управления» → «Система и безопасность» → «Система» → «Дополнительные параметры системы».
На вкладке «Дополнительно», нажмите кнопку «Параметры» в разделе «Быстродействие».

В списке «Визуальные эффекты», выберите «Особые эффекты», теперь найдите и отключите опцию «Отображение теней, отбрасываемых окнами» и нажмите кнопку «ОК».
Все! Тени окна исчезнут. Вы можете вернуться, если захотите снова включить их.
Время на прочтение1 мин
Количество просмотров36K

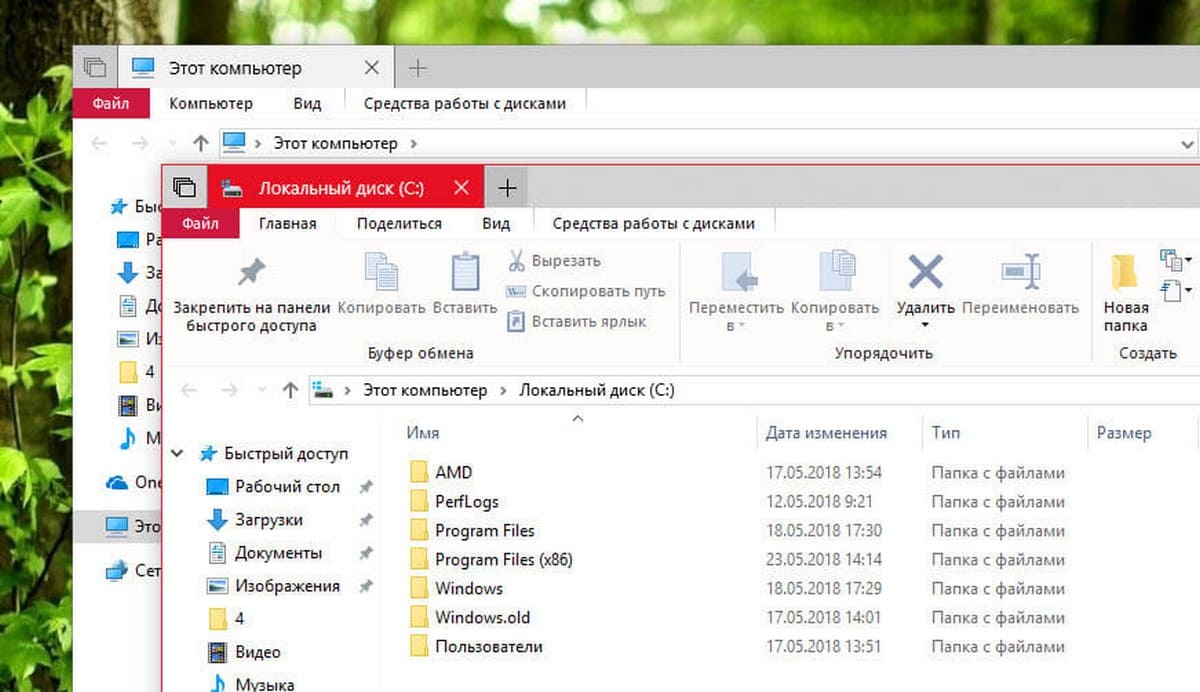
Наверно я не один такой, кто столкнулся с проблемой отсутствия границ окон в новых системах windows, ведь зачем-то их убрали с одним из обновлений. Спрашивают многие, а вот ответа нет однозначного нигде. С данной неожиданной неприятностью легко справиться, сменив руками настройки системы, а если это терминальный сервер и пользователей много? По умолчанию, пользователям выставляется наилучшее быстродействие, что отключает тени, в придачу по умолчанию в системе отключены границы окон, что приводит к полному сливанию окон друг с другом, в итоге невозможно отличить где кончается одно и начинается другое окно. Когда я решил централизованно решить эту проблему для всех пользователей, оказалось что найти решение не так уж и просто, поскольку нет ни одного ответа в интернете, дающего однозначное решение. В итоге перелопатив весь RU и EN сегменты сети, перепробовав разные варианты, я решил проблему. Если вас беспокоит та же проблема, прошу под кат.
Распинаться не стану, достаточно пары картинок, чтобы было понятно, что требуется сделать для централизованного решения в пределах домена. Статью пишу скорее как памятка, вдруг самому когда-нибудь пригодится?
Итак, вы имеете ситуацию как на картинке выше. Ваш путь лежит в редактор GPO, где надо сделать манипуляции, согласно следующей картинке:

|
Key Path |
Value name |
Type |
Data |
|
Software\Microsoft\Windows\DWM |
EnableWindowColorization |
REG_DWORD |
1 |
|
Software\Microsoft\Windows\DWM |
ColorPrevalence |
REG_DWORD |
1 |
После добавления изменений в GPO системе требуется перезагрузка для их применения. Когда вы войдете в систему, появятся рамки и стандартные цвета системы:

В общем-то, на этом все, вы успешно избавились от безрамья и мелкомягкой, весьма странной «фичи».
Если эта публикация вас вдохновила и вы хотите поддержать автора — не стесняйтесь нажать на кнопку
Windows 11 provides multiple ways to personalize the look. Most of us want to customize our operating system according to our choice and where the Windows operating system exists. Windows 11 comes with an accent color feature that is used to give color to Windows borders. Using the accent color option, you can beautify your Windows 11. Window borders look pretty, especially if you use a dark theme on your PC. When you turn on this feature, window borders get highlighted, which you might prefer to use.

There are several color options available that you can use for window borders. According to your choice, you can change the accent color to something you like. However, Microsoft also provides an option to turn off the window border color from Windows 11 completely.
This gearupwindows article will guide on enabling or disabling the window borders color in Windows 11. It is pretty easy, and you might already know about this feature.
How to Turn On or Turn Off Window Border Color in Windows 11?
Before proceeding with the steps, we want to mention that turning the On or Off color on the window borders will also turn On/Off the color on the title bars. Let’s see how it works.
Step 1. Open the Settings app by pressing the Windows + I keys from the keyboard or using any other method. If the settings app is not working or not responding, you can try to reset it.
Step 2. On the Settings window, select the Personalization category from the left side pane, and then on the right side of it, click the Colors tab.
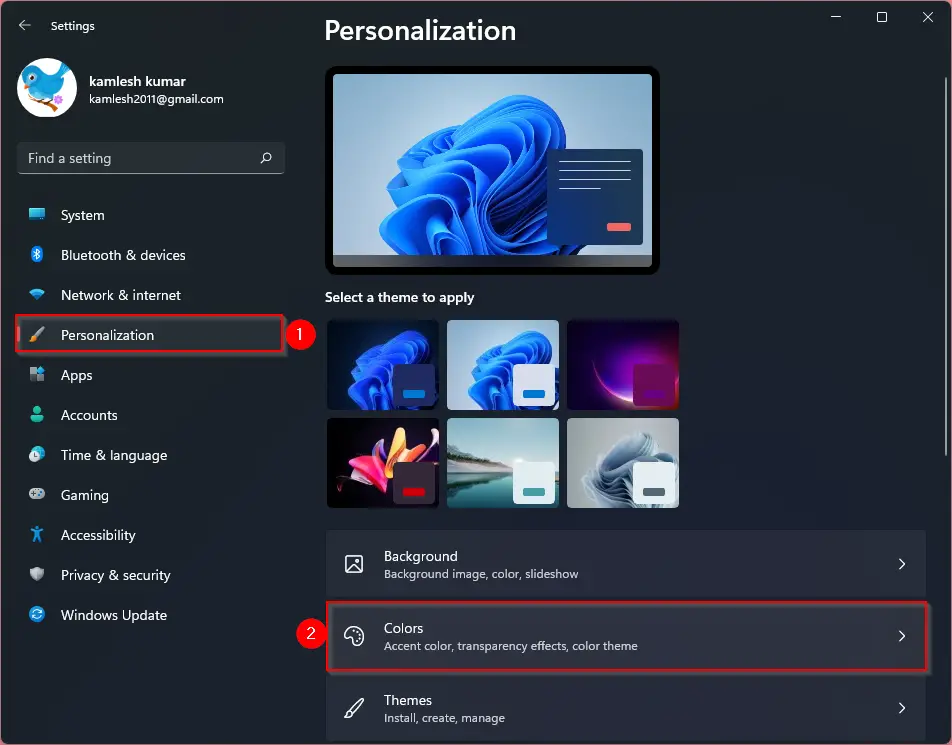
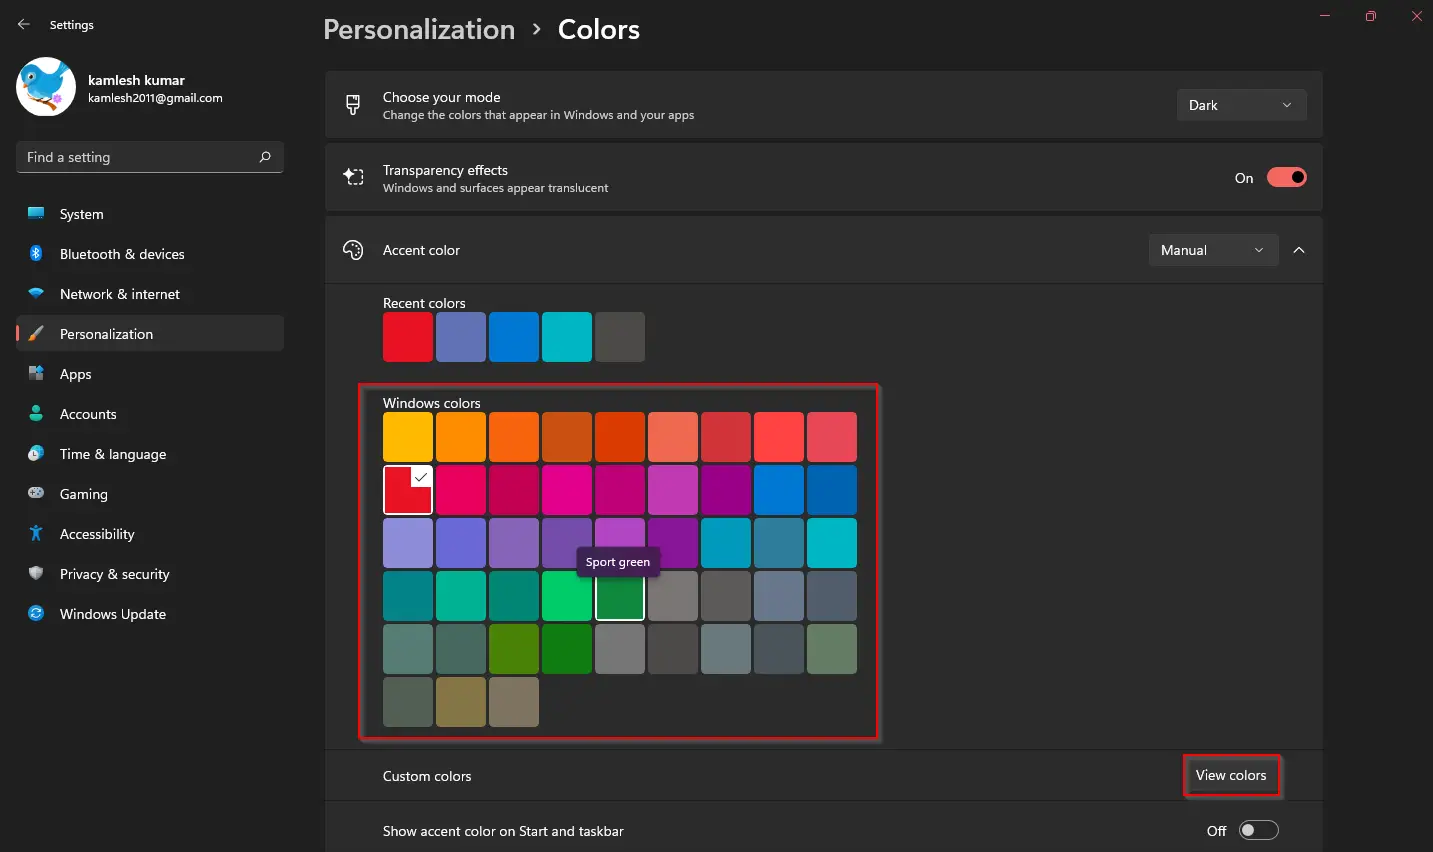
Step 3. Click on the desired colors that you want to see on window borders from the Windows colors option. If you don’t love to use any default available colors, click on the View colors button next to Custom colors and select the desired color from there.
Step 4. Once you choose the desired color, turn the toggle switch to the On position next to the Show accent color on title bars and windows borders option.
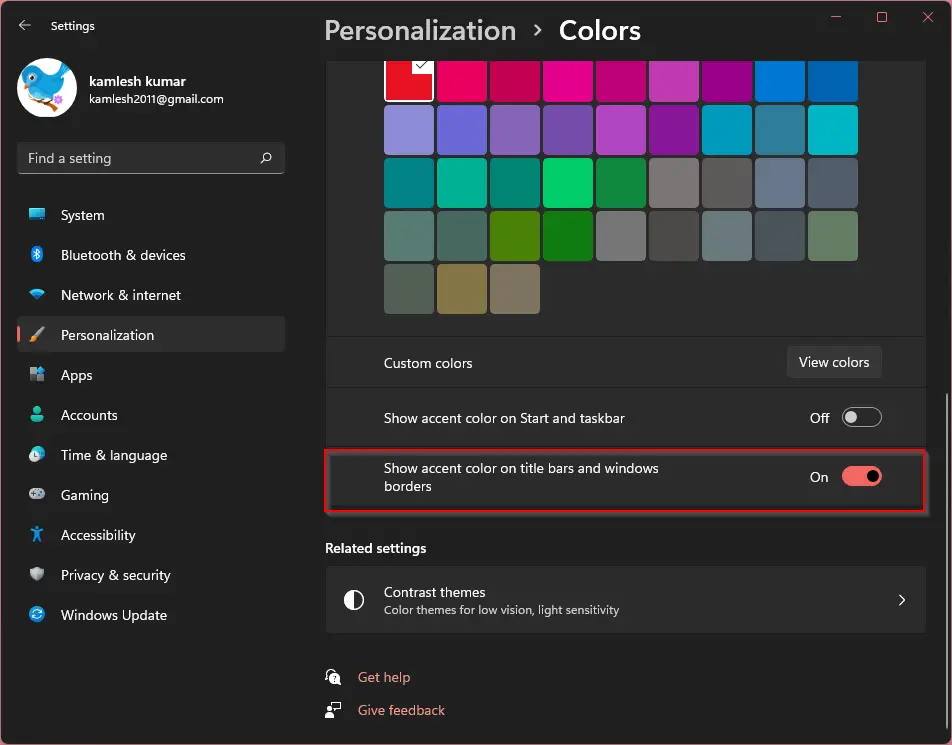
Once you complete the above steps, Windows 11 will use the selected color on title bars and windows borders. To turn off this feature, repeat the above-mentioned steps, and in step 4, turn off the toggle switch next to the Show accent color on title bars and windows borders option. Colors on title bars and window borders will be invisible immediately.
Also Read:
8GadgetPack: Adds more than 60 gadgets in Windows 11/ 10 / 8.1 / 7
How to Enable or Disable Window Border Color in Windows 10?
Before proceeding with the steps, we want to mention that turning the On or Off color on the window borders will also turn On/Off the color on the title bars. Let’s see how it works.
Step 1. First, open the Settings app by pressing the Windows + I keys.
Step 2. Then, click on Personalization in Windows Settings.
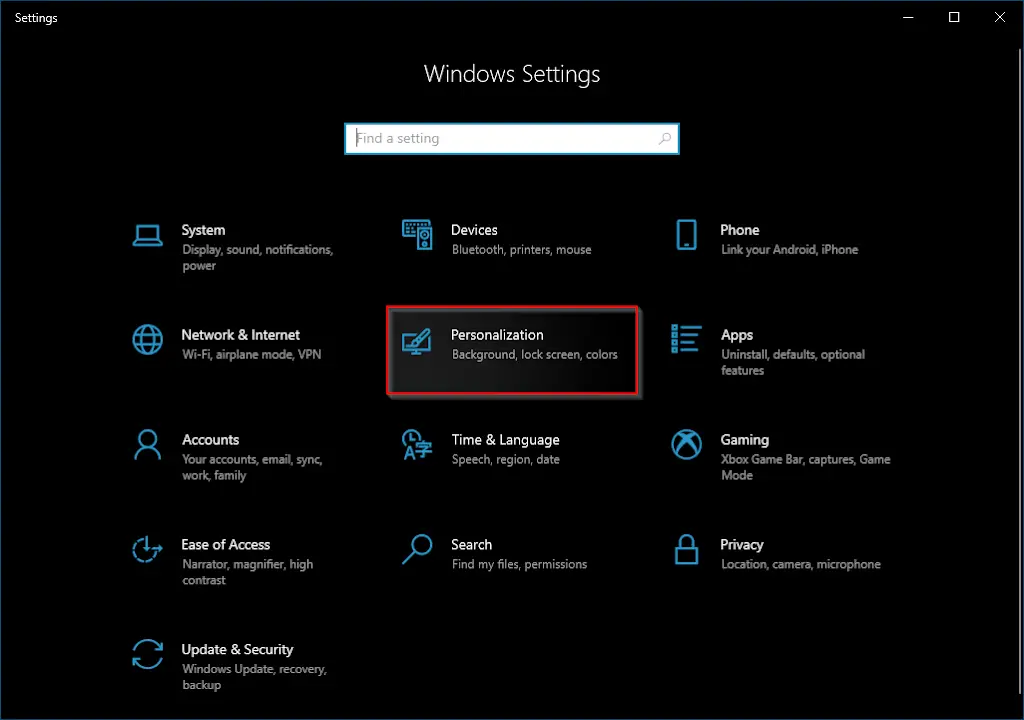
Step 3. Under “Personalization,” select Colors.
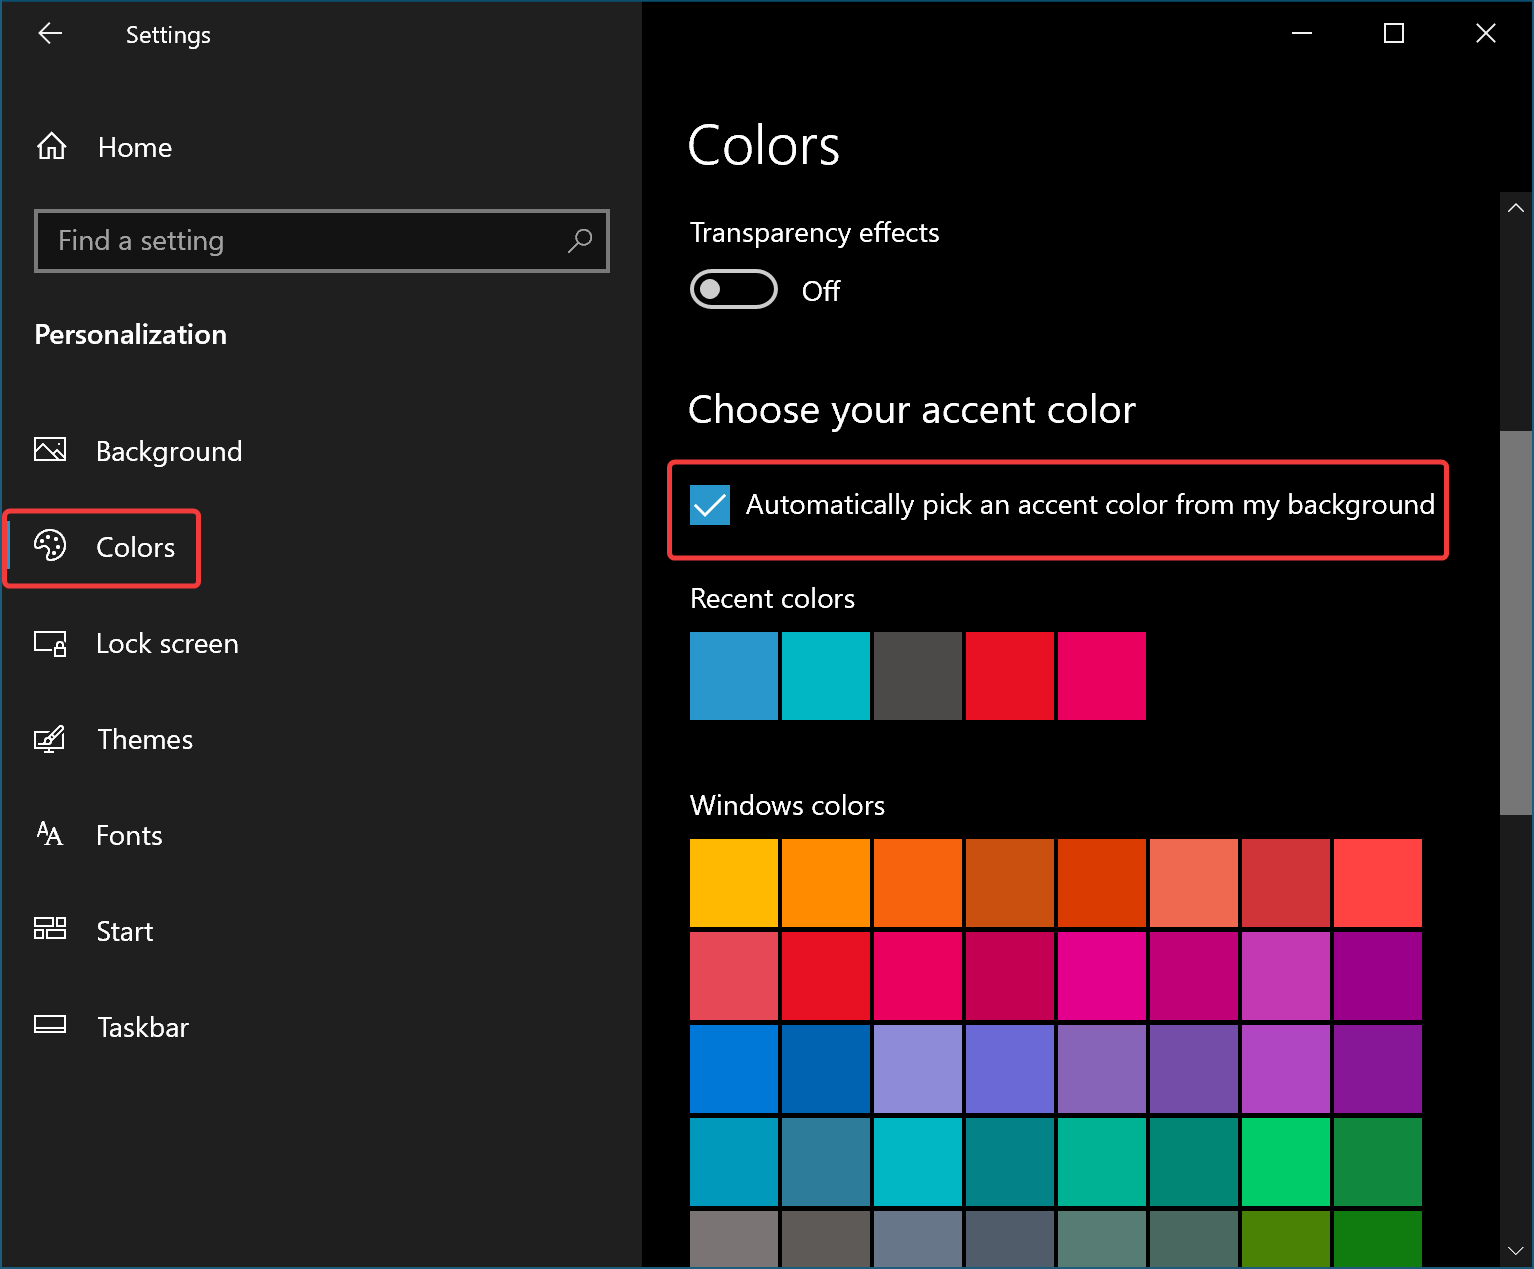
Step 4. On the right sidebar, check the option “Automatically pick an accent color from my background,” or uncheck this option and manually pick a color from the available options.
Step 5. Then, scroll down a little bit to the Colors page and check the option Tile bars and window borders.
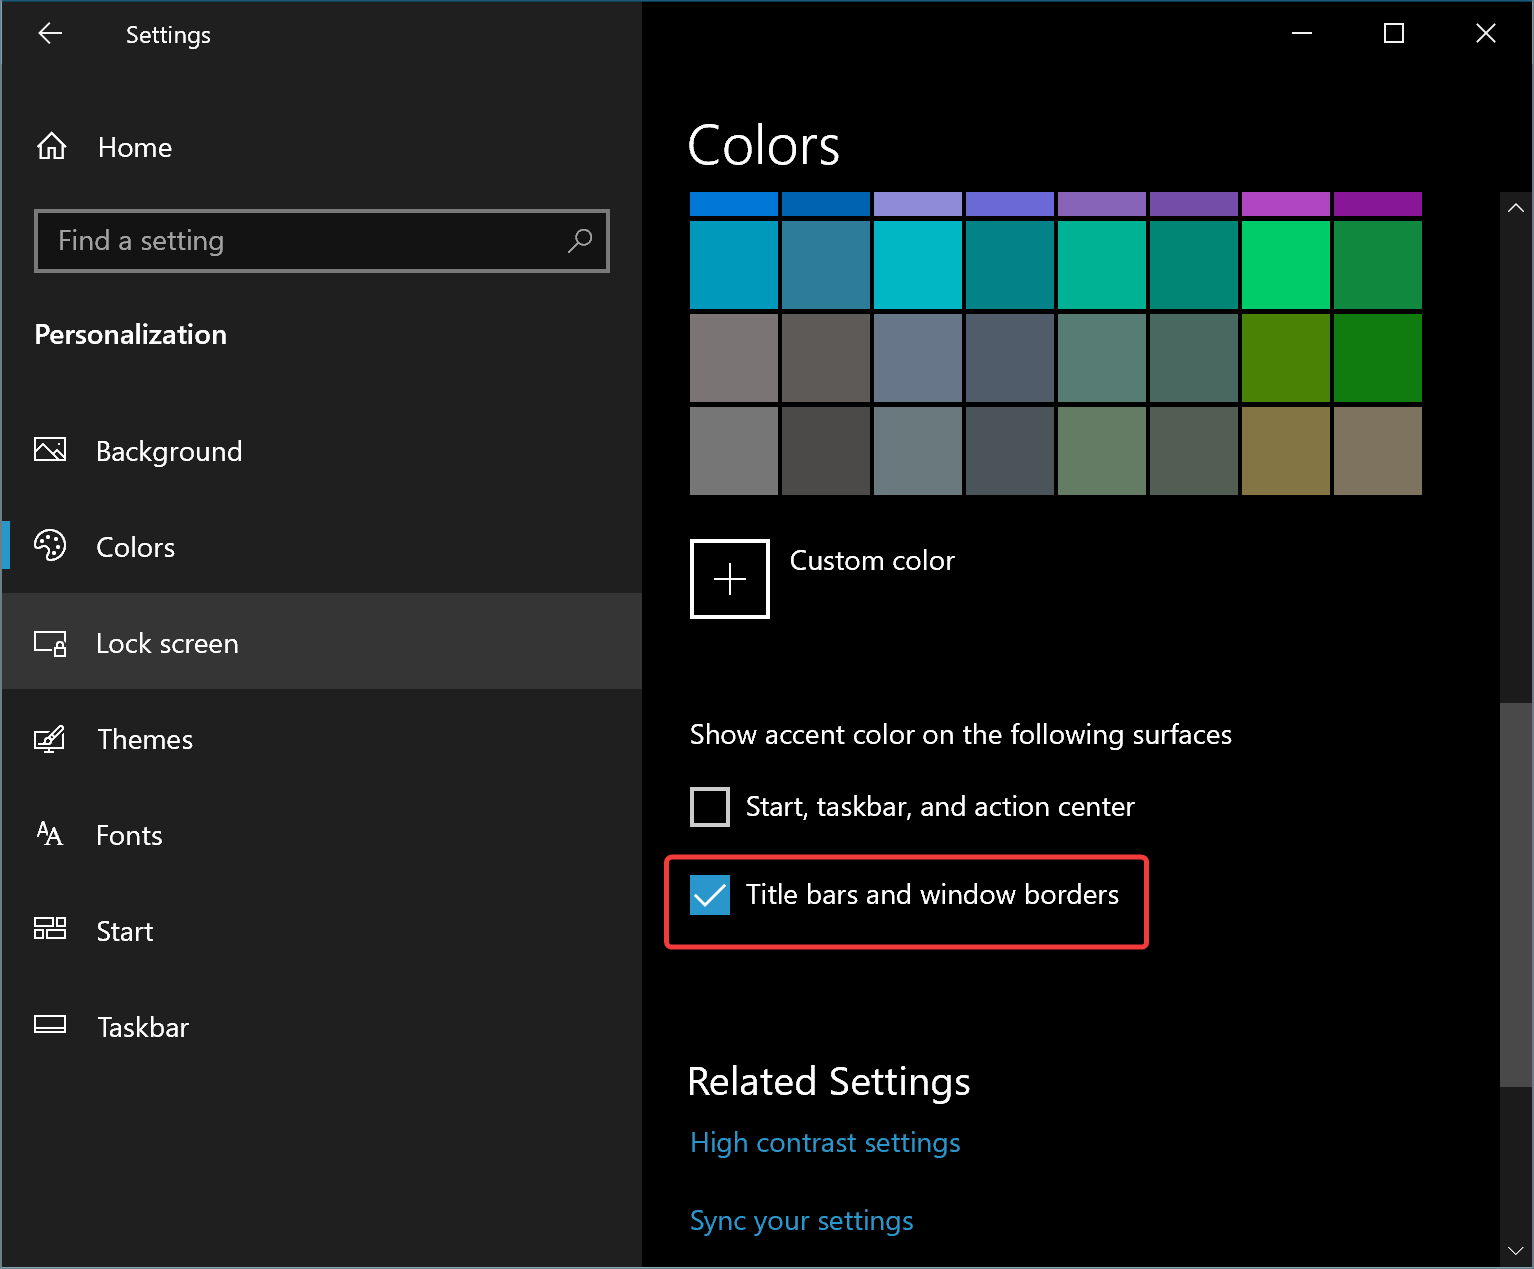
That’s it. Windows 10 will immediately start showing colors on title bars and window borders.
Conclusion
In conclusion, personalizing the look of your Windows operating system has become a must-have feature for many users. Windows 11 offers a great way to customize your PC according to your preference. By using the accent color option, you can add beautiful color to your window borders, giving your PC an aesthetic look. Moreover, if you don’t like this feature, you can quickly turn it off by following simple steps. The process of enabling or disabling window border color is effortless and can be completed by following a few steps in the Settings app. Overall, Windows 11 has made it easy for users to personalize their PC’s look and feel, making the experience more enjoyable.
Download Windows Speedup Tool to fix errors and make PC run faster
Windows 11/10 offers no Settings panel which can help you customize or change Desktop Window Metrics. In Windows 7, you could access it through Advanced Appearance Settings in the Window Color and Appearance panel. Using this panel, in Windows 7 and earlier, you could customize or change the width of the window border, icon spacing, and other settings.
Presumably, Microsoft removed these settings because they primarily affected the Classic themes, and since Windows 8 did not support Classic themes, these were not of much use now. All themes are now based on Visual Styles.
However, if you wish, you can still access most of these settings via the Windows Registry. To do so, open regedit and navigate to the following registry key:
HKEY_CURRENT_USER\Control Panel\Desktop\WindowMetrics
Here you will see the required settings like:
- BorderWidth
- PaddedBorderWidth
- IconSpacing
- IconVerticalSpacing
Change thickness or width of the window borders in Windows 11/10
Using the registry, therefore you can still change the thickness or width of the windows borders. For that, you will be required to modify the values of BorderWidth and PaddedBorderWidth.

To begin with, double-click on BorderWidth and change its value to say, 0. This value determines the current setting for the width of the borders around all the windows with borders that can be sized. The range for this value is from 0 to -750 ( twips ) with the default, as is seen in my Windows 8 Pro x64 RTM installation being -12 (12 twips). Values entered in twips (negative or minus values) are rounded to the nearest pixel value. For instance, -17 converts to 1 pixel, and -28 converts to 2 pixels.

Similarly, double-click on PaddedBorderWidth and change its value from the default -60, to say, 0.
Log off or restart your computer to see the change. You will see the borders to be marginally thin.
Read: Windows icon spacing is messed up.
Horizontal
Change the value of IconSpacing:
- The default value is -1128.
- The minimum amount of space is -480
- The maximum is -2730.
Vertical
Change the value of IconVerticalSpacing
- The default value is -1128.
- The minimum amount of space is -480
- The maximum is -2730.
Choose suitable values according to your requirements.
It is always a good idea to create a system restore point before trying out any registry tweak so that you can revert your computer to a good state if you do not like the changes or if something goes wrong.
Read next: Simulate the effect of a finger touching the LCD screen on your Windows PC.
Anand Khanse is the Admin of TheWindowsClub.com, a 10-year Microsoft MVP (2006-16) & a Windows Insider MVP (2016-2022). Please read the entire post & the comments first, create a System Restore Point before making any changes to your system & be careful about any 3rd-party offers while installing freeware.
В редакторе реестра перейдите в следующий раздел:
HKEY_CURRENT_USER\Control Panel\Desktop\WindowMetrics
В правой части окна необходимо изменить два значения: BorderWidth и PaddedBorderWidth.

Чтобы сделать границы окон как можно меньше, дважды щелкните по параметру BorderWidth и установите его значение на 0, затем щелкните на PaddedBoderWidth и снова установите значение на 0.
Для активации новых значений, выйдите и снова войдите в систему.
Если вздумаете вернуться к значениям по умолчанию, установите значение для BorderWidth до -15 и до -60 для PaddedBorderWidth.
Источник http://windowstips.ru/notes/1855