
Подготовка ПК
Инсталляция и запуск любой из предложенных в этой статье программ имеет смысл, только если на компьютере доступна и активирована технология аппаратной виртуализации (Intel VT (Intel Virtualization Technology) либо AMD-V (AMD Virtualization). Чаще всего включение указанного уже выполнено, но проверить данный фактор практически точно не будет лишним:
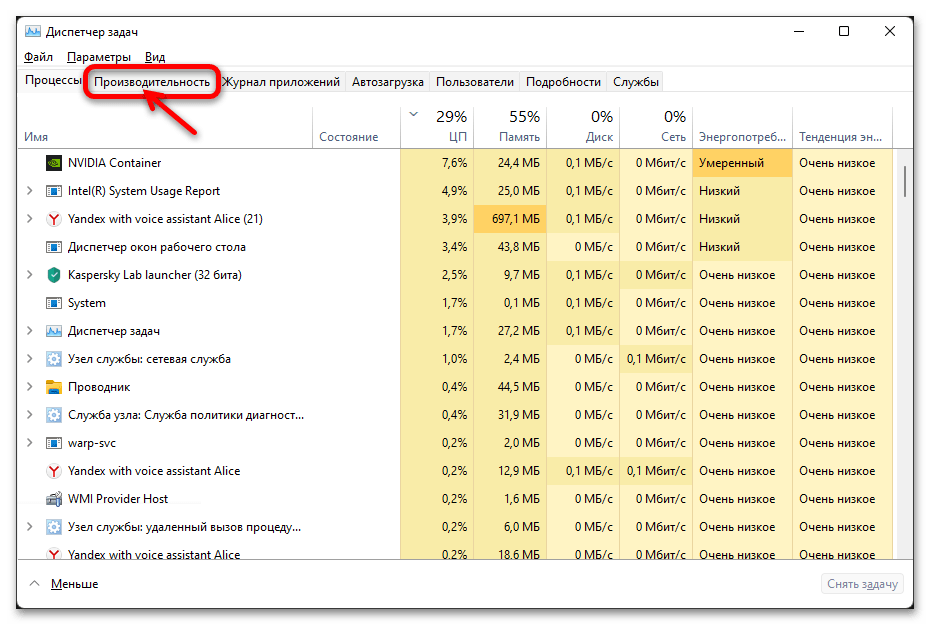
- Любым способом открываем Диспетчер задач (ДЗ) Виндовс 11, например, через дополнительное меню, вызываемое нажатием правой кнопкой мышки по кнопке «Пуск».

Читайте также: Вызов «Диспетчера задач» в Windows 11
- Перемещаемся на вкладку «Производительность».
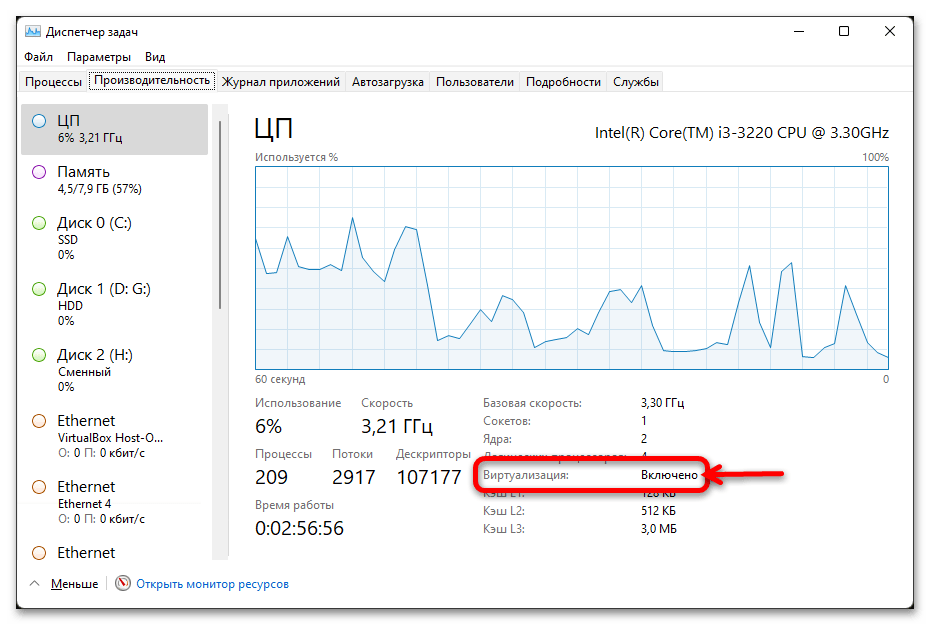
- В расположенном под блоком интерфейса ДЗ «Активность ЦП» перечне параметров имеется «Виртуализация»:
- Если здесь указано «Включено», подготовку компьютера к инсталляции софта для создания виртуальных машин можно считать завершенной, закрываем Диспетчер задач.
- Когда констатируется, что параметру «Виртуализация» в ДЗ присвоено значение «Выключено», необходимо перезагрузиться в BIOS ПК, активировать аппаратную виртуализацию, а затем проверить её доступность в Windows 11 повторно.
Подробнее: Включаем технологию виртуализации в BIOS ПК


Microsoft Hyper-V
MS Hyper-V — основанная на гипервизоре (монитор виртуальных машин, низкоуровневая оболочка) система аппаратной виртуализации. Решение позволяет создавать и эксплуатировать программные версии компьютеров, называемые виртуальными машинами, которые действуют как полноценный ПК, запускающий ОС и программы. Hyper-V входит в комплект поставки Windows 11 редакций PRO («Профессиональные») и Enterprise («Корпоративные»), но изначально данный компонент не активирован в системе, и чтобы получить доступ к его возможностям, необходимо выполнить следующее:
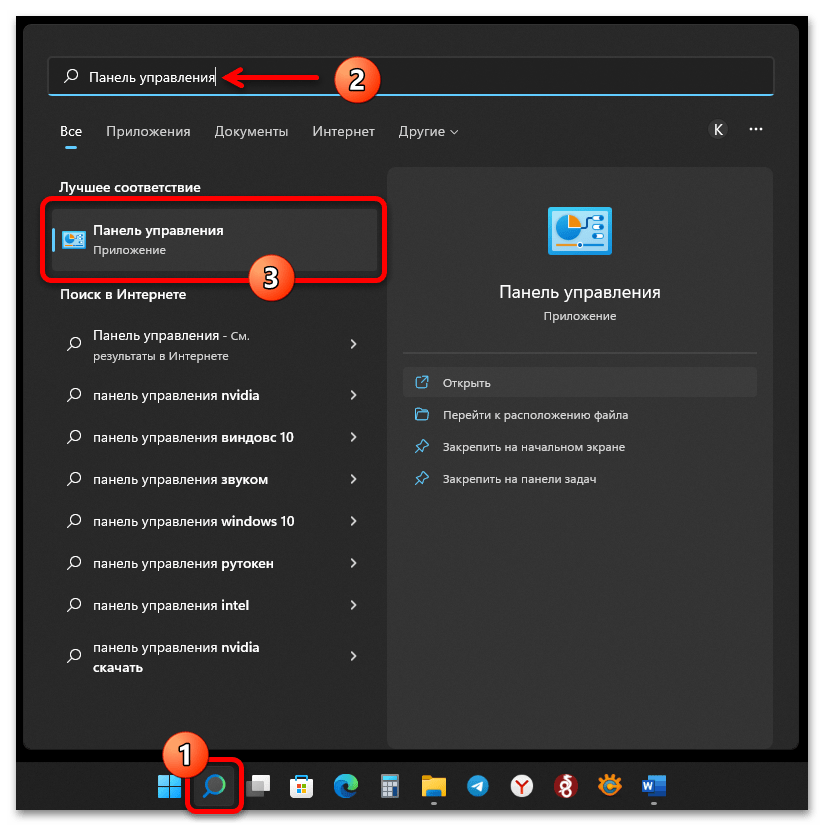
- Открываем «Панель управления» Виндовс — проще всего это осуществить через системный «Поиск», но можно задействовать и другие, перешедшие в Windows 11 из предыдущей версии ОС методы вызова оснастки:
Подробнее: Как открыть «Панель управления» на компьютере с Windows 10
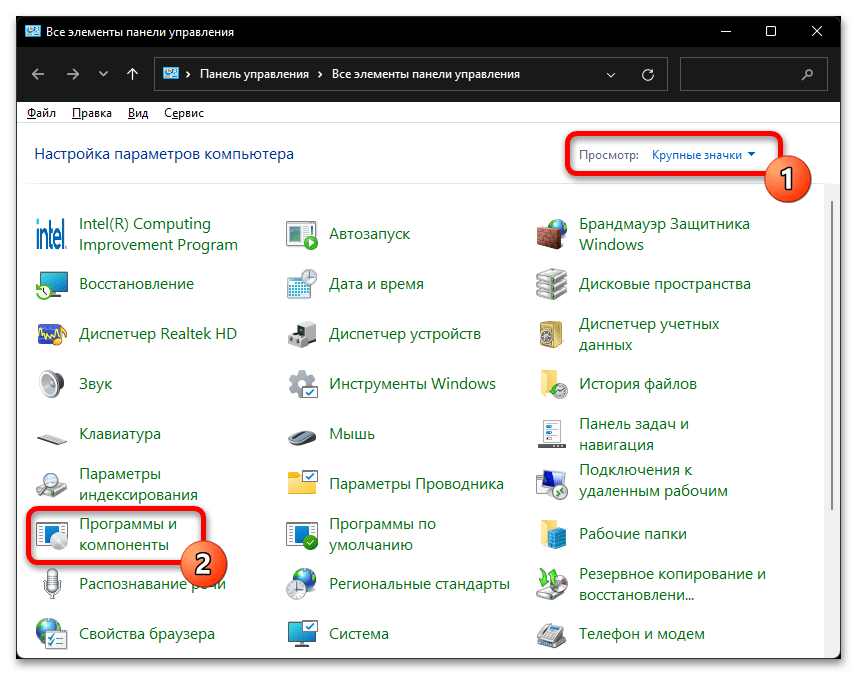
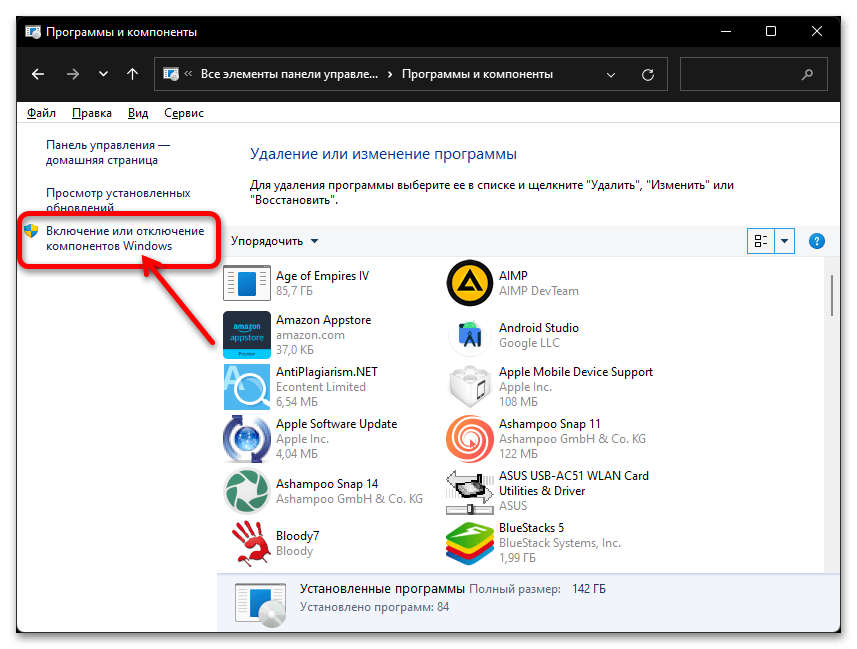
- Переключаем представление элементов Панели управления на «Крупные значки», щёлкаем «Программы и компоненты».
- В меню слева открывшегося окна кликаем «Включение или отключение компонентов Windows».
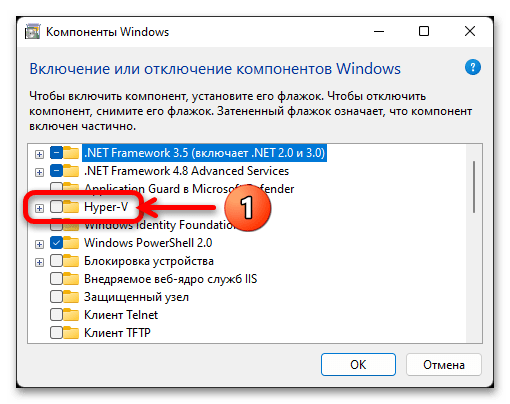
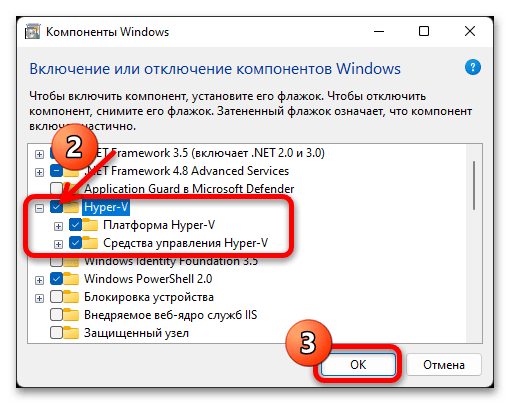
- Находим пункт «Hyper-V» в представленном в рамках открывшегося окошка списке,

устанавливаем отметку в чекбоксе справа от наименования компонента, кликаем «ОК».
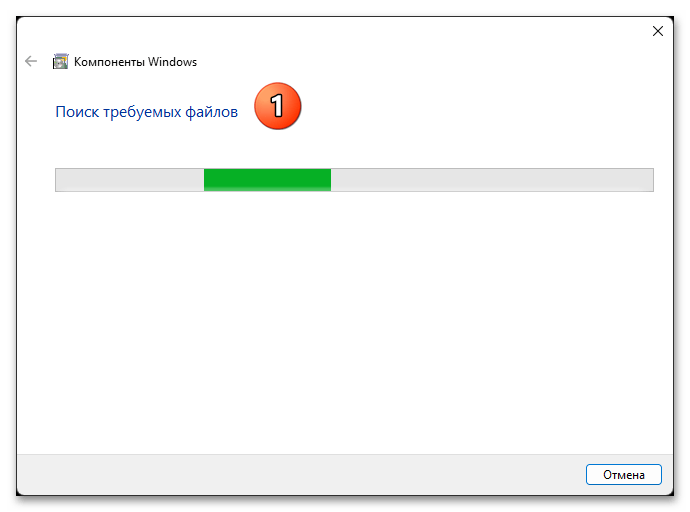
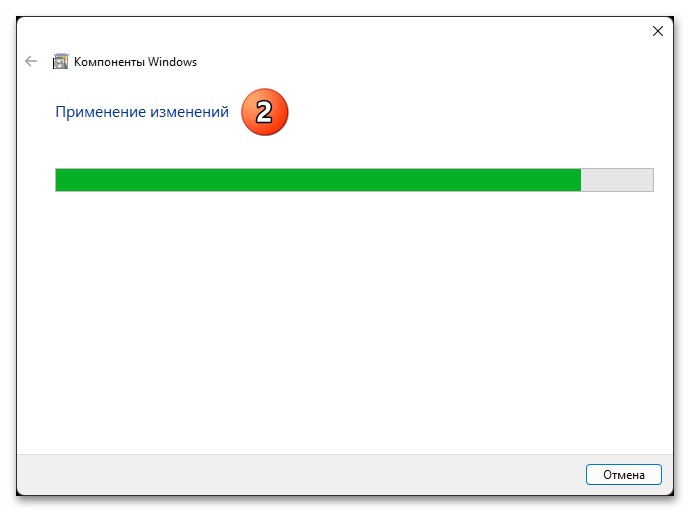
- Далее ждём, пока Виндовс скачает из сети

и интегрирует необходимые для работы Диспетчера виртуальных машин Hyper-V файлы.
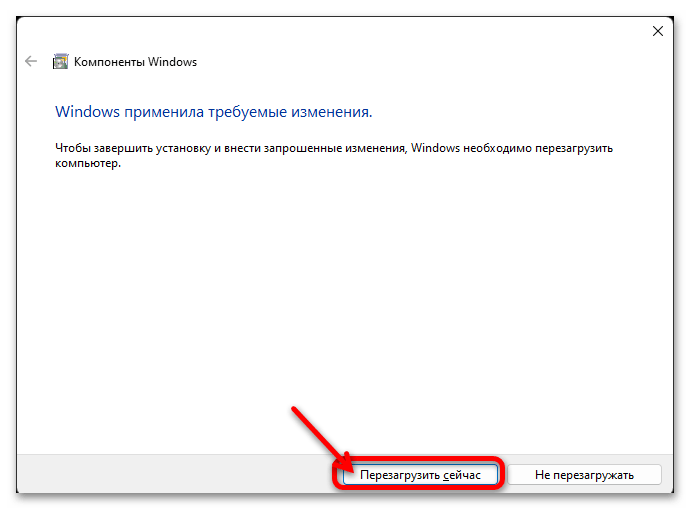
- Нажимаем «Перезагрузить сейчас» в окне с уведомлением «Windows применила требуемые изменения» и ожидаем завершения перезапуска системы.
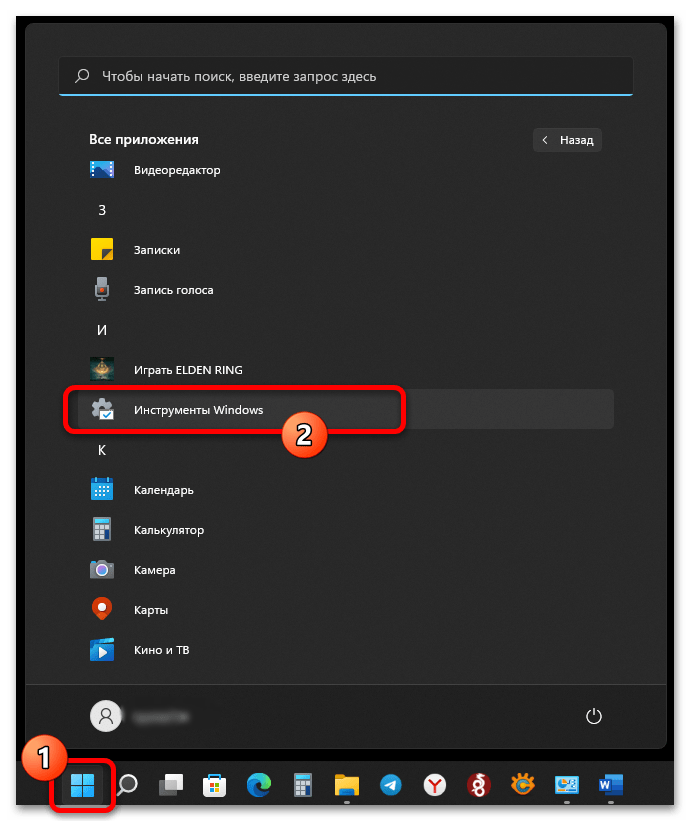
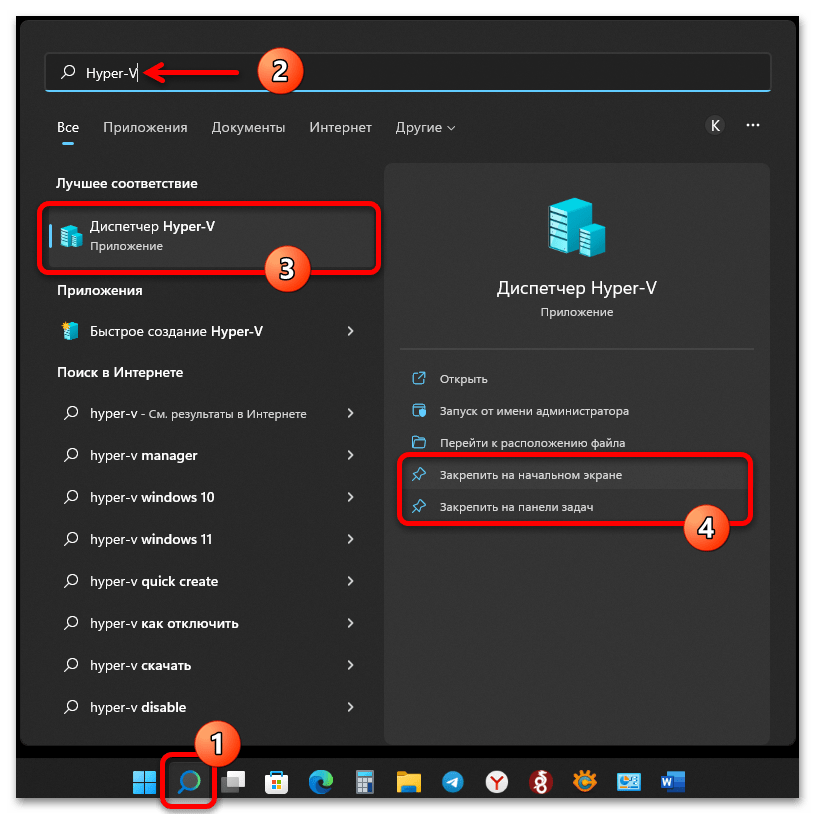
- После перезагрузки вызываем меню «Пуск» Виндовс, находим в нём и открываем «Инструменты Windows»,

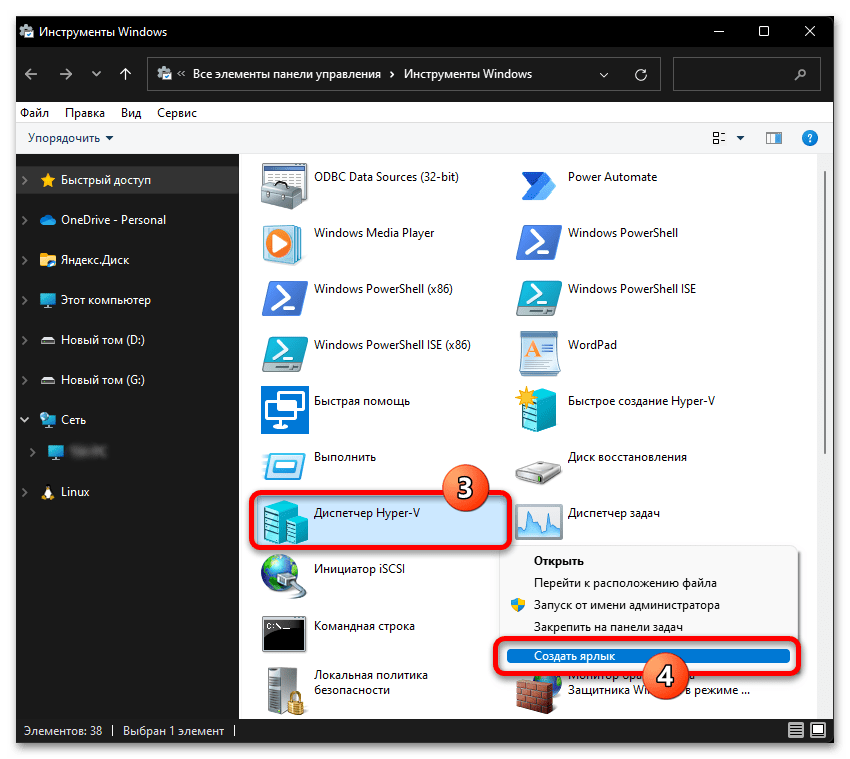
где и обнаруживается «Диспетчер Hyper-V».

Второй вариант получения доступа к полученному средству – найти его с помощью системного «Поиска». В любом случае, для удобства в дальнейшем рекомендуется отправить ярлык найденного приложения на Рабочий стол операционки или же закрепить его на начальном экране либо панели задач Виндовс 11.
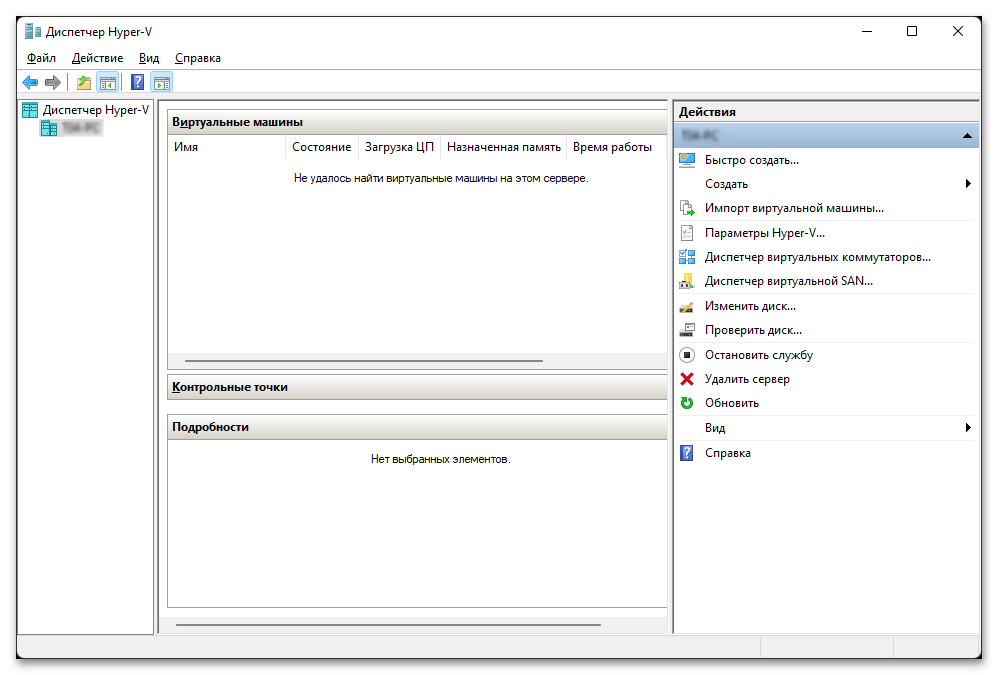
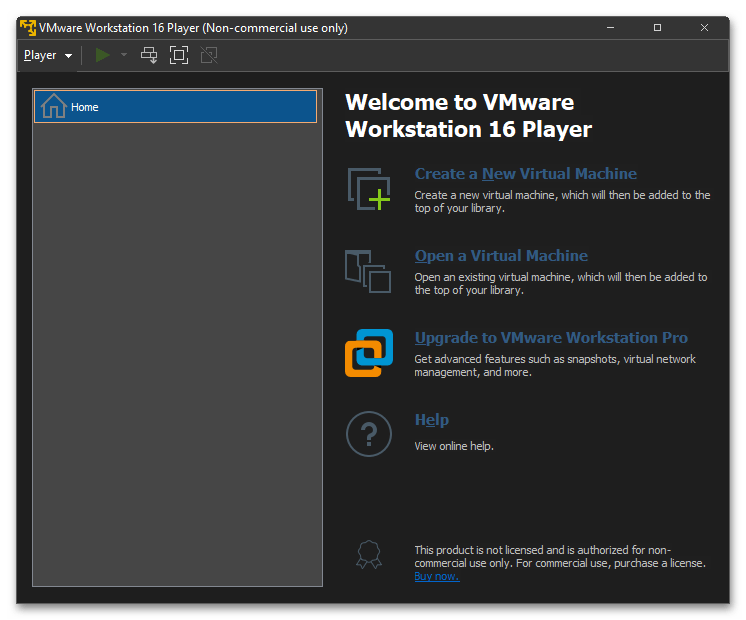
- В результате запуска Hyper-V получаем доступ в главное окно гипервизора, после чего можем приступать к созданию и настройке виртуальных машин в среде ОС Windows 11, собственно, её же средствами.
Oracle VM VirtualBox
Программа VirtualBox от Oracle является, пожалуй, самым популярным средством создания виртуальных сред с целью запуска в них самых разнообразных операционных систем. Этот софт распространяется бесплатно, русифицирован и в целом отлично справляется с выполняемыми через эмулируемые компьютеры задачами.
Скачать VirtualBox
- Инсталляция и использование данного решения на компьютерах под управлением Windows 11

ничем не отличаются от таковых в предыдущих версиях операционки от Microsoft,

поэтому с целью установки софта можно следовать уже опубликованной на нашем сайте инструкции:
Подробнее: Как установить и настроить программу VirtualBox в среде Windows
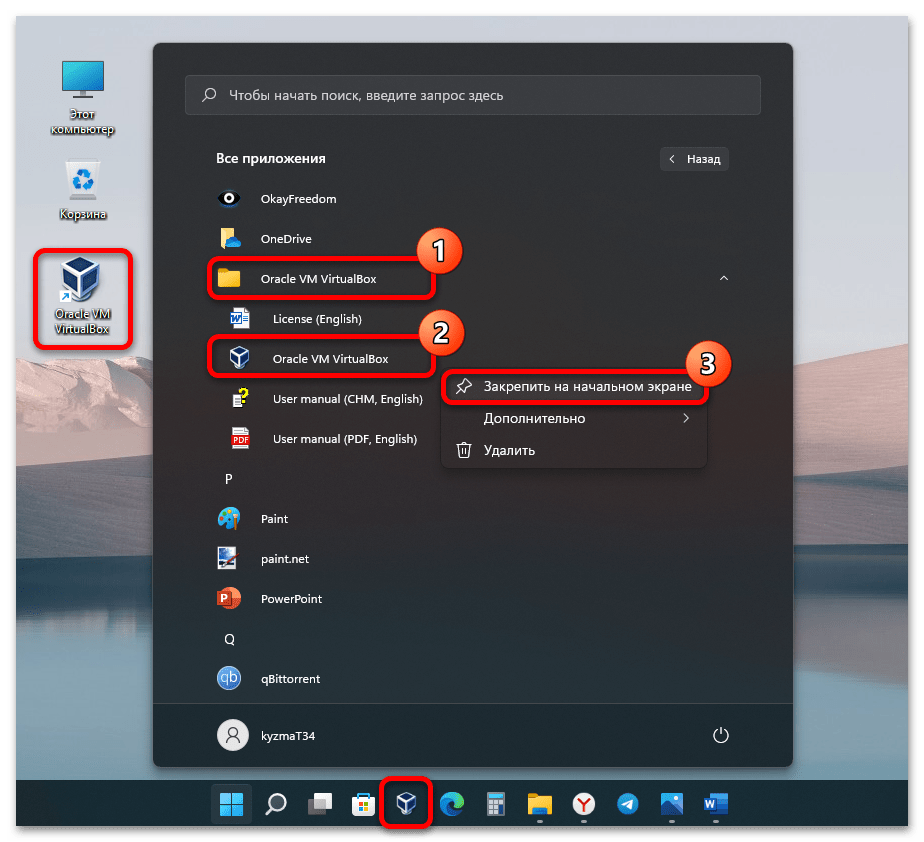
- Запуск Менеджера Oracle VM VirtualBox осуществим всеми известными в Windows способами: с ярлыка на Рабочем столе ОС и из меню «Пуск» («Все приложения» — «Oracle VM VirtualBox»); конечно же, программу можно «Закрепить на начальном экране» и «Панели задач».
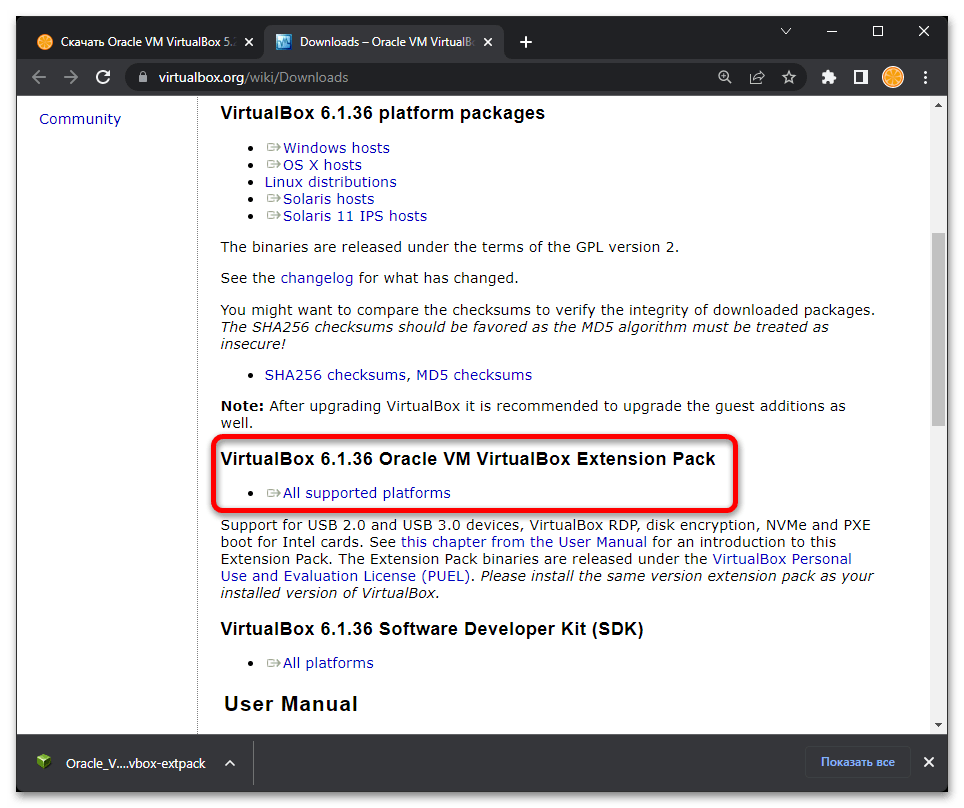
- Кроме прочего, для нормального функционирования большинства ОС в создаваемой при помощи VirtualBox среде, программу необходимо оснастить пакетом дополнений «VirtualBox Extension Pack».
Лучшим решением будет выполнить это заранее, до создания виртуальной машины в программе и следуя рекомендациям из статьи:
Подробнее: Устанавливаем пакет расширений Extension Pack в VirtualBox

VMware Workstation Player
Предлагаемое известной на рынке софта для виртуализации компанией VMware профессиональное программное обеспечение – это ещё одно очень эффективное средство получения полнофункциональных виртуальных копий различных ОС на ПК с Windows 11. Далее продемонстрирована загрузка и установка Workstation Player – менее функционального, нежели Pro-версия программы от VMware, но зато бесплатного для некоммерческого использования варианта софта.
Скачать VMware Workstation Player с официального сайта
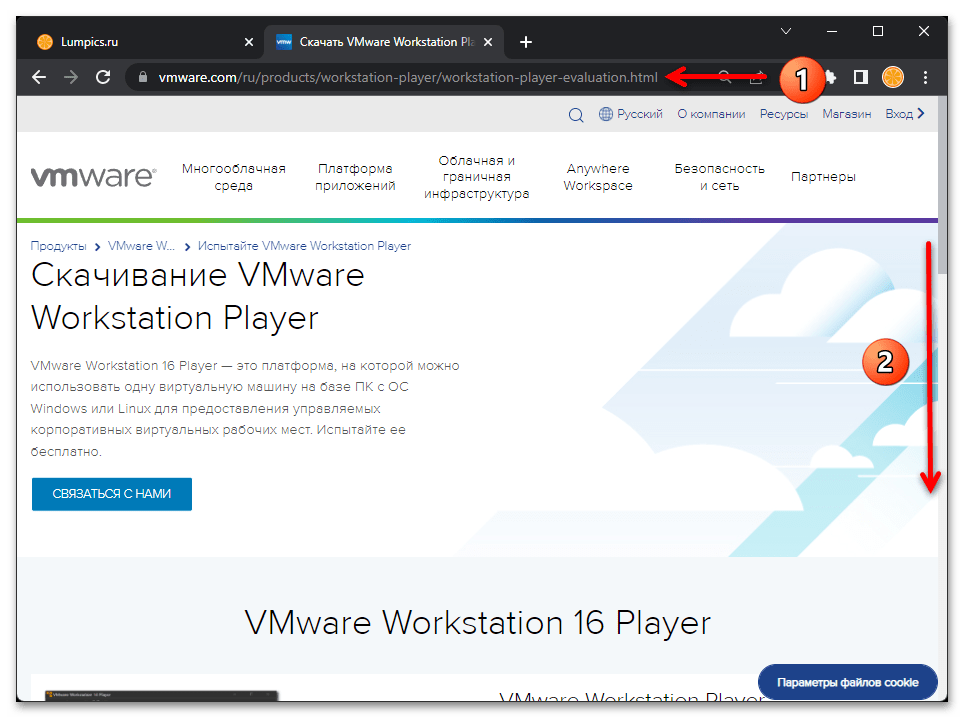
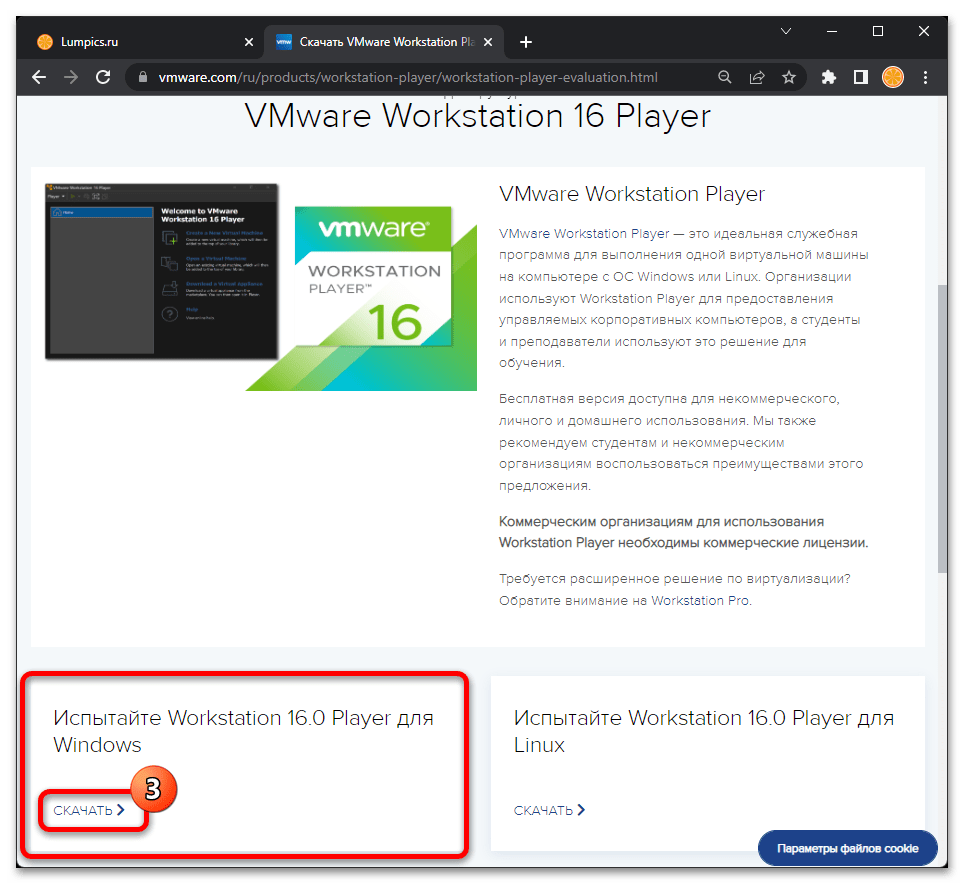
- По указанной выше ссылке переходим в раздел загрузок продуктов VMware на официальном сайте компании, пролистываем открывшуюся страницу до обнаружения блока «Испытайте Workstation 16.0 Player для Windows»,

кликаем в нём «СКАЧАТЬ».
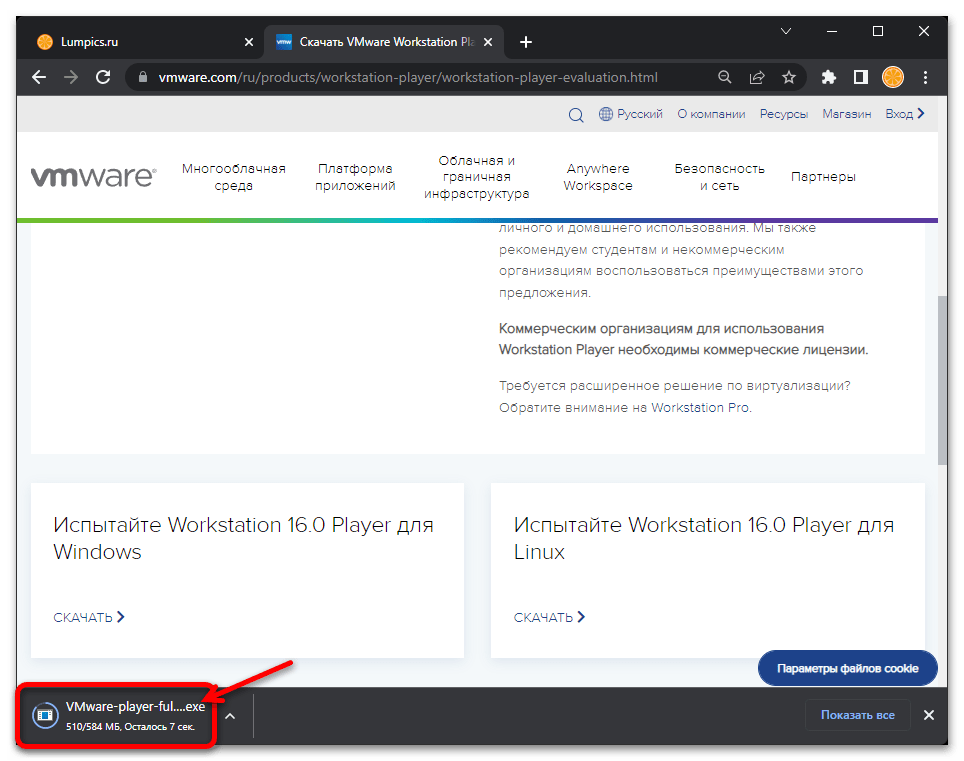
- Скачиваем на компьютер и затем запускаем инсталлятор средства для создания ВМ – файл VMware-player-full-16.X.Y.-XXXXXXXX.exe.
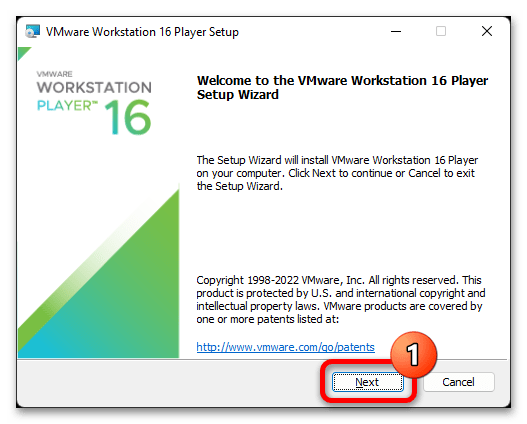
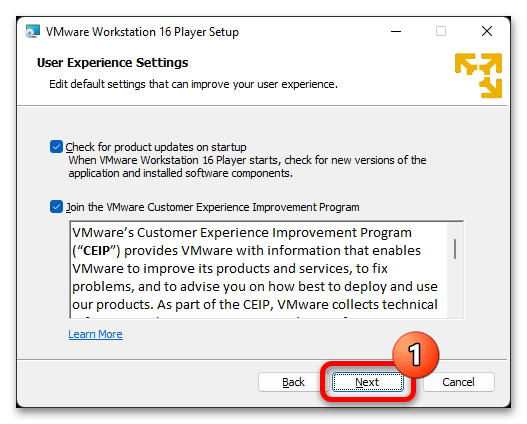
- Кликаем «Next» в первом окне программы установки VMware Player,

во втором аналогично, но предварительно установив галочку «I accept the terms in the License Agreement».
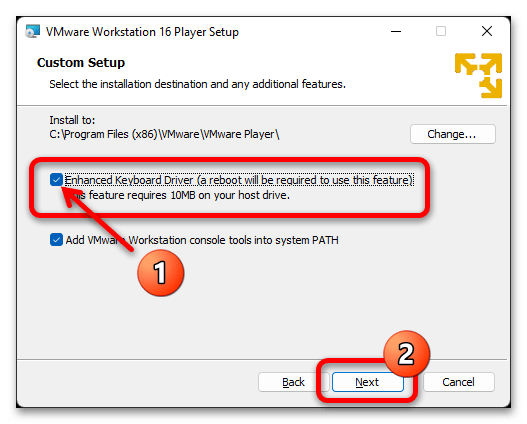
- В следующем окне при необходимости меняем путь инсталляции программы, оснащаем отметкой чекбокс «Enhanced Keyboard Driver», щёлкаем «Next».
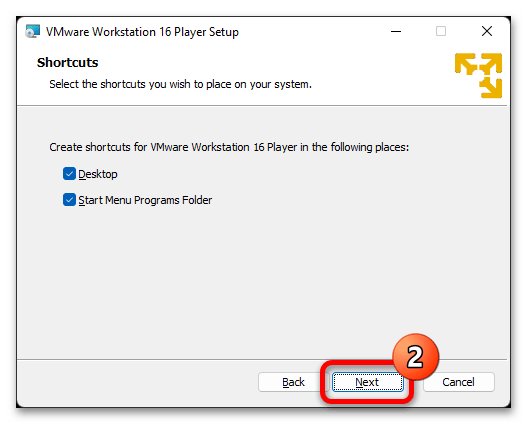
- Далее, ничего не меняя в окнах установщика, дважды
нажимаем «Next»
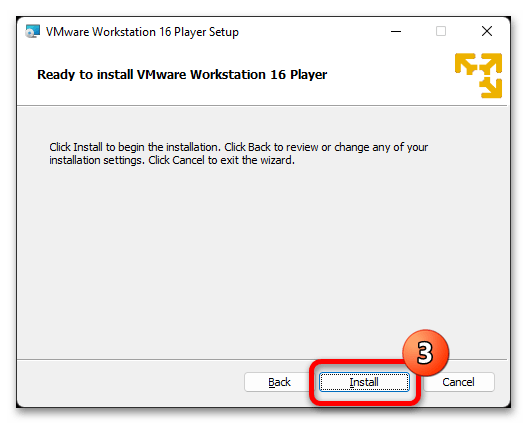
и затем, наконец, — «Install».
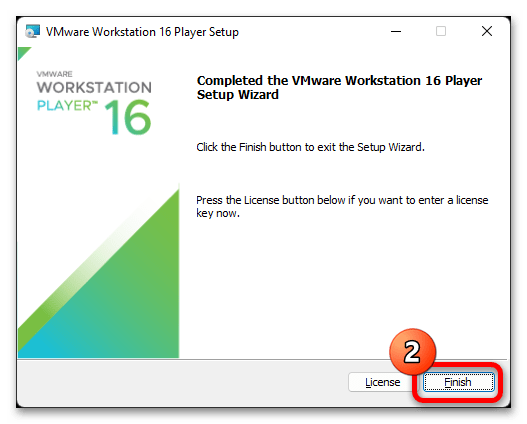
- Ожидаем окончания копирования файлов VMware Player и выполнения других необходимых для установки и функционирования виртуальной машины операций,
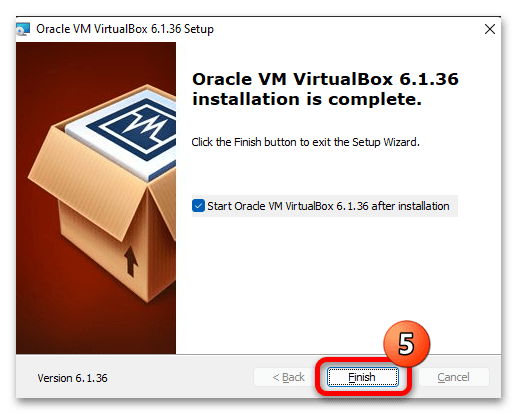
нажимаем «Finish» в завершающем инсталляцию программы окне.
- Щёлкаем «Yes» в появившемся окошке с предложением перезагрузить компьютер, дожидаемся завершения этой процедуры, после чего инструментарий VMware станет возможным открывать и использовать.
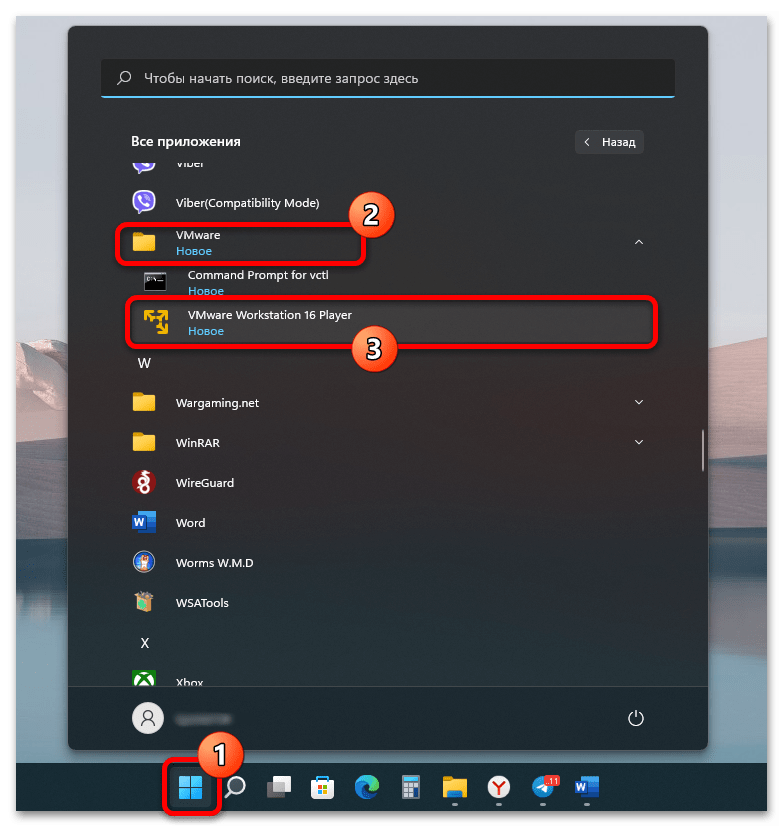
- Запуск Workstation Player от VMware после установки осуществим из меню «Пуск» Виндовс 11,

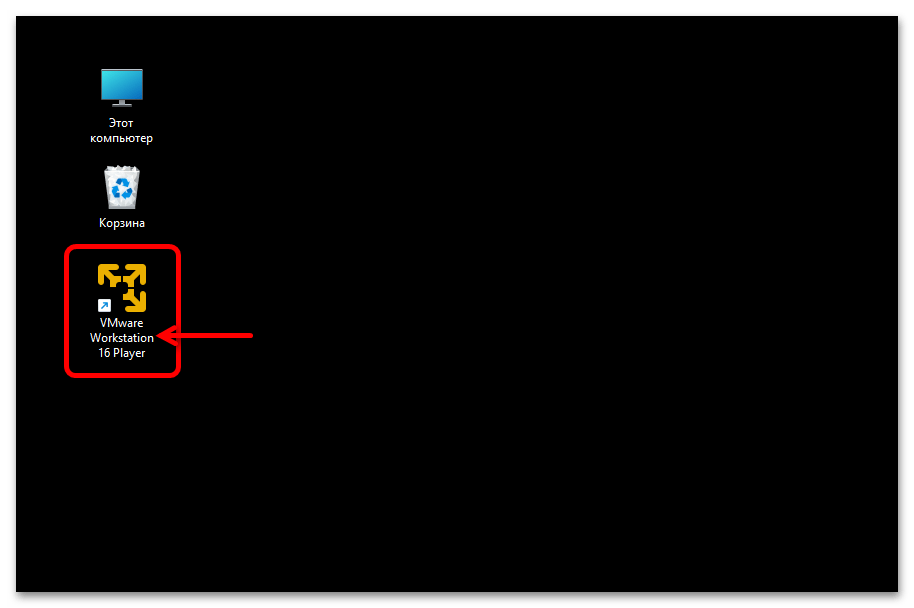
и также путём открытия ярлыка программы

на Рабочем столе ОС.


Наша группа в TelegramПолезные советы и помощь
Oracle’s VirtualBox is a free virtualization application you can install on Windows 11 (or 10), Mac, and Linux to create and use virtual machines to run other versions of Windows or other platforms alongside the main operating system without the need to set up dual-boot or configure another computer.
Usually, you would use this virtualization technology to test pre-releases of Windows 11 available through the Windows Insider Program, run other operating systems like Ubuntu or Kali Linux, or create another virtual machine to test software without affecting your current setup.
VirtualBox has been designed to run on Intel as well as AMD hardware. While it is meant to be an enterprise product, it’s also available for home use with support for many guests operating systems, including Windows 11, Windows 10, Windows 8, Windows 7, Vista, and older versions, Linux (2.4, 2.6, 3.x and 4.x), Solaris and OpenSolaris, OS/2, OpenBSD, and many more.
In this guide, you will learn the steps to install and configure the basic settings to get started with VirtualBox on Windows 11 and Windows 10.
- Install VirtualBox on Windows 11
- Configure VirtualBox on Windows 11
- Install VirtualBox extension pack on Windows 11
To install VirtualBox on Windows 11, use these steps:
-
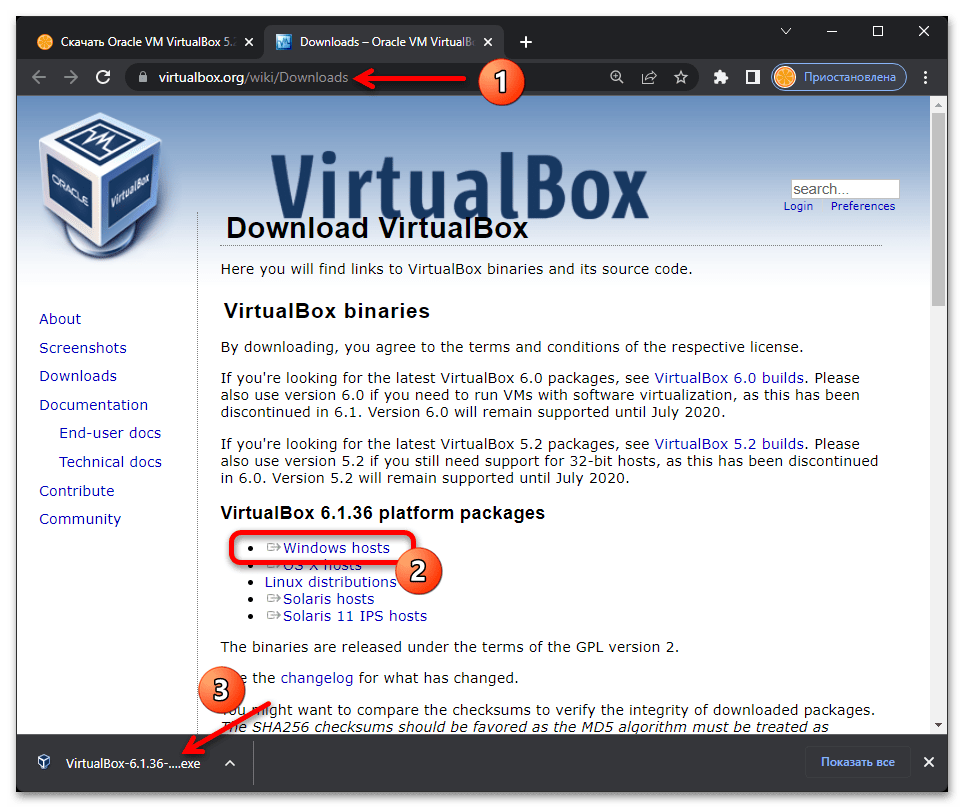
Open Oracle download page.
-
Under the “VirtualBox binaries” section, click the “Windows hosts” option and save the installers on the computer.

-
Double-click the VirtualBox-x.x.x-x-Win.exe file to launch the installer.
-
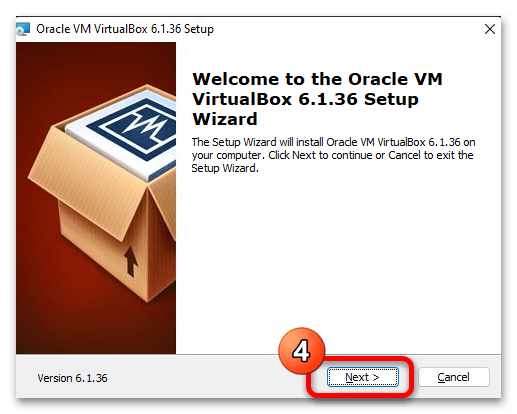
Click the Next button.
-
Click the Next button again.

Quick note: You don’t have to change the default setup settings unless you have specific requirements to install VirtualBox.
-
(Optional) Clear the options you do not want to use.
-
Click the Next button to continue with the VirtualBox installation.
-
Click the Yes button to confirm the virtual network adapter install warning on Windows 11.

-
Click the Yes button to install any missing dependencies (if applicable).
-
Click the Install button.
-
Click the Finish button.


Once you complete the steps, the software will finish the installation and launch automatically. You can also launch VirtualBox from the Start menu like any other application.
Installation with winget command
Alternatively, you can install VirtualBox using the Windows Package Manager (winget) in Command Prompt.
To install VirtualBox with the winget command, use these steps:
-
Open Start.
-
Search for Command Prompt, right-click the top result, and select the Run as administrator option.
-
(Optional) Type the following command to search for the name of the application and press Enter:
winget search virtualbox
Quick note: While the search command is not required, the install query must match the ID, name, or moniker of the package, which can change at any time. So, searching the application to execute the correct install command is a good practice.
-
Type the following command to install VirtualBox on Windows 11 (or 10) with winget and press Enter:
winget install Oracle.VirtualBox


After you complete the steps, the package manager will download and install the virtualization application without extra steps.
Configure VirtualBox on Windows 11
Although the default settings will suit more users, VirtualBox has many settings and features. In the steps below, we will outline some of the most basic ones everyone should consider changing when working with virtual machines.
To configure VirtualBox settings, use these steps:
-
Open VirtualBox.
-
Click the File menu and select the Preferences option.

-
Click on General.
-
In the Default Machine Folder option, specify the folder location to store the virtual machines on Windows 11. Usually, you want to use an external hard drive since using the primary drive can slow down the system.

-
Click on Update.
-
Select the Check for updates option.
-
Confirm the update settings and whether you want to use pre-releases of the software.
-
(Optional) Click on Display.
-
In the Maximum Guest Screen size option, specify the maximum screen resolution for virtual machines.
Quick tip: You can also select the “Hint” option to create a default maximum screen resolution. Usually, you want to leave the default settings and configure the resolution in the virtual machine settings.
-
In the Scale Factor option, select the scale virtual machines should use to make text and visual elements smaller or bigger.
-
Click the OK button.


After you complete the steps, the custom configuration will apply to the virtualization software.
Since the virtualization application configures NAT (Network Address Translation) automatically on each host you create, you do not need to configure the networking settings to get started. However, VirtualBox includes networking settings to create different host-only adapters and bridges, internal networks, and more.
Install VirtualBox extension pack on Windows 11
The extension pack is not a requirement, but it enables USB 2.0 and 3.0 devices, VirtualBox RDP, drive encryption, NVMe, and PXE boot for Intel Cards.
To install the extension pack for VirtualBox, use these steps:
-
Open Oracle download page.
-
Under the “VirtualBox Extension Pack” section, click the All supported platforms link to download the latest pack.

-
Open VirtualBox.
-
Click the File menu, select the Tools submenu, and choose the “Extension Pack Manager” option.

-
Click the Install button.
-
Select the “.vbox-extpack” file containing the extensions.
-
Click the Open button.
-
Click the Install button.

-
Scroll down the page.
-
Click the “I agree button to confirm the terms” option.
-
Click the OK button.
-
Click the OK button again.


Once you complete the steps, the Oracle VM VirtualBox Extension Pack will install on the device. Then you can proceed with the virtual machine creation and the Guest Additions installation.
If you want to remove it, select the package on the “Extensions” page, and click the Remove Selected Package button in the top-right.
Table of Contents
What is VirtualBox?
If you want to run virtual machines (VMs) on your Windows 11 system, Oracle VirtualBox is a free, open-source, and cross-platform virtualization solution. It enables users to run multiple virtual machines on a single host operating system efficiently. VirtualBox is compatible with a wide range of platforms, including Windows, Linux, and macOS. It’s primarily designed for developers and IT professionals who need flexible and powerful virtualization tools.
Whether you’re experimenting with new operating systems, running older applications, or isolating development environments, VirtualBox makes it easy. It allows you to develop, test, showcase, and deploy solutions across multiple platforms—all from one machine.
In this guide, we’ll walk you through the complete process of downloading and installing Oracle VirtualBox on Windows 11. We’ll also walk through how to install the Oracle VM VirtualBox Extension Pack to enhance its functionality.
Prerequisites:
- A windows 11 PC
- Administrator access
- A stable internet connection
Step 1: Download Oracle VirtualBox
Open your browser and navigate to the official VirtualBox download page.

.
Under “VirtualBox platform packages”, click on Windows hosts to download the installer.

.
Save the .exe file to a known location (e.g., your Downloads folder). The Windows installer for Oracle VM VirtualBox 7.1.8 will begin downloading and should complete within a few minutes.

.
Step 2: Run the VirtualBox Installer
After the VirtualBox setup file has finished downloading, launch it to begin the installation process. Right-click the installer and select ‘Run as administrator’ to proceed.

.
Click Next to start the installation process.

.
Accept the license Terms and click Next.

.
In the next setup window, choose to install all available features. These include VirtualBox Networking (Bridged Networking), USB Support, Host-Only Networking, and Python Support. Installing the full package requires approximately 227MB of disk space. Keep in mind that each guest operating system you create will require additional storage based on its individual disk usage.
By default, VirtualBox will be installed in the C:\Program Files\Oracle\VirtualBox directory. If you’re low on space in your C: drive, you can choose a different installation path. In this guide, we’ll continue with the default location. Click ‘Next’ to proceed.
In the following setup window, all options are enabled by default. Simply click ‘Next’ to continue with the installation.

.
At this stage, a warning will appear notifying you that VirtualBox’s network features may temporarily disrupt your internet connection. Click ‘Yes’ to proceed with the installation.

.
Click Yes to add missing dependencies and proceed with Installation.

.
Click Next to continue.

.
At this point, the setup wizard is ready to begin the custom installation of VirtualBox. If you wish to review any changes, you can go back; otherwise, click ‘Install’ to start the installation.

.
The setup wizard will install all required files in your default installation directory. During the process, you’ll be prompted to install USB device drivers. Click ‘Install’ to proceed.
Next, it will update the system registry values and finalize the installation process.
Step 3: Launch VirtualBox Manager
Once the installation is complete, a dialog will appear on your screen. Check the box labeled ‘Start Oracle VM VirtualBox 7.1.8 after installation’ to launch VirtualBox immediately after the setup finishes. Then, click ‘Finish’ to exit the setup wizard.

.
The Oracle VirtualBox Manager will now open on your Windows 11 system.
Step 4: Install the Extension Pack
To add extra features like USB 2.0/3.0 support, RDP, disk encryption, etc.:
Return to the VirtualBox Downloads page.
Under “VirtualBox Extension Pack”, click Accept and download to download the VirtualBox Extension Pack file.

.
Go back to the Oracle VirtualBox Manager console. Navigate into the ‘Extensions’ tab.

.
Click on Install (+) symbol.

.
Locate the downloaded extension pack file ‘Oracle_VM_VirtualBox_Extension_Pack-7.1.8.vbox-extpack’ and click ‘Open’.

.
A dialog will appear in the VirtualBox Manager. Click ‘Install’ to add the Oracle VM VirtualBox Extension Pack.

.
Accept the license Terms and click I Agree.

.
A confirmation message will appear on the screen indicating a successful installation. Click ‘OK’ to proceed.
The installed extension packs will appear in the ‘Extensions’ tab of VirtualBox.

.
At last, Oracle VirtualBox is ready to use. You can now create a new virtual machine by selecting the ‘New’ option.

.
Conclusion
In this guide, we showed how to install Oracle VM VirtualBox along with the matching version of the Extension Pack on Windows 11. With everything set up, you can now create virtual machines and install various guest operating systems using customized network configurations. Thank you!
Post Views: 48
What is a VirtualBox
Oracle VirtualBox is a free and open-source hosted hypervisor that allows you to run different operating systems virtually on your host OS, which in this case is Windows 11. That means you can install operating systems like Ubuntu or Windows 10 without affecting your main system.
If you’re new to VirtualBox, the first thing to do is get yourself set up. Here’s how you go about that.
Before You Begin
Before you get started using VirtualBox there is a little bit of housekeeping needed to make sure your system is ready for it.
First up, if you’re on Windows 11, then your system should be using a CPU up-to-date enough to have no troubles running virtual machines. However, there may well be settings in your BIOS that you need to make sure are enabled first. Each BIOS is different, so you’ll need to refer to documentation for your hardware if you need to know how to get into it and how to navigate it.
Settings could well be labelled clearly as relating to hardware virtualization. Or, you could be looking for Intel VT-x or AMD-V. In any case, it’s worth checking first before you get further along.
You also need to ensure you don’t have Microsoft’s Hyper-V set up on your PC already. If you do, you’ll need to get rid of it before dabbling with VirtualBox.
Also read: How to Convert Virtual Machines from VMware to VirtualBox?
Installation Steps
Download VirtualBox
VirtualBox isn’t available in the Microsoft Store, but there are two different locations to get it.
- Open your favorite browser and search for “VirtualBox.”
- Now, click on the first link from virtualbox.org to access the download page.
- Click the download button for the Windows host to download the installation package.

However, if you use the Windows Package Manager (winget) you can also get it here. Enter the following command into your PowerShell window:
winget install oracle.virtualbox
Winget will go and fetch the installer and instantaneously run it for you.
Run the Installer
Once the .exe file is downloaded, click on it to start the installation.
Follow the setup wizard:
Click Next on the first setup window.

Leave the default installation location unless you have a particular reason to change it.

In the custom setup window, keep all options checked to create desktop icons and shortcuts, then click Next.

Complete Installation
- Click Yes when prompted to allow the installation.
- Wait for the installation to finish. If you receive a warning about installing device software, click Install.
- Once completed, ensure the checkbox to launch VirtualBox is checked and click Finish.

How to Create a Virtual Machine
Open VirtualBox
- After installation, launch VirtualBox.

Create a New Virtual Machine
- Click on the New button or go to Machine > New.

- You will need the ISO file of the operating system you wish to install (e.g., Ubuntu or Windows 10). Download the ISO from the relevant website.
Also read: 3 Methods to Upgrading to Windows 11: A Step-by-Step Guide
Key Points to Remember
- VirtualBox allows virtualization of multiple operating systems on a single host.
- Always download the correct version for your host OS.
- Keep default settings during installation unless specific changes are needed.
We hope these notes helped you understand the process of installing and setting up VirtualBox on Windows 11 effectively. Happy learning…
In the rapidly evolving world of technology, virtualization has become an essential tool for both developers and regular users. One of the most popular virtualization software tools available today is Oracle VM VirtualBox. Designed to create and manage virtual machines, VirtualBox allows users to run multiple operating systems on a single physical machine, facilitating development, testing, and experimentation without interfering with the host OS. For Windows 11 users, getting started with Oracle VM VirtualBox can be a seamless experience with the right guidance. In this article, we will explore how to download, install, configure, and utilize Oracle VM VirtualBox on a Windows 11 system.
Why Use VirtualBox?
Before we delve into the installation process, you might wonder why VirtualBox stands out among other virtualization software. Here are a few compelling reasons:
-
Cross-Platform Compatibility: VirtualBox runs on various operating systems, including Windows, macOS, Linux, and Solaris. This makes it easier to switch between different environments.
-
Free and Open Source: Unlike many other virtualization solutions, VirtualBox is free to use, and being open-source means that you can modify the code if needed.
-
User-Friendly Interface: The interface is intuitive and simple, making it accessible even for those who may not have extensive technical experience.
-
Comprehensive Features: VirtualBox supports a broad range of operating systems and configurations, snapshot capabilities, and shared folders, which are beneficial for developers and testers.
-
Community Support: With a vast user base and community support, finding documentation, tutorials, and solutions for common issues is relatively easy.
Now, let’s proceed to the installation and setup process for VirtualBox on Windows 11.
System Requirements
Before installing VirtualBox, ensure that your Windows 11 system meets the minimum system requirements:
- Processor: Intel or AMD processor with virtualization support (Intel VT-x or AMD-V).
- RAM: At least 4 GB of physical RAM (8 GB or more recommended).
- Disk Space: Sufficient storage for VirtualBox and the virtual machines (VMs) you will create.
- Operating System: A 64-bit version of Windows 11.
Step 1: Downloading VirtualBox
-
Visit the Official Website: Navigate to the VirtualBox website.
-
Go to the Downloads Section: Click on the «Downloads» link visible on the homepage. You will see a list of platforms.
-
Select Windows Hosts: Choose the link for Windows hosts to download the VirtualBox installer specific for Windows.
-
Download the Extension Pack: Consider downloading the VirtualBox Extension Pack, which adds additional features such as USB 2.0 and USB 3.0 support and Remote Desktop Protocol (RDP). Find it on the same download page.
Step 2: Installing VirtualBox
-
Run the Installer: Once the download is complete, locate the downloaded file (usually in the Downloads folder) and double-click to run the installer.
-
User Account Control: If prompted by User Account Control (UAC), select «Yes» to allow the installation to proceed.
-
Installation Wizard: The VirtualBox installation wizard will pop up. Click “Next” to start the installation process.
-
Choose Installation Directory: You can accept the default destination folder or select a new one. Click “Next” to continue.
-
Select Components: Ensure that all components are checked, including the “VirtualBox Networking Features” this is essential for networking virtual machines. Click “Next”.
-
Select Start Menu Folder: Choose the Start Menu folder (default is fine for most users) and click “Next”.
-
Network Interface Warning: A warning may appear indicating that the VirtualBox network interface will be installed, which may temporarily disrupt your internet connection. Click “Yes” to proceed.
-
Ready to Install: After reviewing your options, click “Install” to begin the installation process.
-
Complete Installation: Once installation is complete, you may choose to start VirtualBox immediately by keeping the relevant box checked. Click “Finish”.
Step 3: Setting Up VirtualBox
After installing VirtualBox, you’re ready to set it up for the first time.
-
Open VirtualBox: Double-click on the VirtualBox icon on your desktop or find it via the Start Menu.
-
User Interface Overview: The interface comprises several sections, including the menu bar, toolbar, and machine pane. You will use these elements to create and manage your virtual machines.
-
Check VirtualBox Version: For each new feature, it’s good to check if you’re using the latest version. Go to Help -> About VirtualBox.
Step 4: Creating a New Virtual Machine
Here’s how to create a new virtual machine in VirtualBox:
-
Click on «New»: In the VirtualBox interface, click the “New” button to start creating a new virtual machine.
-
Name and Operating System:
- Name: Give your VM a name.
- Type: Choose the type of OS you want to install (e.g., Windows, Linux).
- Version: Select the version you wish to run.
-
Memory Size: Adjust the RAM allocation. A minimum of 2 GB is recommended for most operating systems, but allocating more can improve performance.
-
Hard Disk: Choose whether to create a new virtual hard disk, use an existing one, or not create any. Generally, you should select “Create a virtual hard disk now.”
-
Hard Disk File Type: The default VDI (VirtualBox Disk Image) is typically fine. Click “Next”.
-
Storage on Physical Hard Disk: You can choose between dynamically allocated or fixed size. Dynamically allocated will take up space on your hard drive only as you fill the disk. Click “Next”.
-
File Location and Size: Choose a location for your virtual hard disk file and allocate the disk size. A minimum of 20 GB is recommended for most modern operating systems.
-
Summary: Review your settings, and click “Create” to finish setting up your VM.
Step 5: Configuring Your Virtual Machine
Once your virtual machine is created, you can configure several settings to optimize its performance:
-
Select Your VM: Click on the name of your VM in the left pane.
-
Settings: Click on the “Settings” button.
-
System Settings:
- Motherboard: Adjust the boot order if necessary. You can enable/disable hardware virtualization under the “Acceleration” tab.
- Processor: Assign multiple CPUs if your host has several cores to improve performance.
-
Display Settings: Allocate video memory and enable 3D acceleration if supported by your graphics card.
-
Storage:
- You can attach ISO files to the virtual CD/DVD drive. This will be necessary when installing the operating system. Click on “Empty” under the Controller: IDE, then on the right side, click the CD icon and select “Choose a disk file…” to upload an ISO.
-
Network Settings: For internet access in your VM, navigate to the «Network» section and enable Adapter 1. You can set it to «NAT» for NAT network settings, which allows your VM to access the internet through your host.
-
Shared Folders: You can configure shared folders for file transfer between your host and VM. Navigate to the “Shared Folders” section, click the add icon, and specify a folder.
-
Input Settings: You can adjust input settings to enable mouse integration or keep the mouse captured until released.
Step 6: Installing the Operating System in VirtualBox
-
Start Your VM: Click the “Start” button to launch the VM.
-
Select Installation Media: If you haven’t set an ISO file as a bootable disk in the storage settings, you will be prompted to do so now.
-
Follow the Installation Process: The OS installation process will begin. Follow the on-screen instructions to complete the installation just as you would on a physical computer.
Step 7: Post-Installation Configuration
Once you have successfully installed the operating system, there are several configurations and tools to enhance your experience:
-
Install Guest Additions:
- After booting into your virtual machine, navigate to the menu bar and select “Devices” → “Insert Guest Additions CD image…”.
- Follow the install prompts in the virtual machine to improve performance and enable features like shared clipboard, drag-and-drop, and better video support.
-
Networking: If you configured your network settings correctly, your VM should have internet access. Verify by opening a web browser.
-
Updating the OS: Make sure to update your guest operating system to ensure you have the latest features and security patches.
Step 8: Managing Virtual Machines
You will likely create multiple VMs for different testing environments or scenarios. Here’s how to manage them effectively:
-
Snapshots: Use snapshots to save the current state of your VM at any point. This allows you to revert to a previous state if needed by selecting the VM and clicking on the “Snapshots” button.
-
Cloning: You can clone a VM to create an exact copy of it. Right-click on the VM, select “Clone”, and follow the wizard to create a clone.
-
Deletion: If you no longer need a VM, you can easily delete it. Right-click the VM in the left pane and select “Remove”. You can choose to delete the VM files or keep them.
-
Exporting and Importing: VirtualBox allows you to export VMs to an OVF format, which can be imported later or on another system. Go to “File” → “Export Appliance” to export.
-
Configuration Management:
- Regularly review and adjust settings for optimal performance. Consider disk space allocations, network settings, and resources as necessary.
Conclusion
Oracle VM VirtualBox is an incredibly versatile tool that opens the door to a wide array of possibilities in virtualization, testing, and development for Windows 11 users. By following the guide outlined in this article, you have not only learned how to install VirtualBox but also how to configure and manage your virtual machines effectively.
With practice and exploration, you will uncover more features and capabilities that VirtualBox offers. Whether you are testing new applications, creating isolated environments, or simply wanting to experience a different OS, VirtualBox provides the flexibility and functionality needed to enhance your productivity.
Remember, practicing good virtualization habits—like regularly updating your systems, maintaining backups, and monitoring resource usage—will ensure that your experience with VirtualBox remains smooth and efficient. Embrace the world of virtualization, and let your creativity and projects thrive!