В статье расскажем, как установить службу Internet Information Services (IIS) на серверы с операционной системой Windows Server 2019. Инструкция подойдет и для ОС Windows Server 2016.
IIS (Internet Information Services) — набор сервисов от компании Microsoft для работы веб-сервера и других интернет служб. IIS устанавливается на сервер и работает с протоколами HTTP/HTTPS, POP3, SMTP, FTP, NNTP.
Чтобы приступить к установке, зайдите на сервер с правами администратора.
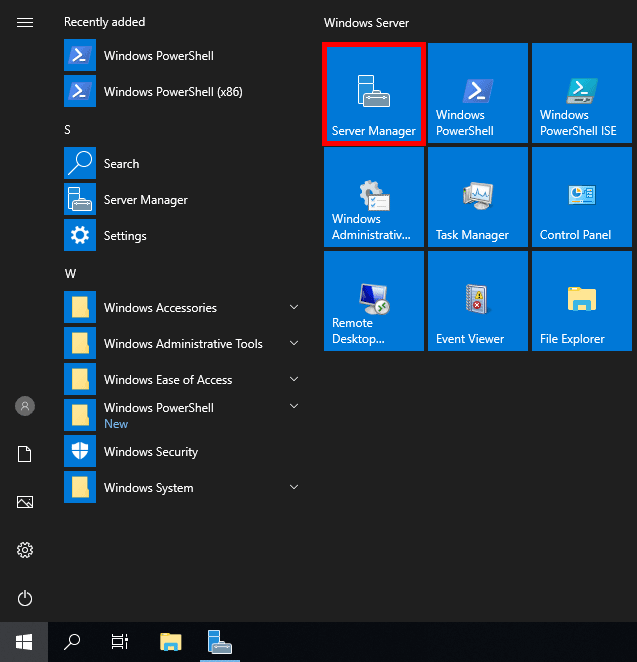
«Диспетчер серверов» (Server Manager) будет уже запущен (запускается автоматически при старте ОС) или запустите его вручную из меню «Пуск».
То же самое можно сделать через панель «Локальный сервер» (Local Server) — «Управление» (Manage).

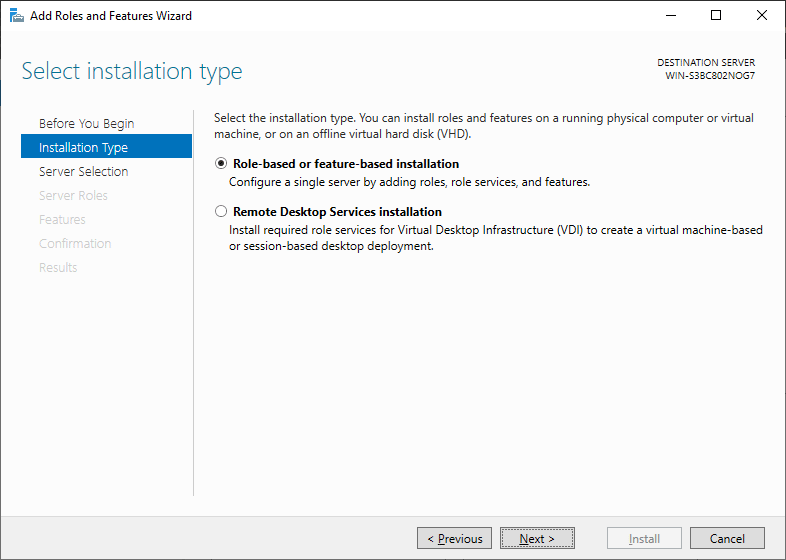
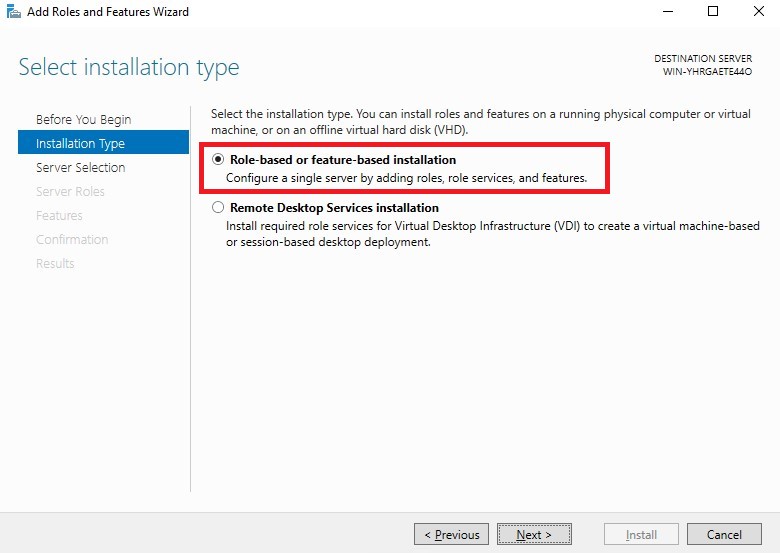
Выберите тип установки «Установка ролей или компонентов» (Role-based or feature-based installation) и нажмите «Далее» (Next).
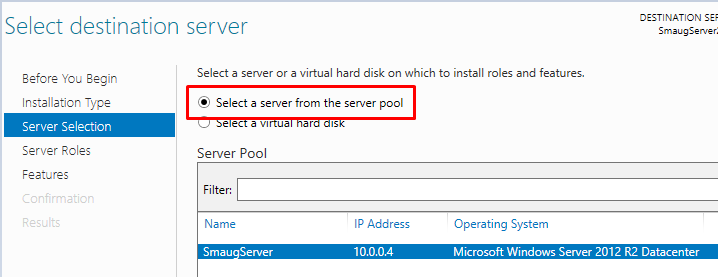
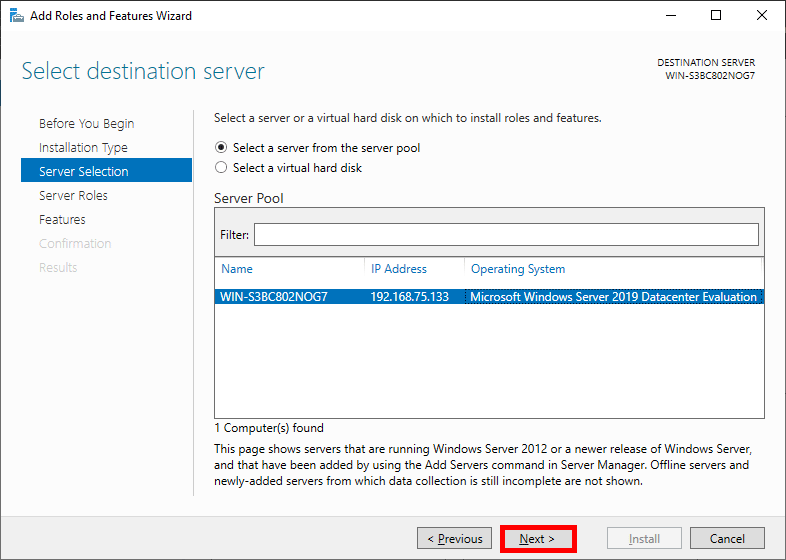
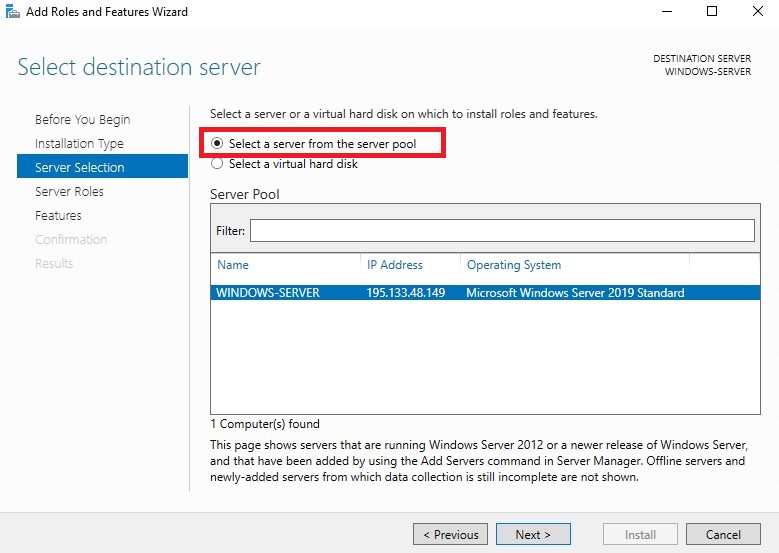
Выберите сервер из пула серверов (Select a server from the server pool) и отметьте имя вашего сервера. Нажмите «Далее» (Next).
Обратите внимание, что служба FTP по умолчанию не устанавливается. Если в дальнейшем вам понадобятся новые роли, то вы сможете их добавить без переустановки IIS.
При необходимости отметьте «Автоматический перезапуск конечного сервера» (Restart the destination server automatically if required), если пункт не выбран, то перезагрузите сервер самостоятельно после окончания установки.
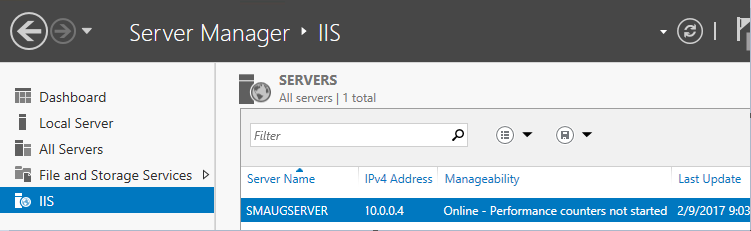
Запустите «Диспетчер серверов» (Server Manager) из меню «Пуск» (Start).
В списке содержимого появится установленная служба IIS.
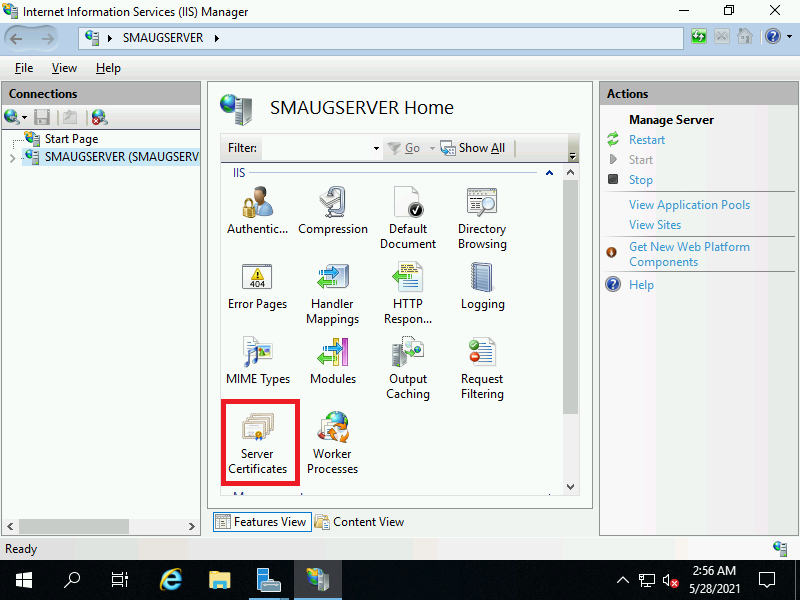
Панель «Просмотр возможностей» (Features View)
Возможности, доступные вам в службе IIS, перечислены на панели Просмотр возможностей (Features View). Отсюда управляйте возможностями IIS, настраивайте и перезапускайте. Например, настройте SSL-сертификаты.
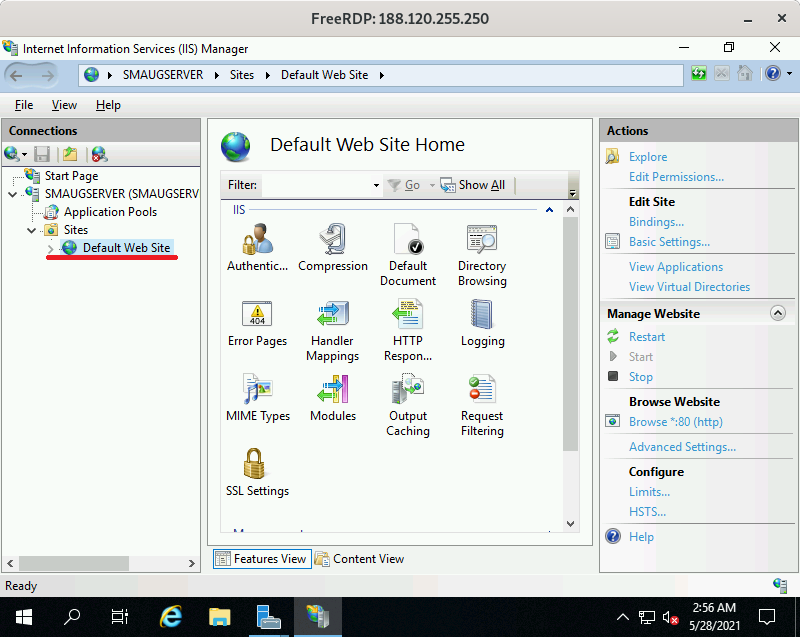
Сразу после установки IIS по умолчанию создается пустой сайт Default Web Site.
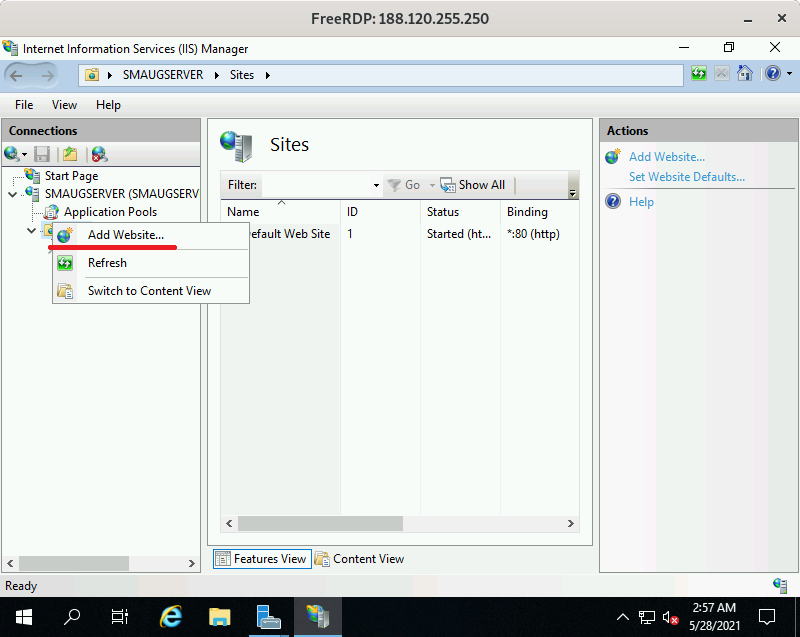
Добавьте сайты, которые будут обслуживаться этим веб-сервером. Для этого в контекстном меню пункта «Сайты» (Sites) на вкладке «Подключения» (Connections) выберите «Добавить сайт» (Add Website).
Заполните поля формы данными о сайте и нажмите ОК.
В списке сайтов IIS появится только что добавленный.
Этот материал был полезен?
В данной статье мы установим и проведем базовые настройки веб-сервера IIS на сервере с операционной системой Windows Server 2012-2019.
1. Установим роль веб-сервера IIS.
Пуск (Start) — Диспетчер серверов (Server Manager)
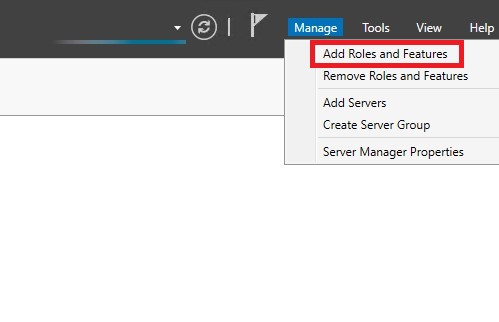
Далее Управление (Manage) — Добавить Роли и Компоненты (Add Roles and Features)
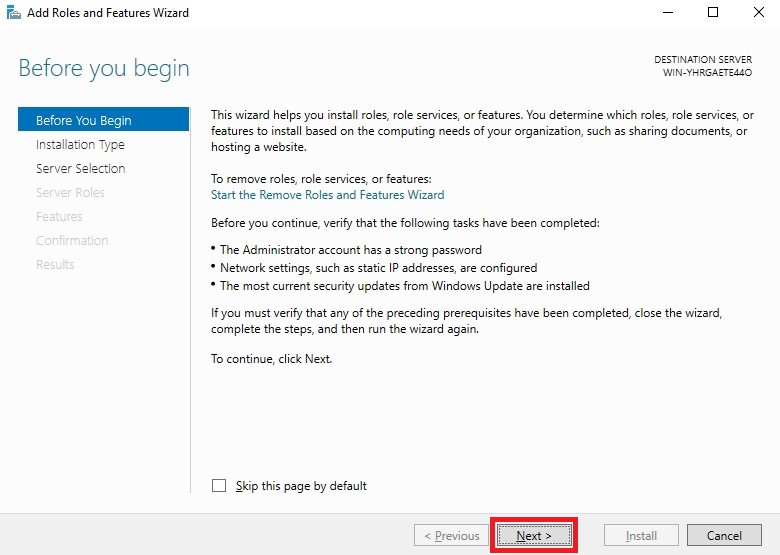
Жмем Далее (Next)
Оставляем выбранную опцию Установка ролей или компонентов (Role-based or feature-based installation) и Далее (Next)
Выбираем локальный сервер, жмем Далее (Next)
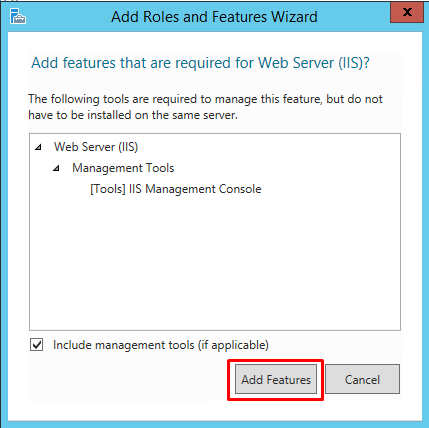
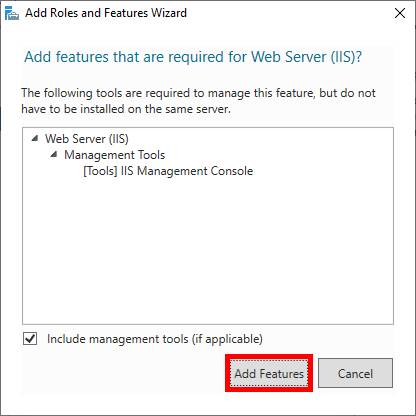
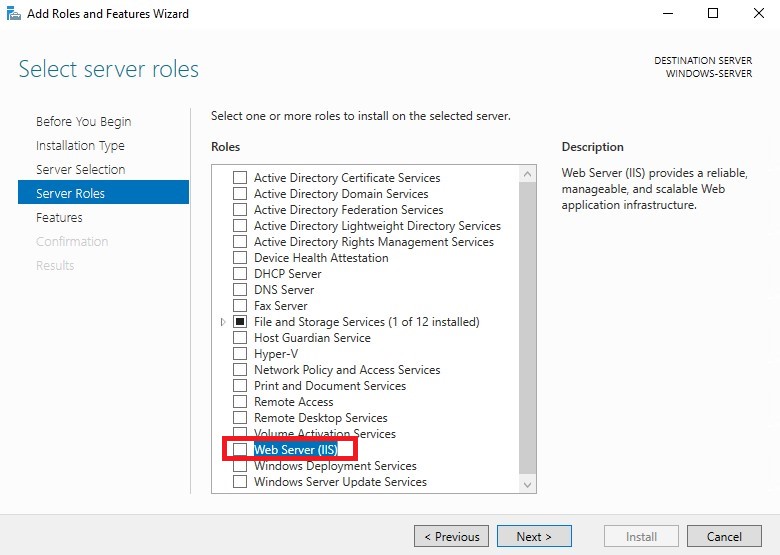
Выбираем Веб сервер Web Server (IIS), жмем Добавить Компоненты (Add Features) и Далее (Next)
В следующем окне Далее (Next)
Далее (Next)
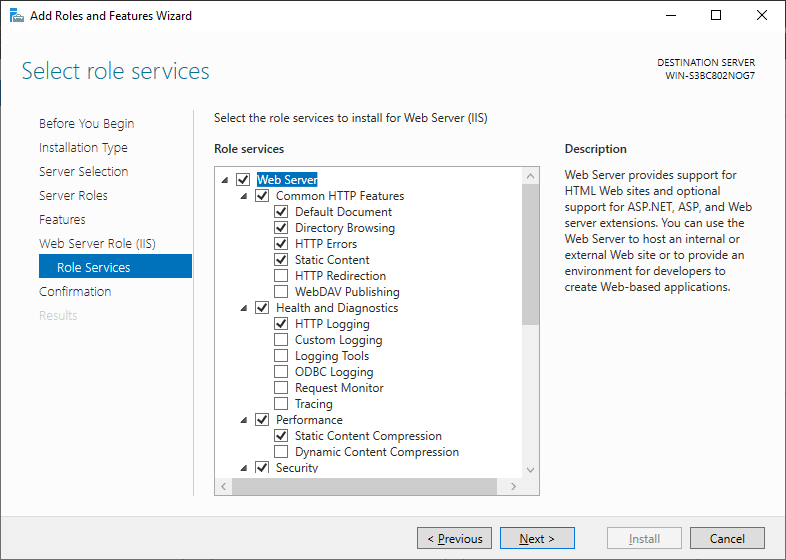
Выбираем для установки CGI (в разделе Application Development). Также рекомендую дополнительно установить FTP сервер, что позволит закачивать файлы на сервер с помощью FTP клиента (например FileZilla)
Далее (Next), ставим галочку для автоматического перезапуска сервера после установки роли и кнопку Install
После перезапуска сервера, IIS запустится автоматически. Но если необходимо перезапустить, достаточно выполнить команду (Пуск — Выполнить)
iisreset
или запустить
iisreset /start
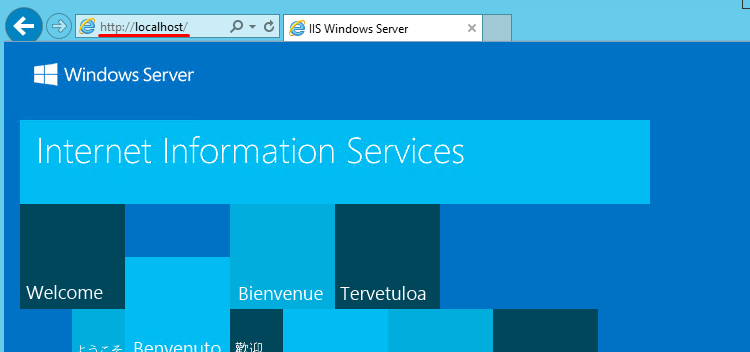
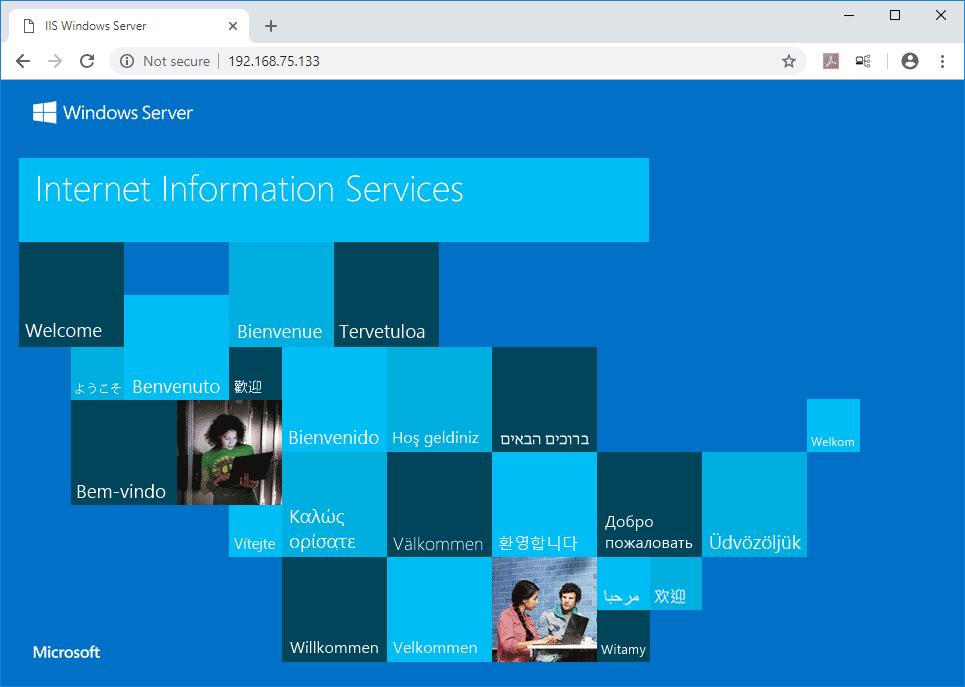
Для проверки работы веб-сервера, откройте в браузере страницу http://localhost/
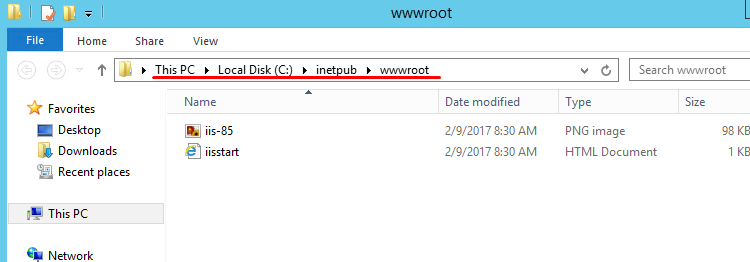
Корневая папка сайта по умолчанию размещена по пути
C:\inetpub\wwwroot
Но часто бывает, что на сервере необходимо разместить несколько сайтов. По этой причине, создадим тестовый сайт со своей корневой папкой.
2. Создание сайта в IIS
Вначале создадим корневую папку сайта на диске сервера. Для примера, будем использовать имя сайта domain.name
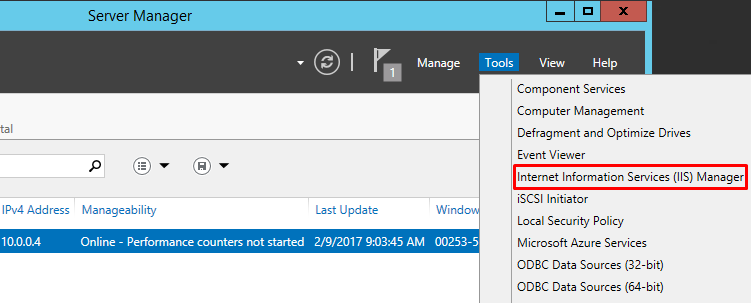
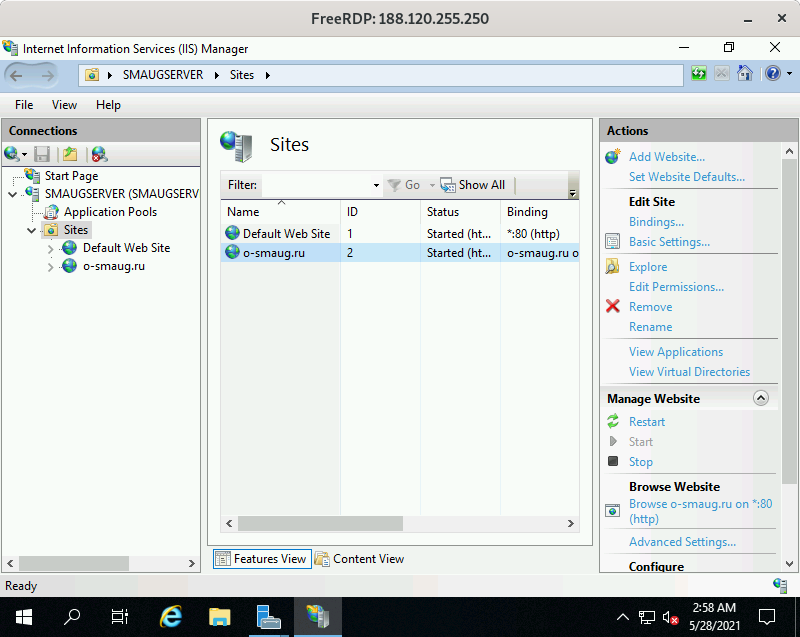
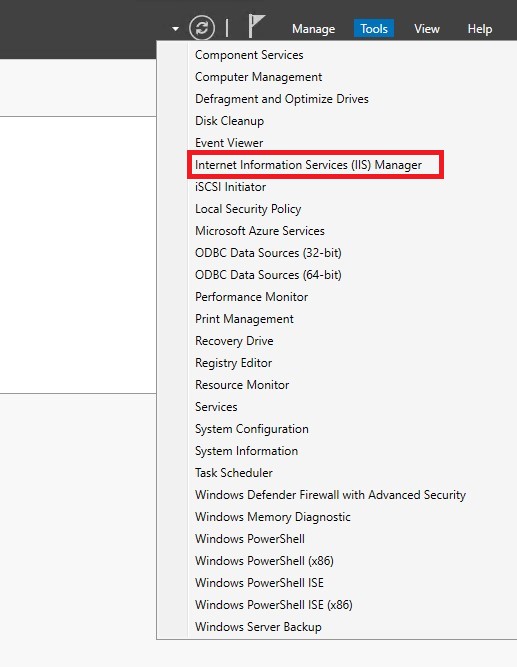
Далее в Диспетчере серверов (Server Manager) — в меню Средства (Tools) — откроем Диспетчер служб IIS (Inetnet Information Services (IIS) Manager)
В окне Диспетчера служб IIS необходимо открыть меню сервера — Сайты (Sites) — правой кнопкой мышки — Добавить веб-сайт… (Add Website…)
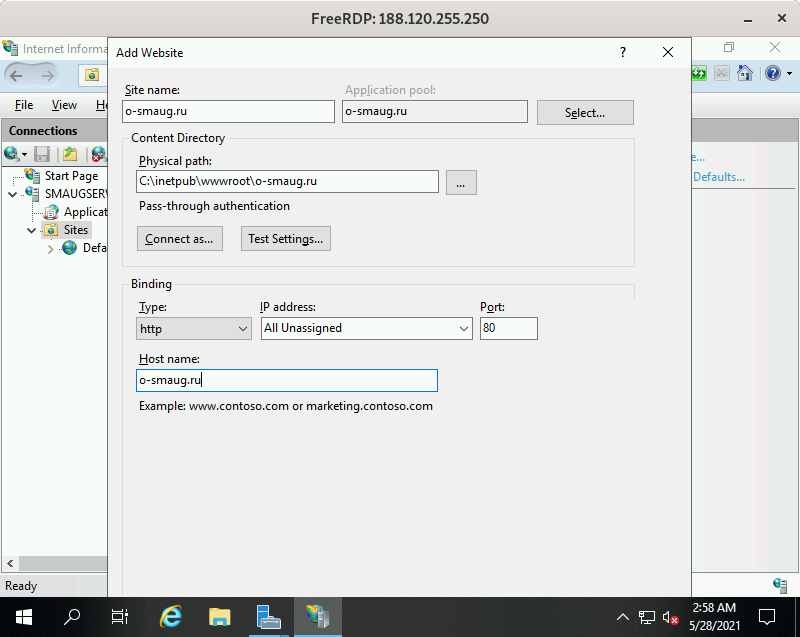
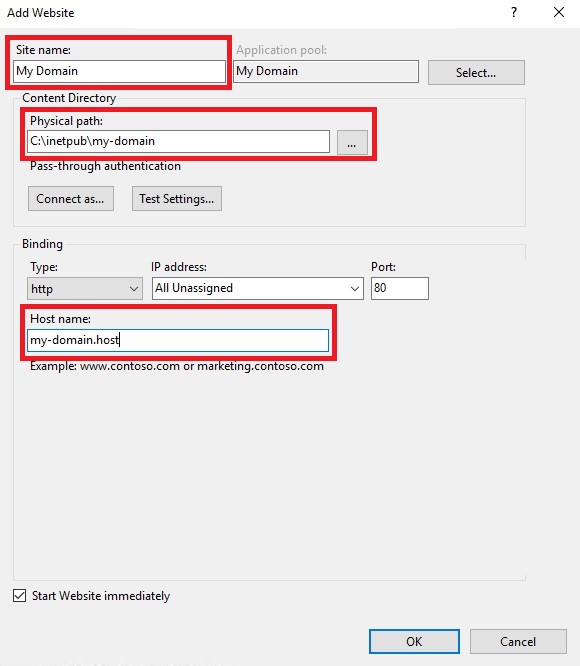
Заполним указанные на скриншоте обязательные поля
Имя сайта (Site name) — произвольное название сайта.
Физический путь (Physical path) — путь к корневой папке сайта.
Тип (Type) — тип протоколв (http или https). Для начальнйо настройки сайта будет достаточно http протокола.
Имя узла (Host name) — доменное имя сайта.
Жмем кнопку Ок и видим, что в списке сайтов, кроме сайта по умолчанию, добавился наш, только что созданный сайт.
Чтобы проверить работу сайта, создадим в его корневой директории файл с именем index.html и скопируйте в этот файл такое содержимое
<html>
<body>
Тело страницы: Test HTML page
</body>
</html>
Примечание: файл index.html можно открыть программой Блокнот или другим текстовым редактором.
Откройте в браузере страницу своего сайта (в нашем примере это domain.name) и увидите такую страницу.
3. Интеграция IIS и PHP
Перед выполнением этого пункта, необходимо установить на сервере PHP. Для этого воспользуйтесь статьей: Как установить и настроить PHP на Windows Server
Чтобы веб-сервер мог успешно обрабатывать php запросы, необходимо выполнить интеграцию IIS и PHP. Для этого в Модуле IIS перейдите в меню нашего сайта и откройте Отображение обработчика (Handler Mappings)
в списке Действий (Action) которого есть пункт меню «Добавить модульный обработчик» (Add Module Mapping). Заполните форму как на скриншоте и нажмите кнопку «Запрос ограничения» (Request Restrictions…)
Выберите вариант «Файл или папка» (File or folder)
Нажмите ОК, потом снова ОК на форме модульного обработчика и подтвердите создание действия
В списке обработчиков должен появиться только что созданный:
Теперь добавим настройку на уровне веб-сервера, чтобы файл index.php открывался в качестве страницы по умолчанию.
Для этого в меню сервера (а не сайта) открываем «Документ по умолчанию» (Default document),
выбираем в списке действий «Добавить» (Add), заполняем поле Имя (Name) значением index.php и жмем ОК
Полученный результат
Для применения всех настроек необходимо перезапустить веб сервер. Для этого остановим его
и запустим
Интеграция веб-сервера с PHP настроена.
Давайте проверим работу PHP скрипта. Для этого в корневой папке сайта создадим файл с именем index.php, откроем его в блокноте и добавим такое содержимое
<?php
phpinfo();
?>
Сохраним файл и обновим в браузере сайт «http://domain.name/»
Должна отобразиться такая страница
Это значит, что PHP скрипты успешно обрабатываются веб-сервером.
В данной статье мы научились устанавливать на Windows Server 2012-2019 веб-сервер IIS, выполнять первоначальные настройки, интегрировать с установленным ранее PHP и создавать отдельный сайт в IIS Manager.
Configuring the Internet Information Services (IIS) on Windows Server 2019 is a crucial step in setting up your web server. IIS is a powerful and flexible web server software that can host websites and web applications on Windows servers. Whether you are a system administrator or a web developer, understanding how to configure IIS on Windows Server 2019 is essential for optimizing your server’s performance and ensuring the smooth functioning of your web applications.
In this blog post, we will explore the necessary steps to configure IIS on Windows Server 2019. We will cover various methods and provide detailed instructions for each, enabling you to set up and customize IIS according to your specific requirements. Whether you are a beginner or an experienced user, this guide will help you navigate through the complexities of configuring IIS and make the process a seamless one.
Video Tutorial:
Configuring IIS on Windows Server 2019 is essential for hosting websites and web applications. Here are some reasons why you need to configure IIS:
1. Hosting Websites: By configuring IIS, you can host multiple websites on a single server, enabling efficient resource utilization and cost savings. IIS provides robust security features and scalability options, making it an ideal choice for hosting websites.
2. Web Application Support: IIS offers excellent support for various web technologies, including ASP.NET, PHP, and Node.js. By configuring IIS, you can deploy and manage your web applications efficiently, ensuring optimal performance and reliability.
3. Load Balancing: IIS provides load balancing capabilities that distribute incoming network traffic across multiple servers. By configuring load balancing, you can enhance the scalability and availability of your web applications, ensuring uninterrupted service for your users.
4. Security Features: IIS offers several security features, including request filtering, SSL certificate management, and IP address restrictions. By configuring these security settings, you can protect your web applications from malicious attacks and unauthorized access.
Now that we understand the importance of configuring IIS on Windows Server 2019, let’s dive into the various methods to achieve this configuration.
Method 1: How to Configure IIS Using the GUI
Configuring IIS using the graphical user interface (GUI) is the most straightforward and user-friendly method. Follow the steps below to configure IIS using the GUI:
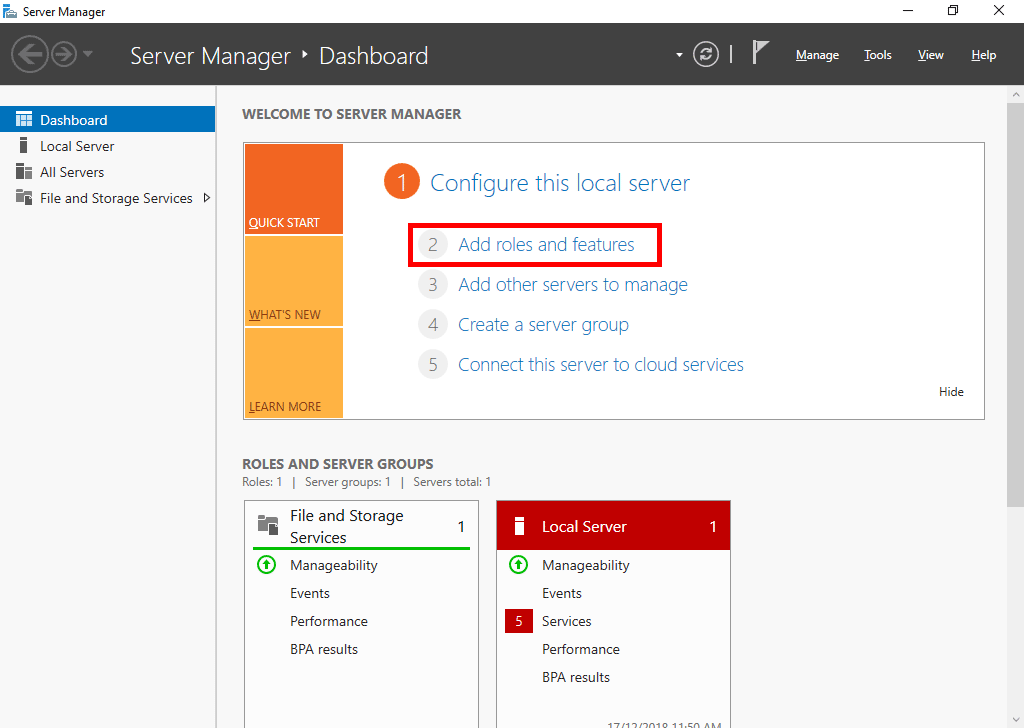
1. Open the Server Manager on your Windows Server 2019. You can find the Server Manager icon on your taskbar or by searching for it in the Start menu.
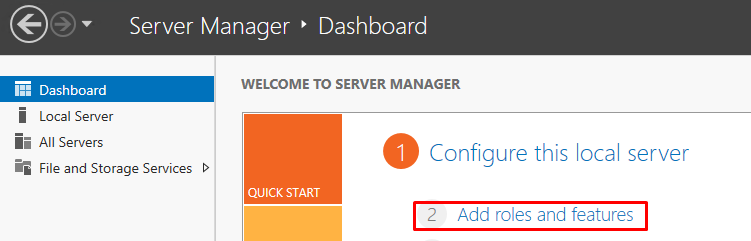
2. In the Server Manager window, click on «Add roles and features.» This will open the Add Roles and Features Wizard.
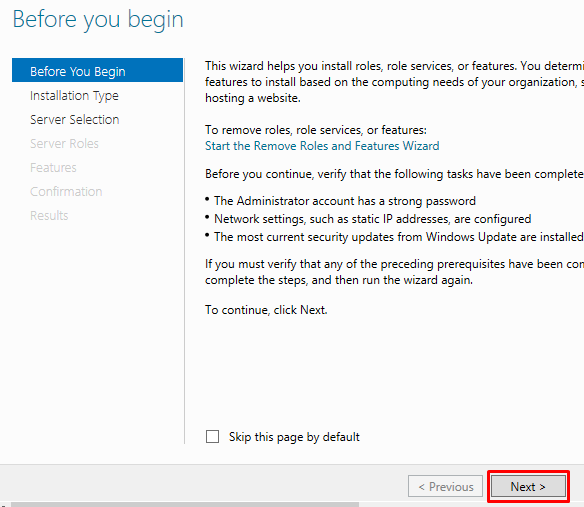
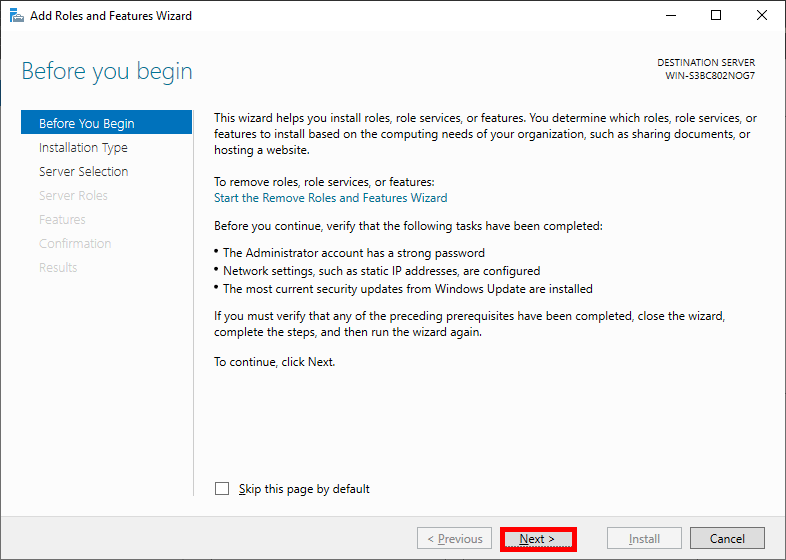
3. In the wizard, click on «Next» to proceed.
4. Select the installation type as «Role-based or feature-based installation» and click «Next.«
5. Select your server from the server pool and click «Next.«
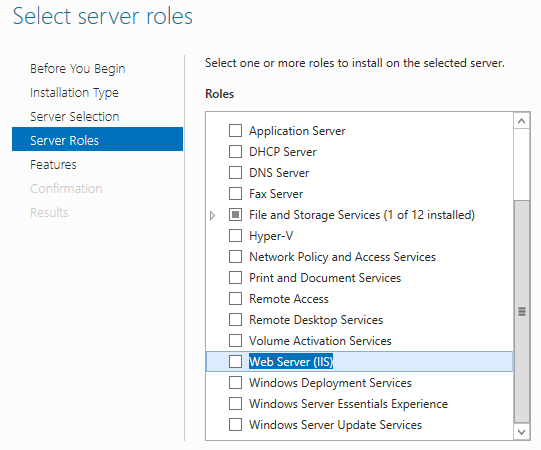
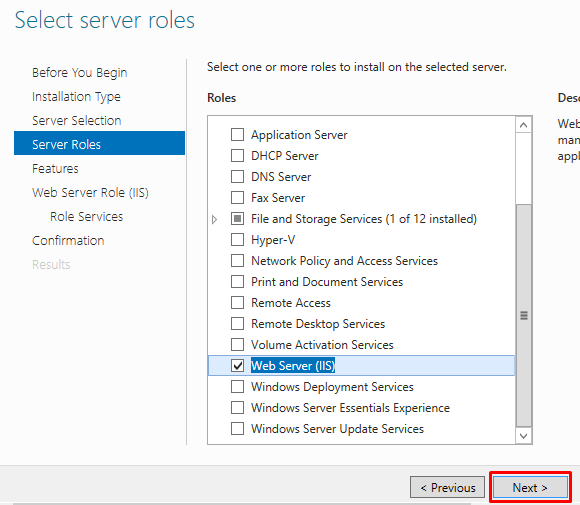
6. Scroll down and find the «Web Server (IIS)» role in the list. Check the box next to it and click «Next.«
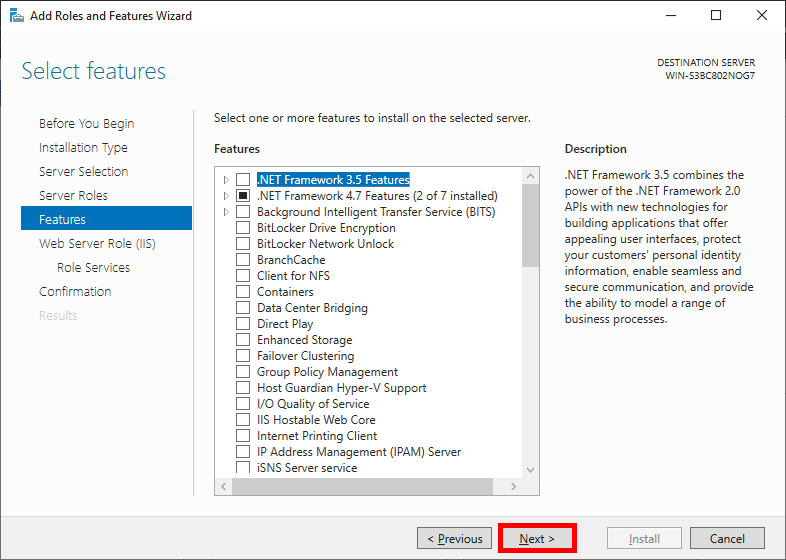
7. You can select additional features as per your requirements. Once done, click «Next.«
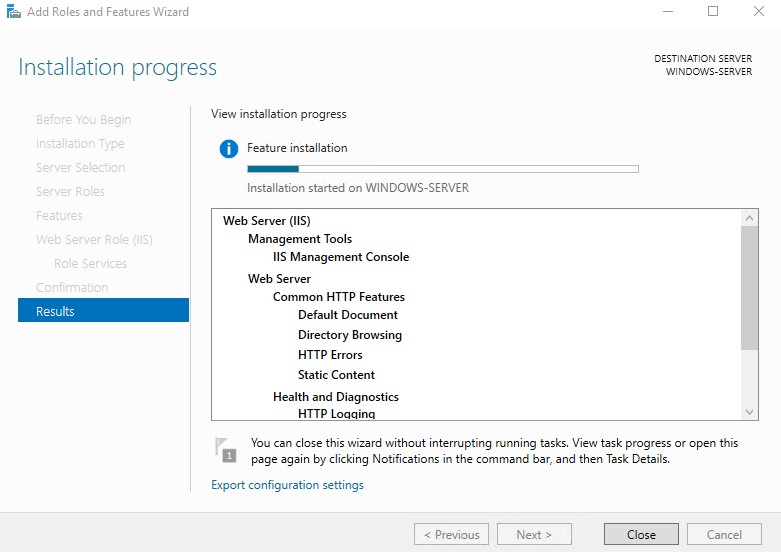
8. On the next screen, review the role and features you selected. Click «Install» to begin the installation process.
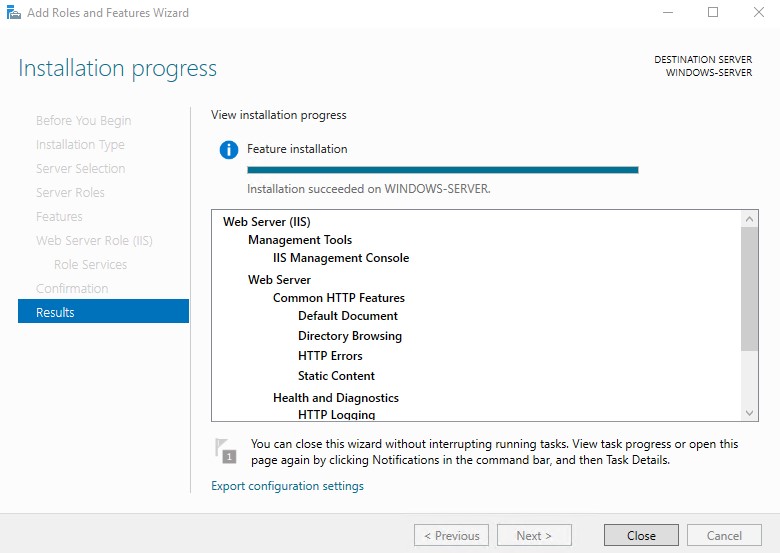
9. Wait for the installation to complete. Once done, click «Close.«
Congratulations! You have successfully configured IIS using the GUI on Windows Server 2019. You can now start managing your websites and web applications through the IIS Manager.
Pros:
1. Easy and user-friendly configuration process.
2. Provides a graphical interface for managing websites and web applications.
3. Supports a wide range of features and customization options.
Cons:
1. May require additional steps for advanced configurations.
2. The GUI interface may not be suitable for remote or automated installations.
3. Increased resource consumption compared to command-line configurations.
Method 2: How to Configure IIS via PowerShell
Configuring IIS via PowerShell provides more flexibility and allows for automation and scripting capabilities. Follow the steps below to configure IIS using PowerShell:
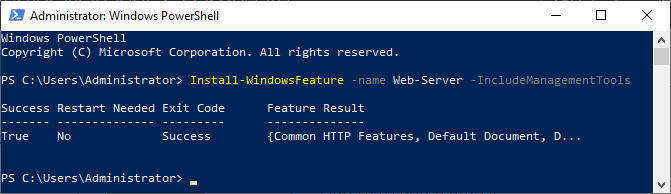
1. Open PowerShell with administrative privileges. You can do this by right-clicking on the Start button and selecting «Windows PowerShell (Admin).«
2. Type the following command to install the required IIS module:
«`powershell
Install-WindowsFeature -Name Web-Server -IncludeManagementTools
«`
3. Press Enter to execute the command. This will install the necessary components for IIS on your Windows Server 2019.
4. Once the installation is complete, you can use additional PowerShell commands to configure various aspects of IIS, such as creating websites, managing application pools, and setting up SSL certificates.
Pros:
1. Provides automation and scripting capabilities for efficient configuration.
2. Allows for bulk operations and easy management of multiple servers.
3. Provides detailed reporting and error-handling capabilities.
Cons:
1. Requires familiarity with PowerShell scripting for advanced configurations.
2. May require additional modules for specific functionalities.
3. Command-line interface may be challenging for beginners.
Method 3: How to Configure IIS via Configuration Files
Configuring IIS via configuration files provides granular control over the server settings and customization options. Follow the steps below to configure IIS using configuration files:
1. Navigate to the directory where IIS configuration files are stored. By default, the directory is «C:\Windows\System32\inetsrv\config.«
2. Locate the «applicationHost.config» file. Create a backup of this file before making any changes.
3. Open the «applicationHost.config» file using a text editor such as Notepad or Visual Studio Code.
4. Find the section related to the settings you want to configure. The configuration files are structured hierarchically, with different sections for various server components and features.
5. Make the required modifications to the settings. Ensure to follow the correct XML syntax and maintain the file structure.
6. Save the changes and restart the IIS service for the new configurations to take effect.
Pros:
1. Provides granular control and customization options.
2. Allows for version control and easy deployment of configurations.
3. Flexibility to modify and manage settings without relying on a graphical interface.
Cons:
1. Requires advanced knowledge of IIS configuration and XML syntax.
2. Manual editing of configuration files can be error-prone.
3. Difficult to troubleshoot issues due to complex file structures.
Method 4: What to Do If You Can’t Configure IIS
In some cases, you may encounter issues while configuring IIS on Windows Server 2019. Here are some troubleshooting steps and fixes to try if you are unable to configure IIS:
1. Verify Administrator Privileges: Ensure that you are logged in with administrative privileges to configure IIS successfully.
2. Check Windows Updates: Make sure your server is up to date with the latest Windows updates. Installing pending updates may resolve configuration issues.
3. Deactivate Windows Firewall: Temporarily disable the Windows Firewall to eliminate any possible conflicts with IIS configuration.
4. Reinstall IIS: If all else fails, you can attempt to reinstall IIS on your Windows Server 2019. Uninstall IIS using the Server Manager and then reinstall it following the methods mentioned earlier.
Bonus Tips
Here are three bonus tips to enhance your IIS configuration on Windows Server 2019:
1. Secure your Websites with SSL: Configure SSL certificates for your websites to enable secure communication over HTTPS. This ensures data privacy and builds trust with your users.
2. Enable Compression: Enable compression for static and dynamic content in IIS to reduce bandwidth usage and enhance website performance.
3. Monitor Server Performance: Regularly monitor your server’s performance using tools like Performance Monitor and IIS Logs to identify bottlenecks and optimize resource allocation.
5 FAQs
Q1: Why is IIS important for hosting websites?
A1: IIS is a powerful web server software that provides features like security, scalability, and performance optimization. It ensures the smooth functioning and availability of websites for users.
Q2: Can I host multiple websites on a single IIS server?
A2: Yes, you can host multiple websites on a single IIS server. IIS supports the configuration of multiple websites with separate settings and bindings.
Q3: How can I secure my IIS server against cyber threats?
A3: You can secure your IIS server by implementing security measures such as SSL certificates, request filtering, IP address restrictions, and regular software updates.
Q4: Can I configure IIS on Windows Server Core?
A4: Yes, you can configure IIS on Windows Server Core. The process involves using command-line tools like PowerShell or configuring the IIS XML files directly.
Q5: Is IIS only for Windows servers?
A5: Yes, IIS is a web server software designed for Windows servers. However, there are alternative web servers available for other operating systems, such as Apache for Linux.
Final Thoughts
Configuring IIS on Windows Server 2019 is a crucial step in setting up a robust and reliable web server. Whether you choose to use the GUI, PowerShell, or configuration files, understanding the configuration methods and their pros and cons will empower you to make informed decisions that align with your server’s requirements.
By following the steps provided in this blog post, you can successfully configure IIS and leverage its powerful features to host websites and web applications effectively. Remember to consider security measures, monitor server performance, and strive for continuous optimization to ensure a seamless user experience.
Posted by
on December 19, 2018
Here we’re going to show you how to install the Internet Information Services (IIS) web server version 10.0 in Microsoft’s Windows Server 2019 operating system.
This can be done both with PowerShell or through the GUI, we’ll cover both methods here.
Install IIS With PowerShell
If you don’t have the GUI installed or just want to use the PowerShell command line interface (CLI) instead, follow these steps. This method is a lot faster than going through all of the GUI options.
- Open PowerShell with administrative privileges and run the Install-WindowsFeature cmdlet as shown below.
Install-WindowsFeature -name Web-Server -IncludeManagementTools

Here we include the management tools so that you can manage IIS on this server, as these are generally installed when using the GUI, making this PowerShell command equivalent with the GUI method below. If you do not plan on managing IIS through this server then you may prefer to not include this option.
- Once the installation has succeeded, you’ll be returned to the PowerShell prompt. At this point IIS should be running on port 80 by default with the firewall rule “World Wide Web Services (HTTP Traffic-In)” enabled in Windows firewall automatically.
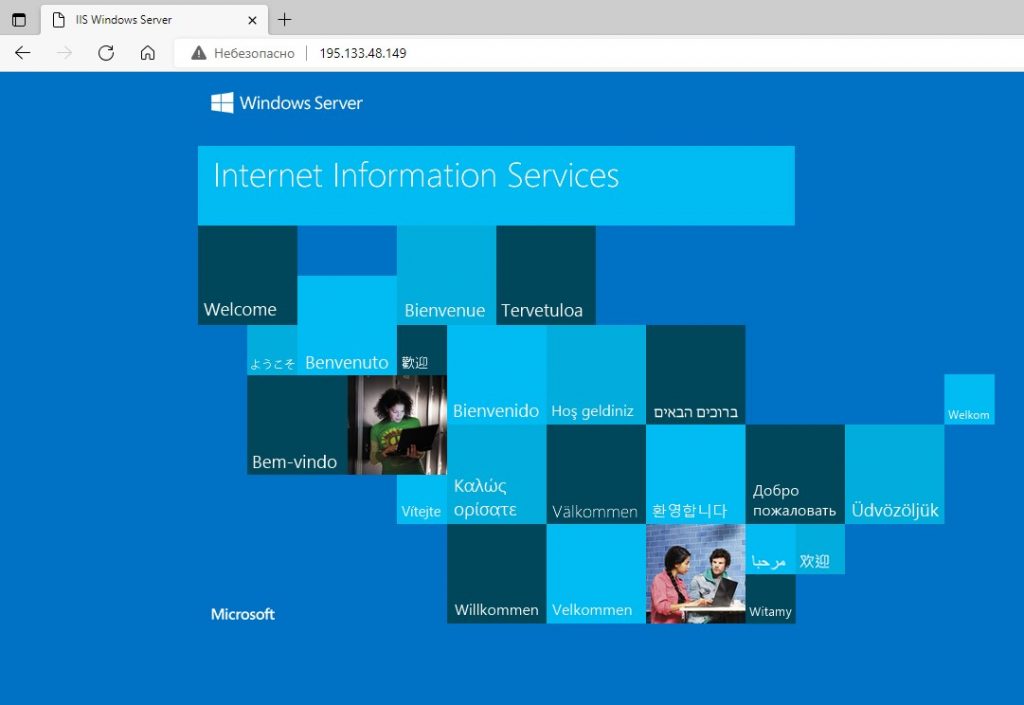
- We can perform a simple test by opening up a web browser and browsing to the server that we have installed IIS on. You should see the default IIS page.

Install IIS Through GUI
If your server has the graphical user interface component installed you can also install IIS by following these steps.
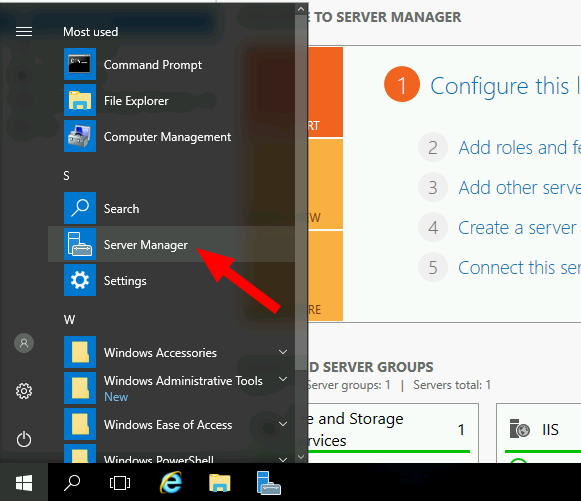
- Open Server Manager, this can be found in the start menu. If it’s not there simply type “Server Manager” with the start menu open and it should be found in the search.

- Click the “Add roles and features” text.

- On the “Before you begin” window, simply click the Next button.

- On the “Select installation type” window, leave “Role-based or feature-based installation” selected and click Next.
- As we’re installing to our local machine, leave “Select a server from the server pool” with the current machine selected and click Next. Alternatively you can select another server that you are managing from here, or a VHD.
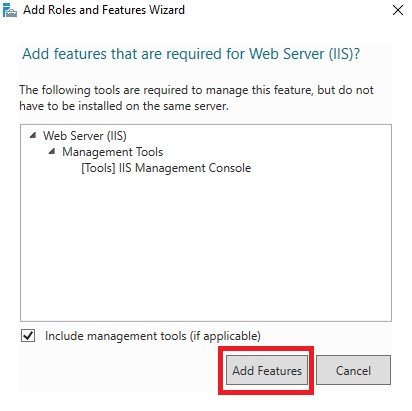
- From the “Select server roles” window, check the box next to “Web Server (IIS)”. Doing this may open up a new window advising that additional features are required, simply click the “Add Features” button to install these as well. Click Next back on the Select server roles menu once this is complete.

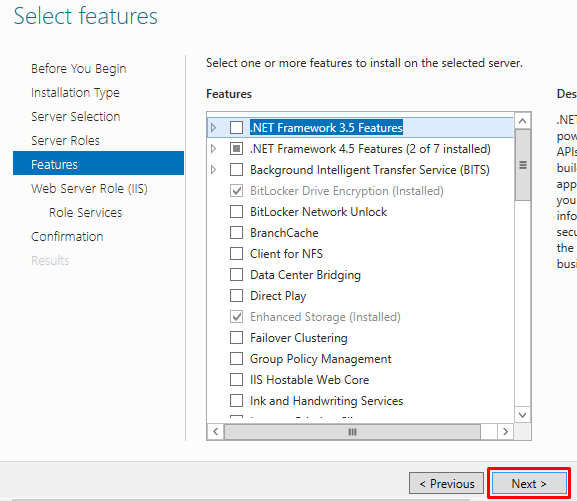
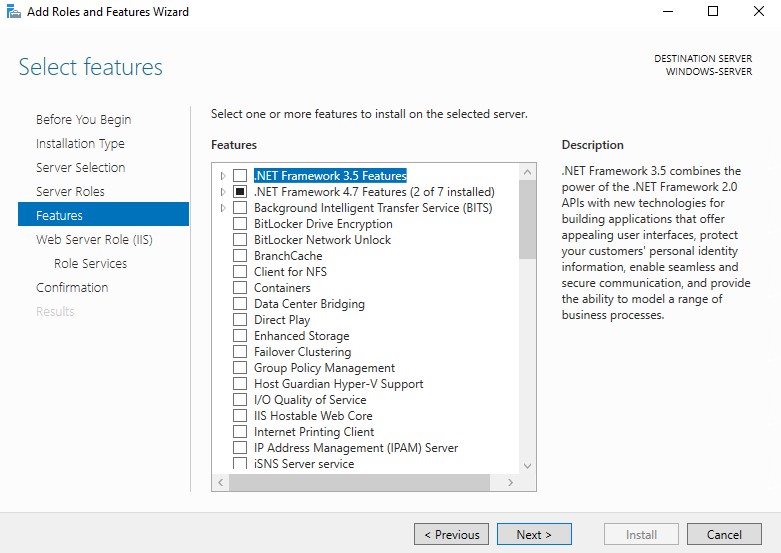
- We will not be installing any additional features at this stage, so simply click Next on the “Select features” window.
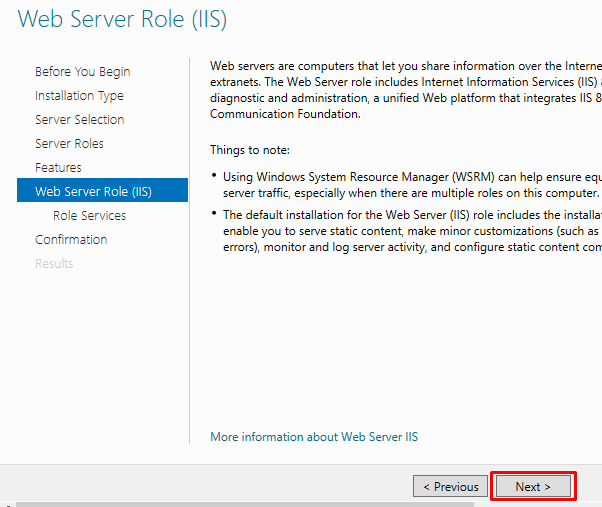
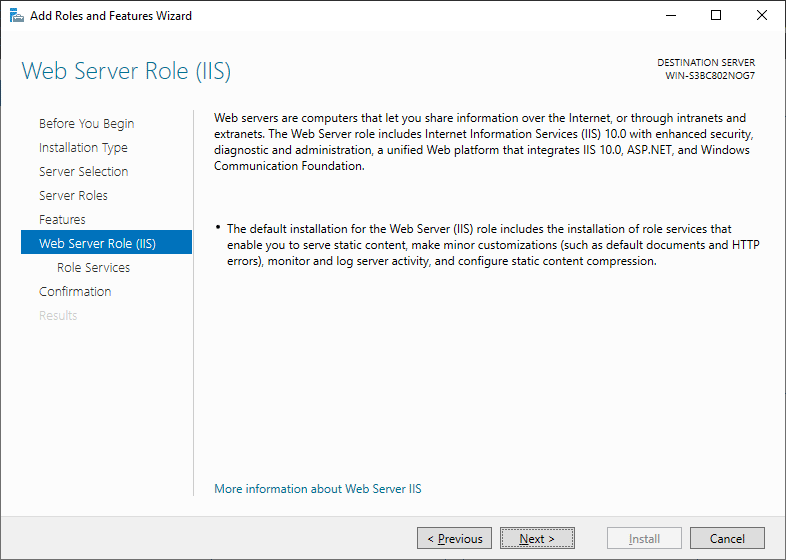
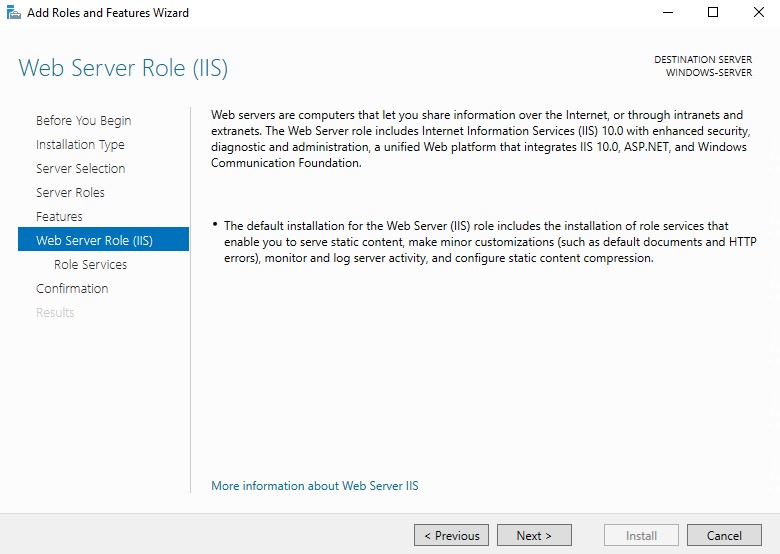
- Click Next on the “Web Server Role (IIS)” window after reading the information provided.
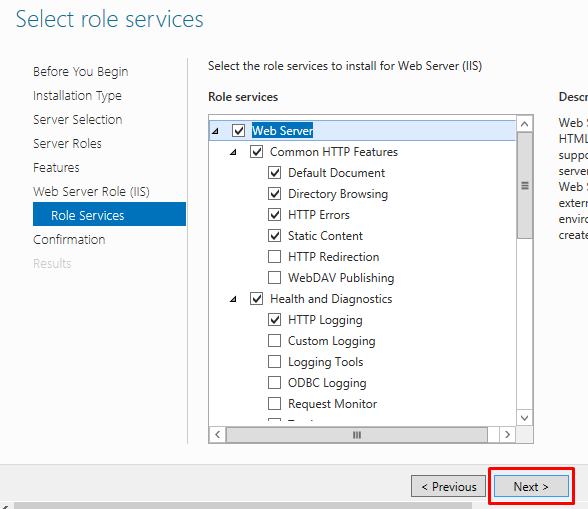
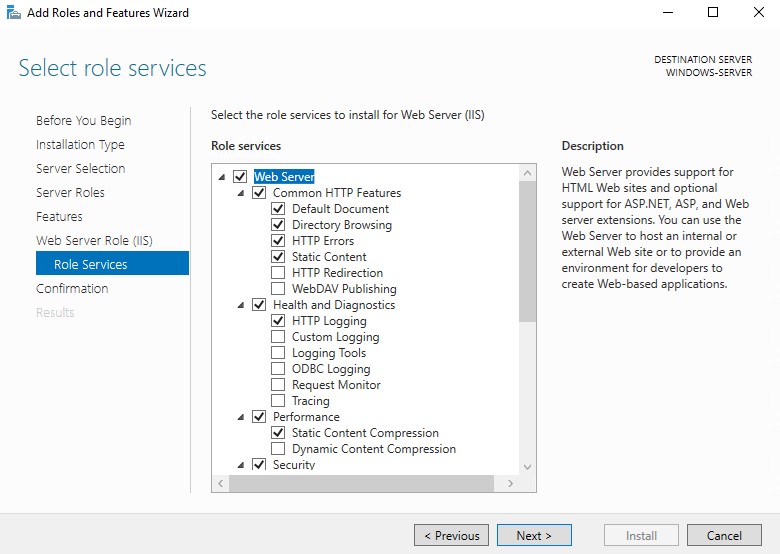
- At this point on the “Select role services” window you can install additional services for IIS if required. You don’t have to worry about this now as you can always come back and add more later, so just click Next for now to install the defaults.
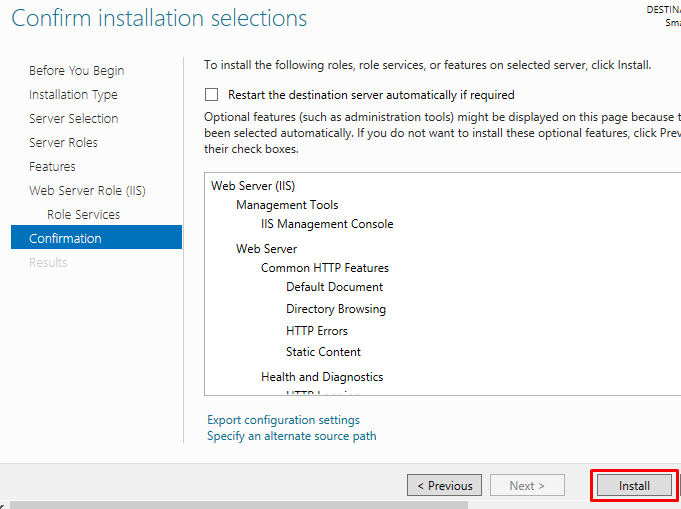
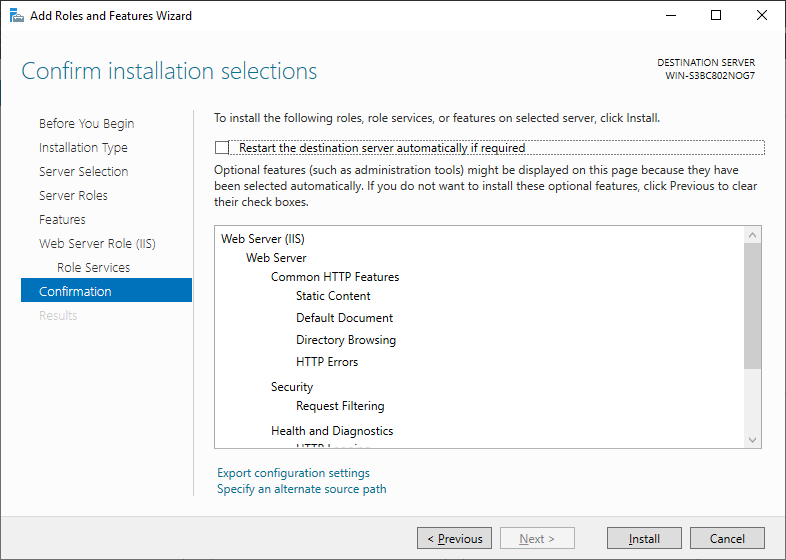
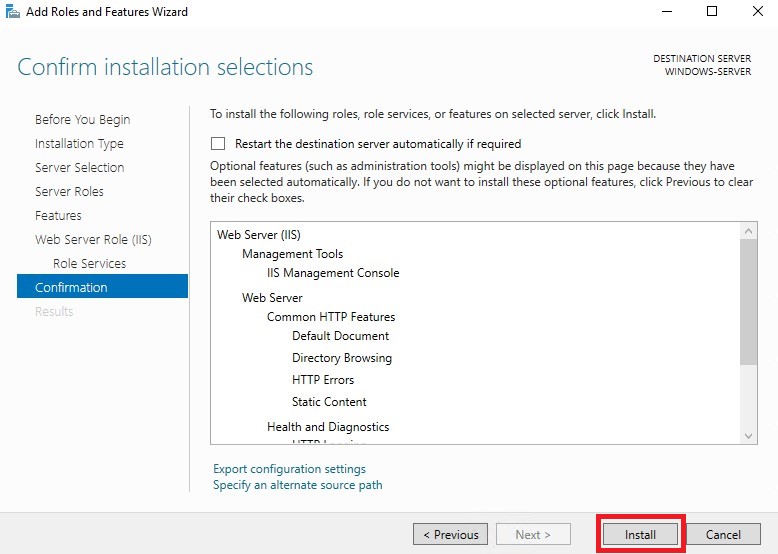
- Finally on the “Confirm installation selections” window , review the items that are to be installed and click Install when you’re ready to proceed with installing the IIS web server.
No reboot should be required with a standard IIS installation, however if you remove the role a reboot will be needed.
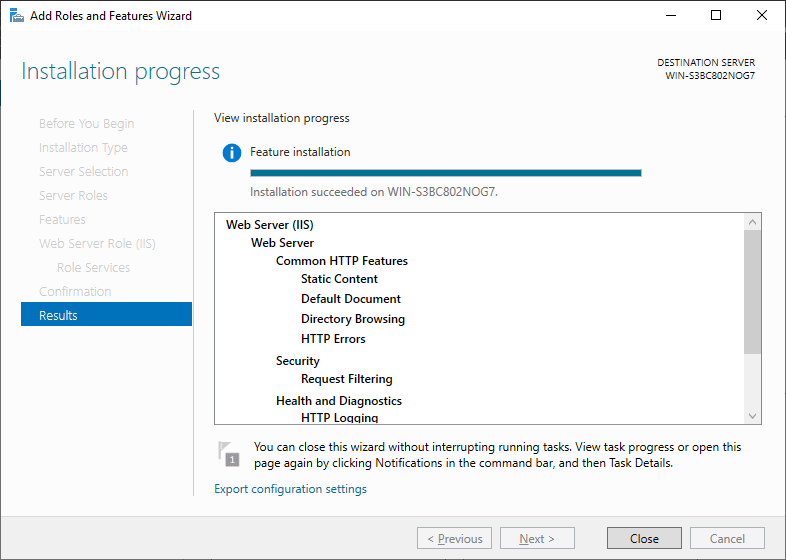
- Once the installation has succeeded, click the close button. At this point IIS should be running on port 80 by default with the firewall rule “World Wide Web Services (HTTP Traffic-In)” enabled in Windows firewall automatically.
- We can perform a simple test by opening up a web browser and browsing to the server that we have installed IIS on. You should see the default IIS page.

As you can hopefully see, it’s quite a lot faster to use PowerShell to perform the same task.
Summary
As shown we can easily install the IIS web server in Windows Server 2019 with both the PowerShell command line or the graphical user interface.
Во многих web-проектах активно используются различные системы управления базами данных (СУБД). Применение их довольно обширно, при том, что создание, хранение баз данных, управление ими может осуществляться как через разнообразные приложения, так и посредством доступа к ним через web-сайт. В данном руководстве мы рассмотрим установку web-сервера из состава MS IIS и СУБД MS SQL Server на виртуальный сервер, работающий под управлением операционной системой Windows Server 2019.
IIS (Internet Information Services) – набор служб и серверов от Microsoft, входящий в состав операционных систем Windows Server. В данном мануале IIS будет интересовать нас прежде всего как web-сервер, на котором мы запустим собственный сайт.
MS SQL Server также разработан Microsoft и является одной из самых распространённых СУБД. Функционально, MS SQL Server использует реляционную модель организации структуры баз данных.
Установка IIS
Чтобы начать установку IIS запустите Диспетчер серверов (Server Manager). Далее, перейдите Manage 🠒 Add Roles and Features.
В стартовом окне открывшегося мастера нажмите Next >.
На следующем шаге отметьте тип установки как Role-based or feature-based installation и нажмите Next >.
Далее, выберите опцию Select a server from the server pool и в списке доступных серверов укажите тот, на который планируете произвести установку. После чего нажмите Next > (в нашем примере доступен всего один сервер).
На следующей странице необходимо выбрать роль Web Server (IIS).
После чего откроется окно, в котором не внося никаких изменений нажмите Add Features.
В результате роль Web Server (IIS) станет активной. Если это так, нажмите Next >.

Если вы устанавливаете только IIS, то на следующих страницах можно всё оставить без изменений и так же нажимать Next >.
Наконец, в окне подтверждения запуска установки нажмите Install.
В результате запустится процесс инсталляции IIS.
По окончании установки необходимо будет перезагрузить сервер.
В результате, когда вы в браузере введёте IP-адрес вашего сервера, должна открыться дефолтная страница IIS.
Запуск сайта
Теперь, когда IIS работает, можно запустить на нём свой домен. Для того, чтобы ваш сайт стал доступен по своему доменному имени, на имя вашего сайта должна указывать A-запись в настройках DNS-записей домена. Отредактировать DNS-записи можно в списке ваших доменов. В нашем примере мы будем использовать имя домена my-domain.host, которое связано с IP-адресом нашей виртуалки именно через A-запись.

По умолчанию файлы сайтов IIS расположены в каталоге C:\inetpub. В свою очередь, файлы дефолтной страницы IIS находятся в директории C:\inetpub\wwwroot. Мы же создадим отдельный каталог для нашего сайта. Таким каталогом будет C:\inetpub\my-domain. В него мы положим файл стартовой страницы сайта index.html со следующим содержимым:
<html>
<head>
<title>
Domain on IIS
</title>
</head>
<body>
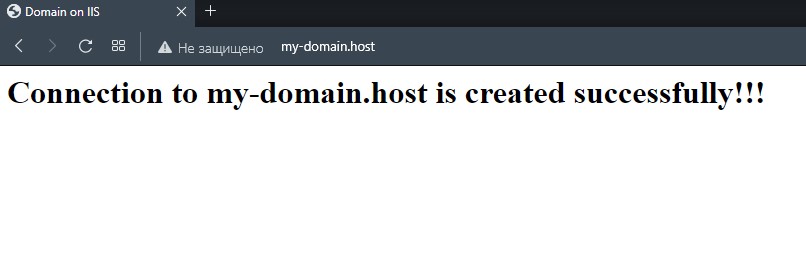
<h1>
Connection to my-domain.host is created successfully!!!
</h1>
</body>
</html>Теперь, когда файл стартовой страницы сайта готов, в Диспетчере серверов перейдите в Tools 🠒 Internet Information Services (IIS) Manager.
В открывшемся окне менеджера IIS раскройте ветку своего сервера и перейдите на ветку Sites.
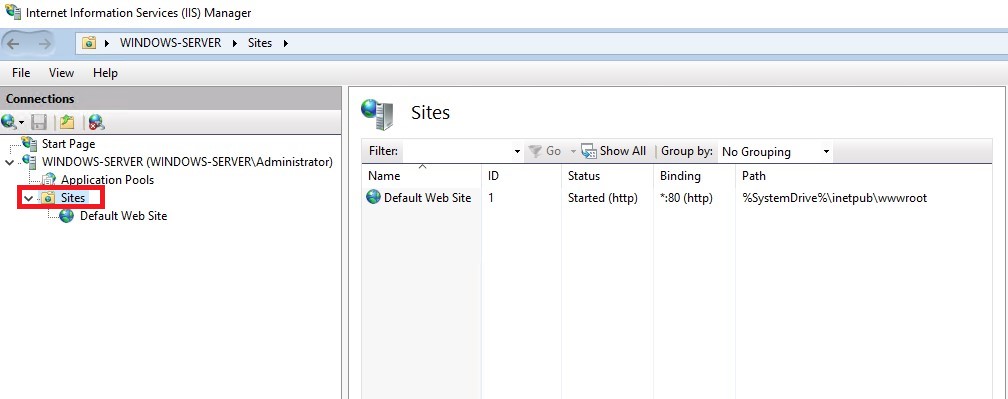
В эту ветку необходимо добавить новый сайт. Для чего на заголовке Sites нажмите правую кнопку мыши и выберите Add Website.... В открывшемся окне заполните поля Site name, Physical path и Host name. После чего нажмите ОК.
Теперь, если вы наберёте в браузере адрес вашего сайта, например, http://my-domain.host, браузер должен будет открыть его стартовую страницу.
Установка MS SQL Server
На нашем виртуальном сервере мы будем устанавливать MS SQL Server 2019. Данная СУБД была выпущена в следующих редакциях:
- Enterprise Edition – полноценная редакция MS SQL Server, предназначенная для использования в реальных проектах и не имеющая ограничений по вычислительным мощностям.
- Standard Edition – также полноценный выпуск, но имеющий определённые аппаратные ограничения.
- Express Edition – бесплатный выпуск для работы простых приложений. Может использоваться для решения реальных задач, но имеет некоторые аппаратные ограничения.
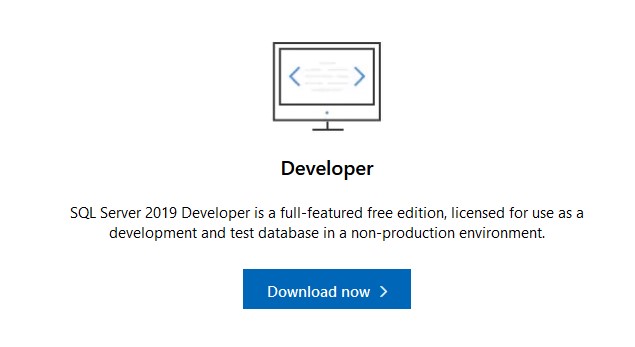
- Developer Edition – полнофункциональная бесплатная редакция, нацеленная на разработчиков. Данный выпуск не может использоваться для работы в качестве реального SQL-сервера, но может быть применён для изучения и тестирования механики MS SQL Server.
Запуск SQL-сервера рассмотрим на примере установки редакции Developer Edition.
Для загрузки инсталлятора перейдите на страницу MS SQL Server. Нажмите Download now > на версии Developer.
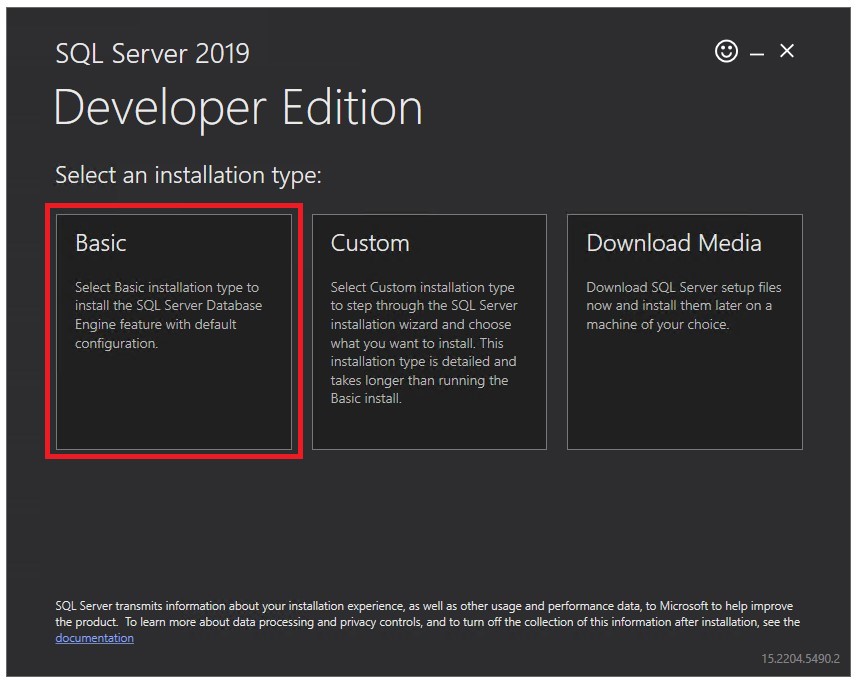
По окончании загрузки запустите установщик от имени администратора. Инсталляция MS SQL Server может производиться двумя вариантами: базовый (basic) и пользовательский (custom). Базовый вариант установки является более простым и не требует дополнительных настроек. Чтобы выбрать этот метод, необходимо выбрать соответствующий тип инсталляции.
В следующем окне нажмите Accept, чтобы принять условия лицензии.

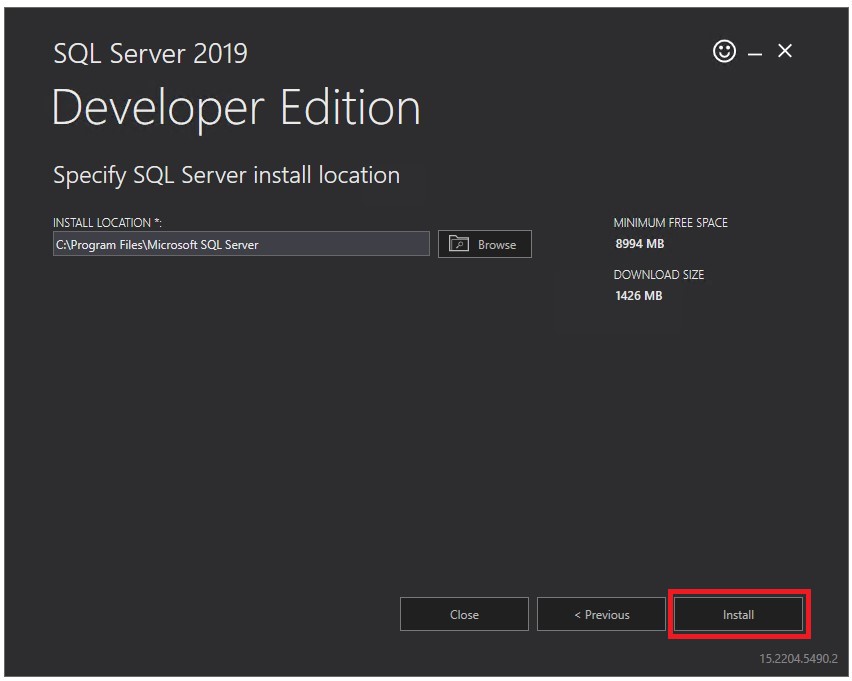
Далее, установщик укажет каталог, в который планирует инсталлировать SQL Server. Вы можете изменить его, если нужно. После чего нажмите Install.
Завершив установку мастер покажет итоговую информацию, которая будет необходима для дальнейшей эксплуатации SQL-сервера. В частности, в строке INSTANCE NAME указано имя экземпляра SQL Server. В одной операционной системе может работать до пятидесяти экземпляров, и каждый из них должен иметь своё собственное имя. Также, в этом окне прописана строка подключения CONNECTION STRING. С помощью содержимого этой строки вы сможете подключаться к SQL-серверу из других приложений, работающих на вашем VPS.
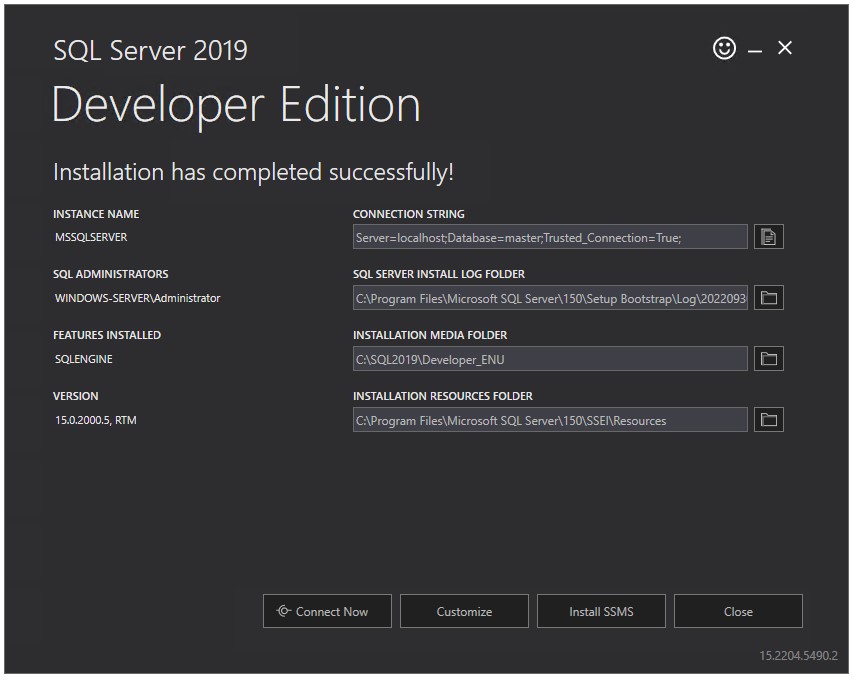
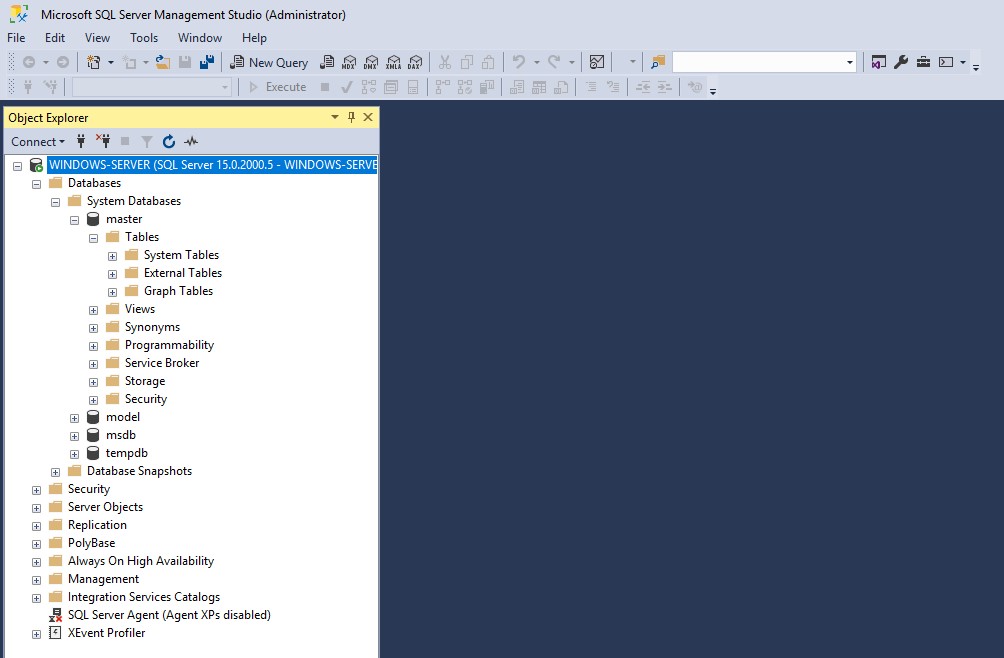
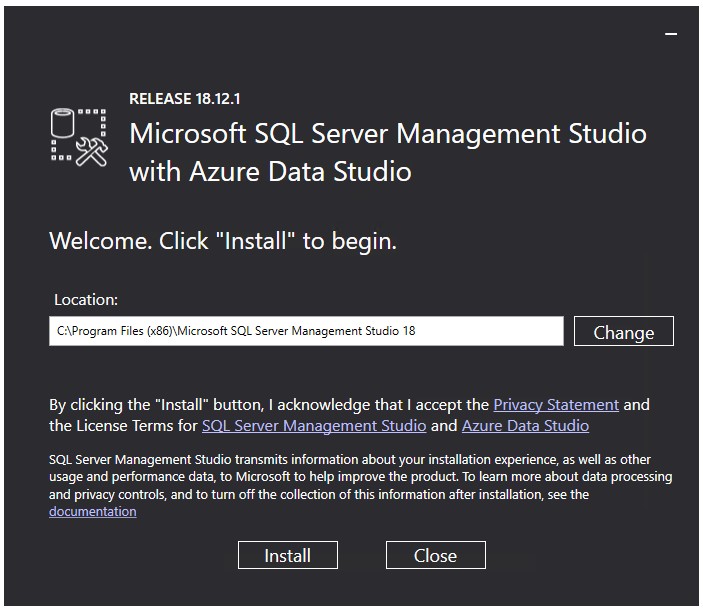
Здесь же есть кнопка Connect Now, с помощью которой вы можете проверить работоспособность данного экземпляра SQL-сервера, подключившись к нему через консольный терминал. В свою очередь, кнопка Install SSMS представляет собой ссылку на загрузку SQL Server Management Studio. Данное приложение является графической средой, содержащей инструментарий для управления инфраструктурой MS SQL Server. При переходе по ссылке загрузите инсталлятор SSMS, и запустите его от имени администратора. Установка начнётся по нажатию кнопки Install.
После завершения инсталляции необходимо будет перезагрузить сервер.
Перезапустив VPS уже можно будет подключиться к SQL-серверу при помощи графической оболочки и приступить к работе с ним.