
Все способы:
- Шаг 1: Основные параметры
- Шаг 2: Дополнительные жесты
- Шаг 3: Дополнительные параметры сенсорной панели
- Шаг 4: Персонализация указателя
- Вопросы и ответы: 0
Шаг 1: Основные параметры
Тачпад на современном ноутбуке обладает довольно обширным набором самых разных функций, откликающихся на действия пальцами. Это позволяет сделать работу за лэптопом более удобной и не испытывать потребности в подключении полноценной мыши. Однако для лучшего контроля понадобится изменить некоторые настройки под себя. В Windows 11 они делятся на несколько категорий, поэтому давайте начнем с основных.
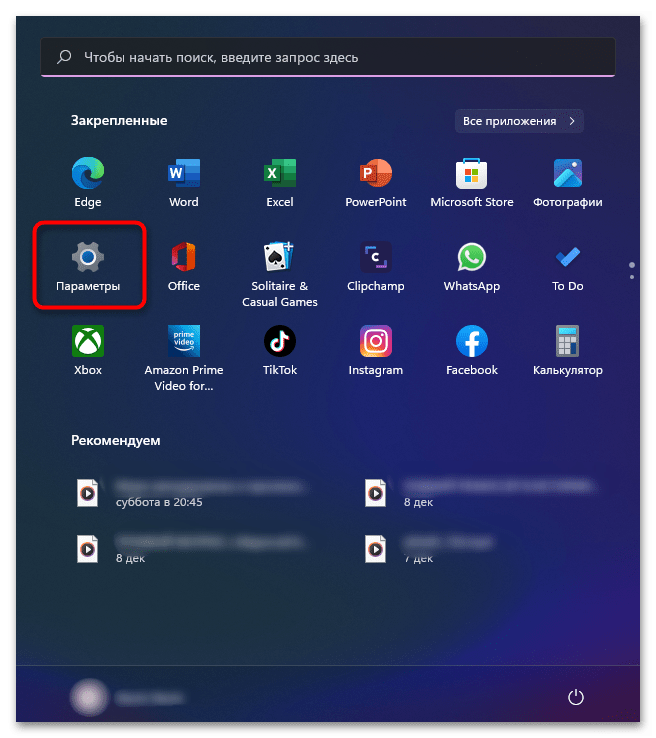
- Откройте меню «Пуск» и нажмите по значку с изображением шестеренки для перехода в «Параметры».
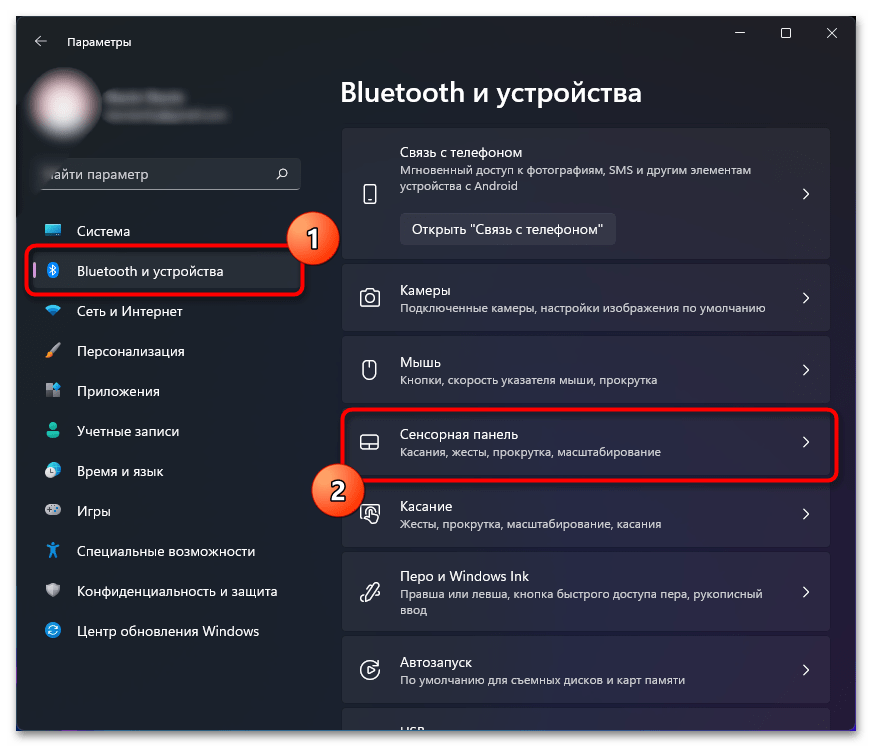
- В новом окне выберите раздел «Bluetooth и устройства», затем откройте категорию «Сенсорная панель».
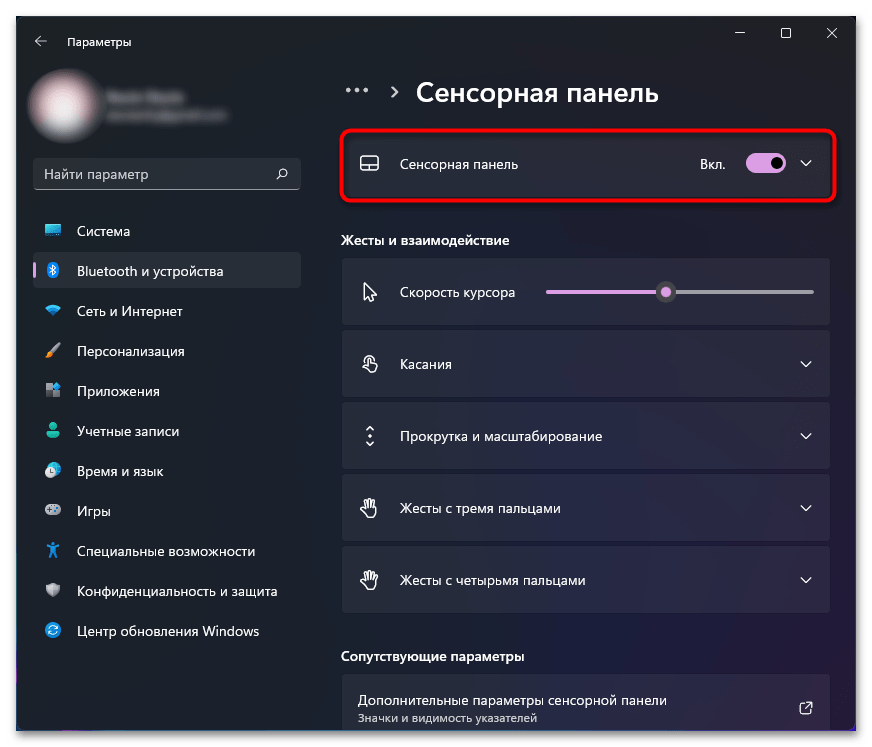
- Самая первая настройка, которую вы видите на экране, выполнена в виде переключателя и отвечает за выключение и включение сенсорной панели, то есть тачпада. Вы можете в любой момент активировать сенсорную панель или отключить ее, если при наборе текста случайно задеваете ее или она мешает по другим причинам.
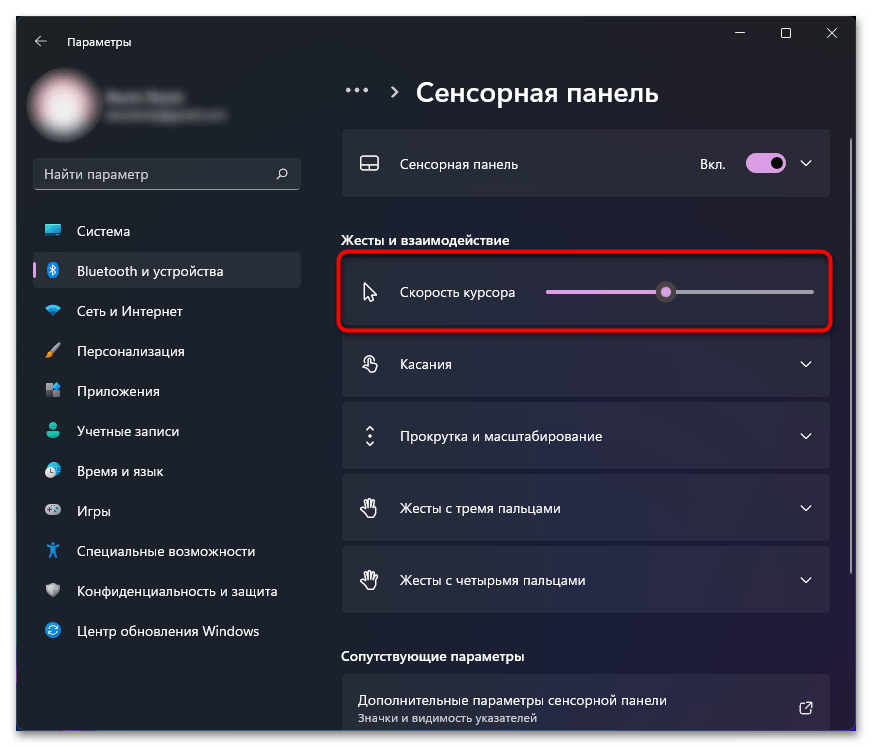
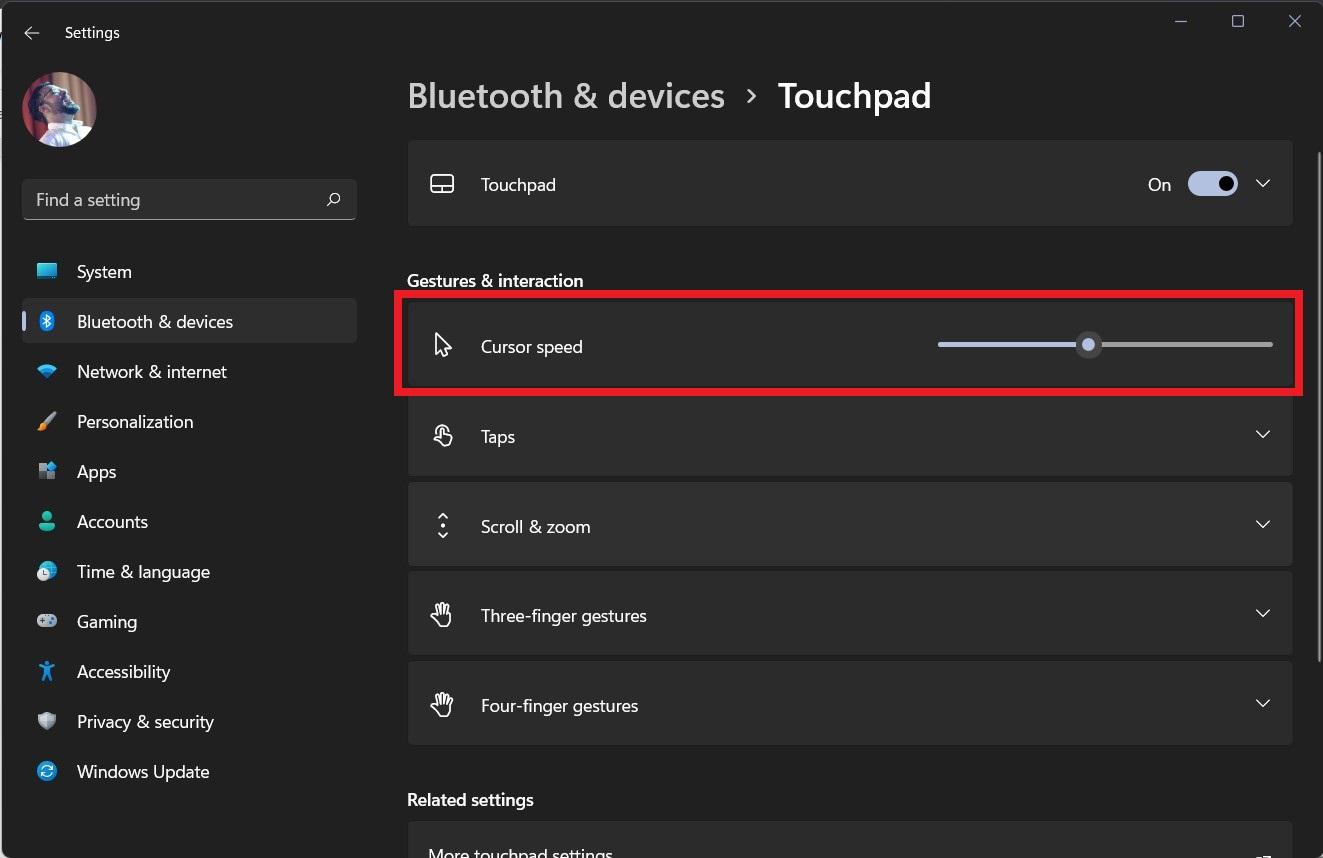
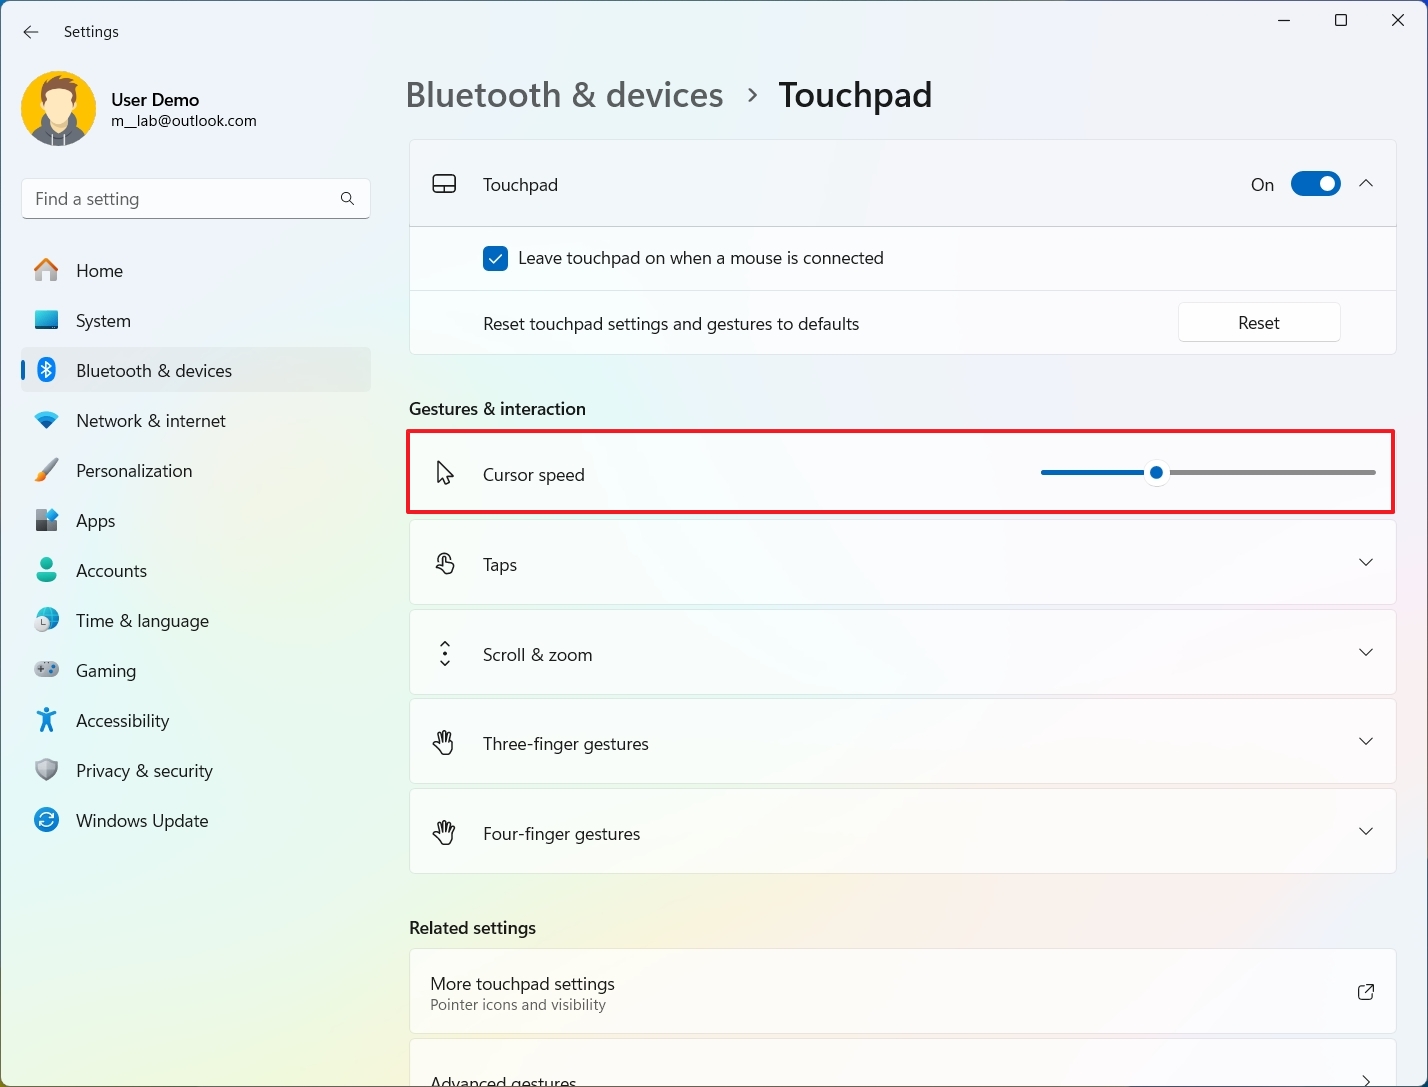
- Следующий параметр имеет вид ползунка и при помощи него осуществляется регулирование скорости курсора. Передвиньте его немного вправо, если желаете ускорить курсор, и влево — для его замедления.
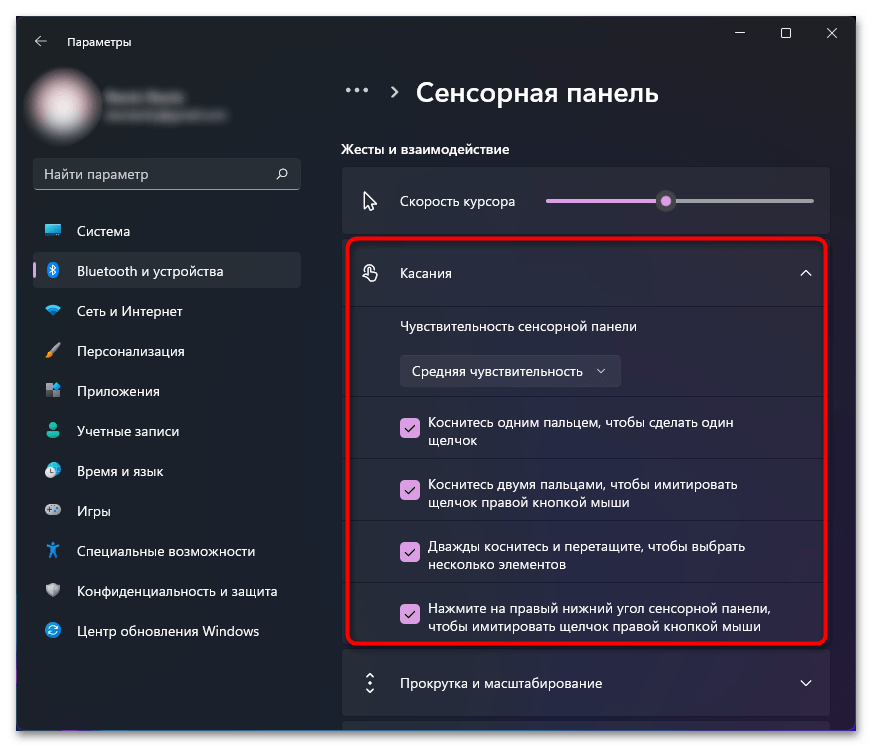
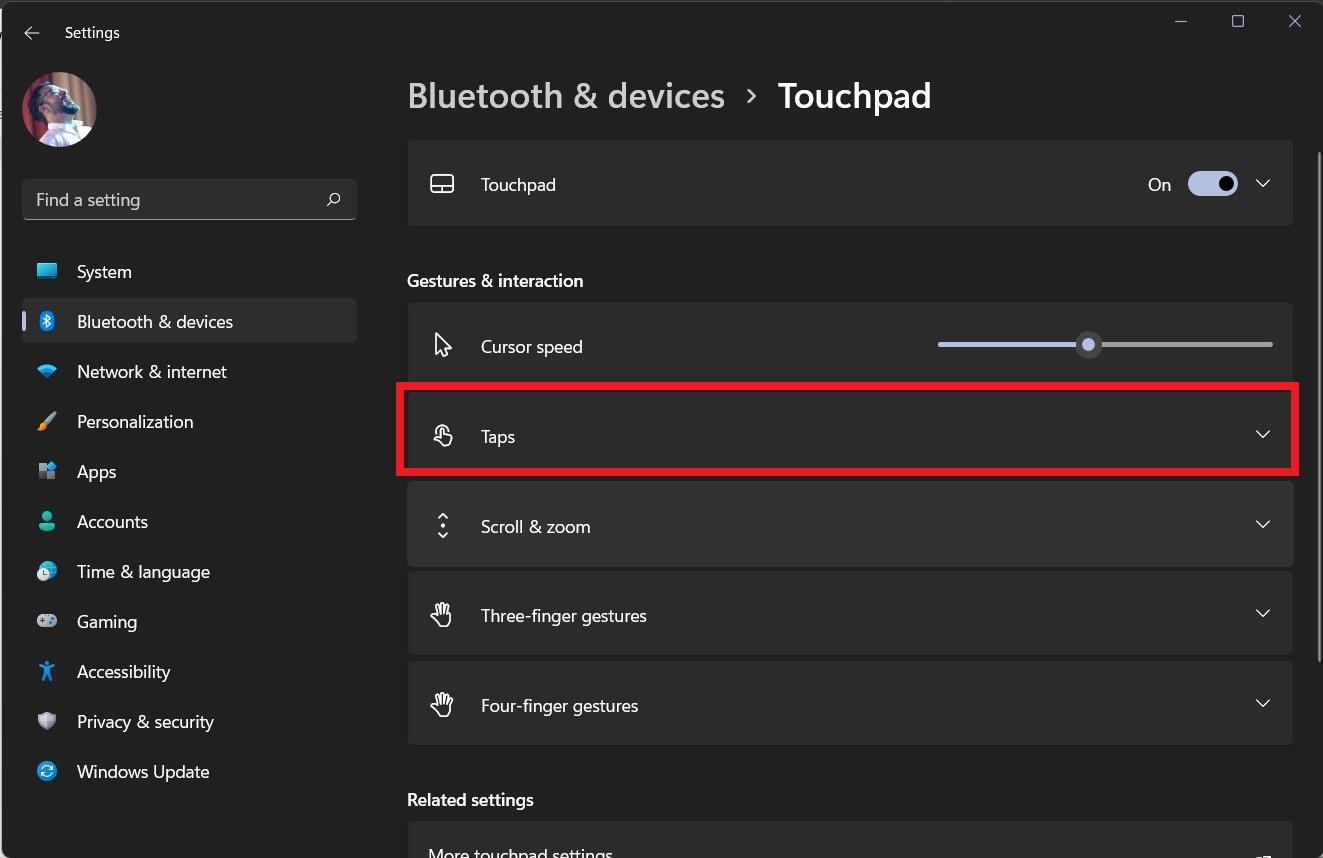
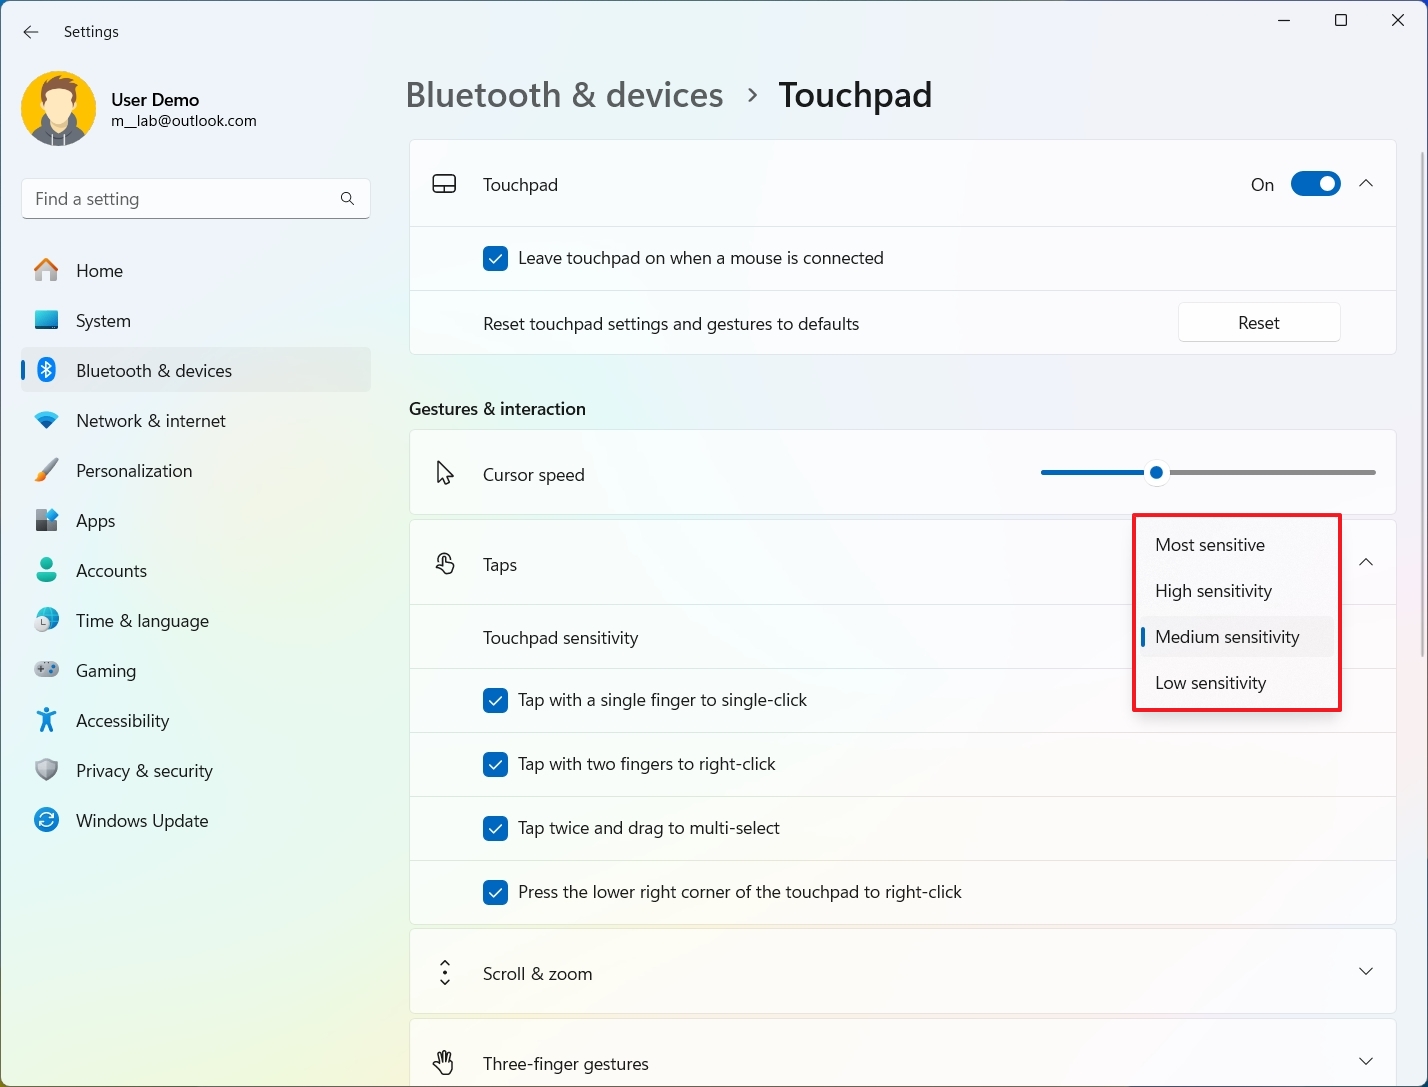
- Разверните список с настройками под названием «Касания». В нем вы можете выбрать чувствительность касаний и деактивировать некоторые параметры, если в них нет потребности. Сюда относится одно касание для щелчка, двойное для имитации нажатия правой кнопкой мыши, дважды — для выбора элементов и касание в правом нижнем углу для имитации щелчка ПКМ. Снимите галочки с ненужных для вас пунктов, если не хотите видеть подобную реакцию на касания.
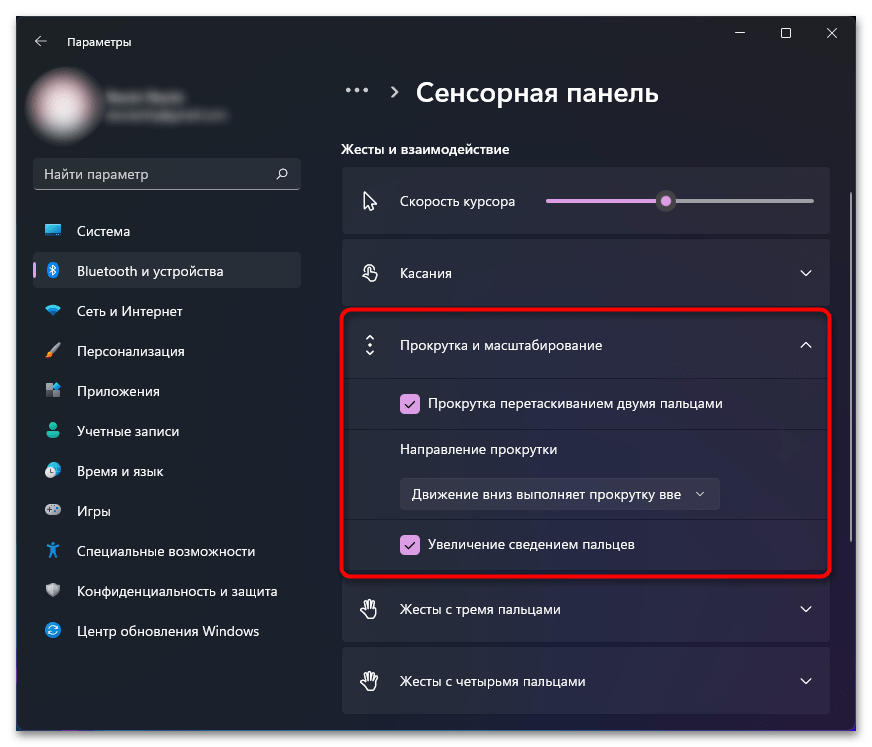
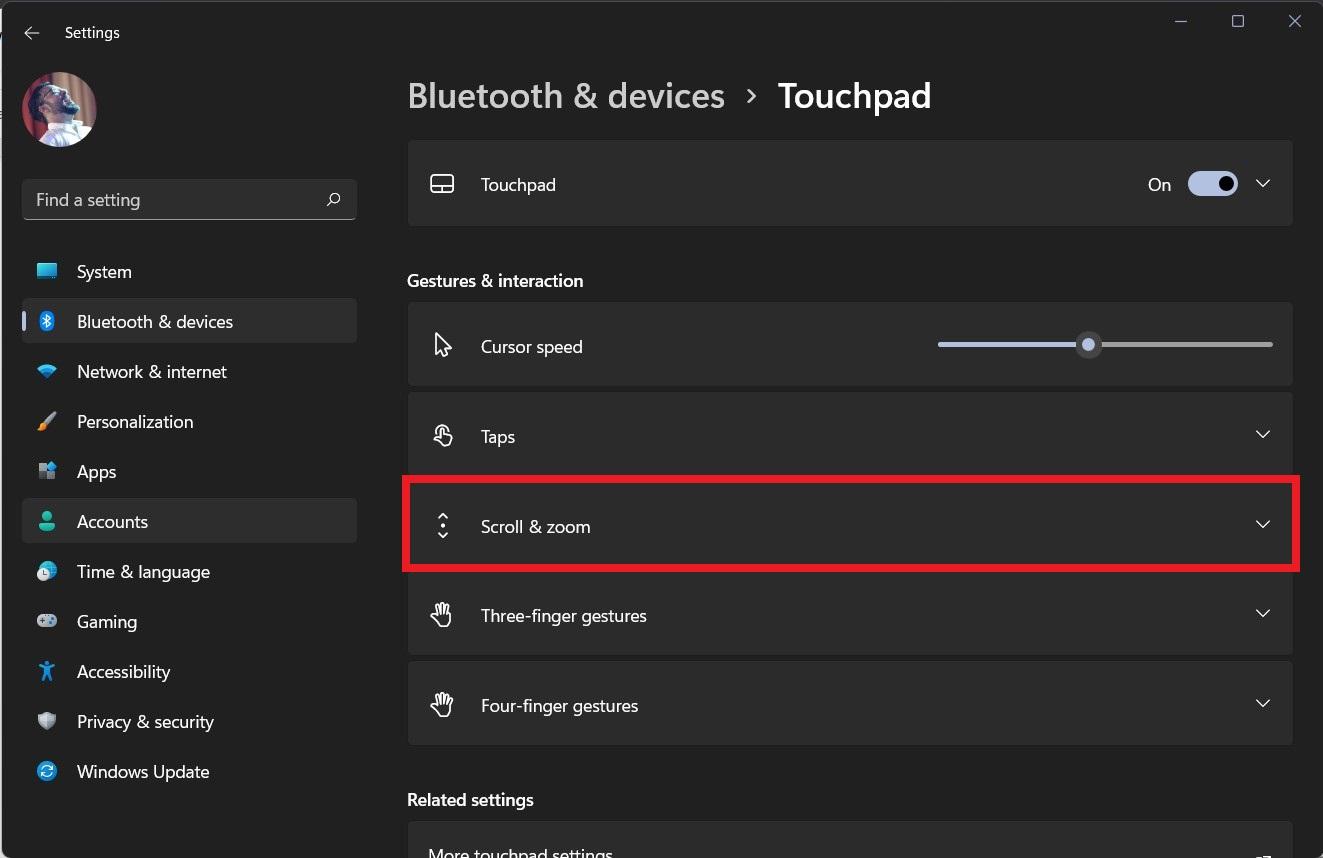
- Далее идет список «Прокрутка и масштабирование». Прокрутка осуществляется при перетаскивании двумя пальцами, а масштабирование при их сведении. Эти настройки можно отключить или же изменить направление прокрутки.
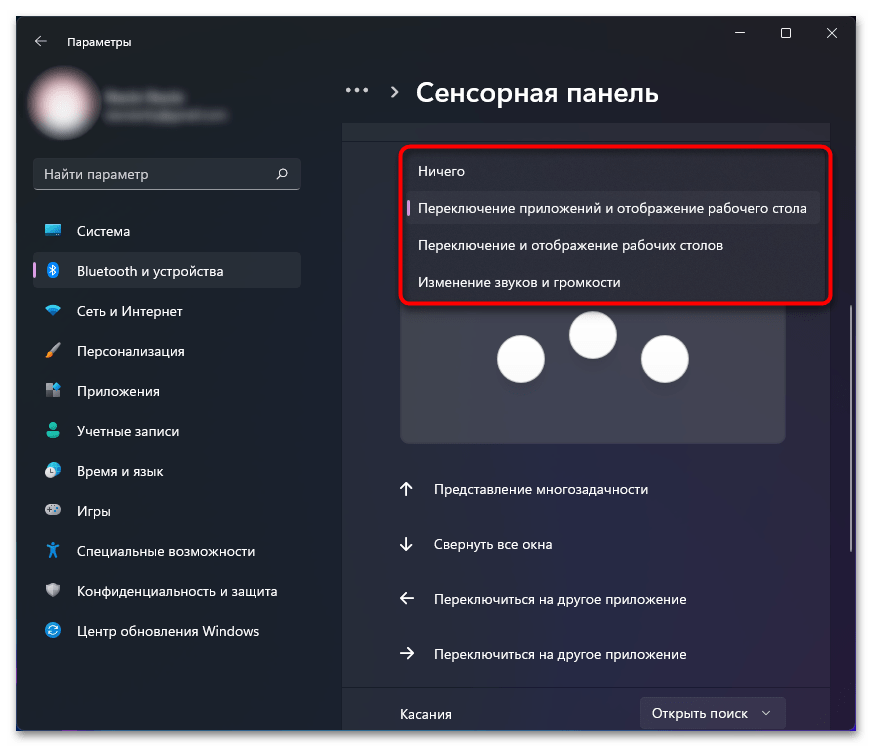
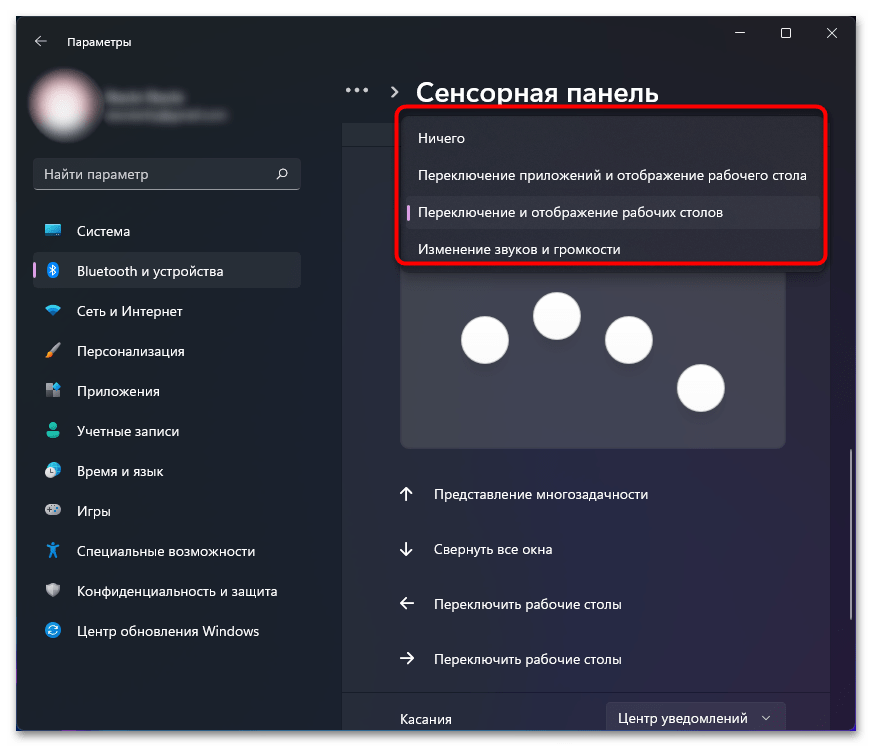
- Одна из самых интересных особенностей сенсорной панели на ноутбуке — возможность управления жестами тремя и четырьмя пальцами. Если такие функции у вас поддерживаются, начните с трех пальцев. Из списка вы можете выбрать действие: изменение громкости, переключение приложений или рабочих столов. Если жесты нужно отключить, выберите «Ничего».
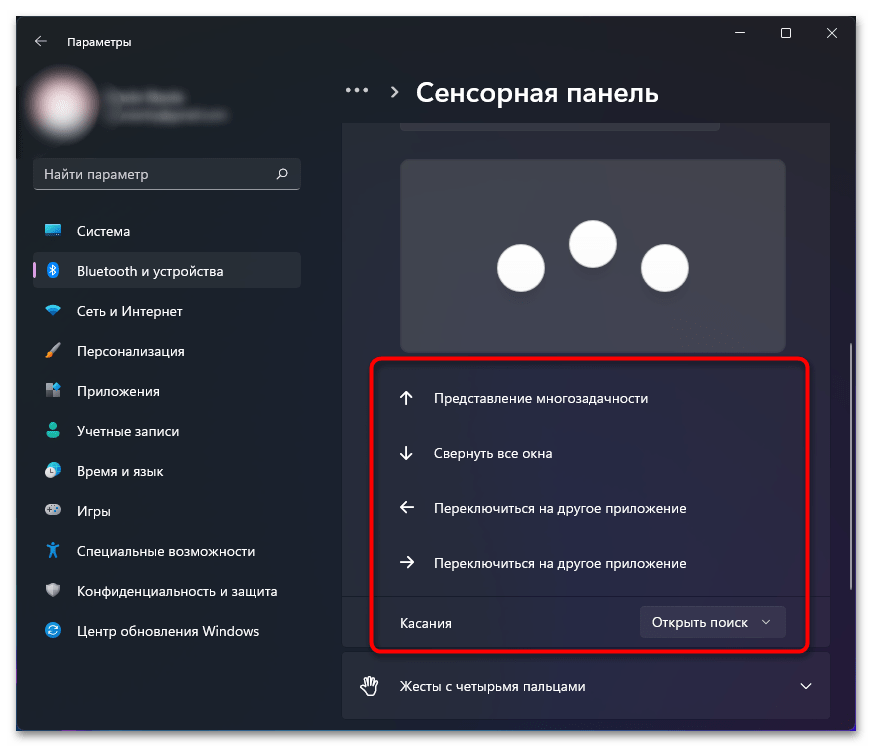
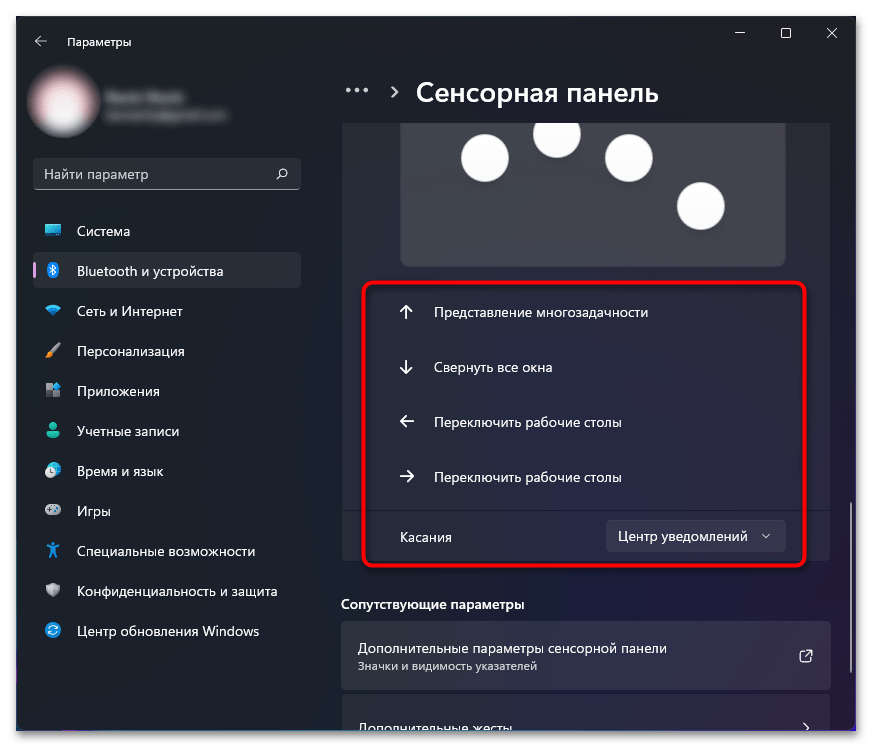
- После выбора типа жестов ниже вы увидите небольшую инструкцию, в которой показано, в каком направлении необходимо проводить, чтобы достичь желаемого результата. Под этой инструкцией есть пункт «Касания» со своим выпадающим меню. В нем вы выбираете действие, выполняющееся при касании по тачпаду тремя пальцами одновременно.
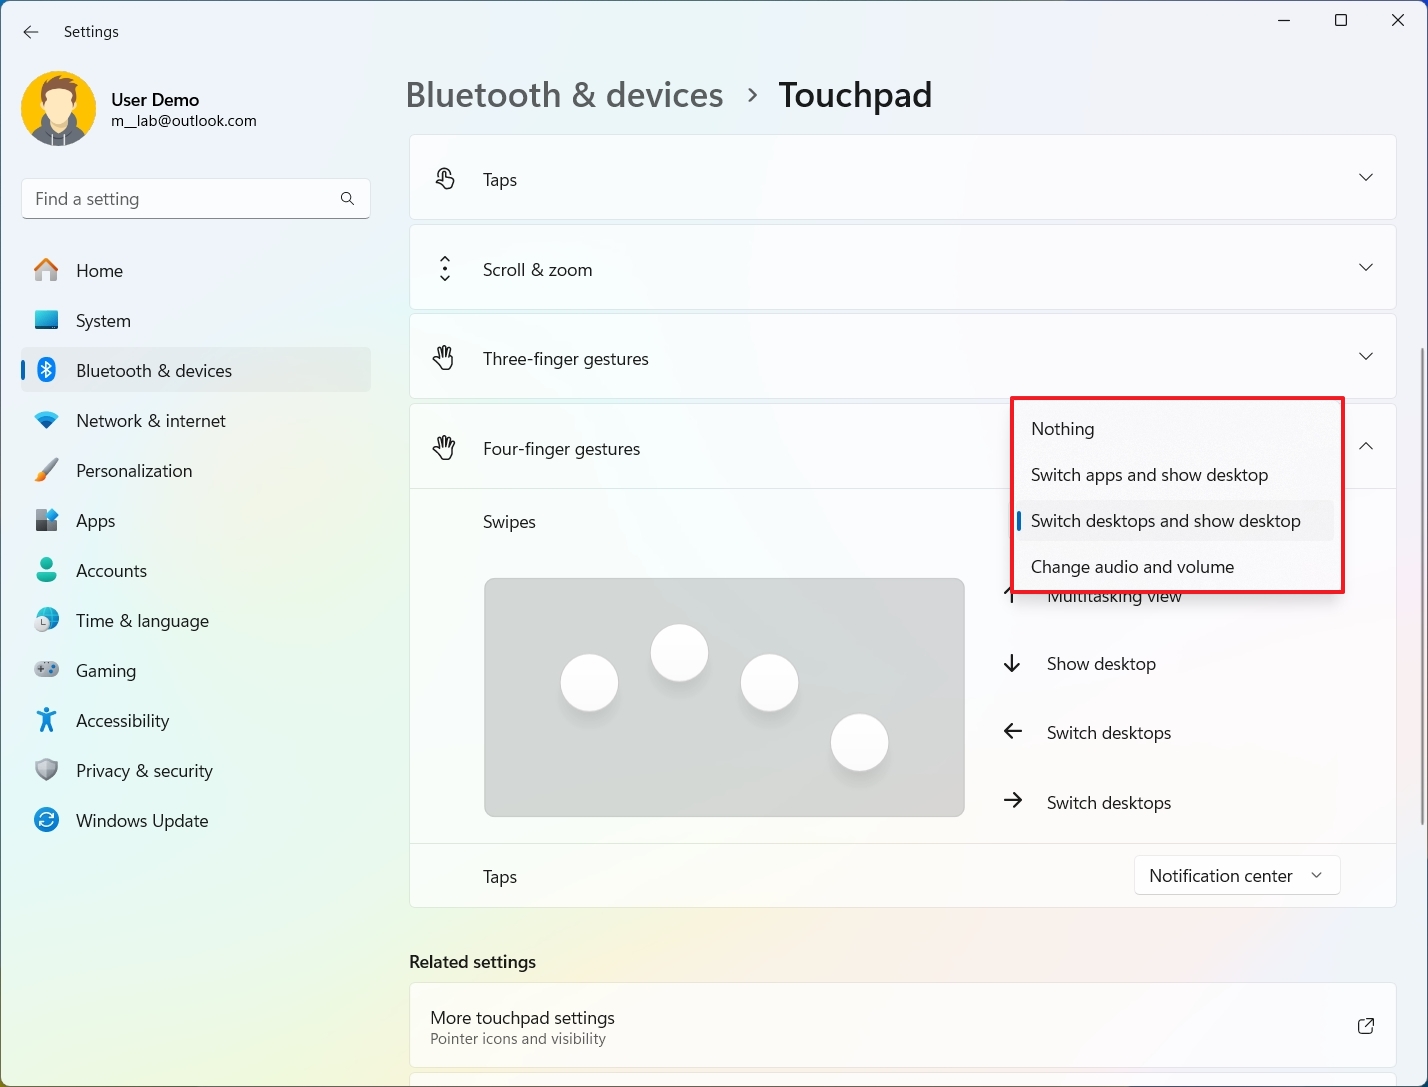
- Примерно то же самое относится и к жестам четырьмя пальцами, даже список действий будет таким же, поэтому останавливаться на нем повторно не будем.
- Точно так же выучите направление для жестов и можете посмотреть, какие доступные реакции есть на касания четырьмя пальцами (список будет отличаться от того, который реализован при касаниях тремя пальцами).
Шаг 2: Дополнительные жесты
В заключительных пунктах предыдущей инструкции речь шла о доступных жестах на сенсорной панели и основных их настройках. Однако это еще не все и в Windows 11 можно найти дополнительное окно с настройками, которые не отображаются в предыдущих списках. Давайте рассмотрим и их тоже, поскольку доступные функции могут быть очень полезными.
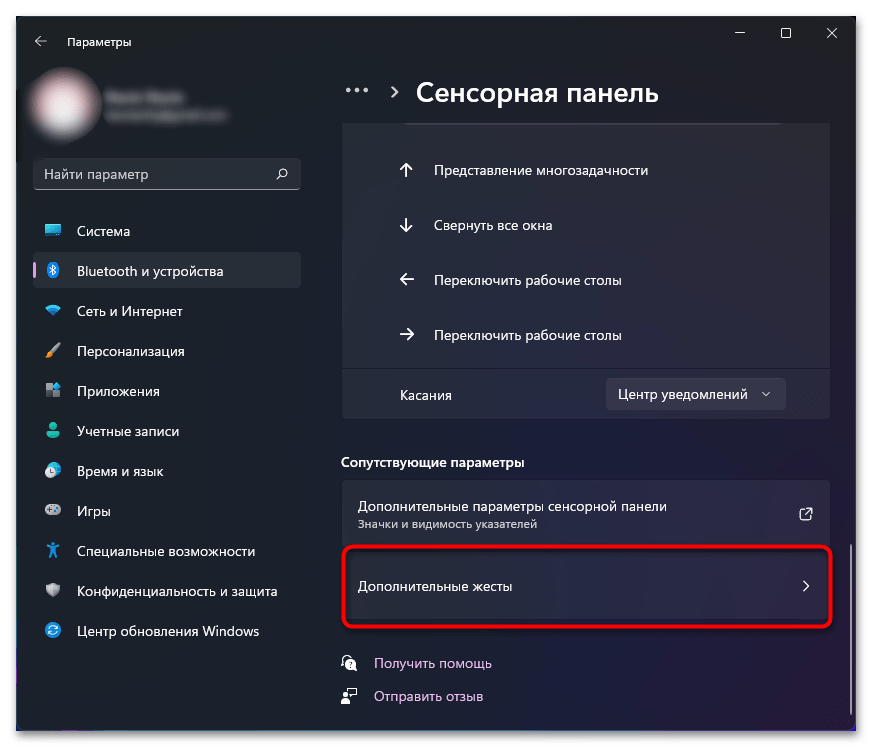
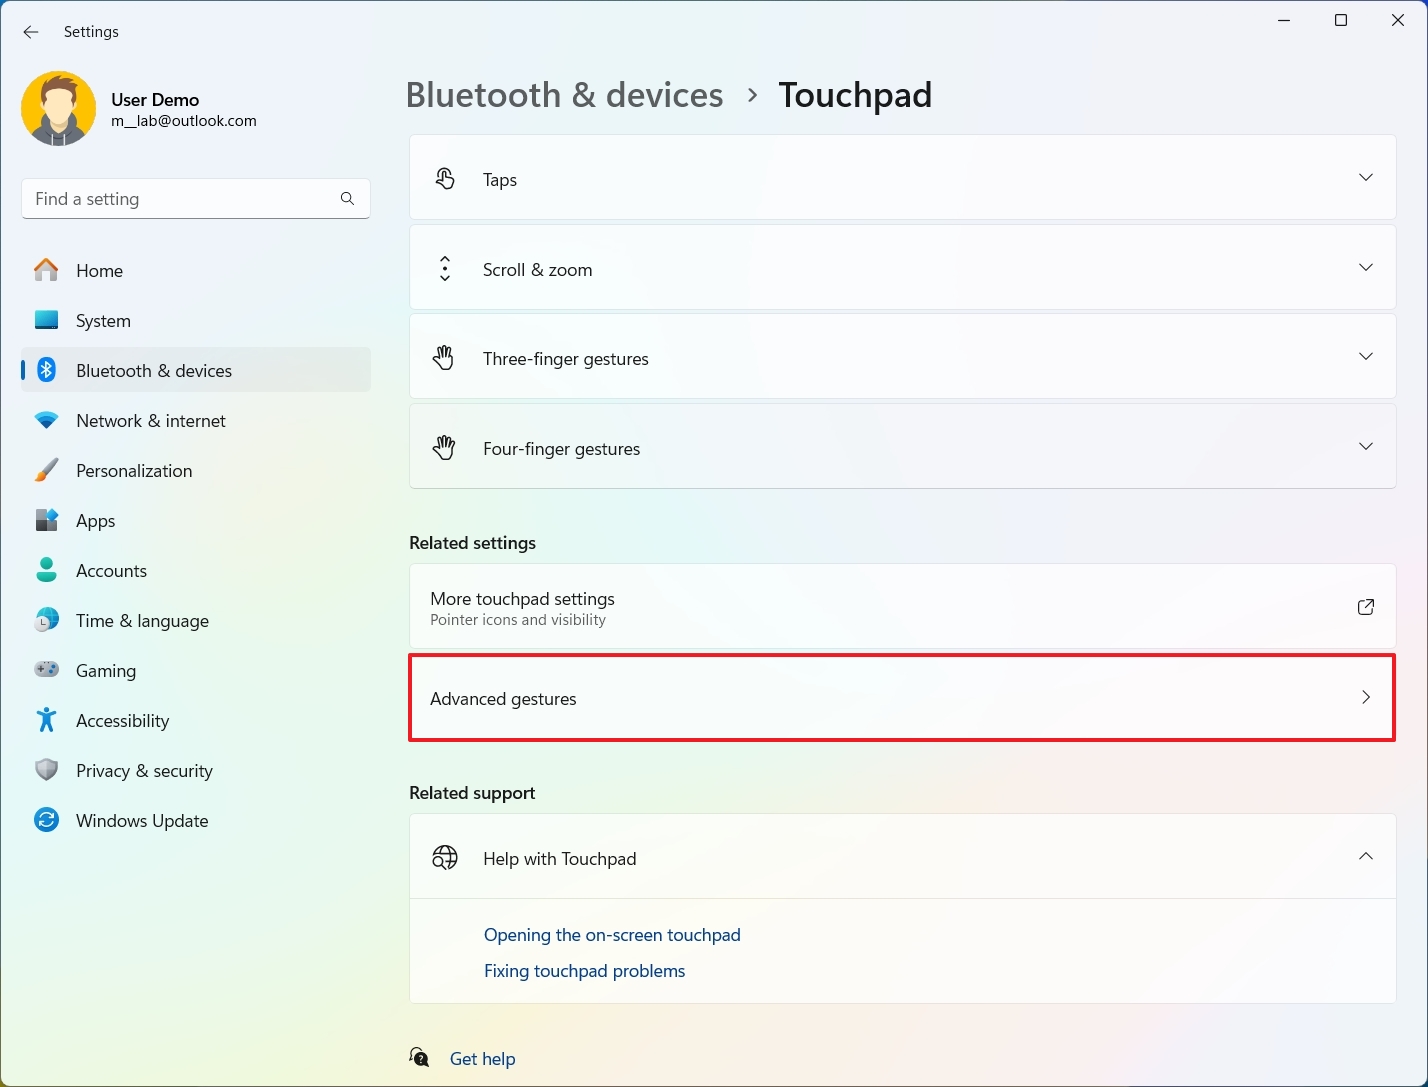
- В том же окне «Сенсорная панель» в блоке «Сопутствующие параметры» нажмите по «Дополнительные жесты».
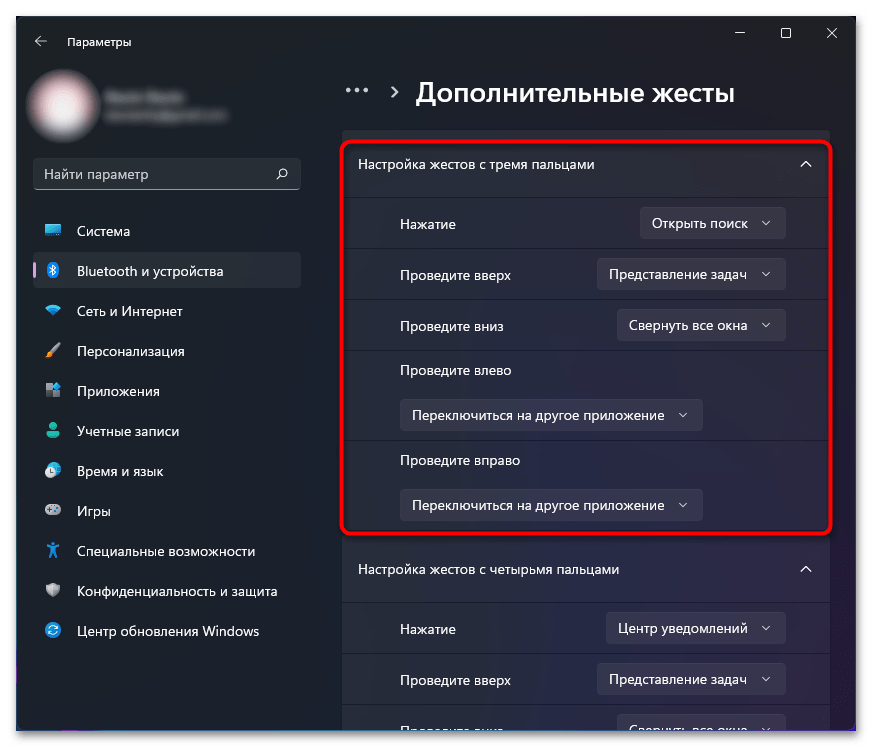
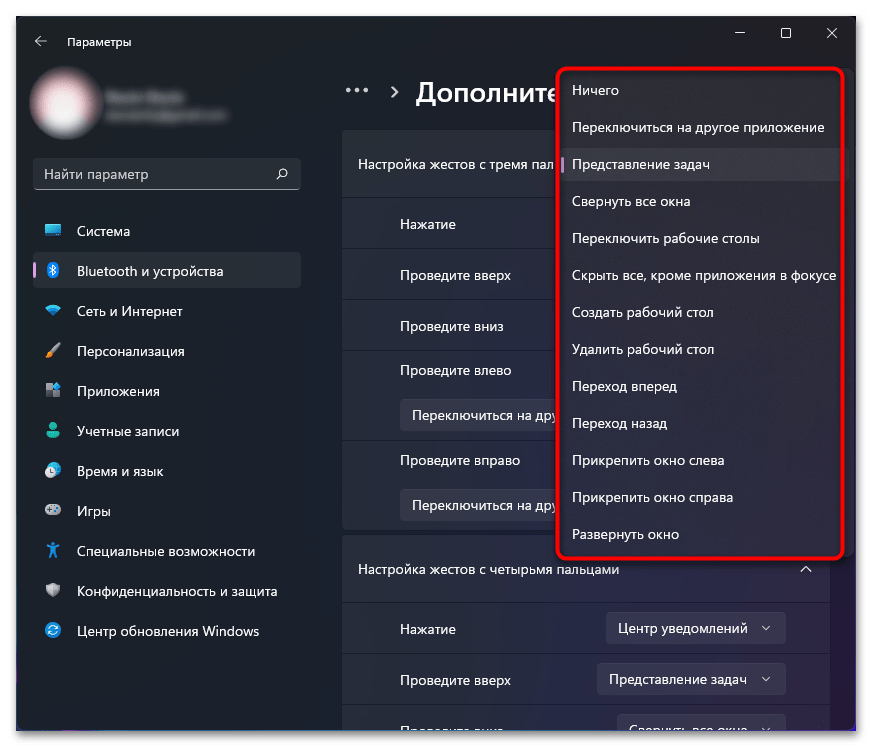
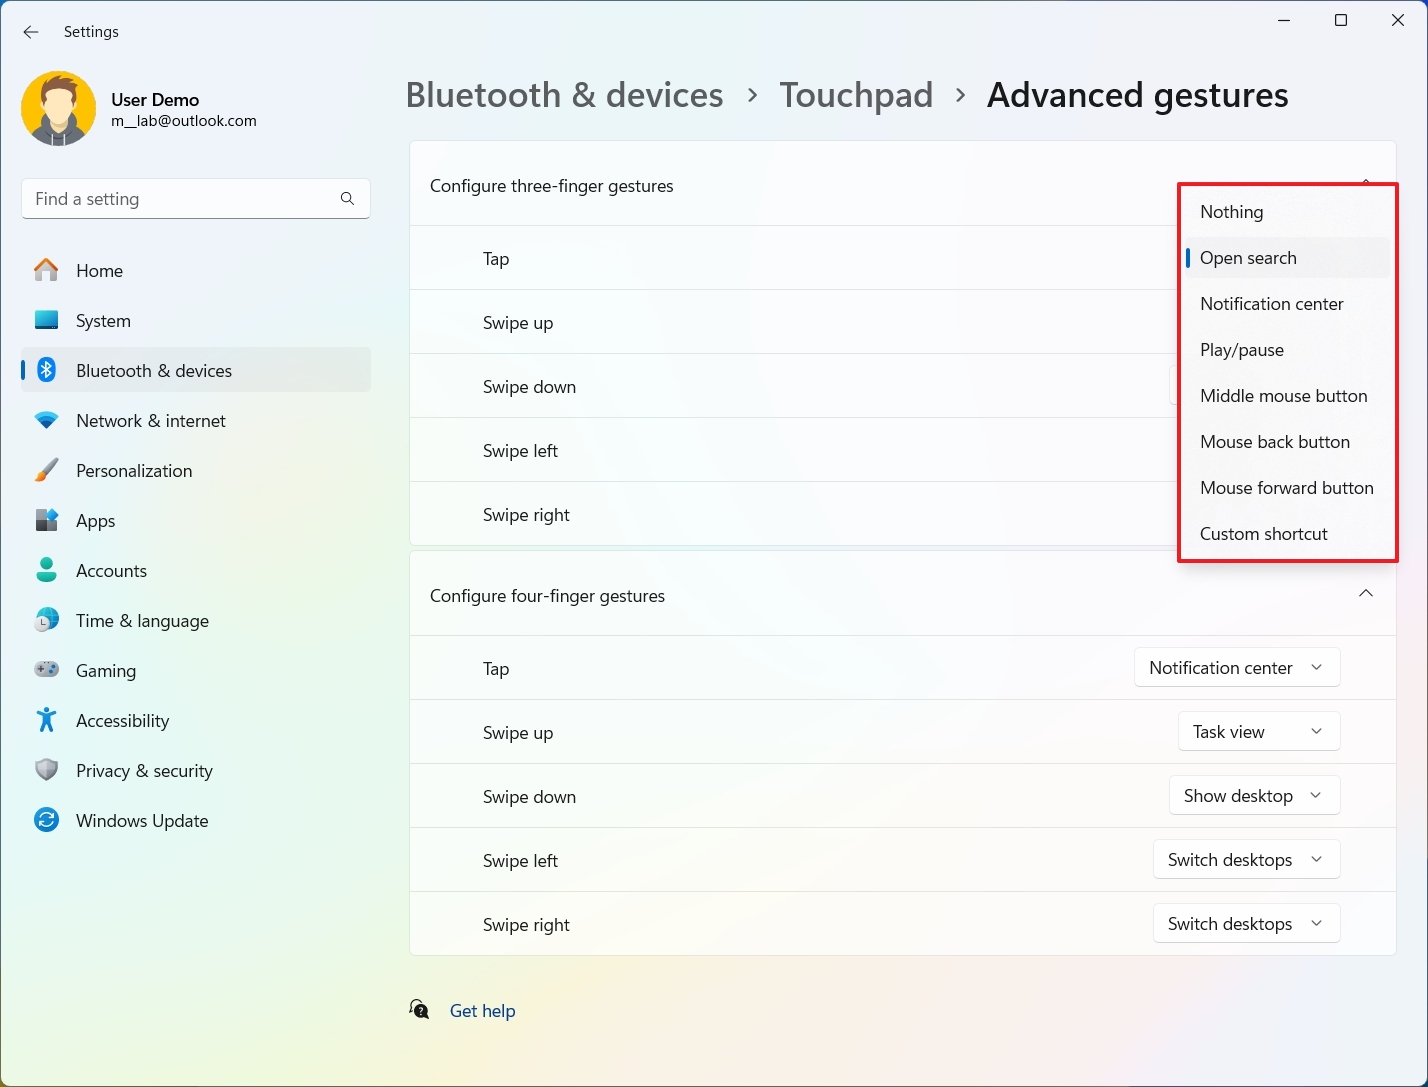
- Сначала обратите внимание на «Настройка жестов с тремя пальцами». Вы увидите разные действия для нажатий и проведения в разные стороны.
- Из списка вы можете выбрать переключение между приложениями, сворачивание окон, прикрепление окон, закрытие или создание рабочих столов.
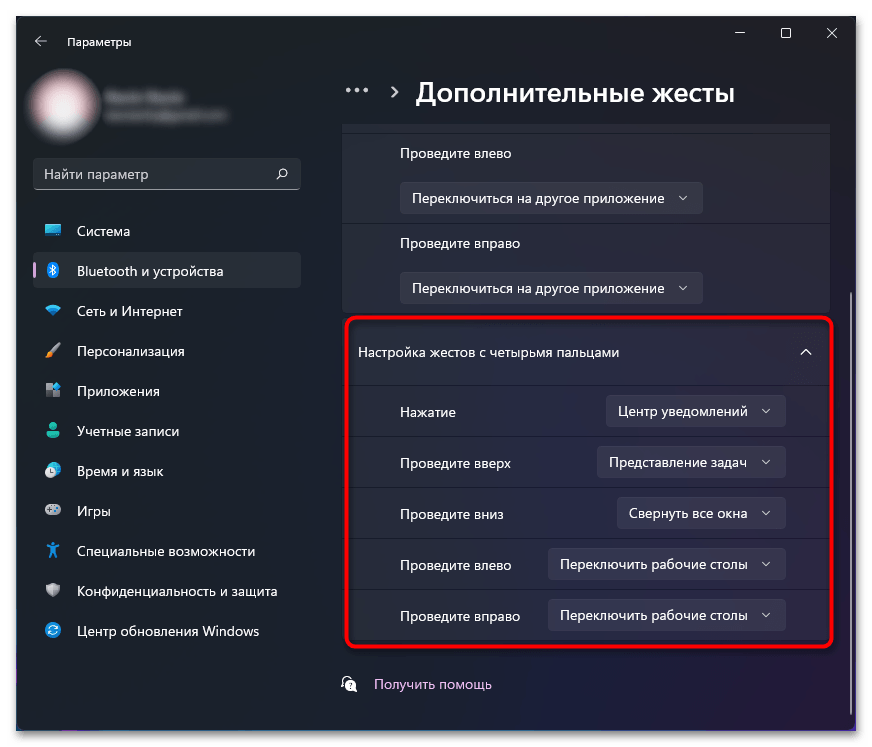
- Точно так же направления для жестов настраиваются и с четырьмя пальцами. Для каждого из них можно выбрать свое действие. Разверните каждый из списков, ознакомьтесь с вариантами и определите подходящие. Такие параметры точно станут полезными, если во время работы за ноутбуком вы часто переключаетесь между приложениями или предпочитаете использовать несколько рабочих столов.
Шаг 3: Дополнительные параметры сенсорной панели
Следующие настройки являются общими, поскольку одинаковы как для мыши, так и тачпада на ноутбуке. Это дополнительные параметры, при помощи которых чаще всего изменяется скорость указателя, его тип, отключается ускорение и настраивается длительность срабатывания двойного нажатия.
- Вам понадобится в уже знакомом окне щелкнуть по ссылке «Дополнительные параметры сенсорной панели».
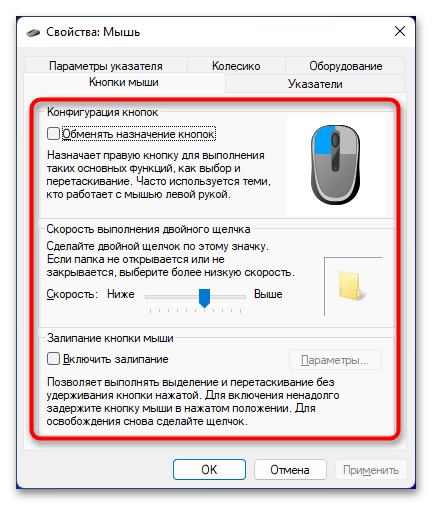
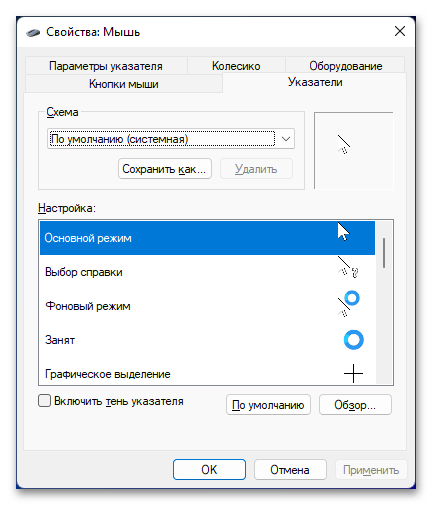
- Вы будете перенаправлены в новое окно, где можете поменять назначение кнопок, включить их залипание и изменить скорость выполнения двойного щелчка. Под каждой настройкой есть свое описание от разработчиков, поэтому запутаться не получится.
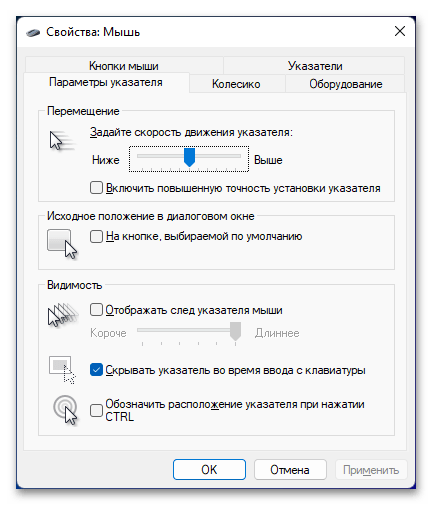
- На вкладке «Параметры указателя» вы настраиваете скорость его перемещения и можете отключить или включить повышенную точность установки указателя, то есть ускорение. Отключение акселерации особо актуально в тех случаях, когда вы используете тачпад для игр на ноутбуке и хотите получать корректный отклик при обзоре мышкой.
- Если выбрать вкладку «Указатели», то можно настроить схему внешнего вида всех указателей ОС. Однако для Windows 11 этот метод уже почти не актуален, поскольку более продвинутую настройку можно выполнить через «Параметры», о чем мы еще поговорим в следующем шаге.

Шаг 4: Персонализация указателя
Завершающий этап настройки тачпада относится к внешнему виду указателей, которые вы видите на экране в Windows 11. Принцип их настройки одинаков и для мыши, и для сенсорной панели, поскольку сам курсор на экране не зависит от типа используемого оборудования. На нашем сайте есть отдельная статья по теме, в которой разбираются как встроенные средства персонализации, так и использование вспомогательных программ.
Подробнее: Изменение курсора мыши в Windows 11

Наша группа в TelegramПолезные советы и помощь
Adjust Laptop Touchpad Settings for Scroll Speed, Pinch and Zoom, Cursor Speed, and Touchpad Gestures for Windows 11 using this Simple Guide.
Windows 11 is slowly made available for more devices as time is passing by. The new operating system brings several design changes along with a few new features. The most notable of them all is the placement of the Start menu has been changed from the left corner to the center position, and also it will soon support Android apps. While you can change the position of the Start menu, there are a few settings that people are finding a bit difficult to tweak and adjust.
One such setting is the touchpad scroll speed. If you are also one of Windows 11 users that is finding it difficult or doesn’t know how to adjust touchpad scroll speed in Windows 11 then, you are at the right place. Because, in this post, we will give you a complete guide on how you can adjust the touchpad scroll speed in Windows 11. With that said, let us jump straight into the article.
The touchpad settings in Windows 11 operating system are located under the Settings menu. Below are the steps that you need to follow in order to access the touchpad settings.
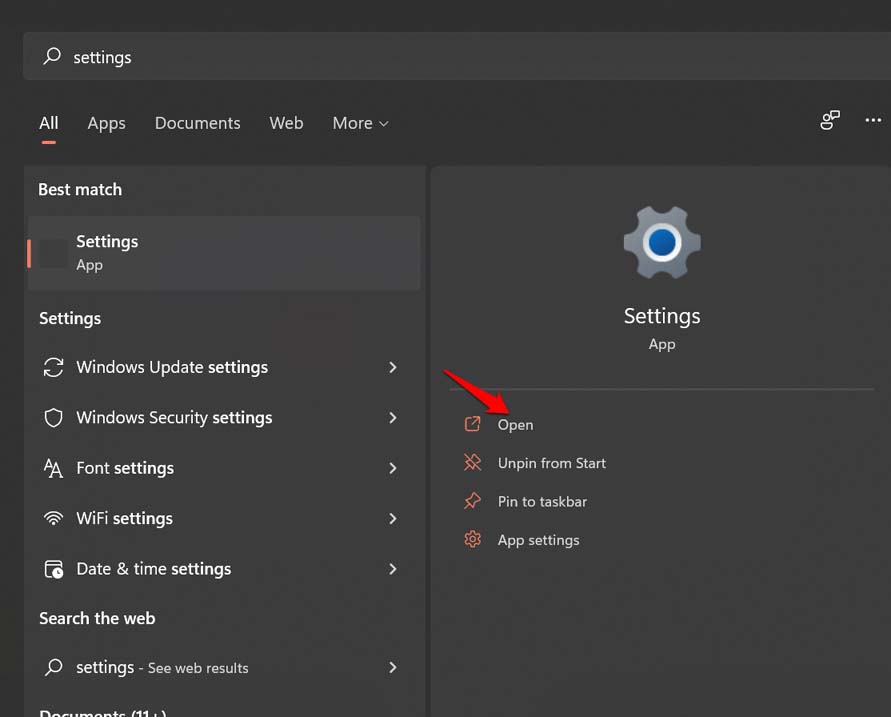
- Right-click on the Windows or Start menu and search for Settings.

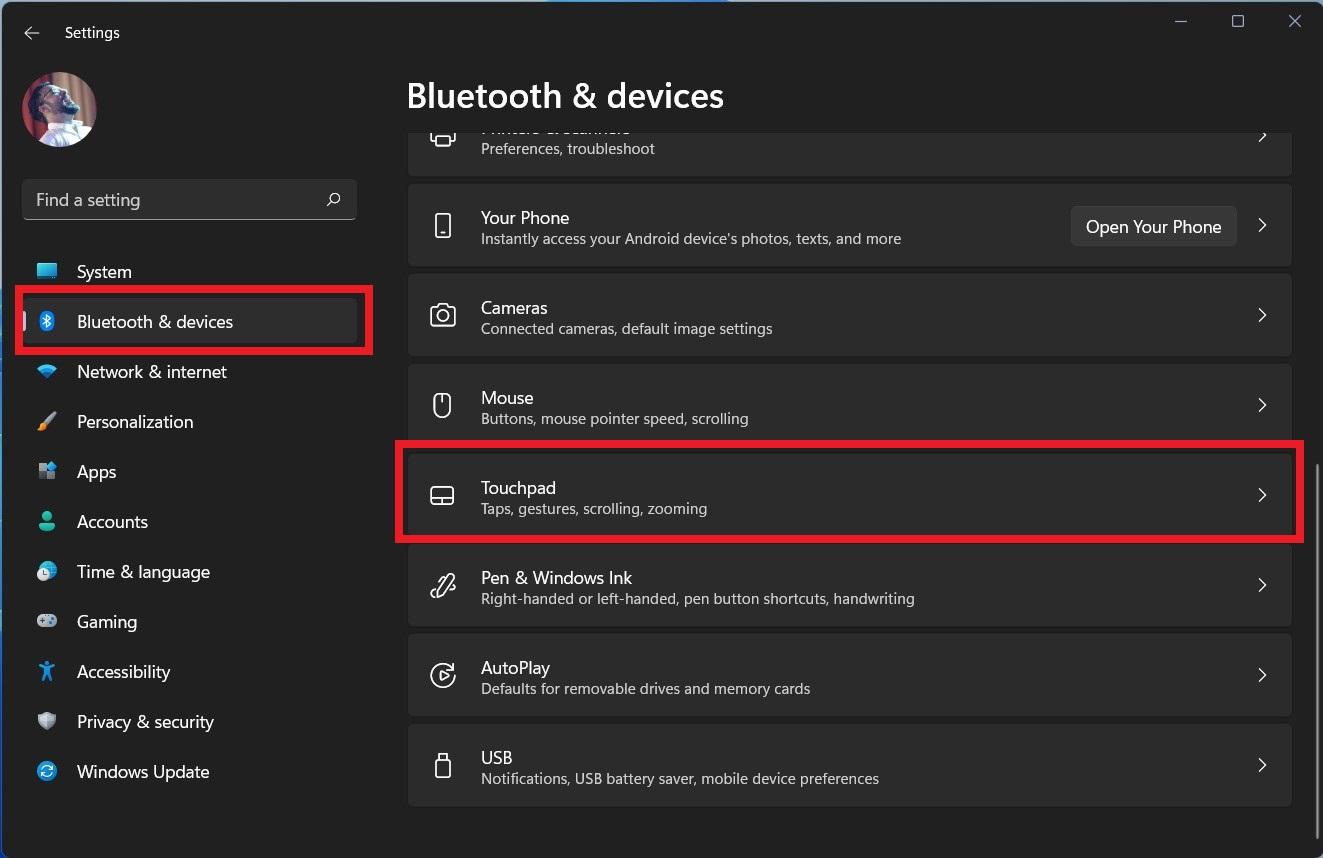
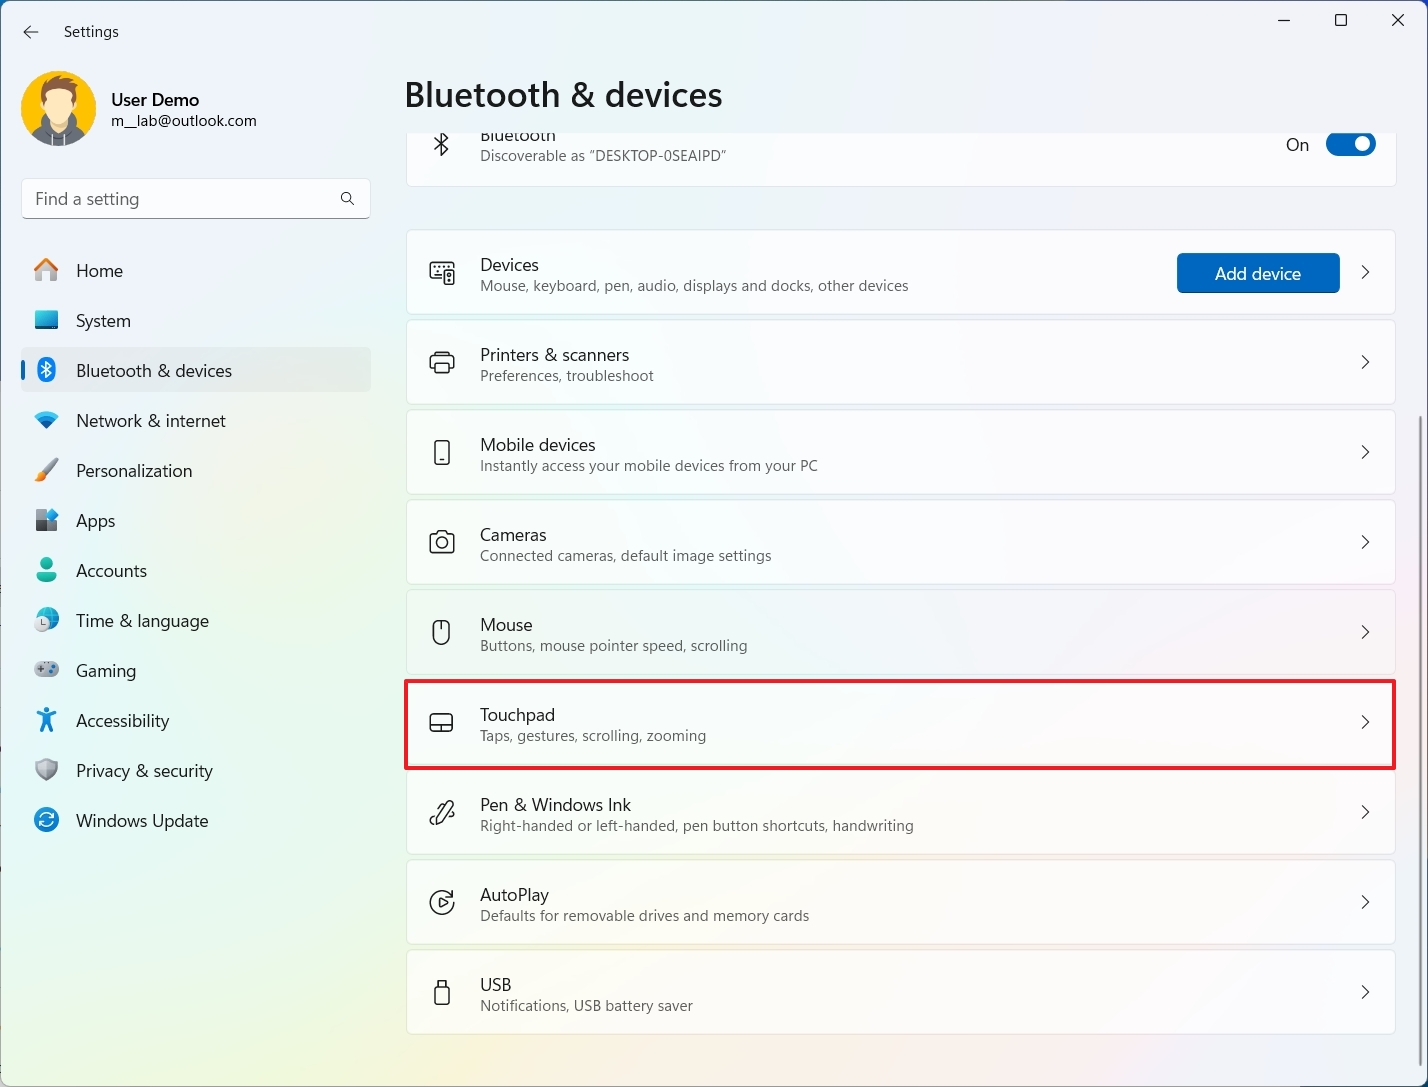
- From the left pane, select Bluetooth & devices.
- Scroll down on the right side and you will see the Touchpad option.

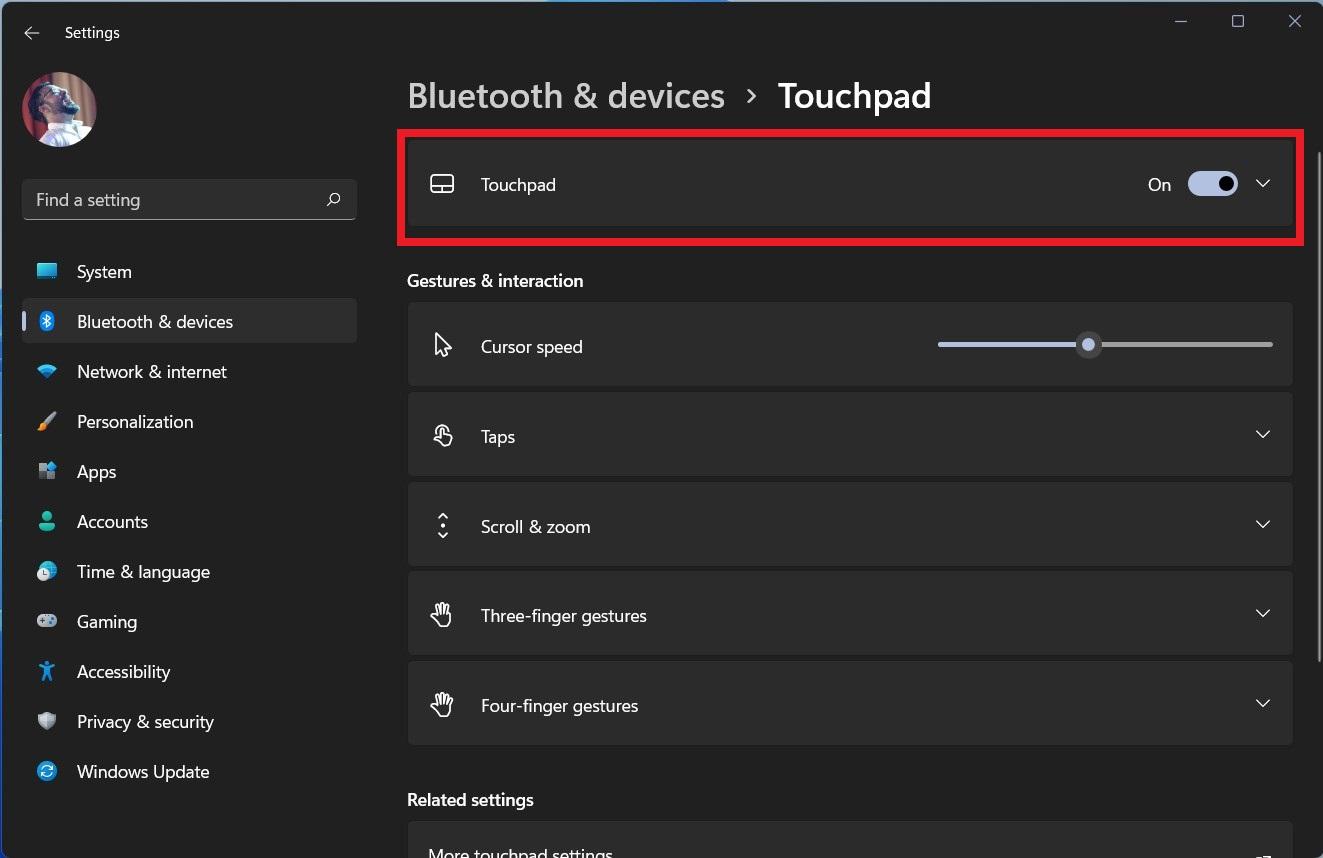
If the toggle next to the Touchpad option is turned OFF, then the touchpad on your laptop won’t work. So, if you come across a situation where the touchpad of your laptop isn’t working, then the first thing that you should check is whether this toggle is turned ON or not.
2. How to Change Touchpad Cursor Speed
If you wish to tweak the cursor speed of the touchpad on your Windows 11 laptop, then after arriving on the Touchpad settings window by following the steps above, you can change the cursor settings. Here, you will be able to adjust the speed of the touchpad cursor according to your pace. Simply follow the below steps.
- Under the Touchpad window, use the Cursor speed slider to adjust the speed of the cursor.
- Sliding the slider to the right will increase the cursor speed. Whereas, sliding the slider to the left will decrease the speed. You can choose the speed accordingly.
3. How to Adjust Touchpad Sensitivity
Are you having trouble with the high/low touchpad sensitivity? If yes, then by following the below-mentioned steps you can tweak the touchpad sensitivity and adjust it accordingly.
- Under the Touchpad settings window, select the Taps option.
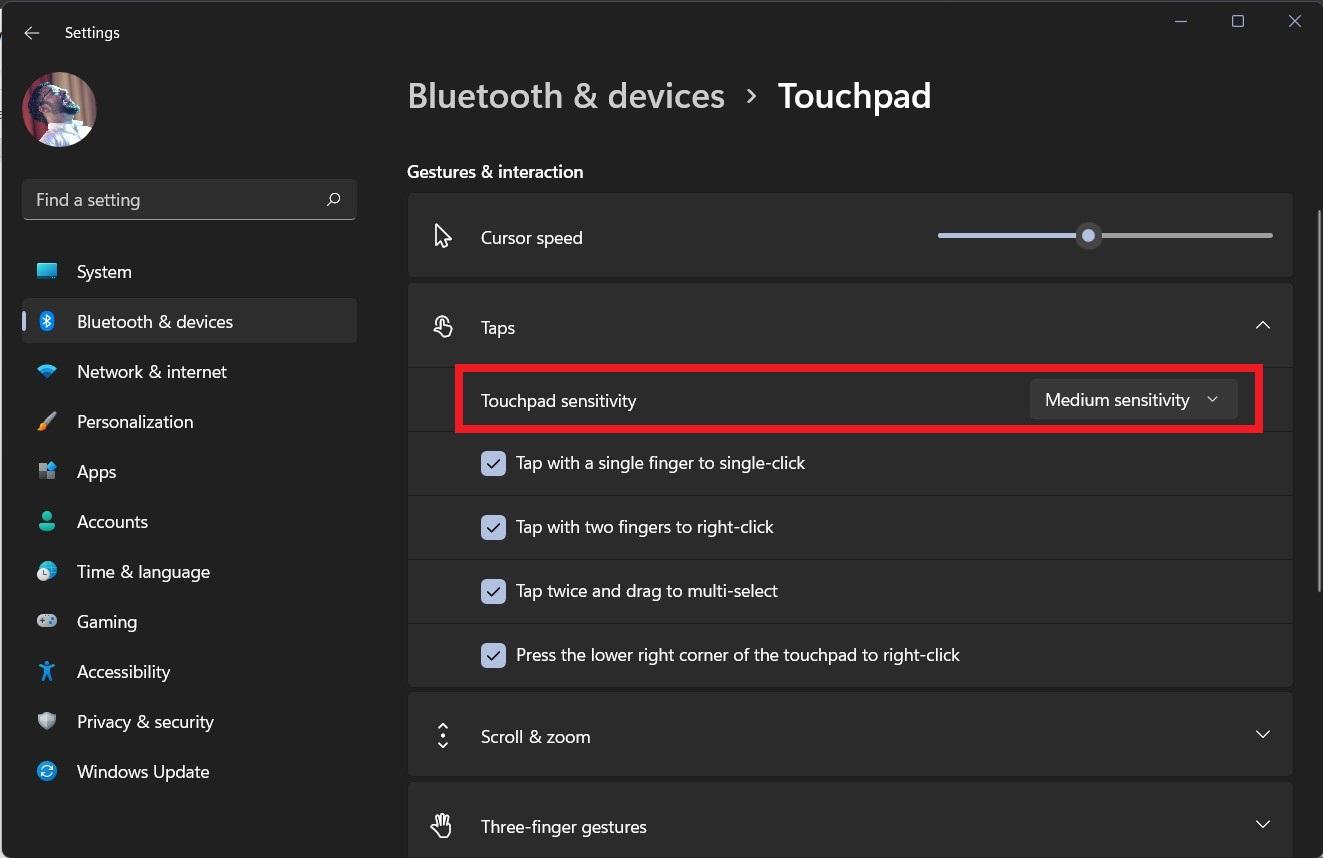
- After expanding the Taps option, click on the box next to Touchpad sensitivity.
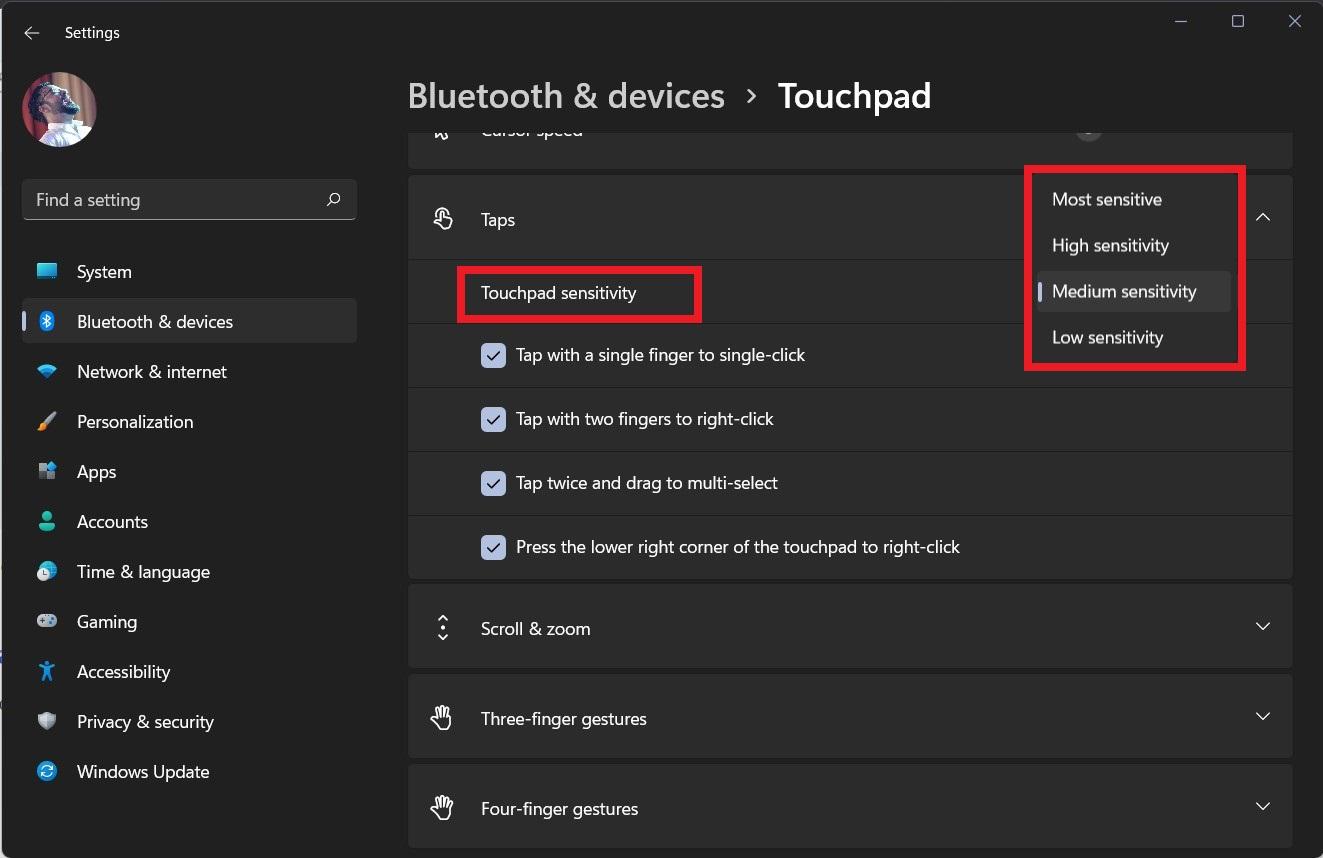
- Clicking the box will show you a drop-down menu with multiple options including Most sensitive, High sensitivity, Medium sensitivity, and Low sensitivity.
- Select the best sensitivity settings that you find appropriate.
- Once selected, simply exit the Settings window and you will see the change taking effect immediately.
4. How to Adjust Touchpad Settings for Scroll and Zoom
Here, we will discuss the settings which you can change to adjust the touchpad settings for scrolling and zooming while web browsing or casual usage.
- Open the Touchpad settings as mentioned above.
- Expand the Scroll & zoom section to configure the touchpad of your laptop.
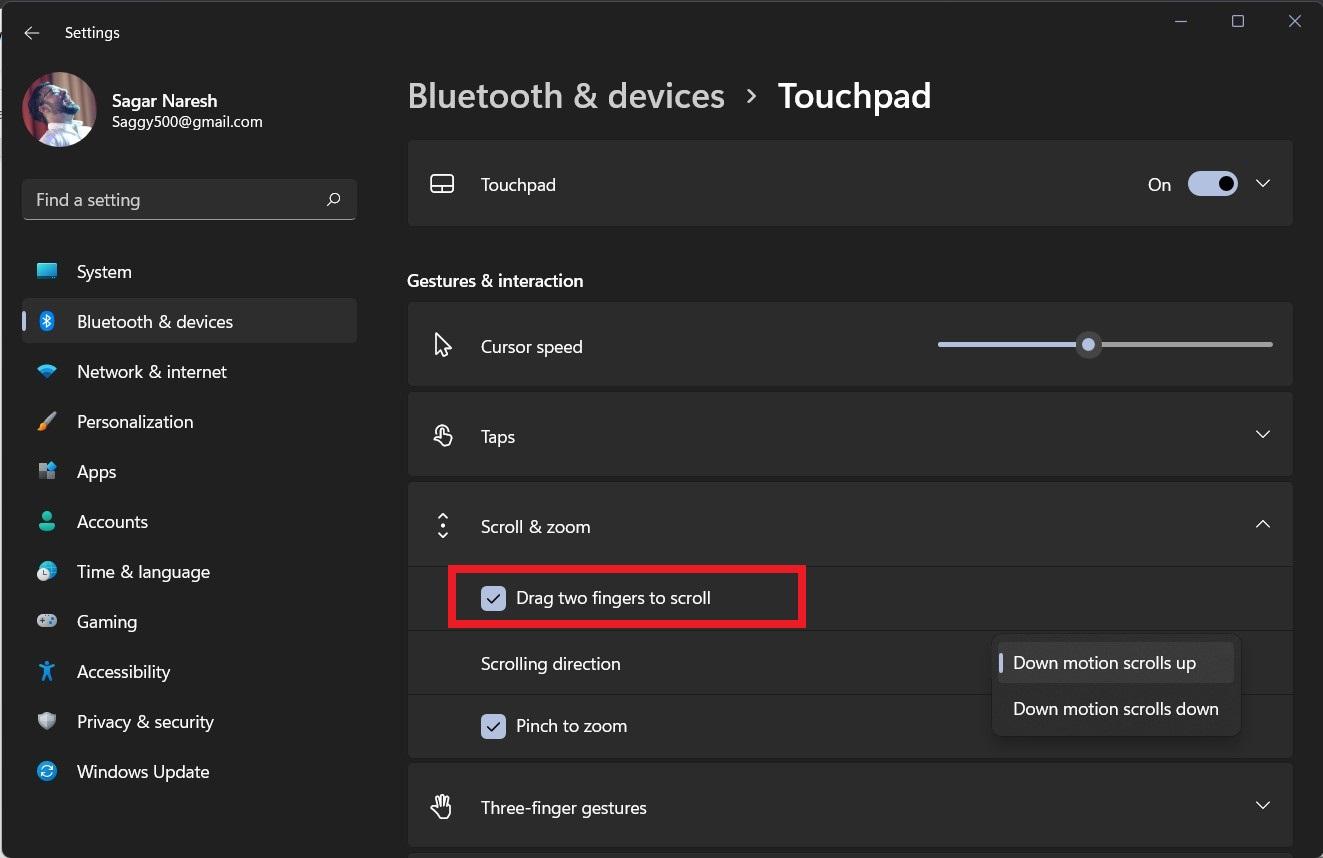
- The first option will let you scroll without moving the cursor to the Windows scroll bar. Clicking on the Drag two fingers to scroll option will let you scroll by swiping two fingers on the touchpad.
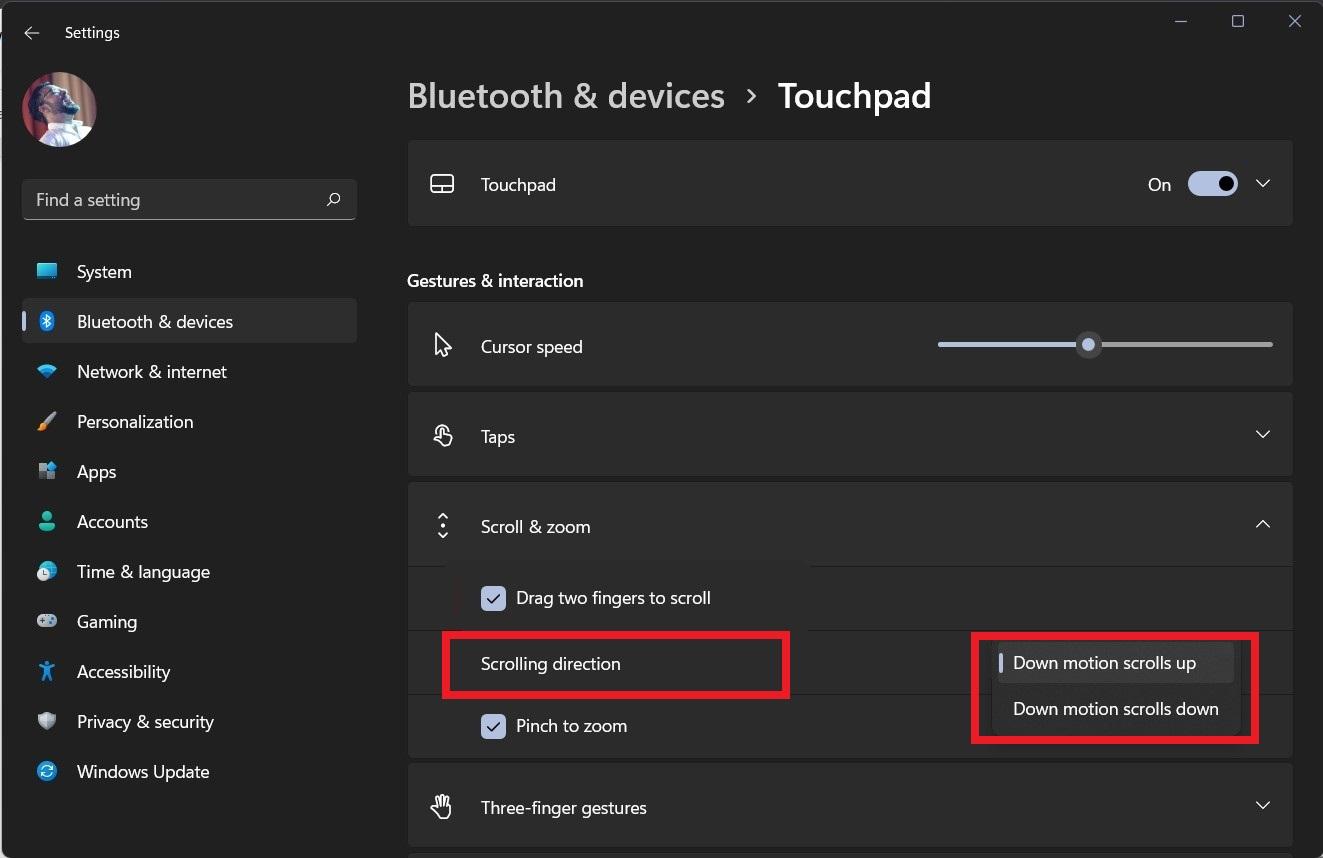
- It also gives you a setting to select if you wish to select down scrolling to move up or down scrolling moves down.
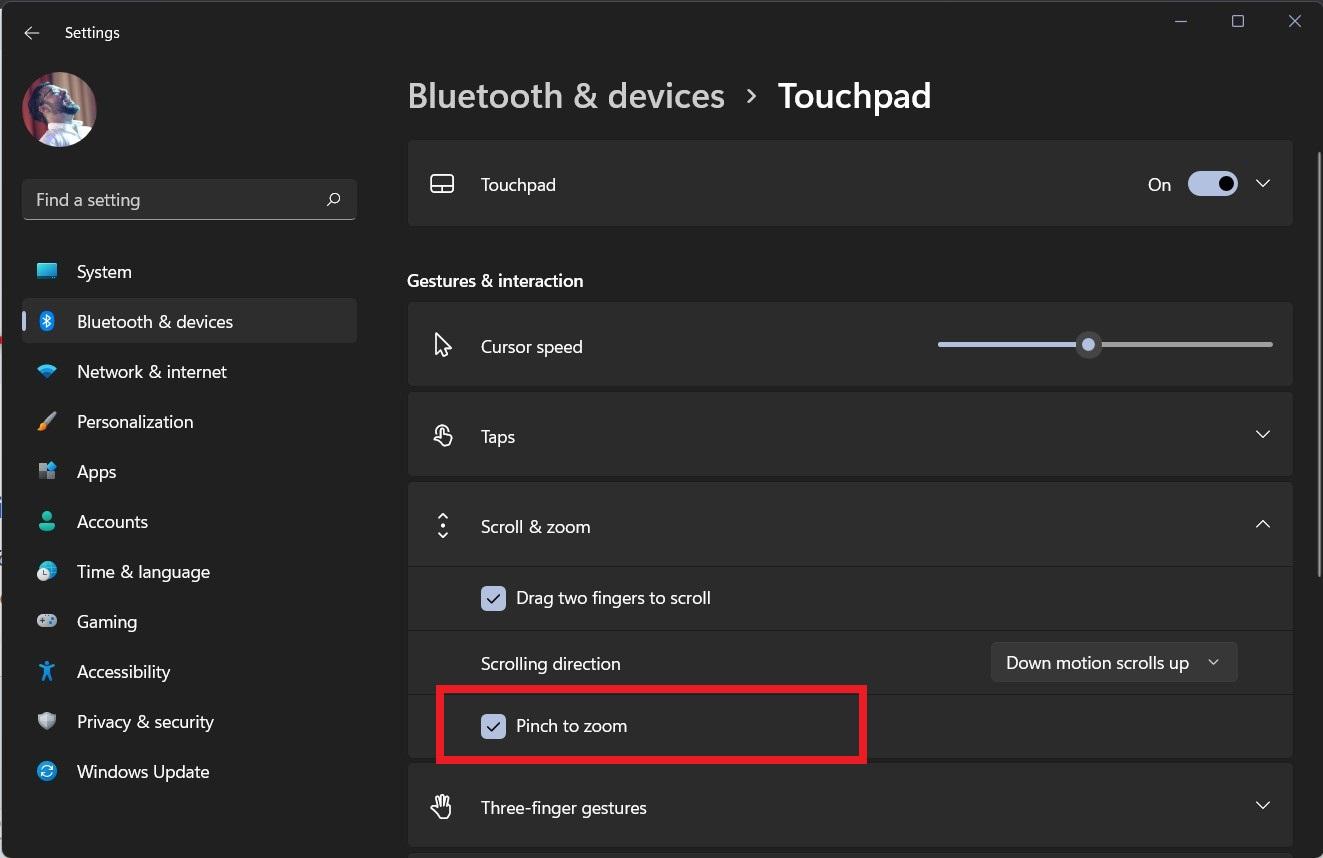
- Now, the next box, Pinch to zoom, lets you zoom in on any photo or a web page by placing two fingers on the touchpad and pinching them together to zoom in or out.
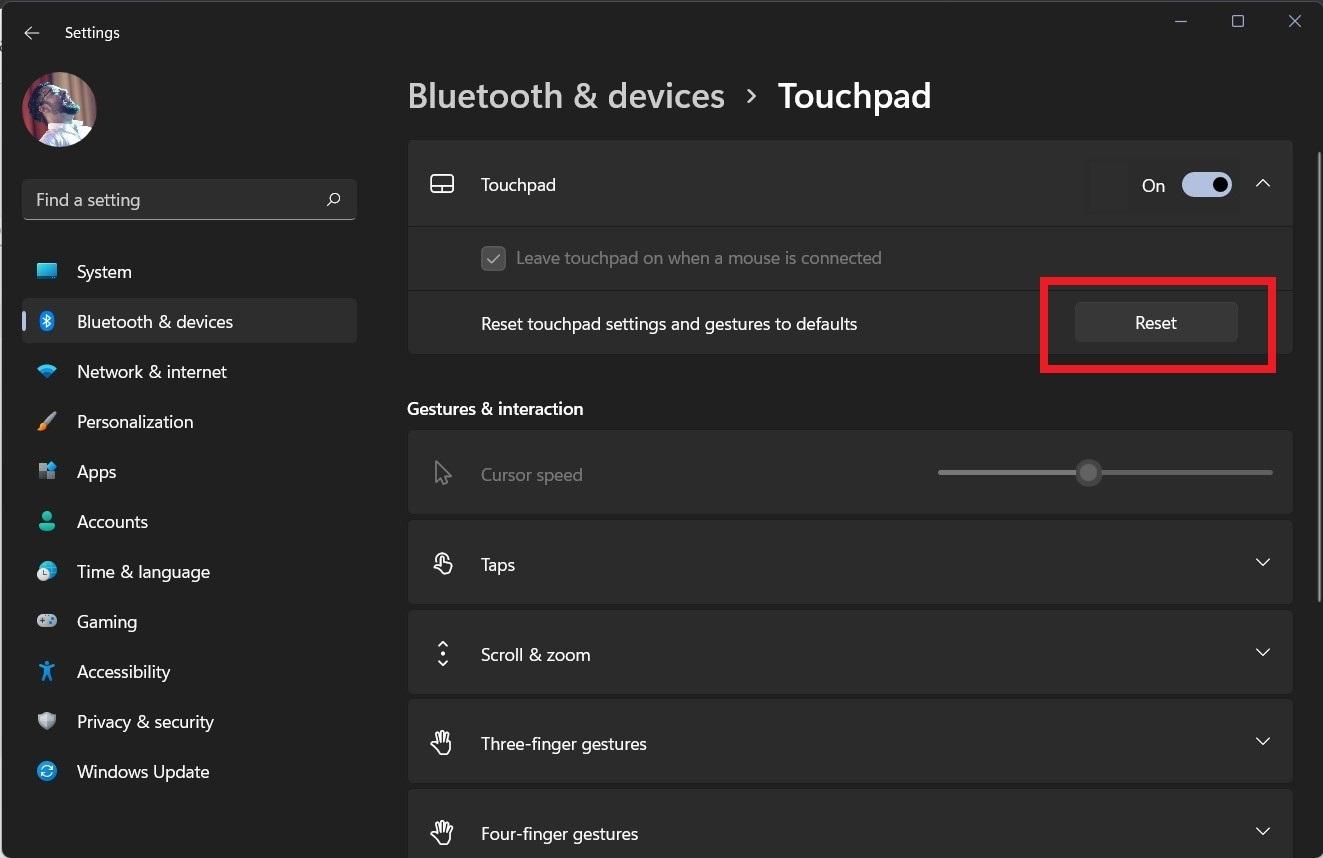
5. How to Reset Touchpad Settings
If you think you have messed up your Windows 11 laptop’s touchpad settings, then there is an option that will let you revert to the original settings. For that, follow the steps mentioned below.
- Open Settings > Bluetooth & devices.
- Scroll down and select Touchpad.
- Expand the Touchpad option and click on the Reset button.
- That’s it! This will change all the changed settings back to the original.
If you’ve any thoughts on How to Adjust Touchpad Settings & Scroll Speed Windows 11, then feel free to drop in below comment box. Also, please subscribe to our DigitBin YouTube channel for videos tutorials. Cheers!
The touchpad is that little touch-sensitive area on the bottom of your laptop that controls the mouse pointer and performs other functions while recognizing the different touch gestures.
When you purchase a new laptop or change from one laptop to another, you may notice that you have to press a little harder to register your finger on the touchpad, or have to move around your finger twice as much to move the mouse pointer. This is probably because of the touchpad sensitivity difference between the two laptops.
In such a situation, you can adjust the touch sensitivity of either of the touchpads to match the other one, so that there is no longer a difference, and the transition is seamless.
Table of Contents
Touchpad Sensitivity: Cursor Speed vs. Tap Sensitivity
Before we show you the different methods to adjust the touchpad’s sensitivity on a Windows 11 laptop, we would like to clear out a common misunderstanding between users.
When you hear the words “touchpad sensitivity,” it is thought of as referring to the mouse cursor sensitivity, when in fact it can also mean the sensitivity by which the touchpad recognizes a finger (tap). This is specifically known as tap sensitivity.
Tap sensitivity is how hard you need to press down on the touchpad for the PC to register your tap. You can select tap sensitivity out of these 4 options:
- Most sensitive
- High sensitivity
- Medium sensitivity
- Low sensitivity
By default, Windows 11’s touchpad tap sensitivity is configured at “Medium sensitivity.”
With that cleared out, let us now show you how to adjust the tap sensitivity and the touchpad cursor speed on a Windows 11 computer.
How to Adjust Touchpad Tap Sensitivity in Windows 11
From Settings app
Follow these steps to adjust the sensitivity of your touchpad to taps from the Settings app:
-
Navigate to the following:
Settings app >> Bluetooth and devices >> Touchpad
-
Here, click Taps to expand it.

Expand Taps -
Now select the sensitivity that suits you best from the drop-down menu in front of Touchpad sensitivity.
Choose touchpad tap sensitivity


If you are not sure which one suits you, you can try them one after the other and select the one you think is best for your touch responses.
From Windows Registry
You can also apply the same configurations directly within the Windows Registry that will apply to the selected tap sensitivity. Here is how:
Note: Misconfiguration of critical values in the system’s registry could be fatal for your operating system. Therefore, we insist that you create a system restore point before proceeding forward with the process.
-
Open the Registry Editor by typing in Regedit in the Run Command box.
Regedit -
Now paste the following path into the address bar for quick navigation:
Computer\HKEY_CURRENT_USER\Software\Microsoft\Windows\CurrentVersion\PrecisionTouchPad

Quick navigation to PrecisionTouchPad Key -
Double-click the AAPThreshold value in the right pane and then set its Value Data to either of the following options:
-
0 – Most Sensitive
-
1 – High Sensitivity
-
2 – Medium Sensitivity
-
3 – Low Sensitivity
Click OK when done.
Select Value Data against tap sensitivity -
-
Now restart your computer for the changes to take effect.


Once the computer restarts, the touchpad’s tap sensitivity will change. That being said, you can still change it to any other configuration using the Registry Editor or through the Settings app as discussed above.
How to Adjust Touchpad Cursor Speed Sensitivity in Windows 11
From Settings app
You can also control your mouse pointer/cursor’s movement speed from the Settings app. Here is how:
-
Navigate to the following:
Settings app >> Bluetooth and devices >> Touchpad
-
Here, you will see a slider under the “Gestures & interactions” section in front of Cursor speed. Drag that slider from left to right to reduce or increase the cursor speed, respectively.
Adjust touchpad cursor speed You can leave the settings where you think the cursor speed is right for you and then close the Settings app.

From Control Panel
If you prefer the legacy Control Panel, you can adjust your cursor’s speed from there too. Here is how:
-
Navigate to the following:
Control Panel >> Hardware and Sound
-
Here, click Mouse under Devices and printers.

Open mouse settings -
From the Mouse Properties popup window, switch to the Pointer Options tab. From there, adjust the slider under “Motion” to adjust the pointer speed. If you are satisfied with the speed, click Apply and Ok.
Adjust pointer speed from Control Panel


Final Thoughts
Using the given methods above, you can now control how your system’s touchpad reacts to your touches and the speed at which the cursor moves. Furthermore, you can also configure 2, 3, and 4 finger touchpad gestures and choose which actions to perform.
Using these methods, the touchpad can become an even better tool than having an attached mouse.
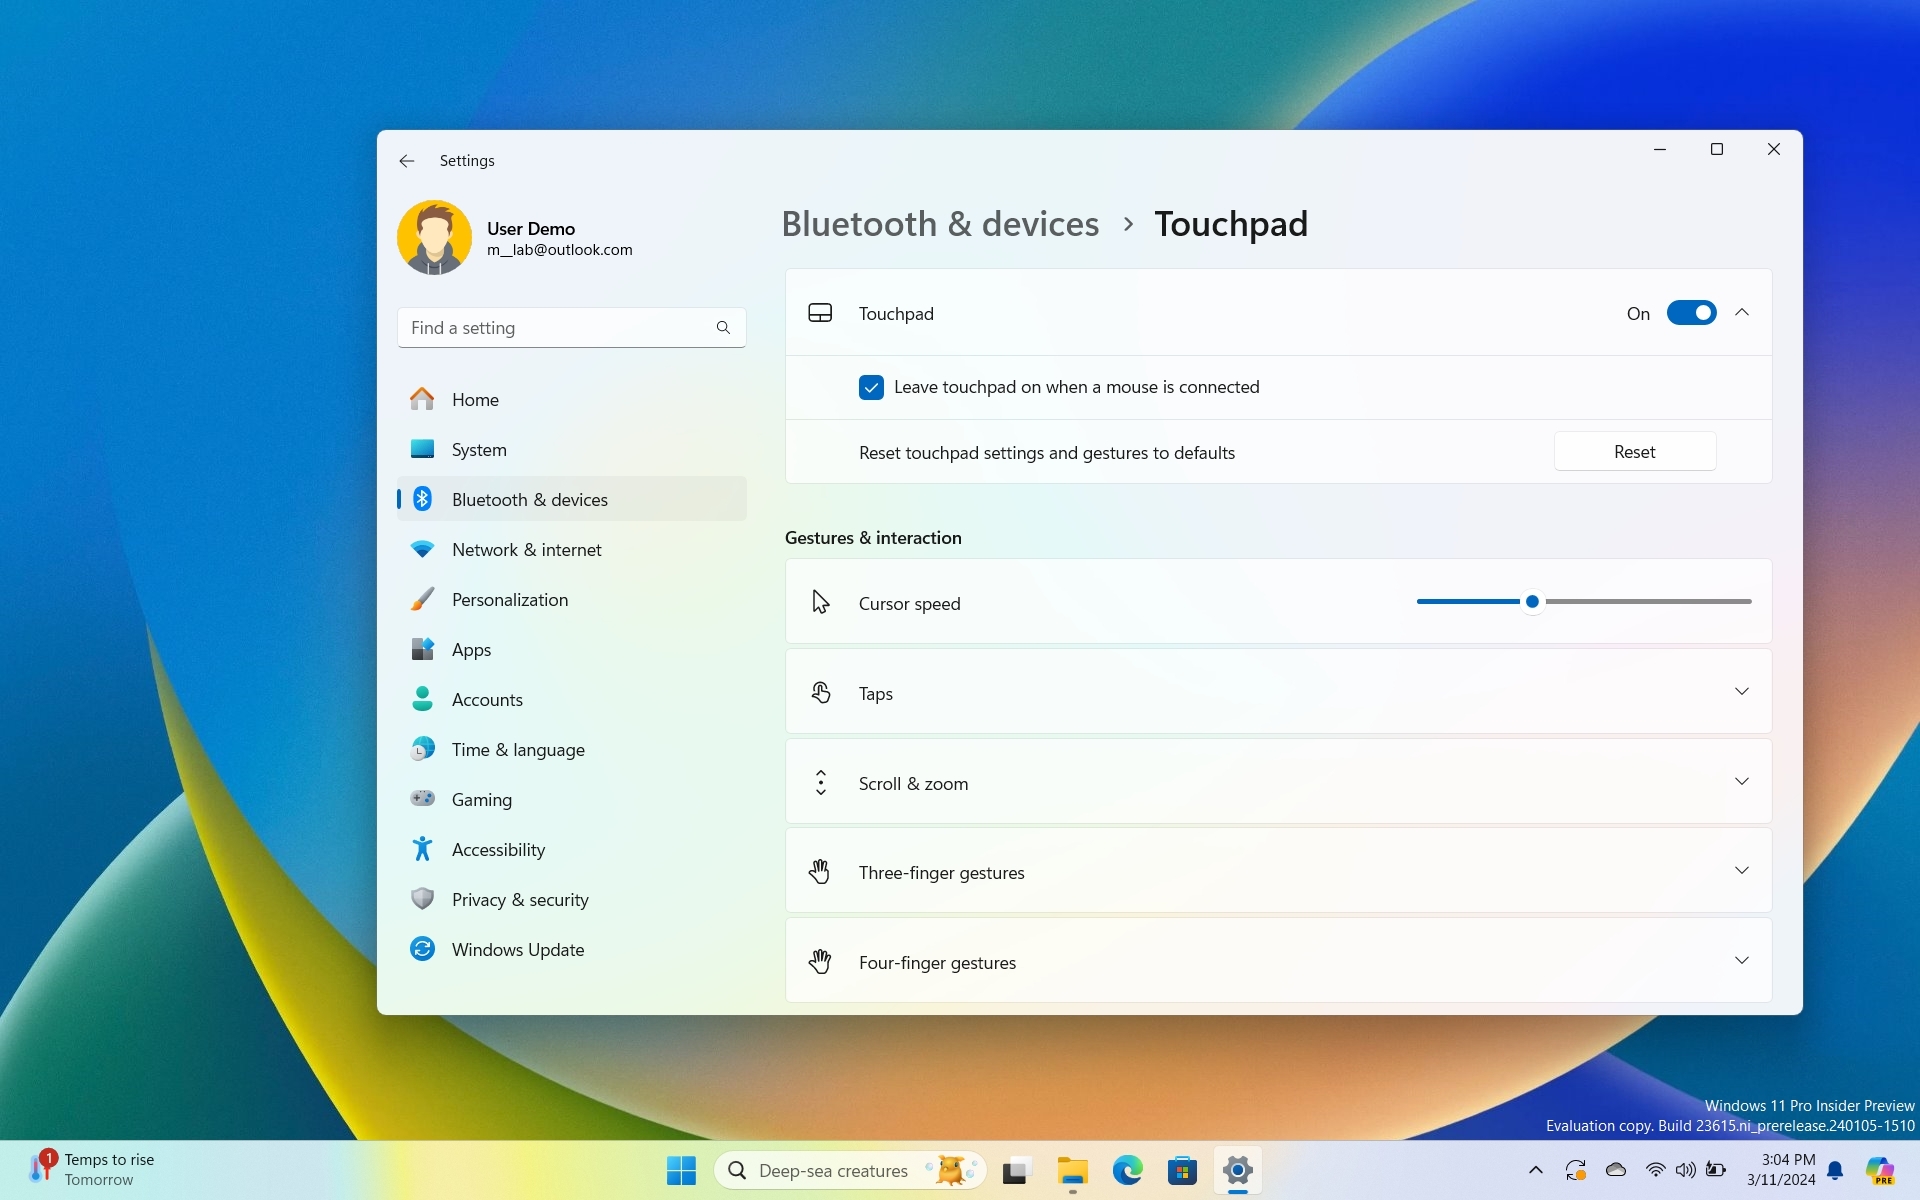
(Image credit: Mauro Huculak)
On Windows 11, you can change the touchpad settings to improve the navigation experience, and in this guide, I will show you how to manage this feature on your laptop.
If you have a laptop running Windows 11, the device more than likely has a precision touchpad. Unlike traditional touchpads, this type provides a more accurate and reliable pointer experience. It also enables additional features, such as a broader range of multitouch gestures, accidental activation prevention, battery life, security, and the ability to customize additional settings.
For example, you can control the cursor speed and tap and finger gestures. You can also change the scroll direction and enable the pinch-to-zoom gesture.
In this how-to guide, I’ll explain the steps to manage the touchpad settings on your computer.
How to adjust Touchpad settings on Windows 11
On Windows 11, you can change various settings to improve the usability of your laptop’s touchpad, including adjusting the cursor speed, gestures, and scroll and zoom. And if you make a lot of changes, you can always revert the settings to their original configuration, and here’s how.
Turn touchpad on or off
To enable or disable the touchpad on Windows 11, use these steps:
- Open Settings.
- Click on Bluetooth & devices.
- Click the Touchpad page on the right side.
- Turn on the Touchpad toggle switch.
- (Optional) Click the Touchpad setting.
- Check the «Leave touchpad on when a mouse is connected» option.
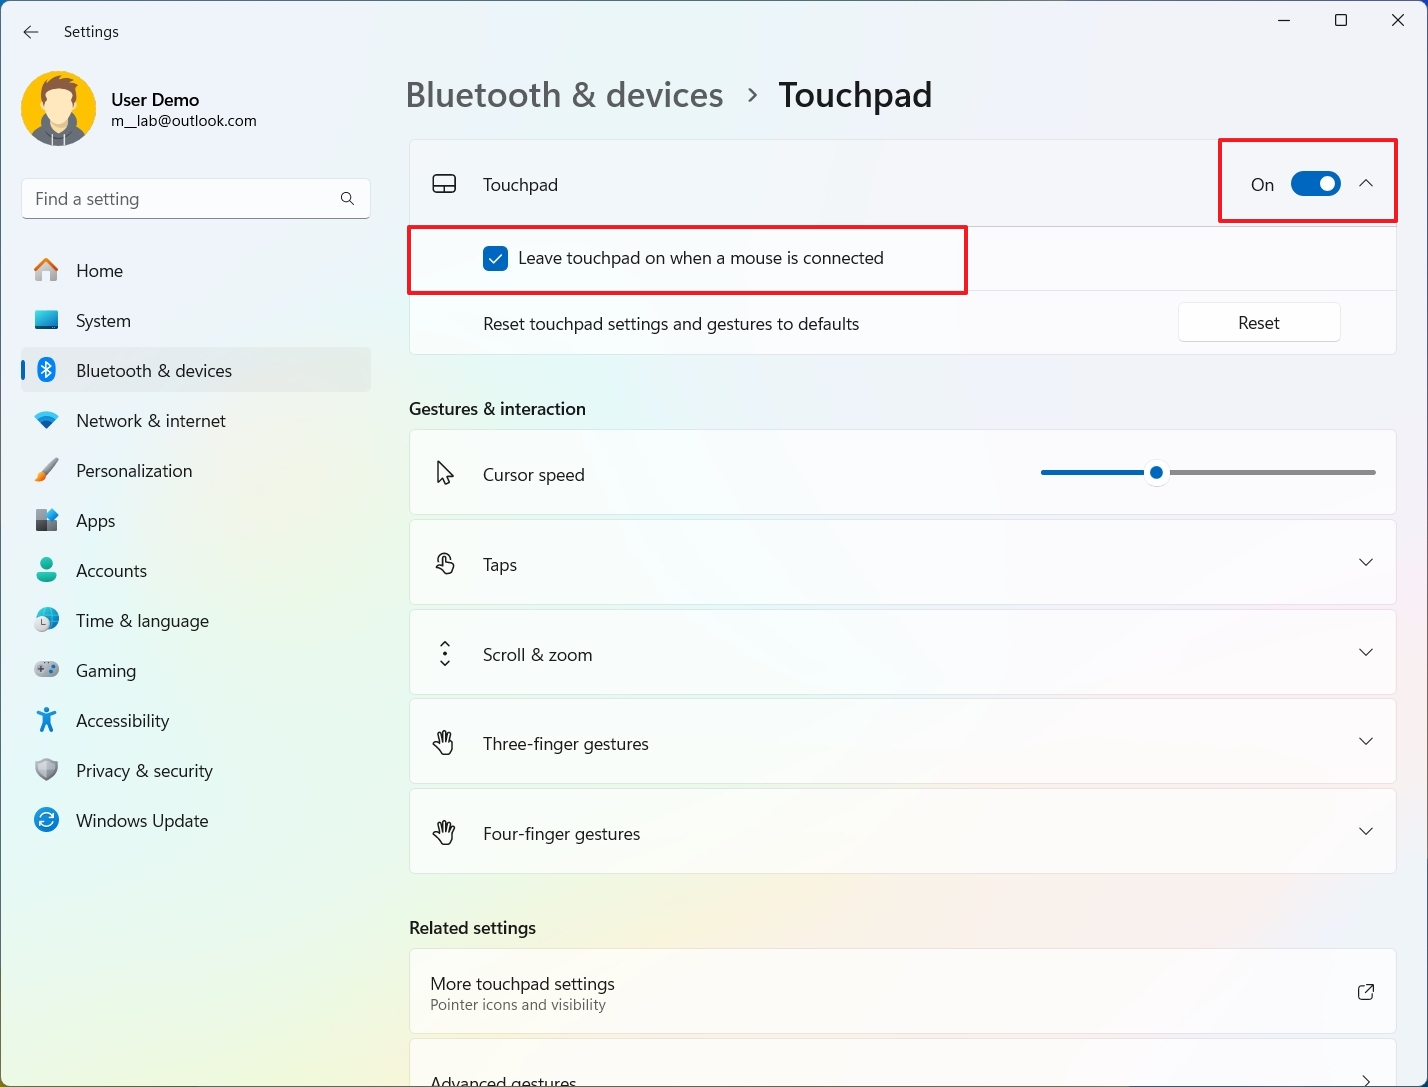
- (Optional) Turn off the Touchpad toggle switch.
Once you complete the steps, you can use the touchpad with your computer.
All the latest news, reviews, and guides for Windows and Xbox diehards.
Change cursor speed
To change the cursor speed for the touchpad, use these steps:
- Open Settings.
- Click on Bluetooth & devices.
- Click the Touchpad page on the right side.
- Use the Cursor speed slider to adjust the velocity of the mouse pointer under the «Gestures & interaction» section.
After you complete the steps, the cursor will travel at the specified speed.
Configure tap gestures
To configure the gestures for taps, use these steps:
- Open Settings.
- Click on Bluetooth & devices.
- Click the Touchpad page on the right side.
- Click the Taps setting under the «Gestures & interaction» section.
- Choose the touchpad sensitivity, including low, medium, high, and most sensitive.
- Check or clear the «Tap with a single finger to single-click» to turn the feature on or off.
- Check or clear the «Tap with two fingers to right-click» to turn the feature on or off.
- Check or clear the «Tap twice and drag to multi-select» to turn the feature on or off.
- Check or clear the «Press the lower right corner of the touchpad to right-click» to turn the feature on or off.
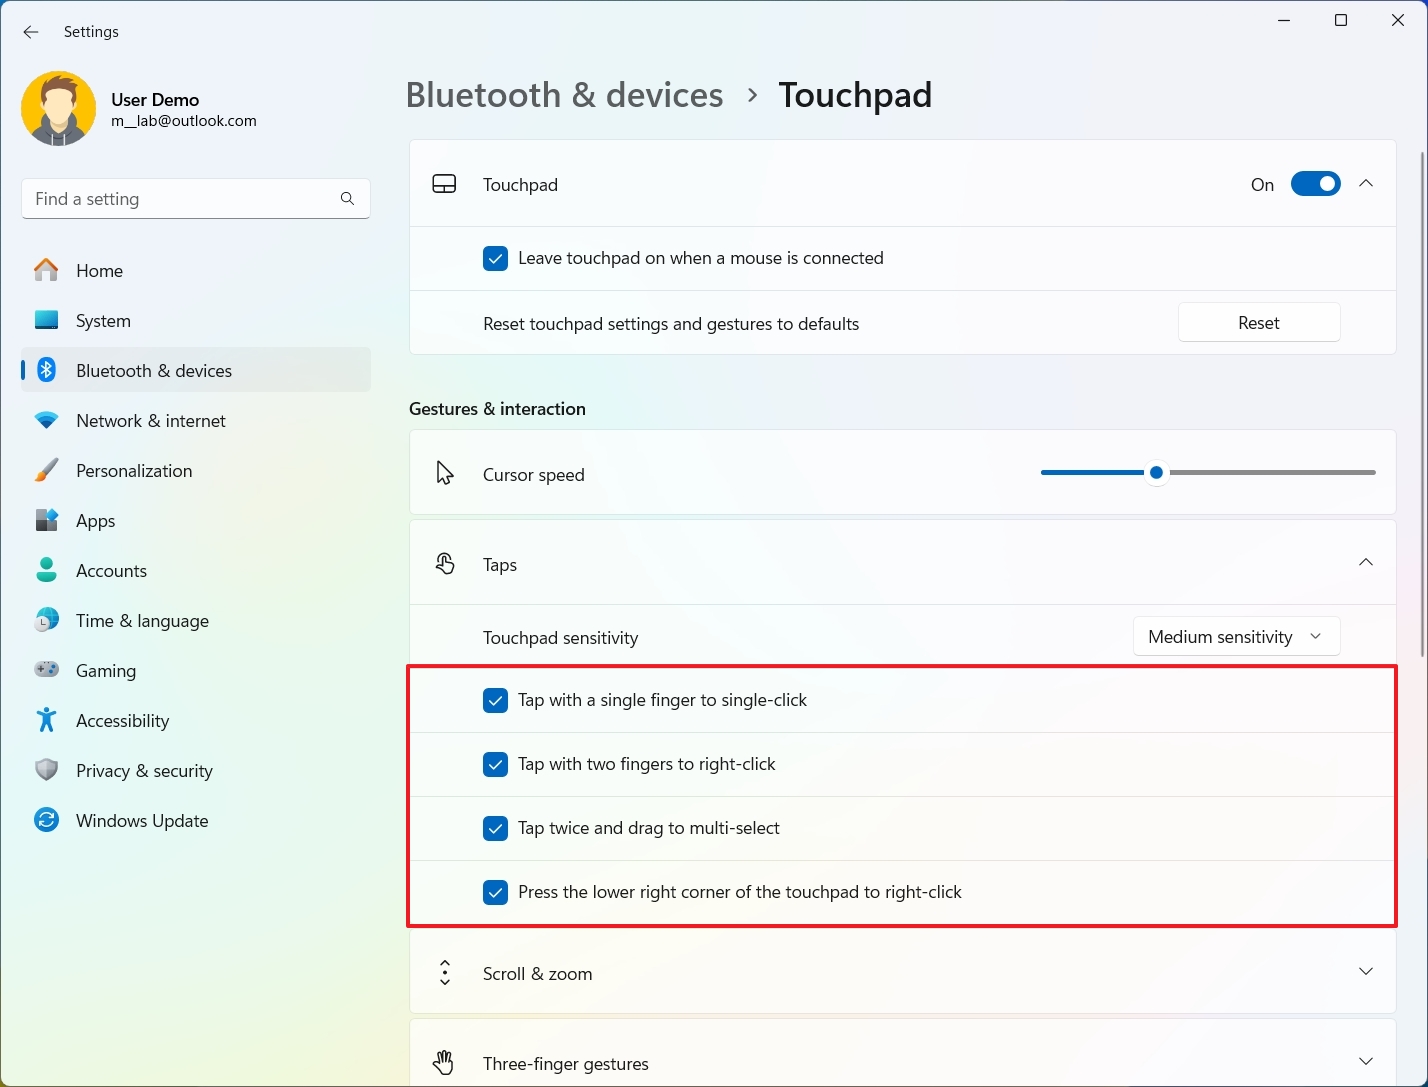
Once you complete the steps, the new settings will apply to the touchpad experience on Windows 11.
To adjust the scroll and zoom for your laptop’s touchpad, use these steps:
- Open Settings.
- Click on Bluetooth & devices.
- Click the Touchpad page on the right side.
- Click the Scroll & zoom setting under the «Gestures & interaction» section.
- Check or uncheck the «Drag two fingers to scroll» option to turn the feature on or off.
- Choose the scrolling direction (down motion to scroll up or down motion to scroll down.)
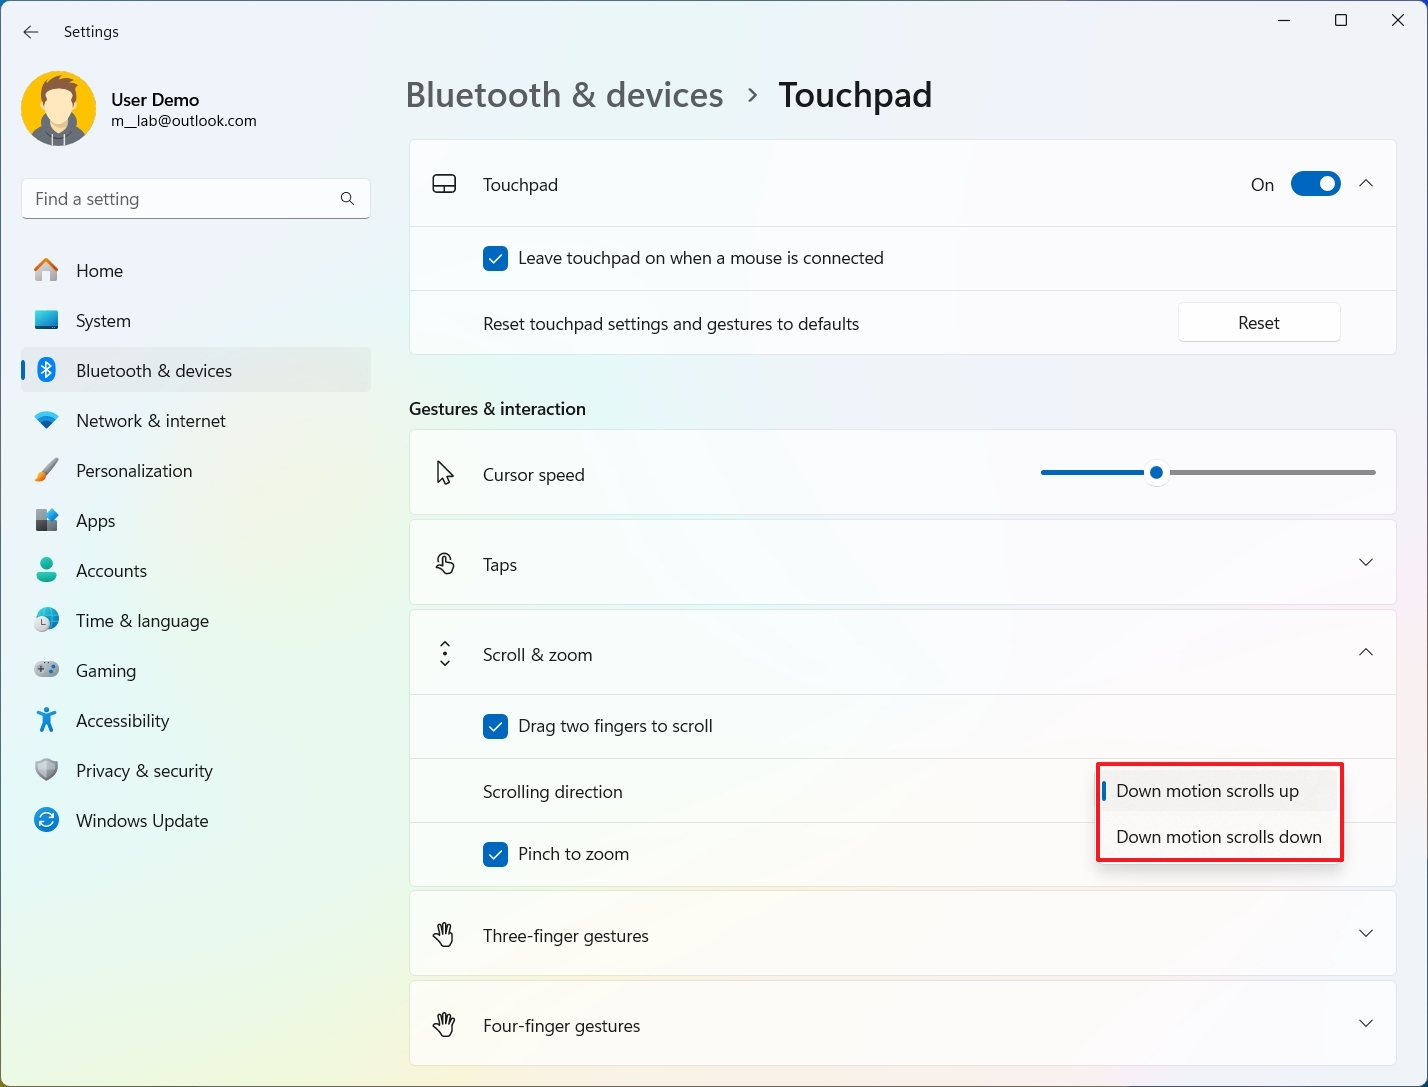
- Check or uncheck the «Pinch to zoom» option to turn the feature on or off.
After you complete the steps, the scroll and zoom customizations will apply to the touchpad on your laptop.
Customize finger gestures
To customize the gestures for three and four fingers, use these steps:
- Open Settings.
- Click on Bluetooth & devices.
- Click the Touchpad page on the right side.
- Click the «Three-finger gestures» setting under the «Gestures & interaction» section.
- Use the Swipes setting to choose the best setting: «Nothing,» «Switch apps and show desktop,» «Switch desktops and show desktop,» or «Change audio and volume.»
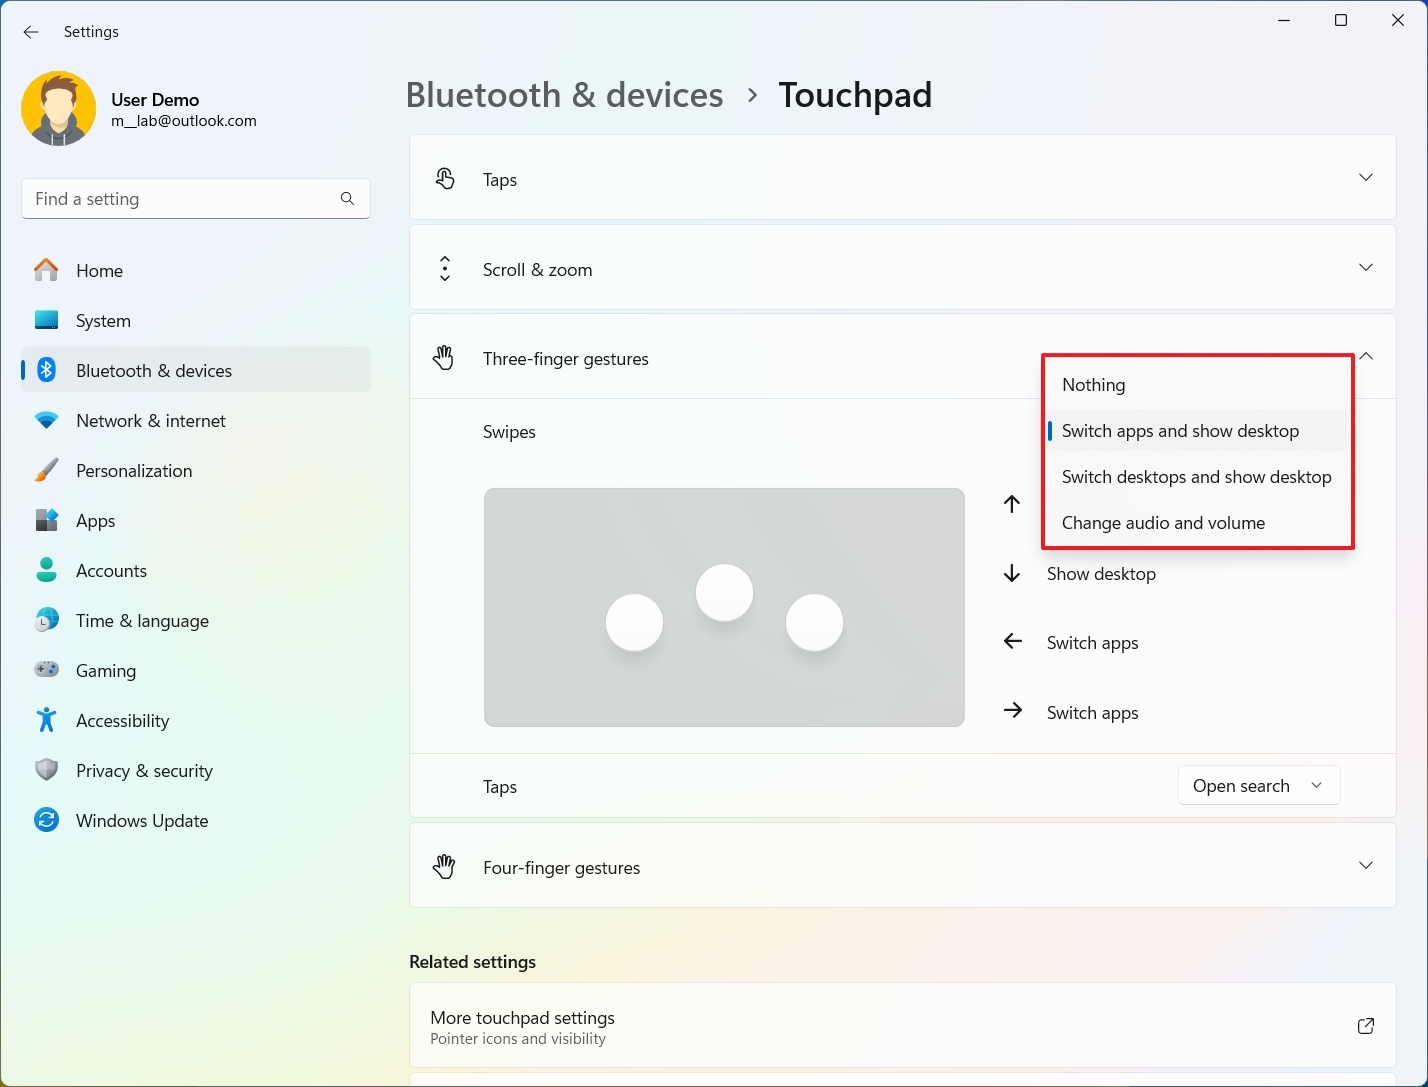
- Use the Taps setting to choose the best setting: «Nothing,» «Open search,» «Notification center,» «Play or pause,» or «Middle mouse button.»
- Click the «Four-finger gestures» setting under the «Gestures & interaction» section.
- Configure the same settings as in steps 5 and 6.
Once you complete the steps, you can use the three and four-finger gestures with specific actions.
Change advanced gesture settings
To change the advanced gesture settings for the touchpad, use these steps:
- Open Settings.
- Click on Bluetooth & devices.
- Click the Touchpad page on the right side.
- Click the «Advanced gestures» setting under the «Related settings» section.
- Configure three-finger gestures. You can choose actions for tapping and swiping up, down, left, and right. Options available include «Nothing,» «Open search,» «Notification center,» «Play and pause,» «Middle mouse button,» «Mouse back button,» «Mouse forward button,» and «Custom shortcut.»
- Configure three-finger gestures. You can choose actions for tap and swipe up, down, left, and right.
- (Optional) Choose the Custom shortcut option.
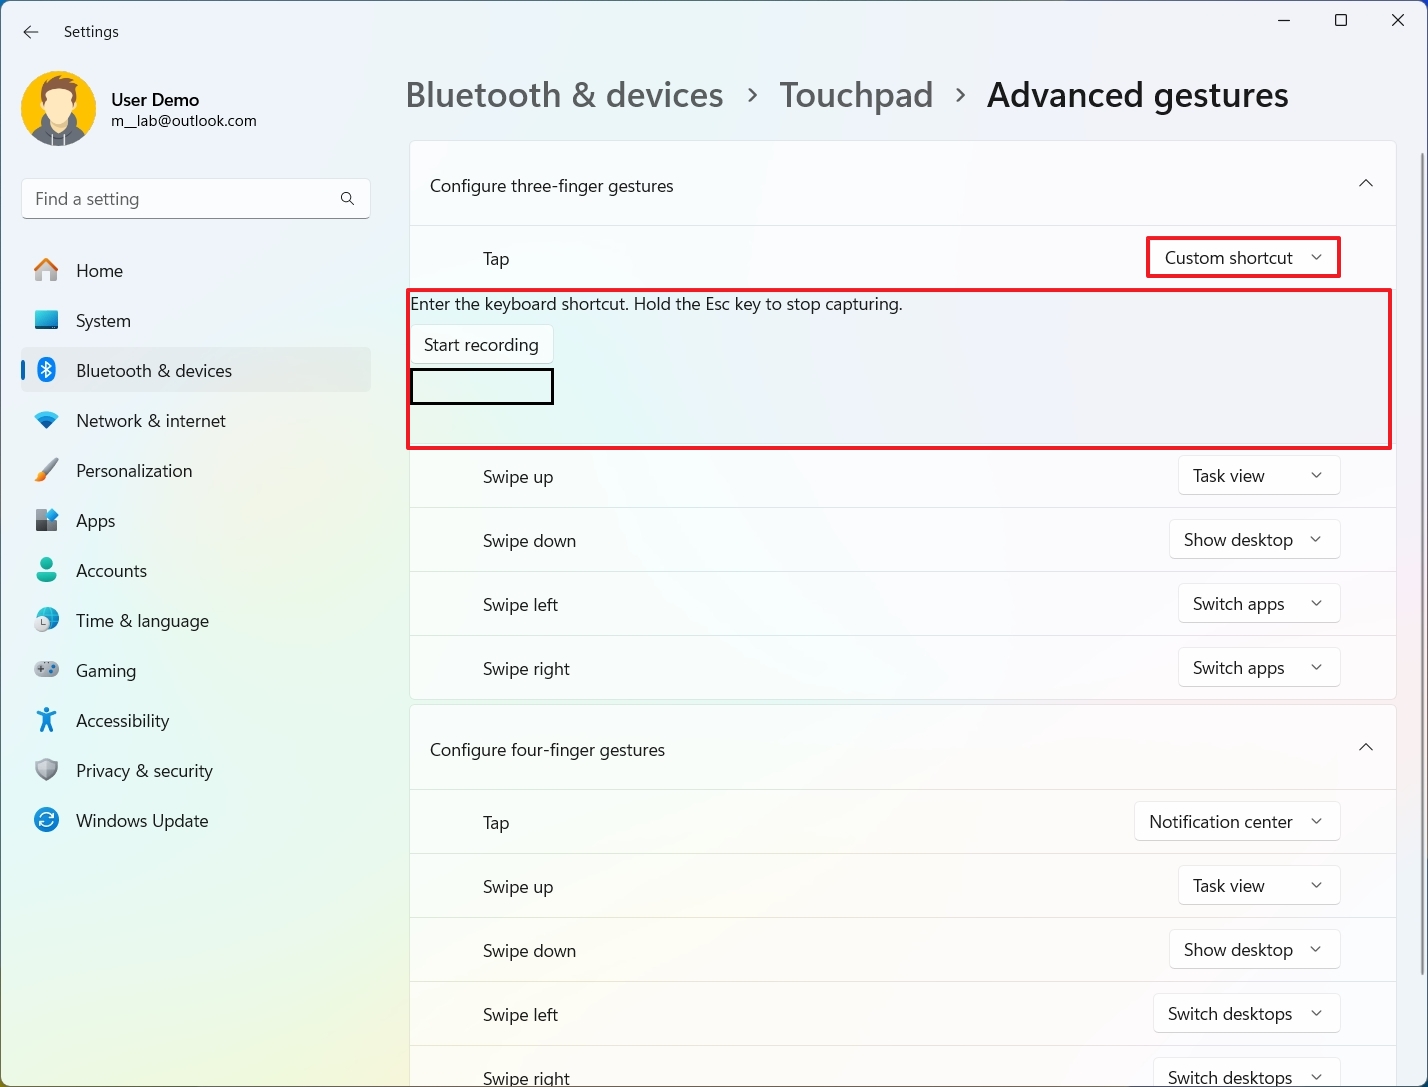
- Click the Start recording button.
- Perform the shortcut action, for example, «Windows key + F4.»
- Click the Stop recording button.
After you complete the steps, the settings will apply for tapping and swiping with three and four fingers.
The difference between the settings in the «Gestures & interaction» section and the advanced settings is that this page allows you to specify custom actions for each gesture instead of using one of the sets of actions.
Reset touchpad settings to default
To reset the touchpad settings to its defaults, use these steps:
- Open Settings.
- Click on Bluetooth & devices.
- Click the Touchpad page on the right side.
- Click the Touchpad setting.
- Click the Reset button.
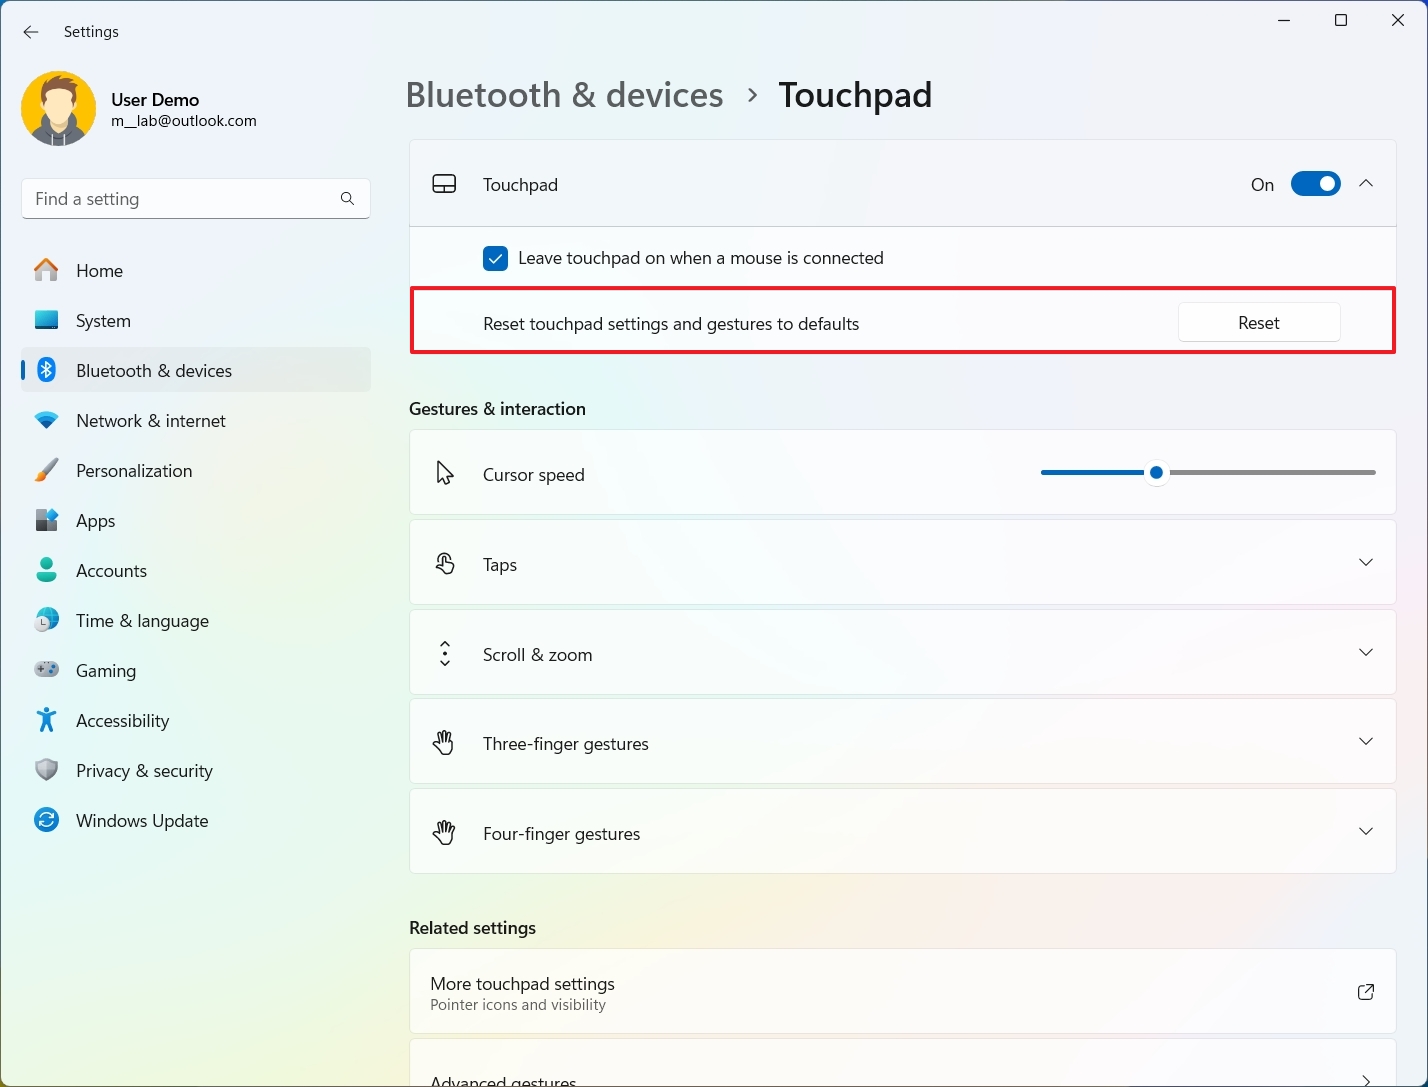
Once you complete the steps, the touchpad settings and gestures will reset to their default configuration.
More resources
For more helpful articles, coverage, and answers to common questions about Windows 10 and Windows 11, visit the following resources:
- Windows 11 on Windows Central — All you need to know
- Windows 10 on Windows Central — All you need to know
Mauro Huculak has been a Windows How-To Expert contributor for WindowsCentral.com for nearly a decade and has over 15 years of experience writing comprehensive guides. He also has an IT background and has achieved different professional certifications from Microsoft, Cisco, VMware, and CompTIA. He has been recognized as a Microsoft MVP for many years.

This tutorial will show you how to change the touchpad cursor speed for your account in Windows 11.
If your Windows 11 device (ex: laptop) has a built-in precision touchpad, you can change its cursor speed if it is moving too slow or fast for you.
Reference:
Contents
- Option One: Change Touchpad Cursor Speed in Settings
- Option Two: Change Touchpad Cursor Speed in Registry Editor
Option One
Change Touchpad Cursor Speed in Settings
1 Open Settings (Win+I).
2 Click/tap on Bluetooth & devices on the left side, and click/tap on Touchpad on the right side. (see screenshot below)

3 Adjust the Cursor speed slider left (slower) right (faster) to the speed you want. (see screenshot below)
Hovering the pointer over the slider will display the current speed (1 to 10).
The default cursor speed is 5.

4 You can now close settings if you like.
Option Two
Change Touchpad Cursor Speed in Registry Editor
1 Open Registry Editor (regedit.exe).
2 Navigate to the key below in the left pane of Registry Editor. (see screenshot below)
HKEY_CURRENT_USER\Software\Microsoft\Windows\CurrentVersion\PrecisionTouchPad

3 In the right pane of the PrecisionTouchPad key, double click/tap on the CursorSpeed DWORD to modify it. (see screenshot above)
4 Click/tap on Decimal, type a number between 2 (slower) to 20 (faster) for the cursor speed you want, and click/tap on OK. (see screenshot below)
The default cursor speed is 10.
This value is halved to determine the cursor speed notch in Settings in Option One.

5 Close Registry Editor.
6 Either sign out and sign in or restart the computer to apply.
That’s it,
Shawn Brink
Related Tutorials
- Change Mouse Pointer Speed in Windows 11
- Enable or Disable Touchpad in Windows 11
- Reset Touchpad Settings and Gestures to Default in Windows 11
- Adjust Touchpad Sensitivity in Windows 11