
Are you tired of being restricted from playing Minecraft due to firewall settings? Fear not, because there’s a way to allow Minecraft through the Windows 10 firewall and enjoy uninterrupted gameplay.
When it comes to allowing Minecraft through the firewall in Windows 10, there are a few key steps to follow. First, you need to open the Windows Security settings by typing «Windows Security» in the search bar and clicking on the corresponding result. From there, navigate to the Firewall & network protection section and click on «Allow an app through firewall.» Find Minecraft in the list and make sure all checkboxes are ticked for both private and public networks. Finally, click on «OK» to save the changes and voila, you can now enjoy Minecraft without firewall restrictions.
If you want to allow Minecraft through the firewall on Windows 10, follow these steps:
- Open the Control Panel and go to «System and Security.»
- Click on «Windows Defender Firewall.»
- Select «Allow an app or feature through Windows Defender Firewall.»
- Click «Change Settings» and then «Allow another app.»
- Locate and select the Minecraft executable file and click «Add.»

Why Allow Minecraft Through Firewall Windows 10?
Minecraft is a popular sandbox game that allows players to explore, build, and share their virtual world. However, when playing Minecraft on Windows 10, you may encounter issues with the game’s connectivity if it is blocked by the Windows Firewall. The Firewall acts as a security measure for your system, but it may sometimes prevent certain applications, including Minecraft, from accessing the internet.
Allowing Minecraft through the Windows Firewall ensures that the game can establish a stable connection with its servers and other players, enabling a seamless gaming experience. It also allows Minecraft to receive necessary updates and patches that improve performance and add new features. In this article, we will guide you step-by-step on how to allow Minecraft through the Firewall in Windows 10, ensuring smooth gameplay and uninterrupted enjoyment.
Step 1: Open Windows Security Settings
To allow Minecraft through the Firewall, we first need to access the Windows Security settings. Follow the steps below:
- Click on the «Start» button in the bottom left corner of your screen.
- From the Start menu, click on the «Settings» icon, which looks like a gear.
- In the Settings window, click on «Update & Security.»
- In the Update & Security window, click on «Windows Security» in the left-hand menu.
By following these steps, you will be able to access the Windows Security settings, which will allow you to configure the Firewall permissions for Minecraft.
Step 2: Open Firewall & Network Protection
Once you are in the Windows Security settings, proceed to open the Firewall & Network Protection options:
- In the Windows Security window, click on «Firewall & Network Protection.»
- Under the «Firewall & Network Protection» section, click on «Allow an app through firewall.»
This will open the Firewall settings where you can modify the access permissions for specific apps, including Minecraft.
Step 3: Allow Minecraft Through the Firewall
Now that you have accessed the Firewall settings, you can proceed to allow Minecraft through the Firewall:
- In the «Allowed apps» window, click on the «Change settings» button. You may need administrative privileges to make changes.
- Scroll through the list of apps until you find «Minecraft.»
- Make sure both the «Private» and «Public» checkboxes next to Minecraft are checked. This allows Minecraft to access the internet through both private and public networks.
- Click «OK» to save the changes and exit the Firewall settings. Minecraft is now allowed through the Firewall.
By following these steps, you have successfully allowed Minecraft through the Windows Firewall, ensuring that the game can connect to its servers and other players without any interruptions.
Troubleshooting: Additional Firewall Settings
If you are still facing connection issues even after allowing Minecraft through the Firewall, you can try the following additional troubleshooting steps:
Check Antivirus Software
Sometimes, antivirus software can also block Minecraft from accessing the internet. Make sure to check your antivirus settings and add Minecraft to the list of allowed apps or exceptions.
Disable Public Network Filtering
If you are using a public network, such as a Wi-Fi hotspot, the Firewall may have stricter settings. In the Firewall settings, try disabling the public network filtering temporarily to see if it resolves the connection issues.
Modify Advanced Firewall Settings
If you are comfortable with modifying advanced Firewall settings, you can try creating specific inbound and outbound rules for Minecraft. This allows you to have finer control over the Firewall permissions and ensure that Minecraft can communicate effectively.
Optimizing Minecraft for Firewall
Now that you have allowed Minecraft through the Firewall, you can also optimize the game’s performance for a better gaming experience:
Close Unnecessary Background Programs
Minecraft requires system resources to run smoothly. To optimize performance, close any unnecessary background programs that may be consuming memory or processing power.
Keep Your Game Updated
Regularly updating Minecraft ensures that you have the latest bug fixes, security patches, and new features. This enhances the overall performance and stability of the game.
Allocate Sufficient System Resources
In Minecraft, you can allocate more RAM to the game to improve its performance, especially when using resource-intensive mods or playing on large servers. To do this, navigate to the Minecraft Launcher, go to «Installations,» select your desired profile, click on «More Options,» and modify the allocated RAM.
In Conclusion
Allowing Minecraft through the Windows Firewall is essential for a seamless gaming experience. By following the steps outlined in this guide, you have successfully configured the Firewall permissions to enable Minecraft’s connectivity. Remember to regularly update the game and optimize your system resources for optimal performance. Now, you can dive into your Minecraft adventures without worrying about connection interruptions.

Allowing Minecraft Through Firewall in Windows 10
When playing Minecraft on Windows 10, you may encounter issues with the game’s connectivity due to the firewall settings. To ensure a smooth gaming experience, you need to allow Minecraft through the Windows 10 firewall. Here’s how you can do it:
Method 1: Using Windows Security App
- Open the Start menu and search for «Windows Security».
- Click on «Windows Security» to open the app.
- Go to «Firewall & network protection».
- Click on «Allow an app through firewall».
- Locate «Minecraft» in the list of allowed apps and make sure it has both «Private» and «Public» checkboxes ticked.
- Click «OK» to save the changes.
Method 2: Using Advanced Firewall Settings
- Open the Start menu and search for «Firewall & network protection».
- Click on «Firewall & network protection» to open the app.
- Click on «Advanced settings» on the right-hand side.
- In the new window, select «Inbound Rules».
- Click on «New Rule» from the right-hand side menu.
- Select «Program» and click «
Key Takeaways
- Allowing Minecraft through the Windows 10 firewall is essential for multiplayer gaming.
- Accessing the Windows 10 firewall settings can be done through the Control Panel.
- Adding an inbound rule for Minecraft in the firewall will enable the game to communicate through the network.
- Make sure to choose the correct version of Minecraft when setting up the firewall rule.
- Regularly updating Minecraft and the firewall settings is important for optimal performance and security.
Frequently Asked Questions
Here are some common questions and answers about allowing Minecraft through the Windows 10 firewall.
1. Why do I need to allow Minecraft through the firewall in Windows 10?
Allowing Minecraft through the Windows 10 firewall is necessary to ensure that the game can communicate with servers and other players over the internet. By allowing the game through the firewall, you allow the necessary network connections to be established, allowing for multiplayer gameplay and online features.
It’s important to note that the Windows 10 firewall acts as a security measure to protect your computer from unauthorized access, so it’s essential to only allow trusted applications like Minecraft through the firewall.
2. How do I allow Minecraft through the Windows 10 firewall?
To allow Minecraft through the Windows 10 firewall, follow these steps:
1. Open the Windows Security app by searching for it in the Windows start menu.
2. Click on «Firewall & network protection.»
3. Click on «Allow an app through firewall.»
4. Click on «Change settings.»
5. Scroll down until you find «Minecraft» in the list of allowed apps.
6. If Minecraft is not listed, click on «Allow another app» and locate the Minecraft executable file.
7. Select «Minecraft» and make sure both the «Private» and «Public» checkboxes are checked.
8. Click «OK» to save the changes.
3. Can I allow Minecraft through the firewall for a specific network?
Yes, you can allow Minecraft through the firewall for a specific network. Follow the steps mentioned in the previous answer, but instead of checking both the «Private» and «Public» checkboxes, only check the checkbox corresponding to the network you want to allow Minecraft on.
This is useful if you want to restrict Minecraft’s network access to a trusted network, such as your home network, while keeping it blocked on other networks, such as public Wi-Fi.
4. What if I’m still experiencing network issues with Minecraft after allowing it through the firewall?
If you’re still experiencing network issues with Minecraft after allowing it through the firewall, there could be other factors at play. Here are a few troubleshooting steps you can try:
1. Restart your computer and try launching Minecraft again.
2. Verify that your internet connection is stable by testing it with other online applications or websites.
3. Check if your router or modem has any settings that could be blocking Minecraft’s network connections. Consult your device’s user manual or contact your internet service provider for assistance.
4. Update to the latest version of Minecraft to ensure you have the most stable and bug-free experience.
If the issue persists, you may need to reach out to Minecraft support or consult a technical expert for further assistance.
5. Can I revert the changes and block Minecraft through the firewall again?
Yes, if you want to block Minecraft through the firewall again, you can revert the changes you made. Here’s how:
1. Open the Windows Security app again.
2. Click on «Firewall & network protection.»
3. Click on «Allow an app through firewall.»
4. Scroll down until you find «Minecraft» in the list of allowed apps.
5. Uncheck the checkboxes corresponding to the network profiles you previously selected.
To summarize, allowing Minecraft through the Windows 10 firewall is crucial to ensure smooth gameplay and prevent any connectivity issues. By following the step-by-step process outlined in this guide, you can easily configure the necessary firewall settings to grant Minecraft access.
Remember to open both the inbound and outbound ports for Minecraft, and create a specific rule to allow the game through the firewall. Additionally, periodically check your firewall settings to ensure they are up-to-date and compatible with the latest Minecraft version.
Hey there, Minecraft fans! We all know how much fun it is to dive into the world of blocks and create our own amazing adventures. But sometimes, we might encounter connection issues that stop us from enjoying the game with our friends. Don’t worry though; we’ve got your back!
In this article, you’ll learn how to allow Minecraft through your firewall so you can get rid of those pesky connection problems once and for all. Say goodbye to being left out when your buddies explore new lands or build epic structures. Get
ready to finally fix the issue and jump right back into the action.
Related: Fix Minecraft Clicking Throws Items Issue
What Does Firewall Got To Do With Minecraft?

You might be thinking, “What does a firewall have to do with Minecraft?” Well, firewalls are like security guards for your computer. They help protect it from hackers and other bad stuff you don’t want on your computer. But sometimes, they can also block things that you actually want to use – like Minecraft.
When you’re trying to play Minecraft, and there’s something wrong with the connection or it just won’t load properly, it could be because of your firewall is blocking the game. Firewalls work by checking all incoming and outgoing traffic on your computer (like when browsing the web or downloading files) and blocking anything suspicious or unknown.
Since firewalls aren’t familiar with every single program out there, including games like Minecraft, they might think that this traffic is potentially harmful and decide to block it.
Now that we know how important a role the firewall plays in our gaming experience, let’s figure out what needs to be done about it. Allowing Minecraft through the firewall means telling your computer’s security system
“Hey! This specific application is totally cool and safe.” That way, the firewall will stop interrupting your gameplay whenever it suspects some sort of danger.
So what should we do next? The good news is that letting Minecraft past your Firewall isn’t as complicated as it sounds. Once we look into changing some settings in our computers’ firewall settings section up ahead, getting back into our favorite pixelated world will be a breeze.
Firewall Settings
Let’s dive into allowing Minecraft through your Windows 10 firewall so you can have a smooth connection.
You might be having trouble joining servers or friends’ worlds, but don’t worry – we’ve got you covered. We’ll take you through the steps to ensure your computer allows Minecraft to use the internet without interruptions.
First off, let’s head over to your firewall settings:
- Press the “Windows” key and type “firewall” in the search bar.
- Click on “Allow an app or feature through Windows Defender Firewall.”
- This will open up a list of apps and features that are currently allowed (or not) through your computer’s firewall.
Now it’s time to find Minecraft on this list! Scroll down until you see “Minecraft Launcher” or something similar. If it’s already checked under both “Private” and “Public,” then congratulations, you’re all set! However, if they aren’t checked yet, here’s what to do:
- Click on the “Change settings” button near the window’s top right corner.
- Now you should be able to check those boxes next to Minecraft.
- Make sure both “Private” and “Public” are ticked for better connectivity!
Great job! By now, you should have successfully allowed Minecraft through your firewall, which means no more annoying connection issues when trying to join servers or play with friends online.
But sometimes, even after taking these steps, there might still be some problems with connecting properly. That’s why we will explore another way of ensuring a seamless gaming experience: port forwarding.
Also read: Minecraft Full-Screen Problem
Port Forwarding
Port forwarding is like opening a special door in your firewall just for Minecraft so that you and your buddies can play together without any hiccups.
First, open up your router’s settings page by typing its IP address into a web browser on your computer or device connected to the same network as the server.
You’ll need to log in with the username and password (you might want to ask your parents if they set it up). Once logged in, look for something called “Port Forwarding” or “Virtual Servers.” This is where all the magic happens!
Now let’s get down to business. In this magical place called port forwarding settings, create a new rule or virtual server entry specifically for Minecraft.
Type in a name like “Minecraft Server,” then enter the IP address of the machine running the server (usually found under ‘status’ or ‘network information’ within router settings), followed by entering “25565” for both start and end ports – this number never changes unless Mojang decides otherwise.
Set protocol type as TCP/UDP since both are used during gameplay. Save these fantastic adjustments made.
Your super-cool Minecraft world should be accessible now from outside your home network using its public IP address – which can be found easily through searching ‘what’s my IP’ online. It’s always good practice to test everything after making changes, so keep reading our next section about testing connections before celebrating too hard.
Test Connection

Now that you have allowed Minecraft through your firewall and set up port forwarding, it’s time to test if the connection issues are resolved. This is an important step because sometimes problems persist even after making changes. Don’t worry; testing the connection is easy and will help us figure out if we need to do any more troubleshooting.
Launch Minecraft on your computer or device to start testing the connection. Try joining a multiplayer server like you normally would, or ask a friend to join your game if you’re hosting one yourself.
Pay attention to whether the game loads quickly and without error messages. If everything seems smooth and connected well, then congratulations! You’ve successfully fixed the problem by allowing Minecraft through the firewall and setting up port forwarding.
However, if you notice that there are still issues with connecting to servers or having friends join your game, don’t get discouraged. It might mean another issue besides the firewall settings and port forwarding. We’ll need to investigate further to find a solution that works for you.
Before troubleshooting other potential causes of these pesky Minecraft connection issues, double-check all previous steps taken were done correctly.
Related: How To Find Spawn Point In Minecraft
Troubleshooting
One common reason that might be causing trouble is a slow or unstable internet connection. Make sure you have a strong Wi-Fi signal, or try using an Ethernet cable instead of wireless.
Restarting your modem and router could also help improve the connection speed. If nothing changes after trying these steps, it might be worth checking with your Internet Service Provider (ISP) for any ongoing network issues or maintenance in your area.
Another thing we need to check is if our game files are up-to-date and not corrupted in any way. You can easily repair or re-download missing files by launching the Minecraft launcher on your computer and clicking “Options” next to the play button.
From there, select “Force Update!” This will ensure all necessary files are updated, so everything should run smoothly again!
Don’t lose hope if you’ve gone through all these steps but still can’t connect properly! It’s time to roll up our sleeves and start troubleshooting even further.
Check whether other players are experiencing similar problems – maybe something bigger, like a server outage, is affecting everyone at once? Additionally, consider contacting Mojang Support for assistance; they may have insights on resolving your specific issue.
Conclusion
In conclusion, we can see that firewalls play a significant role in our Minecraft gaming experience. By adjusting the firewall settings and port forwarding, we can solve most connection issues and enjoy playing with friends.
November 18, 2022
When your computer’s connected to the internet without a firewall, it’s like you’re leaving your front door wide open—anyone can walk right in. Think of your firewall as “Jeeves”, a steadfast doorman who decides who’s allowed in and who’s not. But sometimes Jeeves oversteps his bounds and denies someone entry. You need to give him an updated list of preferred guests so he doesn’t turn away those who are invited. In this guide, we’ll teach you how to allow Minecraft through your firewall, as well as other apps like Spotify, Roblox, and other games or apps.

Why does my firewall block games and apps? Playing games online can be risky. From predators who lurk on servers with kids’ games to hackers trying to overload servers with DDoS attacks. It’s no wonder your firewall tries to block online access sometimes. While many games that are made by well-known developers don’t run into firewall issues, it’s not uncommon for games from small developers to have problems based on the code by which they operate or known server issues. For example, Minecraft’s Java Edition is flagged by firewalls because of known security issues with Java code. It’s not the game itself but the code in the game. Other games like Roblox that include small games from independent developers on their servers might run into problems with malicious software.
Let’s walk through how to update your firewall to allow Spotify, Minecraft, and other games or apps onto your computer.

Microsoft Defender
Stay safer online with one easy-to-use app1
1Microsoft 365 Personal or Family subscription required; app available as separate download
Learn more
How to allow Minecraft through your firewall. There are a couple of ways that you can update your firewall setting to allow a game like Minecraft through your firewall. The first is the easiest because you’re simply responding to a prompt from your computer. It’s not unusual to get a notification from your security software that the firewall blocks a feature of an app. Take note when the notification pops up because it likely won’t include Minecraft in the name of the program. Rather, it’ll say that it’s blocking Java. If you have admin access, click “Allow access,” and you’ll be set to go.
If you bypassed the original notification because you thought it was for something else, you’ll need to take a few more steps to get into your antivirus software and update your settings. Update your firewall settings by accessing your system’s firewall in the security settings, which can be found in the Settings application. Once you’ve reached Settings, follow these steps:
- Scroll down and click “Update & Security.”
- Click “Windows Security” on the left-hand side of the window.
- Under the “Protection areas” list, click “Firewall & network protection.” This should open a new window.
- Below the main options that have icons, you’ll find a list of options that don’t have accompanying icons. Click “Allow an app through firewall.”
- You’ll see a long list of applications that are allowed and disallowed through your firewall. Select “Private” (for your private network only) for Java, and Minecraft will be allowed past the firewall.
- Click “Allow access” and input your admin password.

“Think of your firewall as “Jeeves”, a steadfast doorman who decides who’s allowed in and who’s not. But sometimes Jeeves oversteps his bounds.”
How to update your firewall to allow Spotify. Updating your firewall to allow Spotify requires a few more steps than for a video game, but you can still make the change and enjoy your music, podcasts, and audiobooks. Start by going into your firewall settings the same as you would for Minecraft, but you’ll want to specifically look for Spotify. Click “Allow access” and input your admin password to complete the process.
An alternate solution to allowing Spotify through your firewall is to change your proxy settings. Take the following steps:
- Open your Spotify settings.
- Click the Proxy type drop-down menu and select “No Proxy.”
- Save your changes and restart Spotify. You’ll likely have to log in again.
Your firewall is an important piece to keeping your computer safe from malware, but it can also be somewhat of a hassle by periodically overstepping. You can always override your firewall to allow apps and games that you’d like to have access to the internet through. Should you override your firewall’s default settings, make sure that you’re being extra careful with servers you join to play games and links you click on in ads.
Achieve the extraordinary with Microsoft 365
The powerful productivity apps and creativity tools in Microsoft 365 just got better. Work, play, and create better than ever before with the apps you love and Microsoft Copilot by your side.
Try for free
Topics in this article
Tags
More articles like this one

Package delivery scams: What they are and how to avoid them
Package delivery scams rely on getting you to share your personal information. Learn how to recognize delivery fraud.
Learn more

What is a brushing scam?
If you’ve received a parcel you didn’t order, you might be in a brushing scam. Learn how to protect your information.
Learn more

Apartment rental scams: What they are and how to avoid them
Looking for a new apartment? Avoid rental scams and keep yourself safe with these tips.
Learn more

CEO fraud: What it is and how to identify it
Identify and stop a CEO fraud attack with these tips. Learn how this scam, sometimes known as whale fishing, is aimed at company executives and how to master CEO fraud detection.
Learn more

Reimagine what’s possible with Microsoft 365
Maximize your creativity, productivity, and protection with AI in Microsoft 365.
Try for free
Обычно, устанавливаемые на компьютер программы либо имеют доступ в Интернет и локальную сеть по умолчанию, либо запрашивают такой доступ при первом запуске: появляется диалоговое окно брандмауэра Windows 10, 8.1 или Windows 7 с соответствующим запросом. Однако, если в вашем случае у какой-то программы нет доступа в Интернет, это придется исправить.
В этой инструкции подробно о том, как разрешить программе доступ в Интернет на компьютере или ноутбуке, где используется встроенный брандмауэр Windows, а также дополнительная информация, которая может оказаться полезной в контексте рассматриваемой темы. Схожая тема: Как запретить программе доступ в Интернет в Windows.
Предоставление программе доступа в Интернет и локальную сеть в параметрах брандмауэра Windows
Для того, чтобы разрешить какой-либо программе доступ в Интернет встроенными средствами Windows достаточно выполнить следующие простые шаги, для которых потребуется иметь права администратора на компьютере:
- Зайдите в Панель управления — Брандмауэр Защитника Windows. Вместо этого вы можете нажать клавиши Win+R на клавиатуре, ввести firewall.cpl и нажать Enter (тут может пригодиться: Полезные команды диалогового окна «Выполнить» Win+R).
- В открывшемся окне слева нажмите «Разрешение взаимодействия с приложением или компонентом в брандмауэре Защитника Windows».

- Нажмите кнопку «Изменить параметры», найдите в списке нужную вам программу и отметьте, доступ к каким сетям следует предоставить программе. Если вы не знаете, что выбрать, обычно вполне безопасно можно предоставить доступ и в частной и в публичной сети (но это не всегда так, если у вас есть сомнения по поводу того, что программа может делать в сети, учитывайте это).

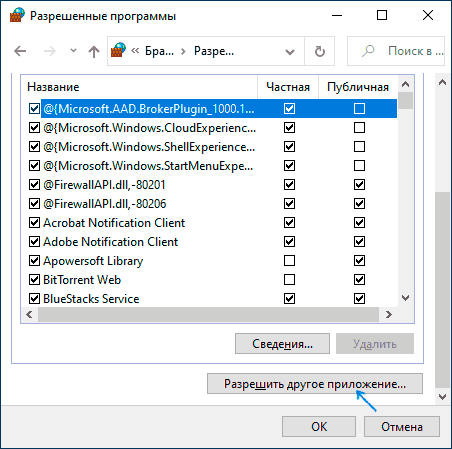
- Если вашей программы нет в списке, внизу нажмите кнопку «Разрешить другое приложение» и укажите путь к исполняемому файлу требуемой программы.


Обычно, если речь идет о встроенных средствам защиты сети Windows, описанных шагов должно быть достаточно. В крайнем случае вы можете полностью отключить брандмауэр Windows, но я бы не рекомендовал этого делать.
Дополнительная информация
Если указанные действия не помогли в разрешении программе доступа в Интернет или локальную сеть, то учитывайте следующие моменты:
- Если на вашем компьютере установлен сторонний антивирус или файрволл, то доступу к сети может мешать он. Попробуйте временно отключить его и проверить, решило ли это проблему. Если решило, можно вновь включить, а затем изучить настройки и найти расположение, позволяющее изменить параметры доступа программ к Интернету.
- Иногда может оказаться, что программа пытается получить доступ к серверу в Интернете, который уже не существует. В этом случае она может сообщить, что нет доступа к сети. В этой ситуации вы навряд ли что-то сможете сделать.
- Если вы блокировали доступ к каким-либо сайтам в файле hosts, это тоже может повлиять на доступ программ к Интернету. Даже если вы не делали этого вручную, но установили не вполне лицензионную программу, доступ к её сайтам мог быть заблокирован автоматически в процессе установки. Подробнее на тему: Файл hosts Windows 10 — как изменить и восстановить (подойдет и для других версий системы).
- Использование VPN, прокси также может повлиять на возможность доступа программы в Интернет. Здесь может быть полезным: Как отключить прокси в Windows.
- На всякий случай можно заглянуть в параметры брандмауэра Windows в режиме повышенной безопасности и посмотреть, нет ли там правил входящих и исходящих соединений, касающихся вашей программы.
Вероятнее всего, один из методов подойдет для решения проблемы, иначе опишите ситуацию в комментариях, по возможности, максимально подробно, я постараюсь помочь.
Если вы являетесь фанатом Minecraft, то наверняка столкнулись с проблемами подключения к игре. Одной из основных причин этого может быть неправильная настройка брандмауэра Windows 10. Настройка брандмауэра может показаться сложной задачей, однако она является необходимой для обеспечения безопасности вашего компьютера и защиты личной информации от потенциальных угроз.
В этой статье мы расскажем вам, как правильно настроить брандмауэр Windows 10 для игры Minecraft, чтобы вы смогли наслаждаться игрой без проблем и необходимости отключения защиты вашего компьютера.
Мы разберем настройку брандмауэра шаг за шагом, от открытия портов до добавления игры в список разрешенных приложений. Следуя нашим инструкциям, вы убедитесь, что ваш брандмауэр настроен правильно и игра Minecraft работает без проблем.
Содержание
- Как настроить брандмауэр Windows 10 для игры Minecraft
- Шаг 1: Настройка правил брандмауэра
- Шаг 2: Добавление исключения Minecraft в брандмауэр
- Шаг 3: Проверьте подключение к серверу Minecraft
- Шаг 1: Откройте настройки брандмауэра
- 1.1. Кликните на кнопку «Пуск»
- 1.2. Нажмите на пиктограмму «Настройки»
- 1.3. Нажмите на «Обновление и безопасность»
- 1.4. Выберите «Безопасность Windows»
- 1.5. Нажмите на «Брандмауэр Windows»
- Шаг 2: Добавьте новое исключение
- Откройте настройки брандмауэра Windows 10
- Добавьте новое исключение для Minecraft
- Сохраните изменения
- Шаг 3: Укажите путь к файлу игры
- 1. Откройте настройки брандмауэра Windows 10
- 2. Выберите «Разрешенные приложения»
- 3. Добавьте «javaw.exe» в список разрешенных приложений
- 4. Сохраните изменения
- Шаг 4: Укажите порты, используемые Minecraft
- Шаг 4.1: Определите порты, используемые Minecraft
- Шаг 4.2: Добавьте правило для входящих соединений
- Шаг 4.3: Проверьте соединение
- Шаг 5: Разрешите доступ сети для Java
- Шаг 5.1: Откройте настройки брандмауэра
- Шаг 5.2: Добавьте исключение
- Шаг 6: Проверьте настройки брандмауэра и запустите Minecraft
- Проверьте настройки брандмауэра
- Запустите Minecraft
- Вопрос-ответ
- Может ли настройка брандмауэра повлиять на скорость Minecraft?
Как настроить брандмауэр Windows 10 для игры Minecraft
Шаг 1: Настройка правил брандмауэра
Для того, чтобы разрешить доступ к игре Minecraft через брандмауэр Windows 10 необходимо создать правила в брандмауэре. Для этого откройте «Панель управления» и перейдите в «Центр управления безопасностью». Затем выберите «Брандмауэр Windows» и кликните на «Дополнительные настройки».
В открывшейся вкладке «Входящие соединения» нажмите «Новое правило». В появившемся окне выберите «Порт» и нажмите «Далее». В следующем окне укажите номер порта, на котором работает игра Minecraft (по умолчанию 25565) и нажмите «Далее».
В следующем окне выберите действие, которое должен выполнить брандмауэр при обнаружении соответствующего порта: разрешить или заблокировать доступ. Рекомендуется выбрать «Разрешить подключения» и нажать «Далее».
Шаг 2: Добавление исключения Minecraft в брандмауэр
Для надежности стоит добавить исключение Minecraft в брандмауэр Windows 10. Для этого перейдите в «Параметры защиты» и нажмите «Управление устаревшими приложениями». Нажмите кнопку «Добавить приложение» и найдите выполнение Minecraft. Добавьте его в список и нажмите «Добавить».
Шаг 3: Проверьте подключение к серверу Minecraft
Запустите Minecraft и подключитесь к серверу. Если всё сделано правильно, то игра запустится без ошибок и подключение к серверу будет успешным.
Шаг 1: Откройте настройки брандмауэра
1.1. Кликните на кнопку «Пуск»
Кнопка «Пуск» расположена в левом нижнем углу экрана и имеет иконку Windows.
1.2. Нажмите на пиктограмму «Настройки»
Пиктограмма «Настройки» выглядит как шестеренка и находится в левой части меню «Пуск».
1.3. Нажмите на «Обновление и безопасность»
В меню «Настройки» найдите иконку «Обновление и безопасность» и кликните на нее.
1.4. Выберите «Безопасность Windows»
Далее выберите вкладку «Безопасность Windows» в меню «Обновление и безопасность».
1.5. Нажмите на «Брандмауэр Windows»
В открывшемся меню «Безопасность Windows» найдите раздел «Брандмауэр Windows» и кликните на него.
Шаг 2: Добавьте новое исключение
Откройте настройки брандмауэра Windows 10
Чтобы добавить исключение для игры Minecraft, необходимо открыть настройки брандмауэра Windows 10. Для этого нажмите на кнопку «Пуск» и выберите «Настройки». Затем выберите «Обновление и безопасность» и «Безопасность Windows».
Добавьте новое исключение для Minecraft
Чтобы добавить исключение для игры Minecraft, выберите «Брандмауэр и защита» и нажмите на кнопку «Разрешить приложение через брандмауэр».
В появившемся окне нажмите на кнопку «Изменить настройки» и выберите «Дополнительные параметры». Затем выберите «Добавить правило» и выберите «Программа».
Найдите исполняемый файл игры Minecraft на вашем компьютере и добавьте его в список исключений. Затем нажмите на кнопку «Далее» и выберите «Разрешить подключения».
Сохраните изменения
После того, как вы добавили новое исключение для игры Minecraft, сохраните изменения в брандмауэре Windows 10. Нажмите на кнопку «ОК» и закройте настройки брандмауэра. Теперь вы можете запустить игру Minecraft и играть без проблем.
| Шаг 1 | Шаг 2 | Шаг 3 |
|---|---|---|
| Убедитесь, что игра Minecraft установлена на вашем компьютере | Добавьте новое исключение для Minecraft в настройках брандмауэра Windows 10 | Запустите игру Minecraft и наслаждайтесь игрой |
Шаг 3: Укажите путь к файлу игры
1. Откройте настройки брандмауэра Windows 10
Для этого перейдите на панель управления и выберите «Система и безопасность». Далее выберите «Windows Defender Firewall».
2. Выберите «Разрешенные приложения»
На странице с настройками брандмауэра выберите «Разрешенные приложения». Нажмите на кнопку «Изменить настройки», если она недоступна.
3. Добавьте «javaw.exe» в список разрешенных приложений
Нажмите на кнопку «Разрешить другое приложение». Откроется окно, в котором необходимо укажите путь к файлу «javaw.exe» в папке, где установлена игра Minecraft. По умолчанию путь к файлу «javaw.exe» выглядит так: «C:\Program Files (x86)\Minecraft\runtime\jre-x64\bin\javaw.exe».
Если вы устанавливали игру Minecraft в другую директорию, то путь к файлу может отличаться.
4. Сохраните изменения
После добавления файла «javaw.exe» в список разрешенных приложений сохраните изменения, нажав на кнопку «ОК».
Теперь ваш брандмауэр Windows 10 настроен правильно для игры Minecraft. Вы можете запустить игру и наслаждаться игровым процессом без проблем с доступом к сети.
Шаг 4: Укажите порты, используемые Minecraft
Шаг 4.1: Определите порты, используемые Minecraft
Minecraft использует порты для связи между клиентом и сервером. По умолчанию, клиент Minecraft использует порт 25565 для подключения к серверу. Если вы используете другой порт, необходимо указать его в настройках брандмауэра Windows 10.
Шаг 4.2: Добавьте правило для входящих соединений
Для того чтобы входящие соединения могли проходить через брандмауэр, необходимо добавить правило для соответствующего порта. Для этого выполните следующие действия:
- Откройте «Центр управления сетями и общим доступом».
- Выберите вашу сеть и нажмите на кнопку «Свойства».
- Выберите «Брандмауэр Windows».
- Нажмите на кнопку «Разрешить приложение или функцию через брандмауэр».
- Нажмите на кнопку «Изменить настройки».
- Добавьте новое правило для соответствующего порта. Укажите название приложения (Minecraft), тип соединения (TCP или UDP) и номер порта.
- Сохраните изменения.
Шаг 4.3: Проверьте соединение
Чтобы убедиться, что правило работает корректно, попробуйте подключиться к Minecraft серверу и убедитесь, что соединение проходит через брандмауэр без проблем. Если при подключении возникают проблемы, вернитесь к предыдущим шагам и проверьте правильность настроек.
Шаг 5: Разрешите доступ сети для Java
Для того чтобы играть в Minecraft, необходимо разрешить доступ к сети для Java. Для этого можно использовать настройки брандмауэра Windows 10.
Шаг 5.1: Откройте настройки брандмауэра
Для открытия настроек брандмауэра необходимо:
- Нажать на клавишу «Пуск»
- Выбрать «Настройки»
- Выбрать «Обновление и безопасность»
- Выбрать «Брандмауэр Windows»
Шаг 5.2: Добавьте исключение
Для того чтобы разрешить доступ к сети для Java, необходимо:
- Выбрать вкладку «Разрешить приложение через брандмауэр»
- Нажать кнопку «Изменить настройки»
- Нажмите «Да» чтобы разрешить изменения
- Найдите и выберите Java в списке приложений
- Нажмите кнопку «OK»
После выполнения этих действий, для Java будет разрешен доступ к сети и вы сможете играть в Minecraft без проблем.
Шаг 6: Проверьте настройки брандмауэра и запустите Minecraft
Проверьте настройки брандмауэра
Перед запуском Minecraft необходимо убедиться, что настройки брандмауэра Windows 10 не блокируют игру.
- Откройте «Настройки» Windows 10 и выберите «Обновление и Безопасность».
- Выберите «Безопасность Windows» и затем «Брандмауэр и защита сети».
- Убедитесь, что брандмауэр включен.
- Нажмите на «Разрешить приложение через брандмауэр».
- Найдите Minecraft в списке приложений и разрешите ему доступ к сети.
Если вы используете дополнительный брандмауэр, например, на роутере, убедитесь, что установлены правильные настройки доступа к портам.
Запустите Minecraft
После проверки настроек брандмауэра можно запустить Minecraft.
- Откройте лаунчер Minecraft и выберите нужную версию игры.
- Запустите игру и проверьте ее работоспособность.
Если игра не запускается или возникают проблемы в работе, убедитесь, что вы правильно настроили брандмауэр и порты.
Теперь вы можете играть в Minecraft, наслаждаться игровым процессом и не волноваться о проблемах с брандмауэром.
Вопрос-ответ
Может ли настройка брандмауэра повлиять на скорость Minecraft?
Правильная настройка брандмауэра не должна повлиять на скорость Minecraft, если вы открыли необходимые порты и настроили брандмауэр правильно. Однако, если вы включите дополнительные настройки брандмауэра, которые могут замедлить Интернет-соединение, это может негативно повлиять на скорость Minecraft.