
In this article, we will learn how to create a .exe file from a Java program. Java is a platform-independent language, which works on the philosophy of «write Once, Run Anywhere». It simply means that if we write a Java program, we can run it on any device that has a JVM(Java Virtual Machine). Now if we want to share the Java application standalone for the windows, then we need the «.exe» file. In this article first, we will create a Java program then we will see the various methods to create a «.exe» file from that file.
Java applications are generally shared and distributed as «.jar» files. These files contain all the required files, to run a .jar file we must need the JVM installed on the system we are trying to run. So what is the need for the «.exe» file, If a system does not have a JVM then we need a «.exe» file to run our application.
Steps to create a .exe file
Before creating the «.exe» file, we need to create a Java program, So let’s create a simple Java program that says hello world. Follow these steps to create and run the Java program:
Step 1: Create a file hello.java
Step 2: Open the file in any IDE, and write the following code.
Java
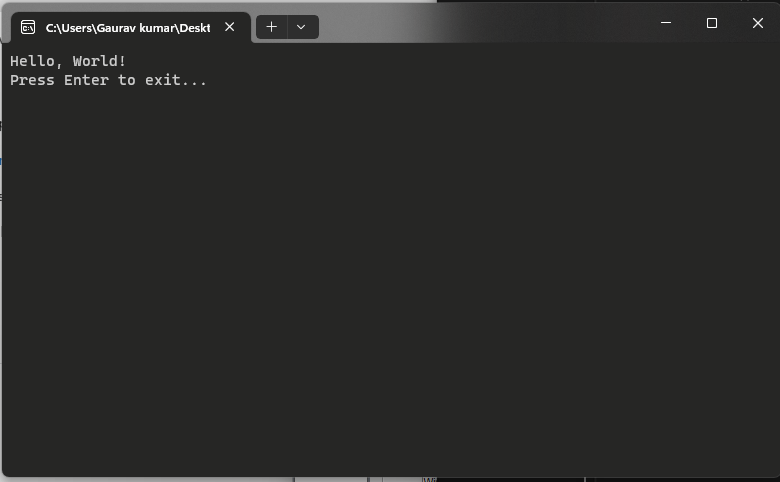
import java.util.Scanner;

public class Hello {
    public static void main(String[] args) {
        Scanner scanner = new Scanner(System.in);
        System.out.println("Hello, World!");
        System.out.println("Press Enter to exit...");
        scanner.nextLine();
        scanner.close();
    }
}
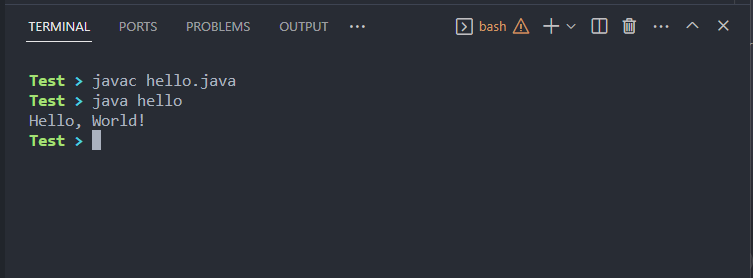
Step 3: Now to compile this program run the following command:
javac hello.java
Step 4: Now there will generate a file called hello.java which means that you successfully compiles, to run this program, run the following command:
java hello
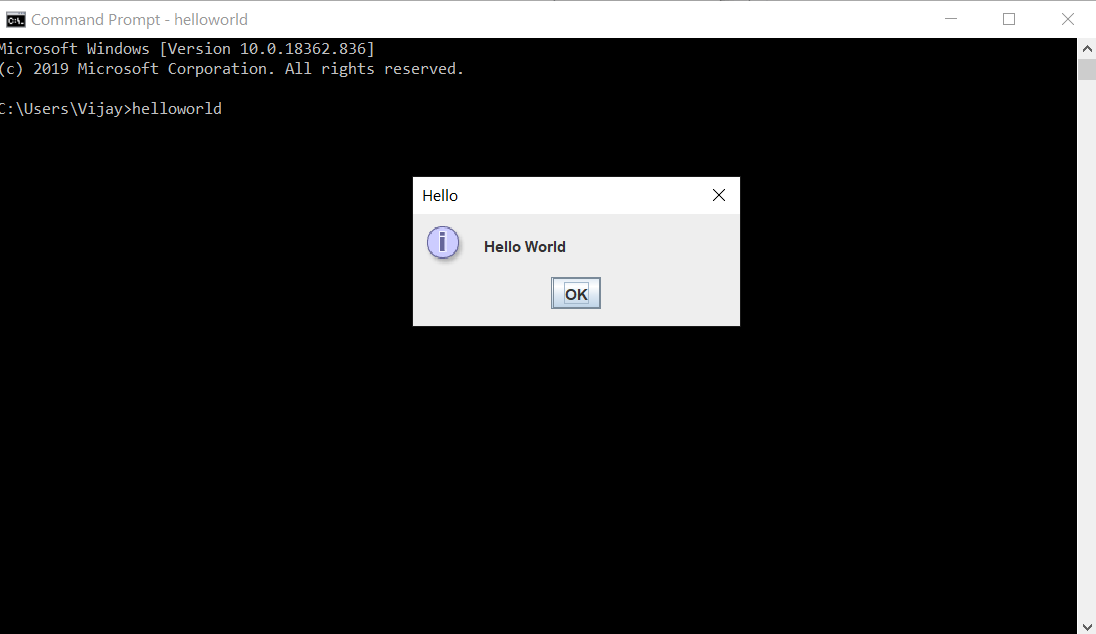
Step 5: See the output in the command prompt:
Creating .exe file
There are several methods to convert a Java application to an .exe file. Some popular methods are listed and explained below.
Now before creating the .exe file, there is one file that we need the .jar file, now when you initially create a java program it generally contains the .java and .class files, use the following commands to create the .jar file.
jar cvfe Hello.jar Hello Hello.class
Now there will be a .jar file, and we will be using that .jar file to create the .exe file using various tools that are discussed below.
1. Using JSmooth
File checks to if a suitable JVM is installed in the system or not and runs the app.
Step 1: Go to the official website of Jsmooth and download the application.
Step 2: Install the application on the system.
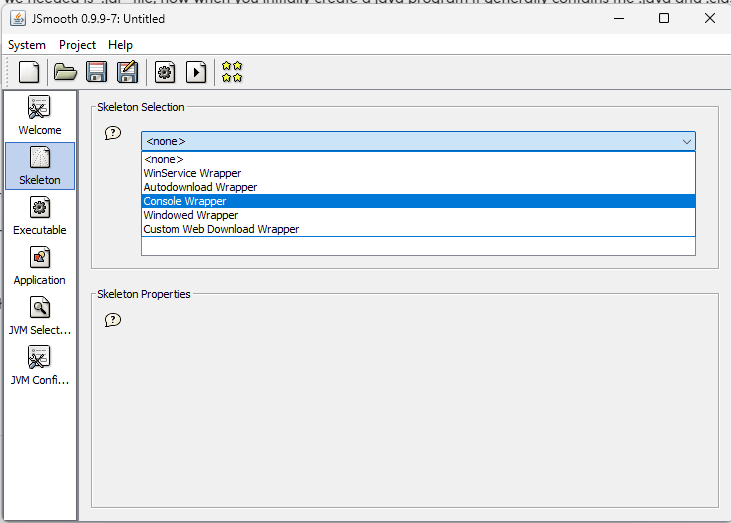
Step 3: Open the application, go to sell, auction, and choose the console wrapper.
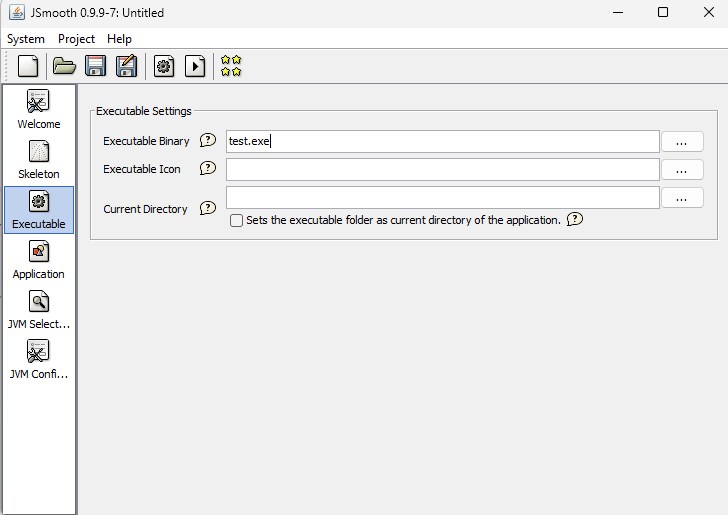
Step 4: Now go to the executable and give the file name that you want to create.
Step 5: Now go to the application first give the class name and choose the location of the .jar file
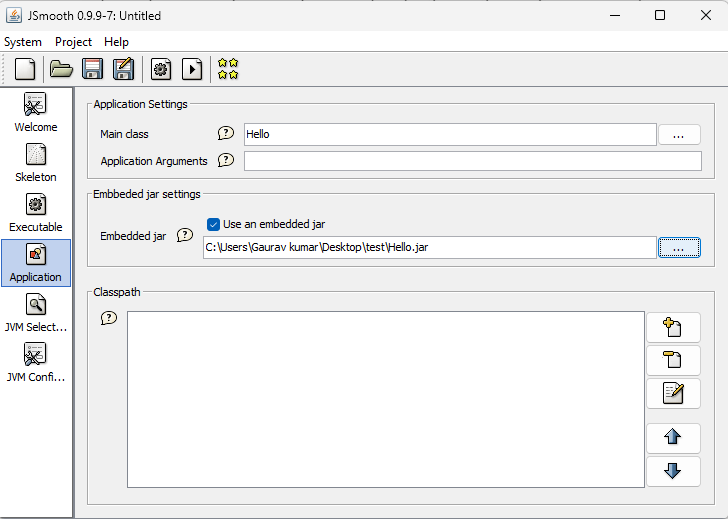
Step 6: Here choose the minimum JRE version, go for 1.5.0
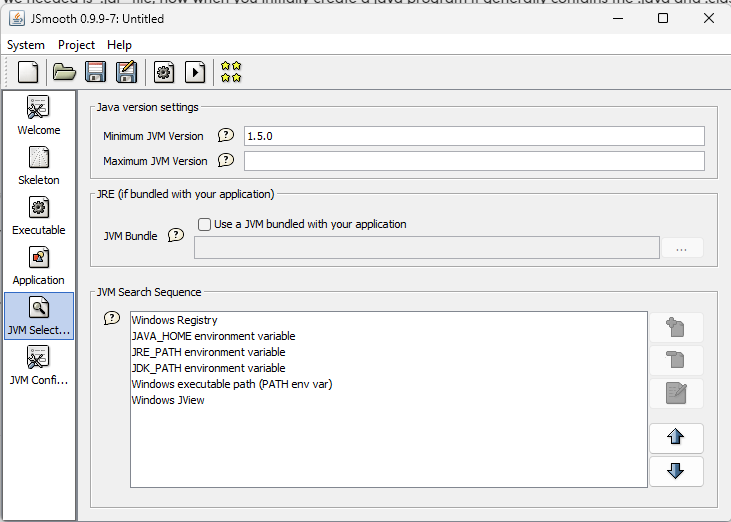
Step 7: Now click on the Gear icon on the top and the .exe file will be created in chosen directory.

Step 8: Now double-click on the .exe file that was created, and see the output.
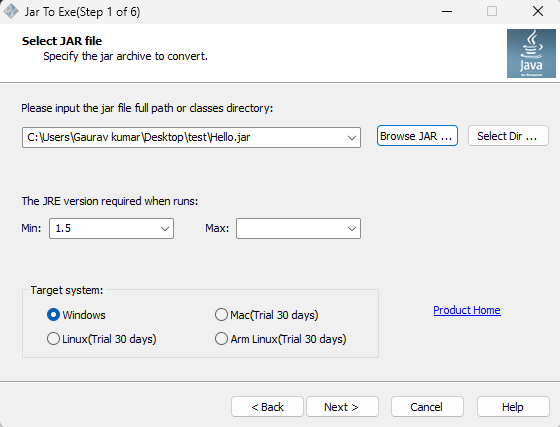
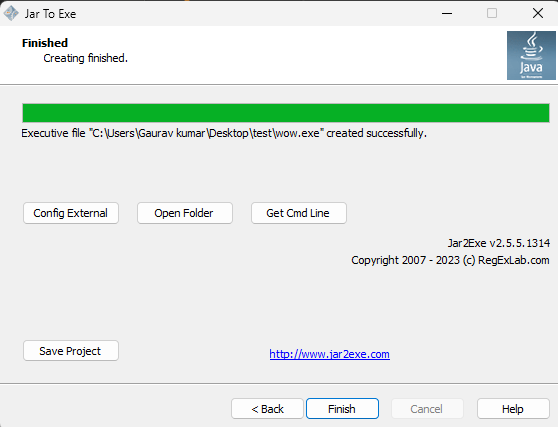
2. Using Jar2Exe
This application is also used to create the .exe file from the .jar file. Follow the given steps to use this application to create the .exe file of the Java application.
Step 1: Go to the official website Jar2Exe and download the application in the system.
Step 2: Open the application, select the path of the .jar file, select the JRE version go for 1.5, and click next for the system choose windows, and click next.
Step 3: Here choose the console application and click next.
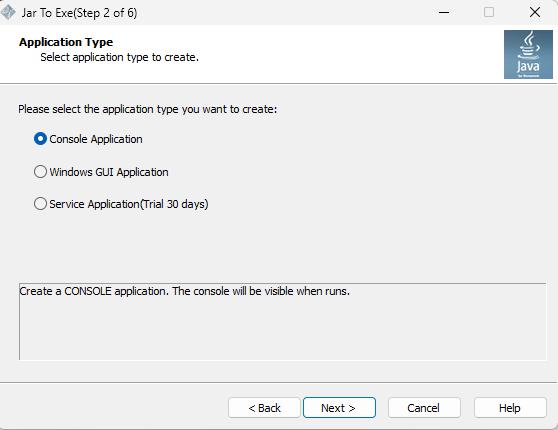
Step 4: Here enter the class name of the Java application and click next.

Step 5: Now .exe file will be created and you can run and see the output by double-clicking the .exe file.
3. Creation using Maven
To create an executable jar file for the maven projects we must have to install the maven in the system. Ensure the maven installation by running the following command.
mvn --version
Now follow the following steps to create the executable jar file. Note that we are using VS code as IDE.
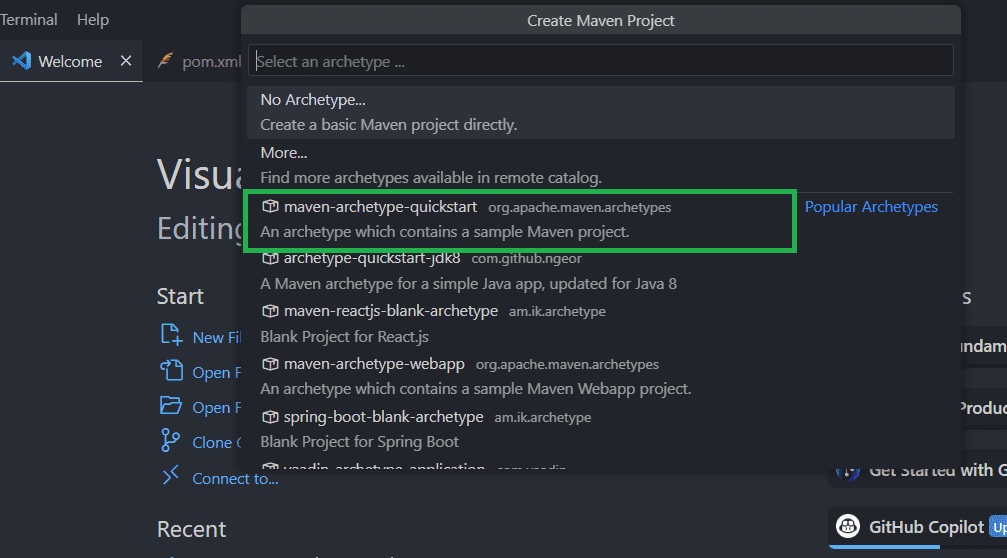
Step 1: Create a maven project, use Ctrl + Shift + P, and choose the create maven project for the basic project use the maven-archtype-quickstart option as shown in the image.
Step 2: After the project creation it will create the file directory and there will be a pom.xml file for the project configuration. On that file add the following code inside the Plugins according to your project name.
XML
        <plugin>
          <artifactId>maven-jar-plugin</artifactId>
          <version>3.0.2</version>
          <configuration>
            <archive>
              <manifest>
                <addClasspath>true</addClasspath>
                <classpathPrefix>lib/</classpathPrefix>
                <mainClass>com.test.App</mainClass>
              </manifest>
            </archive>
          </configuration>
        </plugin>
        <plugin>
Step 3: Now it’s time to build the jar file. run the following command in the terminal.
nvm package
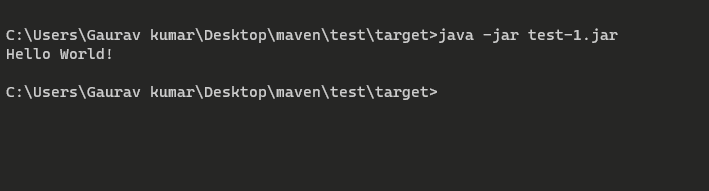
After this command, on the file directory, there will be a folder that will generate a named target, and inside that folder, there will be the .jar file. We can run this file and check by using the following command
java -jar filename.jar
Output:
Conclusion
In conclusion, we have seen two applications that help us to create a .exe file, and it’s pretty easy to use them. Now we can use the methods that are described above, to make the .exe file from the jar file. Follow those method steps and create the .exe file.
Последнее обновление: 20.03.2024
Итак, после установки JDK создадим первое приложение на языке Java. Что необходимо для создания программы на Java? Прежде всего нам надо написать код программы, и для этого нужен текстовый редактор.
Можно использовать любой текстовый редактор, например, Notepad++.
И чтобы превратить код программы в исполняемое приложение необходим компилятор. Компилятор устанавливается вместе с JDK.
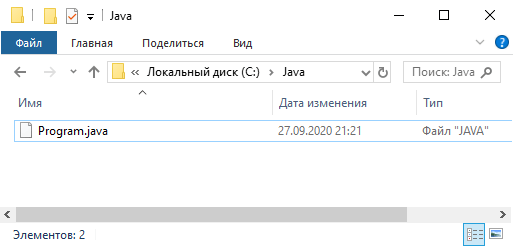
Итак, создадим на жестком диске какой-нибудь каталог, в котором будут располагаться файлы с исходным кодом на языке Java. Допустим, это будет каталог
C:/Java. Затем создадим в этом каталоге текстовый файл, который переименуем в Program.java.
Откроем этот файл в любом текстовом редакторе и наберем в нем следующую программу:
public class Program{

    public static void main (String args[]){

        System.out.println("Hello METANIT.COM!");
    }
}
Java является объектно-ориентированным языком, поэтому вся программа представляется в виде набора взаимодействующих классов.
В данном случае определен один класс Program.
При определении класса вначале идет модификатор доступа public, который указывает, что данный класс будет доступен
всем, то есть мы сможем его запустить из командной строки. Далее идет ключевое слово
class, а затем название класса. То есть класс называется Program. После названия в фигурных скобках расположено содержимое класса.
Класс может содержать различные переменные и методы. В данном случае у нас объявлен один метод main.
Это главный метод в любой программе на Java, он является входной точкой программы и с него начинается все управление. Он обязательно
должен присутствовать в программе.
Метод main также имеет модификатор public. Слово static указывает, что метод main — статический, а слово void — что он не возвращает никакого значения. Позже
мы подробнее разберем, что все это значит.
Далее в скобках у нас идут параметры метода — String args[] — это массив args, который хранит значения типа String, то
есть строки. В данном случае ни нам пока не нужны, но в реальной программе это те строковые параметры, которые передаются при запуске программы из
командной строки.
После списка параметров в фигурных скобках идет тело метода — это собственно те инструкции, которые и будет выполнять метод.
В данном случае фактически определени определена только одна инструкция — вывод на консоль некоторой строки. Для вывода на консоль используется встроенный метод
System.out.println(). В этот метод передается выводимая строка. Каждая инструкция завершается точкой с запятой.
Теперь скомпилируем написанную программу. Откроем командную строку (в Windows) или терминал в Linux/MacOS и введем там соответствующие команды. Первым делом перейдем в каталог, где лежит наш файл с программой с помощью команды cd:
cd C:\Java
В данном случае файл находится в каталоге C:\Java.
Затем cкомпилируем программу с помощью команды
javac Program.java
Компилятор языка Java представляет утилиту javac. Через пробел название нашего файла, который содержит класс программы.
После этого программа компилируется в байт-код, и в каталоге C:\Java можно будет найти новый файл Program.class.
Это и будет файл с байт-кодом программы. Теперь нам надо его запустить с помощью утилиты java:
java Program
Здесь уже расширение у файла не надо использовать.
Для ОС Windows весь процесс будет выглядеть следующим образом:

В примере выше весь процесс разбивался на два этапа:
-
Компилятор javac создает из программы на языке Java файл с расширением
*.class, который содержит байт-код для виртуальной машины Java или JVM -
Утилита java запускает скомпилированный байт-код из файла с расширением
*.class. То есть происходит выполнение программы
Но в последних версиях Java также стало возможно сразу выполнить код программы на языке Java:
C:\Java>java Program.java
Hello METANIT.COM!

C:\Java>
В этом случае утилите java передается файл с исходным кодом. При этом файла с расширением *.class не создается.
Let’s say you have created a Java application and packaged it into a jar.
You want to install this jar in another machine.
Traditionally , you need to first install java in that machine and then copy the jar . The application can be launched by running the jar.
Or you can use third party applications to convert the java application to an exe installation. Java itself didn’t provide this facility for a long time.
Java 8 came up with jpackage tool which can be used to create .exe files. These files can then be used to install a native Windows Application. No need to install Java in the client machine anymore!
Java again removed the tool in Java 11 version and brought it back in Java 14.
Let’s create a simple Java application which displays the message “Hello World” in a message box and convert it into an exe file. Then let’s install the application in a Windows machine.
Here is the algorithm:
STEP 1: Create the java application
STEP 2: Use ‘jar’ tool to generate a jar file
STEP 3: Use ‘jpackage’ tool to convert the jar file to exe
STEP 4: Install the exe file on a Windows machine
STEP 1: Create the java application :
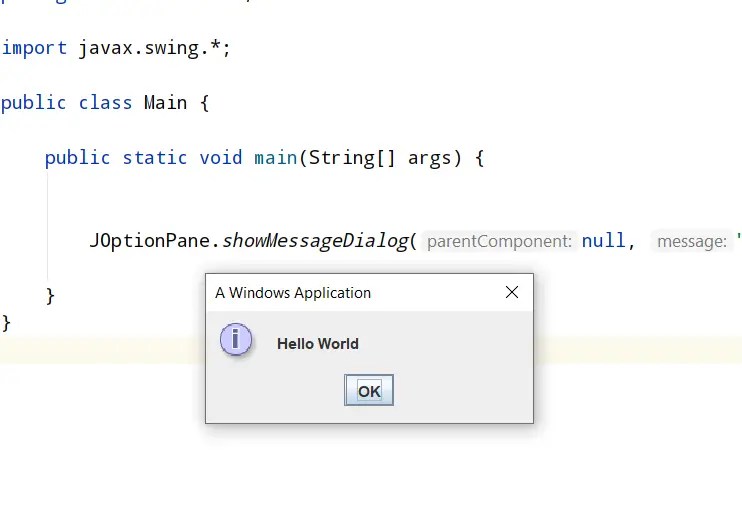
I created a Java application with a single file which opens up a message box with the message “Hello World”.
Here is the code:
package com.helloworld;

import javax.swing.*;

public class Main {

    public static void main(String[] args) {


        JOptionPane.showMessageDialog(null, "Hello World", "A Windows Application", JOptionPane.INFORMATION_MESSAGE);

    }
}
On running this , I get the below output:
Now let’s convert this project into a jar file
STEP 2: Use ‘jar’ tool to generate a jar file
Below is the path where I have created the Java application:
G:\projects\fullstackdeveloperblog\spring\springboot\HelloWorld\
On building the project the classes got generated in out/production folder ( I am using IntelliJ):
G:\projects\fullstackdeveloperblog\spring\springboot\HelloWorld\out\production
A new folder named HelloWorld got generated in the above directory.
I navigated inside it and ran the below jar command:
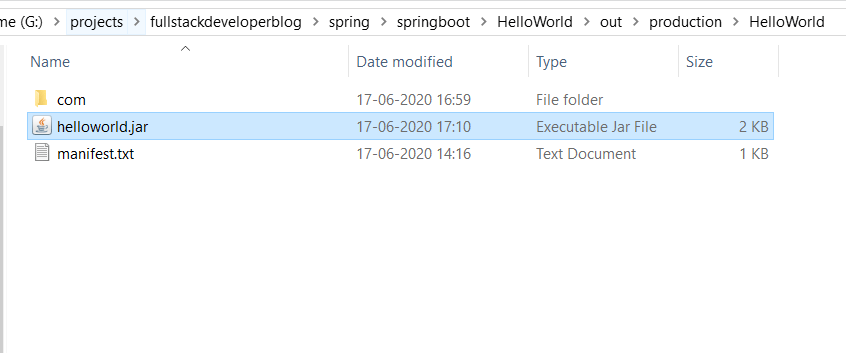
jar cfm helloworld.jar manifest.txt com
helloworld.jar is the name of the jar file to generate
manifest.txt contains meta data about the jar (what is the path of the main class etc)
com is the directory (inside HelloWorld folder) which contains the Main class
To know more about generating jar files refer here : (Generating jar)
A jar file got generated as below:
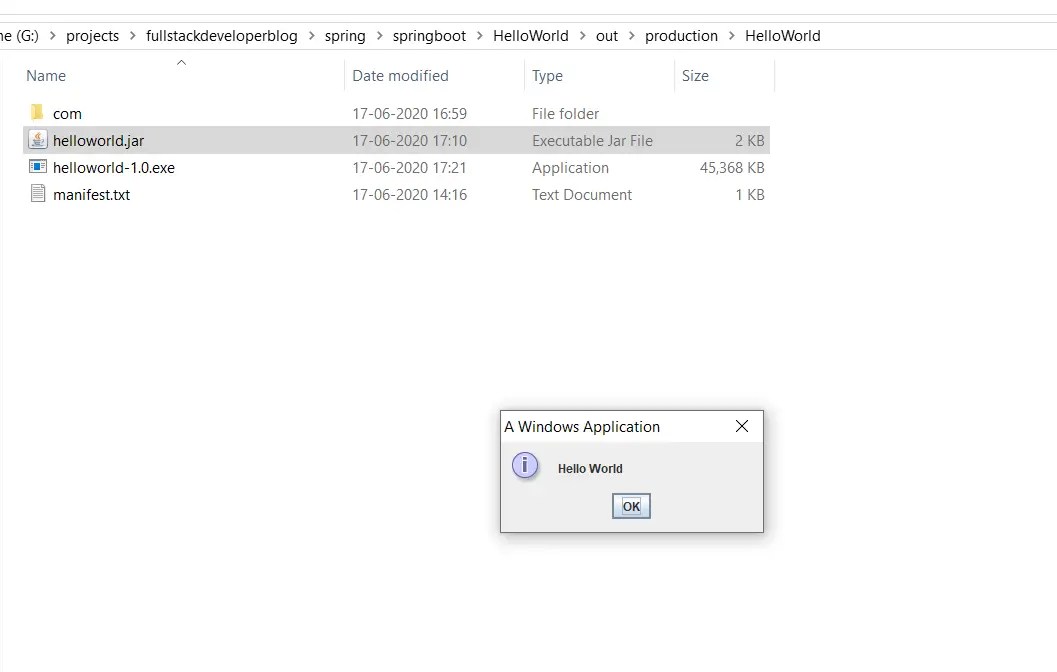
If you double click the jar file you get the same output:
STEP 3: Use ‘jpackage’ tool to convert the jar file to exe
As a prerequisite to run jpackage tool to generate a exe file , you need to install Wix Toolset (suggested by Java) from here .
In the same path where I ran ‘jar’ command I ran the below jpackage command:
jpackage --name helloworld --input . --main-jar helloworld.jar --main-class com.helloworld.Main --win-console
Following –name is the name of the exe file
Following –input (.) is the name of the directory which contains the jar file and other inputs (in this case the current directory)
Following –main-jar is the name of the jar which contains the class to be run
Following –main-class is the name of the class which is to be run.
–win-console means windows console need to be enabled – Command line and Java swing applications need this to be enabled.
–win-console flag is quite important. It took me a while to realise this was needed (Else application won’t be launched when you click on the installed exe)
Here is the screenshot of running the jar and jpackage commands:

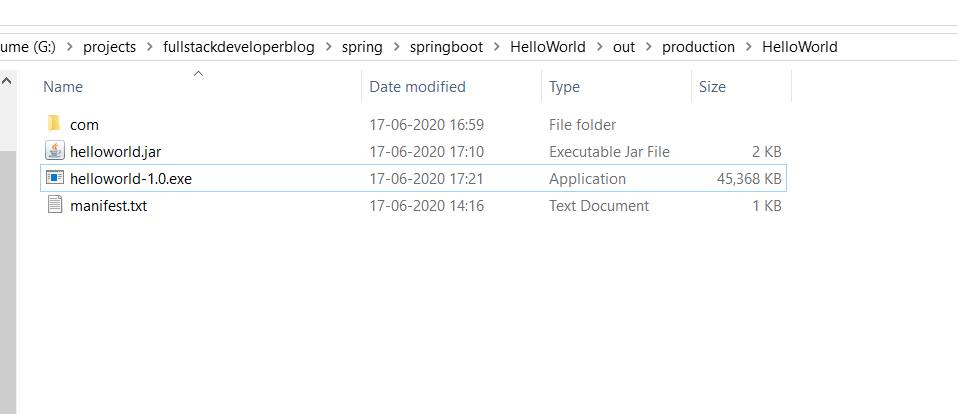
Below is the exe file generated:
STEP 4: Install the exe file on a Windows machine
Now let’s install the application using the exe file created.
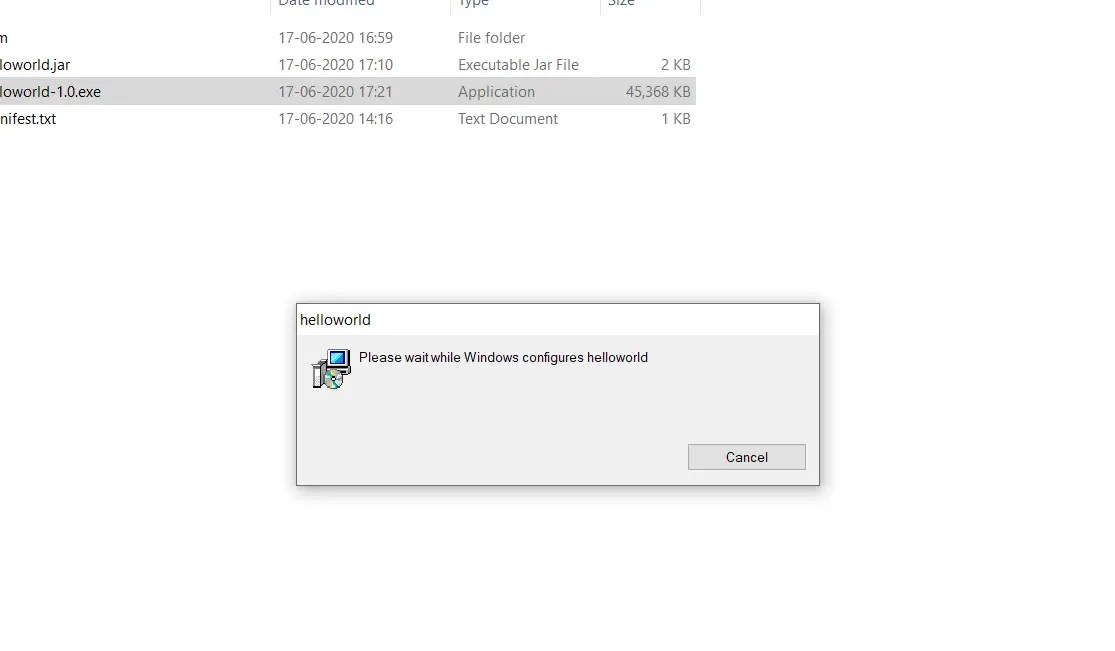
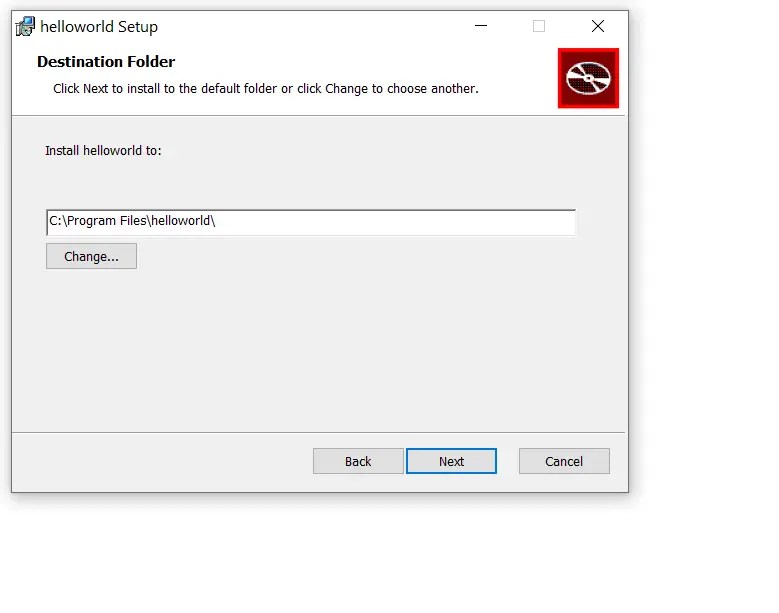
Double click on helloworld-1.0.exe.
The application gets installed :
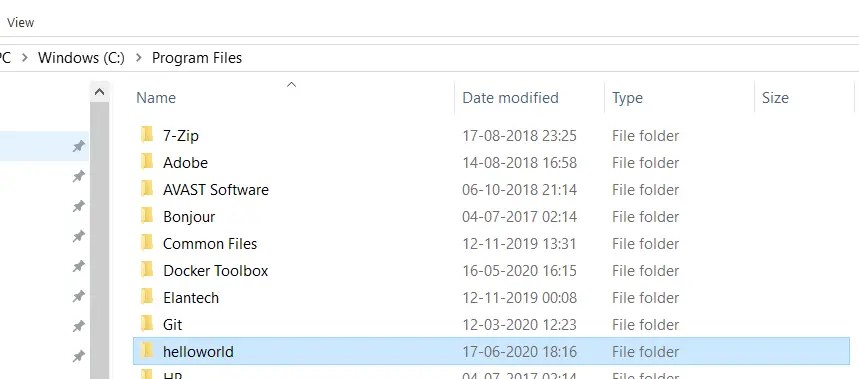
It gets installed in the default C:/Program Files directory:
Go into the folder and click on helloworld.exe:
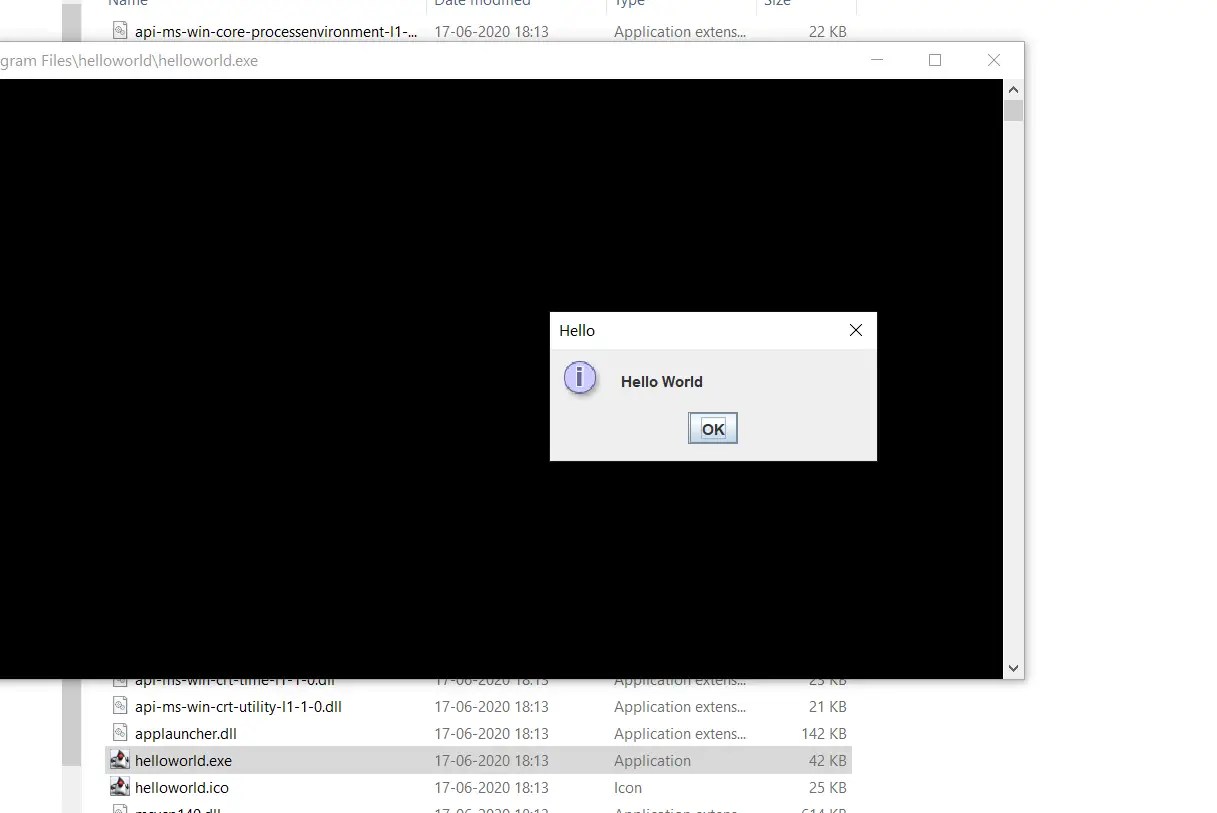
Hello World message is shown!
Now let’s try to execute this exe file through command prompt from any path in Windows machine.
For this to happen , add the path of the exe to the ‘PATH’ environment variable of your machine:
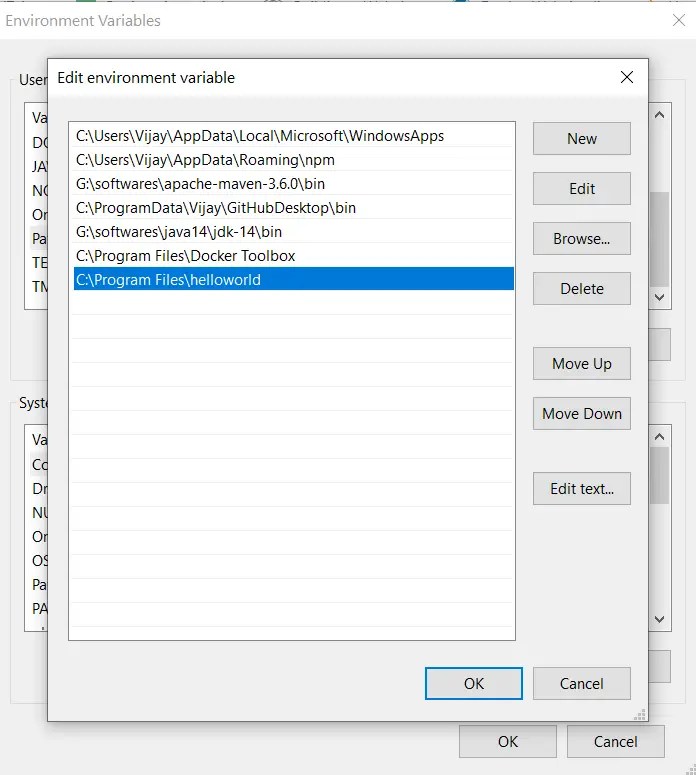
Now go to any path in the command prompt and enter helloworld:
We have created a native windows application!
As said earlier by default it gets installed in C:/Program Files directory .To prompt the user to provide the path while installation add the flag –win-dir-chooser to jpackage command:
jpackage --name helloworld --input . --main-jar helloworld.jar --main-class com.helloworld.Main --win-console --win-dir-chooser
If you want to create a short cut in the desktop once your application is installed add the flag –win-shortcut to the above command:
jpackage --name helloworld --input . --main-jar helloworld.jar --main-class com.helloworld.Main --win-console --win-dir-chooser --win-shortcut
If you want to create a menu under the Start Menu add two flags –win-menu –win-menu-group and against –win-menu-group provide the name of the menu you want:
jpackage --name helloworld --input . --main-jar helloworld.jar --main-class com.helloworld.Main --win-console --win-dir-chooser --win-shortcut --win-menu --win-menu-group "Hello World"
If you want to provide an icon for your application , use –icon flag. Copy the icon file in the same directory where you are running jpackage command.
jpackage --name helloworld --input . --main-jar helloworld.jar --main-class com.helloworld.Main --win-console --win-dir-chooser --win-shortcut --win-menu --win-menu-group "Hello World" --icon helloworldicon.ico
Let’s run jpackage tool with all the above options and create an exe installation file.
Now if you run the generated exe file it will prompt you for installation directory:
Once successfully installed , go to your desktop and notice a short cut created with the icon you chose. Double click the file and Hello World message gets displayed!
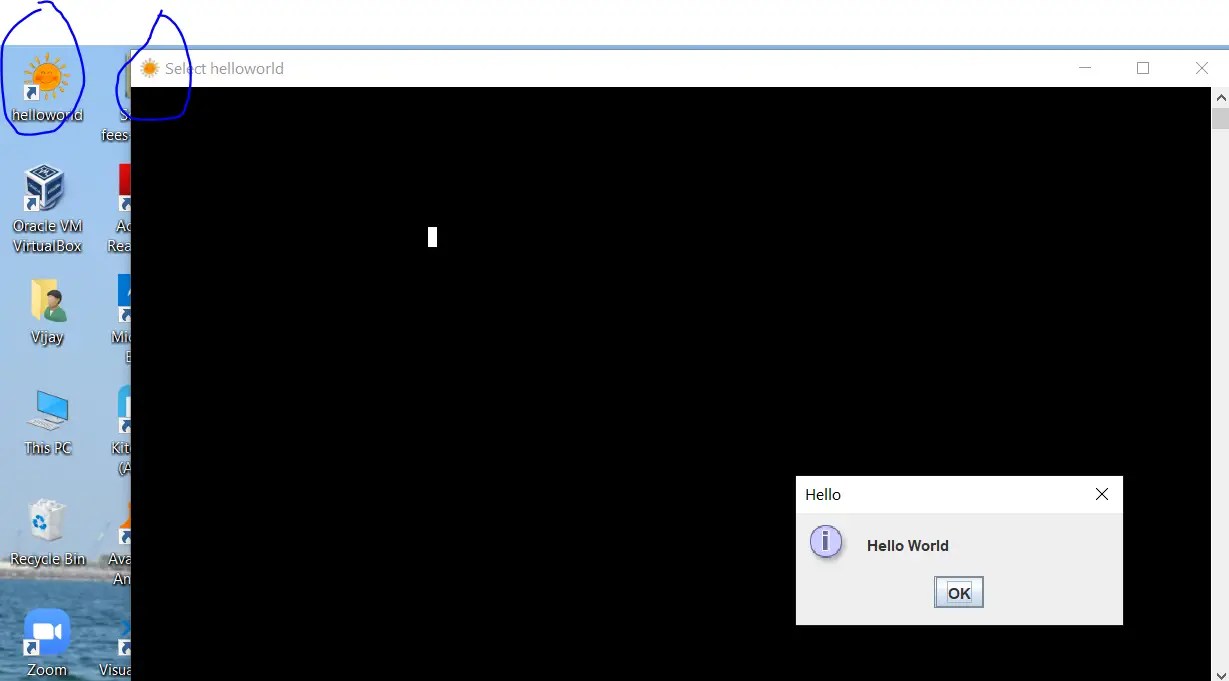
Go to start menu and notice the app “Hello World”:
Creating a Windows Native Application in Java got easier and cooler.
Launch4j is a cross-platform tool for wrapping Java applications distributed as jars in lightweight Windows native executable files. In this post, we will learn making such an executable file for a demo java application.
Step1 ) Create a java application
I am creating a very basic java class which simply displays a frame and some text on it. It also has the main() method which will start the application.
package com.howtodoinjava;

import java.awt.Color;
import java.awt.Font;
import java.awt.Frame;
import java.awt.Label;
import java.awt.event.WindowAdapter;
import java.awt.event.WindowEvent;
import javax.swing.JDialog;

public class ApplicationMain extends JDialog
{
	private static final long serialVersionUID = 1L;
	public ApplicationMain()
	{
		//Create a frame
		Frame f = new Frame();
		f.setSize(500, 300);

		//Prepare font
		Font font = new Font( "SansSerif", Font.PLAIN, 22 );

		//Write something
		Label label = new Label("Launch4j Maven Demo with HowToDoInJava.com");
		label.setForeground(Color.RED);
		label.setFont(font);
		f.add(label);

		//Make visible
		f.setVisible(true);
		f.addWindowListener(new WindowAdapter() {
			public void windowClosing(WindowEvent e) {
				System.exit(0);
			}
		});
	}
	public static void main(final String[] args)
	{
		new ApplicationMain();
	}
}
Step 2) Create maven file with launch4j configured in it
I have created a pom file for packaging the application as .exe file. If you feel something unclear, drop a comment.
<project xmlns="http://maven.apache.org/POM/4.0.0" xmlns:xsi="http://www.w3.org/2001/XMLSchema-instance"
  xsi:schemaLocation="http://maven.apache.org/POM/4.0.0 http://maven.apache.org/maven-v4_0_0.xsd">
  <modelVersion>4.0.0</modelVersion>
  <groupId>com.howtodoinjava</groupId>
  <artifactId>JavaExeDemo</artifactId>
  <packaging>jar</packaging>
  <version>1.0-SNAPSHOT</version>
  <name>JavaExeDemo</name>
  <url>http://maven.apache.org</url>
  <properties>
	    <project.build.sourceEncoding>UTF-8</project.build.sourceEncoding>
  </properties>
  <build>
    <plugins>
        <plugin>
            <groupId>org.apache.maven.plugins</groupId>
            <artifactId>maven-compiler-plugin</artifactId>
            <version>2.5.1</version>
            <configuration>
                <source>1.6</source>
                <target>1.6</target>
            </configuration>
        </plugin>
        <plugin>
            <groupId>org.apache.maven.plugins</groupId>
            <artifactId>maven-shade-plugin</artifactId>
            <version>1.7.1</version>
            <executions>
                <execution>
                    <phase>package</phase>
                    <goals>
                        <goal>shade</goal>
                    </goals>
                </execution>
            </executions>
            <configuration>
                <shadedArtifactAttached>true</shadedArtifactAttached>
                <shadedClassifierName>shaded</shadedClassifierName>
                <transformers>
                    <transformer implementation="org.apache.maven.plugins.shade.resource.ManifestResourceTransformer">
                        <mainClass>com.howtodoinjava.Main</mainClass>
                    </transformer>
                </transformers>
            </configuration>
        </plugin>
        <plugin>
            <groupId>com.akathist.maven.plugins.launch4j</groupId>
            <artifactId>launch4j-maven-plugin</artifactId>
            <version>1.5.1</version>
            <executions>
                <execution>
                    <id>l4j-clui</id>
                    <phase>package</phase>
                    <goals>
                        <goal>launch4j</goal>
                    </goals>
                    <configuration>
                        <headerType>gui</headerType>
                        <jar>${project.build.directory}/${artifactId}-${version}-shaded.jar</jar>
                        <outfile>${project.build.directory}/howtodoinjava.exe</outfile>
                        <downloadUrl>http://java.com/download</downloadUrl>
                        <classPath>
                            <mainClass>com.howtodoinjava.ApplicationMain</mainClass>
                            <preCp>anything</preCp>
                        </classPath>
                        <icon>application.ico</icon>
                        <jre>
                            <minVersion>1.6.0</minVersion>
                            <jdkPreference>preferJre</jdkPreference>
                        </jre>
                        <versionInfo>
                            <fileVersion>1.0.0.0</fileVersion>
                            <txtFileVersion>${project.version}</txtFileVersion>
                            <fileDescription>${project.name}</fileDescription>
                            <copyright>2012 howtodoinjava.com</copyright>
                            <productVersion>1.0.0.0</productVersion>
                            <txtProductVersion>1.0.0.0</txtProductVersion>
                            <productName>${project.name}</productName>
                            <companyName>howtodoinjava.com</companyName>
                            <internalName>howtodoinjava</internalName>
                            <originalFilename>howtodoinjava.exe</originalFilename>
                        </versionInfo>
                    </configuration>
                </execution>
            </executions>
        </plugin>
    </plugins>
</build>
</project>
Step 3) Create .exe file
To make the exe file for above java program, run maven command:
mvn package
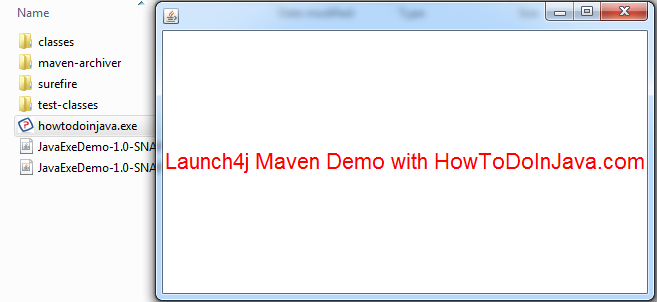
Above command will create the “howtodoinjava.exe ” file in your project’s target folder. Double click on .exe file will open the window like this.
If you want to download source code of above application, click on below given download link.
Sourcecode Download
Happy Learning !!
Java – это популярный язык программирования, разработанный компанией Sun Microsystems в 1995 году. Благодаря своей объектно-ориентированной архитектуре, он обеспечивает удобство и гибкость в разработке программного обеспечения.
Одним из ключевых преимуществ Java является возможность запуска программ на различных устройствах благодаря использованию виртуальной машины (Java Virtual Machine, JVM). Она позволяет компилировать код в байт-код, который затем может выполняться на любой платформе, поддерживающей JVM. Это делает Java универсальным инструментом для создания настольных, мобильных и серверных приложений.
Программирование на Java используется в корпоративных решениях, веб-разработке и мобильных приложениях. Java-разработчики востребованы во многих сферах, включая банковский сектор, игровые технологии и облачные сервисы.
Сейчас это один из ведущих языков, обеспечивающих высокую надежность, безопасность и масштабируемость приложений. Его богатая экосистема и мощные инструменты делают его незаменимым для профессиональной разработки программного обеспечения.
Что такое оконное приложение?
Оконное приложение – это программа с графическим интерфейсом, которая запускается в отдельном окне операционной системы, что позволяет пользователю взаимодействовать с ней с помощью визуальных элементов, таких как кнопки, поля ввода, меню, а такхе другие компоненты.
В отличие от консольных программ, которые работают в текстовом режиме, требуют ввода команд вручную, такие программы имеют удобный интерфейс, где пользователи могут выполнять действия, нажимая кнопки, выбирая пункты меню или вводя данные в поля.
Такие программы используются в различных сферах благодаря своей наглядности, а также удобству взаимодействия. Вот несколько причин, почему они востребованы:
- Удобство для пользователя
- Визуальные элементы позволяют легко управлять программой.
- Понятный интерфейс снижает порог входа для пользователей.
- Широкий спектр применения
- Программы используются в офисных программах, редакторах, играх, инструментах для работы с базами данных и многом другом.
- Например, Microsoft Word, Photoshop или файловые менеджеры – это оконные приложения.
- Интерактивность
- Возможность обрабатывать события (нажатия кнопок, ввод данных, перетаскивание файлов).
- Взаимодействие с пользователем в реальном времени.
- Универсальность
- Могут работать на разных операционных системах (Windows, macOS, Linux).
- Существуют кроссплатформенные библиотеки, позволяющие создавать GUI-программы, работающие одинаково на разных устройствах.
- Гибкость и масштабируемость
- Программа может быть простым (например, калькулятор) или сложным (редактор видео или бухгалтерская программа).
- Можно добавлять новые функции, а также улучшать интерфейс по мере необходимости.
Примеры
- Офисные программы (Word, Excel, PowerPoint).
- Графические редакторы (Photoshop, GIMP, Illustrator).
- Для работы с базами данных (MySQL Workbench, Access).
- Игры (2D, 3D, например, Minecraft, Sims).
- Среды разработки (IntelliJ IDEA, Eclipse, VS Code).
- Музыкальные, видеоплееры (VLC, Windows Media Player).
- Финансовые, бухгалтерские программы.
Таким образом, оконные приложения делают программное обеспечение удобным, доступным, понятным для пользователей, позволяя им эффективно работать с данными, а также выполнять повседневные задачи.
ОНЛАЙН-ПРАКТИКУМ
КАК «ХАКНУТЬ» PYTHON С ПОМОЩЬЮ CHATGPT

ЧТО БУДЕТ НА ОБУЧЕНИИ?
- Прямо в эфире решим типичные задачи программиста только с помощью ChatGPT
- Возможности Python — расскажем что можно делать и сколько на этом зарабатывать?
- Что ждет рынок программирования и почему мы решили сюда пойти
Создание первого приложения может показаться сложной задачей, особенно если вы только начинаете знакомиться с графическим интерфейсом. Однако с правильным подходом и пошаговым разбором процесса это становится вполне понятной и увлекательной задачей.
В этой инструкции мы детально рассмотрим каждый этап разработки программы с использованием библиотеки Swing. Мы создадим окно, добавим в него элементы интерфейса (текстовую метку, кнопку), а также настроим обработчик событий, чтобы кнопка выполняла определенные действия при нажатии.
Шаг 1: установка Java Development Kit (JDK)
Прежде чем мы начнем, убедитесь, что у вас установлен Java Development Kit (JDK). JDK включает в себя все необходимые инструменты для разработки приложений на Java. Вы можете скачать JDK с официального сайта Oracle. Следуйте инструкциям по установке для вашей операционной системы.
Шаг 2: установка интегрированной среды разработки (IDE)
Хотя вы можете разрабатывать Java-приложения с помощью любого текстового редактора, а также командной строки, использование интегрированной среды разработки значительно облегчит вашу работу. В этом туториале мы будем использовать Eclipse IDE, которая является популярным выбором для разработки на Java. Вы можете скачать Eclipse по адресу: https://www.eclipse.org/downloads/

Шаг 3: создание нового проекта
После успешной установки Eclipse IDE, запустите его, следуйте этим шагам:
- Выберите «File» (Файл) в верхнем меню, затем «New» (Создать).
- В выпадающем меню выберите «Java Project» (Проект Java).
- Введите имя проекта, например, «MyFirstJavaApp», и нажмите «Finish» (Завершить).
Теперь у вас есть пустой проект, мы готовы перейти к созданию оконного приложения.
Шаг 4: создание интерфейса
- Щелкните правой кнопкой мыши на папке проекта в обозревателе проектов (Package Explorer), выберите «New» (Создать) -> «Class» (Класс).
- Введите имя класса, например, «MainApp», и убедитесь, что установлен флажок «public static void main(String[] args)».
- Нажмите «Finish» (Завершить).
Откроется окно редактора кода для класса «MainApp». Теперь давайте добавим код для создания окна.
import javax.swing.JFrame;
public class MainApp {
public static void main(String[] args) {
// Создаем экземпляр JFrame (окно)
JFrame frame = new JFrame(«Мое первое оконное приложение»);
// Устанавливаем размер окна
frame.setSize(400, 300);
// Завершаем работу, когда пользователь закроет окно
frame.setDefaultCloseOperation(JFrame.EXIT_ON_CLOSE);
// Делаем окно видимым
frame.setVisible(true);
}
}
Добавив простые операции, можно сделать, например, калькулятор.
Шаг 5: запуск
Чтобы его запустить, выполните следующие действия:
- Выберите класс «MainApp» в обозревателе проектов (Package Explorer).
- Щелкните правой кнопкой мыши и выберите «Run As» (Запустить как) -> «Java Application» (Java-приложение).
Вы должны увидеть окно с заголовком «Мое первое оконное приложение», размером 400×300 пикселей. Поздравляем, ваше первое оконное приложение на Java успешно работает.
Заключение
В этом туториале мы пошагово разобрали процесс создания простого оконного приложения на языке Java с использованием Eclipse IDE. Мы установили Development Kit (JDK), настроили новый проект в среде разработки, написали код для создания окна и успешно запустили программу.
Теперь у вас есть базовое понимание работы с Swing, одной из самых популярных библиотек для разработки графического интерфейса в Java. Мы рассмотрели, как использовать JFrame для создания главного окна, добавили JButton и JLabel, а также настроили обработчик событий, чтобы реагировать на действия пользователя. Это первый шаг на пути к созданию полноценных настольных приложений.
Что делать дальше
Чтобы закрепить полученные знания, попробуйте немного улучшить вашу программу:
- Добавьте текстовое поле (JTextField) для ввода данных.
- Создайте всплывающее окно (JOptionPane) с сообщением после нажатия кнопки.
- Измените оформление интерфейса, используя Look and Feel.
- Добавьте меню (JMenuBar) и изучите работу с ним.
Чем больше вы практикуетесь, тем лучше будете понимать возможности языка для создания функциональных графических интерфейсов.
Программирование – это не только логика и код, но и творчество. Возможности Java практически безграничны: от разработки настольных программ до создания мобильных приложений и сложных серверных систем. Чтобы расти как разработчик, попробуйте изучить:
- JavaFX – современную библиотеку для создания графических интерфейсов с расширенными возможностями.
- Работу с базами данных (JDBC, Hibernate) – для хранения и обработки информации.
- Основы многопоточного программирования – чтобы создавать более производительные интерфейсы.
- Разработку веб-приложений на Java (Spring, Java EE) – если хотите выйти за пределы настолок.
Спасибо, что прошли этот туториал! Надеюсь, вы получили удовольствие от процесса программирования и теперь чувствуете себя увереннее в работе с Java. Успехов в дальнейших проектах, пусть ваш код всегда будет чистым и эффективным.
3-дневный курс
НАУЧИСЬ СОЗДАВАТЬ TELEGRAM-БОТОВ НА PYTHON С CHATGPT
C НУЛЯ ЗА 3 ДНЯ
- Освой Python и нейросети и узнай, как гарантированно получить первые 10 заказов
- УЧАСТВОВАТЬ ЗА 0 РУБ.
- Создай и прокачай собственного чат-бота
Участвовать бесплатно
Вебинар
ФРИЛАНС И ПРОЕКТНАЯ РАБОТАДЛЯ PYTHON-РАЗРАБОТЧИКА
- Подарим подборку бесплатных инструментов для написания кода
Участвовать бесплатно