
Applies ToWindows 11 Windows 10
В большинстве случаев Windows автоматически обнаруживает и устанавливает как сканеры, подключенные локально, так и сканеры, расположенные в сети. Однако если сканер не обнаруживается и не устанавливается автоматически, в этой статье описывается установка сканера вручную. После установки в этой статье описывается сканирование рисунка или документа.
В большинстве случаев для настройки сканера в Windows необходимо подключить сканер к устройству Windows. Подключите USB-кабель от сканера к доступному USB-порту на устройстве с Windows, а затем включите сканер. Windows продолжает установку сканера. Если Windows не устанавливает локальный сканер автоматически, его можно установить вручную:
-
Убедитесь, что сканер подключен к устройству с Windows через USB и что сканер включен.
-
В окне Устройства bluetooth & > Принтеры & сканеры нажмите кнопку Добавить устройство рядом с пунктом Добавление принтера или сканера.
-
Windows выполняет поиск сканеров, подключенных локально к устройству Windows. Поиск может занять несколько минут.
-
После того как локальные сканеры будут обнаружены, они отображаются в списке в окне Устройства Bluetooth & > Принтеры & сканеры . В списке нажмите кнопку Добавить устройство рядом со сканером, который необходимо установить.
-
Windows устанавливает выбранный сканер. После завершения установки сканер появится в окне устройства & Bluetooth > принтеры & сканеры .
Совет: Если сканер входит в состав многофункционального или многофункционального принтера, сканер может отображаться как принтер. Чтобы убедиться, что Windows также обнаруживает принтер в качестве сканера, выберите принтер в окне Устройства Bluetooth & > Принтеры & сканеры . Если принтер также обнаружен в качестве сканера, параметры сканера отображаются в качестве параметра в открывавшемся окне Устройства Bluetooth & > Принтеры & сканеры > <Printer_Name> .
Если сканер включен и подключен к сети, Windows должна найти и установить его автоматически. Доступные сканеры могут включать сканеры в сети, такие как сканеры Bluetooth, беспроводные сканеры или сканеры, подключенные к другому устройству и совместно используемые в сети. Если Windows не устанавливает сканер сети автоматически, его можно установить вручную:
-
В окне Устройства bluetooth & > Принтеры & сканеры нажмите кнопку Добавить устройство рядом с пунктом Добавление принтера или сканера.
-
Windows выполняет поиск сканеров в сети. Поиск может занять несколько минут.
-
После того как сетевые сканеры будут обнаружены, они отображаются в списке в окне Bluetooth & устройства > Принтеры & сканеры . В списке нажмите кнопку Добавить устройство рядом со сканером, который необходимо установить.
-
Windows устанавливает выбранный сканер. После завершения установки сканер появится в окне устройства & Bluetooth > принтеры & сканеры .
Если сканер, который требуется установить, не обнаружен и не отображается в списке, выберите ссылку Добавить новое устройство вручную рядом с пунктом Нужный принтер отсутствует в списке. В открывавшемся окне Добавление принтера следуйте инструкциям, чтобы добавить его вручную.
Советы:
-
Если сканер входит в состав многофункционального или многофункционального принтера, сканер может отображаться как принтер. Чтобы убедиться, что Windows также обнаруживает принтер в качестве сканера, выберите принтер в окне Устройства Bluetooth & > Принтеры & сканеры . Если принтер также обнаружен в качестве сканера, параметры сканера отображаются в качестве параметра в открывавшемся окне Устройства Bluetooth & > Принтеры & сканеры > <Printer_Name> .
-
Если сканер и устройство Windows подключены к сети по беспроводной сети, убедитесь, что они находятся в одной беспроводной сети или SSID.
-
Инструкции по подключению сканера с беспроводными возможностями к беспроводной сети см. в инструкциях, которые поставляется со сканером или веб-сайтом производителя.
Чтобы убедиться, что сканер установлен, убедитесь, что сканер включен, а затем выполните следующие действия.
-
Убедитесь, что в открывавшемся окне & сканеры устройства Bluetoo & th > принтеры , убедитесь, что сканер отображается в окне.
Совет: Если сканер входит в состав многофункционального или многофункционального принтера, сканер может отображаться как принтер. Чтобы убедиться, что Windows также обнаруживает принтер в качестве сканера, выберите принтер в окне Устройства Bluetooth & > Принтеры & сканеры . Если принтер также обнаружен в качестве сканера, параметры сканера отображаются в качестве параметра в открывавшемся окне Bluetooth & устройства > принтеры & сканеры > <Printer_Name> .
После установки сканера можно использовать приложение «Проверка Windows» для сканирования рисунка или документа. Вот как это сделать.
-
Убедитесь, что сканер включен.
-
На устройстве с Windows щелкните правой кнопкой мыши меню Пуск и выберите Поиск .
-
В поле поиска Введите здесь для поиска введите:
Проверка Windows
-
В результатах поиска в разделе Приложения выберите Сканировать в результатах.
Примечание: Если приложение «Сканирование » не отображается в списке результатов поиска, оно может быть не установлено. Чтобы установить приложение «Сканирование Windows» , установите его из Microsoft Store , щелкнув следующую ссылку:
Проверка Windows
-
Поместите документ или рисунок для сканирования в сканере в зависимости от типа сканера:
-
Если сканер имеет планшет, поместите документ или рисунок для сканирования лицевой стороной вниз на планшет сканера и закройте крышку.
-
Если сканер имеет средство подачи документов, поместите документ или рисунок для сканирования в средство подачи документов сканера. Обратитесь к документации сканера, независимо от того, должен ли элемент быть лицом вниз или лицом вверх.
Примечание: Если сканер имеет как планшет, так и средство подачи документов, можно использовать любой из этих средств.
-
-
На странице Сканирование приложения «Сканирование» выполните следующие действия.
-
Убедитесь , что в раскрывающемся меню Сканер выбран нужный сканер.
-
В раскрывающемся меню Источник убедитесь, что выбран нужный источник (планшет, канал, автоматически настроен). В большинстве случаев автоматическая настройка по умолчанию является нормальной. В противном случае источник должен совпадать с местом размещения документа или рисунка на предыдущем шаге.
-
В раскрывающемся меню Тип файла выберите тип файла изображения, чтобы сохранить сканированную копию. Доступные параметры: JPEG, PNG, TIFF и Bitmap.
-
Щелкните ссылку Показать дополнительно , чтобы отобразить параметр Сохранить файл в . Щелкните ссылку в разделе Сохранить файл в. Откроется окно Выбор папки . Перейдите к расположению, в котором должны быть сохранены проверки, и нажмите кнопку Выбрать папку .
Примечание: Если расположение для сохранения не выбрано, то по умолчанию приложение «Проверка Windows» сканирует папку «Изображения и сканирование » в папке пользователя.
-
-
Чтобы отсканировать документ или рисунок, выберите Сканировать в нижней части окна Сканировать приложение.
-
После завершения сканирования документа или рисунка сканер автоматически сохраняет его в ранее выбранную папку. Выберите один из следующих двух параметров в верхней части экрана, чтобы продолжить:
-
Вид — открывает отсканированный элемент в приложении «Фотографии » в новом окне, чтобы можно было просмотреть отсканированный элемент. Отсканированный элемент также можно изменить в приложении «Фотографии «. После завершения просмотра или редактирования отсканированного элемента окно приложения «Фотографии» можно закрыть.
-
Закрыть — завершает текущее задание сканирования в рамках подготовки к дополнительным заданиям сканирования.
-
-
На устройстве с Windows щелкните правой кнопкой мыши меню Пуск и выберите проводник .
-
В открывавшемся окне проводник перейдите к расположению, выбранному для сохранения сканирований в разделе Сканирование рисунка или документа с помощью приложения проверки Windows.
Совет: Если расположение не было выбрано в разделе Сканирование рисунка или документа с помощью приложения «Сканирование Windows» , по умолчанию приложение «Сканирование Windows» сохраняет сканы, — это папка «Изображения и сканирование » в папке пользователя.
Дополнительные сведения, включая дополнительные сведения об устранении неполадок, см. на веб-сайте производителя сканера.
Нужна дополнительная помощь?
Нужны дополнительные параметры?
Изучите преимущества подписки, просмотрите учебные курсы, узнайте, как защитить свое устройство и т. д.
Сканирование представляет из себя процесс переноса информации с физических носителей в электронный вид при помощи периферийных устройств — сканеров.
Для оцифровки используют специальные программы для сканирования. В данной статье рассмотрим, при помощи каких приложений можно отсканировать документ в Windows 11.
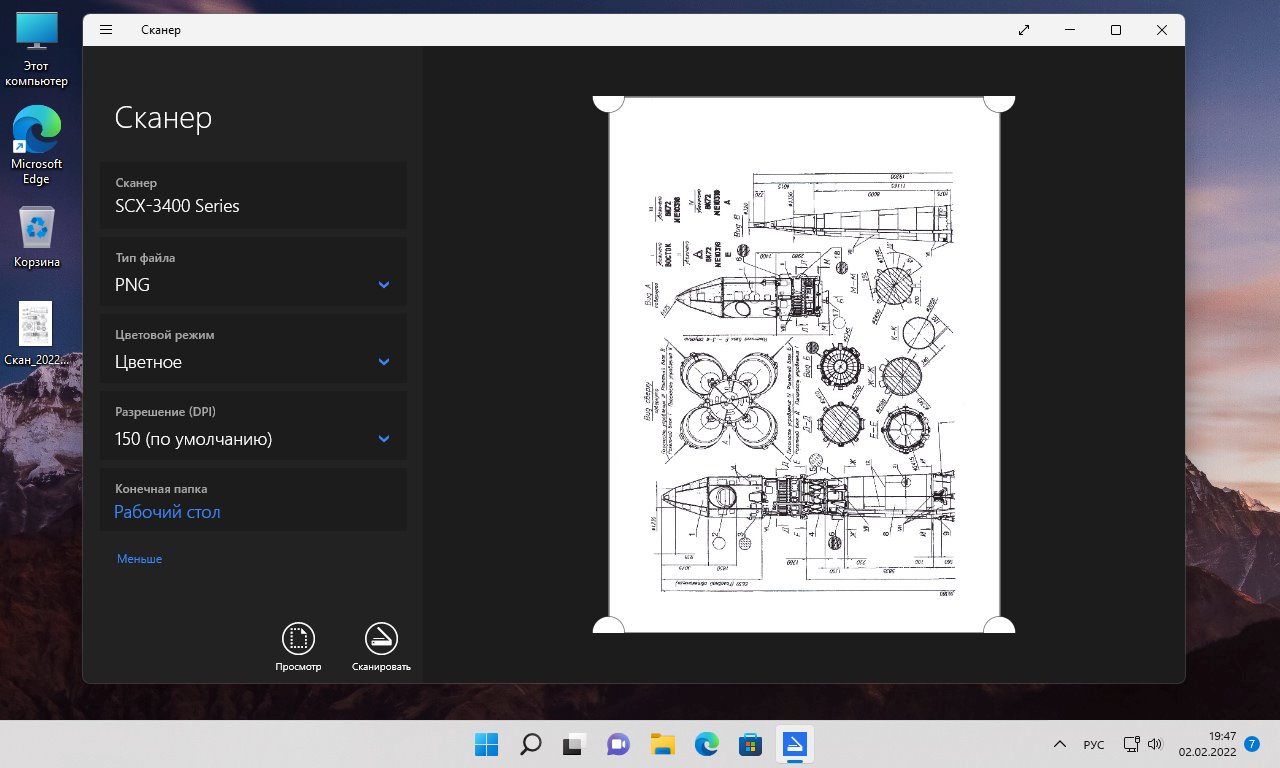
«Сканер» (или Windows Scan) — стандартное приложение в Windows 11. Если по каким либо причинам оно недоступно, его можно скачать и установить через Microsoft Store.
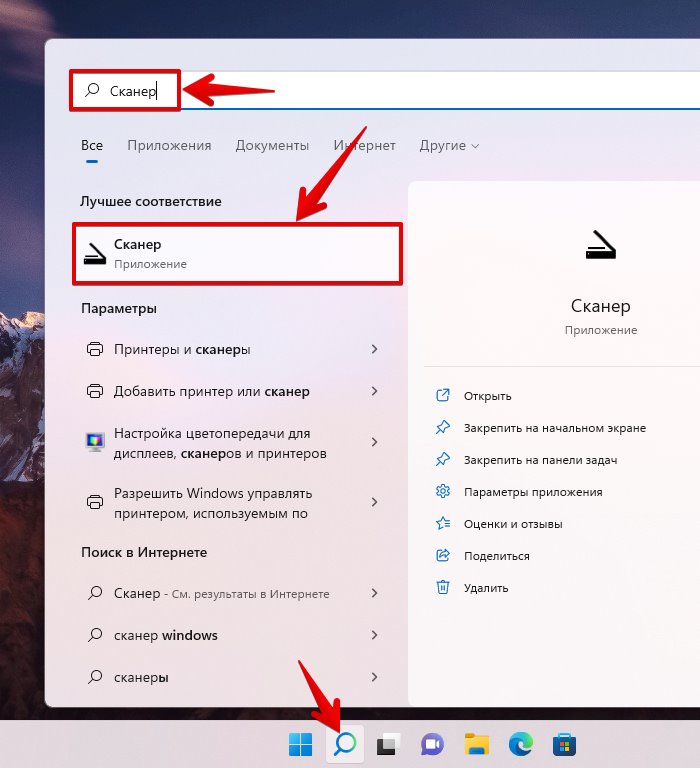
Для запуска приложения используем поиск, щелкаем кнопку поиска на панели задач или нажимаем клавиши быстрого вызова «Win+S». Затем в поисковой строке вводим запрос «Сканер» и щелкаем по приложению в разделе «Лучшее соответствие», либо нажимаем ссылку «Открыть».
Откроется окно приложения «Сканер» с минимальным набором настроек. В примере используем МФУ «Samsung SCX-3405W», который отображается в разделе «Сканер» на правой боковой панели.
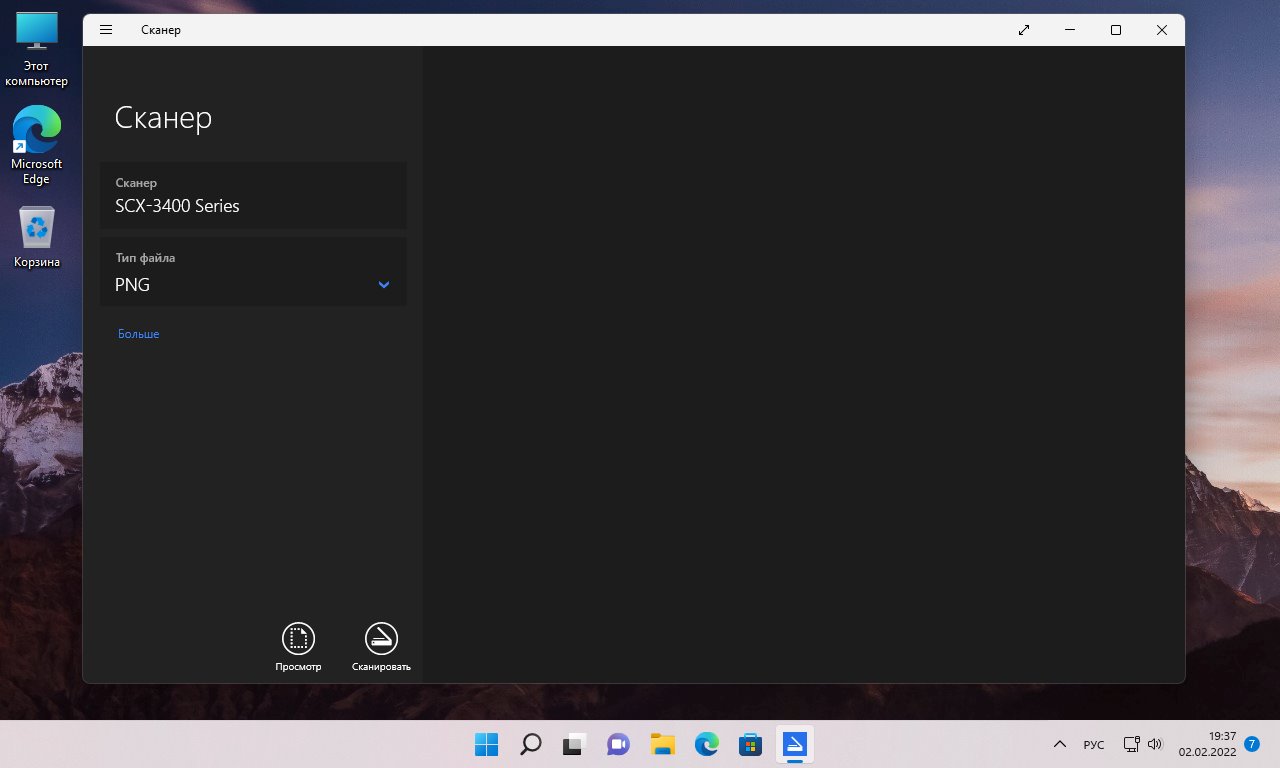
Здесь же на боковой панели доступна настройка «Тип файла».
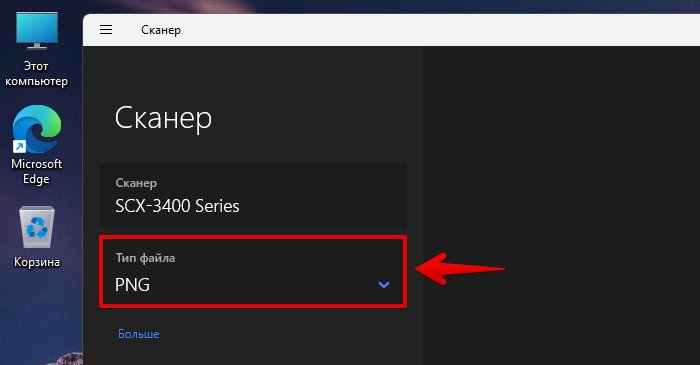
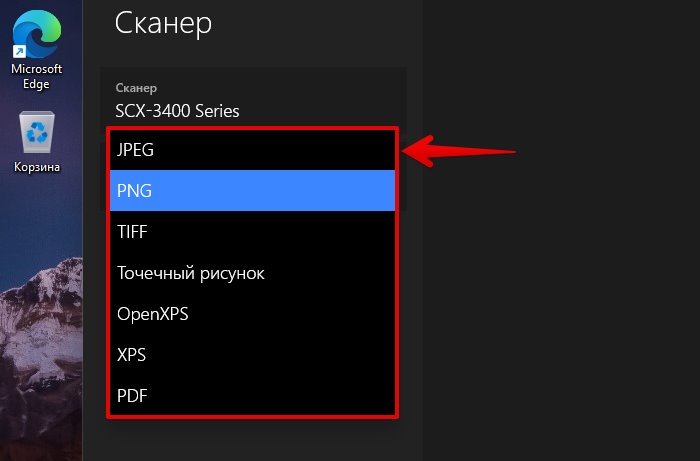
Щелкнув по данной настройке можно выбрать конечное расширение, в котором будет сохранено изображение после сканирования. Доступно семь типов файлов:
- JPEG
- PNG
- TIFF
- Точечный рисунок
- OpenXPS
- XPS
В приложении доступны еще настройки, которые можно отобразить, нажав на кнопку «Больше».

Настройка «Цветовой режим» включает в себя:
- Цветное
- Оттенки серого
- Черно-белое
Настройка «Разрешение (DPI)» содержит значения — от 75 до 600.
Настройка «Конечная папка» — папка, в которую будет сохранено изображение.

Настроив приложение, приступаем к сканированию. Для предварительного просмотра цифрового изображения нажимаем кнопку «Просмотр», результат мы увидим в правой части окна. А для сканирования кнопку «Сканировать».
Это не единственный способ сканирования в Windows 11, переходим к следующему способу.
Приложение «Факсы и сканирование»
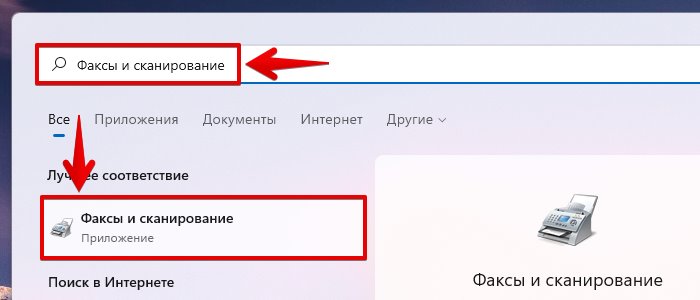
Найти приложение можно так же как и в предыдущем способе — через поиск Windows 11, набрав «Факсы и сканирование» в поисковой строке.
Откроется приложение «Факсы и сканирование», на панели инструментов которого нажимаем кнопку «Новое сканирование».
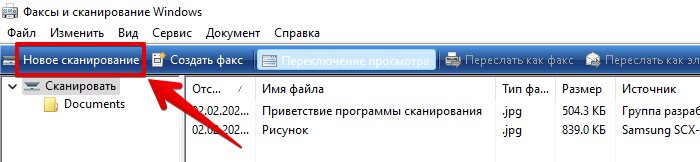
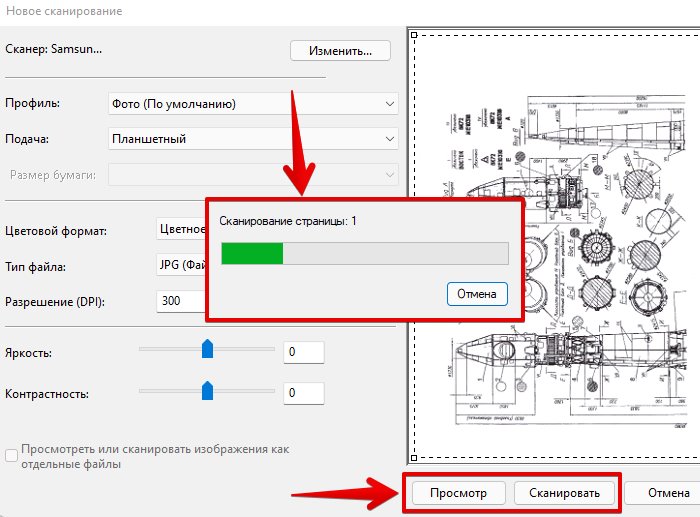
Появится одноименное окно с различными настройками для сканирования.

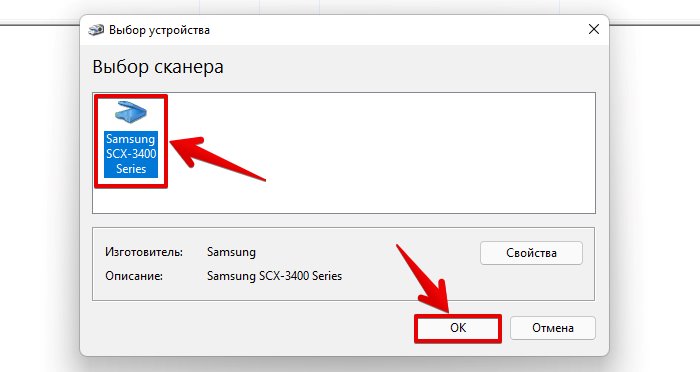
Убедимся, что выбран нужный сканер. Для этого в разделе «Сканер» нажимаем кнопку «Изменить».

И во всплывающем окне «Выбор устройства» выбираем сканер или МФУ и нажимаем кнопку «ОК».
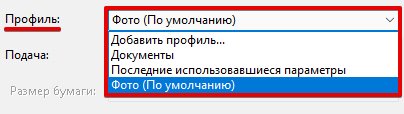
В разделе «Профиль» щелкаем по раскрывающемуся списку и выбираем нужный профиль для сканирования («Документы», «Последние использовавшиеся параметры», «Фото»), по умолчанию установлен профиль «Фото». Для создания собственного профиля со своим набором настроек, выбираем вариант «Добавить профиль…».
В разделе «Подача» будет доступен только один вариант — «Планшетный», а раздел бумаги будет недоступен, если используется планшетный сканер для сканирования. Однако, если используется МФУ или поточный сканер и в зависимости от модели устройств, эти настройки могут быть расширены.
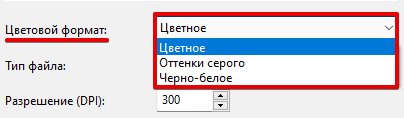
Еще ниже доступна настройка «Цветовой формат», щелкнув по выпадающему списку будут доступны следующие варианты:
- Цветное
- Оттенки серого
- Черно-белое
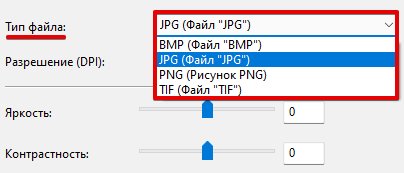
В настройке «Тип файла» доступны четыре типа:
- BMP
- JPG
- PNG
- TIF
Настроив параметры сканирования, нажимаем кнопку «Просмотр» для предварительного просмотра изображения, либо сразу нажимаем кнопку «Сканировать».
Альтернативный вариант для вызова окна «Новое сканирования» без перехода в приложение «Факсы и сканирование» — набрать в поиске Windows 11 запрос «wiaacmgr».
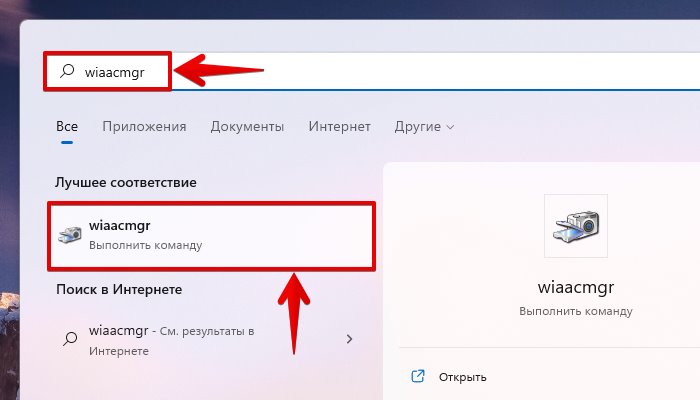
Еще один способ вызова окна «Новое сканирования» — нажимаем горячие клавиши «Win+R», вводим команду «wiaacmgr» в поле «Открыть» и нажимаем клавишу ввода.

Приложение «Paint»
Запускаем приложение «Paint», через меню «Пуск», либо используя поиск. Приложение «Paint» является стандартным приложением в Windows 11.

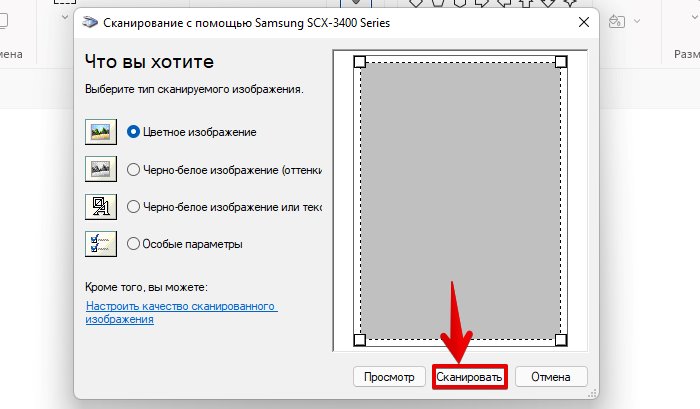
В открывшемся окне кликаем мышью по меню «Файл», а в открывшемся контекстном меню щелкаем по пункту «Со сканера или камеры».

Появится окно «Сканирование с помощью..», в котором нажимаем на кнопку «Сканировать».
Scanning documents on Windows 11 is straightforward, thanks to built-in tools that make the process easy and quick. By using the Windows Scan app or the Windows Fax and Scan utility, you can digitize documents and photos with just a few clicks. The following guide will walk you through the steps, ensuring you can scan any document with ease right from your Windows 11 computer.
Let’s dive into the detailed steps for scanning documents on Windows 11 using the Windows Scan app. This process will help you scan any physical document and save it as a digital file on your computer.
Step 1: Connect Your Scanner
Before you start, ensure your scanner is properly connected to your computer via USB or Wi-Fi.
Verify that your scanner is recognized by your computer. If it’s a Wi-Fi scanner, ensure it’s on the same network. You may need to install the scanner’s drivers, which typically come on a CD with the device or can be downloaded from the manufacturer’s website.
Step 2: Open the Windows Scan App
Access the Windows Scan app by searching for “Scan” in the Start menu and selecting the app from the results.
This app is especially user-friendly for scanning needs. If it’s not installed, you can download it from the Microsoft Store. It’s a lightweight app, so it won’t take up much space on your computer.
Step 3: Select Your Scanner
In the Scan app, choose your scanner from the list of available devices.
This ensures that the app communicates with the correct device. Sometimes, you might see more than one device listed if you’re on a network with multiple scanners. Be sure to pick the correct one.
Step 4: Choose the Scan Settings
Set your preferences such as file type, resolution, and color mode before starting the scan.
These settings determine how your scan will look. Higher resolution scans are clearer but produce larger files. Choose a format like JPEG, PNG, or PDF depending on how you plan to use the scanned document.
Step 5: Preview and Adjust
Preview your scan to make sure everything looks correct. Make any necessary adjustments to alignment or settings.
The preview function lets you see how the final scan will appear, so you can adjust the document’s position or tweak settings before committing to the scan.
Step 6: Start the Scan
Once satisfied with the settings, click the Scan button to begin scanning your document.
The scan will take a moment, depending on the resolution and complexity of the document. You can watch the progress on the screen as your document is scanned.
After completing these steps, your document will be digitized and saved to the location you specified. You’ll be able to view, edit, or share the scanned document as needed.
Tips for Scanning on Windows 11
- Always check for software updates for your scanner to ensure compatibility and performance.
- Clean the scanner glass to avoid smudges or spots on your scanned documents.
- Use the appropriate resolution settings; higher for documents you plan to print and lower for simple archiving.
- Save your scans in a format that suits your needs best, like PDF for documents or JPEG for images.
- Organize your scanned files immediately with clear filenames to make them easy to find later.
Frequently Asked Questions
How do I know if my scanner is compatible with Windows 11?
Most modern scanners are compatible, but it’s best to check with the manufacturer’s website for specific drivers or software updates.
Can I scan multiple pages into a single document?
Yes, many scanners offer an option to scan multiple pages into a single PDF file within the Scan app settings.
What if my scanner isn’t recognized?
Check the connection, ensure the drivers are installed, and try restarting your computer to resolve any recognition issues.
How do I change the file format of my scanned document?
In the Scan app, you can select the output format, such as PDF or JPEG, before you start scanning.
Do I need internet access to scan documents on Windows 11?
No, you don’t need internet access unless you are using a wireless scanner that requires a Wi-Fi connection for operation.
Summary
- Connect your scanner to the computer.
- Open the Windows Scan app.
- Select your scanner.
- Choose scan settings.
- Preview and adjust the scan.
- Start the scan.
Conclusion
Scanning on Windows 11 is a breeze once you get the hang of it. With the built-in tools like Windows Scan, you have everything you need to digitize documents right at your fingertips. Whether you’re archiving family photos or digitizing important paperwork, these steps ensure a smooth process.
Remember, practice makes perfect. The more you use these tools, the more efficient you’ll become at scanning and managing digital files. Also, consider exploring additional scanning software if you require more advanced features for professional use.
For those looking to dive deeper, the Microsoft support page offers comprehensive guides and troubleshooting tips. Now that you’ve learned the steps to scan on Windows 11, it’s time to put this knowledge into action and streamline your document management. Happy scanning!
Matthew Burleigh has been writing tech tutorials since 2008. His writing has appeared on dozens of different websites and been read over 50 million times.
After receiving his Bachelor’s and Master’s degrees in Computer Science he spent several years working in IT management for small businesses. However, he now works full time writing content online and creating websites.
His main writing topics include iPhones, Microsoft Office, Google Apps, Android, and Photoshop, but he has also written about many other tech topics as well.
Read his full bio here.

Introduction: Scanning on Windows 11
Scanning documents and images is a crucial task for many computer users, especially in professional settings. Windows 11 offers a variety of methods to efficiently scan documents directly from your computer. Whether you need to digitize important papers, create backups, or share information digitally, knowing how to scan on Windows 11 is essential. In this comprehensive guide, we will explore the different scanning methods available on Windows 11 and provide step-by-step instructions to help you make the most of this feature.
Using Windows 11’s Built-in Scan App
Windows 11 comes with a built-in scan app that allows you to easily scan documents and images. To use the scan app:
- Connect your scanner or printer to your Windows 11 computer and ensure it is powered on. Make sure the device is compatible with Windows 11 and has the necessary drivers installed.
- Open the Start menu and search for «Scan.»
- Click on the «Scan» app from the search results.
- In the scan app, select the type of document you want to scan, such as «Picture» or «Document.» You can also choose the settings for resolution, color mode, and file format.
- Place the document or image you want to scan on the scanner glass or in the automatic document feeder.
- Click on the «Scan» button to start the scanning process.
- Once the scan is complete, you can preview the scanned document, make any necessary adjustments, and save it to your desired location.
The Windows 11 scan app provides a straightforward and user-friendly interface for scanning documents and images. It allows you to adjust settings for optimal results and save the scanned files in various formats, including PDF, JPEG, and TIFF.
Advanced Features and Settings
In addition to the basic scanning options, the Windows 11 scan app also offers advanced features and settings:
- OCR (Optical Character Recognition): The scan app can perform OCR on scanned documents, allowing you to extract text and make it searchable.
- Multiple Pages: You can scan multiple pages into a single document using the scan app’s document feeder option.
- Color Correction: Adjust the color settings of scanned images to enhance the quality and make them more accurate.
- File Naming: Customize the file names of scanned documents for better organization and easy retrieval.
These advanced features provide greater flexibility and control over your scanning process, allowing you to achieve optimal results based on your specific requirements.
Troubleshooting Scanning Issues
If you encounter any issues while scanning on Windows 11, here are a few troubleshooting steps you can try:
- Ensure that your scanner or printer is properly connected to your computer and turned on.
- Check for driver updates: Visit the manufacturer’s website for your scanner or printer to download and install the latest drivers compatible with Windows 11.
- Restart your computer and the scanning device.
- If the scan app is not working, you can also try using alternative scanning software recommended by the scanner manufacturer.
By following these troubleshooting steps, you can quickly resolve common scanning issues and ensure a smooth scanning experience on Windows 11.
Using Third-Party Scanning Software
While Windows 11’s built-in scan app is sufficient for most users, some may require additional features or prefer alternative software. There are several third-party scanning software options available for Windows 11 that offer advanced functionalities and customization options. Here are a few notable options:
Adobe Acrobat DC
Adobe Acrobat DC is a comprehensive PDF solution that includes scanning capabilities. It provides advanced OCR features, intelligent document recognition, and robust editing and collaboration tools. With Adobe Acrobat DC, you can create, edit, and sign PDFs, extract text from scanned documents, and organize your files efficiently.
VueScan
VueScan is a popular third-party scanning software that supports a wide range of scanners and offers extensive customization options. It provides advanced color calibration, multi-page scanning, and batch scanning features. VueScan also has built-in OCR functionality and compatibility with various file formats.
NAPS2
NAPS2 (Not Another PDF Scanner) is a free and open-source scanning software for Windows 11. It offers a simple and intuitive interface, batch scanning capabilities, and supports various file formats. NAPS2 also supports OCR, allowing you to extract text from scanned documents and make them searchable.
Scanning with All-in-One Printers
If you have an all-in-one printer that includes scanning functionality, you can directly use the printer’s scanning features. All-in-one printers often come with their own scanning software that offers advanced features and seamless integration with the printer’s hardware. To scan using an all-in-one printer:
- Ensure that the printer is connected to your Windows 11 computer and turned on.
- Open the printer’s scanning software either by accessing it from the printer’s control panel or by installing the manufacturer’s scanning software on your computer.
- Follow the on-screen instructions provided by the scanning software to configure the scanning settings, such as resolution, color mode, and file format.
- Place the document or image you want to scan on the scanner glass or in the document feeder.
- Click on the scan button in the software to start the scanning process.
- Preview, adjust, and save the scanned document or image using the options provided by the scanning software.
Using an all-in-one printer’s scanning software allows you to take full advantage of the printer’s features and capabilities, providing seamless integration for your scanning needs.
Scanning to Email or Cloud Storage
Many all-in-one printers also offer the ability to scan directly to email or cloud storage services, eliminating the need for a separate scanning software. By configuring the printer’s settings, you can scan documents and images and have them sent to your desired email account or stored in cloud storage solutions such as Dropbox or Google Drive.
Mobile Scanning Apps
Some all-in-one printers also provide compatible mobile scanning apps that allow you to scan documents using a smartphone or tablet. These apps usually connect to the printer wirelessly and provide similar scanning functionalities as the computer-based scanning software. Check the manufacturer’s website or app store for specific mobile scanning app recommendations for your printer model.
Windows 11 and Network Scanners
Windows 11 also supports network scanners, which are scanners connected to a local network rather than directly to your computer. Network scanners allow multiple users to scan documents and access the scanned files from different devices on the network. To set up and use a network scanner:
- Connect the network scanner to your local network following the manufacturer’s instructions.
- Install the scanner’s drivers on your Windows 11 computer if necessary.
- Open the scan app on Windows 11 and select the network scanner from the list of available devices.
- Follow the on-screen instructions provided by the scan app to configure the scanning settings and start the scanning process.
With network scanners, you can share the scanning capabilities among multiple users, making it an efficient and convenient option for collaborative scanning environments.
Exploring Scanning Methods on Windows 11: A Different Dimension
In this section, we will delve deeper into additional scanning methods and features available on Windows 11 to enhance your scanning experience.
Windows Fax and Scan
Windows Fax and Scan is a built-in application in Windows 11 that allows you to fax, scan, and manage scanned documents. If you have a fax modem or an all-in-one printer with fax capabilities connected to your computer, you can use Windows Fax and Scan to send and receive faxes as well. The application provides a simple and intuitive interface for scanning, and you can easily save, view, and organize your scanned documents.
Scanning with Windows Fax and Scan
To scan using Windows Fax and Scan:
- Connect your scanner or all-in-one printer to your Windows 11 computer and ensure it is powered on.
- Open the Start menu and search for «Windows Fax and Scan.»
- Click on the «Windows Fax and Scan» app from the search results.
- In the Windows Fax and Scan app, click on the «New Scan» button in the toolbar.
- Configure the scanning settings, such as resolution, color mode, and file format.
- Place the document or image on the scanner glass or in the automatic document feeder, if available.
- Click on the «Scan» button to start the scanning process.
- Once the scan is complete, you can preview and save the scanned document to your desired location.
Windows Fax and Scan also allows you to manage your scanned documents, including renaming, deleting, and organizing them into folders. If you have a fax modem or a fax service set up, you can use the application to send and receive faxes as well.
Scanning with Microsoft Office
If you have Microsoft Office installed on your Windows 11 computer, you can use the suite’s integrated scanning features. Microsoft Office applications, such as Word and OneNote, allow you to scan documents directly within the program, making it convenient for tasks such as inserting scanned images into a document or converting physical notes into digital format.
Scanning in Microsoft Word
To scan a document in Microsoft Word:
- Open Word and create a new document or navigate to an existing document.
- Click on the «Insert» tab in the ribbon menu.
- In the «Insert» tab, click on the «Scan» option in the «Illustrations» group.
- Follow the on-screen instructions provided by the scanning dialog box to configure the scanning settings.
- Place the document or image on the scanner glass or in the automatic document feeder, if available.
- Click on the «Scan» button to start the scanning process.
- Connect your scanner or multifunction printer to your computer.
- Search for «Scan» in the Windows search bar and open the Windows Scan app.
- Click on «New Scan» and select your scanner or printer from the list.
- Choose the desired scan settings, such as color, resolution, and file format.
- Click on «Scan» to start the scanning process.
- Once the scan is complete, you can preview, edit, or save the scanned document or image.
- Windows 11 provides a built-in scanning tool for easy document scanning.
- To access the scanning tool, go to the Start Menu and search for «Scan.»
- Once the scanning tool is open, select the type of scan you want to perform, such as a document or photo scan.
- You can choose the device from which you want to scan, including a scanner or a camera.
- After selecting the device and scan type, you can preview the scan and make adjustments if needed.

Scanning on Windows 11
Scanning on Windows 11 allows you to digitize documents and photos, making them easily accessible and shareable. Whether you have a dedicated scanner or a multifunction printer with scanning capabilities, Windows 11 provides several options to assist you. Here’s how to scan on Windows 11:
Using the Windows Scan App
The Windows Scan app is a built-in feature that simplifies the scanning process on Windows 11.
Scanning with a Multifunction Printer
If you have a multifunction printer with scanning capabilities, you can also use its accompanying software to scan documents and images.
To scan with a multifunction printer:
Key Takeaways — How to Scan on Windows 11
Frequently Asked Questions
Are you struggling to figure out how to scan on Windows 11? Don’t worry, we’ve got you covered. Check out the answers to some frequently asked questions on scanning with Windows 11.
1. How do I access the scanning feature on Windows 11?
To access the scanning feature on Windows 11, follow these steps:
1. Connect your scanner or multifunction printer to your computer and ensure it is powered on.
2. Click on the «Start» button in the bottom left corner of the screen and select «Settings» from the menu.
3. In the Settings window, click on the «Devices» option.
4. On the Devices page, select «Printers & scanners» from the left-hand side menu.
5. Under the «Printers & scanners» section, you will see a list of connected devices. Locate your scanner or multifunction printer and click on it.
6. In the scanner settings, click on the «Scan» option to open the scanning interface.
2. Can I customize the scanning settings on Windows 11?
Yes, you can customize the scanning settings on Windows 11 to suit your preferences. Follow these steps:
1. Open the scanning interface as mentioned in the previous answer.
2. In the scanning interface, you will find various options to customize your scan settings, such as choosing the file format, resolution, color mode, and destination folder.
3. Select the desired settings according to your requirements.
4. Once you have customized the settings, click on the «Scan» button to start the scanning process.
3. How can I scan multiple pages into a single document on Windows 11?
To scan multiple pages into a single document on Windows 11, follow these steps:
1. Open the scanning interface as mentioned in the first answer.
2. In the scanning interface, look for an option or checkbox that allows you to enable the «Multiple Pages» or «Document Feeder» feature.
3. Once you have enabled the multiple pages feature, load the pages you want to scan into the document feeder or place them individually on the scanner glass.
4. Click on the «Scan» button to start scanning each page.
5. After scanning all the pages, the scanning software will usually prompt you to save the document. Choose a destination folder and save the scanned document as a single file.
4. How do I choose the right file format for scanning on Windows 11?
Choosing the right file format for scanning on Windows 11 depends on your specific needs. Here are some common file formats and their recommended uses:
— PDF: Best for documents that need to retain formatting, such as contracts or official forms.
— JPEG: Ideal for scanning photos or images that don’t require high-quality resolution.
— TIFF: Suitable for images that require lossless compression or editing capabilities.
— PNG: Recommended for web graphics or images that require transparency.
Before scanning, consider the purpose of the scanned document or image and choose the file format accordingly in the scanning settings.
5. Can I preview the scanned document before saving it on Windows 11?
Yes, you can preview the scanned document before saving it on Windows 11. Here’s how:
1. Open the scanning interface as mentioned earlier.
2. In the scanning interface, you should see a preview pane that shows the scanned image or document in real-time.
3. Take a moment to review the scanned document to ensure it meets your expectations in terms of quality, alignment, and clarity.
4. If you’re satisfied with the preview, proceed with saving the scanned document using the designated save button or option in the scanning software.
Previewing the scanned document allows you to make any necessary adjustments or corrections before saving it.
Based on the instructions given above, I will provide the conclusion for the topic «How to Scan on Windows 11» in two paragraphs with a conversational and professional tone:
Scanning on Windows 11 is a straightforward process that allows you to digitize documents and images conveniently. By following a few simple steps, you can effortlessly scan your files and access them digitally whenever needed.
First, you need to connect your scanner or printer with scanning capabilities to your Windows 11 computer. Ensure that the device is properly installed and recognized by the system. Once connected, open the Windows Scan app, which is a default scanning tool provided by Windows 11.
Next, place the document or photo you want to scan on the scanner’s glass surface and align it properly. In the Windows Scan app, click on the «New Scan» button. Choose the device you want to use for scanning from the drop-down menu and select your desired settings, such as color mode, resolution, and file format. Finally, click on the «Scan» button to start the scanning process.
Once the scan is complete, you can preview the scanned image and make any necessary adjustments. If everything looks good, you can save the scanned file in your preferred location on your Windows 11 computer. Remember to give the file a descriptive name and choose an appropriate file format based on your needs.
Scanning on Windows 11 is a useful feature that allows you to convert physical documents into digital files efficiently. With a scanner or printer connected to your computer and the Windows Scan app, you can easily digitize your important papers and images, making them easily accessible and shareable.
How to Scan in Windows 11
Scanning documents in Windows 11 is pretty simple. Open the Windows Scan app, connect your scanner, choose your settings, then start scanning. Once done, your scanned document will be saved to your selected folder.
In this section, we’ll walk through the steps to scan a document using Windows 11. Follow these instructions, and you’ll be scanning like a pro in no time.
Step 1: Connect Your Scanner
Make sure your scanner is connected to your computer.
Ensure your scanner is plugged in and turned on. If it’s a wireless scanner, make sure it’s on the same network as your computer.
Step 2: Open the Windows Scan App
Launch the Windows Scan app from your Start menu.
If you don’t have the Windows Scan app, you can download it from the Microsoft Store. Once installed, open the app to get started.
Step 3: Select Your Scanner
Choose your scanner from the list in the Scan app.
If your scanner doesn’t appear, make sure it’s properly connected and turned on. You might need to check your scanner’s connection or reinstall its drivers.
Step 4: Choose Scan Settings
Adjust your scan settings, like the file type, resolution, and color format.
You can customize these settings to get the best quality for your needs. For example, you might want a higher resolution for photos or color documents.
Step 5: Start Scanning
Click the Scan button to begin scanning.
The scanner will start, and your document will be digitized. This might take a few seconds to a few minutes, depending on your settings and the scanner’s speed.
Step 6: Save Your Scanned Document
Save your scanned document to your desired location.
After scanning, you’ll be prompted to save the file. Choose a folder where you can easily find it later.
After you complete these steps, your scanned document will be saved to your chosen location. You can now open, edit, or share the document as needed.
Tips for Scanning in Windows 11
- Keep Your Scanner Drivers Updated: Ensure your scanner’s drivers are up-to-date for the best performance.
- Use the Right Resolution: Higher resolutions provide better quality but take more space; choose what’s best for your needs.
- Scan Multiple Pages: If you’re scanning a multi-page document, check if your scanner has an automatic document feeder (ADF).
- Choose the Correct File Format: PDFs are great for documents, while JPEGs are better for images.
- Preview Before Scanning: Use the preview feature to ensure the document is aligned and looks good before the final scan.
Frequently Asked Questions
Why isn’t my scanner showing up in the Scan app?
Make sure your scanner is properly connected and powered on. Check your network connection if it’s a wireless scanner.
How do I change the save location for my scanned documents?
In the Scan app, you can select the save location when you save the document after scanning.
Can I scan multiple pages into one document?
Yes, if your scanner has an automatic document feeder (ADF), you can scan multiple pages into a single document.
What file format should I use for scanning documents?
PDF is usually the best choice for documents, as it maintains formatting and is widely compatible.
How can I improve the quality of my scans?
Adjust the resolution and color settings in the Scan app to improve scan quality. Higher resolutions and color settings typically yield better results.
Summary
- Connect your scanner.
- Open the Windows Scan app.
- Select your scanner.
- Choose scan settings.
- Start scanning.
- Save your scanned document.
Conclusion
Scanning in Windows 11 is a breeze once you know the steps. Whether you’re digitizing old photos, archiving important documents, or just trying to go paperless, the Windows Scan app has got you covered. Remember to keep your scanner’s drivers updated and choose the right settings for the best results. With these tips and FAQs, you’re well on your way to becoming a scanning expert.
If you found this guide helpful, consider exploring other features of Windows 11 to further streamline your digital life. Happy scanning!
Kermit Matthews is a freelance writer based in Philadelphia, Pennsylvania with more than a decade of experience writing technology guides. He has a Bachelor’s and Master’s degree in Computer Science and has spent much of his professional career in IT management.
He specializes in writing content about iPhones, Android devices, Microsoft Office, and many other popular applications and devices.
Read his full bio here.