
Hello everyone. In this article, I am going to show you how to create a Windows 11 bootable USB on Ubuntu using the GParted project.
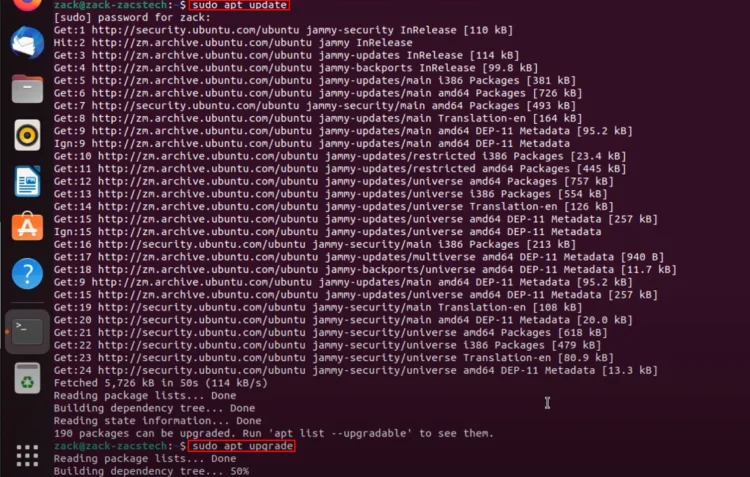
Updating Your System
Before we begin, if you’re using Ubuntu, it’s a good practice to update your system. I will show you how to create a Windows 10 or 11 bootable USB in Ubuntu. You can start by updating your system by typing “sudo apt update” in Terminal. If there are any packages that need to be upgraded, you can upgrade them by typing “sudo apt update“.
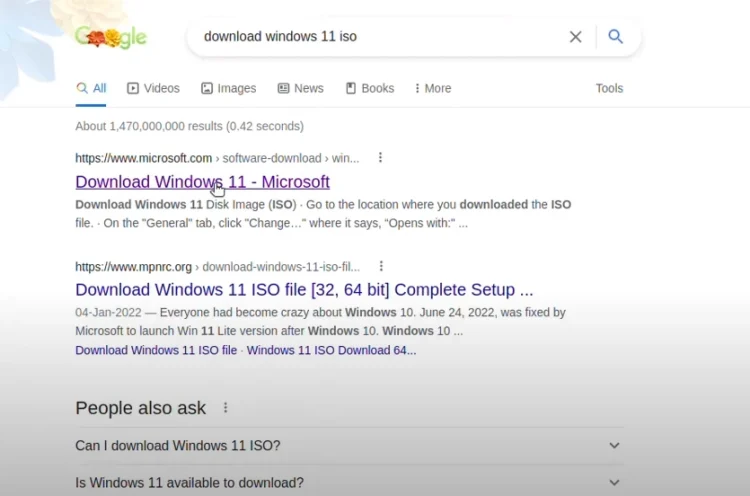
Downloading the Windows 10/11 ISO
So, the first step is to download the Windows 11 ISO image. Open your favorite browser or simply use the default browser that comes with Ubuntu. Simply search for “download Windows 11 ISO” and you’ll get the Windows 11 ISO image from Microsoft’s official website.
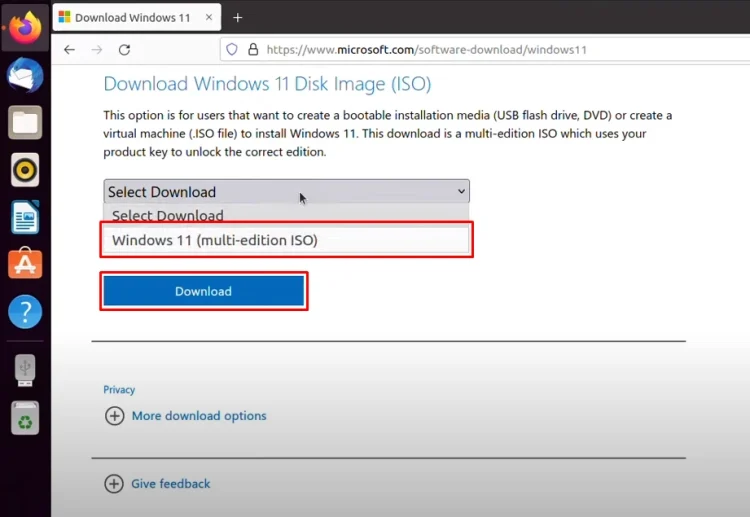
After that, you have to select the Windows 11 ISO image edition and click Download.
Choose a language and click Confirm.
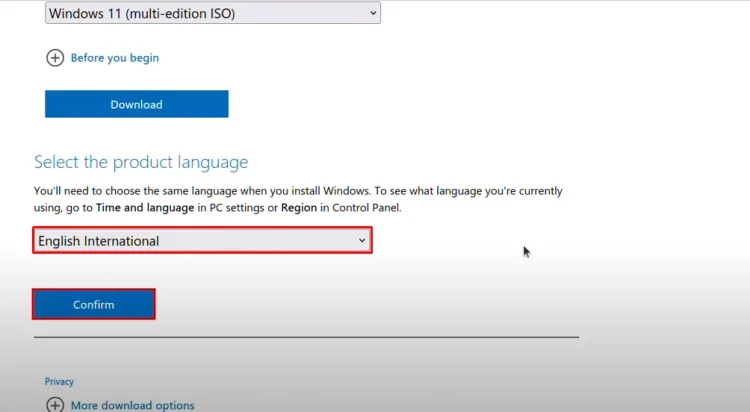
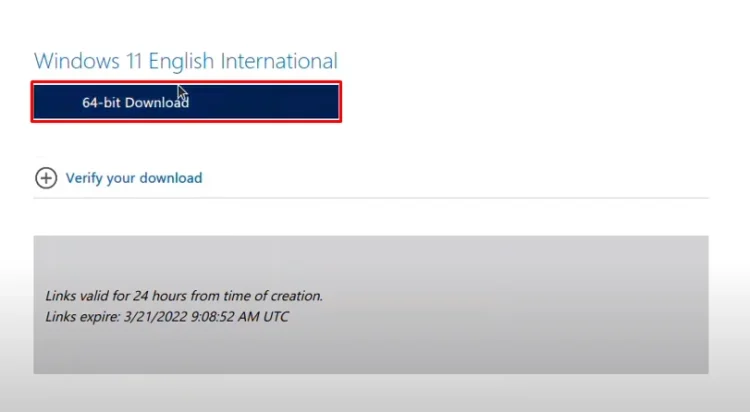
Then click 64-bit Download and save it. It will save the file to your computer.
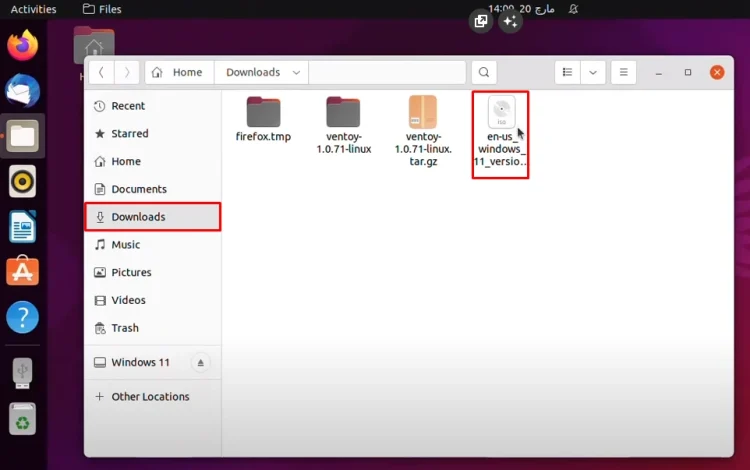
Now, I’m going to insert it because I already have it. If I have to show you, it’s in the Downloads directory, which I have simply imported from my main PC. The size is around 4 GB.
Preparing the USB Flash Drive
The second step is to attach the USB flash drive to your computer. I’ve already done that, so there’s no need for me to attach it.
The third step is to install GParted onto your computer.
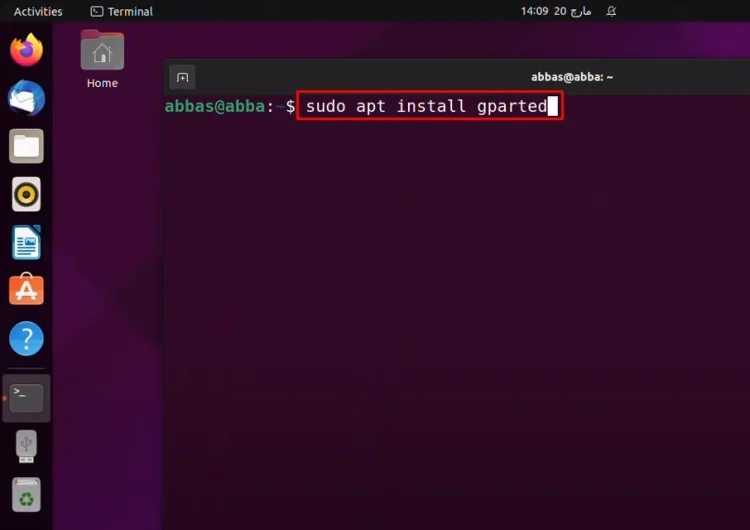
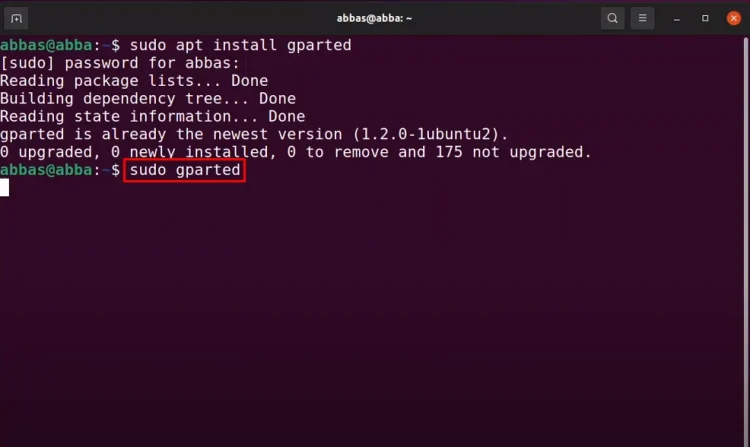
You can use the Ubuntu Software or the Terminal. I prefer the terminal because it’s faster. Once it’s launched, simply type “sudo apt install gparted“.
The next step is to launch GParted, typing “sudo gparted” in Terminal.
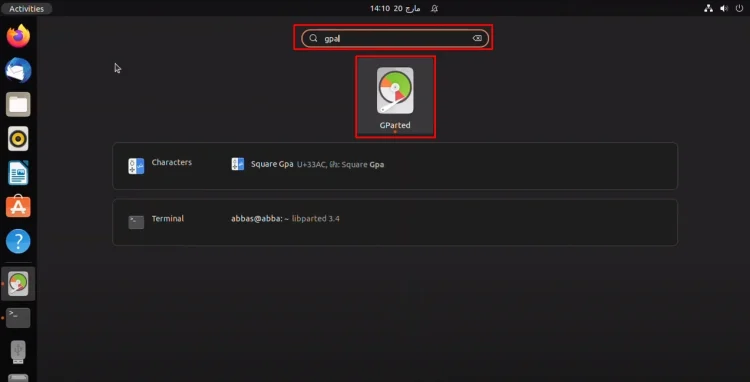
You can also launch GParted from Launchpad. Just simply search for GParted and launch it.
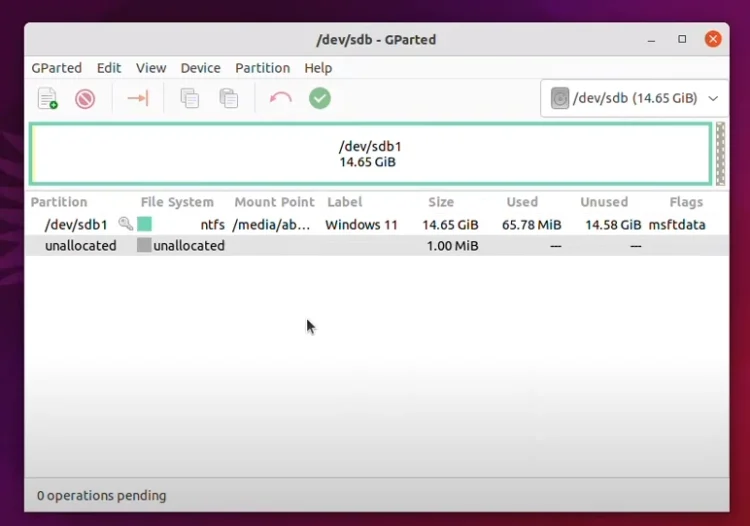
Once it’s launched, select the USB flash drive.

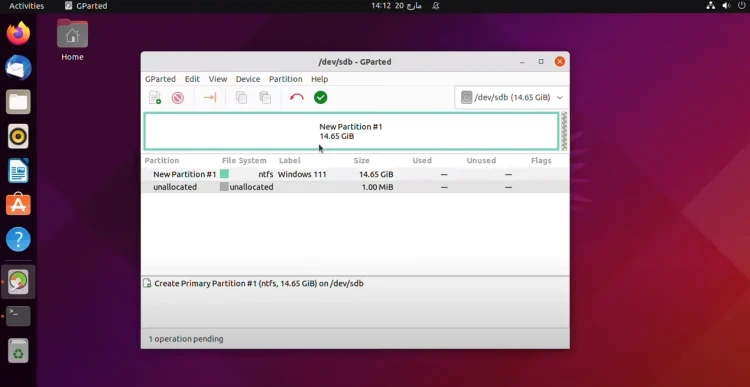
Partitioning the USB Flash Drive
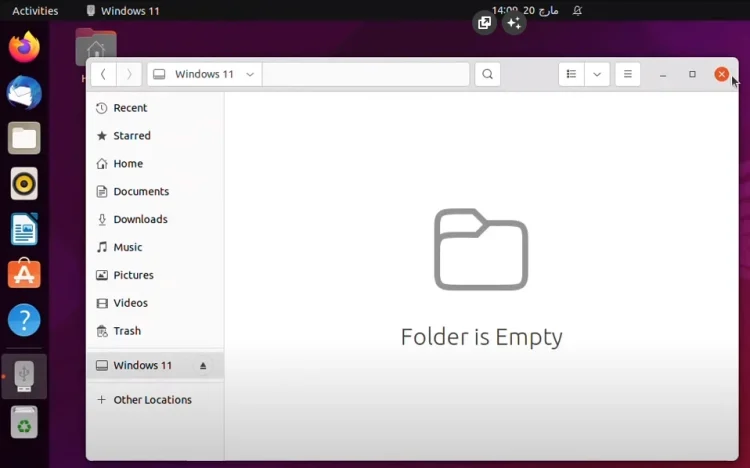
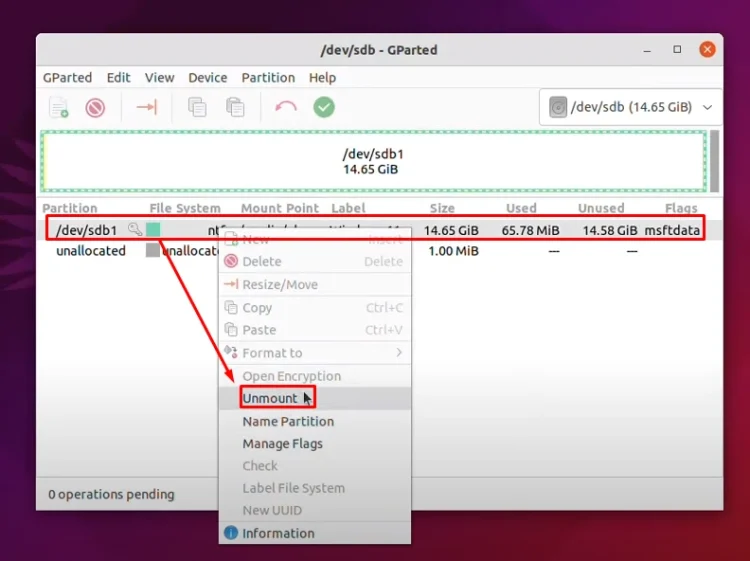
By default, you can see that it’s a bootable USB flash drive of Windows 11.
For now, I have to delete all of them and then I’ll show you how to create them again from the beginning.
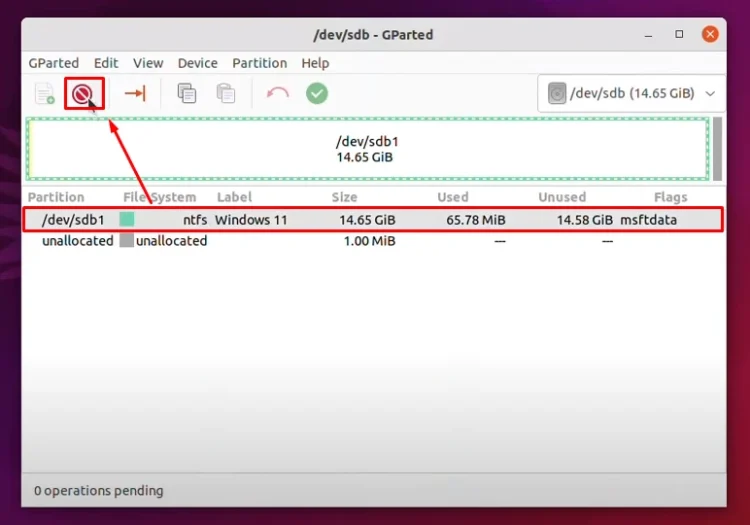
Let me delete it first. You have to unmount it, then delete it. Sorry for that. Now delete.
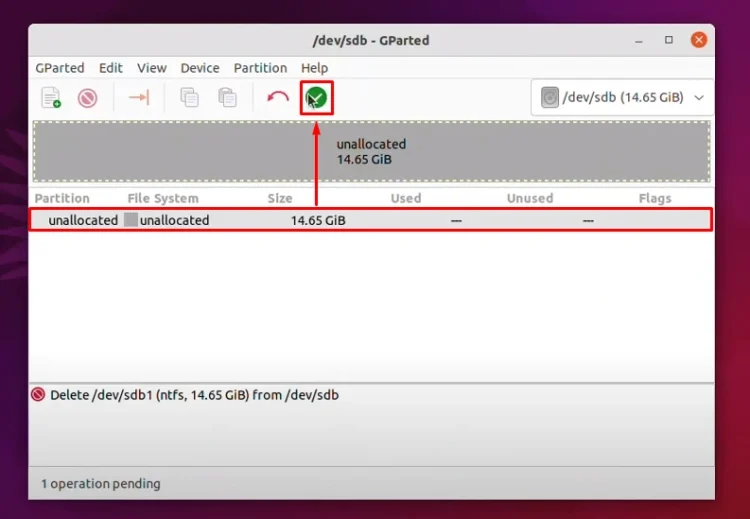
Okay, it is deleted.
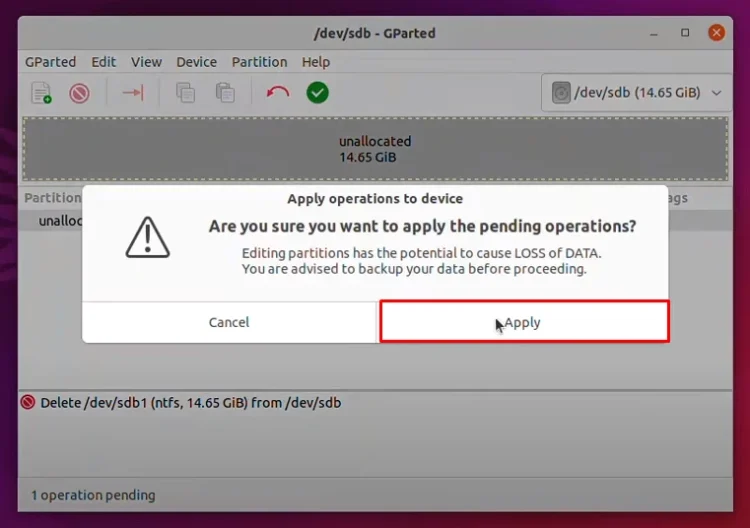
Now click Apply.
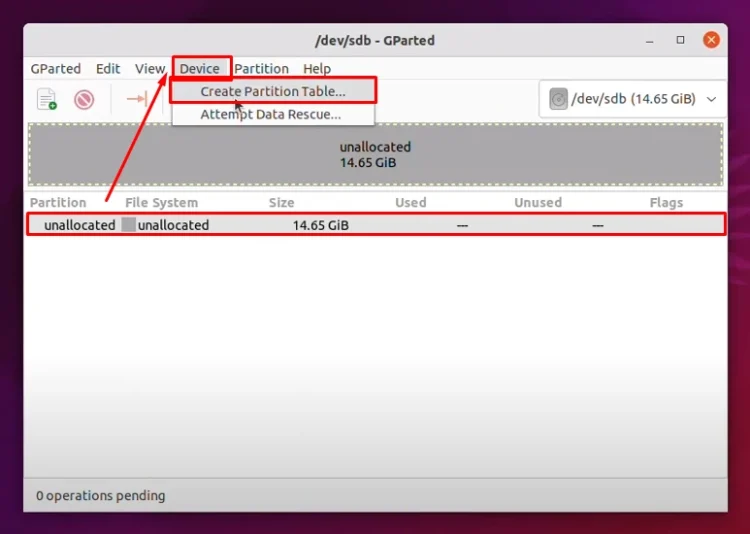
Once it’s removed, we need to create a partition for it. Go to Device and click Create partition table.
From here, select a partition style for Windows. We are going to choose gpt. Click Apply.
Remember, it’s going to remove everything from your USB flash drive, so back up your files.

Formatting and Copying Files
The next step is to create a file system for it.

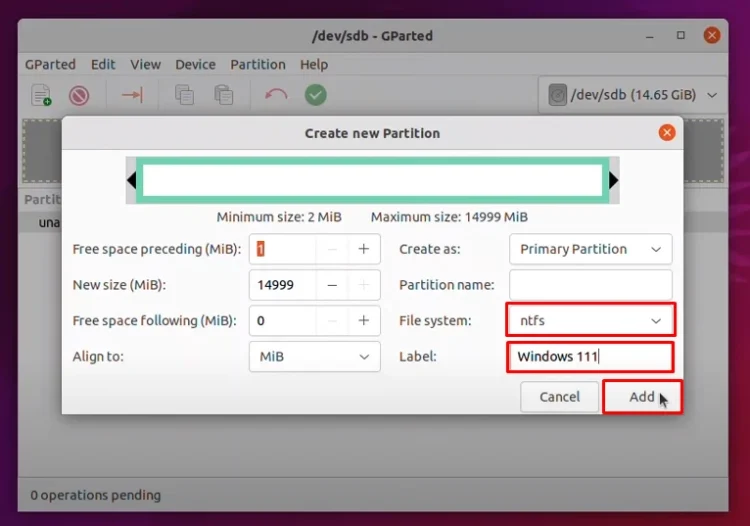
By default, Linux personal file system is ext4. Windows is using NTFS. We’re going to choose NTFS. We can also label the USB flash drive. I’m going to name it “Windows 111“. Click Add.
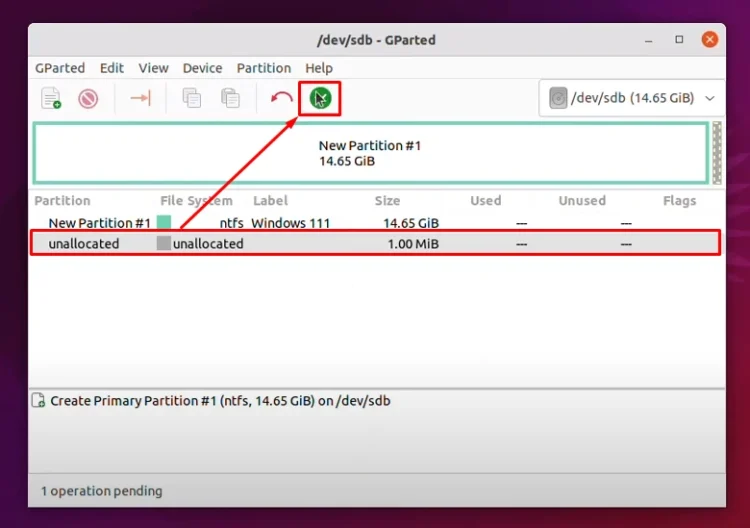
Now you can see that it’s done, but the changes have not applied. Click Apply and wait for it.
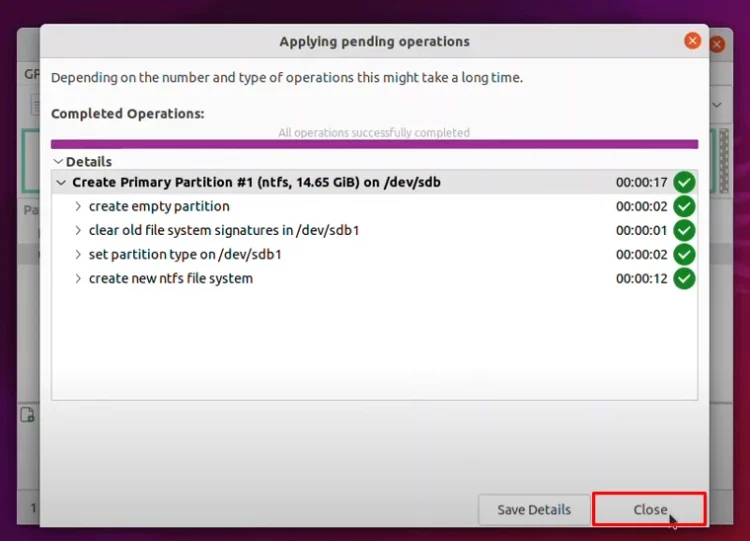
Once it’s done, you can close it.
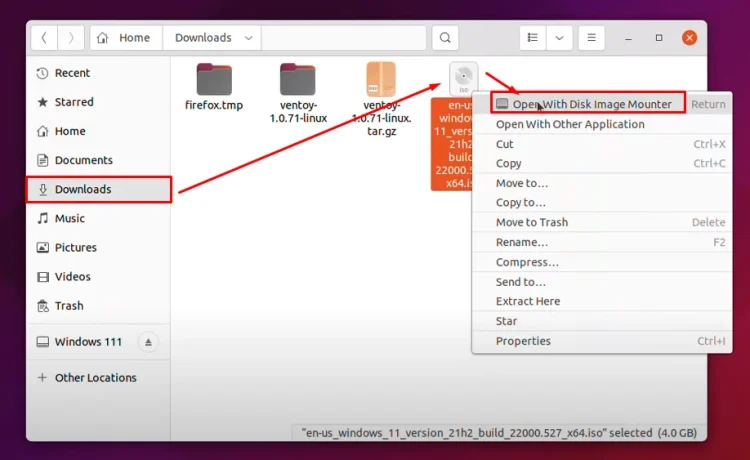
The next step is to open files and go to the Downloads folder where Windows 11 is located. Right-click on it and choose Open With Disk Image Mounter.
Finalizing the Bootable USB
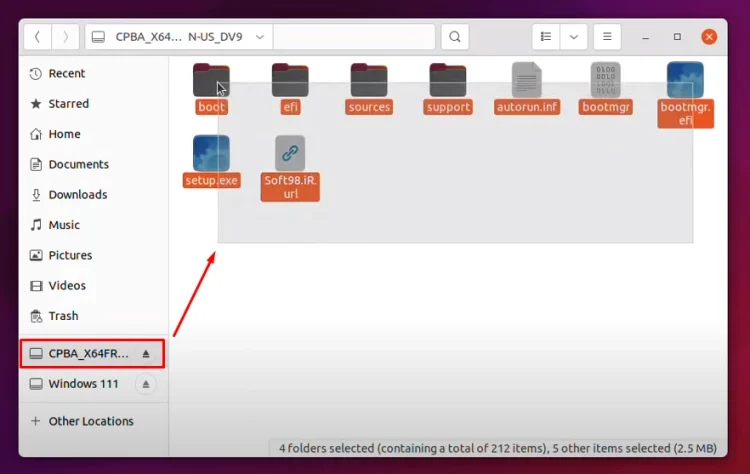
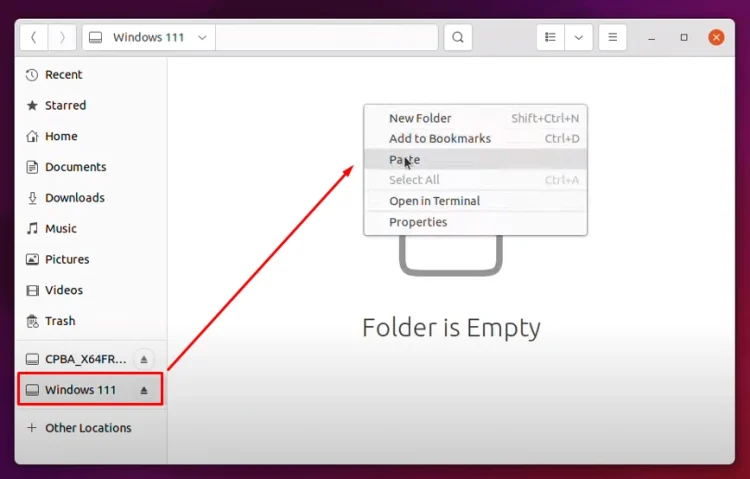
Here you can see that Windows 11 is mounted. Right-click, copy, and now go to the USB flash drive and paste them here.
During the copy of the files, you will not face any type of error. If you face any type of error, it means the Windows 11 ISO that you downloaded from the internet has been corrupted. Maybe the speed of your internet connection was not fast and somehow it got corrupted.
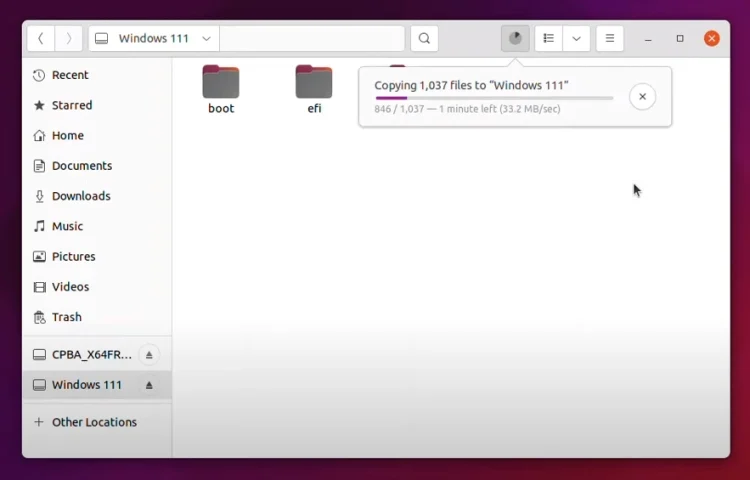
So basically, this is how you can create a Windows 11 bootable USB. For now, I am going to wait until the files are copied from the ISO inside the USB flash drive.
Post Views: 4,613
Если вам по той или иной причине потребовалась загрузочная флешка Windows 10 (или другой версии ОС), при этом на имеющемся компьютере в наличии только Linux (Ubuntu, Mint, другие дистрибутивы), вы сравнительно легко можете записать её.
В этой инструкции пошагово о двух способах создать загрузочную флешку Windows 10 из Linux, которые подойдут как для установки на UEFI-системе, так и для того, чтобы установить ОС в Legacy режиме. Также могут пригодиться материалы: Лучшие программы для создания загрузочной флешки, Загрузочная флешка Windows 10.
Загрузочная флешка Windows 10 с помощью WoeUSB
Первый способ создания загрузочной флешки Windows 10 в Linux — использование бесплатной программы WoeUSB. Созданный с её помощью накопитель работает и в UEFI и в Legacy режиме.
Для установки программы используйте следующие команды в терминале
sudo add-apt-repository ppa:nilarimogard/webupd8
sudo apt update
sudo apt install woeusb
Если эти команды не сработали, попробуйте такой вариант:
wget mirrors.kernel.org/ubuntu/pool/universe/w/wxwidgets3.0/libwxgtk3.0-0v5_3.0.4+dfsg-3_amd64.deb
sudo dpkg -i libwxgtk*_amd64.deb
sudo apt update
sudo apt --fix-broken install
sudo apt install woeusb
После установки порядок действий будет следующим:
- Запустите программу.
- Выберите ISO образ диска в разделе «From a disk image» (также, при желании, можно сделать загрузочную флешку с оптического диска или смонтированного образа).
- В разделе «Target device» укажите флешку, на которую будет записан образ (данные с неё будут удалены).
- Нажмите кнопку Install и дождитесь завершения записи загрузочной флешки.
- При появлении ошибки с кодом 256 «Source media is currently mounted», размонтируйте образ ISO с Windows 10.
- При ошибке «Target device is currently busy», размонтируйте и отключите флешку, затем снова подключите её, обычно помогает. Если не сработало, попробуйте предварительно отформатировать её.
На этом процесс записи завершен, можно использовать созданный USB накопитель для установки системы.
Создание загрузочной флешки Windows 10 в Linux без программ
Этот способ, пожалуй, ещё проще, но подойдет только в том случае, если вы планируете загружаться с созданного накопителя на UEFI-системе и устанавливать Windows 10 на GPT диск.
- Отформатируйте флешку в FAT32, например, в приложении «Диски» в Ubuntu.

- Смонтируйте образ ISO с Windows 10 и просто скопируйте всё его содержимое на отформатированную флешку.


Загрузочная флешка Windows 10 для UEFI готова и с неё можно без проблем загрузиться в EFI-режиме.

Want to create a bootable Windows USB on Linux? Ventoy is a pretty good option.
But before Ventoy, WoeUSB used to be the go-to tool for this purpose. The original WoeUSB project got discontinued around 2014.
Owing to its popularity, a new developer took the task of bringing the project back from the dead. And hence WoeUSB-ng was born. “ng” here stands for “new generation”. In other words, WoeUSB-ng is the new generation WoeUSB. But since the original tool doesn’t exist anymore, I’ll be referring WoeUSB-ng as WoeUSB.
In this tutorial, I’ll show you how to install WoeUSB on Ubuntu Linux. I’ll also share the steps for creating bootable Windows USBs with WoeUSB.
But before that, let’s quickly look at the features of this awesome tool.
WoeUSB

WoeUSB is a simple tool that has the sole purpose of creating bootable Windows USB on Linux.
The original WoeUSB is a shell script. This same WoeUSB is rewritten as WoeUSB-ng in python, which can be installed on your system and provides both a command-line and GUI interface.
Features:
- Support Legacy PC/UEFI booting
- Support FAT32 and NTFS filesystems
- Support using physical installation disc or disk image as source
- It can be used for Windows Vista and later with any language or edition variants
- Legacy/MBR-style/IBM PC compatible boot mode
- Native UEFI booting is supported for Windows 7 and later images (limited to the FAT filesystem as the target)
Installing WoeUSB on Ubuntu and other Linux distros
Arch Linux users can install WoeUSB-ng from AUR.
For other distros, WoeUSB can be installed using PIP. It’s a Python application, after all. I am going to provide commands for Ubuntu/Debian here.
To install WoeUSB-ng, you need to install PIP and other necessary dependencies first.
sudo apt install git p7zip-full python3-pip python3-wxgtk4.0 grub2-common grub-pc-binAfter this, you can install WoeUSB-ng by running:
sudo pip3 install WoeUSB-ngFor all other installations, you can refer to their instructions.
Prerequisite: Get Windows ISO and a compatible USB
This one goes without saying. You need to have the ISO file of the Windows version you want to install.
From the Microsoft website, you should be able to get the ISO for Windows 10 and 11.
If you have ISOs for older Windows versions, they can also be used.
Apart from that, you need to have a USB key/pen drive of at least 8 GB in size. You should format it in NTFS filesystem.
Method 1: Using WoeUSB to create a bootable Windows USB graphically (recommended)
Open woeusb-gui from the activity overview or menu.

In the application window, select the downloaded Windows ISO and the desired USB drive as shown in the screenshot and press Install.
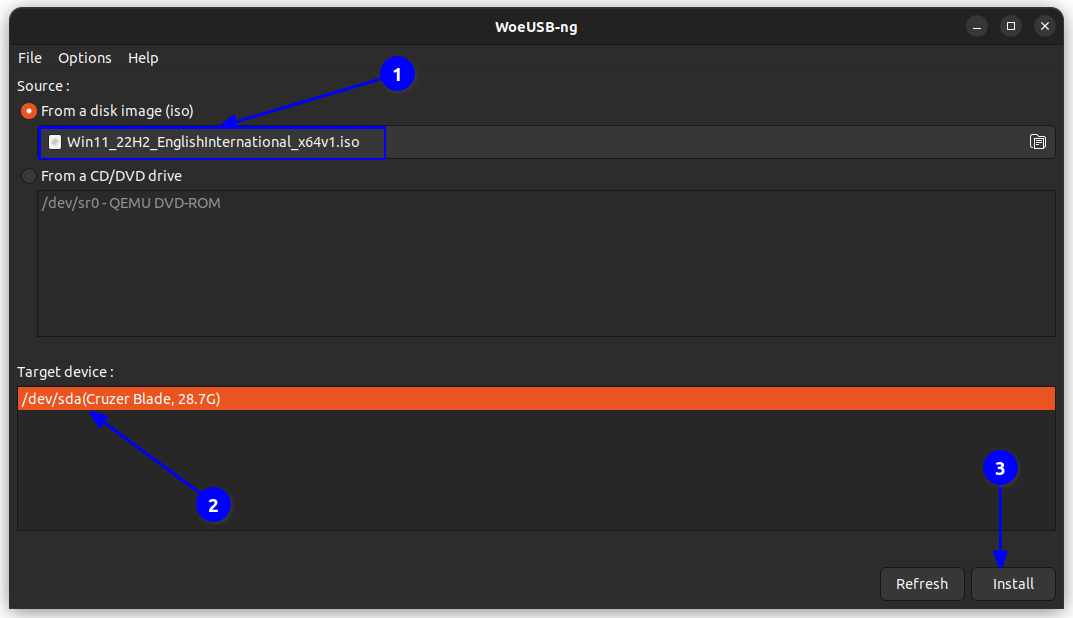
There are also other tweaks available within the app, which can be accessed by the top menu bar.
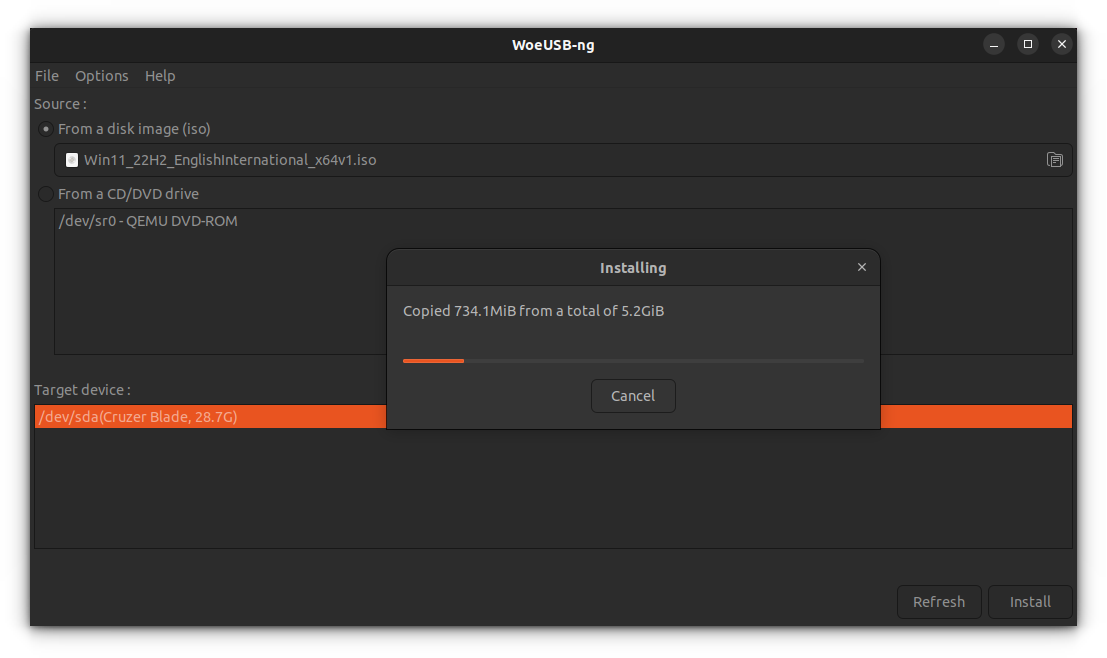
After pressing install, the woeUSB will start formatting and copying files. You need to wait for some time because there are approximately 6 GB of files to be copied.
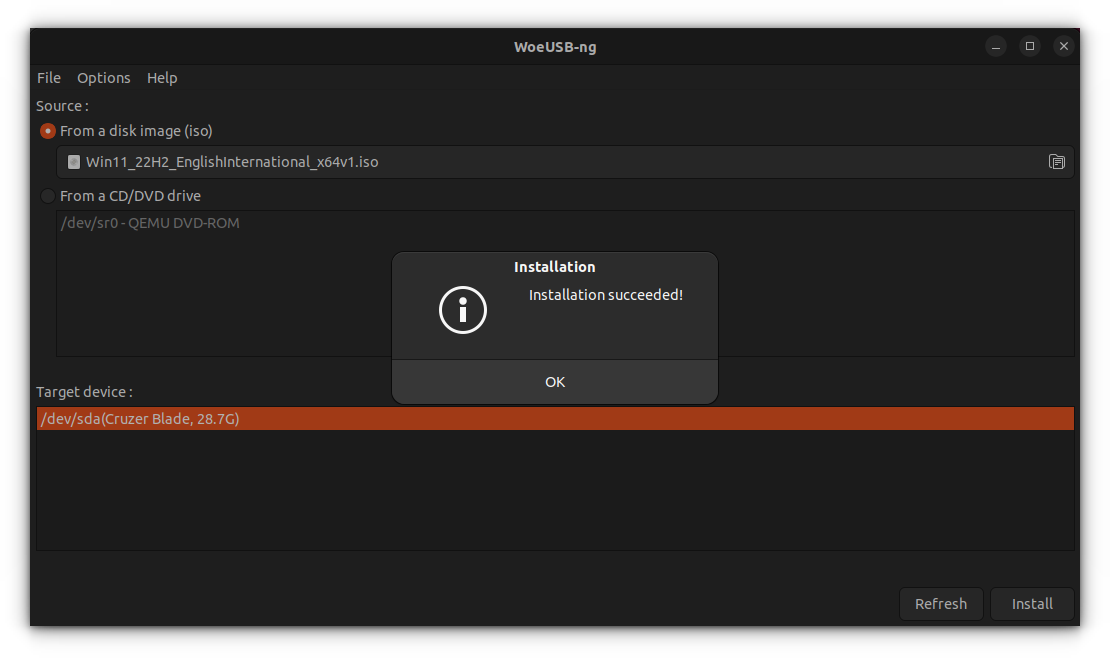
Once copying completes, WoeUSB will prompt a success dialog. You can now safely eject the USB and use it as a bootable USB.
Method 2: Using WoeUSB from the terminal (for experts)
WoeUSB-ng package also provides a command-line utility called woeusb.
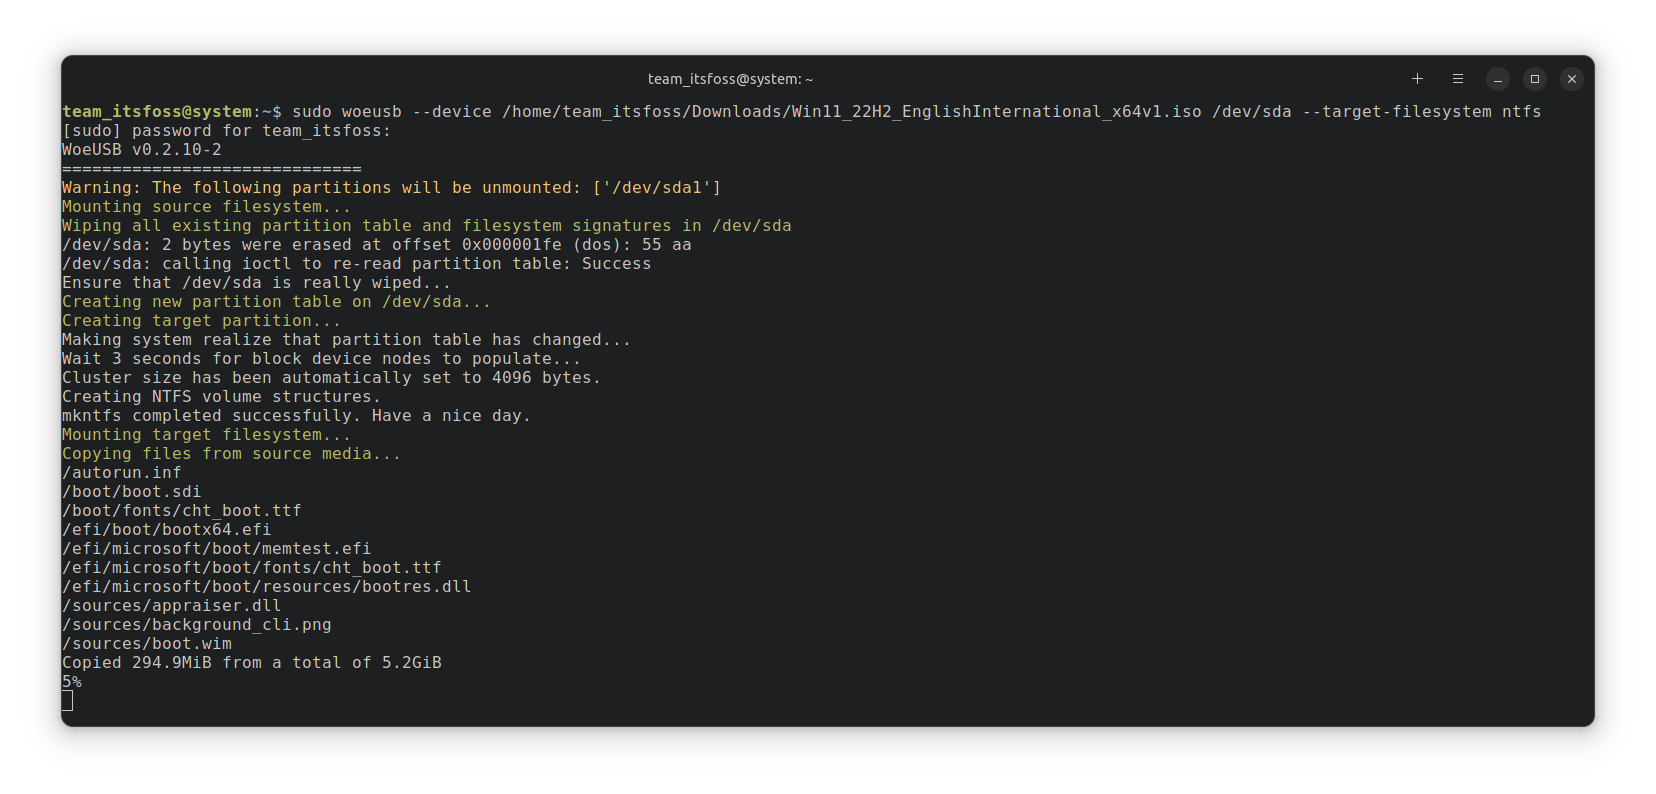
To create the bootable Windows USB using WoeUSb, you need to run the following command:
sudo woeusb --device <path/to/Windows/ISO> <name/of/the/USB/device> --target-filesystem ntfsHere, the --device flag is used to wipe the USB and create a bootable from scratch completely. Also, the –target-filesystem flag is set to NTFS, to avoid problems of copying files more than the size limits of the FAT system.
The process will take some time to complete copying. Once completed, it will display a success message.
At this point, you can eject the USB safely and use it as a Windows bootable USB on other PCs.
Bonus: Using WoeUSB Bash shell script (for experts)
WoeUSB is also available as a bash shell script, which can be used without installing anything on your system.
First, you want to download the shell script from the releases page of the project.
Before executing the shell file, you need to get the required dependencies. To install, run:
sudo apt install wimtoolsNow make it executable either through file manager or through command-line.
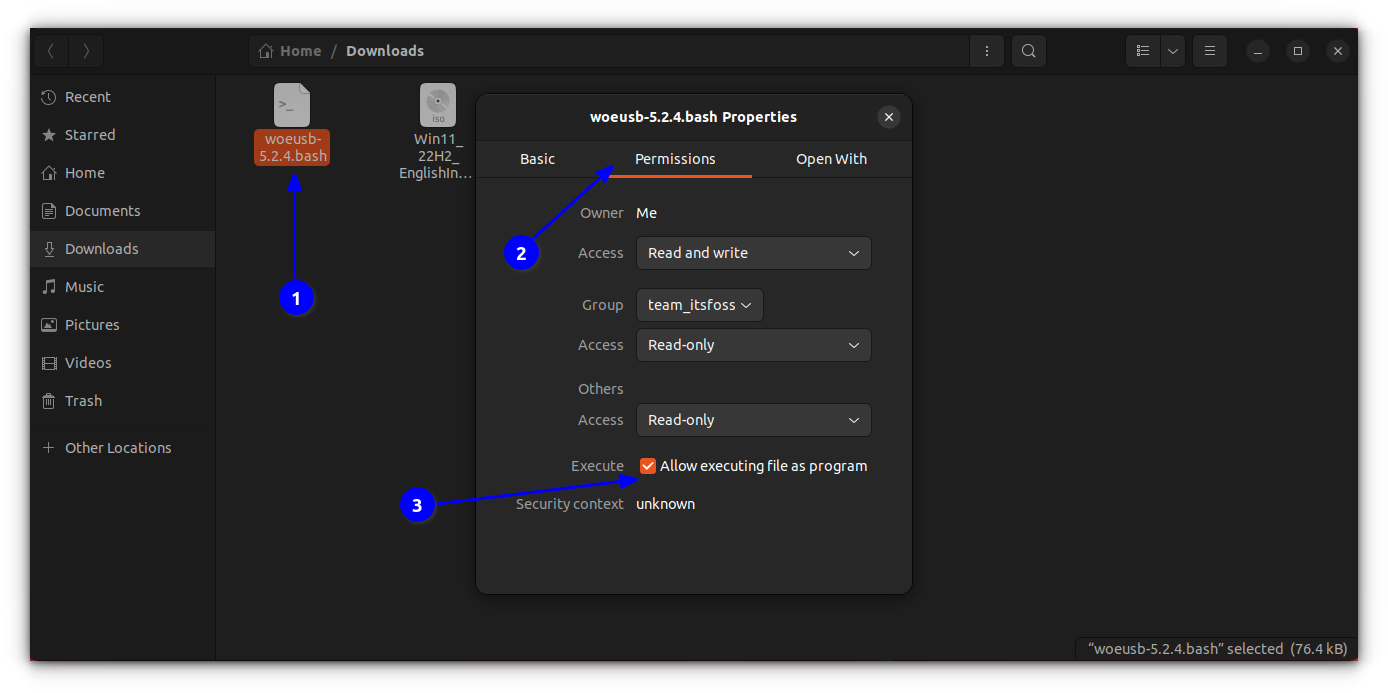
Or you can run chmod +x <path/to/script> to make it executable. Now, run ./woeusb-5.2.4.bash -h inside the downloaded directory to get help.
In order to create a live USB, the process is same as the command-line part of woeusb-ng, except, you are not installing anything.
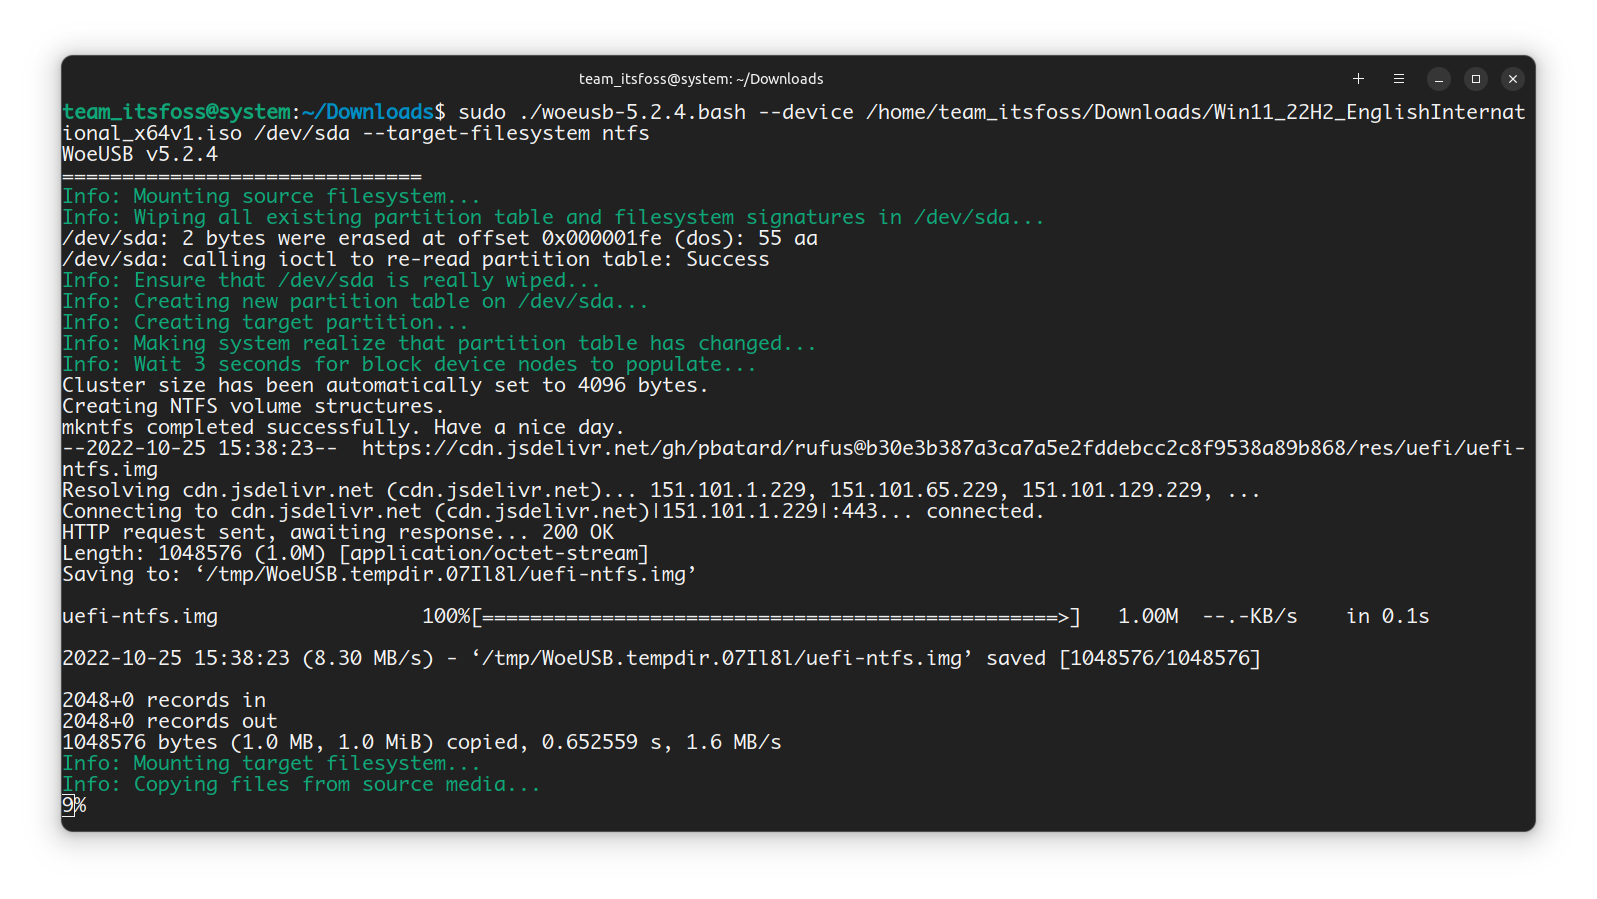
So, in a terminal, run:
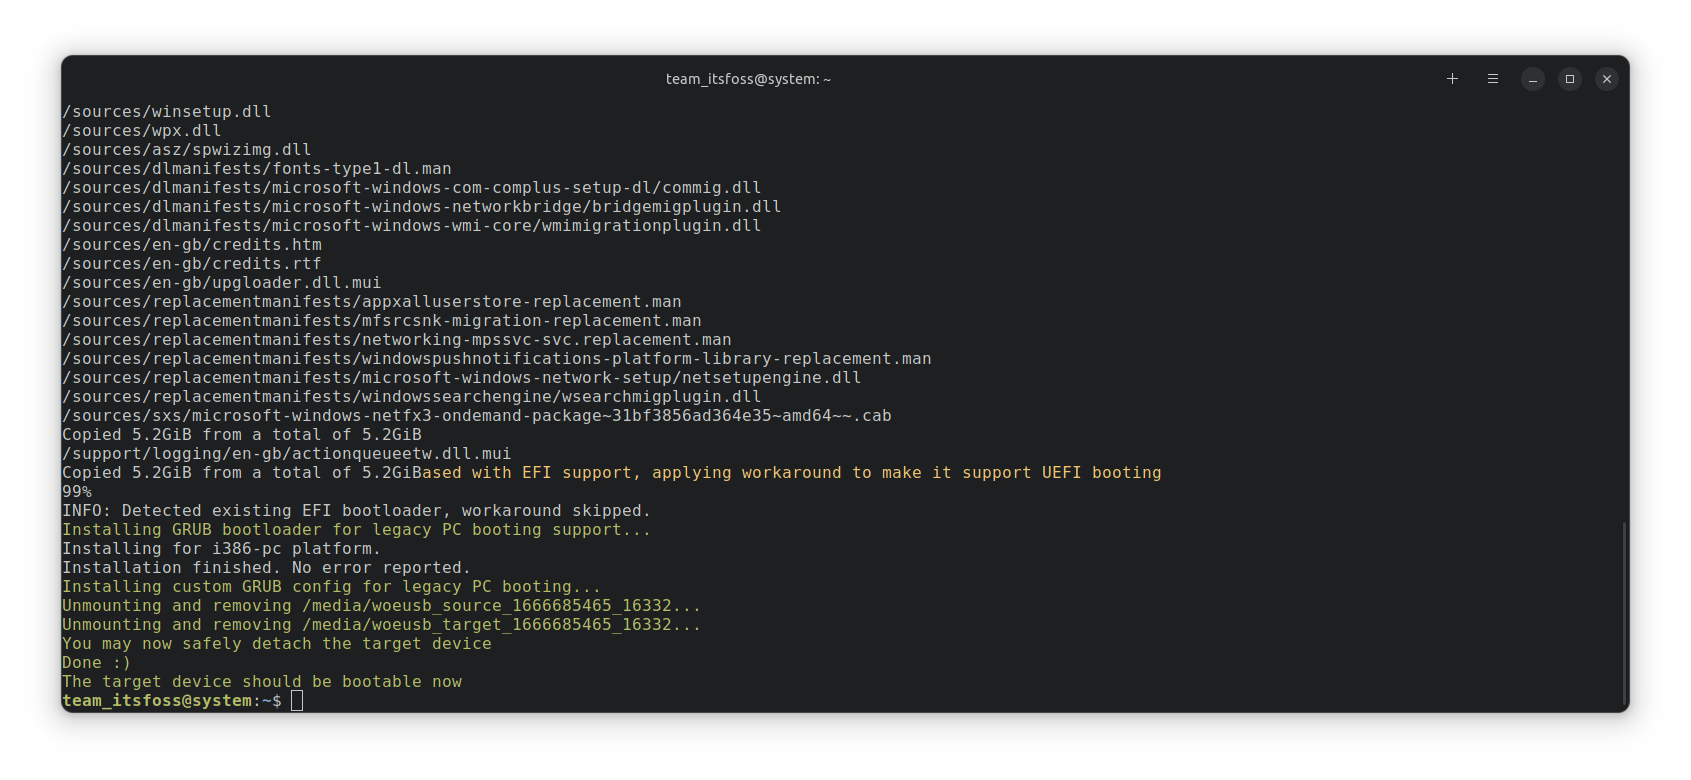
sudo <path/to/downloaded/script/file> --device <path/to/windows/ISO> <name-of-USB-device> --target-filesystem ntfsThis will start writing the ISO to USB drive, as shown in the screenshot below:
Once completed, you can safely eject the USB and use it as bootable USB.
Removing WoeUSB
If you installed WoeUSB using PIP, you can also remove it similarly:
pip3 uninstall WoeUSB-ngYou can keep the installed dependencies on your system or remove them. That’s entirely up to you. I would suggest keeping them.
Wrapping Up
WoeUSB was an immensely popular tool around ten years ago. It’s good that someone else has continued in another form. That’s the beauty of open source.
There are other ways of creating bootable Windows USB. If interested, check them out 👇
How to Create a Bootable Windows 10 USB in Linux
Brief: This tutorial shows you how to create a bootable Windows 10 USB in Linux with and without a GUI tool called Ventoy. I have talked a lot about creating bootable USB of Linux in Windows. How about the other way round? How about creating a bootable Windows 10 USB
It’s FOSSAbhishek Prakash
I hope this tutorial helped you. If somehow the Windows USB created by WoeUSB doesn’t work as expected, you may try using Ventoy. Enjoy it.
Время на прочтение2 мин
Количество просмотров438K
Недавно друг попросил установить ему Windows 7. Так уж вышло, что мой DVD-привод давно не работает, зато есть флешка на 8 ГБ. Тема создания загрузочной флешки с Windows 7 из-под Windows уже давно сильно разжевана в Сети. Но я пользуюсь Ubuntu, так что пришлось искать другое решение. На самом деле, как мне кажется, оно еще и проще.
Для начала нам потребуется графическая утилита GParted и пакет для работы с файловой системой NTFS. Для этого достаточно установить пакеты gparted и ntfsprogs. Это можно сделать как через Synaptic, так и через консоль:
sudo apt-get install gparted ntfsprogs
Далее нам нужно отформатировать флешку.
Можно сделать это из консоли:
sudo mkfs.ntfs /dev/sdb4
вместо /dev/sdb4, разумеется, должен быть адрес Вашей флешки
Можно это сделать и более легким путем. Для этого запускаем GParted, выбираем флешку (выпадающее меню сверху) и выбираем раздел. Выбираем в меню «Раздел» подменю «Отмонтировать», потом снова в меню «Раздел» подменю «Форматировать в » и в выпадающем меню выбираем «ntfs». Жмем зеленую галочку на панели инструментов.
Если Вы форматировали флешку через консоль, то дальше все-равно придется запустить GParted для того, чтобы установить boot флаг на флешку. Выбираем нужный раздел, выбираем меню «Раздел», подменю «Установить флаги». В появившемся окошке ставим галочку на «boot» и закрываем окно. GParted нам больше не понадобится.
Дальше проблема, с которой я столкнулся было то, что стандартные средства Ubuntu не позволяют открыть UDF ISO образ. Поэтому нужно смонтировать образ вручную:
sudo mkdir /media/iso

sudo mount windows7.iso /media/iso -t udf -o loop
Осталось только скопировать все файлы из образа на флешку:
cp -R /media/iso/* /media/MyFlashDrive
Вот и все!
P.S. В принципе можно таким образом на флешку не только Windows 7 скопировать.
UPD. Можно обойтись и вовсе без использования GParted. Вместо него можно использовать fdisk (спасибо icCE)
bogus@bogus-laptop:~$ sudo fdisk /dev/sdb
Команда (m для справки): p
Диск /dev/sdb: 1998 МБ, 1998585344 байт
255 heads, 63 sectors/track, 242 cylinders
Units = цилиндры of 16065 * 512 = 8225280 bytes
Disk identifier: 0x00068ccc
Устр-во Загр Начало Конец Блоки Id Система
/dev/sdb4 1 243 1951712 7 HPFS/NTFS
Раздел 4 имеет различные физические/логические окончания:
физ=(241, 254, 63) логич=(242, 250, 7)
Команда (m для справки): a
Номер раздела (1-4): 4
Команда (m для справки): p
Диск /dev/sdb: 1998 МБ, 1998585344 байт
255 heads, 63 sectors/track, 242 cylinders
Units = цилиндры of 16065 * 512 = 8225280 bytes
Disk identifier: 0x00068ccc
Устр-во Загр Начало Конец Блоки Id Система
/dev/sdb4 * 1 243 1951712 7 HPFS/NTFS
Раздел 4 имеет различные физические/логические окончания:
физ=(241, 254, 63) логич=(242, 250, 7)
Команда (m для справки): w
Таблица разделов была изменена!
Вызывается ioctl() для перечитывания таблицы разделов.
WARNING: Re-reading the partition table failed with error 16: Device or resource busy.
The kernel still uses the old table. The new table will be used at
the next reboot or after you run partprobe(8) or kpartx(8)
Синхронизируются диски.
bogus@bogus-laptop:~$
UPD2. Более простой способ с помощью dd (спасибо stampoon):
dd if=/w7.iso of=/dev/sdx
UPD3. Если после dd или копирования файлов с флешки загрузиться не выходит, вероятно там не корректная MBR. (thx nalimka)
Можно заюзать утилиту ms-sys:
ms-sys -7 /dev/sdb
WoeUSB is the best way to create a bootable Windows 11 USB on Linux. It takes care of the formatting, flashing, and other configuration settings. All the user has to do is provide a Windows 11 ISO.
The WoeUSB app isn’t installed on any Linux operating systems by default. Thankfully, you’ll be able to set up the app using the commands below.
Ubuntu
Sadly, Ubuntu doesn’t provide WoeUSB in their official software repositories, and past PPAs are no longer available. As a result, Ubuntu users will need to get it working with the Python3 package tool.
You must set up the dependencies required to run the software to start. Using the apt install command down below, set up the packages.
sudo apt install git p7zip-full python3-pip python3-wxgtk4.0
With all of the packages set up and configured, use the pip3 install command to download and install the latest version of WoeUSB on your Ubuntu system.
sudo pip3 install WoeUSB-ng
Debian
Like Ubuntu, there is no way to get the WoeUSB app through official software sources, so it must be installed via Python. Use the apt-get install command and set up the latest dependency packages.
sudo apt-get install git p7zip-full python3-pip python3-wxgtk4.0
Once all of the packages are configured and installed on your system, you can install the latest version of the WoeUSB application on your Debian Linux system.
sudo pip3 install WoeUSB-ng
Arch Linux
The WoeUSB application is available in the Arch Linux Community software repository. However, this version doesn’t ship with a GUI. To get the GUI version, install WoeUSB with the commands below.
wget https://builds.garudalinux.org/repos/chaotic-aur/x86_64/woeusb-ng-0.2.10-1-any.pkg.tar.zst

sudo pacman -U woeusb-ng-0.2.10-1-any.pkg.tar.zst
Fedora
The WoeUSB application is in the official Fedora Linux package repositories. However, the Python version of the app works much better. Install the dependency packages using dnf install and set up the app using pip3 install to get it set up.
sudo dnf install git p7zip p7zip-plugins python3-pip python3-wxpython4

sudo pip3 install WoeUSB-ng
OpenSUSE
To get the latest version of WoeUSB working on your OpenSUSE Linux system, head over to the WoeUSB-ng page on the OpenSUSE build site. Then, select your operating system, and choose the “1 Click Install” button to install the software to your system.
Generic Linux
If you’re using a Linux OS not covered by the instructions in this guide, you’ll still be able to install the software through Python 3. However, you’ll first need to set up the package dependencies.
To create a bootable Windows 11 USB on Linux, follow the step-by-step instructions below.
Step 1: Open up the app menu and launch “Woeusb-ng.” When you launch the app, you’ll be asked to enter your password. Using the keyboard, enter your password to access the app.
Step 2: Once the Woeusb-ng application is open, you must download Windows 11. Head over to the Windows 11 download page and find “Download Windows 11 Disk Image (ISO).”
Step 3: After locating “Download Windows 11 Disk Image (ISO),” find the “Select Download” menu and choose “Windows 11 (multi-edition ISO),” and click on the blue “Download” option to download the ISO file.
Step 4: Once the Windows 11 ISO is done downloading, go to WoeUSB and find the “From a disk image (iso)” area. Click on the “None” button to bring up a pop-up window.
Step 5: Use the pop-up window to browse for the Windows 11 ISO you downloaded previously. Then, find “Target device” and select your USB flash drive. Finally, click on the “Install” button when you’re ready to begin.
Step 6: After selecting the “Install” button, WoeUSB will present a message. This message states, “Are you sure? This will delete all your files and wipe out the selected partition.” Click the “Yes” button to continue.
The installation process will take time to complete, as the Windows 11 ISO file is enormous. When the process is complete, you will see “Installation succeeded!”
Other ways to create a Windows 11 USB on Linux
While the WoeUSB app is undoubtedly useful, it isn’t the only way to create a live Linux USB. It is also possible to create one by hand by following the step-by-step instructions below.
Step 1: Head over to the official Windows 11 download page, find “Download Windows 11 Disk Image (ISO),” and download your ISO.
Step 2: After downloading your ISO file, install the gparted app, plug in your USB flash drive, and open the Gparted application.
Step 3: Select your USB flash drive inside of Gparted. Then, click on the “Device” menu. Next, select “Create Partition Table,” select the “Gpt” option, and click “Apply.”
Step 4: Right-click on “unallocated” and select the “New” option in the right-click menu. Create a new Fat32 partition with 1024 MB in size.
Be sure to label it “BOOT” in all caps.
Step 5: After creating the Fat32 partition, right-click on the unallocated space, select the “New” option and create a new NTFS partition with the remaining space left over. Be sure to label this partition “INSTALL.”
Step 6: Open the Linux file manager, select downloads, and right-click on the Windows 11 ISO file. Select “Open with disk image mounter.”
Alternatively, you can mount the ISO with the following commands.
mkdir -p ~/win11iso/
sudo mount -o loop ~/Downloads/Win11_English_x64v1.iso ~/win11iso/
Step 7: Once the image is mounted, copy all files to the flash drive to create your Windows 11 live USB.
