
You can install Windows 10 from a wide range of external media. Keeping a backup copy of Windows 10 on a USB flash storage drive is useful. But what if you need a copy of Windows 10 when you’re out and about?
In that instance, you could install Windows 10 direct from your Android smartphone via the DriveDroid app. Here’s how you set up DriveDroid, then install Windows 10 from your smartphone.
What Is DriveDroid?
DriveDroid is an Android app that allows you to mount an operating system disc image and make it act as an installation media, such as a bootable USB flash drive or CD/DVD-ROM.
You can use DriveDroid to install a wide range of operating systems. It is commonly associated with Linux distros, but you can also use it to install Windows 10.
Important: DriveDroid requires Android root access.
Rooting is a process that gives you privileged access to the device. It allows an app more control and access than a standard app. Rooting is similar to jailbreaking an iOS device.
You can ask if rooting is still useful for Android devices. However, as you’ll see from this tutorial, there is definitely some use!
If you want to root your Android smartphone, check out our guide on the best way to root your Android device. In my experience, Magisk is the easiest method to rooting your device—but you’ll need to take a system backup before committing because the process potentially involves wiping your device.
How to Install Windows 10 From Your Android Device with DriveDroid
If you don’t have root access on your Android device, the rest of this tutorial will not work properly. DriveDroid requires root access on your device to mount the Windows 10 ISO properly. You’ll also need root access if you want to install a different operating system, such as a Linux distro.
From here on in, this tutorial assumes your Android device has root access.
0. A Note Before You Install DriveDroid
Unfortunately, the DriveDroid app is no longer being actively updated. Recent reviews on the DriveDroid Google Play page reveal that potential DriveDroid users using recently released smartphones running recent versions of Android are struggling to get DriveDroid up and running properly.
For example, on 27 July 2022, user Swaroop Ghimire wrote:
This app really needs an update. It says no hosting device which is an error for latest devices, but it works on my old Android phones
The long and short of this is that you can still attempt this tutorial, but there is a chance that it might not work with your Android device—you have been warned!
Furthermore, rooting your device can have other consequences, such as some apps failing to work post-root. You could attempt to trick apps into thinking your Android is not rooted, but there is no guarantee that it will work.
1. Download the Latest Version of Windows 10
To install Windows 10 from your Android device, you’ll need a copy of Windows 10. The Windows Media Creation Tool is the easiest way to download the latest version of Windows 10.
Head to the Windows 10 software download page and select the Download tool now.
- Open the Windows Media Creation Tool.
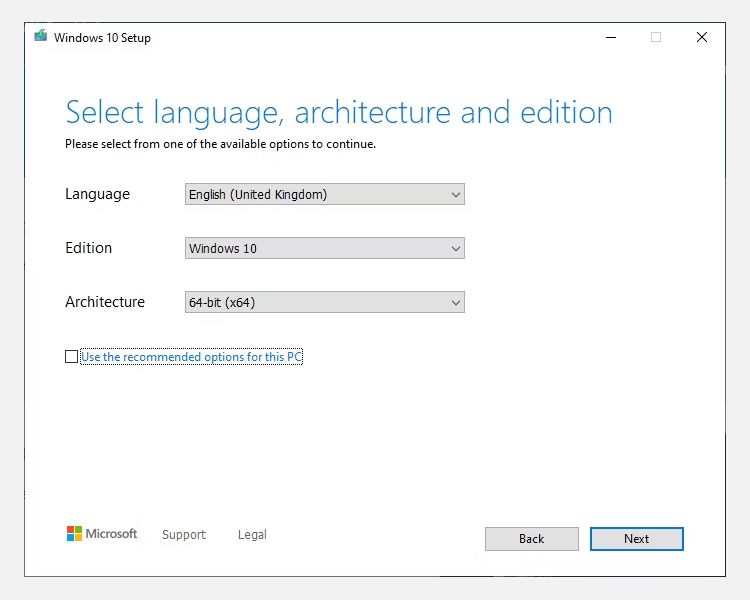
- Select Create installation media for another PC, then create your Windows 10 ISO settings.
- If you’re creating a backup ISO for the PC you’re using, you can Use the recommended options for this PC.
- Press Next, then let the process complete.
After the Windows 10 ISO finishes downloading, you need to copy it onto your Android smartphone in an easily remembered folder. It is best to copy the files to your Android using a USB cable, as you will also require an active connection for the rest of the tutorial.
2. Download and Configure DriveDroid
Download and install DriveDroid.
Open DriveDroid. The app will immediately request root access, which you should Grant.
Configure the Image Directory. The Image Directory is the folder where you store your disc images (ISOs), such as the Windows 10 version you copied to your device.
During the DriveDroid initial setup, you will select a default folder, but you can change this later.
Download: DriveDroid for Android (Free)
3. Test Your DriveDroid USB Settings
DriveDroid will now test the USB connection settings for your Android device. DriveDroid needs to handle the USB connection as a mass storage device, allowing it to mount your Windows 10 ISO as a bootable image.
Follow the steps with the help of the screenshots below:
For most users, the Standard Android Kernel is the correct option. Select the first option, then press Next. Wait for the DriveDroid test file to appear as a mountable drive.
If the device doesn’t appear in your File Explorer, select Choose a Different USB System and try again.
When you cycle through the three basic USB settings and the DriveDroid test file does not appear, don’t worry.
Adjust DriveDroid USB Options
You can modify the DriveDroid USB options from the main page.
Select the Gear icon in the top-right corner, then scroll down. Next, select USB Settings > Manually Change USB Mode > Mass Storage, then Confirm.
4. Mount Your Windows 10 ISO in DriveDroid
Now, you need to mount the Windows 10 image. Depending on the default image folder option, the Windows 10 ISO might already feature on the DriveDroid main page.
If not, select the Gear icon in the top-right, then select Image Directories.
Press the red icon in the bottom corner. Now, browse to the folder containing your disc images and provide access when requested.
Select the correct directory from the Image Directory, then head back to the DriveDroid homepage.
Next, select the Windows 10 ISO, then Host image using CD-ROM. A small disc icon should appear on the disc image, indicating it is mounted and ready to go.
Using a USB cable, you need to connect your Android device to the PC you want to install Windows on. The PC should be switched off, to begin with. Connect the USB cable and your Android device to the computer.
When you switch it on, you need to enter the boot menu using the dedicated shortcut. For most PCs, the boot menu shortcut is F8, F11, or DEL, although it does vary between manufacturers.
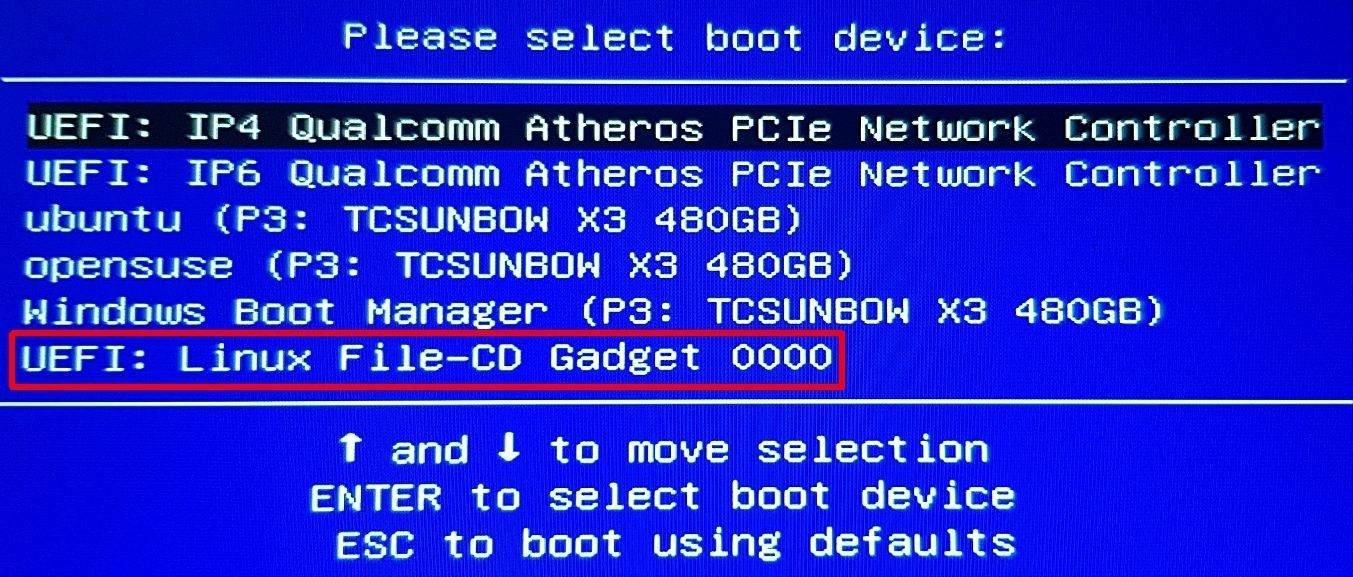
When the boot menu loads, scroll down to find the DriveDroid option, named something similar to Linux File-CD Gadget. Press Enter.
The Windows 10 installation screen will now load, and you can install a clean version of Windows 10 on your computer.
Install Windows 10 From Your Android Smartphone on Any Computer
Once you have the Windows 10 ISO and DriveDroid setup on your Android device, you’re good to go. The only significant downside to the DriveDroid installation method is that your Windows 10 ISO will eventually become outdated.
When that happens, you’ll have to download the latest version, then copy it across to your Android device to use with DriveDroid.
DriveDroid is a handy app to keep close by. You can use the app to even boot your PC directly over a USB cable using any ISO or IMG file stored on your phone.
In this post, I’ll show how to Install Windows 10 on Android without root or without computer. From installing macOS with VMware and VirtualBox to developing apps and beyond, Windows is the solid option for operating them all. While Windows 10 is the most powerful and at the same time, the most useful operating system, installing it is also one of the easiest things we’ve ever done compared to installing other operating systems even installing macOS in Windows is pretty easy. While installing Windows 10 might be risky for some, it’s pretty easy to install Windows 10 on a virtual machine. But better than that, what’s more interesting is to install Windows 10 on Android without root or computer involved. How to Install Windows 10 on Android Without Root/Computer.
Just like installing macOS Catalina or macOS Mojave on Windows, you might have thought of adapting Windows 10 over away. But the question still remains unanswered to where. It’s pretty known to everyone that installing Windows 10 is almost possible on every computer even Mac and any other computer we’d want, but out of those, where we could install it elsewhere. So here’s an option we’ve left to install Windows 10 on Android.
- Related: Install macOS Catalina on VirtualBox on Windows PC
With the high-end mobiles which have at least over 8GBs of memory and 64GB of storage, we’ve a pretty solid computer right. But still, they’d be the smartphone you assume which wouldn’t be able to do most things a computer does. For instance, installing other operating systems, graphic designing, video editing, developing apps, and more. There are lots of things which a smartphone mightn’t be able to do what a computer does yet but still, there are a few things which a smartphone can do from the stuff what a computer does. One of those is install Windows 10 on Android without root or computer. We’ll show it in a moment with shots. In this tutorial, I’ll show how to install Windows 10 on Android, any device, any version without rooting or doing from computer, none of them, so here’s how to do it.
Install Windows 10 on Android Without Root/Computer
Just like virtual machines, installing Windows 10 on Android requires a powerful smartphone which could power the Windows 10 from its resources that would be assigning a slice of its storage, memory, power, and a few more. For this purpose, we’d use a third-party application which isn’t supported or authorized by Google or Microsoft. This might have some risk involved but this doesn’t mean definitely it will harm or mess things up. In some cases, like lack of power like storage or memory or lack of any other thing might make some problem but that’s a usual thing that every procedure does if there’s lack of something.
Except those, we’ll install Windows 10 on Android beside Android OS, similar to dual-boot on a computer which will allow to use Windows 10 and Android OS both. For caution and making everything safe, we’d recommend taking a complete backup of your Android device before. Taking a backup of your phone is pretty easy with Smart Switch or other apps.
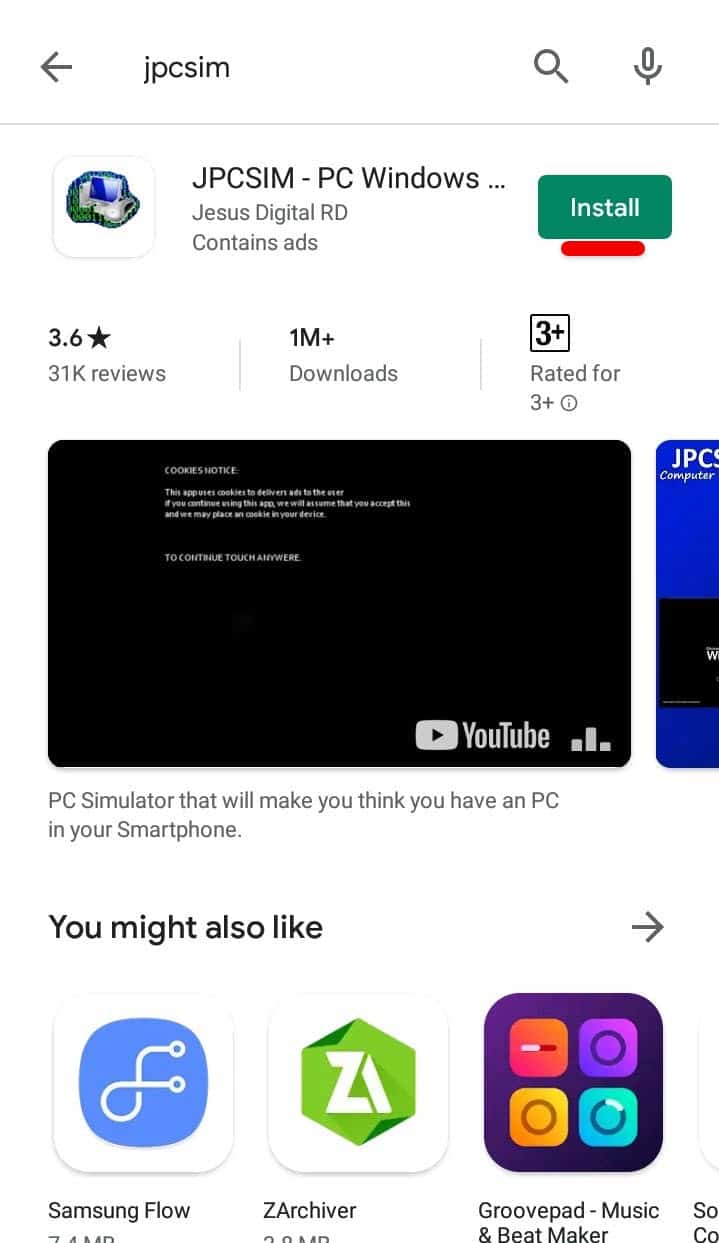
Step One – Install JPCSIM From Play Store
The first and foremost step we need to do is install JPCSIM which will help run Windows. The installation is easy and quick.
Simply head over to the Play Store and search for JPCSIM and click on Install.
Once it’s finished, click on Open.
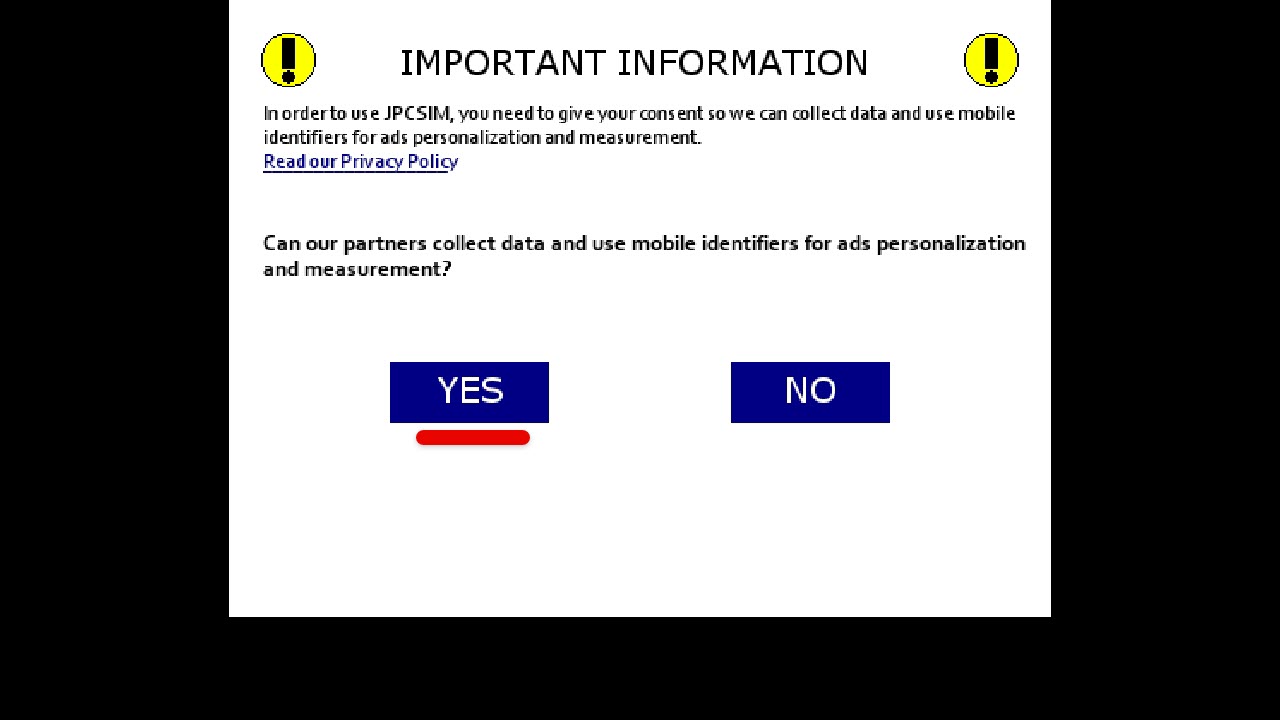
Step Two – Install Windows 10 on Android
Go ahead and tap yes on the screen.
Next up, tap somewhere to continue.
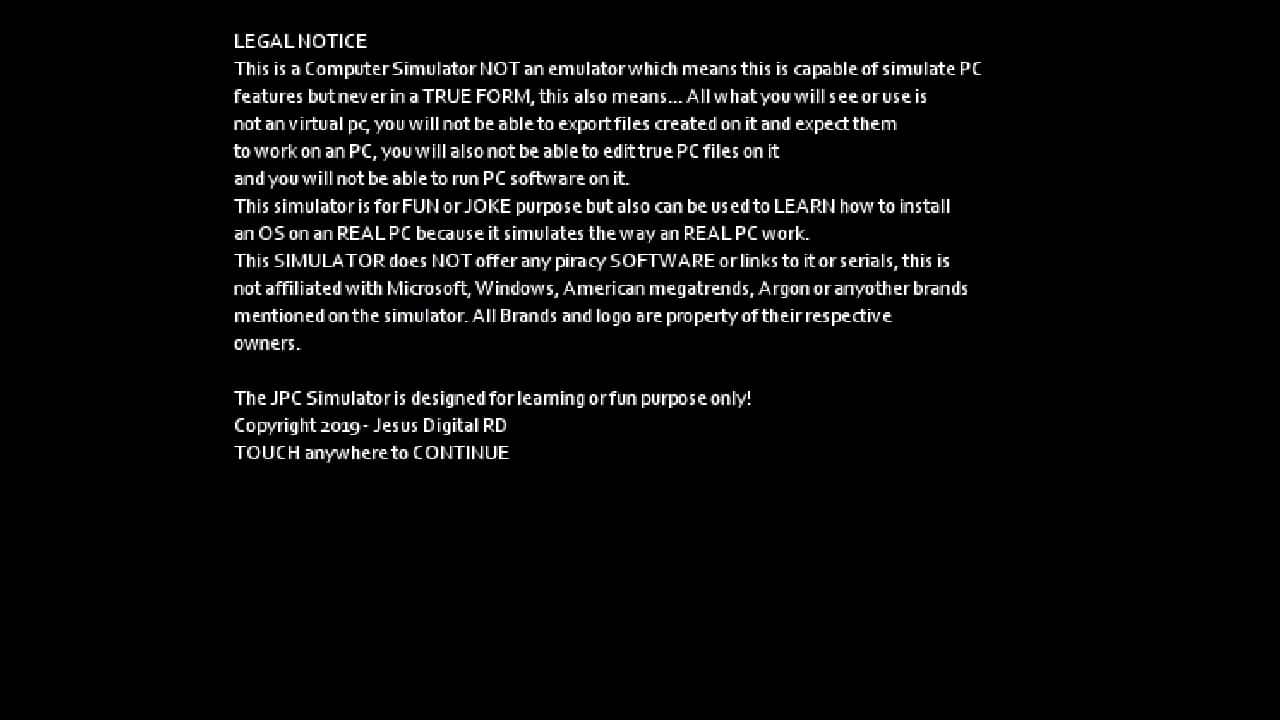
Now tap somewhere on the screen to continue.

In this step, change the Windows version by tapping on the side button, so when Windows 10 appears, click on Start.
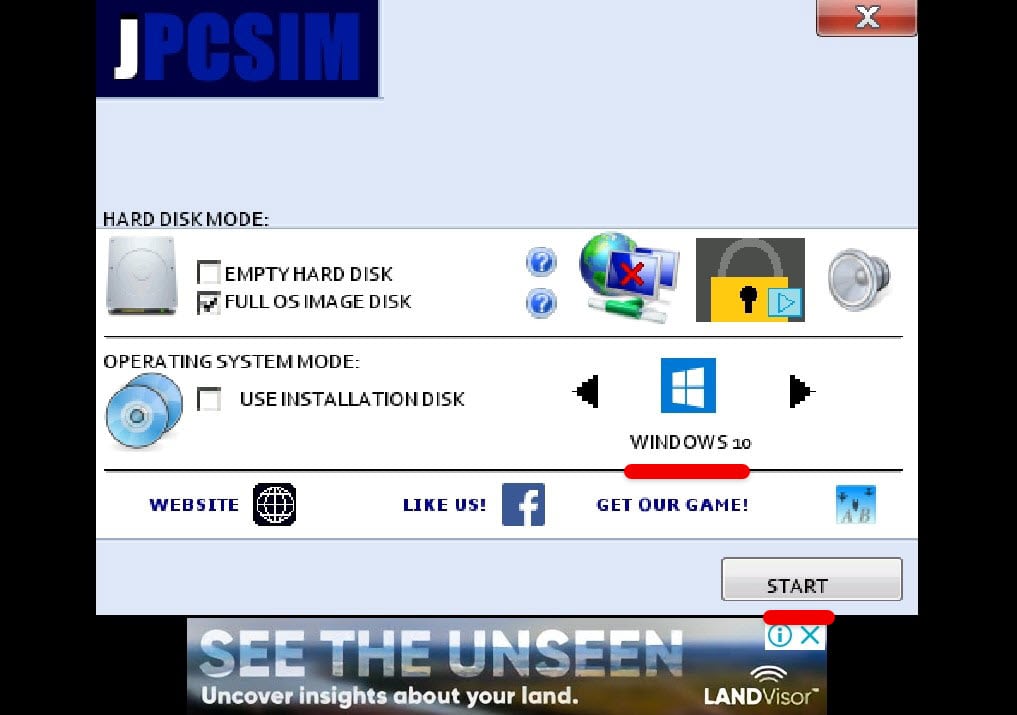
This will begin loading Windows 10 so it will take a while.
Once it’s finished, you’ll see Windows 10 booting and then signing into Android account so it will appear on desktop. For mouse 🖱 to work, simply click on the mouse icon first then start moving the mouse.
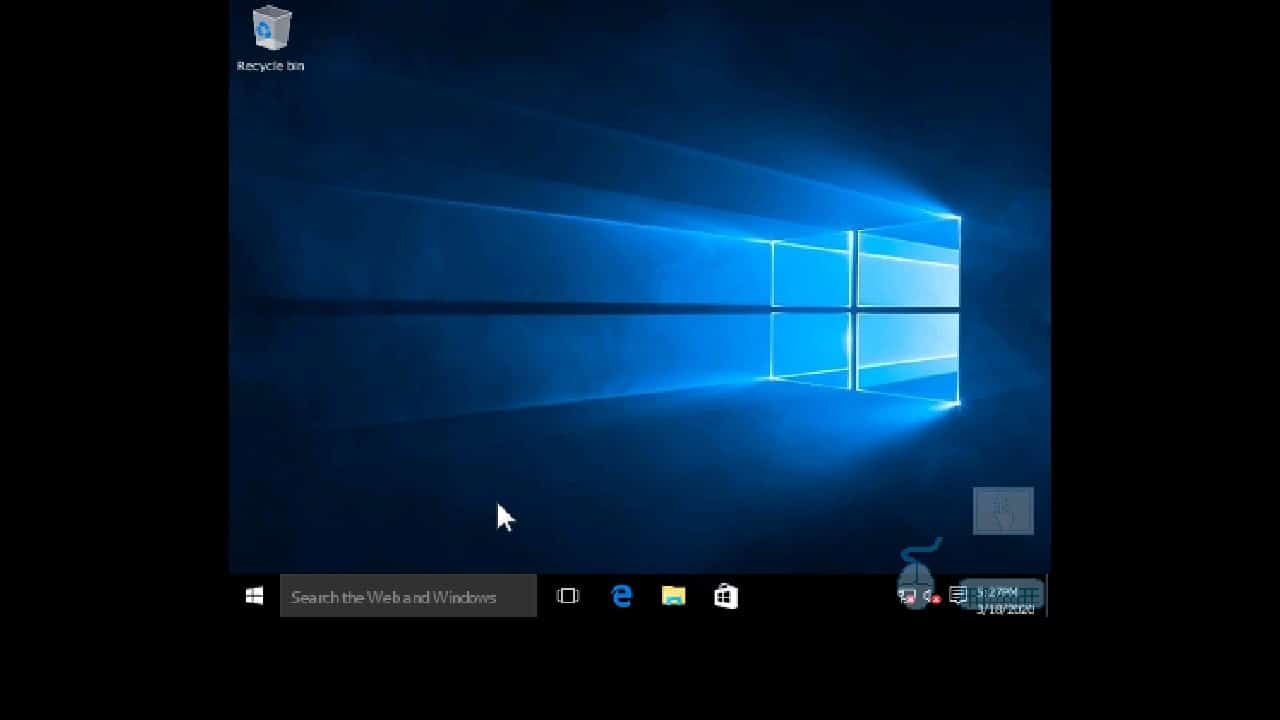
That comes to the end of this tutorial. The Windows 10 is now running on Android without root and without computer. There’s no need of those. In terms of functionality, if you’re curious, it works super well but can’t do heavy tasks, so it works great for surfing and trying out. To close this, simply press the home button so it will be out.
That’s it. If there’s something remaining or would like to add, suggest or give us some idea, we’re happy to know.

We do discuss much about on Techfoe because it is a mobile operating system that is very wide and doesn’t limit your reach when you want to explore. That is one of the things that makes it to be the most popular operating system in the world.
Have you ever given it a thought to install Microsoft’s Windows operating system on your Android device? i’m not talking about Microsoft windows Mobile but Microsoft Windows for PC. That is, any of Windows XP, 7, 8, 8.1 or 10.
The simple answer is yes. You can actually install any of those Windows operating system on Droid device! So in todays post, i will show you how to install any of the Microsoft Windows operating system on your Android device and revert back to android OS in case you just want it for experimental purpose.
Ensure to read the below requirements and get the required tools to Windows OS your Android device. By the way, the steps are simple to follow and doesn’t need you to be a guru for it to work.
Requirements:
1. Any Android device or tablet running Android 4.4 and above
2. PC or Laptop running Windows
3. Change My Software application (link for it is provided below)
4. A USB cable
5. A High speed Internet connection is important
Procedures To Install Windows On Android:
1. From your Android device, go to Settings
2. Click on the Developer Options. However, if you can’t find the Developer Options in your phones settings it means that you haven’t enable it. To enable it, still within your phone settings, go to About Phone and click on it, now locate Build Number and then keep clicking on it until it shows a pop-up telling you that You are now a developer.
3. Now return back to your settings and then locate the Developer Options. Click on it and then scroll down and click on USB debugging.
4. From your PC, download Change my Software and then install.
5. Connect your Android device to your PC via USB and then launch the Change my Software on your computer.
6. Select the option Android > Windows (8/8.1/7/XP) to install the Windows on your Android device (Based on the type of Window that you want, select Change my Software option and then chose the version of Windows that you want)
7. If your device is properly working, click on the tab to continue.
8. Select your language. When you select your language, the Windows drivers will automatically start.
9. When the download is complete, click on Install.
10. Now, if you do not want to dual-boot (Windows and Android) you can choose to Remove Android which means you will only have the Windows OS on your Android device. However, if you want to dual-boot, just ignore the Remove Android option.
Also Read: Over 500 Best Android Secret Codes To Hack In 2021
11. By now the Windows installation process should have began. Wait for the installation process to complete. Do not interrupted it!!
12. When all the features and files have been installed, your Android device will reboot automatically
Now you will have the option to boot either Windows or Android OS whenever you start up your Android device.
However, in case you want to revert back to only your Android OS, simple follow the below procedures.
Procedures To Restore You Android Back To Its Former Self:
1. Reconnect your Android device or tablet to your PC via USB.
2. Launch the Change My Software app, select Restore to original condition.
Once the above is done, your old Android will be restored back.
If you like this post, kindly share.
Tags:
How To Install Windows 7, 8 and 10 on Android device, How to Install Windows, How to use another OS on Android, Hoe to run Windows on Android and iPhone, Simple steps to install windows 10 on your Android phone 2021,

Android and Windows OS are the most popular operating system in the world which provides a lot of flexibility and customization that you can’t get in any other OS.
Android is a Linux based operating system which not only provides you the flexibility of automation and other advanced security functions. It also provides you the power to install other OS such as Kali Linux, BackTrack, Windows 10 OS, MacOS. All of these advanced functionality works only in a rooted device. And we know that rooting an android device void the warranty of our device.
Installing an Operating system requires that your device must be rooted or you must have to unlock the bootloader and you must have the Windows 10 ROM. And then you need to flash your device with the custom ROM and after that, you can use the Win10 OS on your Android device.
If you do not want to root your device then no worry. In this tutorial, I will show you, ‘how you can easily install Windows 10 OS in your Android device without root using Limbo PC emulator.’
Required files:
1. Download Windows 10 img file and keep it in your Micro SD card. click here
2. And then download and install Limbo PC emulator.
Follow the below tutorial:
Note: I assume that you have already downloaded the required files from the above links.
1. Install the Limbo pc emulator in your android device (either tablet or mobile) and open the app.
2. At your Limbo dashboard, You will have a dropdown menu for load machine. You need to tap the dropdown menu and then select “New.” see below picture.

3. Now, a pop-up window will appear. You need to enter the name of the your new virtual machine and then click on ‘Create‘. see below picture

4. Architecture option: Here you need to select PC.
5. Machine Type option: Here you need to select x64 option.
6. CPU Model option: Here you need to select SandyBridge option.
7. CPU cores option: Here you need to select 4 Cores.
8. RAM memory option: Here you need to select 880 mb RAM. You can select more RAM if your device has more than enough RAM.
9. Hard disk option: Here you need to select the “OPEN” option. After that, you will be redirected to your SD card. Now you need to locate the downloaded windows 10 ISO file and then select the file.

10. Device option: Here you need to select Hard Disk in the boot settings.
11. VGA Display option: Here you need to select Vmware.
12. User Interface option: Here you need to select SDL.
13. Now you need to match all the settings as shown in the below picture one by one.
14. Now you need to click on Play Option. It will start booting process of windows 10.

15. While booting being in process. You device screen will look something like below picture.

16. When the booting process will be 100% completed. Your Windows 10 home screen will look something like below picture.

17. That’s it.
I hope that the above step by step guide has helped you for installing Windows 10 on your android device (tablet or mobile) without root using limbo emulator.
Функциональные возможности операционной системы Android крайне богаты, однако до таковых в компьютерной версии Windows 10 они все равно сильно недотягивают. Именно поэтому разработчик Бен Имбушуо на протяжении последних месяцев пытался запустить полноценную «винду» на своем мобильном устройстве, коим выступила Lumia 950 XL. Сегодня, 14 мая 2018 года, он сообщил об успехе всей своей затеи, а также поделился инструкцией о том, как установить компьютерную Windows 10 на любой смартфон. Стоит учитывать, что этот процесс достаточно сложен.
Разработчику удалось добиться даже запуска сторонних приложений на Windows 10, в том числе веб-браузера Chrome, офисного пакета Microsoft Office, а также всех UWP-приложений, доступных для загрузки из фирменного магазина программного обеспечения. Единственное, что пока что по-прежнему не работает – беспроводная сеть, то есть мобильное устройство отказывается подключаться к Wi-Fi, потому как данный модуль попросту не распознается системой.

Пользователь ADeltaX с форума Reddit уже воспользовался опубликованной разработчиком инструкцией и установил на свой смартфон операционную систему Windows 10, пускай и сборку для ARM-устройств. Она ничем не отличается по функциональным возможностям от простой «винды», кроме незначительных ограничений. Нельзя не заметить, что пользоваться компьютерной ОС на смартфоне все же можно, потому как она поддерживает масштабирование.
В операционной системе Windows 10, установленной на телефон, имеется даже поддержка функции поворота экрана. Судя по всему, «винда» считает мобильное устройство планшетом, но с маленькой диагональю дисплея. Вся система работает достаточно быстро и без каких-либо проблем, однако произвести ее установку достаточно сложно. По словам разработчика, установить ОС можно на любой смартфон, оснащенный процессором ARM, однако для этого нужно настраивать загрузчик.
Сам же разработчик выложил в сеть все файлы для установки Windows 10 на смартфон Lumia 950, благодаря чему его владельцам достаточно лишь следовать инструкции, которая была опубликована в репозитории разработчика на GitHub. В ближайшем будущем процесс установки «винды» может быть упрощен, а в сеть выложит подробные видео, которое позволит облегчить этот процесс.
Ранее стало известно о том, что получить лицензионный ключ для Windows 10 Pro можно не за 14 000 рублей, сколько за него просят в магазине Microsoft Store в России, а более чем в 40 раз дешевле – всего за 300 рублей.
Источник изображений: «Яндекс Картинки»
Присоединяйтесь к нам в Google News, Twitter, Facebook*, Instagram*, ВКонтакте, YouTube и RSS чтобы следить за новостями и оперативно получать интересные материалы.
* Сервисы признаны судом экстремистскими и запрещены в России.